
Kiava Gamma is one of the main planets you must visit to restore the dynasty mission in Chapter 2. There’s reason to believe heresy has taken over the planet, with Heinrix demanding that you go there and check it out. While there, you’re going to get into many fights, loot some good items, and do some companion questlines. Regardless of what you’re there for, here’s a closer look at everything you need to know in our Kiava Gamma Walkthrough in Rogue Trader.
A guide on all the choices, bosses and other parts in a Kiava Gamma Walkthrough in Rogue Trader. Image via Owlcat.
Kiava Gamma Location - Rogue Trader
The first thing you’re going to want to know is the location of Kiava Gamma. Extensive exploration is required to reach Kiava Gamma in the Cranach system. One option is to invest a significant amount of Navigator’s Insight for a jump from Mundus Valancius to the Crossroads of a Hundred Dreams, with an estimated cost of 4-6 units, depending on the chosen route. Alternatively, a more cost-effective approach is to return to Telikos Epsilon (Janus) and travel to Orsellio Prophecy. Obtain Navigator Insight from the four connected star systems, including Crossroads and get as much Navigator’s Insight as possible. Once this phase is completed, proceed from Orsellio towards Adamant II, located on the left side of the map, and then head south towards Tenebris Aquae. One final leftward jump will bring you to Cranach, where Kiava Gamma can be located.
- Read More: Reclaim What Was Lost Planet Locations
Kiava Gamma Walkthrough - Rogue Trader
When you arrive at the planet, you will be forced to bring Heinrix with you. Prepare your party as best as you possibly can knowing you’ll have a slot not normally eaten up if you don’t run him regularly in your squad. If you’ve not been using Heinrix, we have a Vanguard tank build you can use for your build if you so desire.
Once arriving on the planet, you’ll find a few Heretechs around. This geezer will call a few Servitors to aid him in the fight, and you’ll have a shootout over an open chasm. Be prepared for a long brawl, shooting at enemies in full cover and so on. Get your grenades and buff your ranged damage. Feel free to take a look at our build guides on Yrliet, Cassia, Argenta and Jae if you intend on bringing those characters to the fight.
With that out of the way, you now need to path around the northern route further afield, where you’ll encounter king of the crabs and chief architect of robo heresy, hurling abuse at you from a distant platform. Feel free to engage in shit talk back at Mr. Crabs, and he’ll scamper off at some point.

Face-off against a few Skitarii and work your way through the level.
After that ordeal, continue on your path forward. You’ll encounter a warehouse to the side where you can get some loot, alongside a fight with some Skitarri Ranger-type enemies. There will be some on the same platform as you, with a few more by the staircases to the right and dead ahead. AoE-type weapons or Burst Fire is effective here, thanks to the incredible funneling you can do. Once done, feel free to loot the warehouses and get some cargo and other items. There’s also a dying Tech priest you can speak to near the Conveyor Belt line near the edge of a catwalk to get some more of your diplomatic choice style points up if you wish.
Once you’re done in that area, you must follow a trap-laden path leading to the platform the crab man hurled abuse at you from. Simply go up to it and rotate the platform so you can access the right side of the Manufactorum map. From here, you have two pathways you can go. Going north leads to some cargo, while going south leads to an interaction for ![]() Pasqal if you bring him along. You’ll need to fight a few more Tech-priests before continuing on.
Pasqal if you bring him along. You’ll need to fight a few more Tech-priests before continuing on.
With that fight over, you once again have a choice to continue south or go north. Going south is part of Heinrix’s questline, while going north is the route you need to go through for the main storyline.
Heinrix’s Companion Quest


(1 of 2) You can find the ladder to access Heinrix’s quest on Kiava Gamma here.
You can find the ladder to access Heinrix’s quest on Kiava Gamma here. (left), Look for a ladder by a fenced walkway after finding Pasqal’s mate on the south-east side of the map. (right)
If you intend to go South for Heinrix’s Quest, then you need to look for a ladder you can use to reach the roof of a building. Climbing this ladder will bring you to some loot along the rooftop, and you will have an elevator you can access to reach where you had a fight with the Servitors right at the start of the Kiava Gamma Walkthrough. Feel free to loot everything up there and from those enemies, and you’ll grab yourself a nice upgraded ![]() [Mezoa-Pattern] Plasma Gun for your troubles, and some other bits and bobs.
[Mezoa-Pattern] Plasma Gun for your troubles, and some other bits and bobs.
With that out of the way, you will need to go back up the building, and now look for a Hexmechanic on the ground. Go left from the Ladder you climbed, and then turn right towards a pipe you can walk across. You’ll find a red-cloaked man on the floor you can speak to and learn more about the heresy going on in Kiava Gamma’s factories. Speak to the dude, and you’ll eventually learn a security code, which opens a door near the round platform you spin around. Go back down the elevator, cross the gap using the terminal to lower the draw bridge, and go towards the spiral platform. Once again, spin the platform around so the rotating platform brings you towards a north and south-facing route, and take the south option. This will bring you to a locked door, where you can use the Hexmechanic’s codes to access the building.

(1 of 2) Look for the Ad-Mech on top of the roof near the side pathway leading down. Speak to him and learn the access codes to the building below.
Look for the Ad-Mech on top of the roof near the side pathway leading down. Speak to him and learn the access codes to the building below. (left), Have your party spread out in 3s with a clear line of sight for your AOE troops to reset attacks and nuke the mobs without friendly fire. (right)
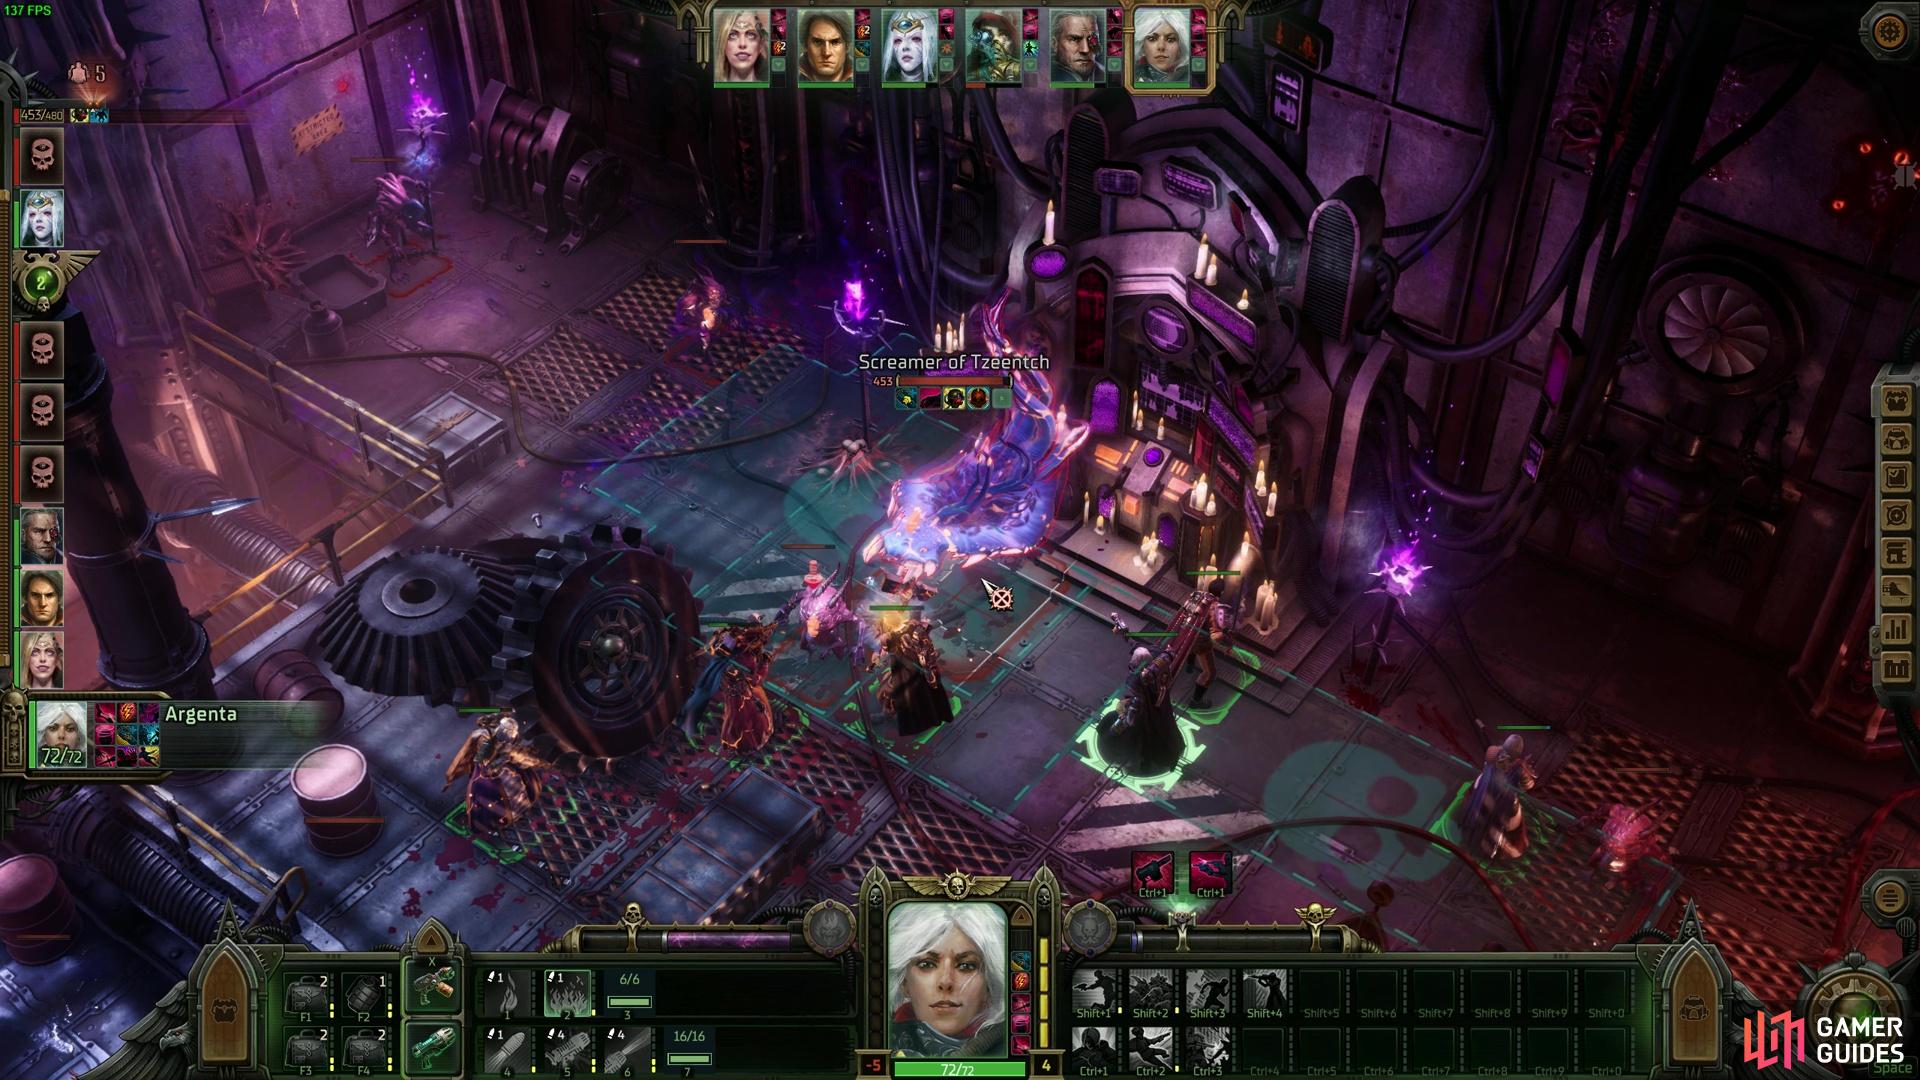
Now you’re inside, interact with the mutation in the cage and proceed further into the room to find a terminal. Have Heinrix interact to the fullest extent with the heretical Congitator, and then proceed with what you can. You’ll get a fight with a Screamer of Tzeentch, a Tzangor, and some Pink Horrors.
When placing your units, be aware that the Pink Horrors will use an AoE explosive, so avoid stacking your army up too much. Otherwise, the splash damage can get nasty. Meanwhile, The Screamer is a major wound sponge with some moderate damage attacks. The Caster, on the other hand, will use lightning attacks, so once again, line of sight and try to clump your units in a 3 tile-wide area to avoid unnecessary chain damage. These are the only major threats you need to be aware of, so kill the enemies as required and avoid getting hit by the most likely attacks that can decide whether you need to restart the fight or not.
Kiava Gamma’s Boss Battles
With the Heinrix Side quest out of the way, you can now proceed with the remaining sections of the fight. Heading north, you’ll work your way towards a sermon. You’ll find another World Eater Space Marine preaching to some cultists about the plan. Chat to the Marine, then beat it and its cronies up. Note that this fight is drastically easier than the Chapter 1 Chaos Space Marine fight, but don’t disrespect the Chaos Marine’s damage and kick potential, as you can go Prone if you’re unlucky. The Cultists are also the standard enemies you’ve fought before, low Wound annoying swarmers that you can take out with a ![]() Flamer, grenade or Burst Fire and other such AoE-type attacks.
Flamer, grenade or Burst Fire and other such AoE-type attacks.
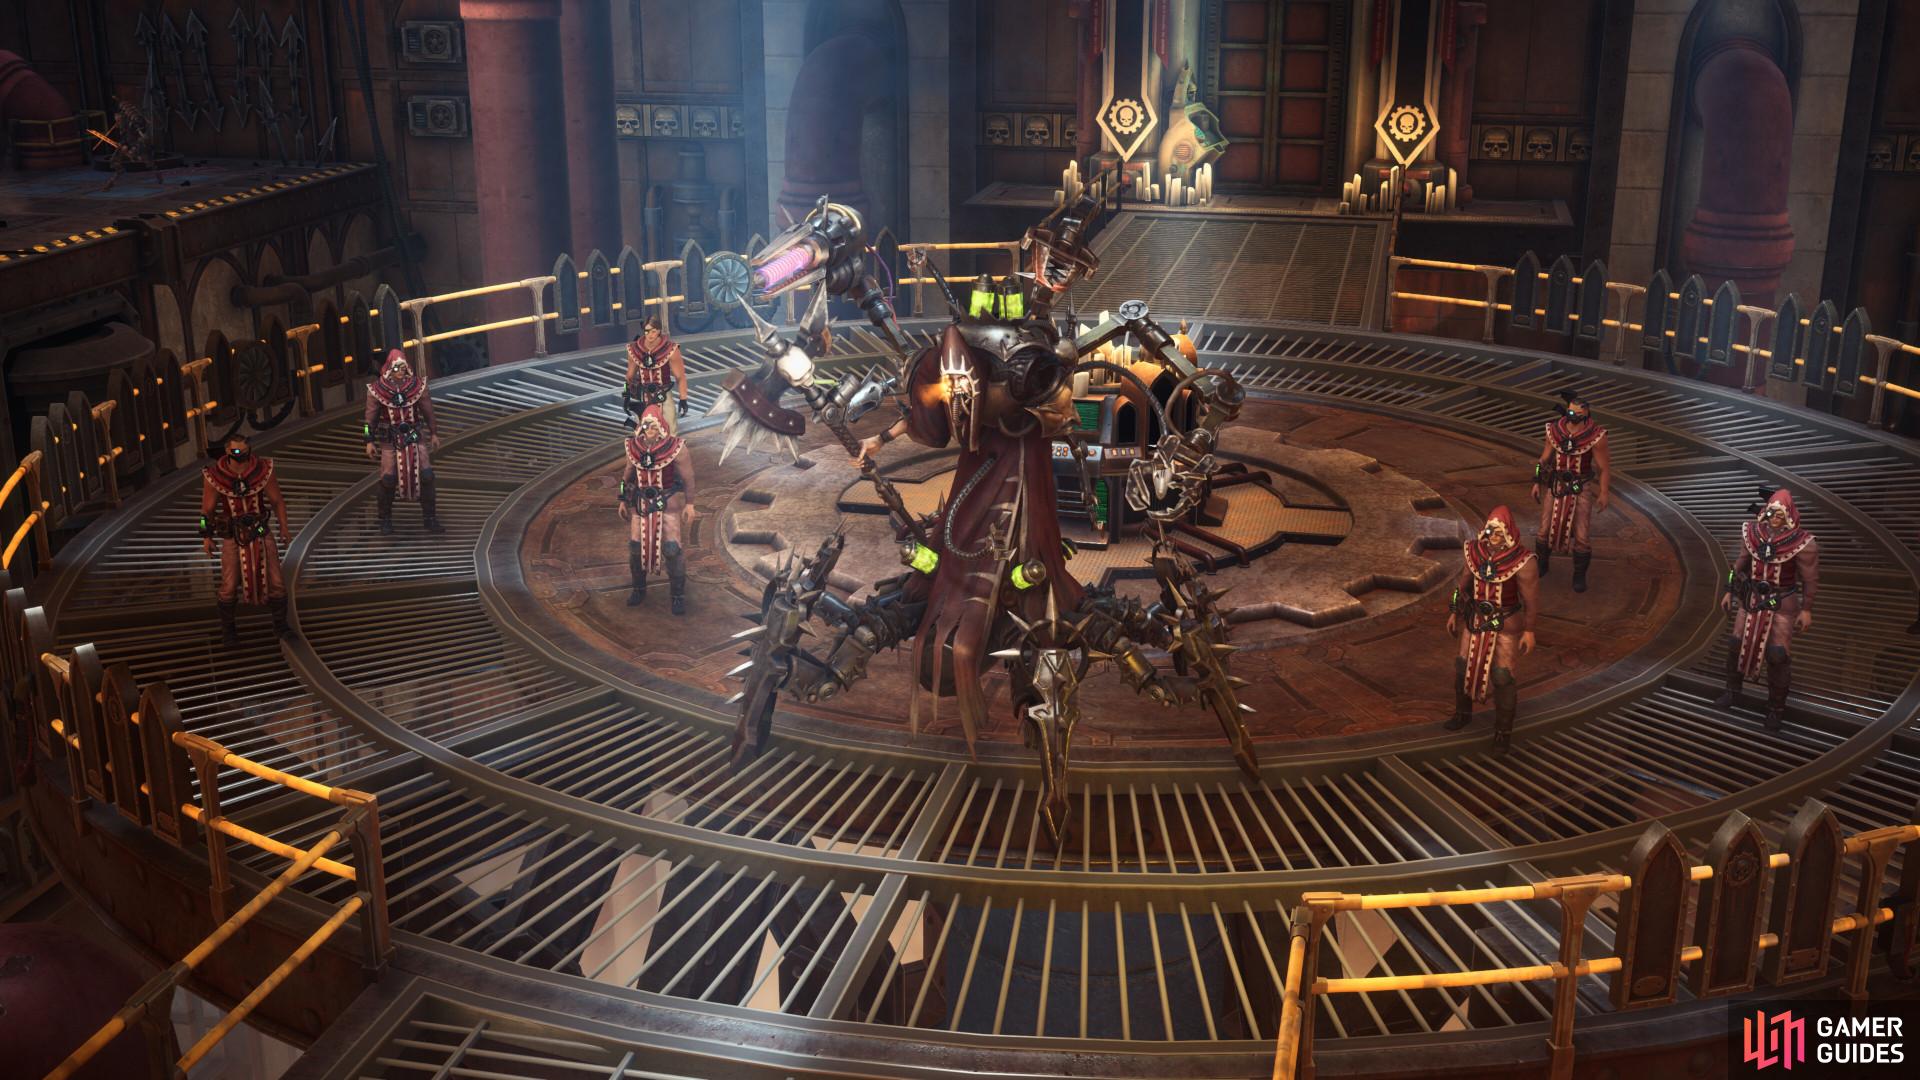
With the Marine and his men down, now you need to move forward one more time. This will lead to the final showdown with the chief Heretech. However, the boss is not alone, as there are two Forgefiends there. These are high-wound and low-damage threats, so it’s not much to worry about, with some added Skitarri and cultists around the place which pose little threat. Deal with the adds as appropriate and ignore the Forgefiend at the back until later on.


(1 of 2) If you have the Follower Rank of Heretic, you can recruit the Forgefiend on the left as a neutral ally. There’s a further option with what to do with it later if you’re looking for more fun decisions or agree it’s heresy and destroy it later.
If you have the Follower Rank of Heretic, you can recruit the Forgefiend on the left as a neutral ally. There’s a further option with what to do with it later if you’re looking for more fun decisions or agree it’s heresy and destroy it later. (left), Have a tank control the boss and have the rest of your party mop up Skitarri threats before turning your attention to Mr. Crabs. Grand Strategists can also grant Backline support to increase your tanks defensiveness while tanking it. (right)
Also, if you’re doing a Heretic playthrough, you can select a dialogue option during the conversation that possesses one of the Forge Fiends and have it on your side. It is sensibly there to do some minor damage on its turns and be a wound sponge for you. You can also use it again in a dialogue option during warp combat if you want and skip it, which is a nice touch. But if you don’t have access to that option, it’s no big deal.
As for the big boss itself, this creature does not really do much but it can retaliate with melee attacks whenever you hit it. Avoid clumping your characters together, as its melee damage is power damage and will cleave regardless of attack type. So, have a Vanguard tank it, and support them with buffs from a Master Tactician’s ![]() Stronghold, or have your Grand Strategist offer some Stratagems to support the defensives of your tank character. Someone like
Stronghold, or have your Grand Strategist offer some Stratagems to support the defensives of your tank character. Someone like ![]() Abelard or Heinrix’s
Abelard or Heinrix’s ![]() Endure spell will help if you don’t have a Vanguard with some Temporary Wounds at least.
Endure spell will help if you don’t have a Vanguard with some Temporary Wounds at least.
While the boss is threatened with a tank, have your melee and ranged damage deal with the shooter threats and other minor enemies, then have the ranged turn on the main boss, with your melee supporting against the Forgefiends. Ranged DPS have no risk of fighting the Mechanicus boss, so splitting your party’s damage up makes sense.
Uralon The Cruel Choices

A spooky Chaos man will pop as you leave, offering a verbal agreement choice, which will show up as potential quests in later chapters if you accept the offer.
As you leave the planet you will get a visit from a World Bearer, who will provoke some options. You can call him a heretic and be on your way, but for heretical players, if you agree to a deal with Urlaon, then you will get some future chaos-related quests and possibilities in future quests and chapters. They won’t entirely change the way the game is played, and you’ll still have to do the same stuff that Iconoclasts and Dogmatic playthroughs have. If you do opt for it, then this choice will present itself late Chapter 4, where you can take Uralon’s Offer alluded to here, which will have major ramifications for the late game’s storyline.
To give you an idea without direct spoilers, Heretic players who agree verbally with Uralon can find an extra quest in Chapter 3 with some chaos demons that change the ending of the chapter ever so slightly. The chapter will still play out as normal but the details of it will be different if you do decide to go that route. That’s the sort of thing you can expect for a slightly more immersive heretical campaign.
Again, it is no major deal-breaker type choice, but it is something to consider depending on your goals for a campaign.
Choices: What to do with Kiava Gamma?

Each choice grants points related to the answer style, along with some extracts at a minimum.
Once your party has defeated the final boss and you’ve done Heinrix’s questline, you can move on to deciding the planet’s fate. You have three options, all representing Iconoclastic, Dogmatic and Heretical options. These options will grant a large numeric value to your chosen playthrough style.
For the most part, you can choose an option that you want to increase your points in. I went with the Heretical option with some Howler Cannons for the ship, and three Mobile Extractiums. Our Iconoclast writer got points for Iconoclast and three Mobile Extractiums too, so there’s a theme of points for your chosen option and some Extractiums. So, choose whichever option is more fitting for your playthrough, as it’s merely a campaign preference, and you won’t get locked from content.
More Rogue Trader Guides
If you’re looking for more Rogue Trader guides, including one for how to get Extractiums and the Iconoclast Choices, check the links below.

 Sign up
No Comments