
After the events in Footfall during Chapter 2 in Rogue Trader, you’ll gain access to the full map of the Koronus Expanse. By following the yellow route north of Furibundus, you’ll find Aviorus. Inside Aviorus, you’ll find a drifting voidship southeast of the map. Scan the planet, enter the ship, and you’ll start the “Enter the Main Computing Cathedral” errand. At first glance, the place is desolate aside from a few crazy Tech-Priest, but later, you’ll have numerous difficult battles including a boss fight against the Forgefiend. Read on to find out how to complete the puzzles, win the battles, and defeat Forgefiend.

Be careful what you find in an abandoned voidship. You never know what you will find.
Drifting Voidship Walkthrough
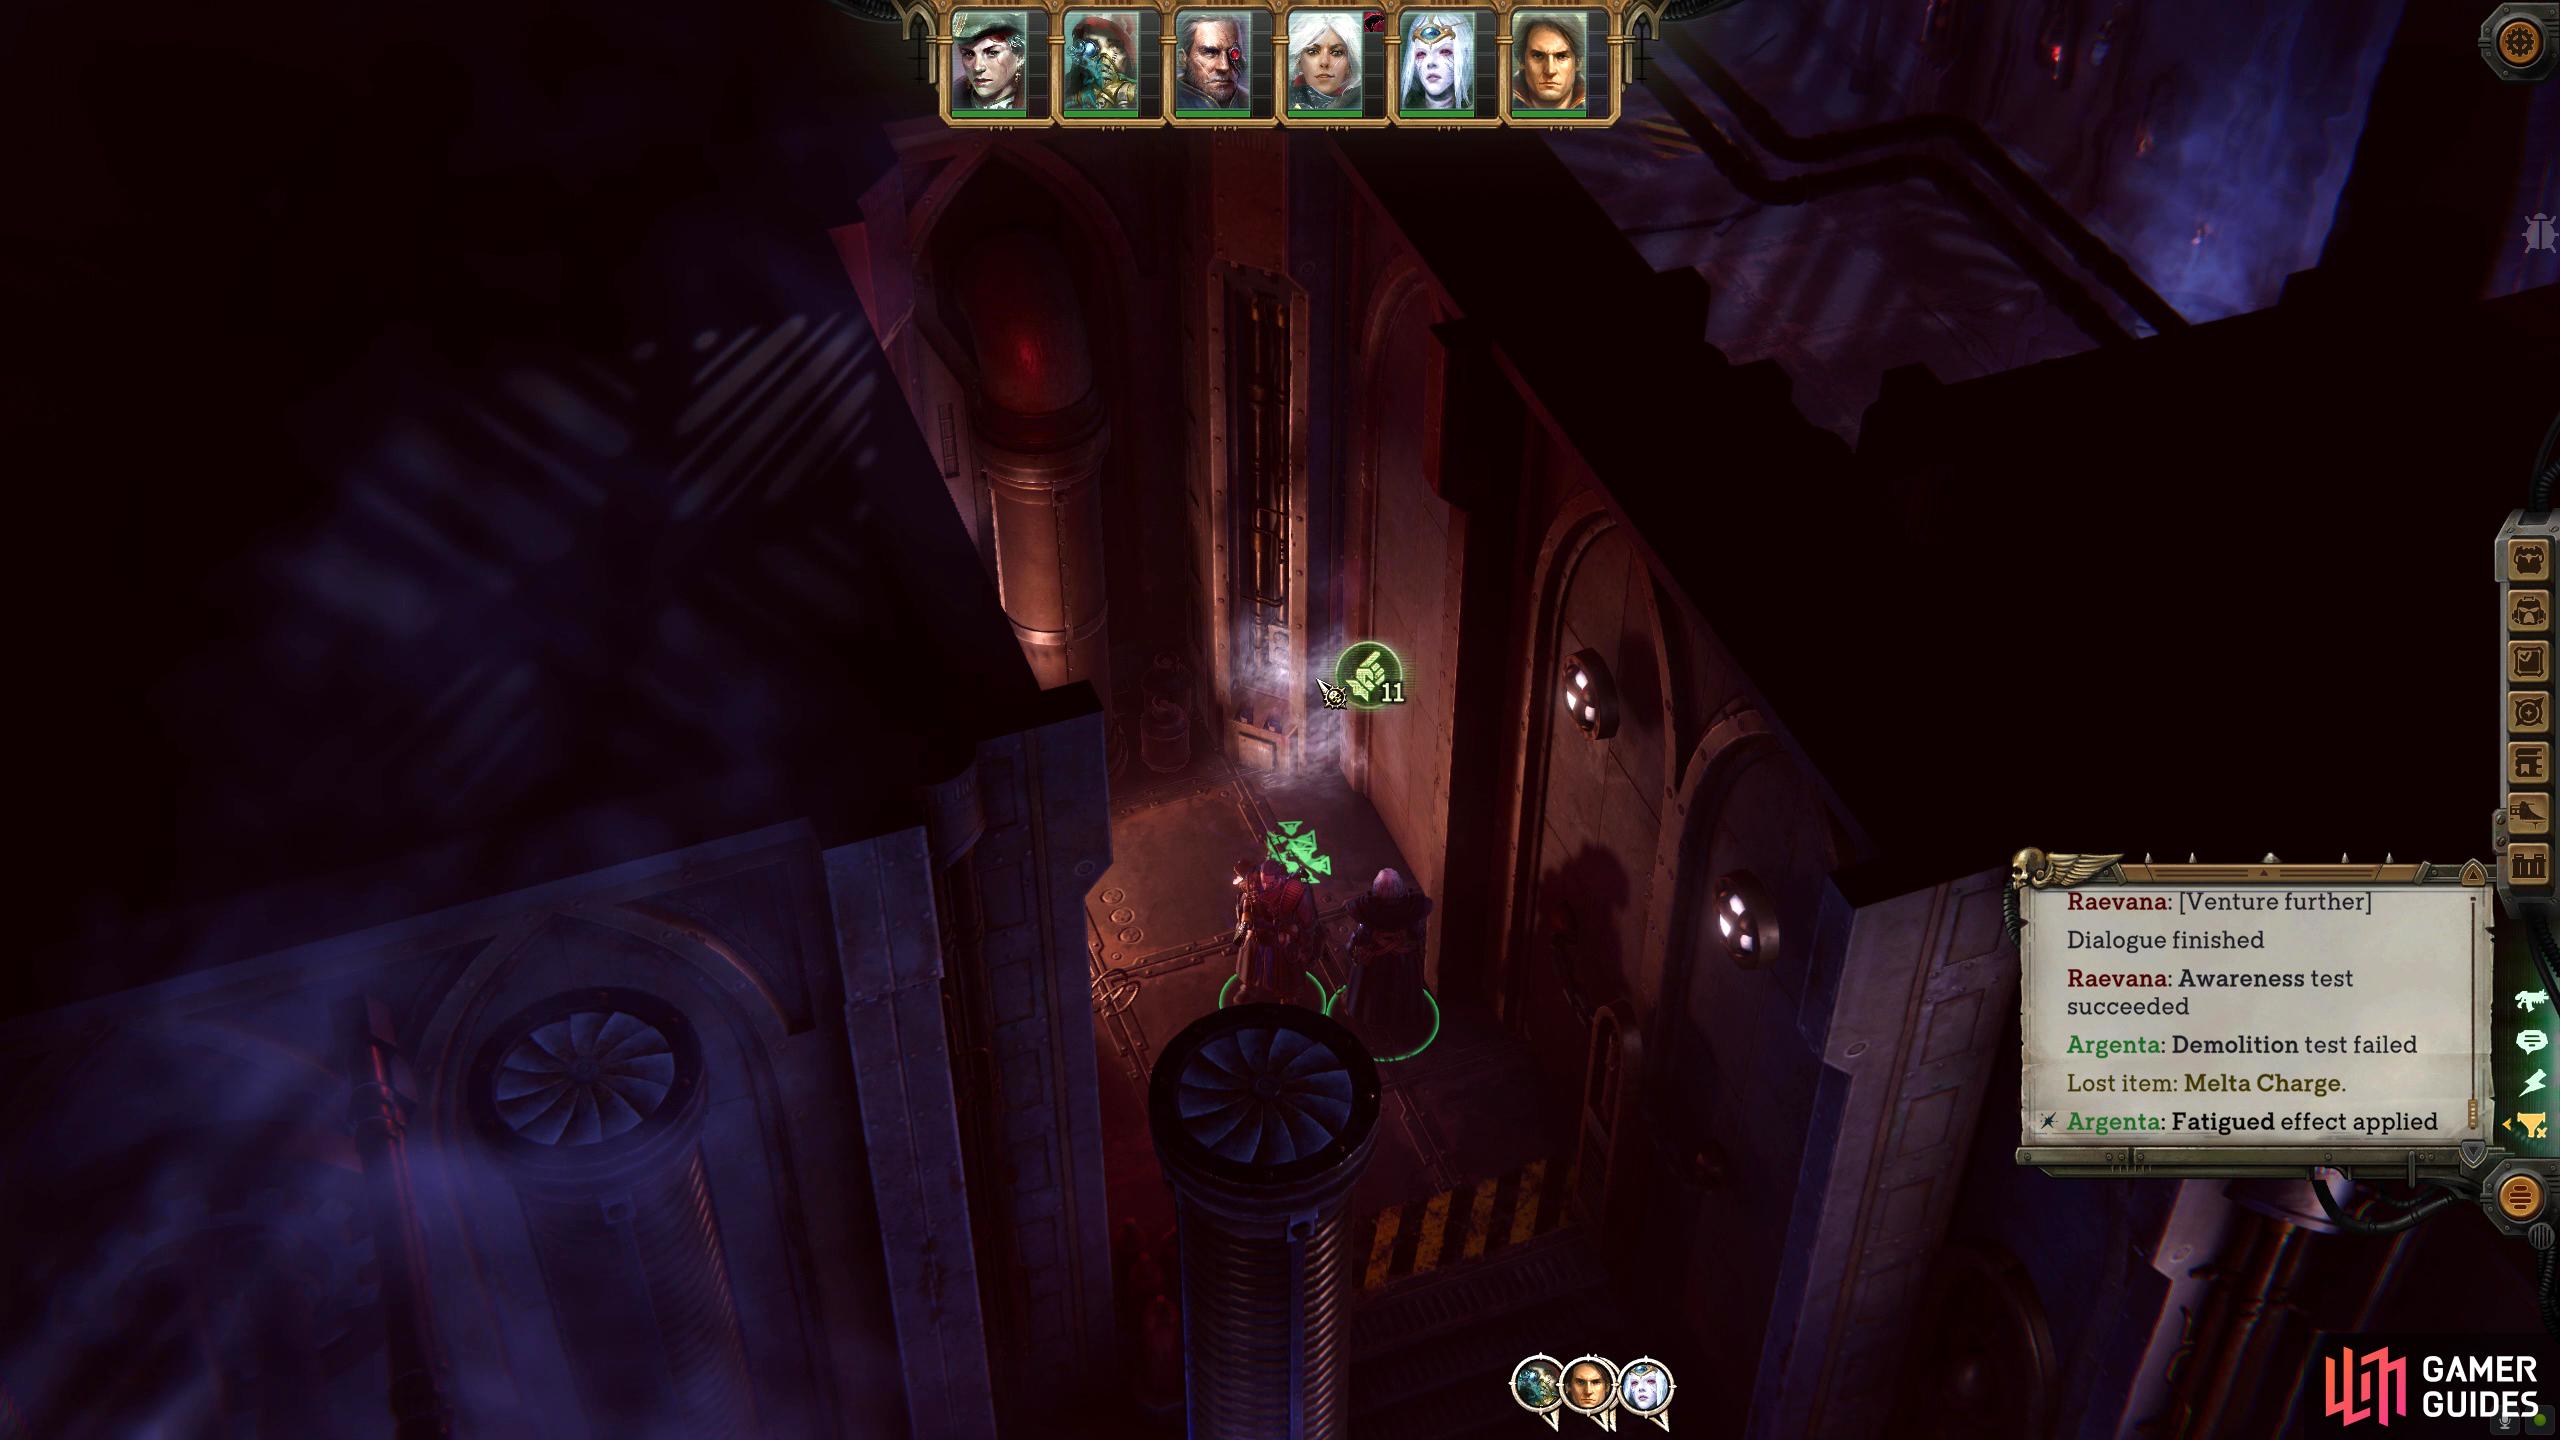
When you enter the ship, it’s quiet… too quiet. Proceed north until you get to a large door. If you interact with it, you’ll get a [Tech-Use - 20] check for more information, but you won’t be able to do anything with it yet, as you’ll need to restore the power to the ship. Instead, head through the door to your east, and head immediately south where you’ll find a [Demolition] check. Destroy the wall with a Melta Charge, and then enter the new area to find a safe on the wall containing some cargo, and some usable items. Head back to the corridor and continue.
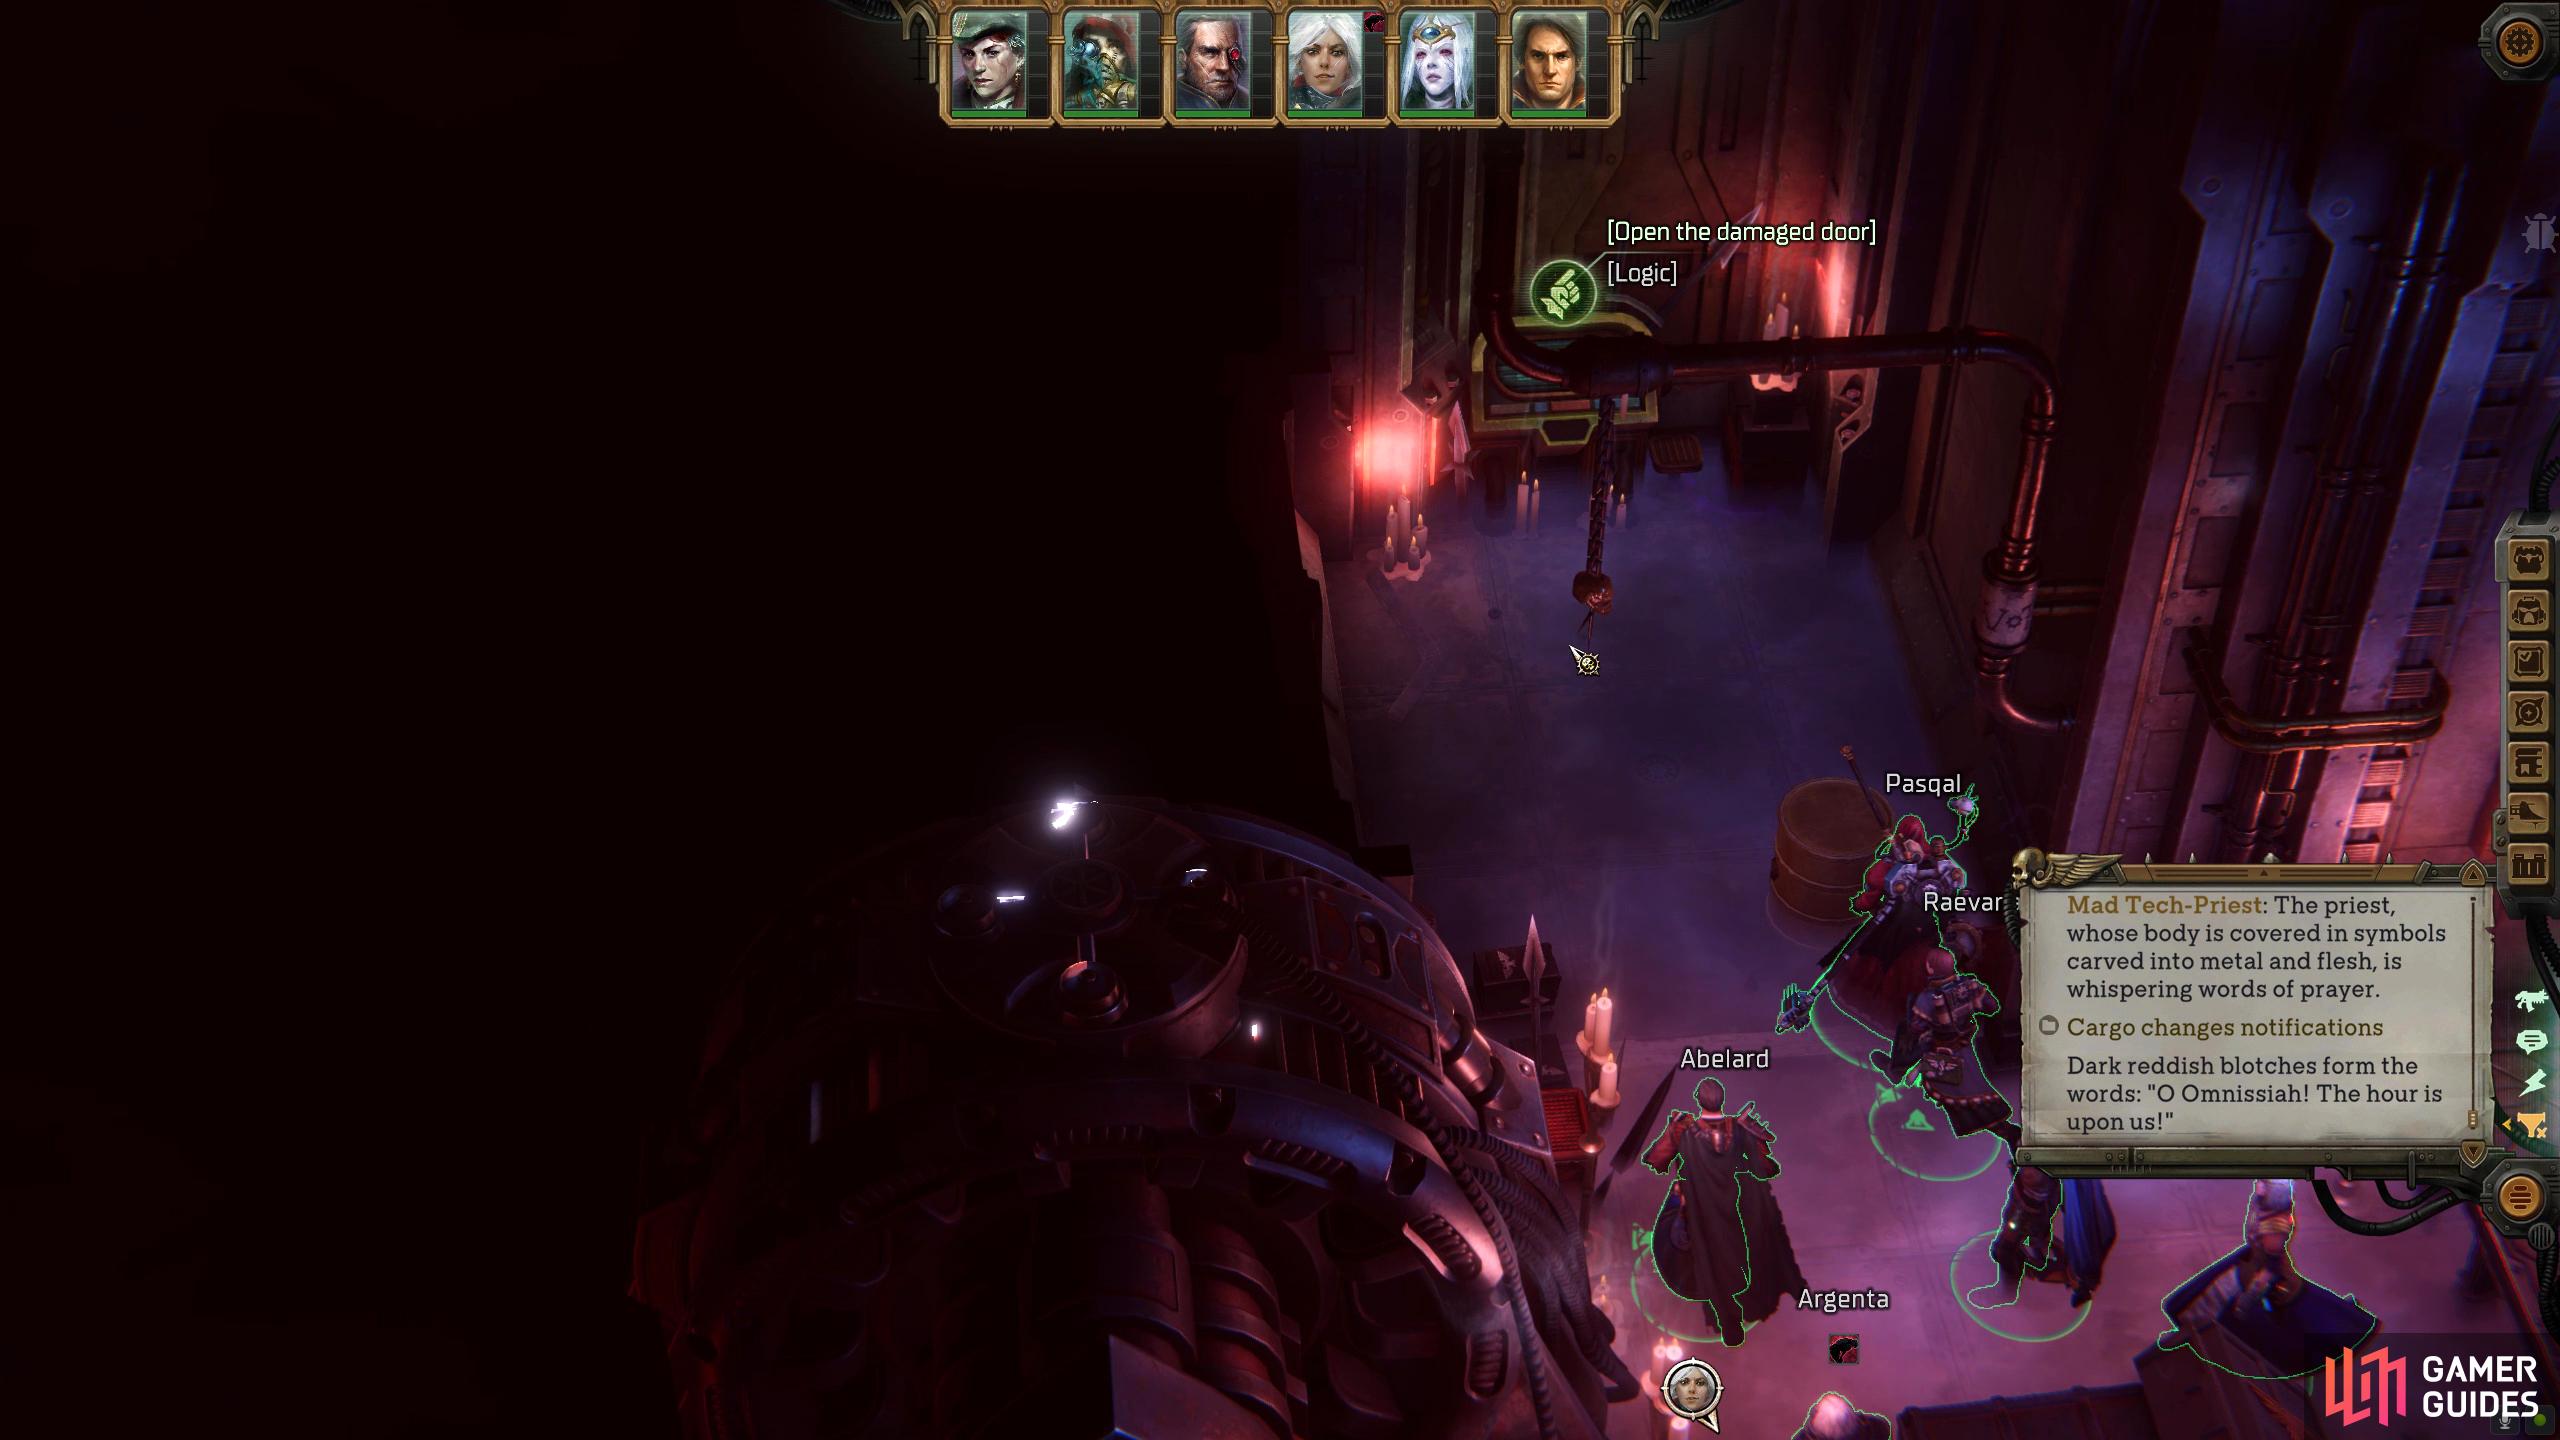
Follow the catwalk east until you reach a large room. Here, you’ll find a couple of Mad Tech-Priests who are not hostile…yet. Talk to them if it pleases you, pick up the goods against the west wall, and then proceed further into the room. As you get further in, the door becomes jammed. Make your way to the end of the wall, and head east to find a console that requires a [Logic] check. Before attempting this, make a quick save before attempting to access the console as it has fairly high Logic requirements. Once you’ve “fixed” the door, head through it into the dark corridor.
Pick up the goods to your right while going through the corridor, and the next set of goods in the lockers which are between the Tech-Priest and the electric coils. Now, these coils can damage you quite badly if you get hit by the electric currents. The electric currents will appear on the floor around each coil. Move each party member one at a time past the coils when the current disappears from the floor. You will only have a brief moment, so watch the pattern before going. Alternatively, you can just run through it, and heal up the injuries on the other side, provided you have enough Medikits (each member will get about three fresh injuries). However, if you have a member of the team who has a high Tech-Use skill, you can fix the coil on the right. After you’ve made your way across, cut the power off from the coils at the nearby console.


(1 of 4) Near the entrance of the ship is a large locked door. Everything you do in the ship is to unlock this.
When you’ve reached the other side, pick up the box of goods, and then interact with the console to cut the power. This will give you a brief eerie scene before you can regain control. With the power out, a [Lore: Warp] check will appear on the floor behind you. Interact, and pass the check to gain a small amount of experience as well as some information regarding the scene you just got. Proceed through the northern door and take the stairs up. Now, follow the winding corridor until you get a scene with the Tech-Priests, and it appears they’ve lost their mind. Continue up the corridor to where the priests are, but don’t worry, they won’t attack you…yet.
As you make your way further into the room, you should spot a trap in the middle of it, provided your perception is high enough. To get past this without triggering it, you’ll need to select your demolition expert, and safely navigate them around the trap to reach the switch indicated by an orange line. With the trap disarmed, collect the goods from the safe on the wall which will require you to pass a [Tech-Use] check, but it’s well worth it as you’ll find the ![]() Augmented Gloves accessory which gives you +10
Augmented Gloves accessory which gives you +10 ![]() Weapon Skill and +5
Weapon Skill and +5 ![]() Strength.
Strength.

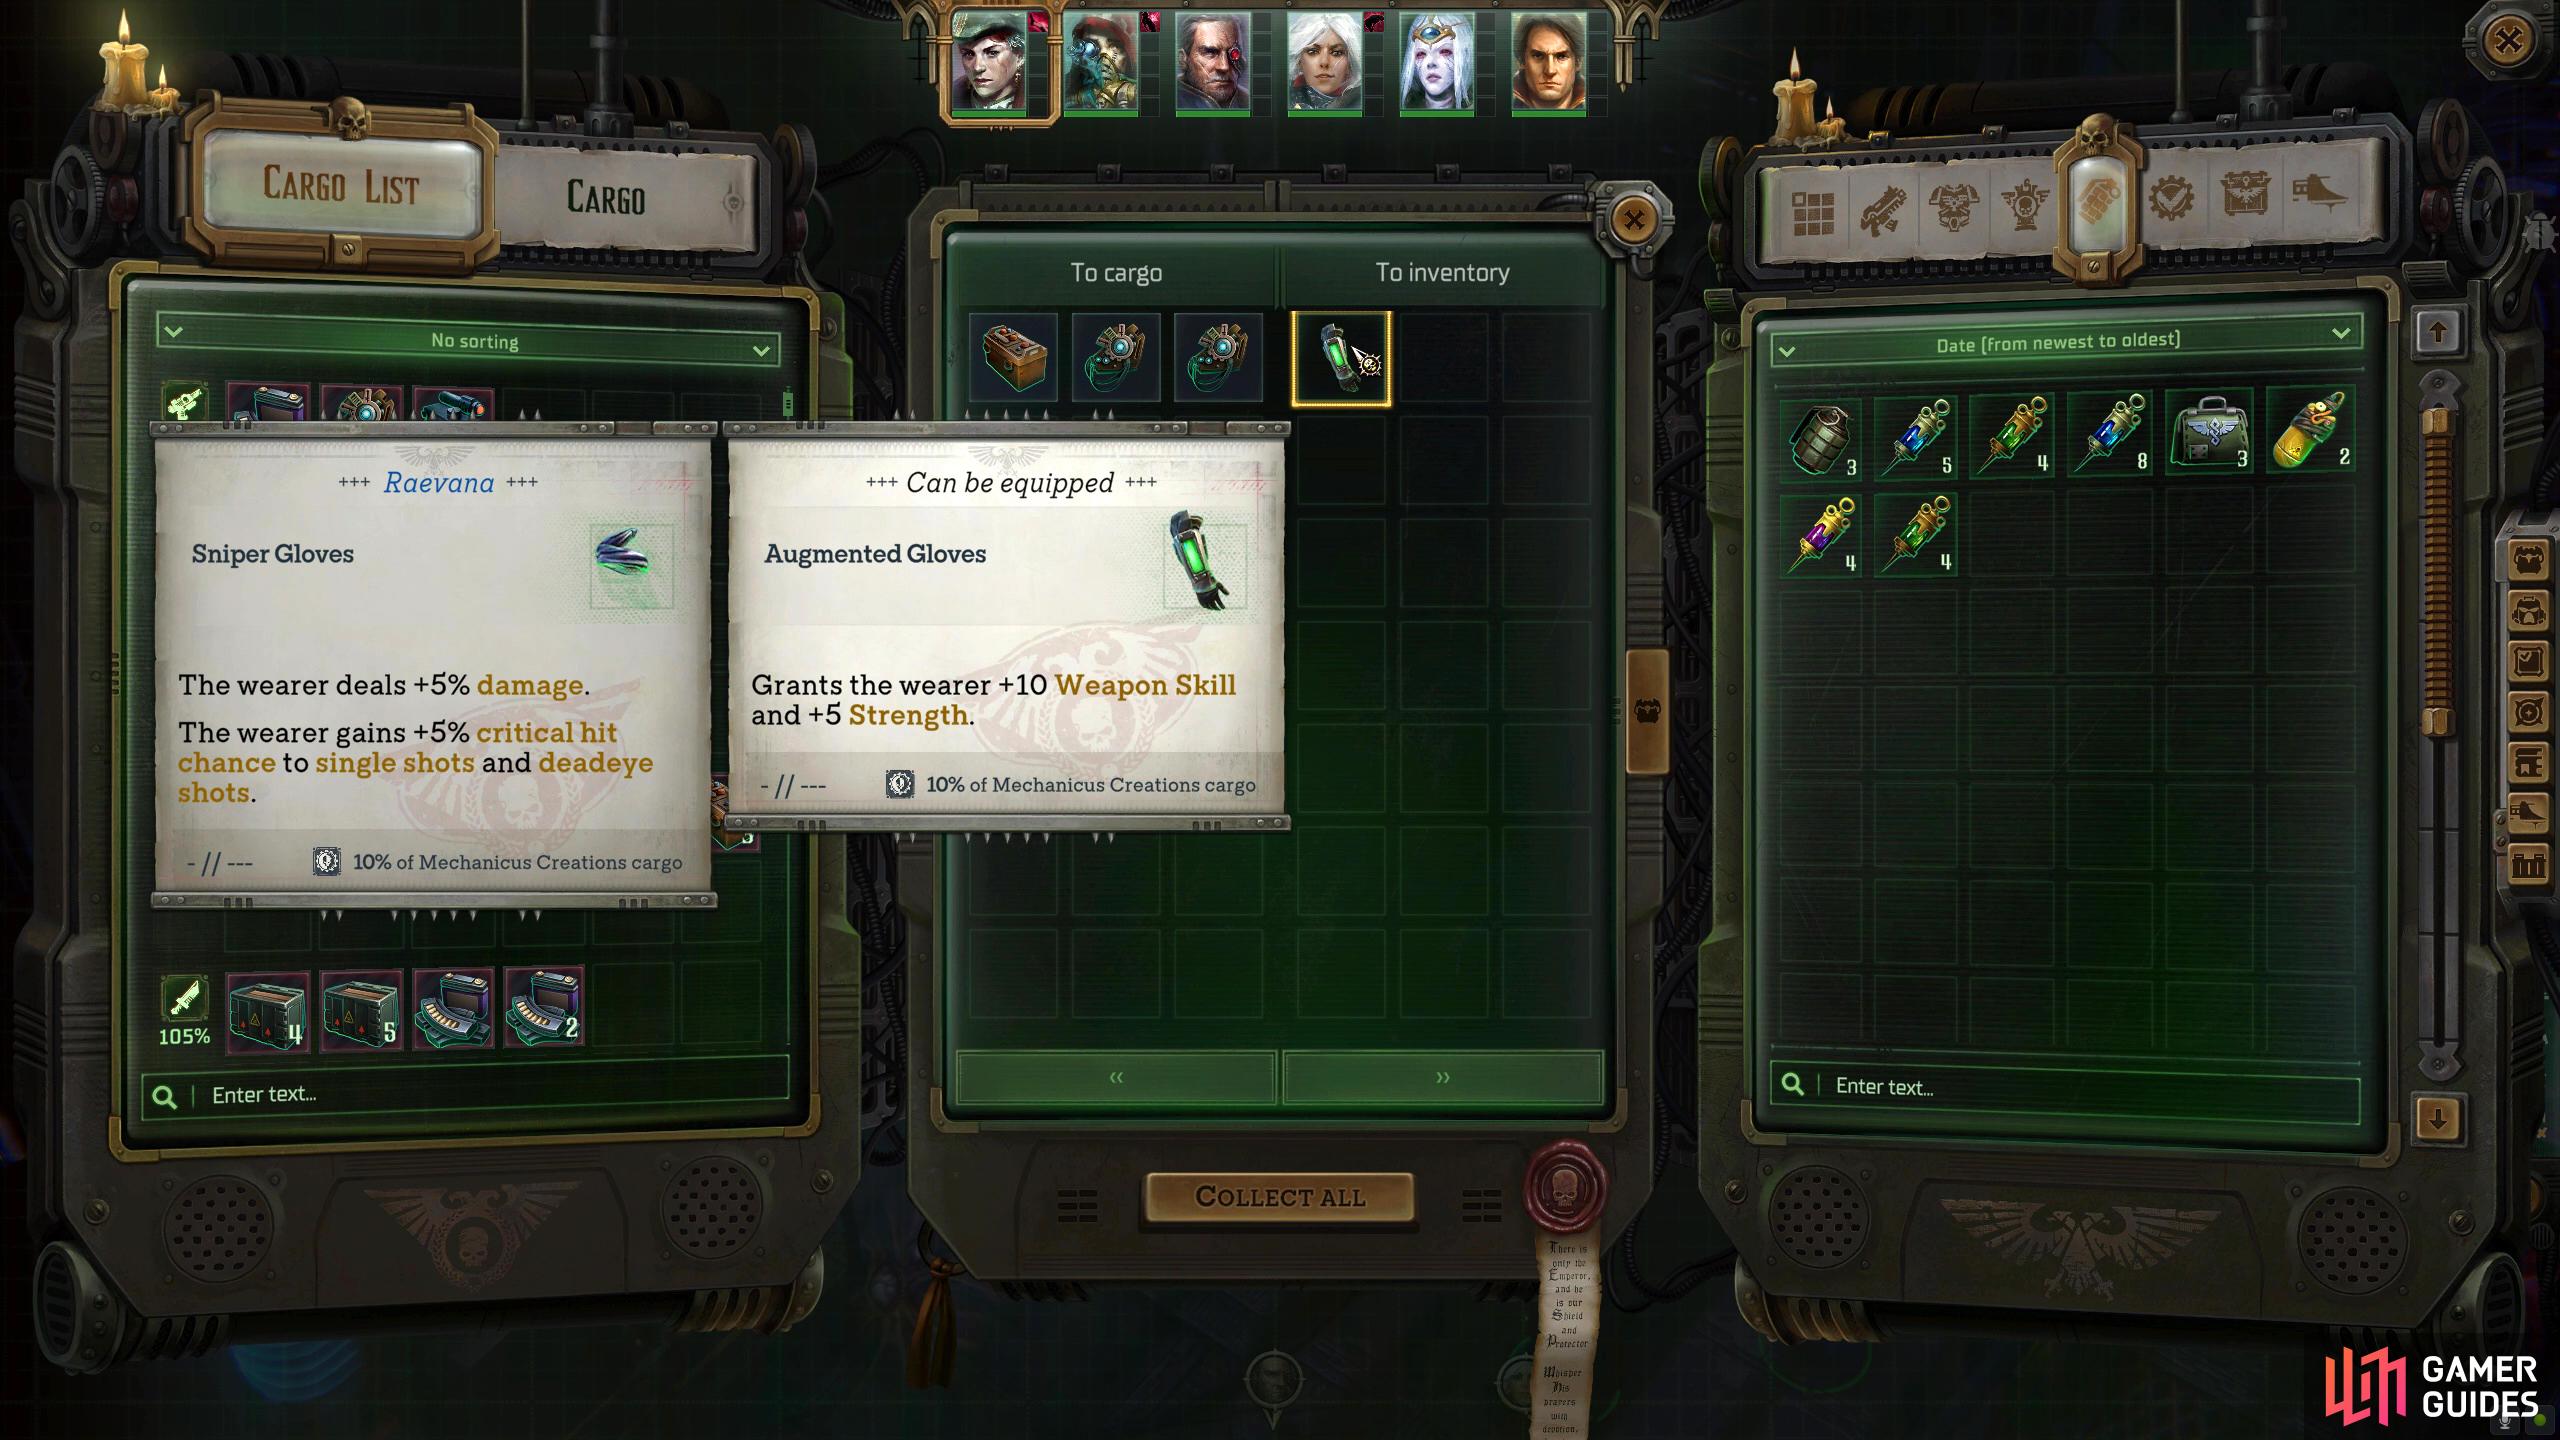
(1 of 2) Open up the safe on the side of the wall.
Open up the safe on the side of the wall. (left), Inside, you’ll find the Augmented Gloves! (right)
Backup Generator Valve Puzzle Solution
In the next room, you’ll face a puzzle you’ll need to conquer. Firstly, the floor is covered with toxins, but ignore that for now. Interact with the nearby console and it’ll tell you the pressure parameters need the expected value of 10 before unveiling some pressure stabilizers. Select one of your party and send them to the other side of the room. You won’t take any serious damage from the toxin unless you stay in it. Now, use one of the party members nearest to the console, and turn both of the stabilizers there for a combined value of 5. Next, select the lone member on the other side of the room, and turn the stabilizer nearest to the backup generator, and you will have successfully reached the expected value of 10. Finally, select the party member nearest to the console again to remove the toxin. All that’s left to do now is turn on the backup generator, which has a [Tech-Use] check. Pass the check to turn on the generator, and you’ll get another brief scene. Head to the wall opposite the generator and destroy the wall to proceed.
This small room has two traps to disarm, the first is to the left of the door, so disarm that first, but the second trap will require you to navigate the demolition expert around the second trap to find the switch which will be on the left side of the room. With them disarmed, pick up the crate of goods on the right side of the room, and head back out. Now that the ship has power again, it’s time to go back to the beginning of the ship, where the locked door is. Unfortunately, it won’t be as easy as it was getting here.


(1 of 3) Interact with the console to start the puzzle, and you’ll need to reach the value of 10.
Mad Logis Encounter Guide
Head back the way you came until you reach the room with the electric coils. Make sure you save here, as you’ll have a few difficult encounters coming up. Depending on your difficulty, these next couple of battles can go from tricky to almost impossible. Enter the room slowly and leave the party near the console before selecting your tank, which will most likely be ![]() Abelard. Now, move him up the catwalk to the right toward the Servitor and the Mad Logis to trigger the battle. In the prep phase, have your Navigator (
Abelard. Now, move him up the catwalk to the right toward the Servitor and the Mad Logis to trigger the battle. In the prep phase, have your Navigator (![]() Cassia) hide behind the lockers near the tank. Place two DPS behind the right coil behind the cover, and one DPS, preferably with a Sniper, behind the console. Finally, put the last character anywhere behind cover, and start the battle.
Cassia) hide behind the lockers near the tank. Place two DPS behind the right coil behind the cover, and one DPS, preferably with a Sniper, behind the console. Finally, put the last character anywhere behind cover, and start the battle.
It’s impossible to determine who will go first as there are a lot of variables at play such as difficulty, how you leveled up your party, and what items you have access to. For this reason, we can’t give you a turn-by-turn guide, but we can tell you how you should approach the battle. The first thing you’ll need to do is defeat the two Heralds of Corruption which are situated on both sides of the room, one near the tank, and one opposite the middle-left coil. If you don’t, they will use their “Code of Tainted Blessing” buff on all the enemies with a large amount (35) of temporary wounds, which will make the battle ten times harder. Fortunately, they don’t have a lot of health provided they die before the buff, and they take an extra 30% Shock damage.
As soon as the battle starts, use your tank to destroy the first Herald of Corruption on the right (use a Stim if you have to), and defeat the Herald of Corruption on the left with your strongest DPS behind the console. If you have a sniper, you may want to use it on them. With some luck, you will defeat the Heralds before they can cause you any trouble. While the other two are taking care of the Heralds, keep the other members where they are for now while using their buffs or debuffing the enemies. It will take a couple of turns before the Servitors will get to them.


(1 of 2) Place your party in these positions during the prep phase. The important ones are Abelard (top), and the strongest DPS (bottom). The rest can be put elsewhere.
Place your party in these positions during the prep phase. The important ones are Abelard (top), and the strongest DPS (bottom). The rest can be put elsewhere. (left), Your priority at the start is to take out the Heralds on the left and right walls. If done correctly, you can take them out before they can buff the enemies. (right)
Whatever you do in this battle, do not underestimate the amount of damage any of these enemies can do to you, especially the Logis. So, make sure to keep yourself above 60% health by using Medikits and buffs. Work your tank further down the catwalk and keep their defenses up while dealing with the Servitor and Logis with help from the Navigator, and then let the rest of the party stay in cover, focusing down the army of Servitors slowly heading your way. It’s better to focus on getting one Servitor down than spreading the damage, so focus on one at a time unless you can hit them all at once. If you have grenades, use them, especially Stun or Krak grenades as they are incredibly useful.
Once you’ve dealt with the Servitors, you can slowly bring your party up while still using the coils as cover to defeat the Tech-Priests. When the tank finally takes out the Logis, have him run back to the party using his MP and ![]() Charge skill. This battle may take you a fair few tries because if the enemies hit you with a critical hit, and they most likely will, they can decimate the party. Don’t worry, though, this is the easier battle. Once you’ve defeated the enemies, loot their corpses, save the game, and head into the next room where you’ll get the next encounter. Make sure you disarm the trap first just before entering.
Charge skill. This battle may take you a fair few tries because if the enemies hit you with a critical hit, and they most likely will, they can decimate the party. Don’t worry, though, this is the easier battle. Once you’ve defeated the enemies, loot their corpses, save the game, and head into the next room where you’ll get the next encounter. Make sure you disarm the trap first just before entering.
Vox-Skulls Encounter Guide
This battle is similar to the first, but the cover is worse, there are more Heralds of Corruption (four) and Servitors, and a new enemy called Vox-Skulls. These frustrating creatures will either heal or give the servitors another turn. Normally, their low health would make them easy to take care of, but with four Heralds, even they take a few hits to defeat. So, what’s the priority, you ask? Well, either the Heralds or the Vox-Skulls, but that won’t be a simple task due to the former buffing the latter. Before we get started, rotate your camera so you’re facing the Magos opposite the room entrance, so it’s easier to guide you.
In the prep phase, place your tank (Abelard) at the door entrance, in line with the Herald on the wall to the right. You’ll need to be two free cells away from it, as you will charge when he gets his first turn. Place Cassia/Navigator behind the door to the left so she can still see the tank. If you’re using Heinrix or another melee, place them behind the cover to the left of the door, and finally leave the rest in the corridor where they can’t be targeted. The reason for this is the Magos will target a group of your team and throw three grenades at them in its first turn. On the harder difficulties, this can wipe out two or three party members.


(1 of 3) Start your party in the above positions. The three in the corridor can be anywhere in there, provided Cassia can still reach Abelard.
When you start the battle, you want to place the majority of your party on the cover to the left and focus on the Herald on the left wall, and the other enemies. Meanwhile, the tank, another DPS (whoever has the most defense), and your Navigator will focus on the right side. Make the Heralds your priority and buff up the tanks as much as you can, especially the main tank on the right, as they’ll be under serious fire. If you have a Grand Strategist, keep Frontline around the tank on the right, and Backline on the left party. Keep your party above 50% health, so they don’t get taken down with a critical hit, and slowly make your way around the room. The right party wants to focus their efforts on the Heralds while taking out those pesky skulls. You can find the Heralds in the following locations: the Middle of the left wall, the wall to the right of the door (opposite the cover), the far-right wall, and finally, on the back wall to the right of the console.
Once the party has dealt with their enemies, start heading toward the second party on the right while taking the enemies out along the way. This is a difficult battle, and you may have to retry it a few times. Once you’ve dealt with the enemies, head into the area to the right of the console to find a hidden door. Open it up, disarm the trap, and loot the goods inside. The chest at the back right will contain a ![]() Provocateur’s Helmet, which applies a -10 penalty to
Provocateur’s Helmet, which applies a -10 penalty to ![]() Perception to all enemies against the wearer within a 2-cell radius. When you’re done looting, follow the catwalk back to the entrance while disarming traps along the way.
Perception to all enemies against the wearer within a 2-cell radius. When you’re done looting, follow the catwalk back to the entrance while disarming traps along the way.
When you get to the main entrance corridor, head toward the large door that you couldn’t open, and you’ll spot two traps in front of it. Safely disarm them, save the game, and prepare yourself for a boss battle. Once you’re all healed up and ready, interact with the large door, select “restore power”, and enter the room. Loot the goods to the left of the door, and then proceed to the back of the room, and talk to Magos Tiberius Mahla. The main choices here are to kill him or coerce him. If you succeed in the [Lore: Warp] check, you’ll get a persuasion check too. Regardless of your choice though, you’ll still end up in a boss fight.
How to Defeat Forgefiend
Considering how difficult this place has been, Forgefiend isn’t particularly difficult considering its size, although it isn’t easy either. The main thing about Forgefiend is its “Raging Fiend” skill. This allows it to counter every additional attack after the first hit. Besides that, and its Twin Plasma attack which hits a large area and can push you back, and make you prone, it isn’t too difficult. Along with the boss are two Vox-Skulls, and two Servitors, and you should make them your priority while the tank keeps hold of the boss.


(1 of 3) Place your party in the same position as shown above. The priority positions here are Abelard’s, and Cassia’s.
Prep Phase
Place your tank in front of Forgefiend, slightly to the right, place another melee like Heinrix to the left, and then two members behind the cover on both the left and right, near where the Magos were.
Forgefiend Boss Guide
Forgefiend doesn’t do a lot, but it has a lot of health, and it hits like a truck. Then you have to deal with the Vox Skulls who can give the boss, and the Servitors an extra turn, or heal them. So, set your tank onto Forgefiend, give him as much defense as possible, and taunt the boss to keep it on him. When he gets hit by the boss, the priority is to keep him healed because if the tank goes down, the battle will only get worse from there. While the tank does its job, have the rest of the party focus on the Vox-Skulls, and then the Servitors, but make sure the Navigator favors the tank. If you have the ![]() Enfeeble ability, use it on the boss as soon as you can to reduce its damage. Once the rest of the enemies are down, you want to spread the party away from each other, as the boss has large area-of-effect attacks. Whenever you attack it, it’ll retaliate with an attack of its own which can deal a large amount of damage, so keep yourself healed up.
Enfeeble ability, use it on the boss as soon as you can to reduce its damage. Once the rest of the enemies are down, you want to spread the party away from each other, as the boss has large area-of-effect attacks. Whenever you attack it, it’ll retaliate with an attack of its own which can deal a large amount of damage, so keep yourself healed up.
As long as the boss has a taunt on it from the tank, and the tank always has full defense buffs, then you should be okay as the boss will attack the tank even when it counters someone else’s attack. To deal damage to the boss, you’ll want to use the usual Analyze Enemies/![]() Expose Weakness to lower its armor. You can make it burn and bleed, but it’s immune to toxins. Finally, use your attack buffs such as
Expose Weakness to lower its armor. You can make it burn and bleed, but it’s immune to toxins. Finally, use your attack buffs such as ![]() Reckless Strike,
Reckless Strike, ![]() Sworn Enemy, Bounty Hunter abilities, and Assassin abilities to name a few. When the boss is defeated, speak to the Magos to see the result of your choice, and to complete the quest. Before you go, make sure you loot the goods below his body to acquire the
Sworn Enemy, Bounty Hunter abilities, and Assassin abilities to name a few. When the boss is defeated, speak to the Magos to see the result of your choice, and to complete the quest. Before you go, make sure you loot the goods below his body to acquire the ![]() Diagnostor accessory, which gives you +15 to Medicae.
Diagnostor accessory, which gives you +15 to Medicae.


 Sign up
I noticed you mentioned the master tactican in the Vox-Skulls encounter section and I believe you meant the grand strategist. God bless.
Good spot Jedir, changed it to Grand Strategist. Thanks for pointing it out.