
This page details everything you need to know about how to get the most useful items for your base, and where to get them. We’ll cover technology modules, transport modules, industrial modules, and agricultural modules.
Where to Find Blueprints For Your Base in No Man’s Sky
There are so many items that you can construct for your base that it may seem overwhelming at first. Thankfully, there’s a system in place as part of the introduction to the game which allows you to gradually acquire most construction modules from the base computer. All you have to do is wait for a notification from the computer which informs you when a new blueprint can be learned. In this way you can casually explore the base building process in your own time, without being exposed to the enormous number of blueprints all at once. It will also save you time since you can acquire the modules for free in this way. However, if you want to get most of them as quickly as possible, you can visit the Construction Research Station on board the Space Anomaly. Here you can purchase almost all of the base construction modules in exchange for Salvaged Data.
The below details some of the most useful base items which allow you to increase production of materials, explore planets more easily, encounter more visiting pilots (such as those you meet on space stations), and generally make life in No Man’s Sky much easier, since you can have many of the most useful items all in one place.
Technology Modules
Save Beacon 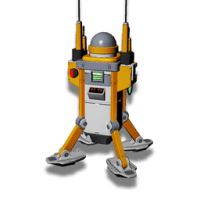 
The Save Beacon is one of the most important items to have in the early game, especially while you’re building a base. It will allow you to save your game whenever you interact with it, but it will also create an icon on the compass at the top of your screen, allowing you to quickly check where a specific part of your base is. This is mostly only useful if your base is big enough to warrant another icon alongside the one you’ll have for the base computer, but it’s a nice item to have in different parts of the base for quick access to a save function without having to run too far in larger bases.
Health Station 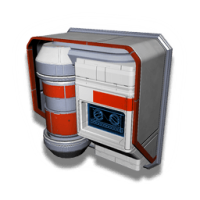 
Although your health will slowly regenerate over time in No Man’s Sky, it’s always useful to have a quick and easy way to replenish it in an emergency. The Health Station provides this, allowing you to mount it on a wall anywhere in your base. This can be particularly useful if you’re in the middle of fighting sentinels, pirates, or other players, but it can also be useful if you take a few nasty falls while building. This may be a simple item, but there will be times when you’ll be glad to have a few of them around.
Hazard Protection Unit 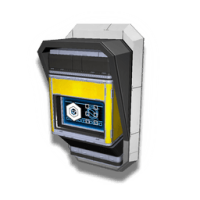 
As with the Health Station, the Hazard Protection Unit can be an invaluable item in certain circumstances. If you’ve set up your base on a hospitable planet with few hazardous substances, this item may not be entirely necessary. However, if you’re on a planet with a toxic, radioactive, or otherwise hostile atmosphere, the Hazard Protection Unit provides a great way to quickly recharge your Exosuit, allowing you to explore the local area for longer periods of time.
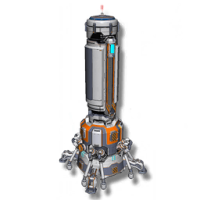
Base Teleport Module 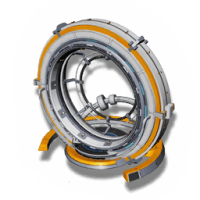 
As the name suggests, this item allows you to teleport from your base to any known space station, or to any other teleportation module that you might have set up elsewhere. This will be incredibly useful to have when you need to tap into different star systems for specific resources which are limited to specific planet types, such as Frost Crystal or Solanium. The possibilities are endless with this one, so you’ll want to get it set up and powered as soon as possible.
Galactic Trade Terminal 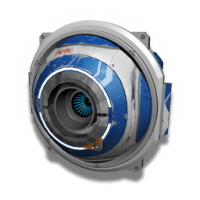 
This is another useful item which will make your life much easier, both in the early game but also when you’re more established. It may not seem like much effort to get into your starship and visit the nearest space station with the express purpose of using the trade terminal there, but it becomes a major nuisance when you realize that you’ve just got back to your base having forgotten a key item that you could easily find from a trade terminal.
Oxygen Harvester 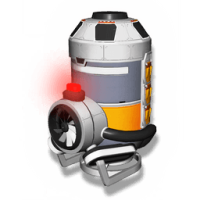 
This item isn’t necessarily the most useful if you have frequent access to sources of oxygen, but as with the Health Station and Hazard Protection Unit, it provides a quick way to replenish your vitals. This will be most useful if you find yourself using a lot of oxygen for crafting, or in any other endeavour where the element is required.
Mineral Extractor and Gas Extractor 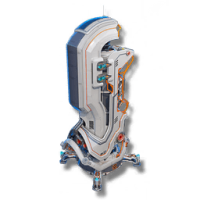
These two items can be mentioned together since they essentially provide the same service, but for different materials. The Mineral Extractor can be set up to extract minerals from a hotspot source until it’s depleted, while the Gas Extractor does a similar thing, but for valuable gasses. The type of mineral or gas extracted will depend on the specific type of hotspot that you identify, but in terms of gasses you’ll often find Sulphurine on scorching and barren planets, Radon on irradiated and frozen planets, Nitrogen on toxic and lush planets, and Oxygen on exotic planets. Both of these tools can save you a lot of gathering time while you focus on doing other things.
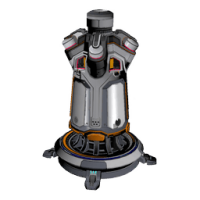
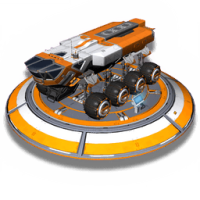
Landing Pad 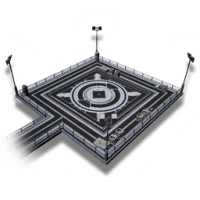 
The Landing Pad isn’t only there to be used by yourself and your friends. When you construct one, it will attract the attention of visiting pilots from across the system. This means that you can encourage the same types of ships that you see in the space station to land near your base instead, since each star system has its own unique designs for ships. You may also find that you see pilots with similar items on offer returning to your base, giving you a fairly reliable source of purchasing things without influencing the economy system built into the Galactic Trade Terminals.
Signal Booster 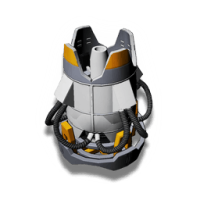 
The blueprint for the Signal Booster should be something that you learn early on in the game, since it’s one of the first base items which is introduced to you from the base computer. If you don’t yet have one you can always purchase the blueprint from the Construction Research Station, as with any of the other items on this list. The booster is incredibly useful for identifying points of interest on any planet, so longas you provide it with Navigation Data.
Large Refiner  
The Large Refiner essentially does the same job as the Portable or Medium Refiner, but it can handle more materials at once, and it refines them much more quickly. It’s worth having a few of these placed in your base for whenever you need to refine a large amount of materials, or especially if you’re interested in farming Units via the Chlorine and Oxygen method, which is detailed on our page on how to make units quickly here.
Nutrient Processor, Livestock Unit, and Automated Feeder 
These three items will become more and more useful as you progress with your base building. The Nutrient Processor will allow you to extract nutrients from many materials, turning them into edible products, some of which can be used to feed your pet companions. The Livestock Unit will allow you to automatically harvest substances such as milk, eggs, or other specialist produce from any animals in the area, providing a constant source of these items. In turn, the Automated Feeder allows you to automatically supply those same creatures with food, keeping them happy and healthy.
Transport Modules
Exocraft Modules
The Transport Modules mostly consist of geobays for the main Exocraft available to you. This includes the Roamer, Nomad, Pilgrim, Colossus, Minotaur, and Nautilon. All of these can be constructed in or near your base, although the Nautilon requires a body of water since it is a marine Exocraft. Each of these Exocraft allow you to navigate different types of landscapes more easily, often providing more efficient mining tools or protection from hazardous environments. A more detailed breakdown of what each of the Exocraft are capable of doing can be found on our How to Get All Exocraft and How to Use Them page.
| Icon | Exocraft | Type |
|---|---|---|
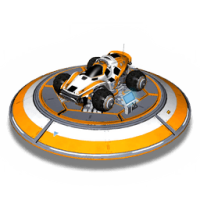 |
Roamer | Land / water vehicle |
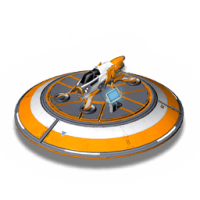 |
Nomad | Land / water hovercraft |
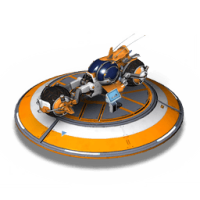 |
Pilgrim | Land vehicle |
 |
Colossus | Land vehicle |
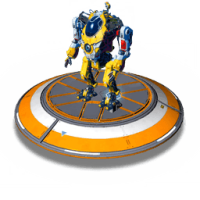 |
Minotaur | Mech Suit |
 |
Nautilon | Submersible |
Race Track Modules
In addition to the Exocraft, you can build your own race track with some very basic blueprints. These include a Race Initiator, which allows you to place a starting point and an end point for a race track. You can place these in almost any area you want to practice your maneuvering and speed. If you want to make things a bit more interesting, you can also build Race Obstacles and Race Force Amplifiers. The former essentially provides a ramp for you to drive onto, while the latter significantly boosts your speed when driven over. These items aren’t necessarily the highest on your list of priorities, but they certain add to the fun and they can actually help to develop your movement skills in Exocraft.
Industrial Modules
Electrical Wiring  
This item is fundamental to most of the power source items that you can construct for your base, including the Biofuel Reactor, Solar Panel, Mineral and Gas Extractors, and the Battery. You may find that the wiring becomes a bit of an eye sore, so one way to reduce this is by ensuring that all of the items which require wiring to be powered are stored in the same room or area. Alternatively, you can use an Electrical Cloaking Unit, which as the name suggests removes most of the appearance for the wiring, reducing their prominence.
Biofuel Reactor  
The Biofuel Reactor is likely to be the first power generator that you encounter while base building. It’s a relatively simple device which is primarily powered by burning carbon-based fuel that can be inserted into its furnace tank, thereby converting it into usable power. You’ll need to pair it with some Electrical Wiring to feed power into other items, but this one is an excellent choice to power some of the more useful early items such as the Base Teleport Module.
Solar Panel  
The Solar Panel is the best friend of a Battery. You can pair these two items to ensure that you have an excellent storage of power available at all times. The Solar Panel is much more efficient than the Biofuel Reactor and can be connected directly to a power grid without the need to supply it with a material fuel source. The Solar Panel on its own can often power most of the tasks that you might perform during the day, and over night you can have it store energy into a Battery where necessary. A Solar Panel will make your life on the base much easier in every way, removing the need to constantly supply a generator with material.
Battery 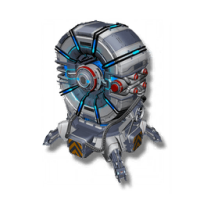 
The Battery is essentially the next step in power storage for your base. It has the advantage of being able to automatically draw down spare capacity to recharge its cells, while also being able to automatically deploy power to make up for any shortfalls when a grid attempts to draw more power than is currently supplied. In simple terms, the Battery will store any power that a Biofuel Reactor or Solar Panel generates during the day, allowing you to use the power during the night when necessary. You can stop the flow of power to and from a battery, as with the other power generators, using different types of electrical switches.
Electromagnetic Generator 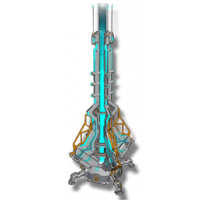 
The Electromagnetic Generator is currently the most efficient source of power that you can have installed on your base. The output will vary depending on where you place it, but even in less desirable sites it will often give you much more available power than a Biofuel Reactor or Solar Panel. You’ll need to use the Analysis Visor to locate appropriate sites where the generator can be installed. However, you won’t be able to do this with the default Analysis Visor. As with identifying mineral and gas extraction hotspots, you will need to use the Survey Device upgrade for the Analysis Visor, which can be purchased from the Multi-Tool upgrade module merchant on board the Space Anomaly. You can then toggle to Power Survey Mode with the Analysis Visor to identify Electromagnetic Power Hotspots.
Agricultural Modules
Hydroponic Trays, Bio-Domes, and Standing Planters 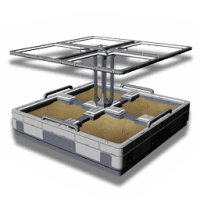

As Agricultural Modules go, the Hydroponic Tray is the most fundamental item that you should encounter fairly early on in the game. It will allow you to cultivate any of the seeds shown in the table below, providing a more local source of a valued flora type. The Large Hydroponic Tray provides an upgrade to the basic one, allowing you to cultivate up to four plants at once. The Bio-Dome is the next step up, allowing you to cultivate up to 16 seeds at once and harvest them all at the same time when they’re ready. A Standing Planter functions in a different way to the others. They don’t provide a slot for specific types of plants, but instead grow generic, unnamed flora which yield a decent amount of Carbon every 10 minutes or so. The amount you get will vary each time, but it’s often between 60 - 120 per yield.
| Icon | Cultivated Flora | Materials Required |
|---|---|---|
 |
Gamma Weed | 50x Gamma Root, 25x Uranium |
 |
Fungal Cluster | 50x Fungal Mould, 25x Ammonium |
 |
Frostwort | 50x Frost Crystal, 25x Dioxite |
 |
Venom Urchin | 100x Emeril, 50x Gold |
 |
Solar Vine | 50x Solanium, 25x Phosphorus |
 |
Gutrot Flower | 40x Faecium |
 |
Gravitino Host | 25x Chromatic Metal, 120x Silver, 25x Magnetised Ferrite |
 |
Mordite Root | 40x Mordite |
 |
Echinocactus | 50x Cactus Flesh, 25x Pyrite |
 |
Star Bramble | 50x Star Bulb, 25x Paraffinum |
 |
Albumen Pearl Orb | 60x Indium, 20x Paraffinum |
 |
NipNip | 1x NipNip Bud, 20x Faecium |
No Comments