
| Important Items in this Area |
|---|
| Star Pendant |
| Transform Materia |
| W Machine Gun |
| Wizard Staff |
Crossing Mt. Corel
From Costa del Sol head south-west, then make your way north-west around a ledge to reach the mountains. Along the northern face of these mountains you’ll find a trail leading through them. Head along the trail, across a bridge, and through the mountains to find a cave alongside more mountains, near a river. Looks like this is the real way through the mountains.
Vault over some rocks and talk to an old man, who will confirm that you seem to be on the right track. Head past him uphill to reach another area, where you’ll need to continue uphill and over some rocks to reach the Corel Reactor. Head down some stairs to reach the reactor - which you will fortunately not be entering. You don’t need to blow up every reactor you come across, no… that didn’t end well last time. Anywho, from the reactor head south across some train tracks to reach… more train tracks! Follow these tracks to the south-east to find a series of train tracks fit for an amusement park.
A Trek Over Train Tracks
And of course, there’s a mini-game here. As you follow the tracks, you’ll occasionally come across a weak section. You can jump to avoid falling, but it’s much more profitable to fall. As you fall, hold down either left or right on your directional pad, while mashing [Circle] ([OK] on the PC) to move in that direction. After a while you will catch hold of the support beams holding up the train tracks, and if you landed far to the left or right, you’ll gain some treasure while climbing up; a Wizard Staff to the left, and a Star Pendant to the right. The Wizard Staff is a new weapon for Aeris, and although it has less Attack than the Striking Staff and one few Materia slot, it does had Double AP Growth. There are more falls than treasure, so there’s no reason why you can’t leave this screen with both.
Continue along the tracks to the east and, when they split take the upper tracks and fall in your first hole. Once you’re back on the tracks again, continue east to find a chest containing a W Machine Gun . It’s a weapon just like the Wizard Staff, having less attack than the Atomic Scissors, one fewer Materia slot, and Double AP Growth.
Backtrack to the west until this track meets with the lower track, which you should now follow east. Endure another fall and score the loot there, then continue east along the tracks until they again bisect. Follow the elevated tracks back to the west to score a Turbo Ether and a piece of Transform Materia … although there’s another fall separating the two goodies. Return to where the tracks bisect each other and follow the upper tracks to the east this time; the lower tracks lead to a dead end, where the characters who aren’t in your party will be waiting. You can switch out party members there, for what that’s worth.
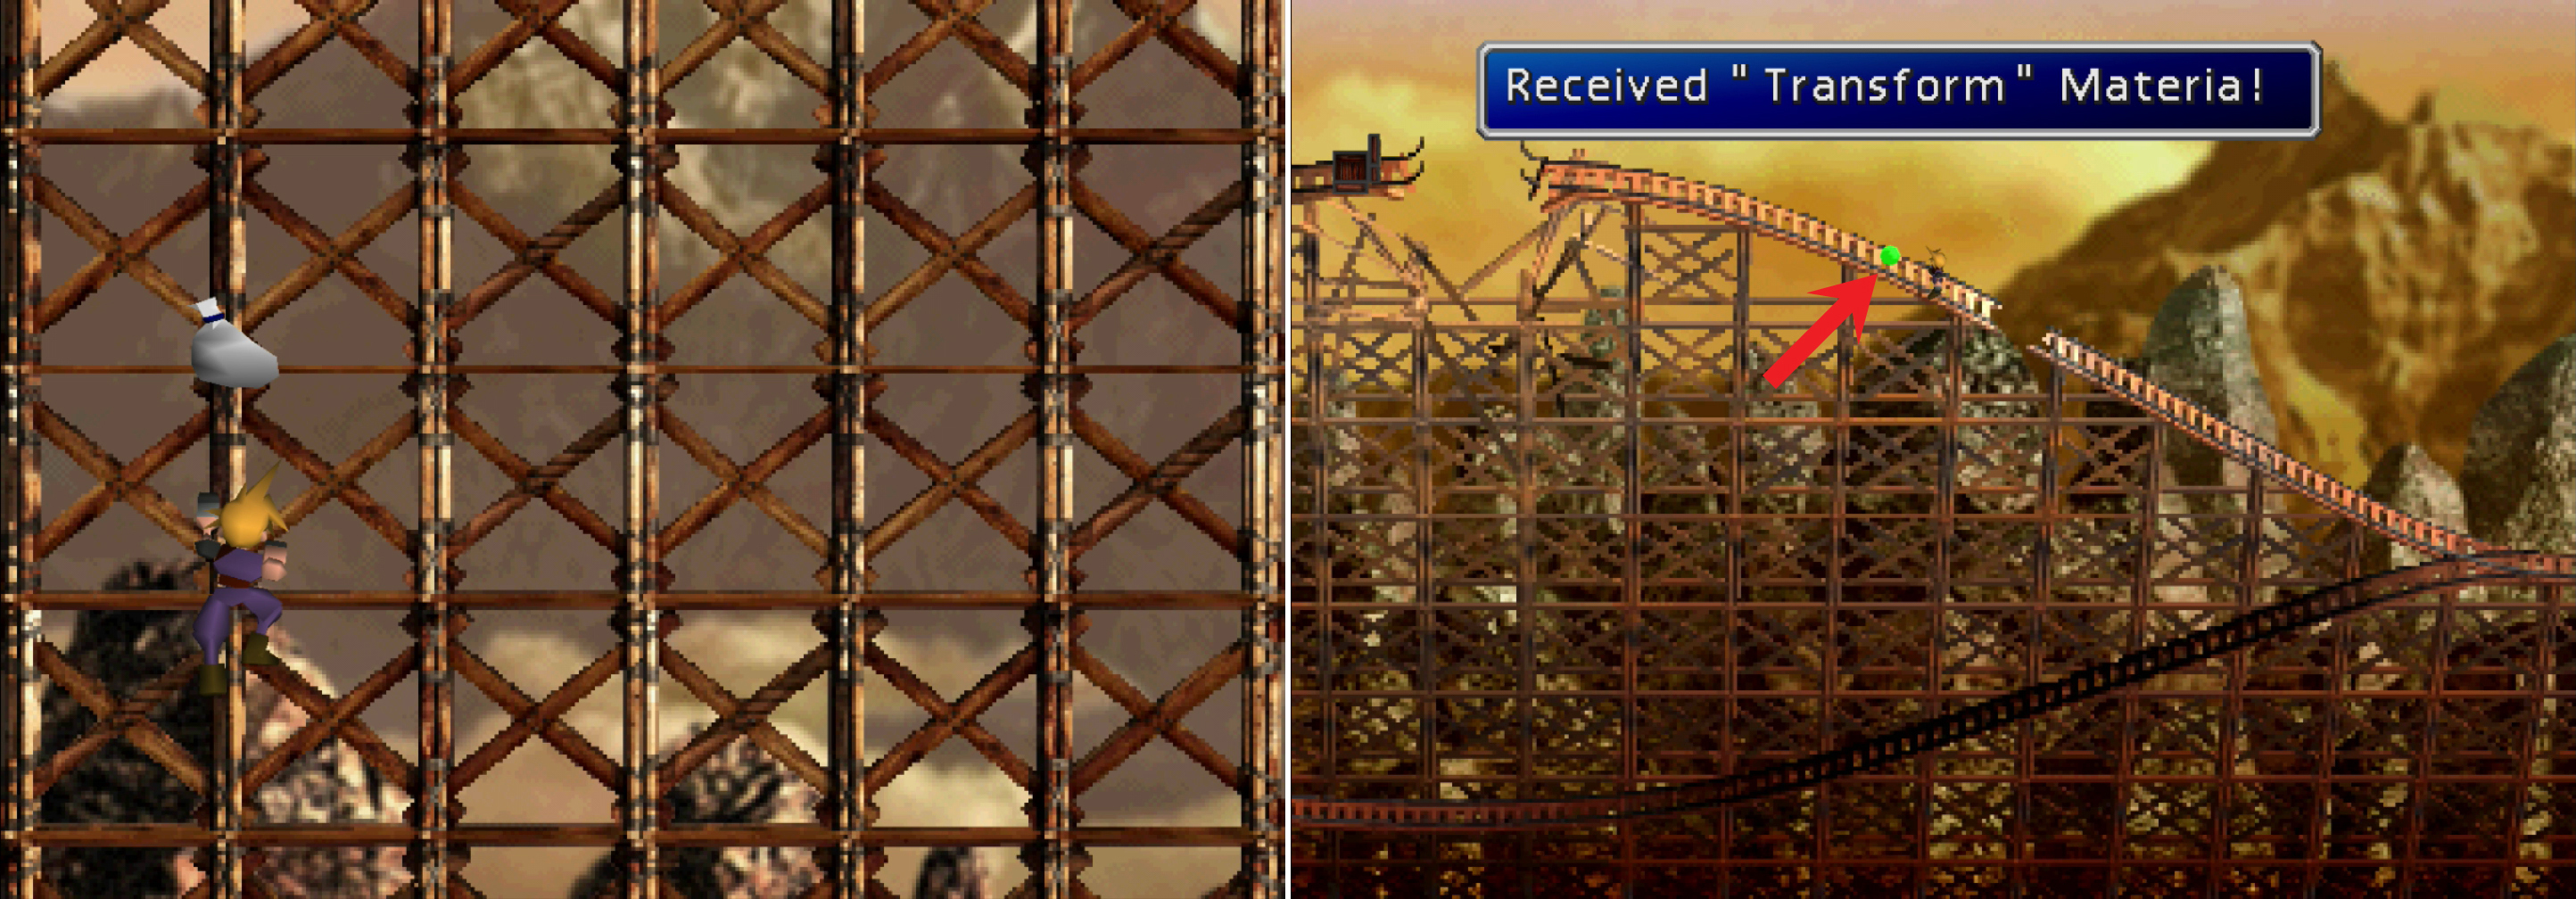
Navigate left or right when the train tracks give way under your feet, as treasure lies along the supports (left). Of course, there’s plenty of treasure on the train tracks, too (right).
Follow the tracks east, around a blind corner, and into an uncomfortably tight shed, where you can fiddle with a button to lower the bridge and grand your allies below passage. Leave the shed and follow the tracks south-east until you hear birds chirping, at which point walk into the wall to climb it. At the end of your climb you’ll find a bird’s nest on top of a treasure chest. You can either leave the birds in peace, or take their treasure (ten Phoenix Downs ). If you do the latter, you’ll have to fight off a Cokatolis. Oh well, birds aren’t surviving without their mother, and do you really want more Cokatolis wandering around? You probably saved somebody’s life by snatching the treasure.
Make your way back west along the tracks and, in the previous screen, head east down the lower tracks to reach the lower tracks where you allies were waiting. Follow these tracks to the next area, a large rope bridge, which history shows these characters don’t have good luck with. Cross the bridge, whose sole guardians are Bomb enemies, and make your way to the village of North Corel.
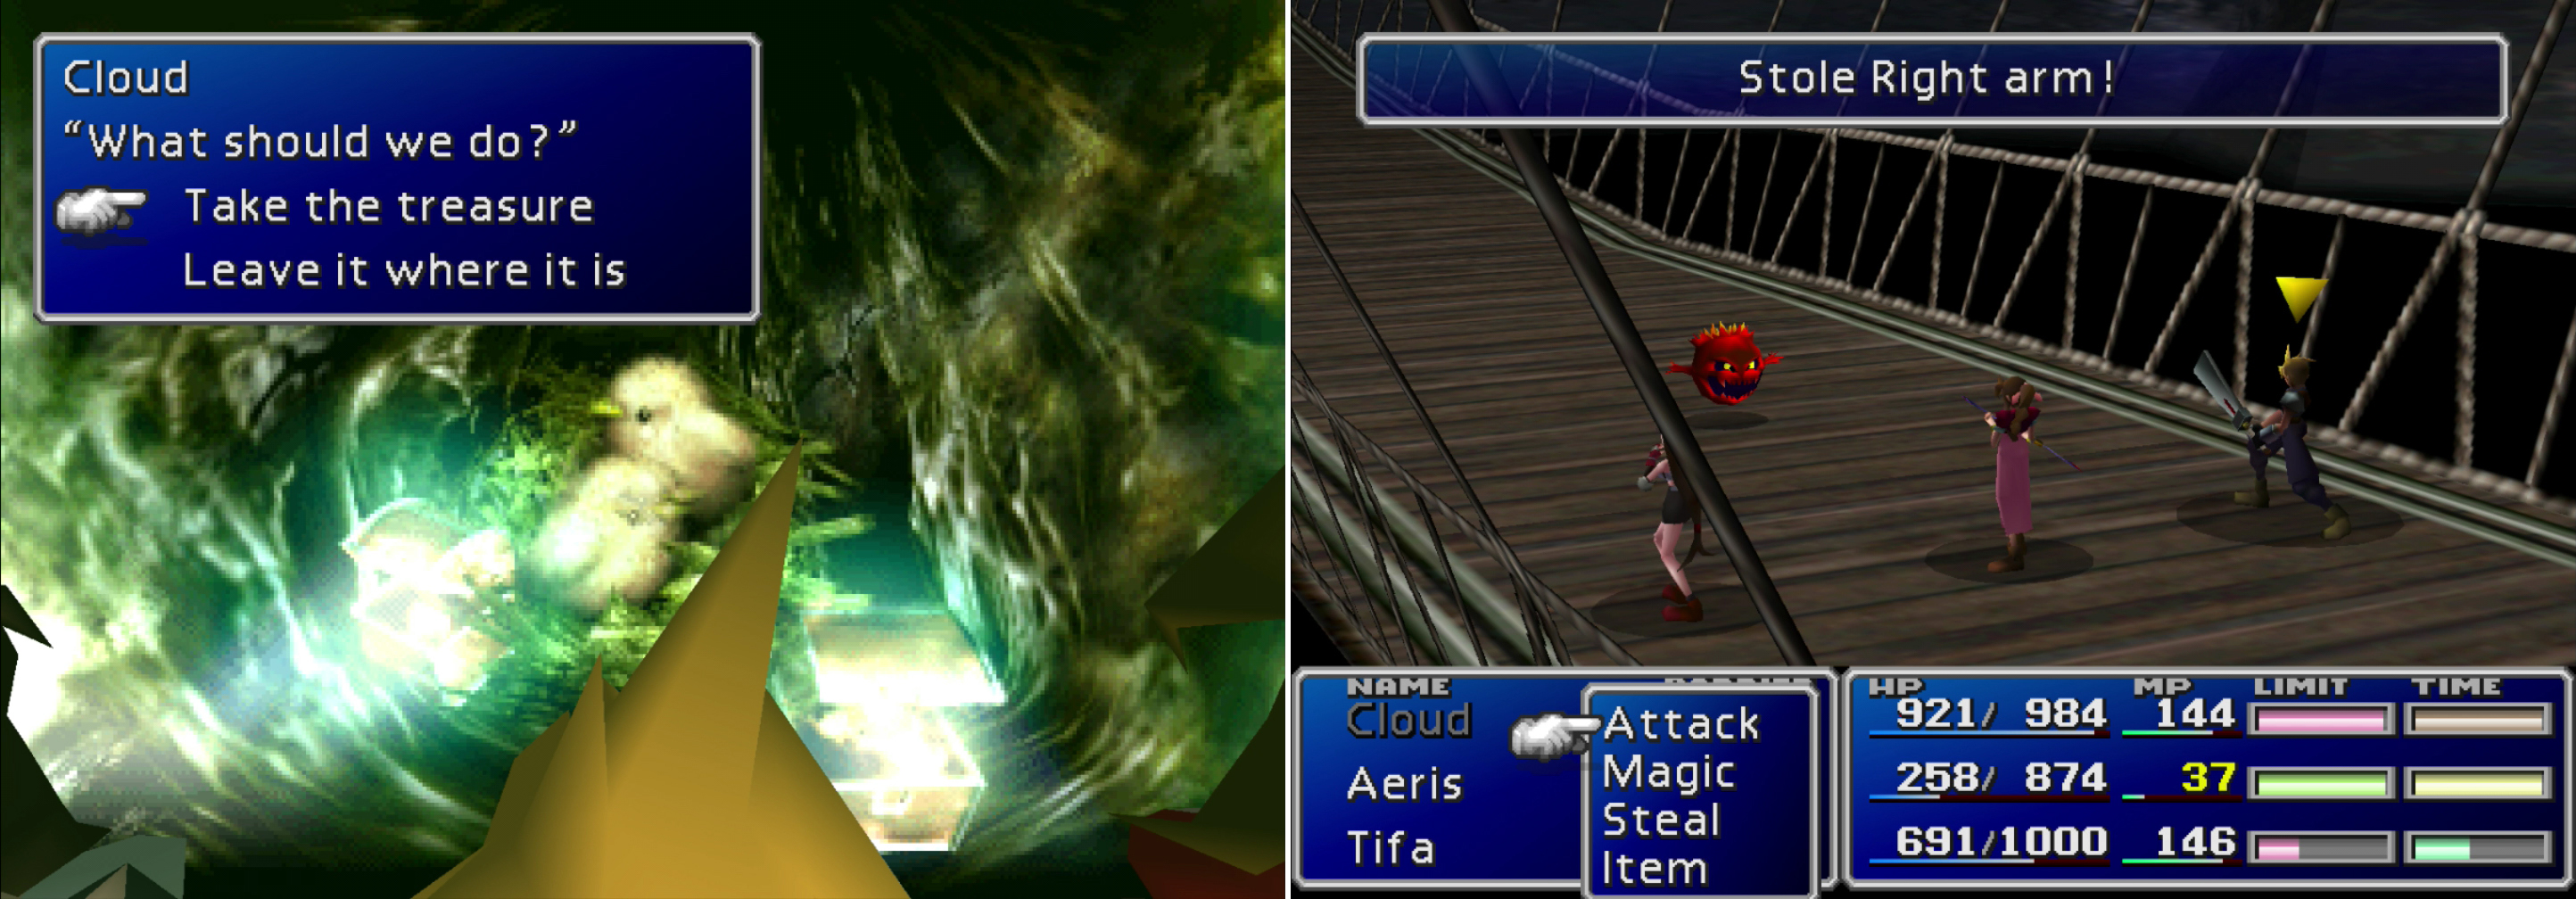
Find the hidden Cokatolis nest and loot it t oscore ten Phoenix Downs, or leave it to remain a menace to future travelers (left). On the bridge leading to North Corel you’ll encounter Bombs, iconic Final Fatnasy foes (right).
Travel south through the ruined village to see Barret having an altercation with some of the locals. After the mean words have been exchanged, talk to Barret and he’ll again claim responsibility for what happened here. Continue south, talking to people as you wish, until you reach a market with three stalls, one (the northern-most stall) sells a poor selection items, another (the southern-most stall) sells… more items, plus the Transform Materia (you’ll find one shortly, so you don’t need to buy it if you wish to save yourself 5000 Gil) and the last (western-most stall) sells Carbon Bangles the Force Edge, and Molotovs… so if you were missing that Force Edge that could have been won at the end of the parade, worry no longer.
Basic Item Shop
| Item | Gil |
|---|---|
| Potion | 50 |
| Phoenix Down | 300 |
| Tent | 500 |
Advanced Item Shop
| Item | Gil |
|---|---|
| Transform Materia | 5000 |
| Maiden’s Kiss | 150 |
| Cornucopia | 150 |
| Soft | 150 |
| Hyper | 150 |
| Tranquilizer | 100 |
Weapon Shop
| Item | Gil |
|---|---|
| Carbon Bangle | 800 |
| Force Stealer | 2200 |
| Molotov | 400 |
After you’re done shopping, you can talk to the townsfolk and listen to them complain about their poverty. In the top-most shack you can also rest for 50 Gil a night, should you need to recover expended HP/MP. When you’re done, head west of the shops to reach a new screen, where your party will have gathered near the rail car. Approach them to hear Barret’s sad back-story, which explains exactly why he’s not a fan of the Shinra. When the story is over, board the rail car and head to the Gold Saucer.
 Sign up
No Comments