
| Important Items in this Area |
|---|
| Enemy Skill Materia |
| Poison Materia |
65th Floor
Head upstairs to the 65th Floor to find yet another puzzle room! This one is simple - chests lie around the level. Go and collect their contents, “Midgar Parts” and use them to restore the model of Midgar in the circular, central chamber. The catch? All but one of the chests remain locked while you do this, and there are random enemy encounters, meaning it’s your typical “run around and fight enemies while solving a puzzle that’s just a time sink” section.
The first puzzle piece is in a room west of the room with the model of Midgar, in the southern of the two chests. Grab it, insert it into the model, and the next chest - the one in the room south of the last one (again in the southern-most of the two chests) - opens up. The third chest is the one north of the first one you looted. The fourth set of “ Midgar Parts “ is in a green, glowing room north of the stairwell. Loot the fifth and final set of “Midgar Parts” from the remaining chest in the room south-west of the model room. Once that’s all done, by process of elimination, the last chest - the one in the stairwell - will open up. Inside you’ll find “Keycard 66” .
66th Floor
Make your way up to the 66th Floor, where there’s really not much to do, compared to the last few levels. That’s right, no silly puzzles or anything. In the center of the level is a large rectangular room where the biggest of the big-wigs have gathered for a nefarious meeting. In the north-western corner of the level is a bathroom, which you should make your way to. Once there, head inside a bathroom stall, climb on the toilet, and, when you’re in the air duct, make your way towards the camera to spy on the meeting. Here you’ll be introduced to pretty much all of Shinra’s top executives, and hear them talk about a “Promised Land”, after which Hojo arrives and makes some rather unsettling comments about Aeris, and their future plans for her.
67th Floor
After the meeting ends, climb back down out of the air duct, leave the bathroom and return to the stairwell, where Hojo, dolt that he is, will be spotted walking upstairs. If you follow him upstairs he will leave the door open for you. Instead of taking the rational approach and following him as soon as possible, you can rely on Shinra’s crappy security and facilities. That door isn’t closing any time soon. Head back down to the 64th Floor and save your game. There’s some grinding to do on the 67th Floor, and it can be a tad dangerous.
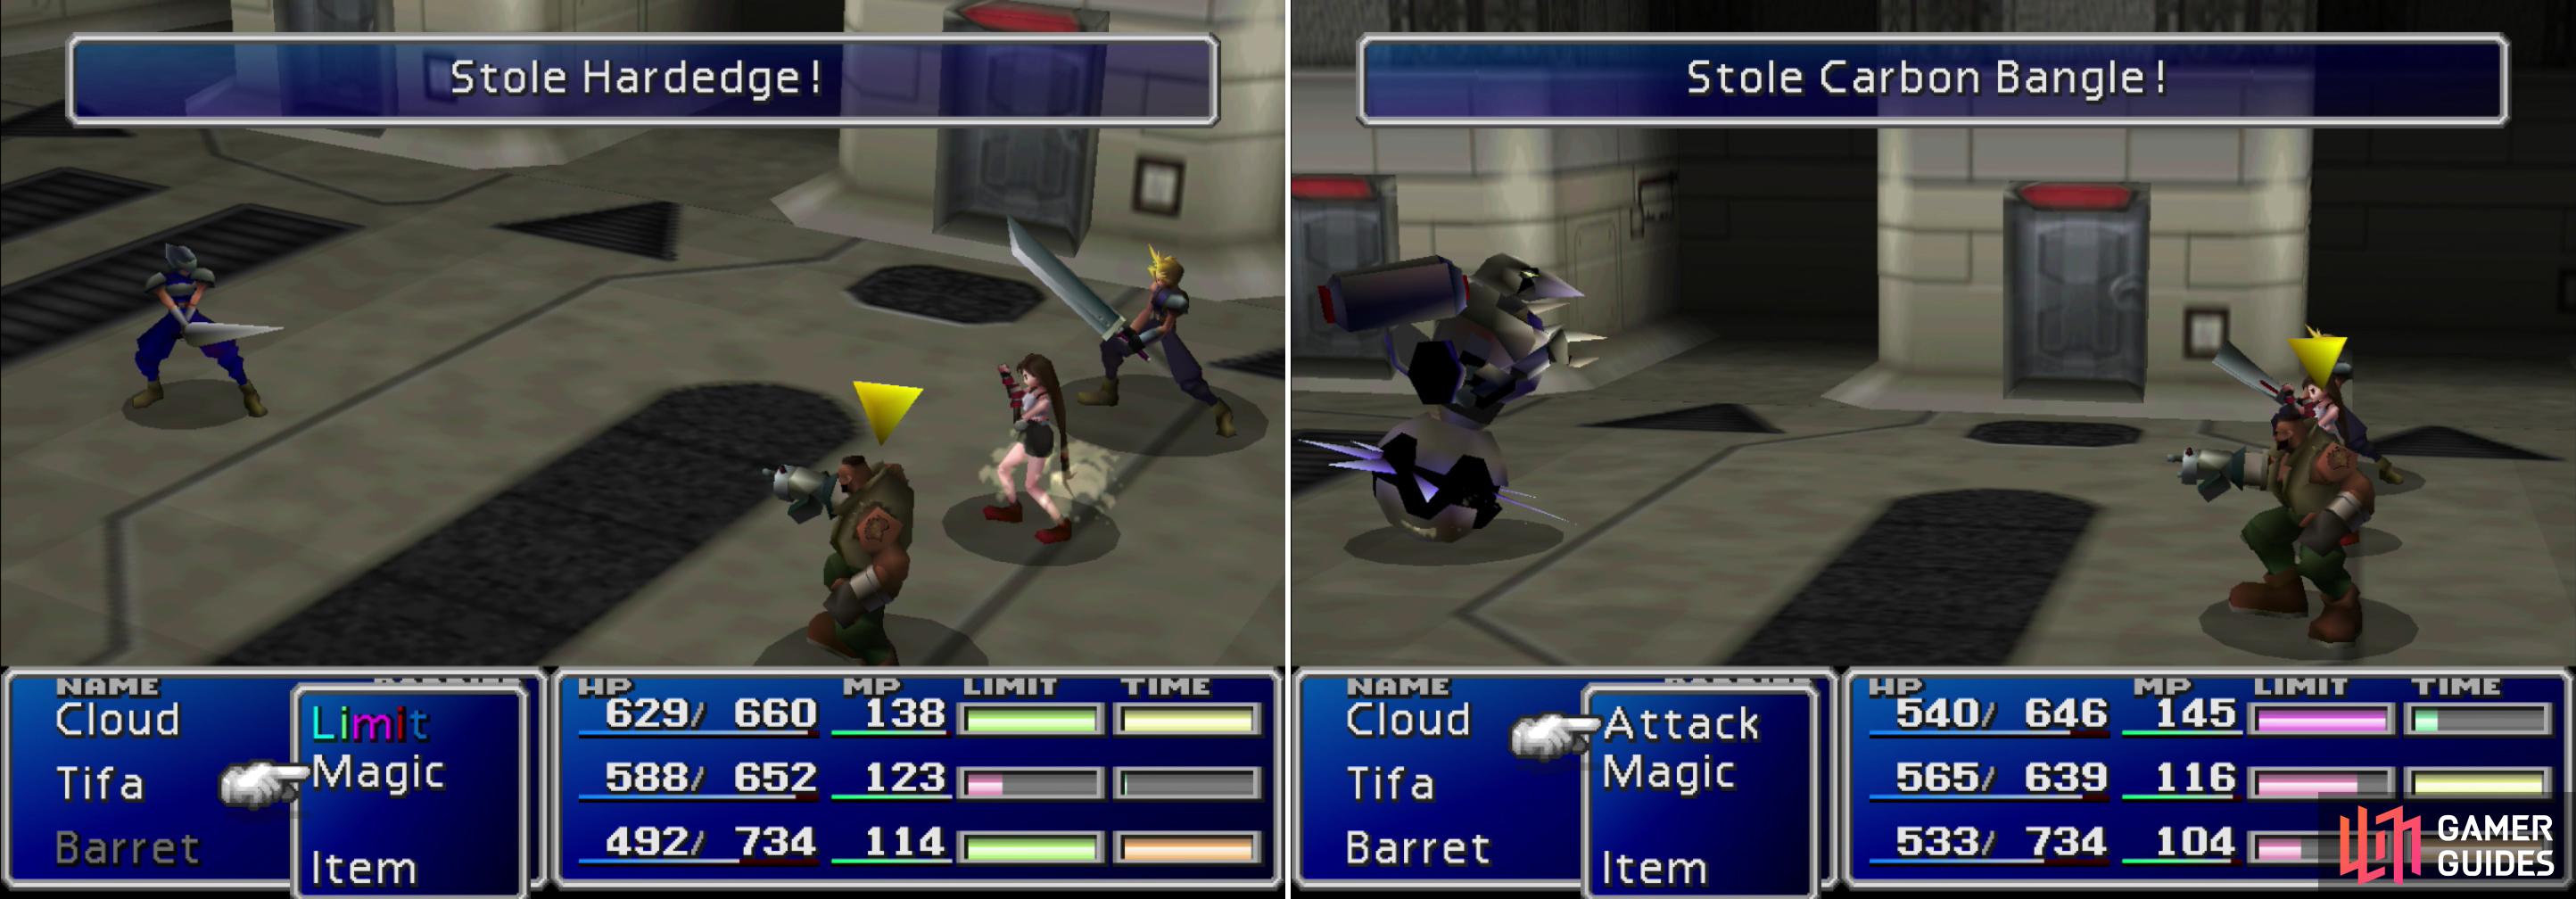
Steal a Hardedge from Soldier 3rds (left) and Carbon Bangles from Moth Slashers (right). Both are items you can’t otherwise get until much later in the game.
What took a minute or two to read will probably take you a few minutes to steal, but it’s worth doing. When you have, say, five Carbon Bangles and at least one Hardedge, head west along the southern end of the level. When you can no longer head west, go north and the camera will zoom in. Cloud will hide and Hojo will oggle a specimen. When he leaves, Cloud will have an encounter with another specimen named “Jenova”, which causes him to freak out again. Tifa will have to stop poking at Hojo’s specimen to see to Cloud, and Barret has a typically great line about the whole situation. Barret’s just, well, he’s just great.
Continue north through a sea of crates and the camera will zoom out again. Grab a chest near a Save Point to score the Poison Materia , which will come in handy immediately. Now, minor spoilers: there’s a fight coming up, and you’re going to be deprived of one of your party members. You get to choose which one, so you can prepare accordingly. If it helps any, if you send Barret away it’ll improve his disposition, while if you send Tifa away, it’ll lower hers.
Whichever ally you intend to keep, equip them with Poison Materia + Elemental Materia in a joined armor slot (hello, Carbon Bangle!) and in their weapon slot equip Fire Materia + All Materia. On Cloud, equip the Star Pendant in his Accessory slot. Once your two chosen characters have Fire Materia + All, resistance to poison, and Restore Materia equipped somewhere, save your game and go up the nearby elevator.
68th Floor
Exit the elevator and the heroes will heckle Hojo, who will release his specimen from the floor below into the enclosure with Aeris. Before the bestial breeding program can begin, Barret blasts the barrier with bullets. Hojo gets slightly mauled and Aeris is rescued. Unfortunately, your meddling had an unintended consequence - another specimen will escape and, after being joined by the ginger cat-dog critter (which will be referred to by its default name; Red XIII) you’ll have to fend it off. Send either Barret (Barret +2) or Tifa (Tifa -2) away to take care of Aeris and the battle will begin.
Boss Battle: Sample H0512
Sample HO512 is another novel boss, mostly due to the fact that he comes with friends; a trio of Sample HO512-opt critters, which look like little bouncing ticks. They serve mainly one purpose - to keep Sample HO512 in the back row, hence reducing the damage he’ll take from melee attacks. Merely shoot over him with Barret, or pummel him with Fire spells and ignore his critters, or blast them with Fire + All, which all three characters should be equipped with. And of course use Limit Breaks whenever possible.
As for its attacks, the only noteworthy ones are its “Shady Breath **”** , which poisons the entire party (hence the poison resistance) and “Reanimagic”, which will revive its little ticks, a feat it can perform at most three times. So long as you focus your offense with spells and limits, it should be dead far too soon for the poison to do any serious damage to you.
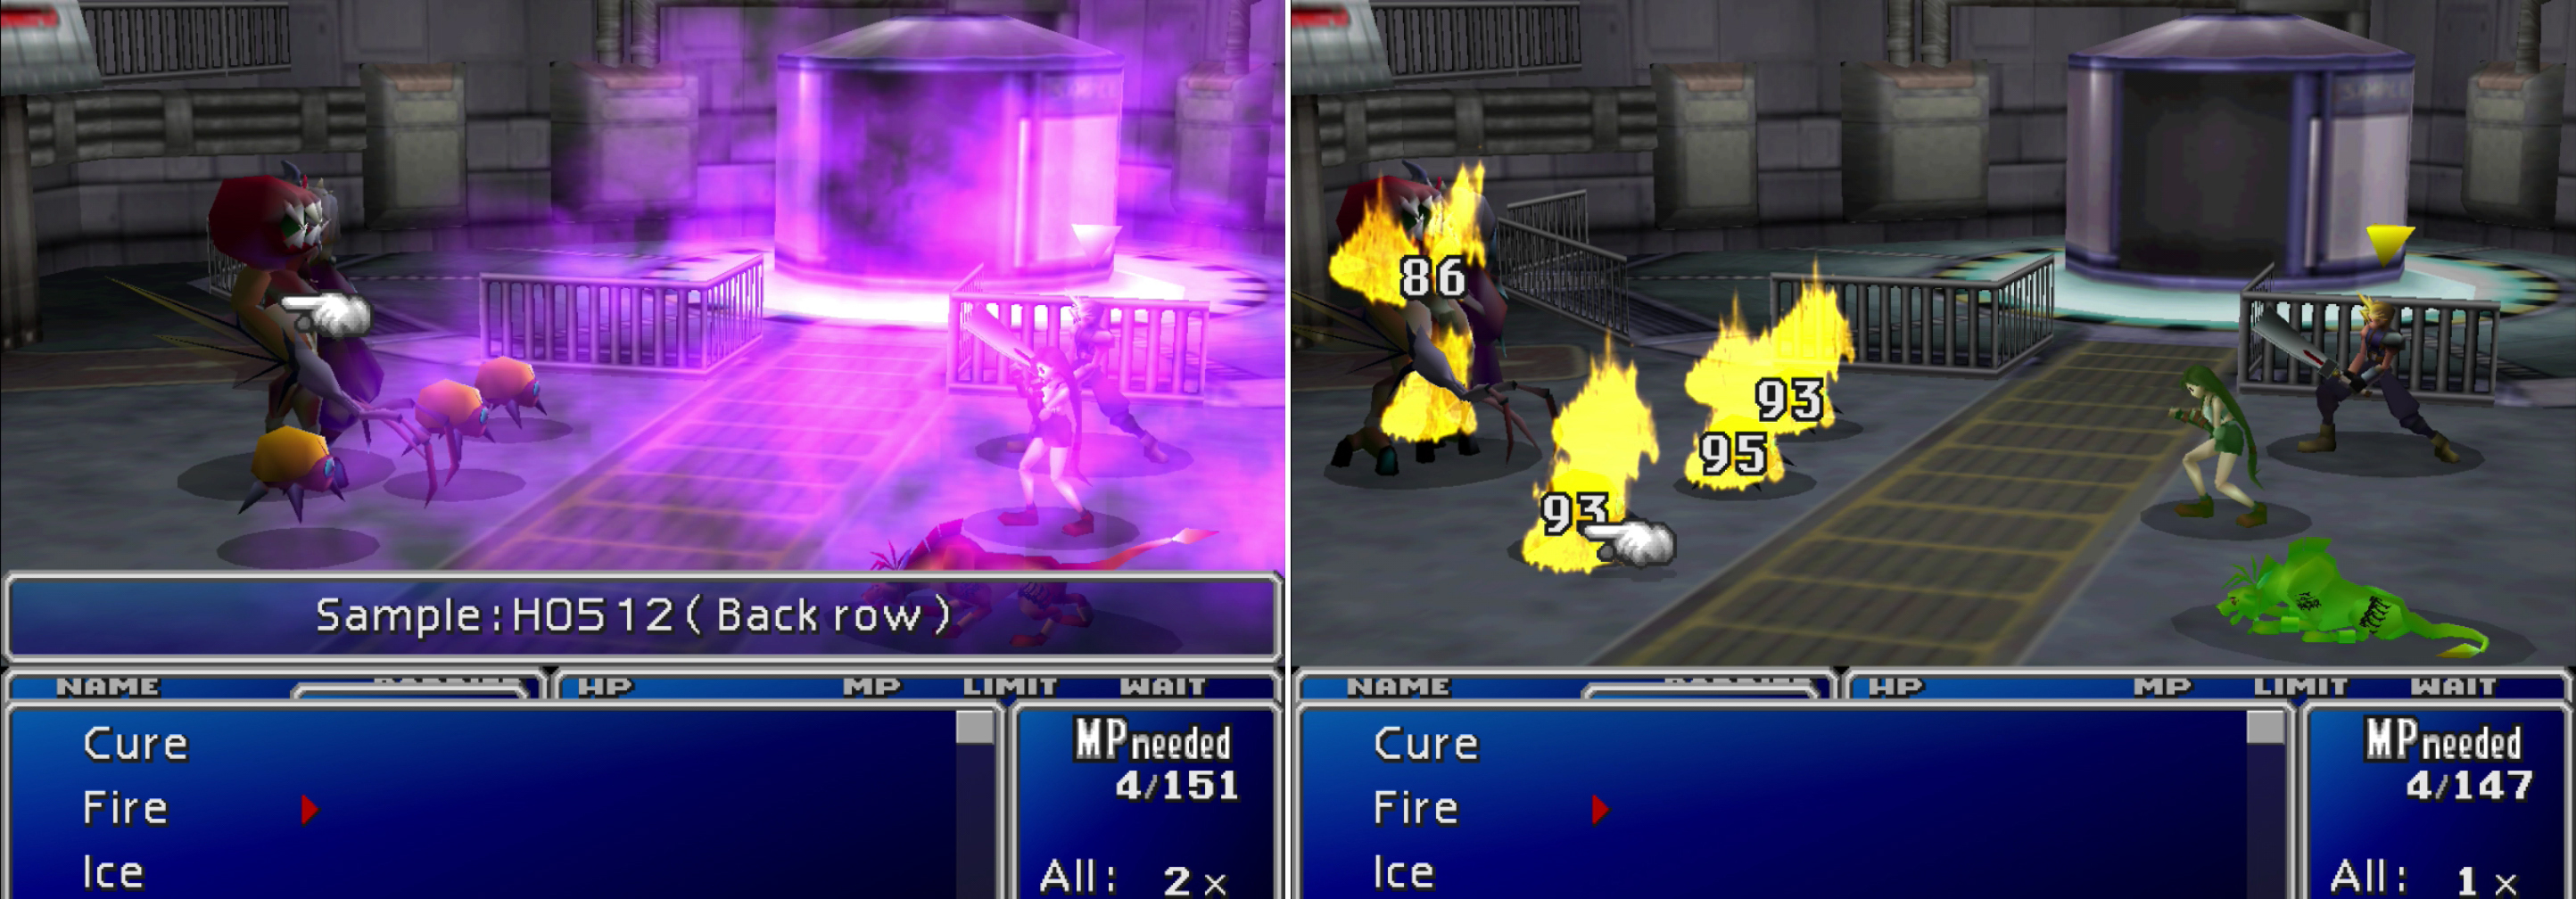
Sample HO512’s “Shady Breath” attack can poison the entire party if they’re not protect with a Star Pendant or Elemental Materia (left). Using magic to strike all your foes - or to harm Sample HO512 while bypassing its undelrings - is a good idea (right).
| Sample HO512 | Stats |
|---|---|
| HP: | 1000 |
| MP: | 120 |
| Weaknesses: | N/A |
| Resistances: | Gravity (negates), Lightning (halves), Poison (absorbs) |
| XP: | 300 |
| AP: | 30 |
| Steal: | n/a |
| Drop: | Talisman |
| Gil | 250 |
Enemy Skill Materia
After your victory, the group will gather and chatter with each other. Red XIII acts smart and invites himself into your group. Same goals, the enemy of my enemy - pick your anecdote. And pick your party - it doesn’t really matter who you bring along, although Aeris is probably relatively under-leveled, while Red XIII has made no progress on any of his limits, but you can worry about those issues when you have more freedom. Red XIII comes at a level comparable to your highest character’s level and has three Materia on him: Sense Materia, All Materia, and Fire Materia. Nice. It should be noted that whomever is in your party will gain disposition towars you (Aeris +2, Barret +2 and/or Tifa +2), so if you want to move the chains towards “Best Bromance”, make a party of Cloud, Barret and Red XIII.
Once your party is set and you’re ready to move on, the unchosen party members will wander off. The first thing you should do is grab the Enemy Skill Materia in the enclosure Aeris and Red XIII were in. This is super important. Seriously, pick up the Enemy Skill Materia ! Do not leave this area without grabbing the glowing yellow ball of goodness! It might not be very useful at the moment, but it’ll become one of the strongest pieces of Materia in the game if you take the time to power it up. It’s so important (did you pick it up yet?) it’ll get its own section.
Enemies have skills. Some of them are pretty neat. With this Materia, any time an Enemy Skill is used on you and you’re equipped with a piece of Enemy Skill Materia, you’ll learn that Enemy Skill, and will be able to cast it any time thereafter. Some Enemy Skills are just stupidly good, and with a few well-stocked Enemy Skill Materia, most of the game will be simple. Anything from stealing MP from your enemies, a super-buff that affects the whole party, a great healing spell, several offensive spells that won’t be surpassed by other magic until near the end of the game - they’re all Enemy Skills.
For most of these, however, you’ll need another piece of Materia - Manipulate Materia - as enemies understandably won’t cast generous buffs on your party. Some Enemy Skills are rarely ever used at all, so it’ll be a while before you start filling this Materia up. No small amount of effort will be spent in this guide telling you where, when and how to obtain the best Enemy Skills. While ostensibly optional, Enemy Skills will be worked into battle tactics, so neglect them at your own detriment.
Note that you must survive the attack and win the battle to keep any Enemy Skills you learned. You won’t learn it if you don’t survive, and you can’t flee after you get the skill. In case you’re wondering, no, you cannot learn Enemy Skills on one character by casting that Enemy Skill on another character. It has to be cast on you by an enemy, manipulated or not.
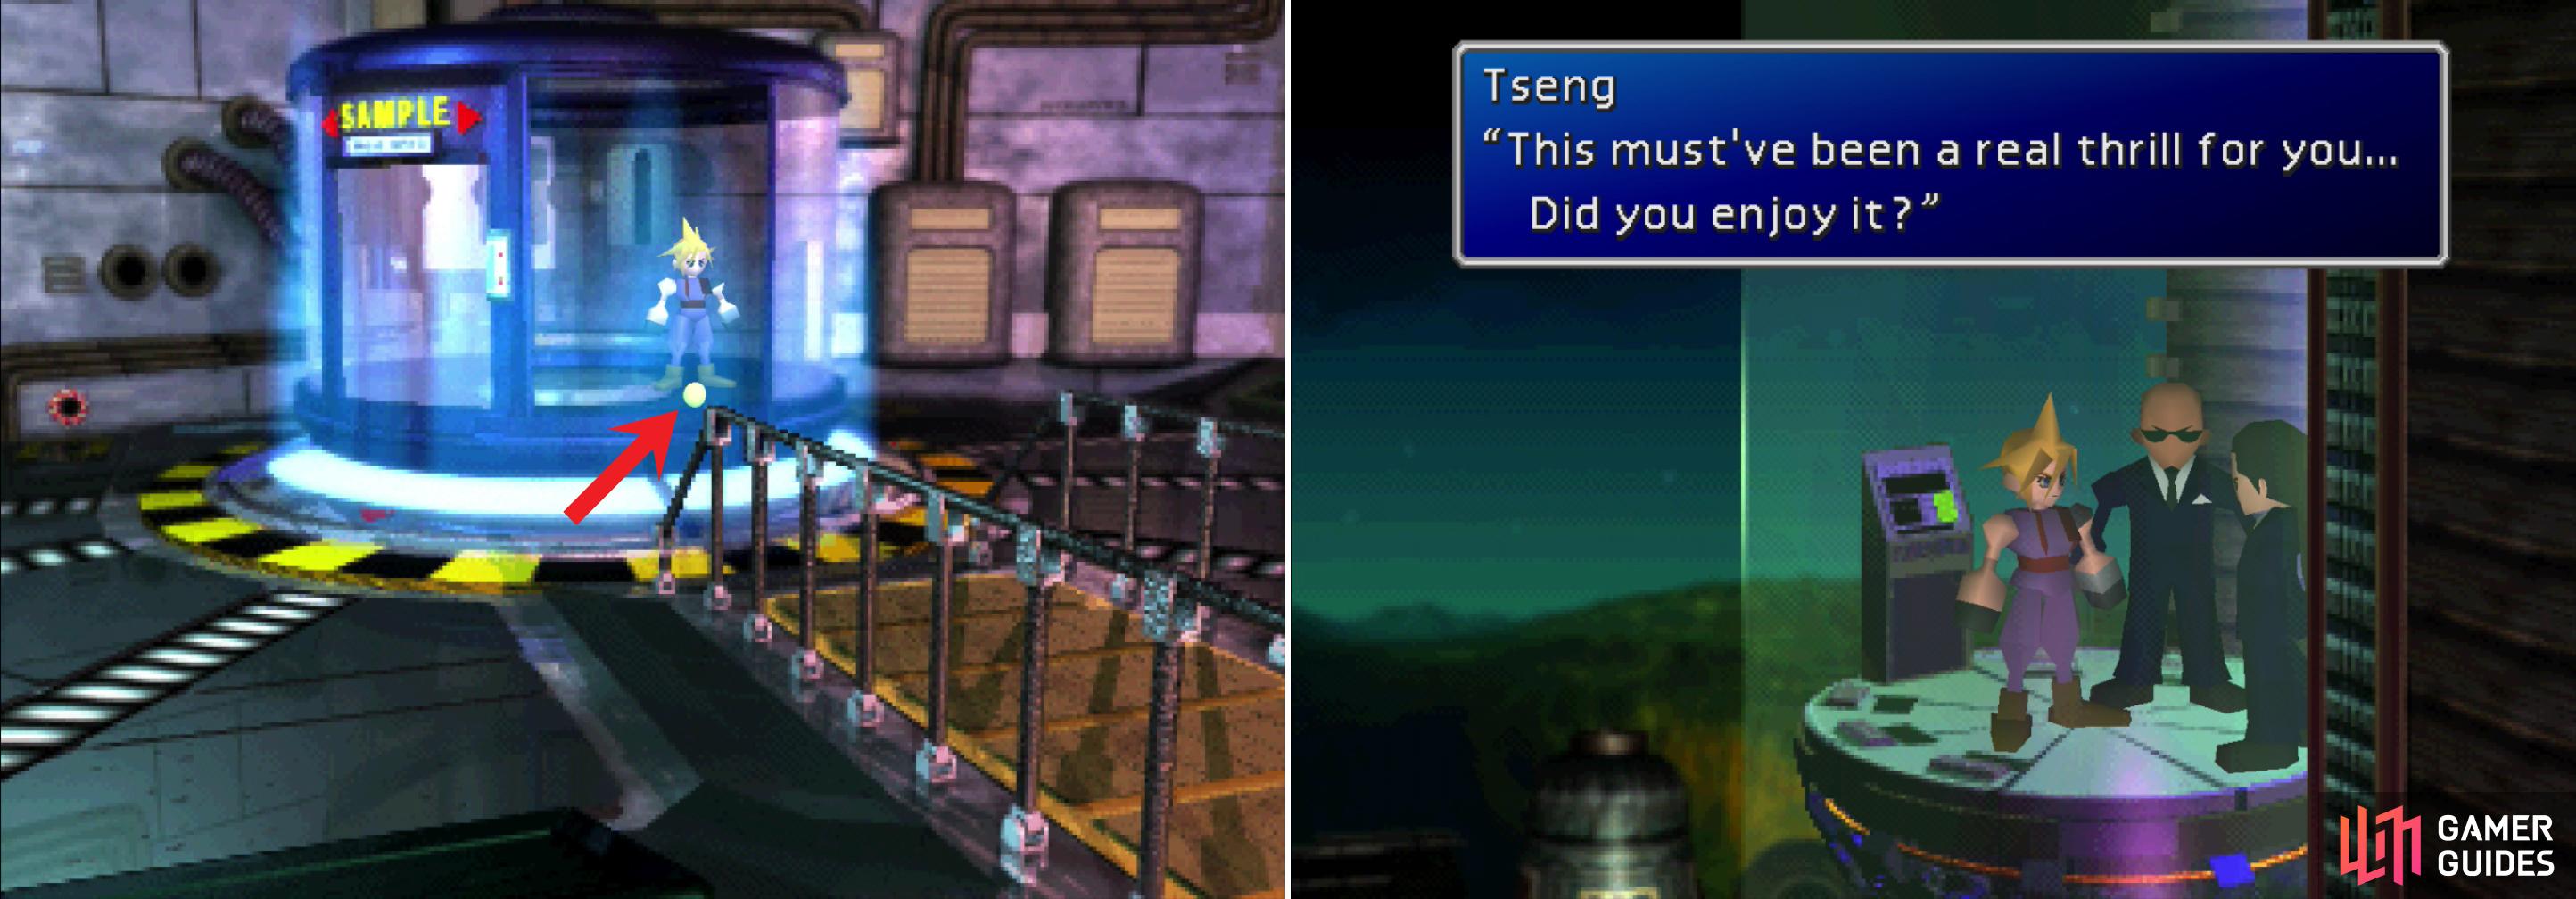
Be sure to grab the Enemy Skill Materia! You see that big red arrow there? I did that just for you! Grab it! (left). Your trip further up the building will side-tracked by an unwelcome visit by the Turks (right).
Now that you have your Enemy Skill Materia (you did pick that up, right?) walk away from the enclosure. When the camera zooms out head south, up some stairs, and grab a pair of Potions . Head north along the walkway and talk to the suit standing by the observation station and he’ll give you his “Keycard 68” . Return to the ground floor and head east into a tunnel, where you can grab another pair of Potions . Go through a door to the south, then make your way to a stairwell to the north. Go down two flights of stairs to reach the 66th Floor, at which point make your way to the elevators south of the conference room, where you’ll get an unpleasant surprise.
No Comments