
Wondering
Yeah… that didn’t go so well. After the chatter you’ll find yourself in prison. Talk to Tifa and say either “Leave it to me” to improve her disposition towards you (Tifa +1) or “Kinda hard” (Tifa -1) to lower it. You can do this as many times as you want, so, if you’re looking to date Tifa, now’s the time to lock it in. If not, deplete her approval to the point where there’s no possible way she’s a contender anymore, which will greatly help with the “Best Bromance” trophy.
When you’re done manipulating Tifa’s disposition, head to the door and wonder about the different party members to see what they’re doing. Whomever you wonder about first will gain a moderate amount of approval towards Cloud (Aeris +3 or Barret +3), while the second person you wonder about will get a tiny bit of approval (Aeris +1 or Barret +1). After you wonder, wonder, wonder about each character, approach the door again and decide to crash for the night.
Something Wicked This Way Came…
When you wake up, notice the door is open, then talk to Tifa, who will go exploring. Follow her out and talk to her and the two of you will muse about the dead guard. After you claim his key, free your other friends, and talk to them all. The party will be set for you - Cloud, Aeris, and Tifa will travel together for now, so equip them appropriately, then return west to find that the Jenova specimen has escaped. Talk to Red XIII, who will state the obvious. Once done, head up to the elevator, through the 68th Floor and to the 69th Floor.
The King is Dead, Long Live the King!
Follow the blood trail out of the stairwell and through a doorway to the west, then up some stairs. Barret will state the obvious, and Cloud will identify the cause - and the owner of said cause. The goofy head of Shinra’s space program will, when caught, confirm Cloud’s suspicions. Eventually a helicopter arrives and breaks up the party’s discussion. When you’re back in control of Cloud, head through a door to the north to confront the heir of Shinra, Inc. Rufus, cool-as-ice, gives a Machiavellian speech before Cloud sends the rest of the party away.
As they’re leaving, Tifa will bail, too, leaving you with a party of Barret, Aeris, and Red XIII. Equip them all with at least Bolt and Restore (remove Cloud and Tifa’s Materia), which should be sufficient for the upcoming battle. Restore + All makes a good combination here, since you’ll only be fighting one foe at a time, and Poison + Elemental can protect you from its status effects, to a degree. When you’re ready head to the elevators to the south and ride on down.
Boss Battle: Hundred Gunner/Heli Gunner
Unfortunately, one of Shinra’s security robots arrives to make sure the trip down won’t be an easy one. This is a ranged battle, meaning only Barret can perform physical attacks. Everybody else will have to resort to Lightning, which Hundred Gunner is weak against, so everybody might as well use it. You should be doing well over 150 damage per cast if your level is in the teens. As for the Hundred Gunner’s own attacks, he’s got a number of different attacks of varying strength, but they’re all physical attacks that target one enemy, or the whole group, dealing around 100 to 150 damage per attack. Be sure to heal any characters who drop below 200 HP, and use Restore + All advantageously, along with Aeris’s Healing Wind Limit Break.
When you’ve done enough damage to the machine, it’ll be destroyed, only to be replaced by the Heli Gunner. The same tactics apply on your end - hit him with Lightning and Limit Breaks and heal his damage, which isn’t more impressive than Hundred Gunner’s was. Heli Gunner’s “AB Cannon” can put its target to sleep, while its “C Cannon” can inflict poison. Worse still, it’s “Firing Line “ attack hits all characters and can inflict Sleep and Poison on all of them. A character that is asleep and poisoned is one that will sleep as the poison kills them; at least, until a physical attack wakes them up. When it’s heavily damaged it’ll start spinning, at this point abandoning its ranged attacks in order to hit you with the “ S pinning Bodyblow” and “Flying Drill” attacks, which deal hefty damage, but only to one character, and carry no nasty status effects.
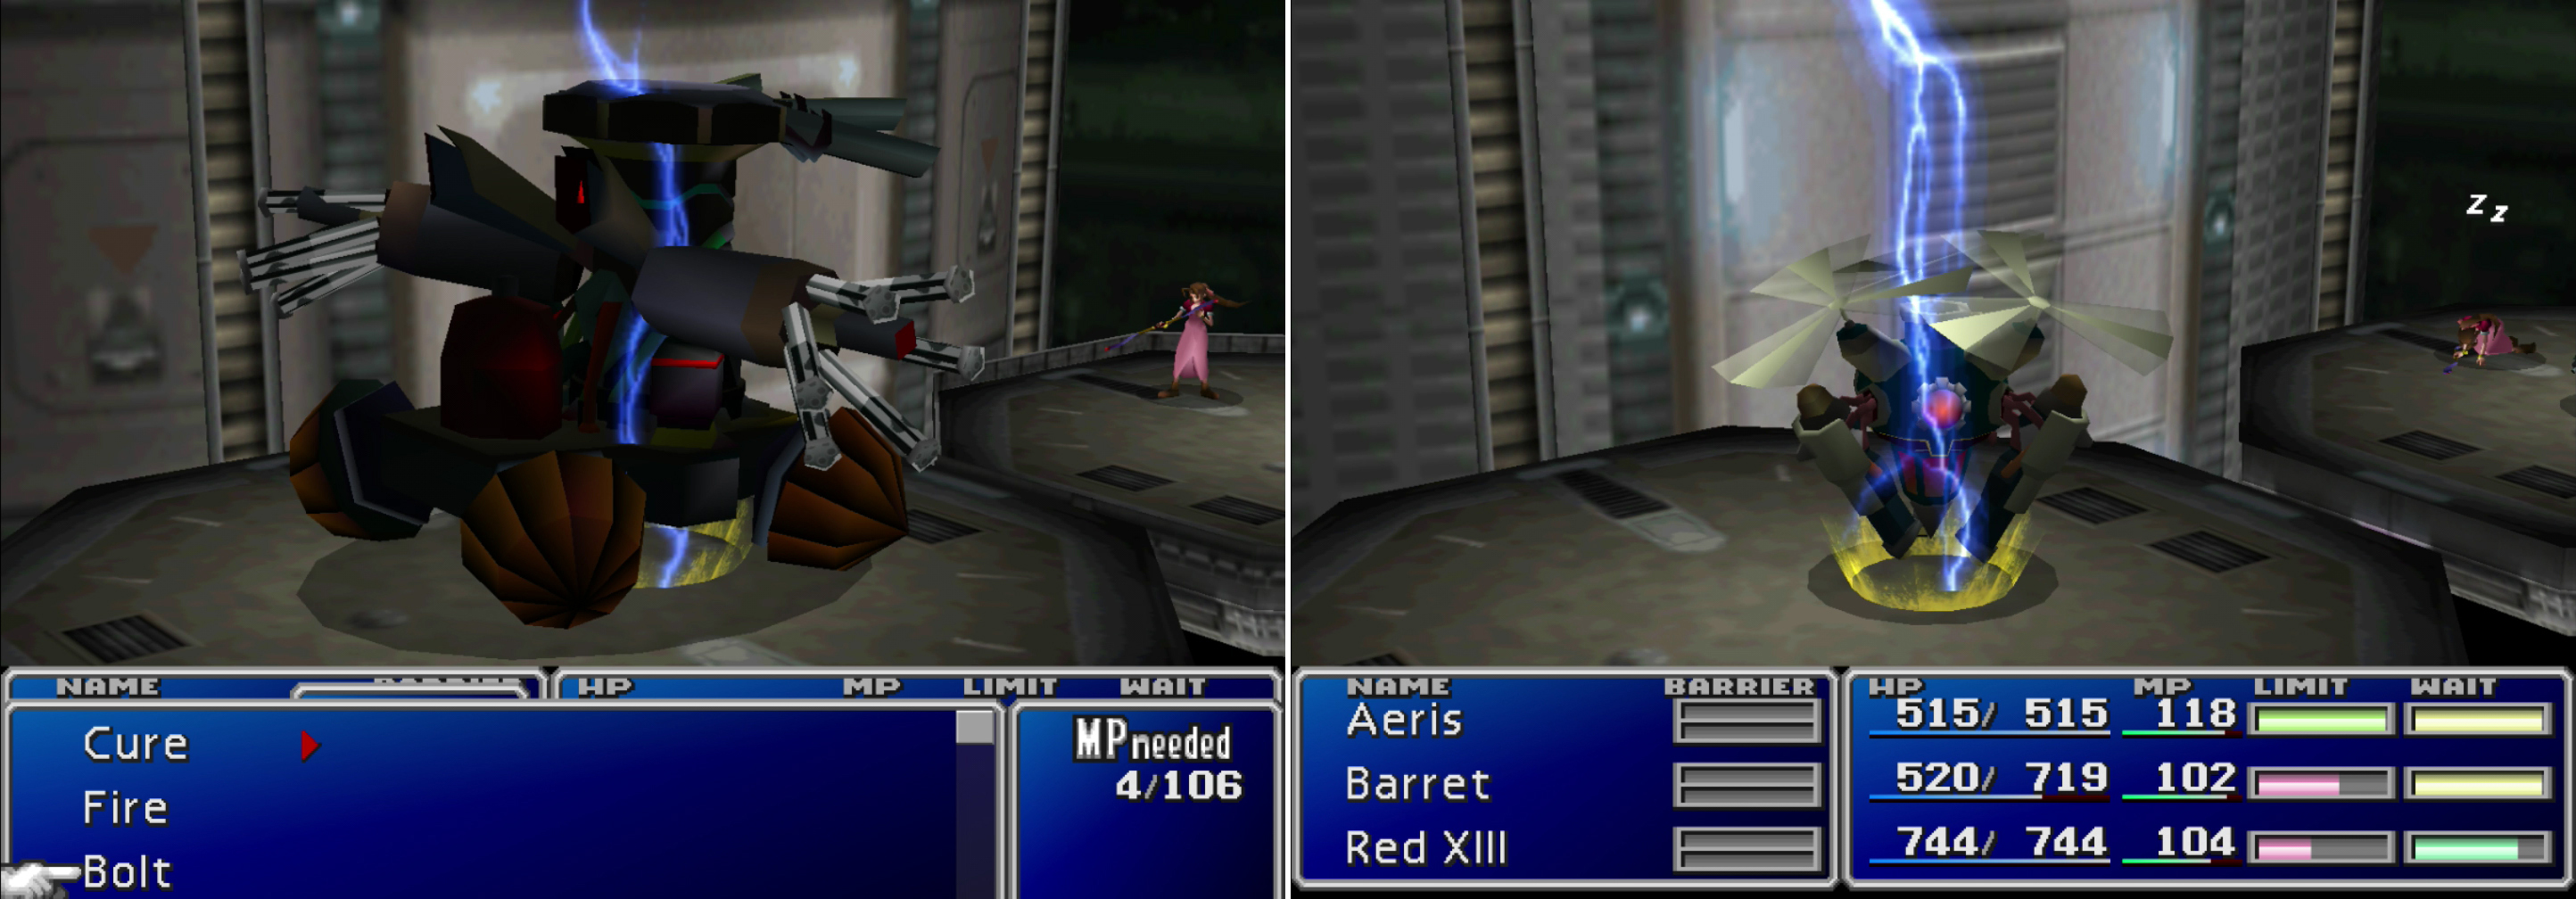
Hundred Gunner is protected by distance, but is vulnerable to lightning (left). After inflicting enough damage, Heli Gunner will replace Hundred Gunner, and as a machine, it’s weak to lightning, too (right).
| Hundred Gunner | Stats | Heli Gunner | Stats |
|---|---|---|---|
| HP: | 1600 | HP: | 1000 |
| MP: | 0 | MP: | 0 |
| Weaknesses: | Lightning | Weaknesses: | Lightning, Wind |
| Resistances: | Gravity (halves) | Resistances: | Earth (negates) |
| XP: | N/A | XP: | 250 |
| AP: | N/A | AP: | 25 |
| Steal: | N/A | Steal: | N/A |
| Drop: | N/A | Drop: | Mythril Armlet |
| Gil | N/A | Gil: | 200 |
Boss Battle: Rufus (with Dark Nation)
Meanwhile, Cloud will confront Rufus. Remove the Materia from your other party members and re-equip Cloud. What you carry with you isn’t terribly important, as this fight won’t really be about finesse. Poison works well on Rufus, but it’s not necessary. Restore will ensure you can’t possibly lose. Rufus is joined by Dark Nation (what an odd name for a pet), who has only one purpose; protect Rufus by casting Barrier and MBarrier. Focus on it first and kill it, then engage in a slug-fest with Rufus. If you’re getting low on health, heal; Rufus only has 500 HP, and if you stole a Hardedge earlier, you should easily win by trading blows with him.
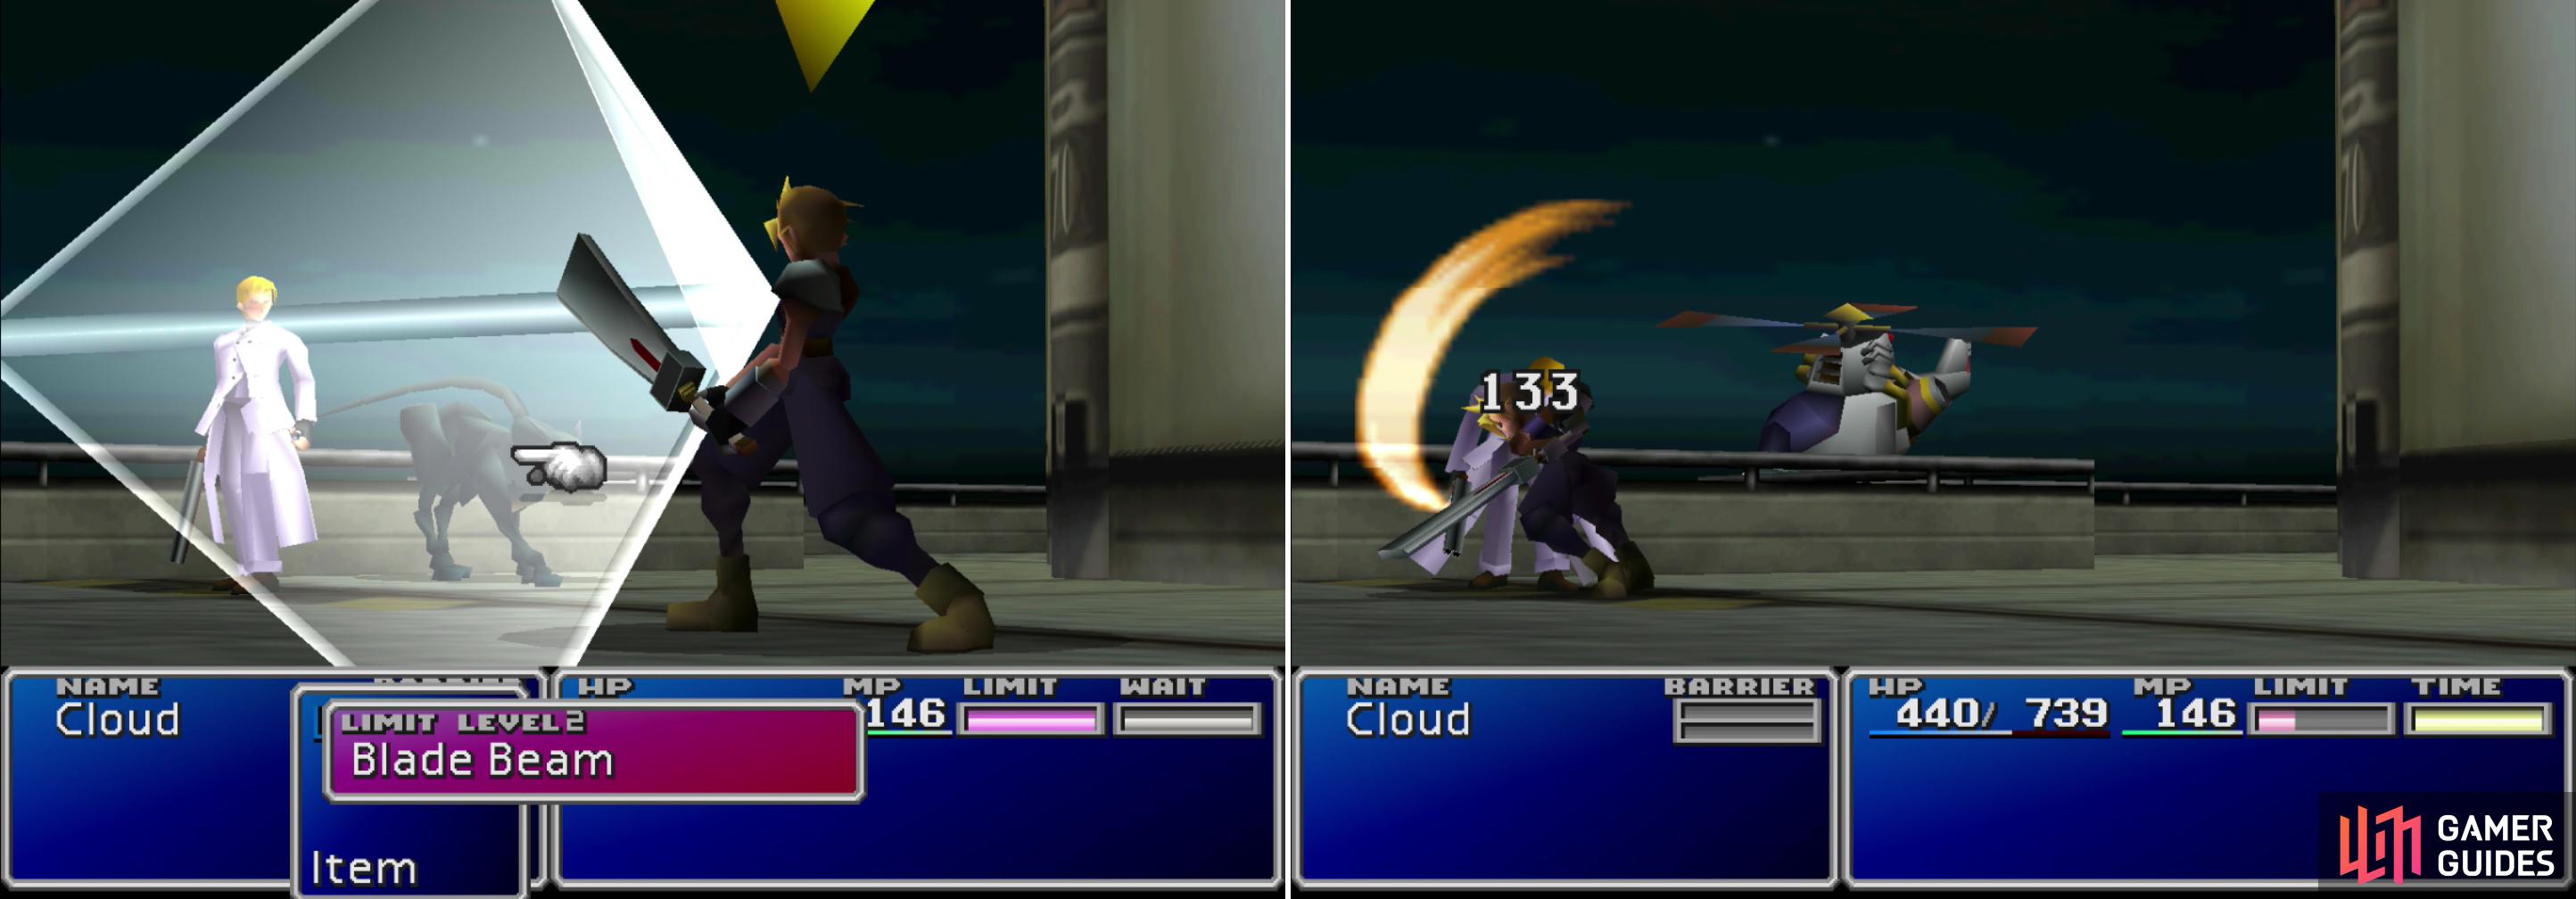
Rufus’s pet Dark Nation will start out the fight by protecting its master (left). In the long run, however, Rufus can’t trade blows for Cloud in a one-on-one engagement (right).
| Rufus | Stats | Dark Nation | Stats |
|---|---|---|---|
| HP: | 500 | HP: | 140 |
| MP: | 0 | MP: | 80 |
| Weaknesses: | N/A | Weaknesses: | N/A |
| Resistances: | Gravity (negates) | Resistances: | N/A |
| XP: | 240 | XP: | 70 |
| AP: | 35 | AP: | 7 |
| Steal: | N/A | Steal: | N/A |
| Drop: | Protect Vest | Drop: | Guard Source |
| Gil | 400 | Gil: | 250 |
The Ride
Once Rufus is gone, head downstairs and reunite with Tifa. You’ll then be switched to Aeris and company. Run outside, or try to, anyway. Looks like Shinra finally woke up. After some chatter, Tifa shows up. Apparently Cloud and Tifa devised a plan of escape while Barret fired futilely at off-screen baddies. After another iconic scene, you’ll start the famous motorcycle mini-game. Your goal? Attack the Shinra soldiers on motorcycles to mitigate the damage they do to the rest of your party. Before that begins, however, adjust your party to include the characters you want and equip Materia on them. Fire + Elemental, Restore + All, and Lightning are all good equips, here. Also be sure to put on some of those new accessories you have to use. The Protect Vest increases your Vitality (physical defense) and the Talisman improves your Spirit (magic defense). You should also switch the row your party members are on to the opposite of what you have them on now. So if someone is set to ranged, switch them to the front and melee characters should switch to ranged. You will see why shortly.
When everybody’s in the right spot with the right gear, begin the mini-game. There are three grades of baddies, noted by the color of their bikes; blue and orange bikes indicate scrubs, while the soldiers on the red bikes are stronger, and trickier, often hanging back to lure you away from your allies, only so they can zoom up and score some cheap hits. The hit detection is a bit wonky, but you can also deal damage to enemies by ramming them, or by having them drive over the dismounted bikes of their buddies. Do your best, as the damage you sustain here will carry over to the next fight…
Boss Battle: Motor Ball
After you make it far enough, you’ll notice a giant mechanical monstrosity following you. When the road ends, your fight with Motor Ball begins, who starts out by ramming you, as a cheap shot. Jerk! He likes his fire attacks, of which he has two: “Twin Burner” and “Rolling Fire”. Both hit all characters, with the former dealing about 100 damage, and the latter dealing near 200. Otherwise, his physical attacks all deal a bit less damage and only hit one character. By now, you should know the drill. He’s a machine, meaning he’s weak to Lightning. Pelt him with Bolt spells, heal when you must, and use Limit Breaks when you can. Just be sure everybody stays above 200 HP and you should have little trouble whittling down Motor Ball’s 2600 HP.
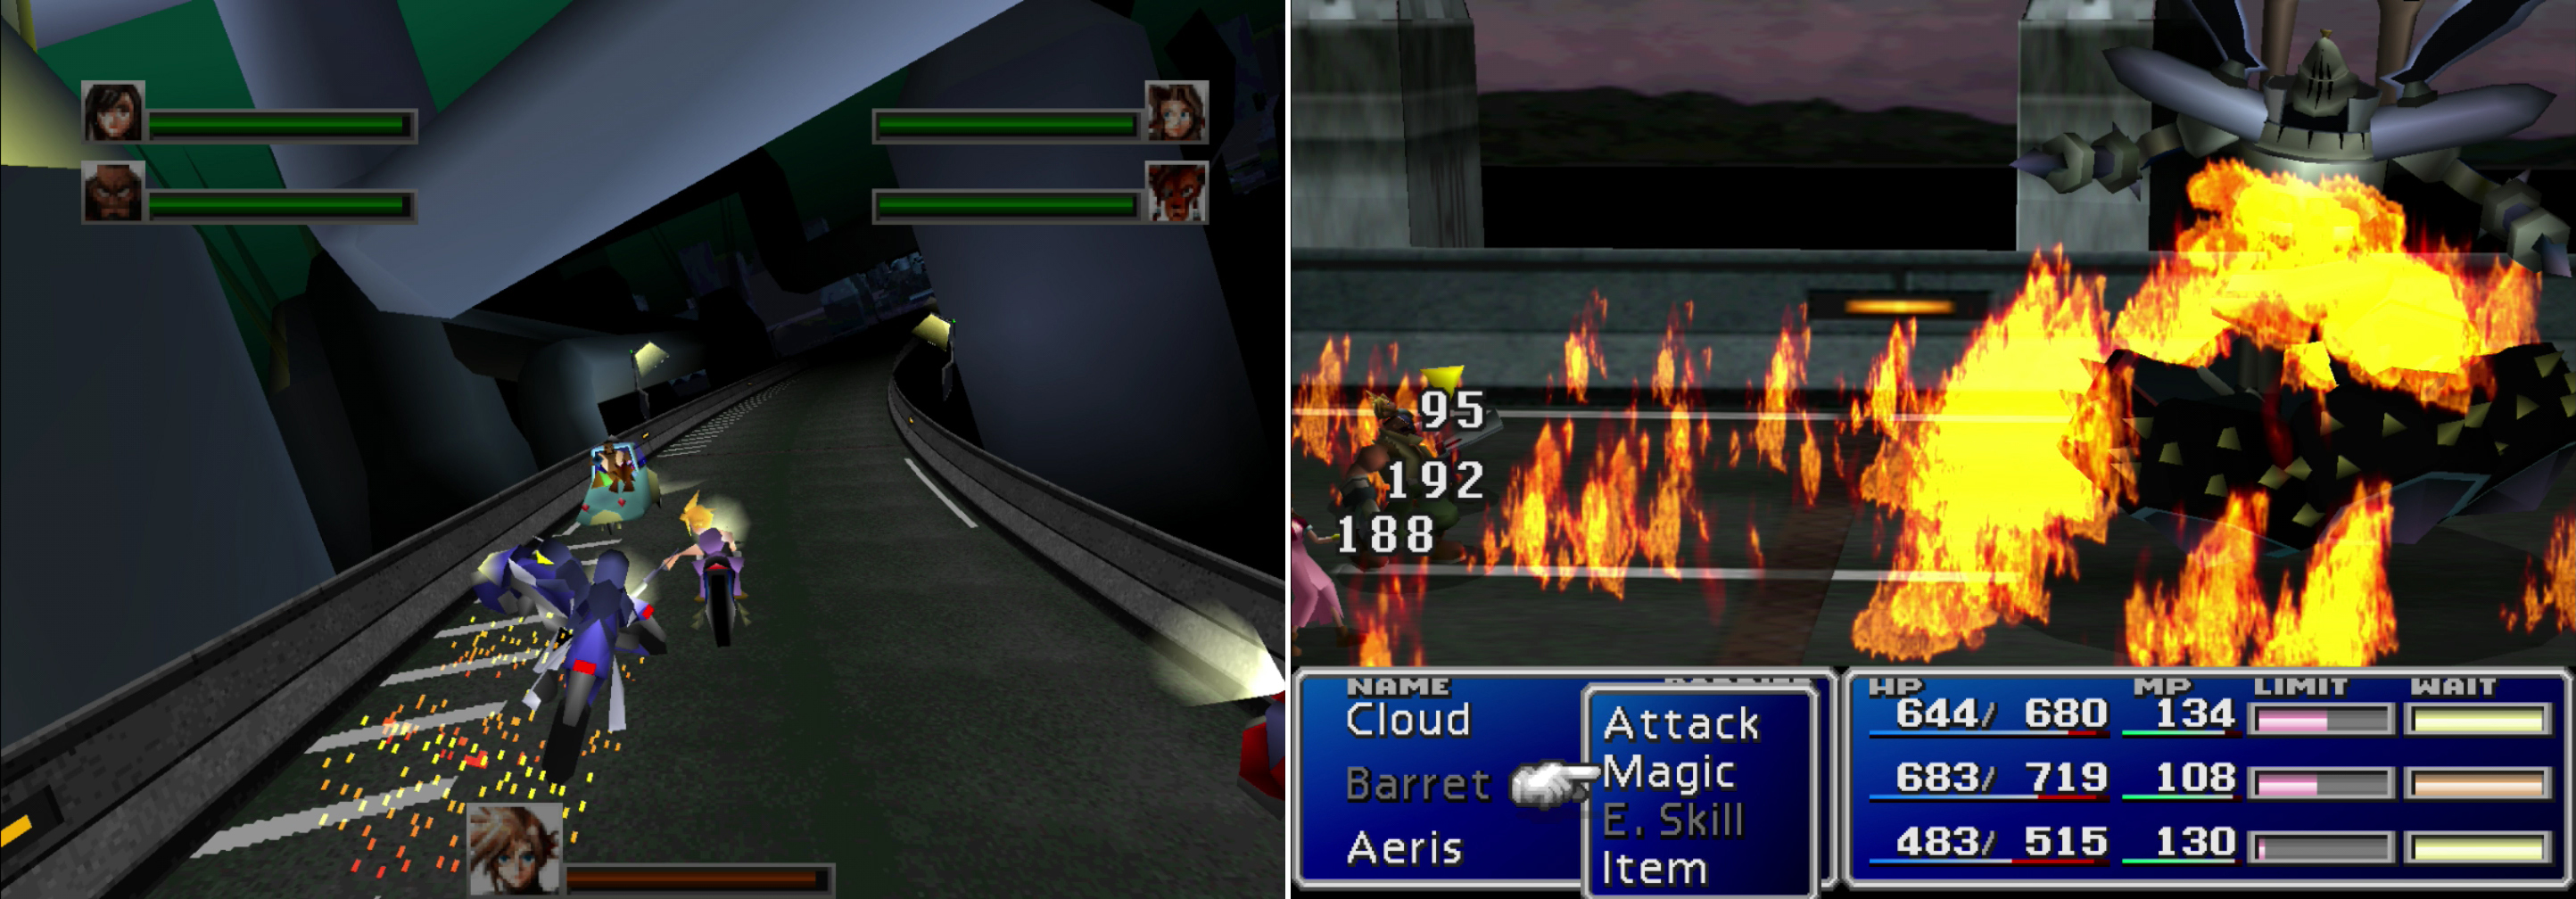
Defend your allies from enemy motorcycles as you make your escape (left). At the end of the road you’ll have to fend off Motor Ball, who shows its fondess for fire with its “Twin Burner” and “Rolling Fire” attacks (right).
| Motor Ball | Stats |
|---|---|
| HP: | 2600 |
| MP: | 120 |
| Weaknesses: | Lightning |
| Resistances: | Fire (halves), Gravity (negates), Poison (negates) |
| XP: | 440 |
| AP: | 45 |
| Steal: | N/A |
| Drop: | Star Pendant |
| Gil | 350 |
When the battle ends the group will discuss their future plans; Cloud has a score to settle with Sephiroth, Barret wants to save the planet, Red XIII wants to get home, Aeris wants to learn more about the Cetra, and Tifa… well, a mix of motivations on her part. What seems clear is that they need to beat both Sephiroth and Shinra to the Promised Land, which means leaving Midgar behind for now.
Once the group is gathered outside talk to everybody (if you wish) then head to the edge of the screen, at which point Cloud will rally the troops, be named the leader, and another flimsy excuse will be given for why they can’t all travel together. Did they never hear of “strength in numbers”? Whatever. Pick your party. Whomever you pick will gain disposition towards you (+1 Aeris, +1 Barret and/or +1 Tifa), which doesn’t really matter for Red XIII. It’s not a big deal, strategically, either, since you’re not going very far before everybody is reunited. If you’re going for “Best Bromance” of course, you’ll want to pick Barret and Red XIII; every little point couts, after all. Anyways, pick your party, then head out into the big, wide world…
No Comments