
The Mermaid Moon that you got from the storehouse in past Wetlock is a very important item, so Zoom on over to La Bravoure and talk to Colette, showing her the Mermaid Moon. She will be waiting for you around the church, but it seems she has forgotten where the hidden entrance to the cellar is. Go behind the church and just keep mashing the A button until you find the hidden entrance. Follow Colette and open the chest to finally get your hands on the Flying Carpet (this one is real)!
Use the Flying Carpet like any other item and you will be able to use it to fly around the world, although it’s low and is basically restricted to flat land and water. Your first use is to get across to the shrine on the other side of the river near La Bravoure. Go inside and speak with the ghost, who is one of the soldiers who fought alongside the Almighty. He talks about how Sir Mervyn was sealed inside of a stone that grows hotter as it nears his revival; this sounds a lot like the hot stone that your uncle Pike has in his possession, as pointed out by Maribel.
You can listen to what was said again by interacting with the bones on the ground. Break the nearby pots for a Seed of Life , then pick up the Green Fragment before you exit the shrine. Zoom on over to Estard and speak with your uncle, who can be found inside of the pub. It turns out that he sold the stone to some rich fellow, so you just missed out on it. Luckily, you should have an inkling as to who this is, as his name has been mentioned a few times by now. Zoom on over to L’Arca and get on your carpet, flying to the big house to the north of the town.
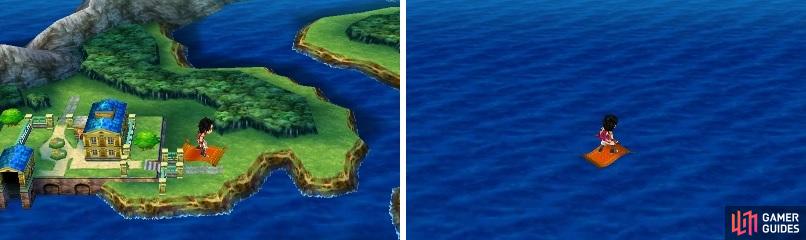
The Flying Carpet will likely replace the ship as your go-to choice for transportation.
This is Palazzo di Bulgio, the richest man in the world. Feel free to talk to the people there, who will mention that Bulgio isn’t home at the moment. Check out the well outside to find out that it’s really a Well Wisher enemy. Defeat it, then enter the main building and use the stairs in the kitchen to go into the basement. Smash the breakables to get 120 gold coins , then go into the small room to find a Yellow Fragment and a Tortoise Shell in the chest. Ascend to the second floor and check the cupboards for a Bow Tie , then open the two chests for a Mini Medal (#51) and a Magic Key . On the top floor, there will be a Top Hat in one of the cupboards.
Zoom to Grondal and speak with some of the residents to learn that Bulgio was there. If you go into the big mansion (back door), some of the people there will mention that he has gone back to his “Primo Palazzo,” which is where you just were! You’ll find Bulgio on the second floor, in the room with the two chests from earlier, and speaking with him will not make him relinquish the Sizzling Stone. As you try to leave his place, he will stop you and ask to accompany you to find the legendary hero. Say yes and he will join your party.
Return to Grondal and get on your carpet, flying south from the village to find a big building inside of the mountains there (kind of looks like the Taj Mahal a bit). This is King Maximo’s Mansion and he is a collector of Mini Medals. At this point, you should have 51 Mini Medals, which is enough to get the first two prizes on his list (for 45 and 50), a Poison Needle and a Staff of Divine Wrath . If you go downstairs and read some of the books, you will learn that the tower where the great Sir Mervyn is being held is located west of King Maximo’s Mansion. So, fly to the west across the little bit of water and enter the tower.
The Tallest Tower
As you approach the main entrance, the Sizzling Stone will emit a blinding light and open the doors. Enter the building and you will find that there’s two sets of stairs on the first floor, one in the far north and another near the central area. Take the southern of the two stairs, since it leads to treasure. Follow the path here to the center of the second floor to find the chest, which contains a Mercury’s Bandana . Return to the first floor and take the other set of stairs now. There’s nothing in this section of the second floor, so head straight on up to the third floor.
You will want to be careful on the southern edges of this screen, as you can fall off, putting you back at the main entrance. Follow the path around to get to the stairs in the northwest and up to the fourth floor. There is a chest in the southeastern corner, which contains 370 gold coins . The slightly winding path will lead to the stairs going on up to the fifth floor, which looks like a bit of a mess from the map. As you can probably see, there are no ledges around the outside edge of the floor, meaning if you fall, you will have to start the dungeon over from the beginning.
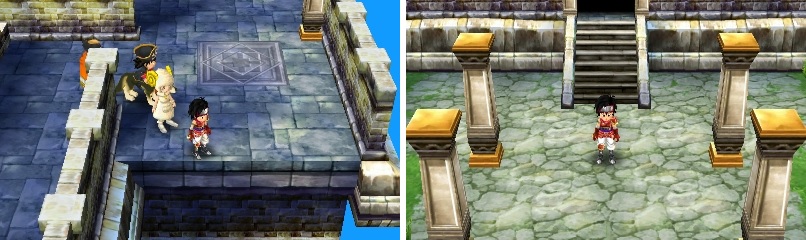
If you happen to fall off the tower (left), then you’ll end up back at the main entrance (right).
Luckily, the inside portion do have walls, so you don’t have to worry there. Also, enemies don’t seem to spawn on this floor and there’s no treasure, either, so just follow the outside edge to the southern end and find that path the leads to the stairs. There’s nothing on the sixth floor, so head straight to the exit and to the seventh floor, which is similar to the fifth. However, the main difference is that enemies seem to spawn on this one, so it makes it very difficult to avoid battles due to the narrow floors/hallways. Also, there is one treasure chest on this floor, which makes you go out of the way to get it (it’s important).
From where you enter via the stairs, go south and take the path going right, then north and the right path. After doing that, go south once more and continue right, following the path to reach the chest in the south ( Mini Medal #52 ). Now, go back two columns to the right of the one with the stairs, heading north this time and then to the stairs. On this floor, the four separate areas on the northern end require you to use the elevators. You might see a chest on the one platform, but it is empty, so ignore it. The elevator you want to use to reach the stairs is the second from the left.
There will be one more maze floor in this dungeon on the next floor. There’s no treasure here, so you can go straight for the exit. Start by heading down the eastern side until you get to the southern edge. From there, you should be able to clearly see the path needed to reach the stairs on your map. Once you ascend to the next floor, a short scene will play out, with Bulgio handing over the Sizzling Stone. Walk onto the altar and use the stone to bring forth an old man, who introduces himself as Sir Mervyn. Agree to let him join your party and he’ll hand over a Red Fragment . Talk with Bulgio to get him to rejoin, then drop off the ledge on the previous floor to get back to the bottom.
Zoom over to the Temple Palace and get on your carpet, then fly over to the Likeness of the Great Spirit, which is west of the palace. There isn’t much to do here (or can do) for now, so go upstairs until you see the tablet fragment on your map. Take the south door here and go around to the west side to find a door that’ll lead straight to the Blue Fragment . Exit this place and go back to La Bravoure, entering Honore’s place to get an extra scene now that Mervyn’s been brought back.
No Comments