First and foremost, it’s possible to fall off some of the ledges in this dungeon (you can see the differences), making you fall into the “void” and appear near the door north of where you begin, which is the exit to the dungeon that leads back to El Ciclo. You can use this opportunity to rest at the inn and save at the church, although you would need to turn the clock back on in order to do that. From where you begin, go straight west until you come to a chest, which has a Seed of Agility in it.
Now, go back to the beginning and north, then west to the northwest corner of this area to find two pots, one containing an Agility Ring and the other being an Urnexpected. There’s one more chest located in this area and it’s in the southern section. If you go to the southernmost path, you will see that there are ledges you can drop off of, so do that and open the chest to find that it’s a Cannibox. Fall off the ledge near the warp to the south to get back to the beginning, then head south until you come across a warp thing naturally in the way.
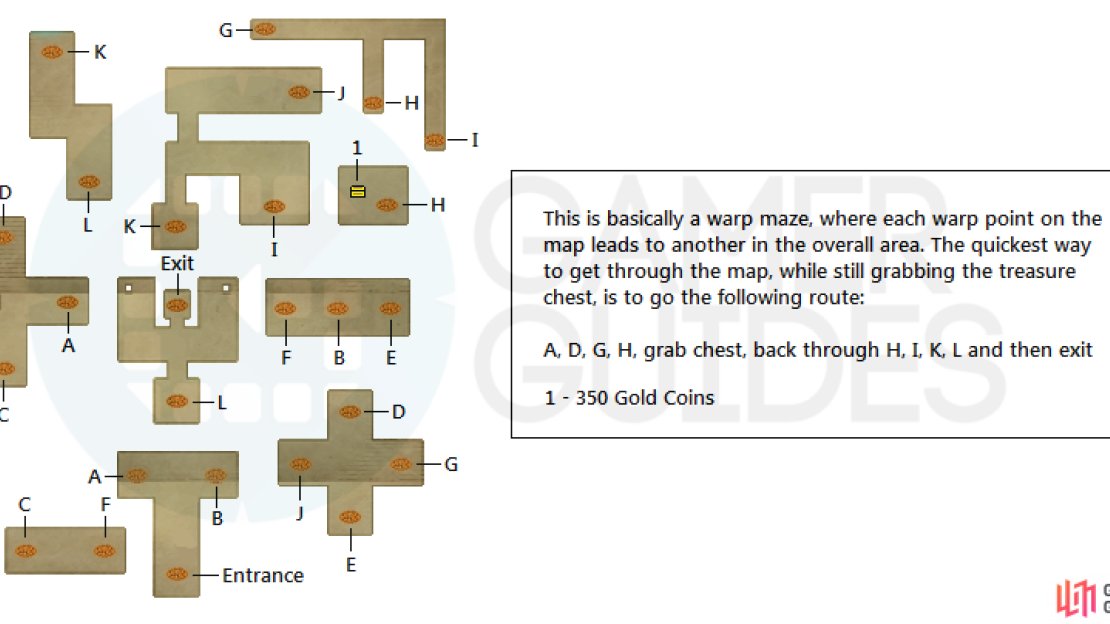
This will take you to a linear area, where you will encounter a chest with a Mini Medal (#40) in the way. The warp at the end will bring you back to the beginning area, where you will want to go where you dropped off to open the chest a bit earlier; there will be another warp to the south of that chest. This will lead you into an area that is filled with a bunch of warps, which can very confusing if you take any single one. There is a set path you can take to easily get through this area without any trouble, while also getting the one chest along the way.
A map of the maze with all of the warps.
If you look at the map above, you will find the path to take by looking at the matching letters. Basically, take the left warp at the beginning (A), then the northern one at the next junction (D), which will put you at a crossroads of warps with a healing circle. Take the eastern warp (G) and then the first southern one (H) to arrive on a platform with a chest ( 350 gold coins ). Return to the previous one and take the other southern warp (I), then go north, west and south to the warp there (K). Once you arrive, use the warp to the south of your position and you’ll appear on the central platform.
Take the warp to come to a new area, where you will find a stone in the middle that reads, “Begin at the end and trace a path back to the beginning. Only then will the way ahead open to you.” This room is structured like a clock and straight north is “XII.” Start there and go counter-clockwise around the room, stopping to open up the chests along the way for a Magic Water and 200 gold coins . Once you get back to the “XII” mark, a warp will appear over it. Use this warp and go north to find some monsters waiting for you…
BOSS - The Time Being
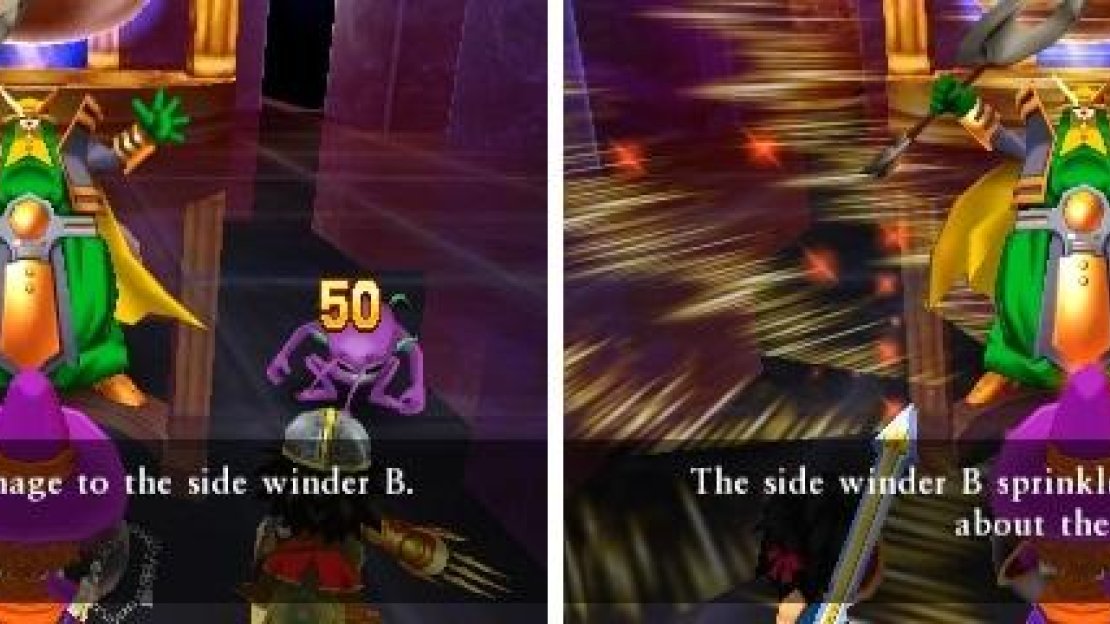
The Time Being is accompanied by two Side Winders, who are going to be your first targets in this battle. It isn’t because of Crack or their physical attack, but rather the fact that they can use the Sands of Time to turn back the clock in the battle. This essentially means that they will make it so the battle starts over from the very beginning, whenever it first started. So, if you began the battle with 2 HP on a character and healed him/her after it began, then when one of the Side Winders wound back time, that character would have 2 HP again.
Of course, that rewinding of time could also benefit you, should you have a party member dead and can’t revive him/her. Anyway, focus solely on the Side Winders until they are both gone, then you can concentrate on The Time Being. As for him, his physical attack can deal around 40-45 damage at 100 defense, so that can definitely hurt, especially if you’re using a vocation that limits your overall HP. He also has the annoying blinding flash move you should be accustomed to at this point.
One of the more damaging moves in his arsenal is Frizzle, which only hits one person, but it can do a lot of damage. The counter to this is that you might have enough equipment that mitigates fire damage on your characters, where it does a lot less. Boom is a stronger version of Bang and Bounce is similar to reflect in Final Fantasy games, where spells thrown at the boss will bounce back to the caster. You shouldn’t have too much trouble with this battle if you quickly take out the Side Winders.
Concentrate on the Side Winders first, as they can restart the battle using the sands of time.
The Time Being will drop a Yellow Fragment upon his defeat, as well as give you a hint as to what you need to do to break the time loop. Walk up to the hourglass and choose to smash it, netting yourself some Sands of Time. This handy item will allow you to restart any encounter in the game, essentially being the same as the Side Winders’ ability during the previous boss battle. You’ll be thrown back to El Ciclo and there’s nothing new to do, so head on over to the inn and rest to finally progress to the next day.
One more time, go to the bridge and approach the mass of people for a quick scene, then check the dock to find Pomposo. The next morning will come and it looks like nothing else can be done, but go to Pomposo’s studio to see that his assistant as quit. Talk to Pomposo, then return to the village and speak with Salvadore, who mentions that Pomposo staying at his place could have some good outcomes with Antonia. Leave Salvadore’s house and Maribel will mention that it’s now up to them, so you’re done here.


No Comments