Khazra Abomination Bosses
In-Game Description
![]() Khazra Abomination is a hulking, corrupted Goatman who uses its sharp poisonous claws to attack its prey.
Khazra Abomination is a hulking, corrupted Goatman who uses its sharp poisonous claws to attack its prey.
Description
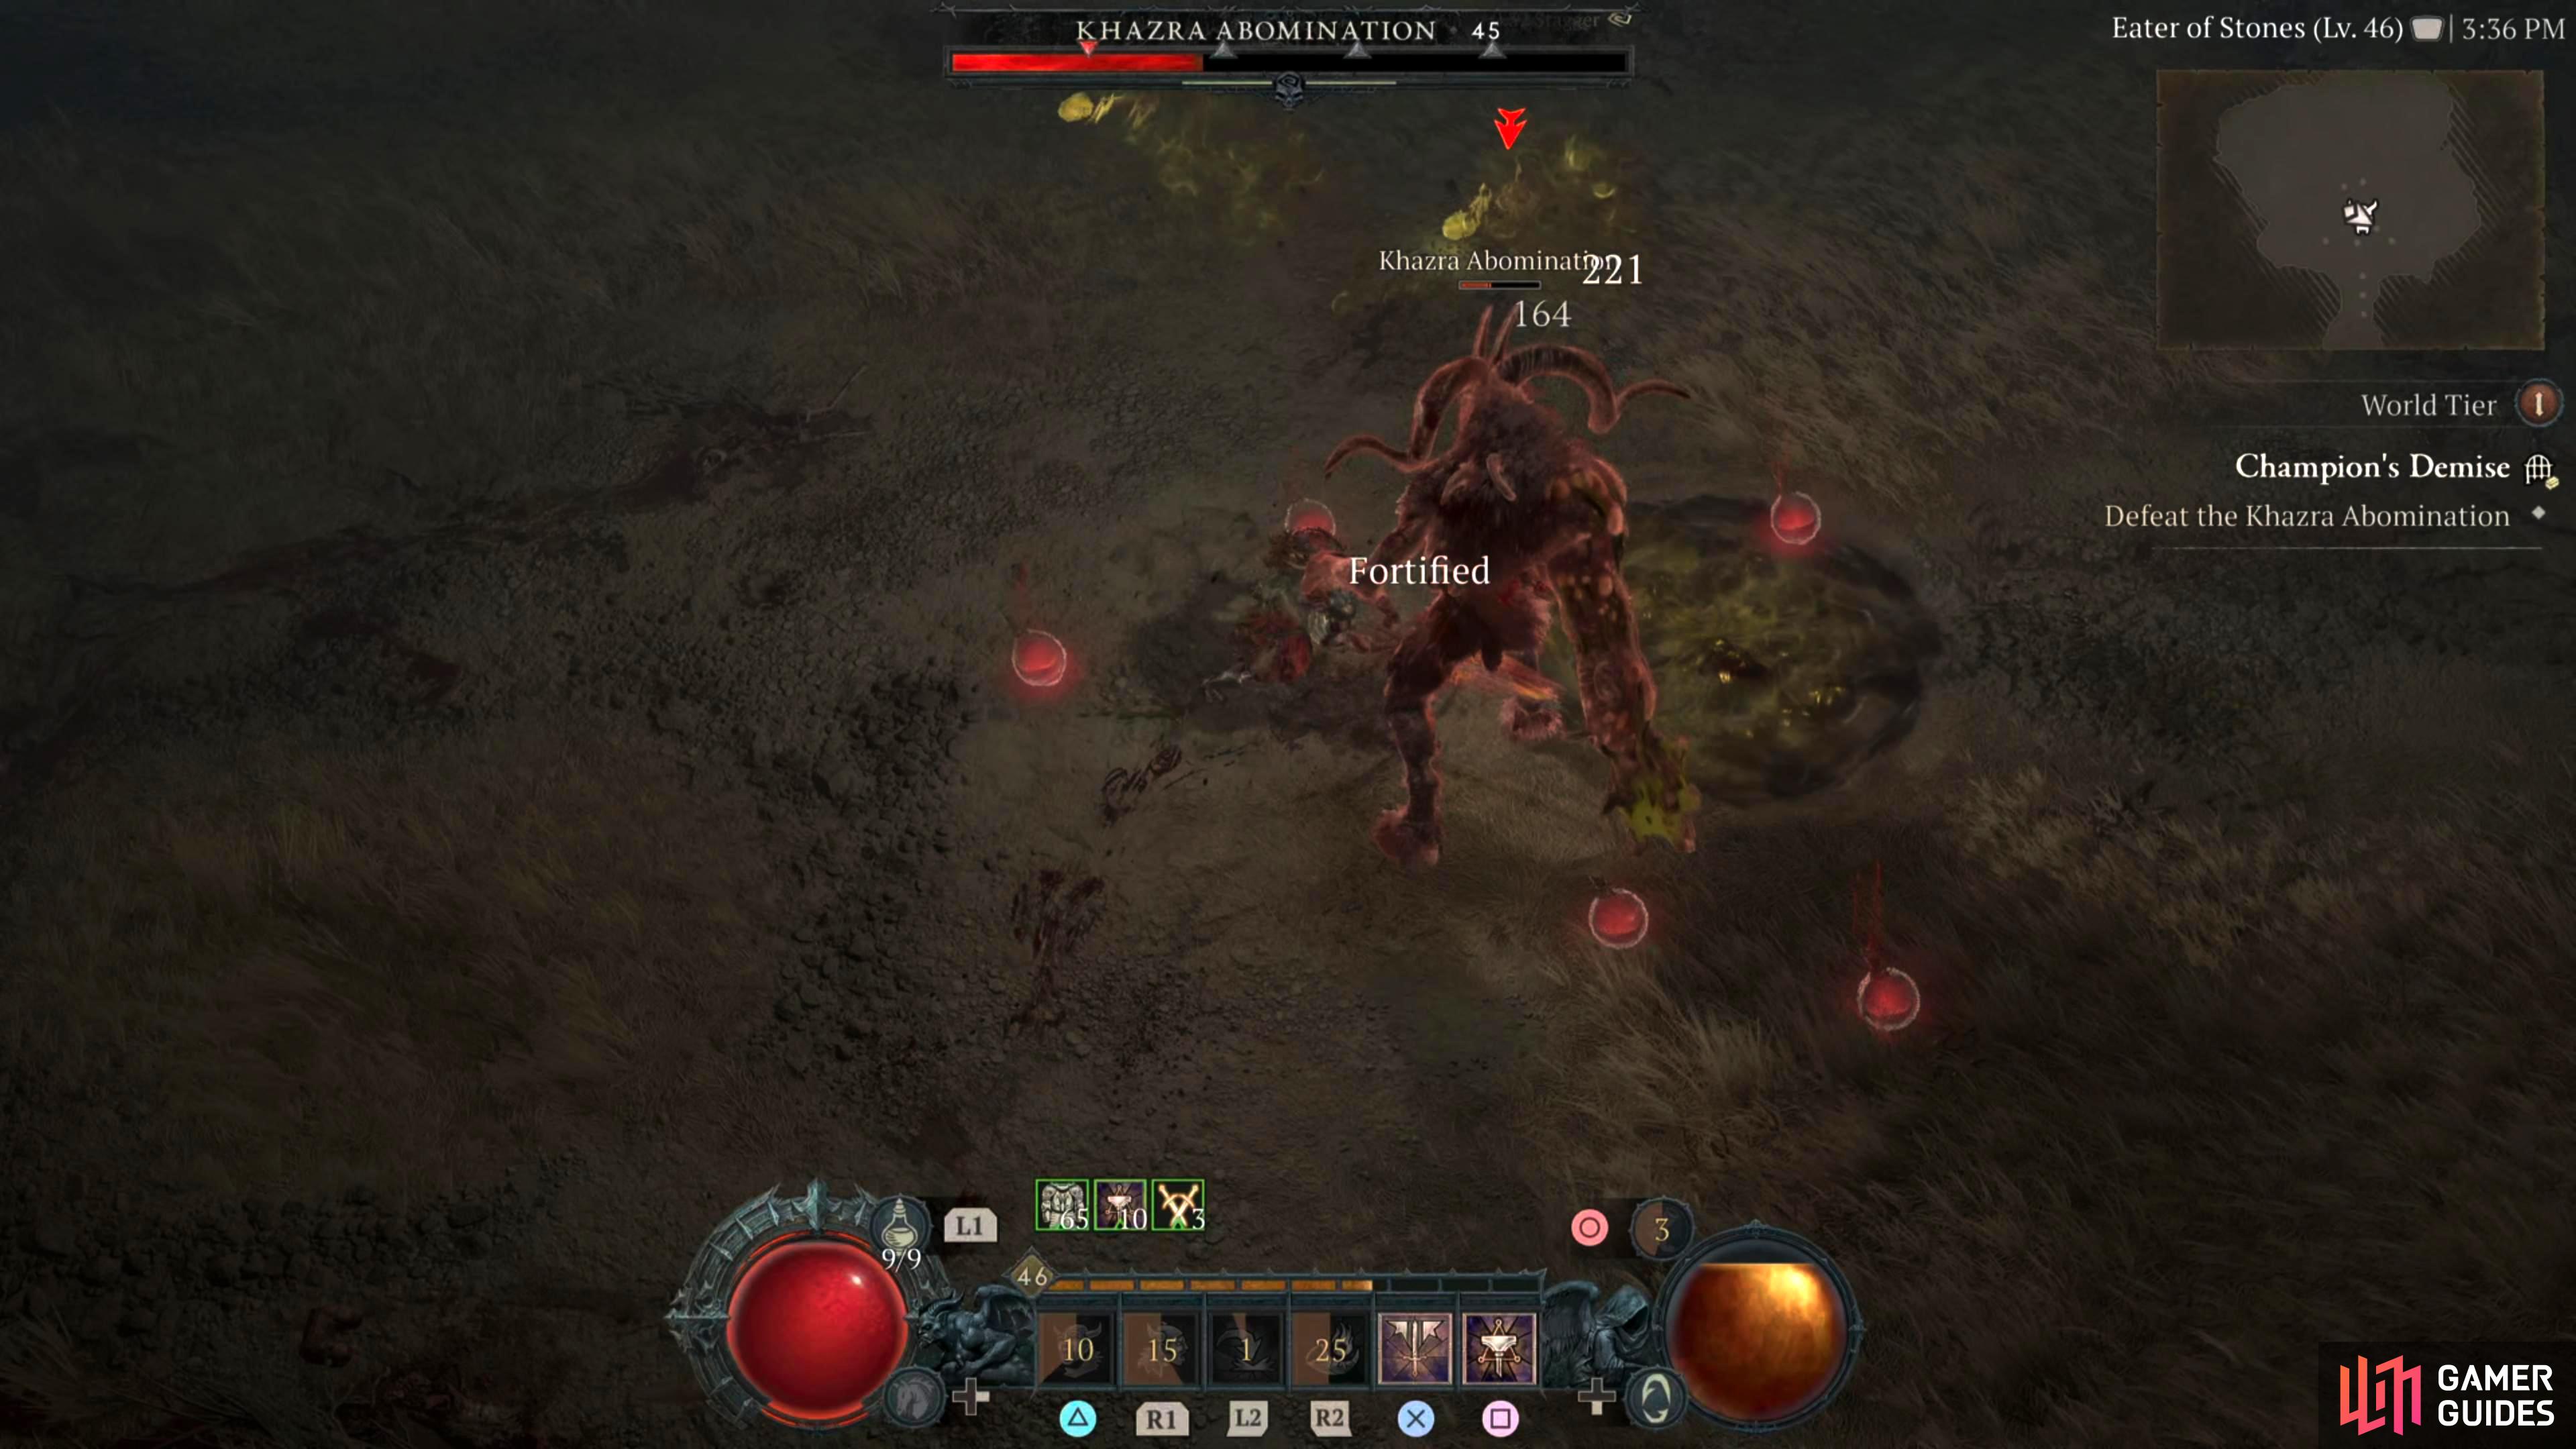
The ![]() Khazra Abomination is one of the first bosses you’ll experience, and it’ll appear more evident when you see its lack of attacks. Saying that it can still cause trouble for new players as its poison pools can slowly drain away your health.
Khazra Abomination is one of the first bosses you’ll experience, and it’ll appear more evident when you see its lack of attacks. Saying that it can still cause trouble for new players as its poison pools can slowly drain away your health.
As it leaves poison pools in its wake, ideally you’ll want to bring some Poison Resistance Elixirs but mostly, just don’t stand in them. It has a decent health pool but is largely not too complex of a boss on lower World Tiers. Either way, here is what attacks it has in its arsenal:
-
Poison Stab - When the boss is in melee range, it’ll stab its claw into the ground leaving behind a pool of poison. This happens after a couple of regular swipes first when it lifts its arm upwards, evade to the opposite side. After a while, the area will get surrounded by poison pools, when this happens, move the boss to another part of the arena.
-
Poison Throw - The Khazra Abomination will fling its arm towards you, launching two-three poison pools which have surprising accuracy. This attack appears more often if you’re fighting at range, but it will still be used in melee. Try to dodge just as the pools of poison are about to land.
-
Charge - This is the boss’s gap closer. If you’re attacking from range, it’ll charge across the arena, knocking you over briefly if you’re caught by it. Either stay in melee range or dodge at the last second to avoid the attack.
For a full guide, click here.
Found In
Detailed Location
- Final boss of the
 Broken Bulwark dungeon.
 - Final boss of the
 Forsaken Quarry dungeon.
 - Final boss of the
 Hoarfrost Demise dungeon.
 - Final boss of the
 Oldstones dungeon.
 - Final boss of the
 Rimescar Cavern dungeon.
 - Final boss of the
 Domhainne Tunnels dungeon.
 - Final boss of the
 Komdor Temple dungeon.
Screenshots


Region
 Fractured Peaks


 Sign up
No Comments