| Collectibles | # |
|---|---|
| Runes | 7 |
| Bone Charms | 5 |
| Blueprints | 3 |
| Sokolov Portraits | 1 |
Distillery District
After getting off the boat, turn right and pull out your heart. Note the markers showing the Bone Charms and Runes? Let’s swim out to the far end of the bridge we can see ahead. Here, we can climb out of the water and use Blink to climb up into a room containing a Bone Charm (1/5) . Drop back down into the water and Blink across to the upturned boat against the wall beyond the bridge. Climb out here and ascend the nearby stairs before the guard comes by.
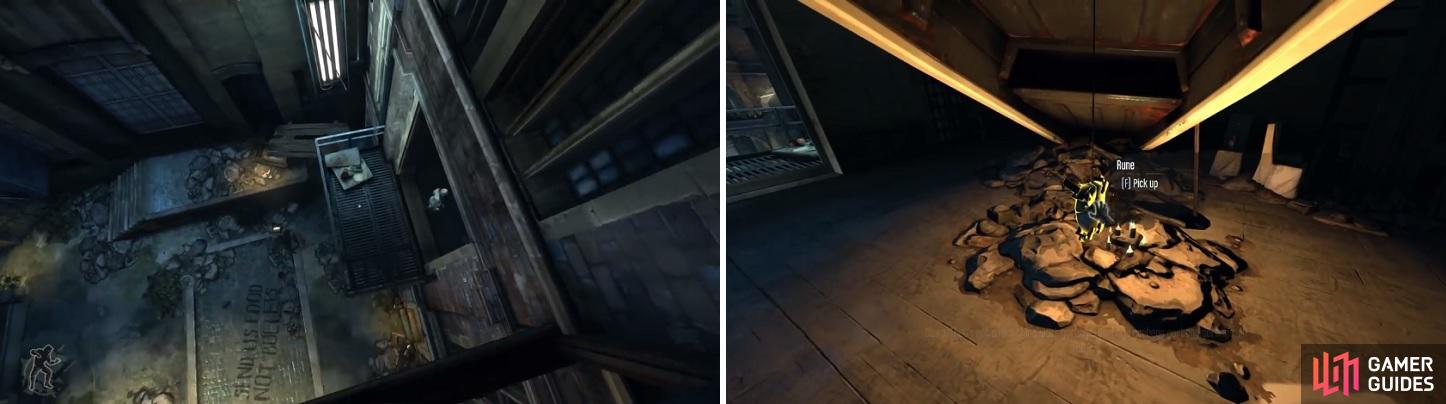
The wall of light we want to go through is ahead up the next set of stairs. Instead of going there though, continue down the street to the right. When you reach the dead end, you’ll see an old woman up on a balcony to the right tossing stuff out on the street. Use the debris nearby to climb up and into the building. Go down the stairs and you’ll find Granny Rags in the kitchen. Ignore her for now and enter the door just to her left. Follow these stairs to the bottom to find a Rune (1/7) and an Outsider Shrine .
Granny Rags offers two sidequests in this mission, both of which will reward you with a Rune. These side missions are completely optional and don’t offer anything of value to a Ghost/No-Kill run.
Granny Rags 1: Gentleman Callers
Return and chat with Granny Rags for an optional side-quest . Three thugs will start banging on her door and she wants you to deal with them. Return to the balcony we came in from and Blink across to the other side of the street.
Sneak up and grab one of the bad guys from the back and stick him in the shadows somewhere, then use Sleep Bolts to deal with the other two (as not to kill anyone). Afterwards, return to Granny Rags and after a short chat, she’ll tell you she’s left a present for you upstairs. Go up to where you originally entered to find a Rune (2/7) .
Jump down onto this balcony (left) to enter the building and find Granny Rags. She will offer you some side missions and upon completing them, you will receive some Runes (right).
Granny Rags 2: Infecting the Distillery
After another conversation with Granny Rags, exit Granny’s building and go down the opposite alleyway. There are a pair of gangsters abusing another passer-by around the corner to the left, so to avoid a fight for the moment (we’ll deal with these clowns later), use Blink to get up to the rooftop to the left and continue along the roofs and through the open floors here until you reach Clavering Boulevard.
From our current location, you’ll see the marker pointing to Galvani’s Flat on the opposite side of the boulevard. Still up on the roof, drop down to the vent and follow it left and all the way around to the balconies in front of Galvani’s place. Jump up onto the balcony and look above and to the right of the door to see another vent, blink up to here and then from here to the higher balcony. Head inside.
As soon as you enter Dr Galvani’s Office, check the desk to the left for a health elixir, the key to Galvani’s lab and an audiograph to listen to whilst you loot the rest of the room. Afterwards, examine the bookcase to the right of the door we entered for a false book. Use that to reveal a secret room behind, grabbing the rat viscera from the table.
Backtrack across the vents until you reach the roof of the building opposite Galvani’s place. Continue back along the alley until we reach the T-intersection. To the right, you’ll see Granny Rags place and to the left, you’ll see a door to enter the Whiskey Distillery, so head on in here.
Dunwall Whiskey Distillery
As you enter, you’ll see a slanted sheet of metal to the right in front. Blink to this and cruise up. Use the roofs and pipes along the way here to make your way around the corner to the right towards the distillery itself, marked with the objective marker.
To the right of the door are a pair of rats and you can possess one and send it through the nearby grate to infiltrate the building (this option will net you a Blueprint and incendiary bolts - note: you’ll come back in the next mission, so you don’t need to grab it now and the distillery master key from a hook on the wall near the window overlooking the floor). Otherwise, you’ll need to wait for the guards to walk away and drop down and enter the door like a normal person.
Either way you go, you’ll enter the same large room and there are five guards patrolling in here. If you entered the door, there will be a tripwire directly in front of you will need to avoid - I suggest Blinking to the chain beyond and above it. To get through the room without getting spotted, you are going to want to sneak inside and then Blink up to either the pipes near the top of the rooms (if you have Blink level 2) or the chain mentioned earlier on the right hand side (Blink level 1), so that you can access the pipes. Blink across to the far side and to the pipe above the door on the raised platform. Wait for the guard to patrol away from it before dropping down and heading inside.
Turn to the right as you enter, check the cupboard near the table for a spiritual elixir, then use the wall of barrels as cover to observe the thug patrolling the stairs behind. When it’s safe to do so, drop down behind him and choke him to sleep and hide the body. Now pull out your heart, you’ll see a Bone Charm (2/5) hidden at the top of the room. Use Blink to help scale the barrels sticking out of the walls on either side to make your way up to it. Drop back down and descend the stairs.
Crawl under the space beneath the barrel under the stairs to find the still we need to infect. Check out the desk nearby for a Springrazor item. You can also find some instructions on how to use the still attached, noting you can grab some of the empty vials lying around the room and use the still to create additional health elixirs for yourself. Once you are ready, use the still and choose the **** ‘infect bootleg elixir’ option.

Don’t forget to grab the Bone Charm sitting on the rafter in the room with all of the barrels (left). Turn the valve to be given a choice on whether to infect the distillery or not (right).
Retrace your steps back upstairs, look through the keyhole for the guard to leave and then enter the large room, Blink back across to the entrance (don’t forget to avoid the trip wire if you didn’t disarm it). Once outside, Blink back up to the pipes and make your way back across the top of the room to the entrance to return to the Distillery District. Go back to Granny Rags’ place to get another Rune (3/7) for finishing this side mission.
Distillery District
Go down the alleyway opposite Granny Rags’ place and use Blink to get onto the roof to the left. As soon as you get up, look to the right to see an open window behind a balcony above. Blink up here and loot the re-wire tool, health elixirs and everything else in the room before returning to the roof below. Continue along the rooves towards the Clavering Boulevard.
If you’ve done the side-quest, you’ll now notice that the two gangsters we saw earlier are now standing guard outside of a door with the guy they were harassing trapped inside. Drop down from the roof onto the pipe just above them and edge out slightly so you can see them below. Use Blink to teleport down behind them. It may sound crazy, but if you grab one of them and hold the action button so that you carry them rather than letting them hit the floor, the other will not notice it happening. So grab one, deposit him in a shadow nearby and return for the second. Smash down the door to free the citizen.
It turns out he’s a vendor named Griff who, like Piero can trade things to you. He also has a pair of blueprints you can purchase ( Lens Magnification and Sokolov’s Formula ). Note that if you cannot afford both of them at this time, you’ll be returning to this area in the next level and you can purchase them then. Check out the room behind him and look up to see another floor above. Blink up here to find a Bone Charm (3/5) on the table nearby.
Return outside and climb back up to the roof above. Use the vent overlooking the square to make your way left and around to Galvani’s flat. Drop down into the alley below Galvani’s place, keeping your eye on the guards patrolling the boulevard nearby, then make your way to the stairs at the far end. Blink down to the left and climb the stairs to the right of the thug here. At the top of the stairs, three thugs will be arguing, so use Blink to get behind the cover opposite and then into the alley beyond to avoid a confrontation.
Climb the stairs here and blink into the guard post in front to **** to find a Rune (4/7) . Turn around and Blink up onto the vents above the stairs we just ascended to avoid bumping into the patrolling guards. Blink to the top of the guard post and wait for all of the guards to move away from the entrance to Holger Square (objective marker) and when it’s safe, Blink over to the tunnel and run inside to quickly use the door to get to the next zone.
Holger Square
As you enter, you will see Overseer Martin (the fellow we need to rescue) in the center of the square in shackles. Nearby is a single guard, taunting and talking to him. Sneak up on him and choke him out and then use the lever next to Martin to free him. After a short scene, head into the alley behind the platform Martin was on and to the right and use the bits and pieces in there to blink up to the vents above, which will allow you to enter the area behind the big gate.
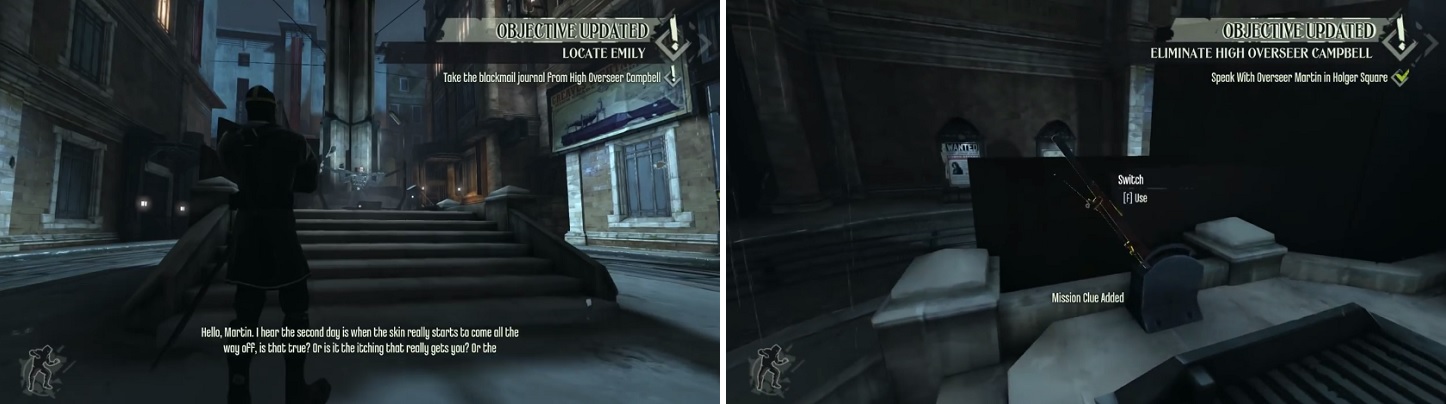
Sneak up behind the guard talking to Martin (left) and quickly choke him unconscious, then pull the lever nearby to free Martin from his bindings (right).
Notice those lamp poles? We can actually stand on these, so let’s use them to Blink across to the gate on the far side of the area without alerting the patrolling enemies below and use the vent against the building to the left to help us over the fence.
When no guards are looking, Blink down to the stairs on the right, climbing them and entering the nearby gate. As you enter, turn immediately right and quickly make your way over to the building here. Blink up to the ledge, turn left and keep going until you reach a dead end. Here, if you have the possession power, you can send a rat through the grating. If not, we’ll have to do it the hard way!
Drop down to the right at the dead end and crouch down into the small window you find here. You’ll witness a quick scene between a pair of guards and be able to grab a springrazor as well. Afterwards, climb up to the small window directly opposite the one you came in from.
Grabbing the Traitors Brand
From the hatch here, Blink to the light to the left and then again onto the pipes and follow them around the corner. Jump up onto the hatch above the door at the end, where you’ll find yourself in a library type area. Look down and you will see branding instructions on the table (we’ll need these if we want to dispose of the Overseer without killing him).
You’ll see a guard patrolling a raised area at the back of the room. When the coast is clear, Blink over to the stairs behind and to the left of the table, then climb up to take down the guard from behind. Next, return down to the table, grab the instructions and then Blink back up to the hatch.
Now look to the left, where you’ll see that door at the end of the hallway. The next item we need is in there. So using the library we just got the instructions from as a body depository, we are going to clear the area of guards and drop the bodies back in the library.
Once they are all gone, head down the hall and enter the door to the interrogation room. Climb the stairs and pick up the Heretics brand up off the table. Return back down the hallway and turn left from the entrance to the library. Blink up to the pipes at the top of the room and enter the hatch above the door in front.
Wait for the guard ahead to be on the lowest set of stairs and then make your way over to him, hop up to the ledge on the right when you can and when it’s clear, make your way over to the front entrance. Once inside, you’ll notice a large group of soldiers in front and we want to avoid alerting them, so immediately turn right and enter the side room here. Choke out the lone guard here. Note this is where the rat will have infiltrated to if you used that option.
Continue out the other door and enter the open room to the right, make sure the guard on the stairs is looking elsewhere and then immediately turn left and enter the door just inside the entrance. Climb down the stairs and at the bottom, you ll see a bust of a man to the right. Look at his eye. Activate it to open a secret door. Inside you’ll find a hidden room with a pair of audiographs to play, a Rune (5/7) in a cabinet on the far left and a Sokolov Portrait (1/1) on the right.
Return to the previous room and wait for the soldier on the stairs to start climbing up again, quickly blink up behind him and choke him to sleep. Stick him in a shadowy corner and continue to the top of the stairs. Here, you’ll find a spiritual elixir under a table to the left. Now look up at the door and you’ll see an open hatch above. Blink up to this and enter the next room.
Using the hatches and light fixtures blink across to the objective marker until you find yourself outside the target room. Enter through the hatch above the door. Welcome to the Overseer’s meeting room.
Drop down and grab the Rune (6/7) from its mounting on the far right wall and then look at the table in the center of the room. On the table here you’ll find a pair of glasses and a pitcher. If you have heard a few of the conversations and read a few of the notes, you’ll know that Campbell is planning to poison Captain Curnow. There are a couple of options here.
For a stealthy, no kill run, I would definitely recommend option 4, however if you also want to complete Callista’s optional task, you’ll have to do option 5. It’s a little riskier as you will have to avoid or take out a lot more guards and will take longer to complete, but it ultimately will do the job:
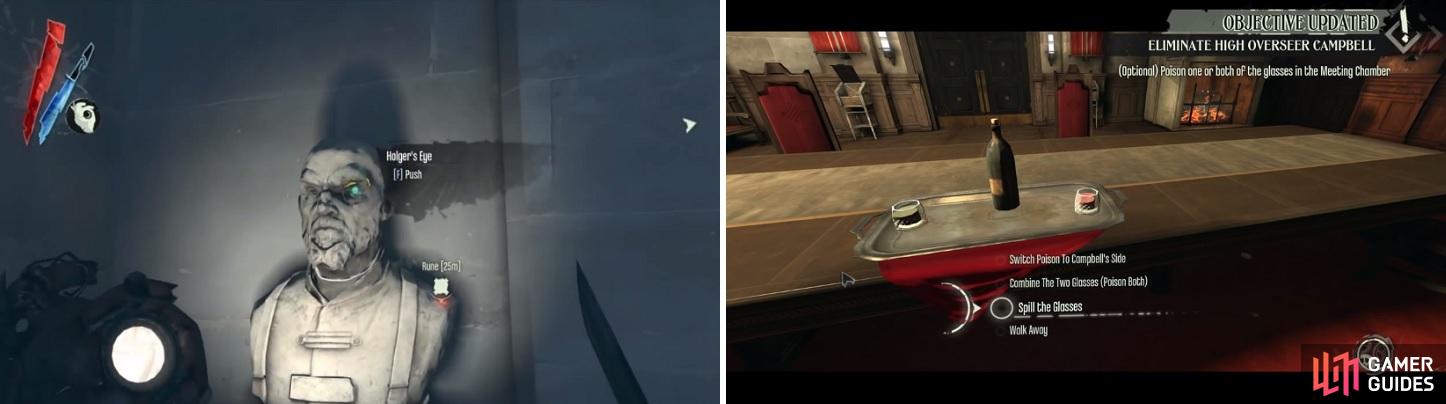
Interact with the bust on the wall (left) to open a door to Campbell’s Secret Chamber. Choose to spill both drinks (right) to make both Curnow and Campbell go to said chamber for the non-lethal method.
Lethal
-
You can switch the glasses in which case the High Overseer will kill himself (but it still counts as you killing him so will void a no kills run), Captain Curnow will escape though, fulfilling the optional mission given to you by Callista.
-
You can mix the glasses. This will kill both the men, voiding your no-kill run and also failing the optional task.
-
You can leave the glasses alone, wait for them to enter and drop down and kill them both. This will kill both the men, voiding your no-kill run and also failing the optional task.
Non-Lethal -
You can leave the glasses alone and let Campbell kill Captain Curnow and then choke him to sleep in the meeting room. You will fail the optional task. Once you have knocked him out, take him back to the interrogation room and place him in the chair. Use the brand on him.
-
You can spill both glasses and follow the two men to an alternate meeting room (that secret room we looted before). Campbell will attempt to kill the captain here too, however once he draws his sword, you can grab him before he attacks and Captain Curnow will realise you are trying to help him. Afterwards he will escape, completing Callista’s optional task. Once you have knocked Campbell out, take him back to the interrogation room and place him in the chair. Use the brand on him.
Return back down the stairs and follow the marker to enter the door to the backyard.
The Backyard
Now that we are on the way out, all we really need to do is meet up with Samuel to complete the mission, however before we do so there are a pair of bone charms and a rune available to pick up. Let’s grab those first.
From the start of the area, exit via the door directly in front and continue straight ahead along the rooftops. When you reach the vent, pull out the heart to see a Bone Charm (4/5) nearby. Follow the marker and when you are above it, drop down off the nearest roof and onto a ledge; enter the room here for the charm. Return to the roof.
See the big white Greaves Lightning oil sign? Blink up to the top of this building go to the opposite side of the rooftop and blink to the pipe below. Follow the pipe to the right. Once the pipe reaches the rooftop, smash the pane of glass nearby and drop down inside. Pick up the Rune (7/7) off the bench here, loot the rest of the room and grab the safe key off the bench.
Open the safe in here for a Blueprint (Bonded Galvani Weave) then blink back up to the roof through the window. Pull out the heart to see another bone charm. Blink up to the higher roof nearby and work your way across the rooves, enter the broken window at the end and climb down the chains here. Blink to the nearby workbench (don’t land on the floor or the rats will attack) and use the vice to access the Bone Charm (5/5) . Return up the chains and make your way down to Samuel to finish the mission.


No Comments