
This page covers the events through the Trench of Flames and Glanymede Castle for the story in Tales of Arise. This walkthrough will take you through obtaining all items and uncovering everything available to you.

Glanymede Castle is a dungeon in Calaglia.
| Items | Location |
|---|---|
| Saffron | Trench of Flames - Gates of Fire, inside the house |
| Apple Gel | 1F - To the east of the elevator |
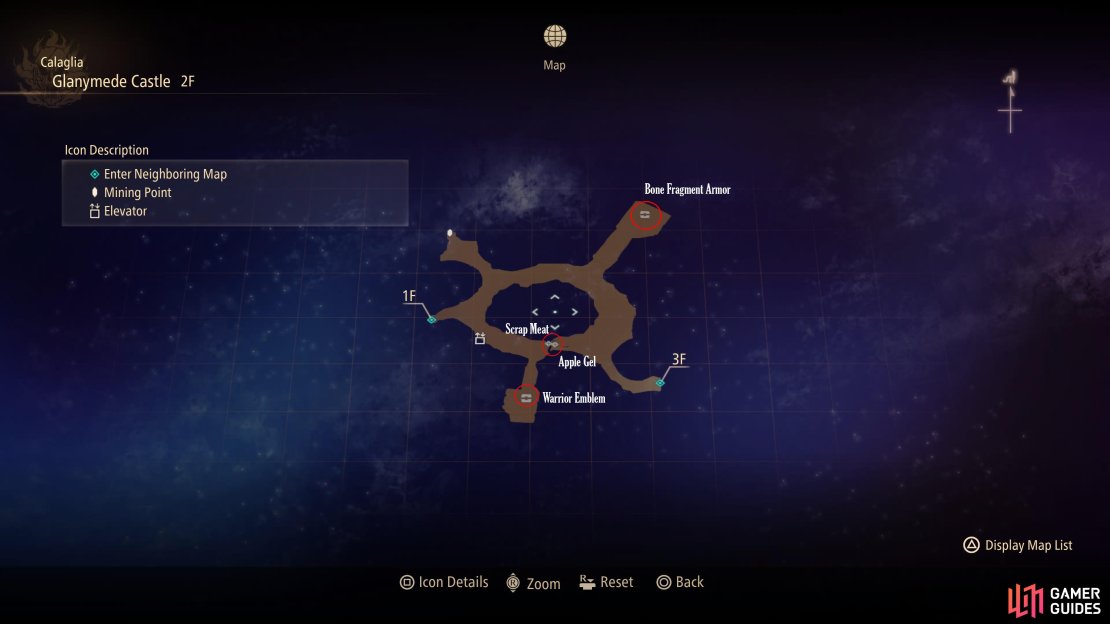
| Scrap Meat | 2F - On the barricade to the east of the elevator |
| Warrior Emblem | 2F - Chest in northern room |
| Bone Fragment Armor | 2F - Chest in southern room |
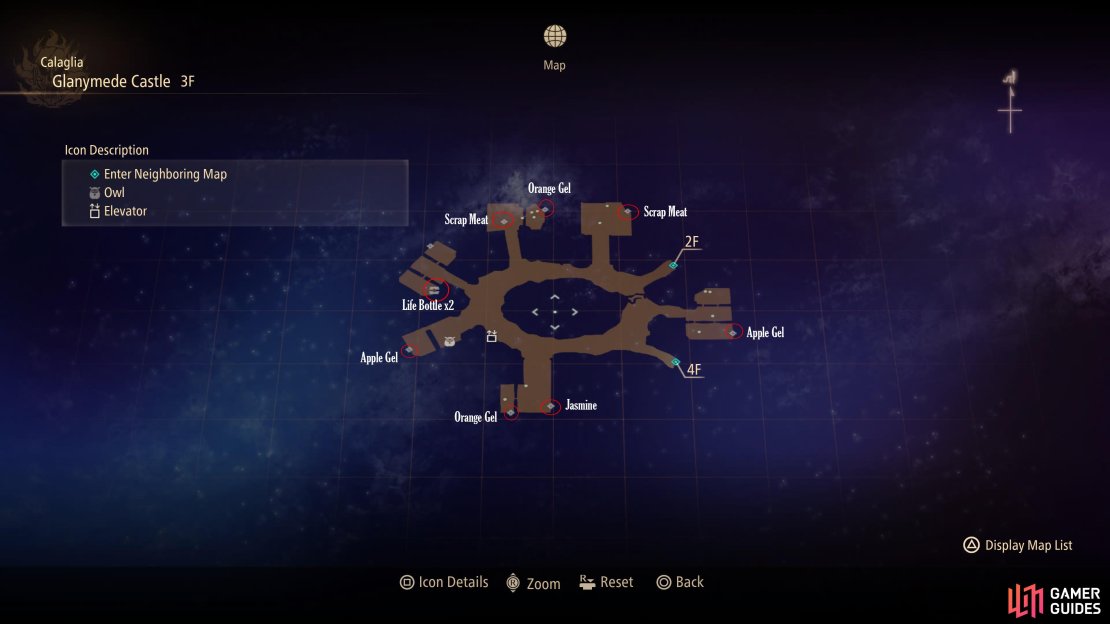
| Savage Key | 3F - Story progress |
| Scrap Meat | 3F - Easternmost room on the north side |
| Scrap Meat | 3F - Westernmost room on the north side |
| Orange Gel | 3F - Westernmost room on the north side |
| Orange Gel | 3F - In the northwest room |
| Life Bottle x2 | 3F - Chest in the northwest room |
| Jasmine | 3F - Outside the southern room |
| Orange Gel | 3F - Southern room |
| Castle Elevator Key | 3F - Eastern room, northern bedroom bookshelf |
| Apple Gel | 3F - Eastern room, southern room |
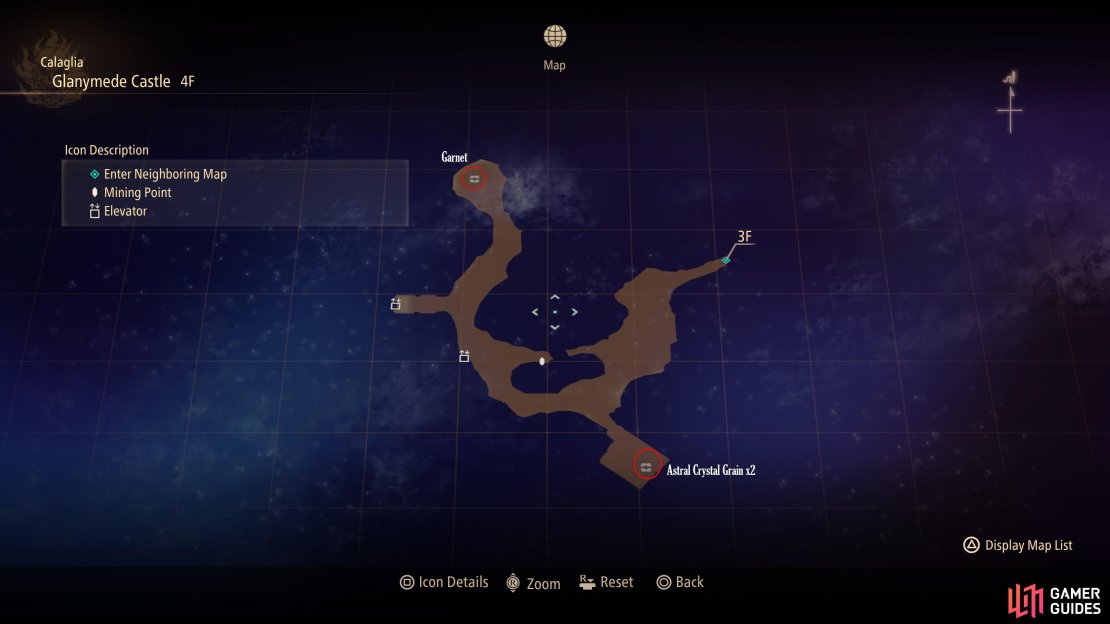
| Astral Crystal Grain x2 | 4F - Chest in southern room |
| Garnet | 4F - Chest to the north of the floor |
| Astral Flower | 4F - Toxidillo Gigant reward |
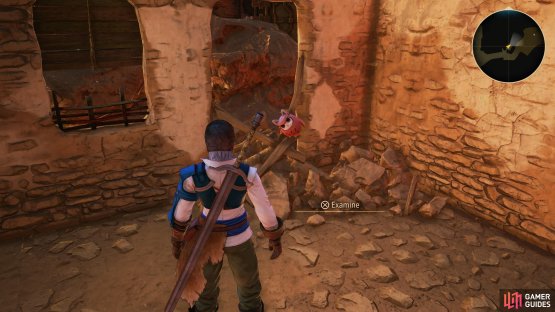
| Owl | Trench of Flames - Castle Gates, in the ruined house |
| Owl | Trench of Flames - Gates of Fire, behind the fence along the northern wall |
| Owl | 3F - Among the chickens in the room to the west of the elevator |
| Enemies | Lv | Weakness |
|---|---|---|
| Armadillo | 7 | – |
| Bee | 8 | – |
| Wolf | 7 | – |
| Calaglia Armored Swordsmen | 10 | – |
| Toxidillo (Gigant) | Lv 13 |
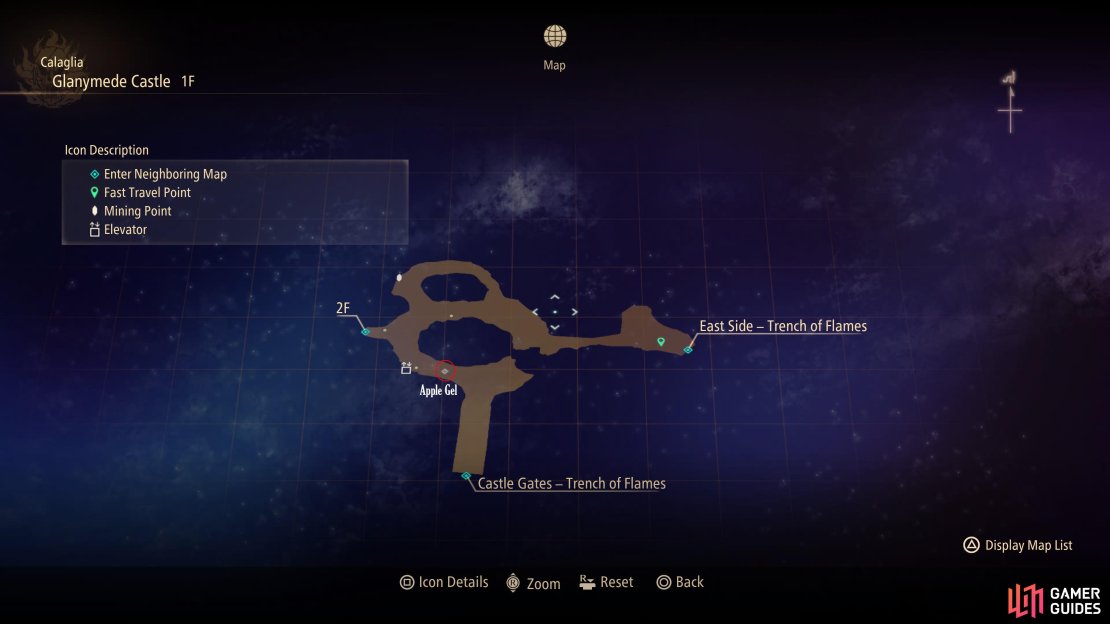
(1 of 4) The map for the 1F of Glanymede Castle
Taking down Balseph
The time has come to take down Balseph and liberate the realm of Calaglia. The plan is set, Zephyr and his team will create a diversion so that Iron Mask and Shionne can slip in the back door of Glanymede Castle and take on the Lord himself. Before setting out for Kyrd Garrison, consider resting at the Inn and eating a fresh meal for the dungeon ahead, Steamed Potatoes is a useful option here to save on your CP.
Once in Kyrd Garrison, you’ll notice that you can now take the elevator to the east of your location, do so and you’ll reach the Trench of Flames. The battle is well underway as you take the stairs up to the north and then at the intersection, go east and pause to search the house on your left to locate Owl #6 inside that will hand over the Dog Ears. Leave the house and continue through to the next area to the east.
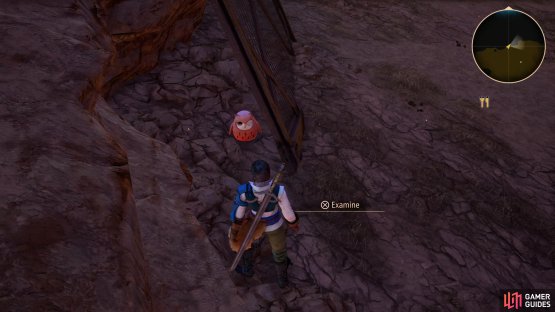
(1 of 2) You’ll find the sixth Owl in the house to the right of the drawbridge


You’ll find the sixth Owl in the house to the right of the drawbridge (left), the seventh Owl is hiding behind this fence in front of the Gates of Fire. (right)
You’ll spot the sight of the massive Gates of Fire up ahead and there are more Crimson Crows fighting here, preventing you from getting a closer look however if you hug the wall to the north of the Crimson Crow here, you’ll find a fence and behind it, Owl #7 which will present you with the Left Bandage. Continue to the west in the direction of Glanymede Castle but first, search the house to the south to pocket a Saffron before continuing to the west. The first door here is locked but follow the path and you’ll find a ladder leading down to a makeshift bridge leading to the castle itself.
1F
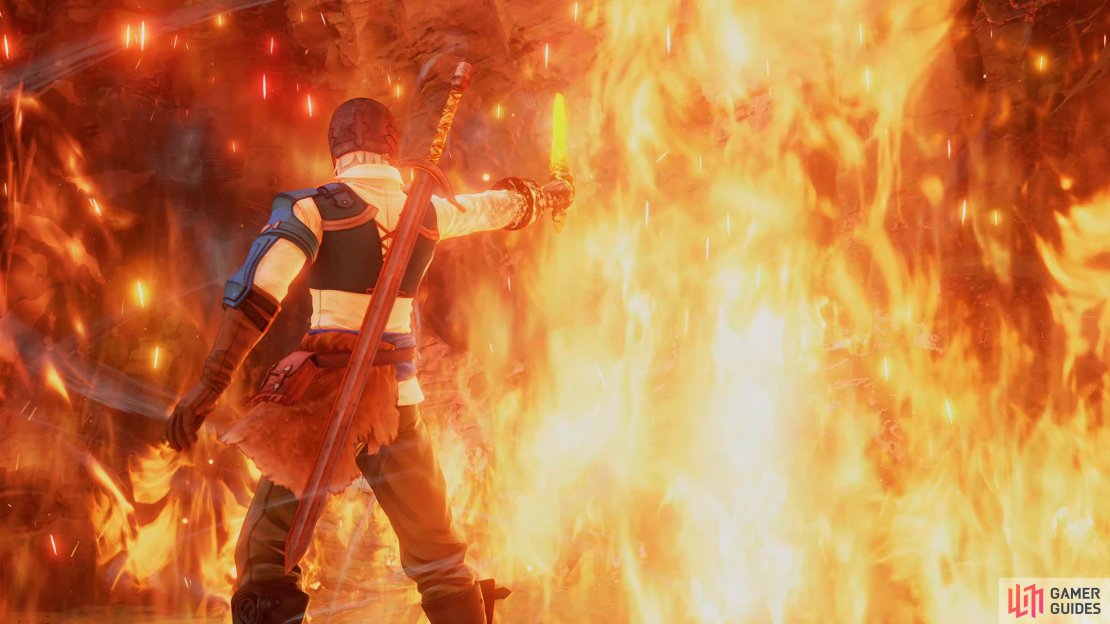
Once Shionne and Iron Mask make it safely into the castle, Shionne decides to let Iron Mask hold on to the Blazing Sword, unlocking the Blazing Sword Title in the process. This allows you to make use of Iron Mask’s perk in all battles now, where he can sacrifice his HP by holding down an Arte’s button that you’ve learnt the corresponding Flame Strike for. The Blazing Sword Title will automatically unlock the Infernal Torrent Flame Strike and there’s another one on the same emblem, Rising Phoenix, that you can unlock. This is an important mechanic for Iron Mask, although it does cost his HP, the Flame Strikes are extremely potent attacks and will be your main source of burst damage when playing as him, just remember to be careful if your HP is low until Shionne has time to heal you.
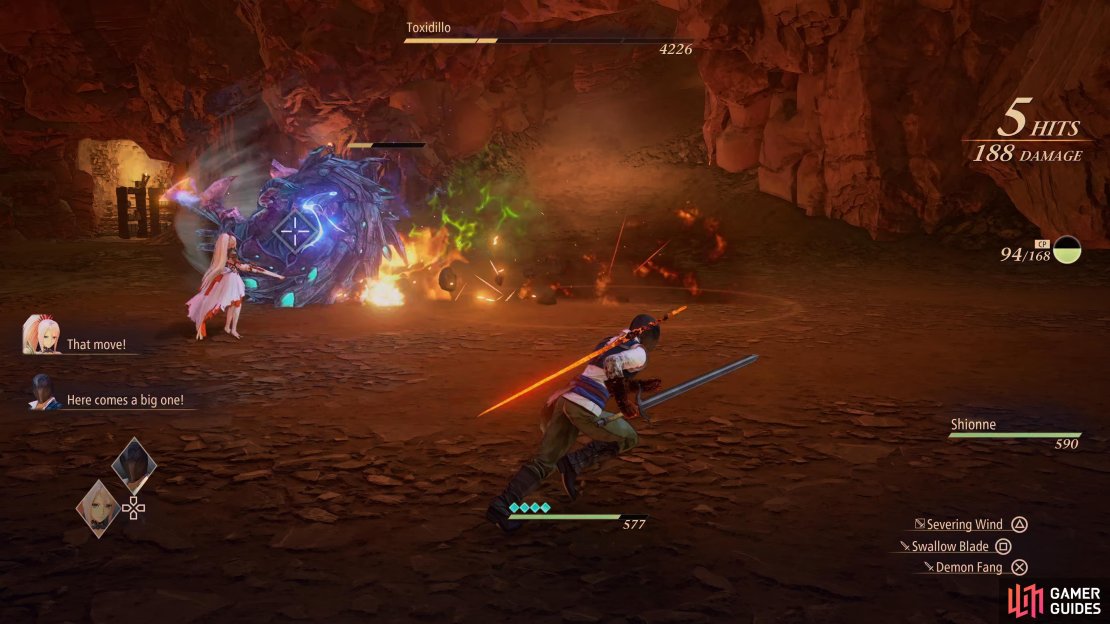
You’ll also note that Iron Mask has now unlocked his full extent of his Boost Attack, Burning Wave. This has great range on it and will down any enemy, leaving them open for you to focus on burst damage such as Flame Strike. Once you’re ready to continue, head north and you’ll be forced into a battle with a Calaglia Armored Swordsmen which acts as a tutorial for the Blazing Sword.
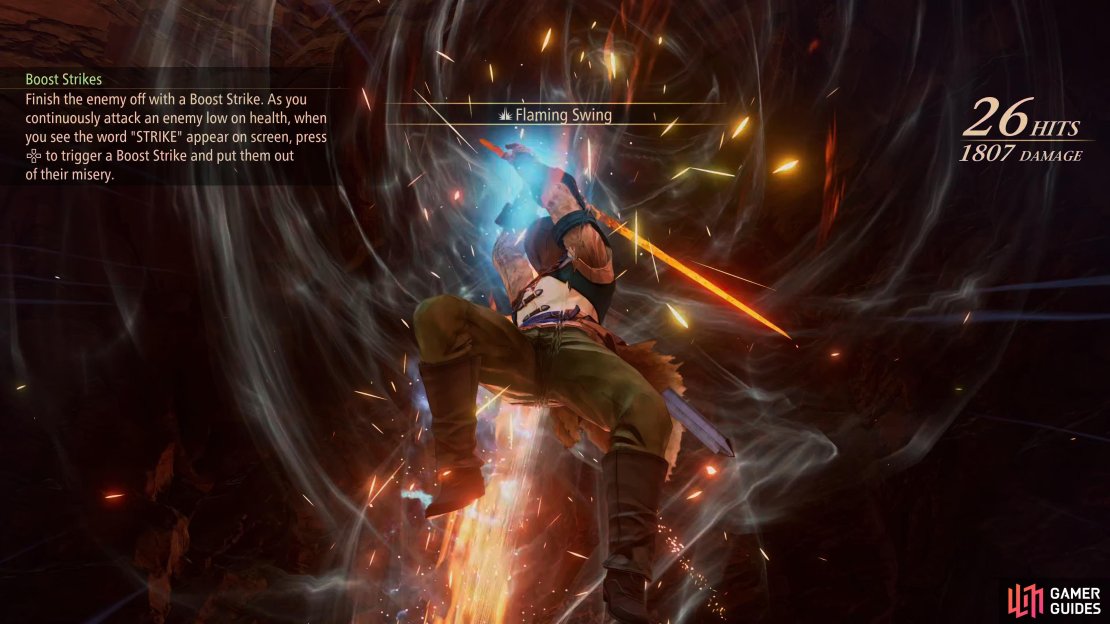
For now, Swallow Blade is likely the only Arte that you can use Infernal Torrent on so be sure to have it assigned to a slot. Finally, you’ll be taught about Boost Strikes, these are exceptionally flashy finishers that you can execute by pressing the D-Pad in relation to the character whose Strike you wish to use. Although you only have the one available between Iron Mask and Shionne for now, there is eventually a Boost Strike for every combination of party members making for great variety. You’ll also spot that when fighting enemies now, a blue gauge will fill on the target marker as you combo them. Fill this and you’ll be able to use a Boost Strike, and it becomes increasingly easier to fill as an enemy’s HP drops.
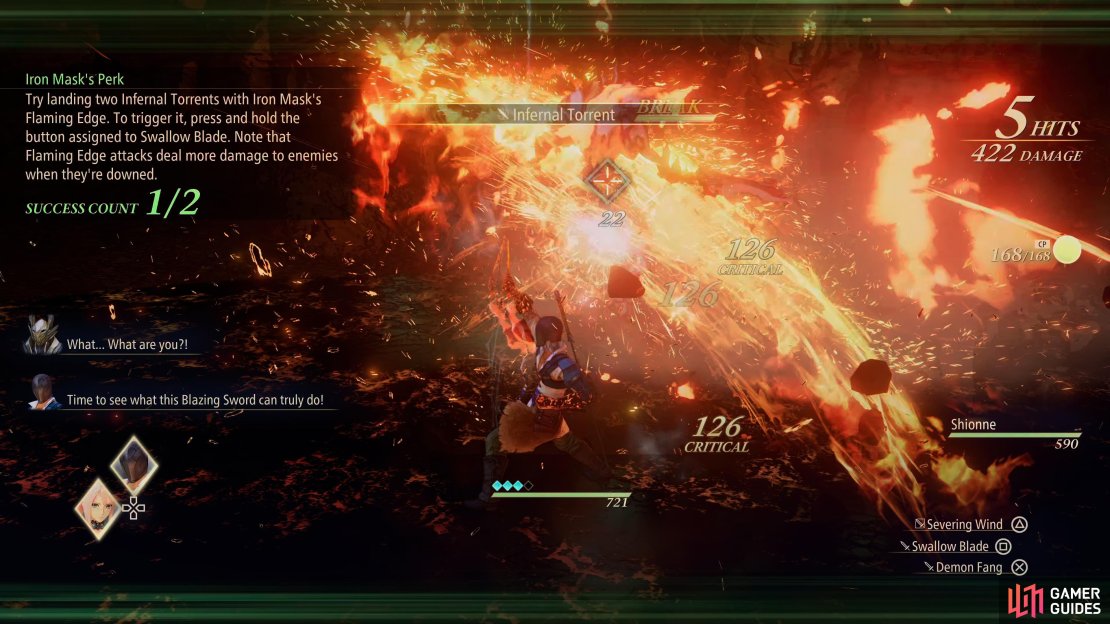
(1 of 3) Flame Strikes are a core part of Iron Mask’s playstyle
After the battle, Shionne remarks about the wave of flames that stands in your way, this introduces you to Map Actions and Iron Mask’s in particular. At the cost of CP, you can use a character’s Map Action to access more places, it’s for this reason that your CP management is crucial so be sure to always have some Orange Gels at hand for moments such as this. Use Iron Mask’s Map Action and you’ll reach an intersection.
You can take the path around to the north to avoid this group of enemies and use Iron Mask’s Map Action to come out from behind them. Ignore this temptation however as you’ll want to fight as many battles as you can to earn Exp, SP and items. Instead, charge forward and deal with this first group of enemies. With Iron Mask’s ability to use the Blazing Sword, you should be able to make short work of them but be sure to avoid charging into the middle of them or it will spell an early grave.
Deal with the two Wolves after this group and then head around the path you neglected to take a moment ago to find a Mining Point. Be sure to not waste your CP on the Map Action here as it’s needless and then search the barricade to the east of the elevator to locate an Apple Gel. You’ll need a key before you can use this elevator so instead, head through the exit to the west to reach the 2F.
2F
A Skit will become available as you enter the 2F, view it and then head east to find some Scrap Meat on the barricade behind the Wolves. Head south from here and use the Blazing Sword to discover a Chest containing Bone Fragment Armor, be sure to equip this on Iron Mask right away. Head back around to the north of the elevator now and search the corner to the northwest to find another Mining Point.
Continue along to the east, dispatch the Wolves, and then head into the northern room by using the Blazing Sword and open the chest here for a Warrior Emblem, this raises your Attack by 15% so equip it on Iron Mask and hand the Pierce Emblem to Shionne. Follow the path around to the south and search the western side of the barricade for an Apple Gel before taking the southeast exit to the 3F.
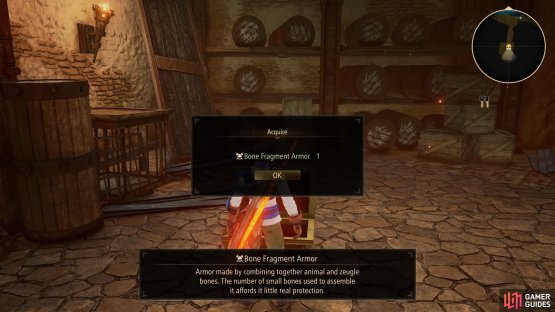
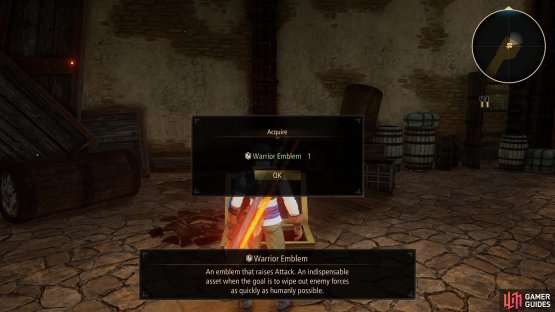
(1 of 2) You’ll find some new armor for Iron Mask in the southern room


You’ll find some new armor for Iron Mask in the southern room (left), and a useful Warrior Emblem in the northern room. (right)
3F
As you enter the 3F, Iron Mask and Shionne will become alerted to a Caglian Swordsmen attacking a child and intervene. The battle is a simple one, just the lone swordsmen so dispatch him, and you’ll obtain the Savage Key, needed for the elevator. You’ll also unlock a new Titel for Shionne at this point, Thorny Woman, which will automatically unlock her first Bomb Arte and with it, Shionne’s Perk. When playing as Shionne, holding down the button of a Bomb Arte will have Shionne fire special ammo at it, increasing the effects of it. There is a limit to how much special ammo Shionne has until she needs to reload, and this can be performed by pressing [R1/RB] at 0 ammo or [R1/RB] + [L2/LT] at any time.
Be sure to search in the corner of this room after to pocket more Scrap Meat and then be sure to trigger the Skit here. You can obtain another Skit following a battle in which Shionne uses her Perk so make sure you keep an eye out for it. The next room along contains more Scrap Meat on the table and if you search the bedroom to the east, you’ll be able to loot an Orange Gel. A group of two Swordsman and an Armadillo protects the next room along, dispatch them and search the bedroom on the right for another Orange Gel while the room to the left houses a Chest containing two Life Bottles.


(1 of 3) A Chest containing Life Bottles can be found in the western room
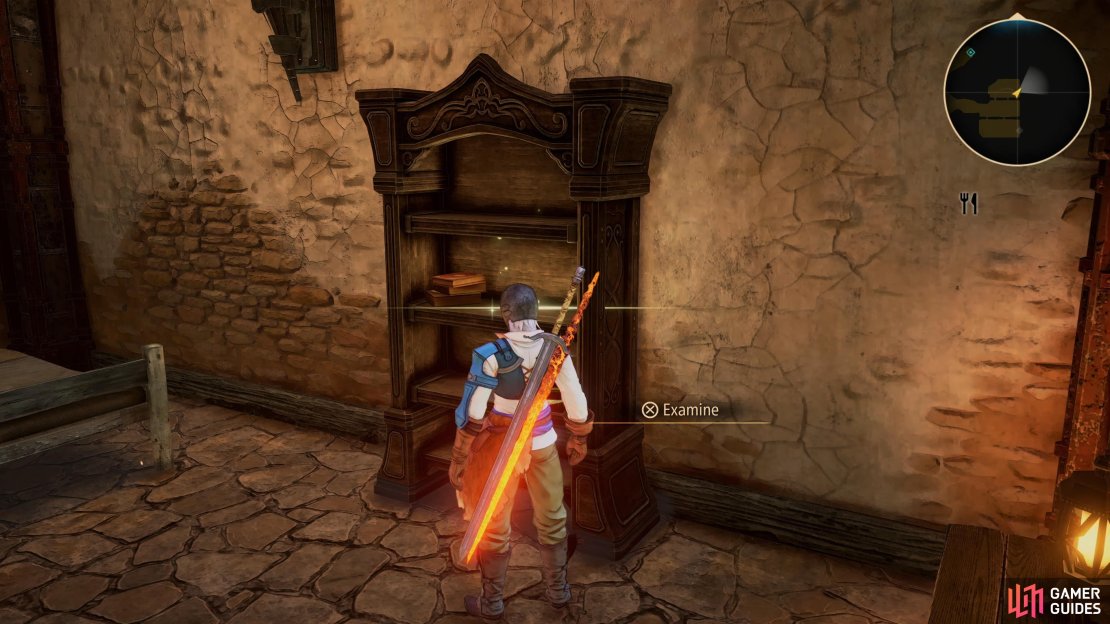
The next room along contains a group of chickens as soon as you enter, look closely though and you’ll spot Owl #7, which will hand over Rabbit Tail. Head to the back of the room and pocket an Apple Gel before leaving and then continue around to the room in the south. You’ll find a Jasmine behind the large group of Bees and in the room to the left, another Orange Gel. Follow the path to the east, dispatching the enemies and then ignore the path to the southeast leading to the 4F and instead search the room just beyond it to locate the final items on this floor, another Apple Gel in the southern room and the Castle Elevator Key in the northern room. With all of the items looted here, return to the previous path and take it up to 4F.
4F
The first thing you’ll notice as soon as you step foot on this floor is the massive Armadillo just ahead, this is the Toxidillo, a Gigant and despite being a tough battle, this (like most future Gigant’s) is defeatable when you first come across them. Be sure to Save your game, restore your HP and possibly use an Orange Gel to top up your CP and take it on.
Gigant - Toxidillo
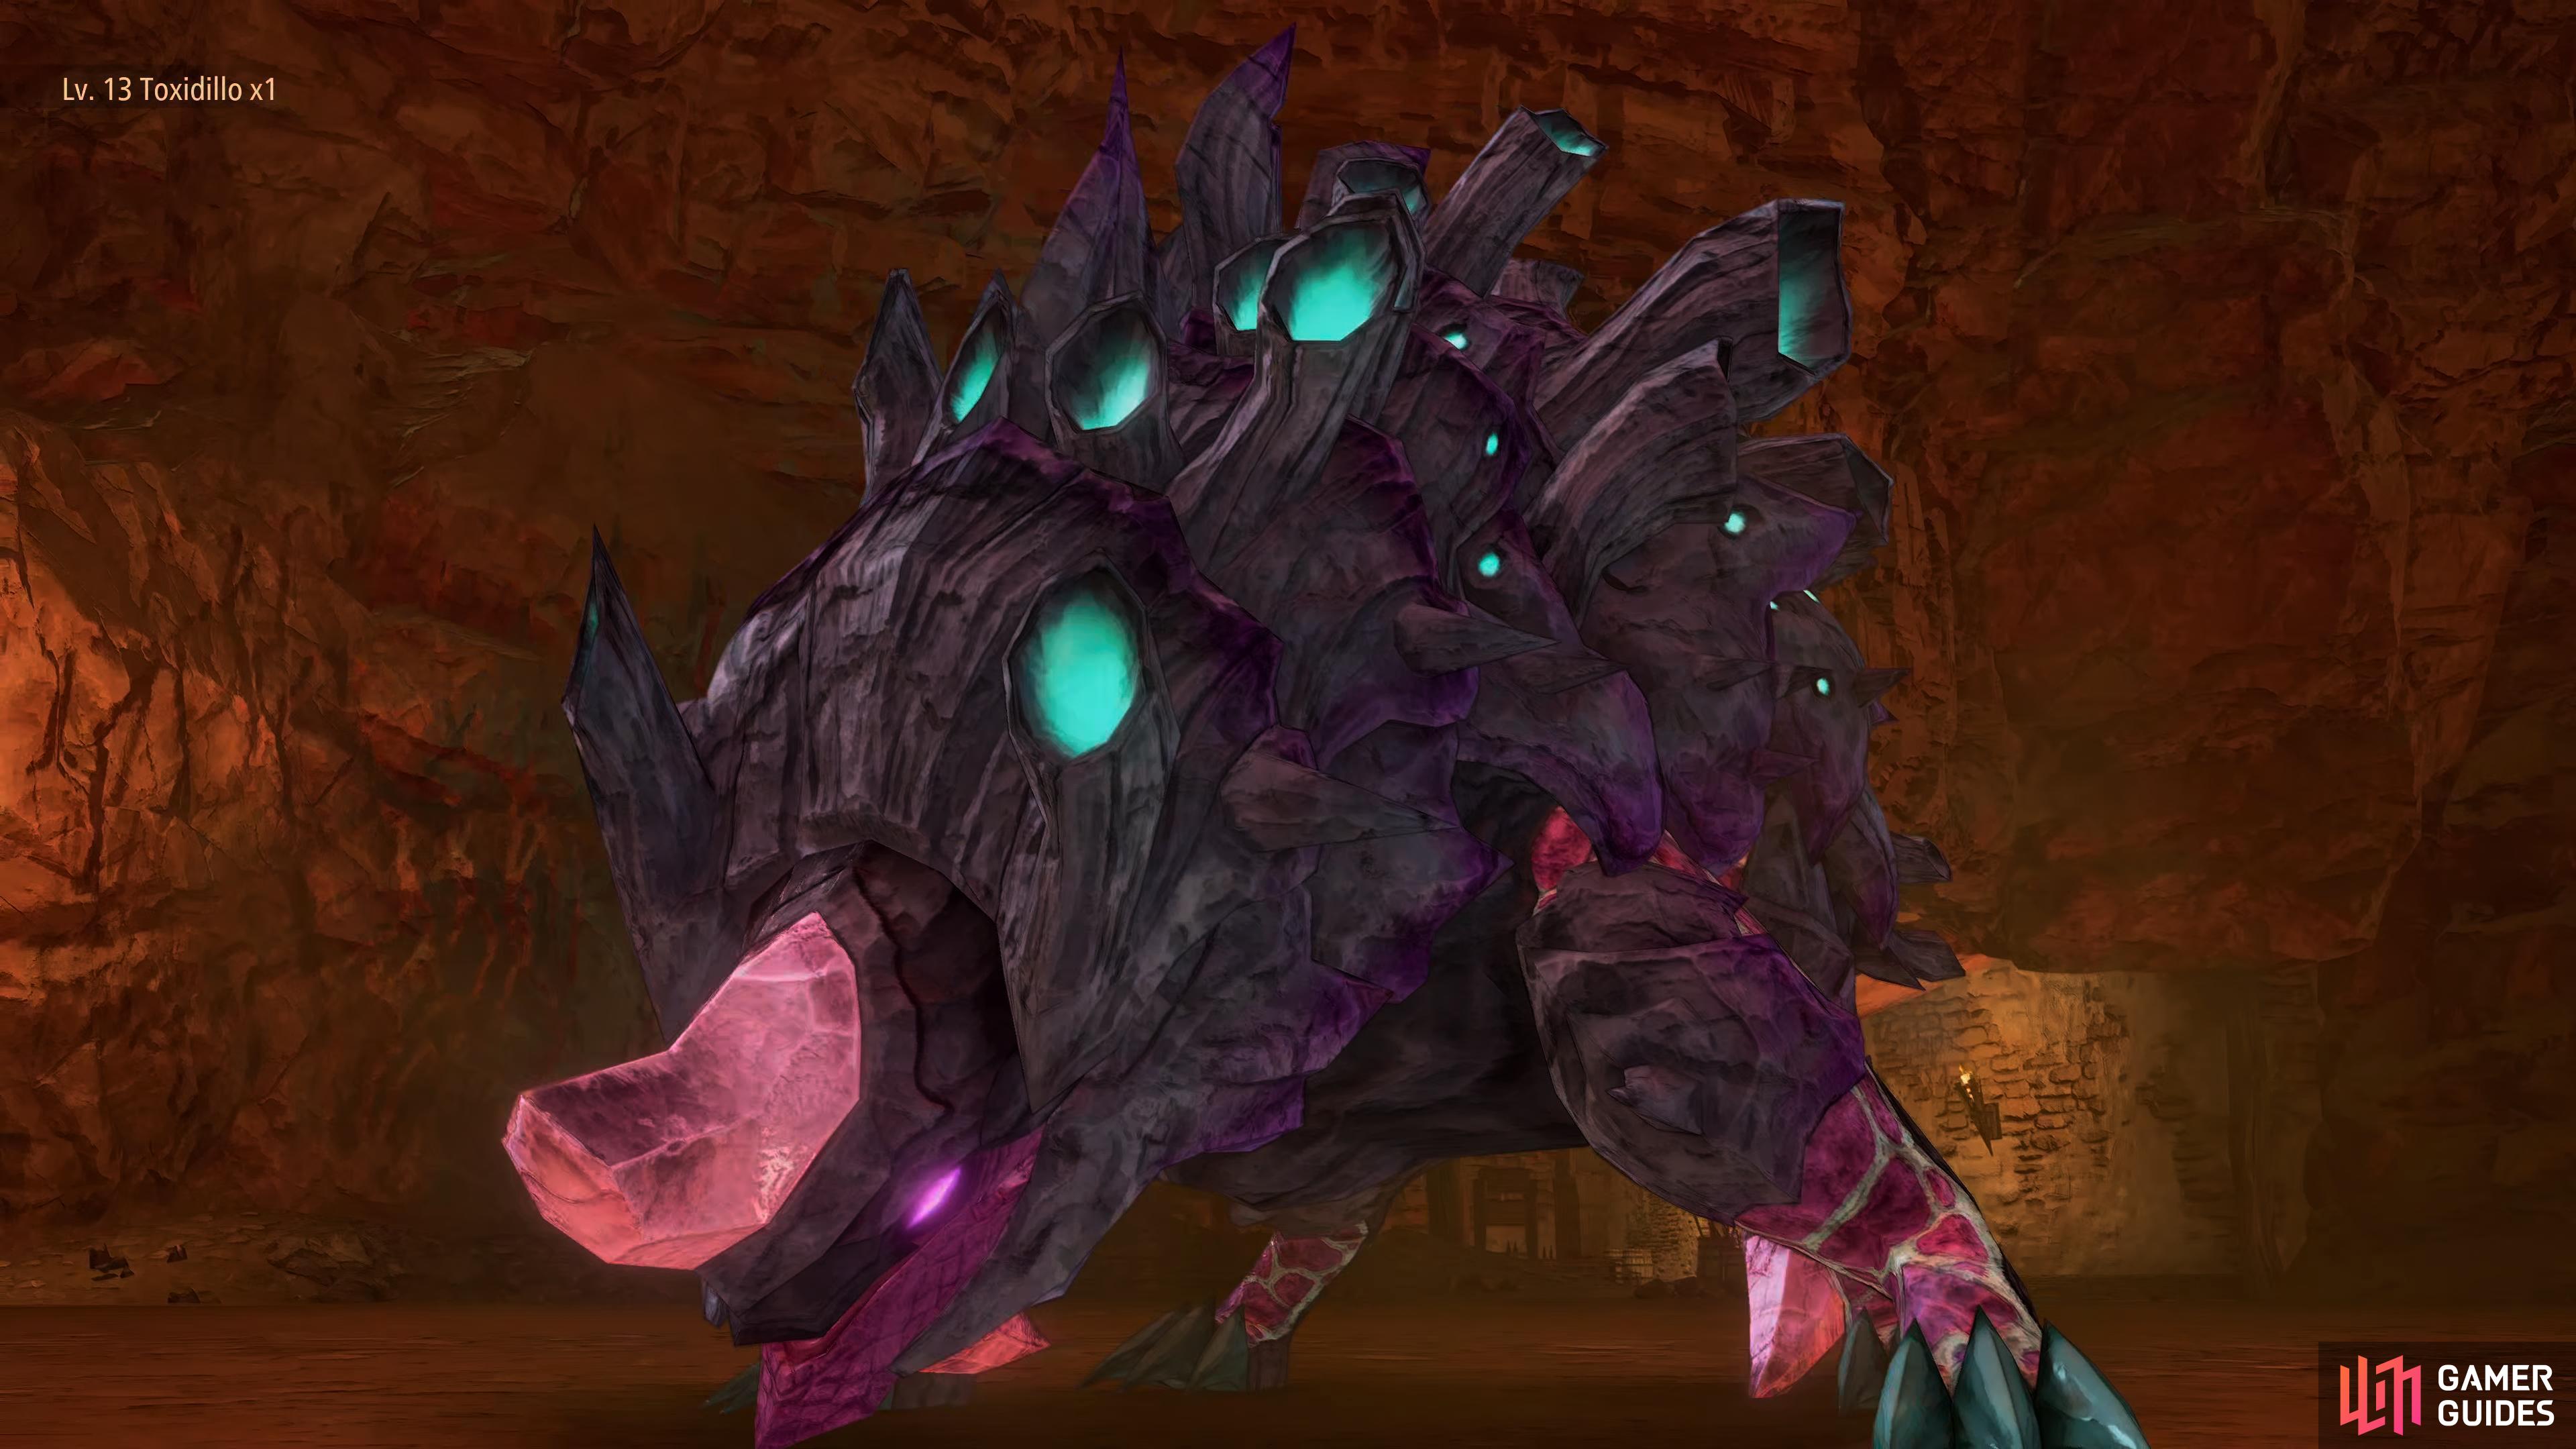
Toxidillo is a Gigant in Glanymede Castle.
| Gigant | Lv | Weakness |
|---|---|---|
| Toxidillo | 13 | – |
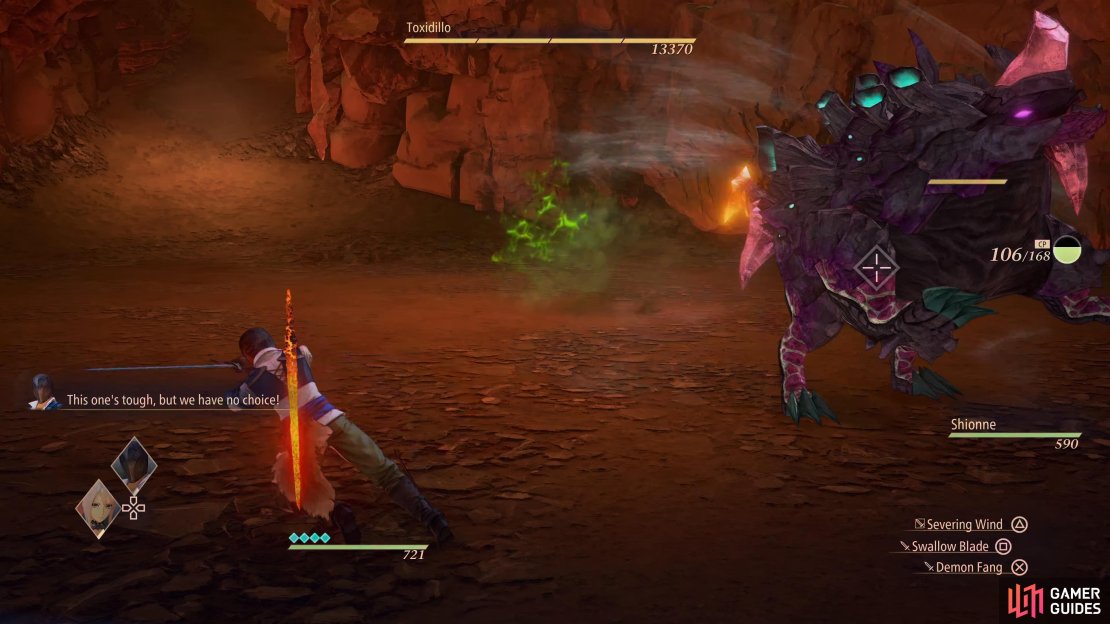
This will be the toughest battle you’ve encountered yet, but it’s also good practice for what lies beyond it. You’ll need to be careful with your attacks and ensure you don’t leave yourself open by trying to go for an all-out attack style. The Toxidillo hits hard and, as you might expect, as the ability to Poison you too.
Toxidillo will usually begin the battle with a Charge, this causes him to charge a short distance ahead of himself which will inflict moderate damage should it strike you; this is no different to the regular Armadillo charge so you should be able to evade it easily by now. The more deadly attack to watch out for however is when the Toxidillo stops and spins on the spot, this indicates he’ll use his Toxic Spin attack that sees him spew Toxic around him, keep your distance and wait the attack out before resuming your attack.
This can be hard to judge however, because if the Toxidillo stops and only does a short spin on the spot, get ready to keep evading as it’ll begin using it’s Rolling Bounce attack that sees it constantly bounce around the arena, inflicting large damage should you get struck by it. This is, however, a prime opportunity to use Shionne’s Boost Attack to blast it out of the sky and stun it, allowing you to hopefully use Infernal Torrent with Iron Mask.
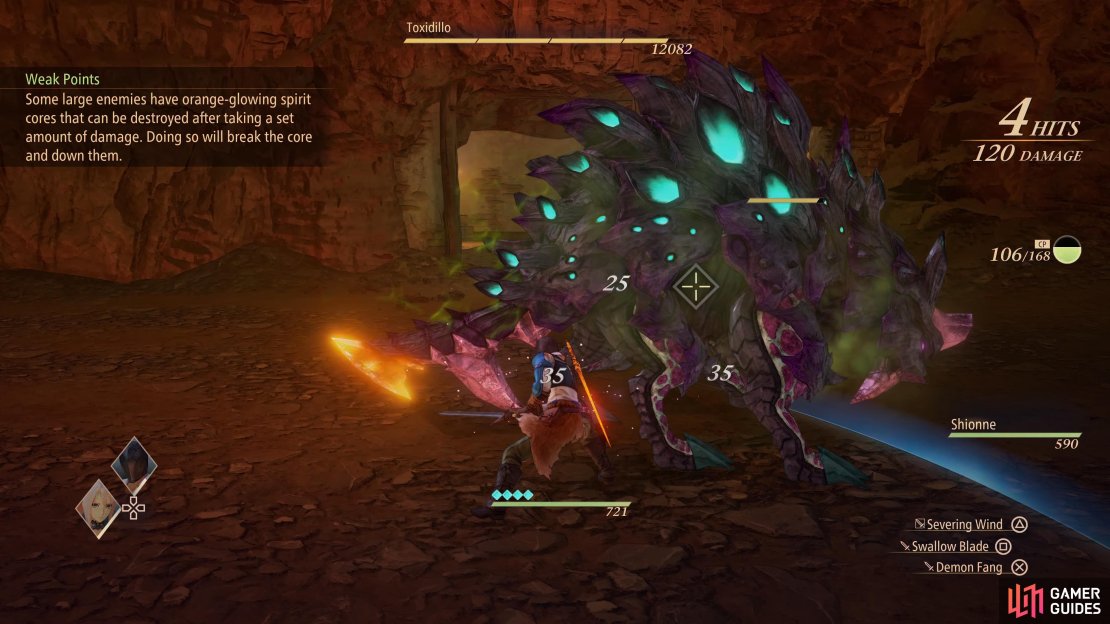
Toxidillo will repeat these attacks until you take it to around half of its HP at which point it will start entering Overlimit, indicated by the blue hue around it. This will increase its attack, speed and grant it a new attack, an Arena Spin that will cause it spin all around the arena, forget about attacking during this and wait the attack out before resuming your attack. Indeed, especially on the Hard Difficulty, considering waiting out its Overlimit before resuming your assault, enemies that are in Overlimit can’t be downed with Boost Attacks which make it difficult to create an opening.
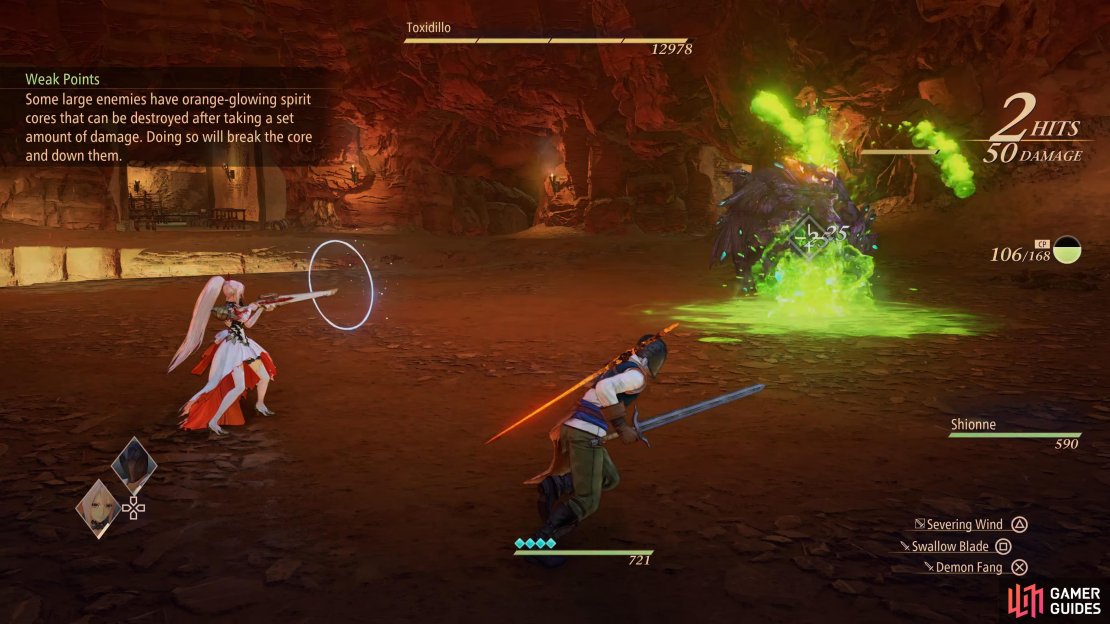
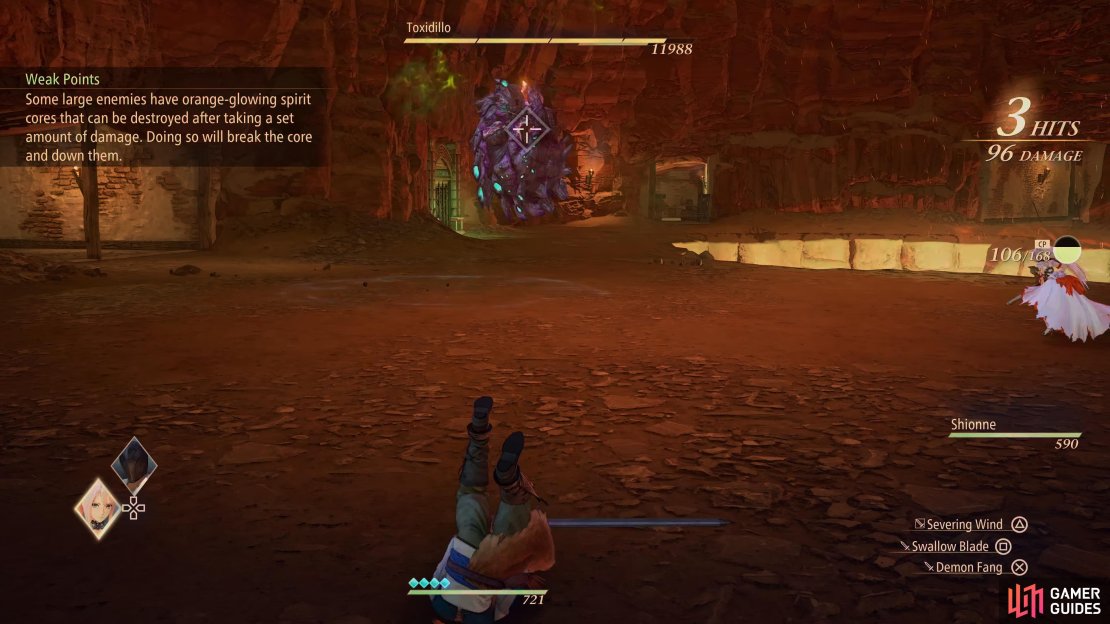
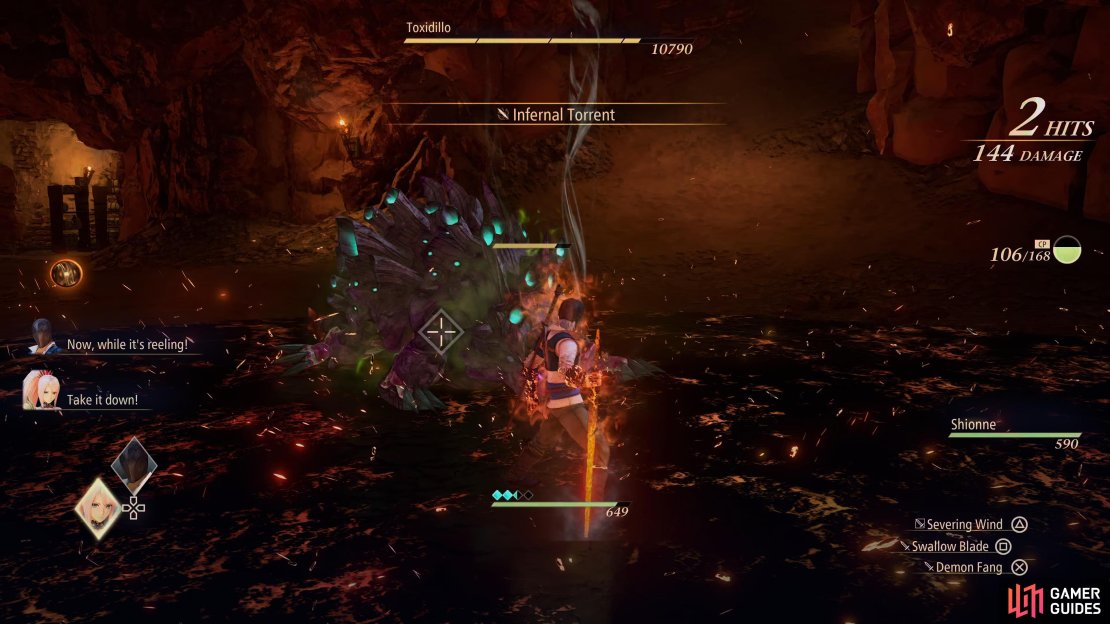
As for your attack strategy, you’ll notice that the Toxidillo has a weak point on its tail, you should aim your attacks at this to hopefully cause a Core Break and stun it for a period, allowing you to go all out with Infernal Torrent for large burst damage. Make use of Shionne’s Boost Attack whenever it finds itself in the air and use Iron Mask’s outside of its Overlimit to down it and get some time to use an Infernal Torrent. It has 12,000+ HP so it’ll be a longer fight than you’re used to but so long as you don’t overcommit, you should be able to take it down.
Your reward for downing the Toxidillo is plenty of EXP and SP (you should be able to obtain a new Skill from this) and your first Astral Flower. Every time you take down a Gigant Zeugle, you’ll obtain an Astral Flower and each of these will grant Max CP +10. Take the time to learn any new Skills and use an Apple Gel or two after, then continue down to the southern edge of the map to find a room housing a Chest containing two Astral Crystal Grains. These Materials will allow you to forge a weapon for both Iron Mask and Shionne but hold off until you’ve fully explored this castle first.
Head around to the west and look the to the east of the first elevator to find a Mining Point, then follow the path all the way to the north of the room to find the final Chest in this castle containing a Garnet. This being the Lord of Fire, and the Accessory reducing Fire/Water Damage -50% should be giving you a strong hint, so be sure to equip this on Shionne for the upcoming boss. Ignore the hallway leading to an elevator to the west and instead, interact with the lower one and use the Elevator Gate Key to activate it.
With this now active, it’s a good time to use Fast Travel to return to Ulzebek’s Inn and forge both the Crude Sword and Basic Rifle, these will give you an edge in the upcoming boss. It’s also a good idea to rest and eat some fresh food, Grilled Mushrooms will help with its Elemental Defense Up boost, but you can’t go wrong with that or Porridge. Once you’re ready to finally encounter Balseph, Fast Travel back to Glanymede’s 1F and use the elevator to return to the 4F. You’ll need to deal with two Calaglian Armored Swordsmen before you can access the next elevator, do so and take it up to reach the Top Floor.
Walk forward and make use of the Healing Light, this will restore all your HP and CP and usually indicates a major battle is just ahead. Take the time to listen to the Skit that triggers and then ensure Shionne has the Garnet equipped and Iron Mask the Warrior Emblem. Once all of this is done, head through the doors for a showdown with Lord Balseph.
Boss: Lord Balseph

Lord Balseph is the boss of Glanymede Castle.
| Boss | Lv | Weakness |
|---|---|---|
| Lord Balseph | 15 | – |
Phase One
Lord Balseph is your first boss battle and the first of the Lords you’ll encounter during your adventure. These battles are often extreme tests of your skills and unlike most regular battles, you’ll really need to pay attention, not leave yourself open and only use the Blazing Sword as and when an opportunity presents itself. This is even more important on the higher difficulties as most of their attacks will most likely down your or bring you close to it, with the harder difficulties sometimes adding in new mechanics too.
True to his stature, Balseph is a brute and despite his attacks being slow, they pack a punch, so you’ll need to wait for an opening. Most Lords tend to aim for the player-controlled character, so you can use this to your advantage to use Iron Mask and keep him away from Shionne. During this first phase, Balseph will often charge on the spot and unleash a quick Explosion, this deals moderate damage to anyone nearby so should you see him crouch down, be sure to evade away.
His Axe Slam requires a bit more work on your part however to avoid, Balseph will jump into the air and slam his axe down, create a ring of fire from the impact, be sure to keep your distance and leap over the flames as they approach. This is however, another prime time for Shionne to use her Boost Attack while he’s airborne and down him, leaving him open. After Shionne comments on it, the next time Balseph attempts to use this will prompt a special Boost Strike with Shionne, use it to trigger a unique attack that will down him and leave him open.


He has several variations of strikes with his axe, with the most common being a simple Axe Swipe that covers a large range. More troublesome however, is when he charges at you and performs his Axe Charge, either dash away from him or get ready to avoid the wide arc of the axe once he closes in on you. Balseph will also launch himself in the air and attempt to use a Ground Pound on you that will deal large damage should it strike you, this is much easier to avoid than his Axe Slam.
This first phase shouldn’t cause too many issues so long as you only go in for attacks when Balseph is open. Make use of Iron Mask’s Boost Attack to down him and follow it up with Infernal Torment while Shionne is useful for keeping damage up against him for a distance. Once you take Balseph down to 50% HP, you can use a Boost Strike that will end this phase of the battle and trigger some cutscenes.
Phase Two
With the addition of the Fire Avatar, Balseph becomes a lot trickier up on the roof of Glanymede Castle. Despite the HP gauge for it, you can’t target or deal damage to the Fire Avatar, you’ll need to focus on dealing with Balseph instead and he won’t gain any new attacks during this phase.
What is new however, is the Fire Avatar will attack the battlefield throughout so try to avoid attacking Balseph when he’s close to it and keep an eye out for it. The Fire Avatar will often use an Arm Swipe attack that will swipe across the battlefield, be sure to evade backwards to avoid this lethal attack. The Fire Avatar will also cast Fireballs that home in your location, keep on the move, evade and drag them away from Shionne to protect her. After the Fire Avatar has used a few attacks against you, you’ll get a trigger for a special Boost Strike with Iron Mask, use it to disable it for a period of time and allow you to focus on damaging Balseph without worry of extra attacks from it.
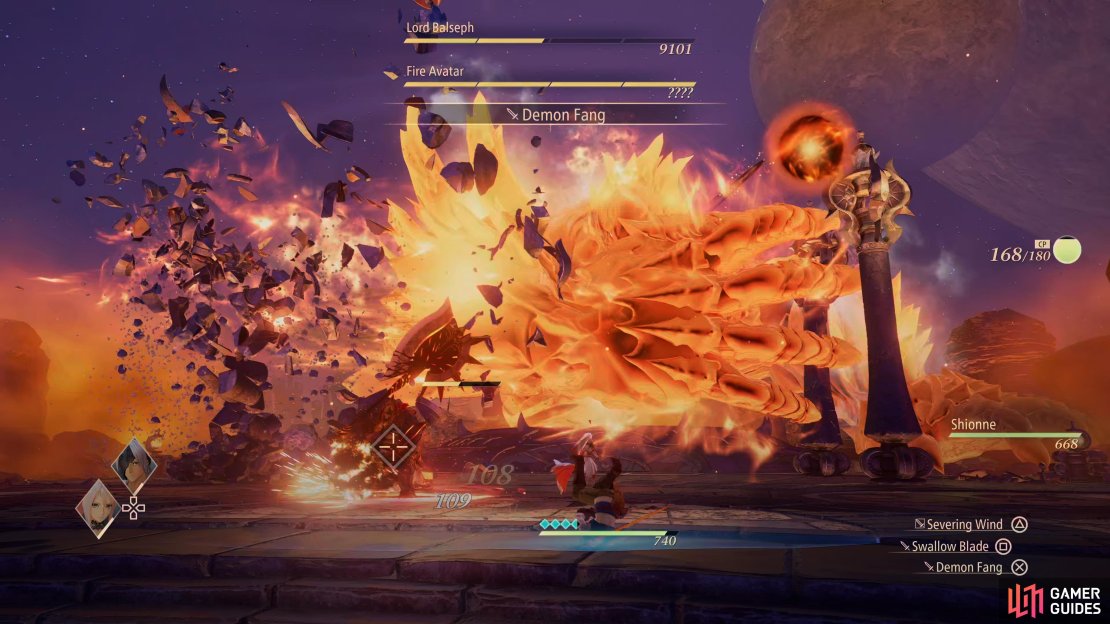


Once Balseph is near death, he’ll use his Overlimit and begin charging his Mystic Arte, this is your cue to go all out on Balseph or risk taking massive damage, and perhaps a party wipe if your HP is low, from his Pyroclasm Mystic Arte. Dash to the back of the battlefield and get ready to evade the massive pillars of flames that come shooting your way, each one that strikes you will deal well over half of your current HP. Regardless of whether you manage to defeat Balseph before he uses this or not, drain his HP to 1 and use a Boost Strike to end the battle, bringing an end to the Fire Lord’s reign and earning the Emissary of Liberation Trophy/Achievement.
No Comments