Mount & Blade II: Bannerlord Battle Tactics Guide
This section covers how to control your forces on the battlefield. For a detailed personal combat guide, see Combat.
Assigning Unit Groups
Once you have an army of sufficient size to accommodate multiple infantry, ranged, and cavalry units, you can begin to think about how best to use them on the battlefield. There is a fairly comprehensive system for organising your troops in the thick of battle, but it can take a while to become familiar with all of the options available to you. The first thing you need to understand is how to access specific groups of troops. By default, you can select up to eight different groups of warriors in order to issue specific commands to them. Each group can be selected by using numbers 1 - 8 on your keyboard. You can press 0 to select all of your troops, regardless of their group.
The particular troops which are assigned to each number by default will depend on the structure of your army. For example, if you have multiple ranged units of different cultures, skill level, or even weapon type (between bows, crossbows, and throwing weapons), these will be assigned to the same number as ranged units by default. Once you have enough of each type, you can then consider how you might want to assign them more specifically, such as separating bows from crossbows, or assigning throwing units to their own key so that you can use them to flank an enemy and function as ranged shock troops. Without your own customisation, troops will be assigned into four basic categories: Infantry, Ranged, Melee Cavalry, and Ranged Cavalry.
Basic Tactics & Refining Unit Groups
While your army can function effectively for most battles with the default unit categories, you will certainly find it more useful to increase the control that you have over specific types of troops by separating them as much as possible. For example, numerous different types of infantry units will do just fine when charging a group of bandits or a relatively low level, small army. However, when it comes to fighting multiple highly experienced, large enemy armies, you will need to ensure that your troops don’t become overwhelemed in one place. An effective method for preventing this involves separating heavily armoured infantry, such as spearmen, from more lightly armoured but aggressive berserkers.
In this scenario you can send in your spearmen to meet the main bulk of enemy infantry units, while reserving your berserkers for when the spearmen might be overwhelmed. To leave your most aggressive troops in reserve may seem counterintuitive initially, but when you consider that Bannerlord AI often leans toward flooding you with infantry, the main bulk of your forces can quickly become surrounded. Reserving a group of shock troops such as berserkers will allow you to break through one side of any force that might overwhelm your main infantry, while inflicting heavy damage from behind. This can be combined with a cavalry charge which will further demoralise the enemy, thereby increasing the chances of them fleeing.
A similar tactic can be used by specialising specific ranged units. For example, if you assign all archers to one key, you can assign crossbows or throwing weapons to others. This will allow you to use the superior range of archers to inflict as much damage as possible on any incoming force. At the same time, you can maneuver crossbows or throwing units to either side of an attacking force once it reaches your main melee units. You can then inflict heavy losses on all sides of an army that will be primarily engaged with your infantry. However, you will need to ensure that any ranged units used to flank are protected by heavy melee units or cavalry, lest they be trampled by enemy cavalry.
Battle Orders and Formations
One of the great joys of Bannerlord battles and part of what makes them so unique is the capacity to control your army with battle orders and formations. In terms of basic usage, these are utilised by using the F1-F7 keys, with the possibility of customising them further in the game options, as mentioned above. Below is a list of basic commands and formations associated with each key and its subcategories, along with a brief description.
F1: Movement Commands
You can select this key immediately to control your entire army and instruct all forces to obey the given movement command. However, if you want to control a specific type of unit to follow a particular command, you will need to select the number that the unit is assigned to first. For example, if your infantry units are assigned to number 1 on your keyboard, press 1 first to select them, and then press F1 to bring up the movement command options.
-
[F1] To Position: Moves specific unit to a position of your choice without breaking formation
-
[F2] Follow Me: Units will follow wherever you roam on the battlfield
-
[F3] Charge: Units will charge enemy forces in no particular order
-
[F4] Advance: Units will take a few steps forward without breaking formation
-
[F5] Fallback: Units will take a few steps back without breaking formation
-
[F6] Stop: Units will cease to follow an order that has recently been given
-
[F7] Retreat: Units will retreat from the battlefield, allows you to select which
-
[F9] Return: Allows you to return to the previous command menu or exit command menu
The above commands may seem overly simple, but they are essential to understand in order to command your forces effectively. For example, at the beginning of a battle you can choose to advance your ranged units (F4) a few steps forward to bring them within firing range of incoming forces. This will ensure that you’re inflicting as much damage as possible before the enemy has fully engaged, providing you with an opportunity to demoralise enemy troops. Charge (F3) can be used to command all troops to attack immediately, and is the quickest method of dispatching an insignificant attacking force, but you can also use it to specifically command your heavy melee units to meet the charge of an enemy. Meanwhile, you can position specific units such as cavalry or archers under cover of foliage, ready to strike at the appropriate time. Alternatively, you might want to command infantry to fallback (F5) to a position of cover, allowing your ranged units to take out enemy forces chasing behind. Each of these commands can save you time, preserve army cohesion, and ultimately reduce your losses while inflicting as many upon the enemy as possible.
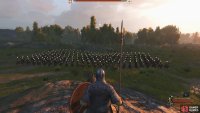
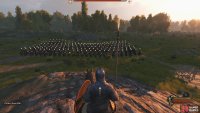
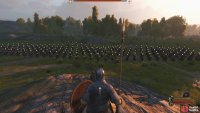
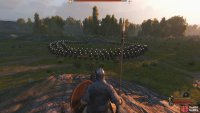
F3: Formation Commands
-
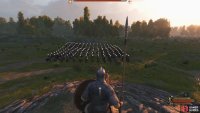
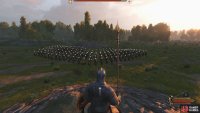
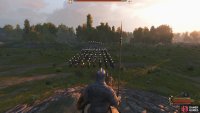
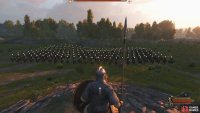
[F1] Line: Forms a basic line of troops
-
[F2] Shield Wall: Forms a dense shield wall, used to protect from infantry and cavalry charges
-
[F3] Loose: Forms a loose formation, used to minimise ranged impact, good for horse archers and skirmishers
-
[F4] Circle: Forms a circle of troops, can be used to defend vulnerable units within
-
[F5] Square: Forms a square, similar to lined formation
-
[F6] Skein: Also known as V formation, often used by cavalry to more effectively penetrate a line of defence
-
[F7] Column: Forms a long column of troops, similar to lined and square formations
-
[F8] Scatter: Forms a scatter of troops similar to loose, used to minimise ranged impact, good for horse archers and skirmishers
Aside from the large subcategory menus of movement (F1) and formations (F3), you can utilise F2, F4, F5, F6, and F7 for the following commands:
-
[F2]: Change the direction in which your forces are facing
-
[F4]: Alternate between commanding units to Fire At Will or Hold Fire.
-
[F5]: Command units to mount or dismount
-
[F6]: Delegate command of a specific unit type to a sergeant
-
[F7]: Choose units from a specific group to retreat

No Comments