
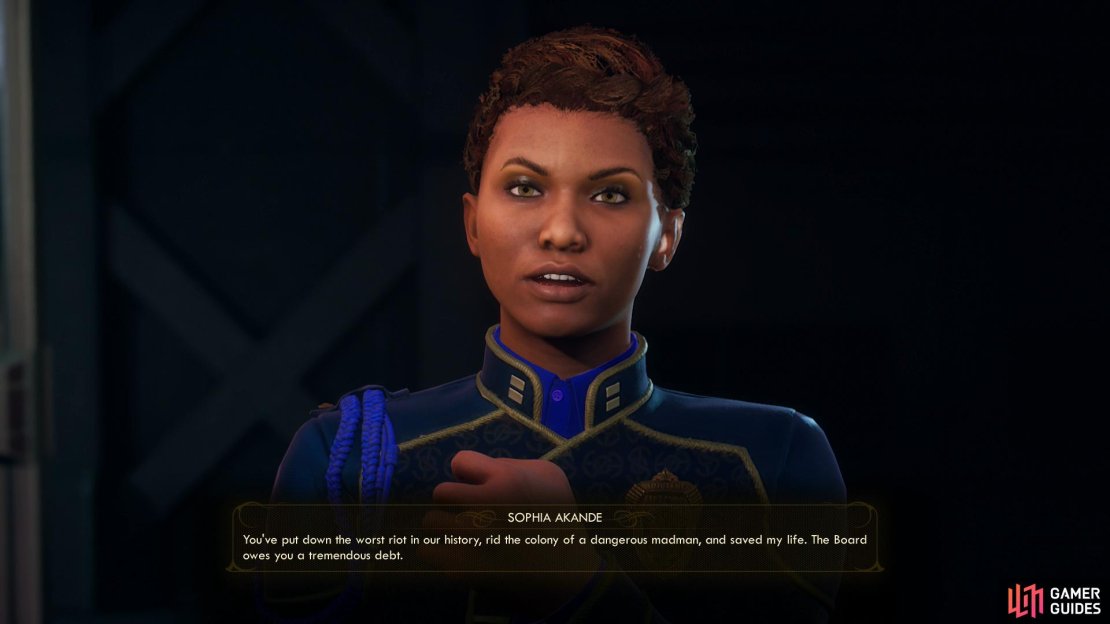
The last quest in the game, like Kept Secret But Not Forgotten, varies a bit depending on which faction you sided with, although this time there are less shades of gray. If you skipped the Hope to Terra 2, you sided with Phineas and will be facing down Akande and the Board on Tartarus. If you skipped the Hope to Tartarus, Phineas will have broken free, seized control of the prison, and your foes will be the former inmates, now well-armed.
As usual you have options, and however you want to tackle this quest preparation is going to count a lot more for how this quest plays out than execution. That being the case, we’ll try to get you ready to finish your adventures in Halcyon. We’ve neglected it in this guide thus far, save for introducing you to it at the beginning of the game, but now is a fine time to become reacquainted with your friend, the Vocational Competence Respecification Machine. Once you’re done with Tartarus, the game is over, so you don’t necessarily need to worry about being as well-rounded for this part as you may have been earlier. We’ll discuss various options below and what gear/skills you should aim for, and let you decide what route to take.
Final Preparations - Combat
The most difficult approach is probably combat, which isn’t necessarily saying much, since you can, with the right skills, just walk through the final dungeon and talk your way out of all fights. More on that in a bit. The enemies you’ll face consist if either corporate troopers (if you sided with Phineas) or escaped prisoners (if you sided with Akande) and there are some noteworthy differences.
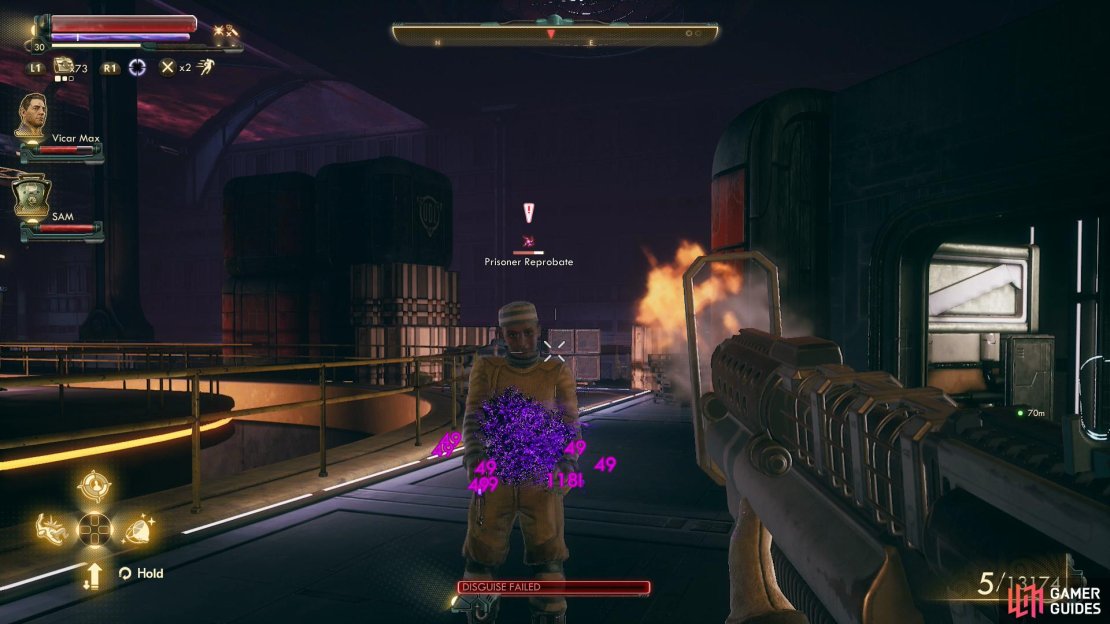
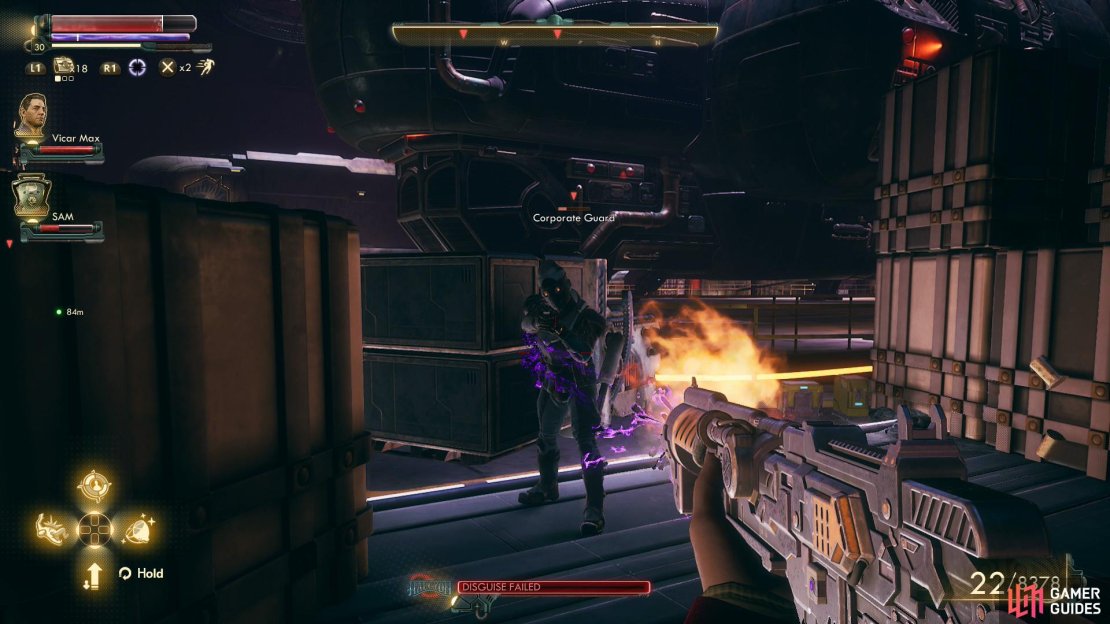
The corporate troopers are well-armored, typically having between 40-80 armor while the prisoners are more lightly armored, rarely exceeded 20 armor. That being the case, n-ray weapons and corrosive damage will work wonders for the former, and plasma is viable for the latter. In both cases we found stealth and sniping to be the easiest way to advance, even though we could only pick off the weakest of foes with a single headshot - the damage output of, say, a fully upgraded Pink Skip made armor fairly redundant. This was especially true in Hard difficulty, as long range encounters usually gave us time to pick off one or two foes from afar before the rest of the enemy could reach us. We generally fared less well in short-to-mid range combat - enemy technicians can deal tremendous damage with heavy weapons in a very short time.
You’ll also have to fight the odd medical drone, which can sustain allies - when they’re around, make them a priority, as they can turn, say, a corporate commander into a relatively sturdy nuisance into a nigh invincible foe. Again, we found corrosive damage fairly effective, as well as high-powered rifles in general. Anything that does more damage in a single shot, like Dead Eye Assault Rifle II’s.
Hard mode can be a challenge, and given the volatile nature of combat we absolutely do not recommend you try to fight your way through Tartarus on Supernova difficulty. That said, you can return to your ship at any time to rest, sleep, save, repair, swap companions, etc., even though you cannot actually leave Tartarus.
You can, of course, use stealth to avoid trouble areas and pick your fights, as well as to facilitate telling first strikes. Some parts of Tartarus are pretty populated and don’t give you a lot of room to maneuver - specially the second half of the prison, where you’re essentially limited to circular walkways and the odd hallway.
Upgrade your weapons and armor via Tinkering, make sure you have n-ray, corrosive, plasma and/or high-damage per shot weapons to bring with you, and that the skills covered by said weapons are 60+. If you plan to use the Vocational Competence Respecification Machine, it might not be a bad idea to boost Science to 100 so you can afford to tinker more. Especially in Hard difficulty, no amount of damage or armor should be left on the table.
Final Preparations - Diplomacy and Duplicity
If you want to try a more nuanced approach (highly recommended for Hard/Supernova!), the Vocational Competence Respecification Machine will also come in handy. In many respects it’s hard to see why you need to be competent in both combat and… well, anything else at this point in the game. If you get into a fight, you’ll probably want to be very good at it to overcome the foes you’ll be facing, enough so that you can dispense with superfluous skills you won’t be using. On the other hand, if you invest in Dialog, Stealth and Tech skills you won’t need anything invested in combat.
You can literally walk your way through Tartarus if you have all your Dialog skills (Persuade, Lie and Intimidate) maxed at 100. This seems daunting, but with the Chimaera outfit (complete the quest Makes Space Suits, Won’t Travel) and the Armor Master perk, you’ll have a +20 bonus to these right out the gate. If you invest 60 skill points in Inspiration, any two companions can boost any two Dialog skills by up to 40 points each. 150 skill points - roughly half the amount available in the game - will allow you to stroll to victory. Not bad.
If you want to avoid all fights in Tartarus you will need a Dialog skill (any one - doesn’t matter which) to be 100 before traveling to Tartarus without companion boosts, or 80 points and Chimaera + Armor Master. You can drop this even lower with a good bit of headware, like A Nice Hat (+7 Persuade, +14 with Armor Master). To maximize your skill spread, boost Persuade to 66, ensure you have Armor Master and wear Chimaera and A Nice Hat. This honestly isn’t a bad idea for anybody, as it’s hard to overstate how much easier Tartarus will be if you travel there with any Dialog skill at 100.
Other useful skills include Lockpick and Hack, of course. If you want to avoid a boss fight you’ll need a Lockpick skill of 100 and a Hack skill of 90~, both final values allowing for boosts from companions and gear, of course. That said, if your Dialog skills are good enough you don’t need them, as you can talk your way out of the same boss fight before you have the need or opportunity to use Hack or Lockpick, but it’s still worth mentioning. If you boost your Dialog skills, you can settle for a measly Lockpick 55, which will help you open a door and shorten your visit… but again this doesn’t matter, as Dialog can substitute for that, too. Finally, there are a lot of locked containers that require Lockpick 85. You won’t need the loot, as the game ends after this anyways, but if you planned to do some fighting… well, it might get you a trivial amount of Bits and gear that you can put to use?
Science 90 will also pop up in dialogue, albeit combined with a Persuade 90 check, as will odd outliers like Heavy Weapons 60, 2-Handed Melee 60, Handguns 90, Medical 60 and Engineering 60 (the last one only if you sided with Phineas), but these are all less frequent and should be given less consideration than the aforementioned Dialog skill, Hack and Lockpick.
There are also several attribute checks that generally require you to have +3 in said attribute. These include Charm (if you skipped the Hope to Terra 2), Intelligence (if you skipped the Hope to Tartarus), Temperament and Perception. There’s only so much you can do to boost these, but if you have +2 in any of these skills, bring along some caffeine to boost your Mind attributes by +1 (Intelligence and Perception) and some alcohol to boost Personality attributes (Charm and Temperament).
Final Preparations - Summary
That’s a lot of information, so summary of what skills to have and what/who to bring is in order. To pass as many checks as possible, avoid every fight (if you wish), and generally be as prepared as possible for Tartarus, this is what we suggest:
-
Boost your Science score to 100. Respec if you have to. Make n-ray, corrosive and (if you skipped the Hope to Tartarus) plasma weapons. Tinker with and mod your weapons so they’re as powerful as possible.
-
Consider boosting Engineering to 60, then shoot a weapon, repair it, and try to make it pristine. If you’re doing any fighting on Tartarus, you’re going to be firing a lot, and having a pristine weapon will prevent you from having to repair your weapons quite so often. This costs around three Weapon Parts per repair, but it’s better than having your guns constantly underperforming in battle.
-
Ensure any one Dialog skill is 100 without the aid of companions.
-
Travel to Tartarus and acquire a Biometric ID Cartridge (see below) with aforementioned Dialog 100 skill check. The easiest way to do this is Persuade 66 (base), the Armor Master perk, Chimaera and A Nice Hat attire.
-
Respec your character and set the following skills:
| Skill | Base | Adjustments | Total |
|---|---|---|---|
| Persuade | 80 | +20 (Chimaera) | 100 |
| Lie | 80 | +80 (Chimaera) | 100 |
| Intimidate | 50 | +20 (Chimaera), +38 (Max), +44 (SAM) | 152 |
| Hack | 50 | +38 (Max), +40 (SAM) | 128 |
| Lockpick | 100 | -- | 100 |
| Inspiration | 60 | -- | 60 |
With these skills you’ll be able to do pretty much everything you could care to do on Tartarus. It’s worth noting that 1) this setup also got our protagonist up to Science 100 without spending a point, just through the virtue of having Vicar Max and SAM as companions and 2) we still had nearly 80 skill points left over, so you could also dump points into a weapon tree if you wanted to be competent in combat, too. Chipping in a few points to get Engineering up to 20 wouldn’t hurt, either, so you can perform field repairs.
Finally, gather up any drugs you might need for the fight ahead, including healing Adreno, caffeine and alcohol if you want some attribute boosts for some dialogue checks. No sense in leaving anything behind. When you’re done, set your destination to Tartarus and the game will warn you that you’re passing the point of no return and offer to make a hard save for you. Do what you will, then proceed to Tartarus.

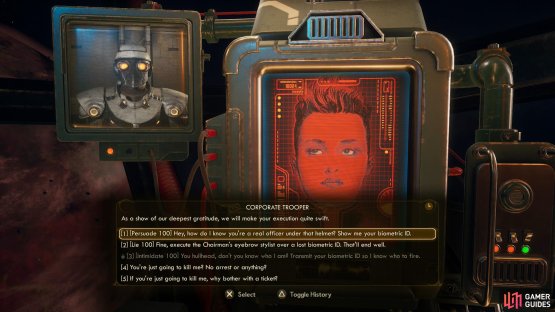
(1 of 2) When you approach Tartarus, you’ll be contacted by a trooper

When you approach Tartarus, you’ll be contacted by a trooper (left), Regardless if you sided with the Board or with Phineas, you can pass a check to get a biometric ID cartridge. (right)
Arriving at Tartarus - The Biometric ID Cartridge
When you approach Tartarus you’ll be contacted by a corporate trooper.
If you skipped the Hope to Tartarus he’ll be in a panic about the prisoner revolt incited by Phineas. Respond however you wish the first time you get a chance, after which be sure to say “I’ll handle it, but I need a prisoner’s biometric ID so I can disguise myself.”. He’ll balk about violating Board protocol, which is apparently something he values more than his life. Pass a [Persuade 100], [Lie 100] or [Intimidate 100] check, however, and you’ll get the Labyrinth Prisoner ID Cartridge. If you can’t pass quite so lofty a Dialog skill check, you can instead pass a [Persuade 40] or [Intimidate 40] check to convince the troopers to fight. Their help is marginal, at best, and is in no way comparable to getting that ID cartridge.
On the other hand if you skipped the Hope to Terra 2, the corporate trooper will be somewhat more belligerent, daring you to step out of your ship so they can shoot you and get back to doing whatever bored troopers on a miserable prison planet do. Probably best not to think about it. Whatever you say, you should get an opportunity to demand the trooper’s biometric ID, albeit only if you pass a [Persuade 100], [Lie 100] or [Intimidate 100] check. This will get you the Labyrinth Security Personnel ID Cartridge.
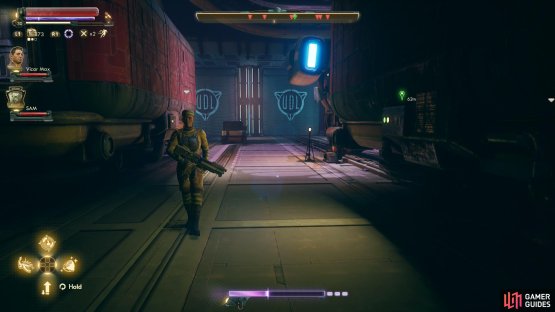
It can’t be overstated how useful this ID cartridge is, as it’ll allow you to use your wonderful Holographic Shroud, in turn enabling you to bypass large sections of Tartarus. One bar of cover should be enough if you want to beeline, but if you want to explore a bit - and only a bit - you can manage… After all, you needed a Dialog skill to be 100 to get this ID cartridge, so it stands to reason your Dialog skills should remain high enough to talk your way out of any confrontations you get into, right? That’s four bars of cover, which is frankly overkill.
Anyways, ID cartridge or not, leave the Unreliable.

(1 of 4) If you earned their trust, Junlei will send Mardets from the Groundbreaker.
Tartarus - Tartarus Docking Facilities
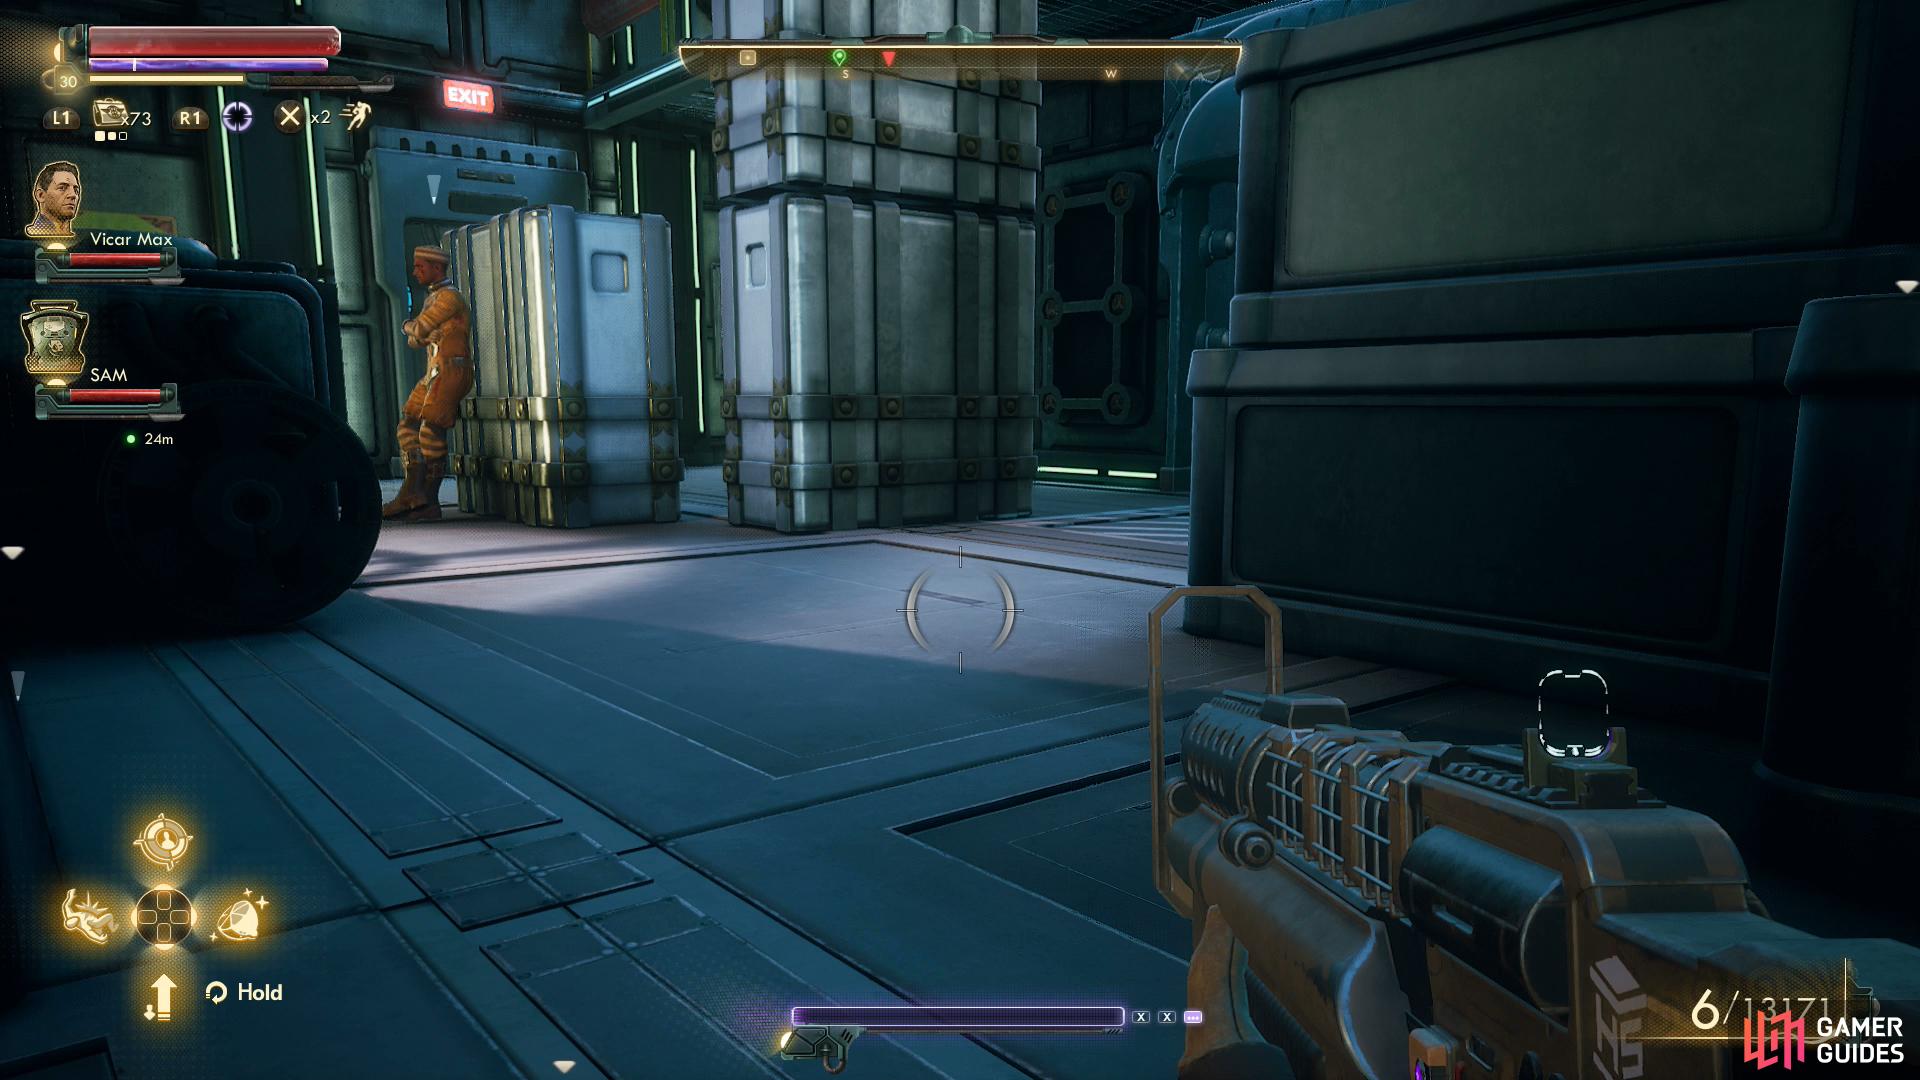
Head southwest, then west across a bridge to enter the restricted zone, then turn south. If you helped the crew of the Groundbreaker - presumably by completing Happiness is a Warm Spaceship and/or keeping your reputation high with them - you’ll hear Junlei basically declare her loyalty to you and send some Elite Mardets to help. They’re quite powerful, and whether you’re walking through with an ID cartridge, sneaking, or fighting, they’ll prove helpful, or at least benign.
Turn southeast when the dock widen to the east, head up some stairs, then continue south to spot a bay door and some stairs leading up to a walkway above said door. If you just want to get past, just head south through the bay door - this can all be accomplished with a single cover bar, although only barely.
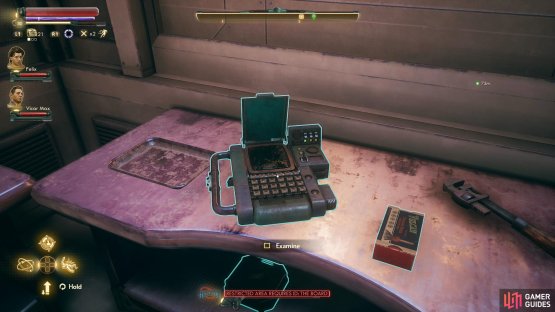
On the other hand, if you want to get something that may prove helpful later, go upstairs and turn right (south) to spot two doors ahead, one straight south and the other to the east. Go through the latter and search some cabinets on the southern end of the room you find yourself in to find the Rotating Password List #1 - AKANDE datapad. It mentions something called a “RAM”, which, frankly, you don’t even have to worry about if your Dialog skills are high enough. Still, options. Exit out the western door, then south and go through the door there [Lockpick 55] and enter the tunnel beyond, where you’ll find a hole in the floor you can drop down. This will put you in enemy-free territory behind the bay door you neglected earlier.
Once you’re beyond the bay door to the south - however you go there - continue south then west and ride an elevator down.
(1 of 2) If you scored a biometric ID, you can just walk past your foes.

If you scored a biometric ID, you can just walk past your foes. (left), If you want more options earlier, search the cargo yard for a passcode datapad. (right)
Tartarus - Cargo Yard
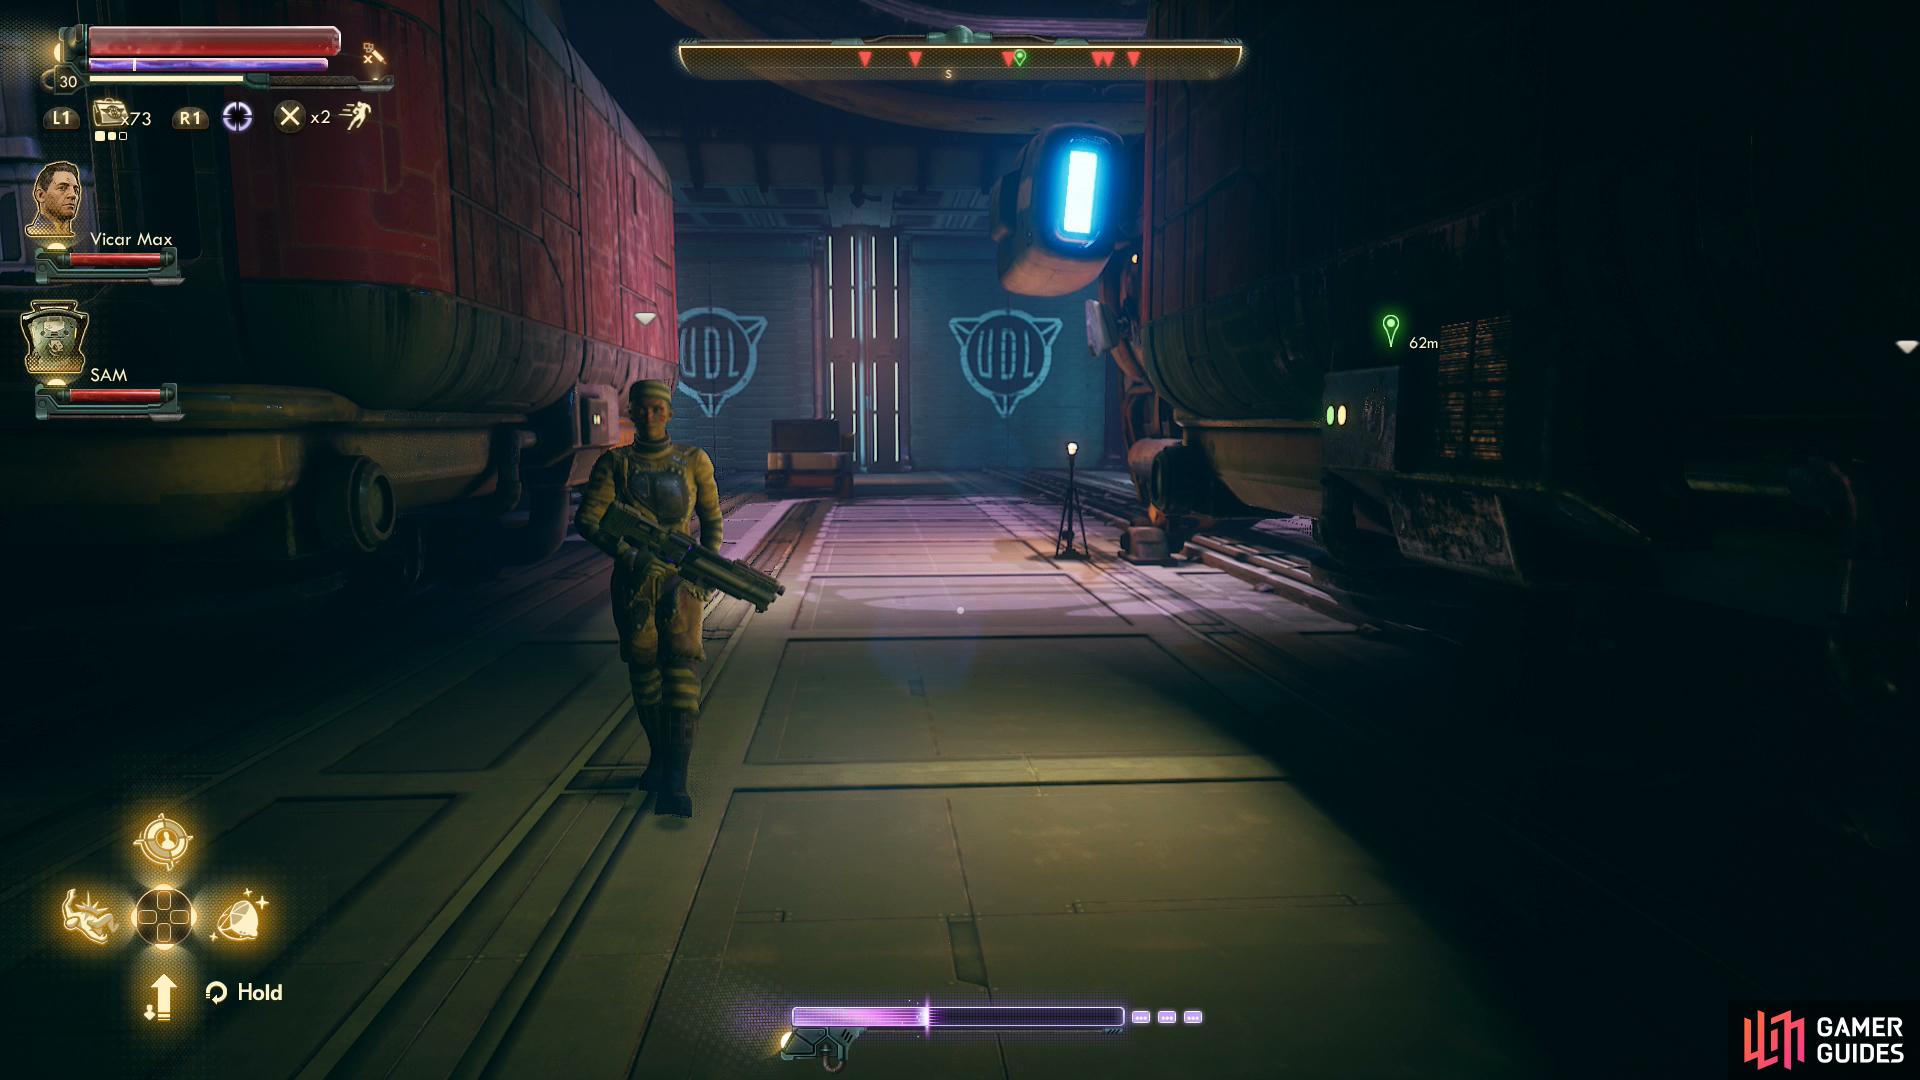
When the elevator descend, make your way east, south, east and north down some stairs, where the path will split. Going down the stairs to the east is the quickest way to the next area, but you can pick up another part of the password more easily by continuing north, then west and south down two flights of stairs.
From here head south through the cargo yard, past some stairs to your left (east) and between two red buildings. Once you pass the red buildings turn left (east) and enter a room where, on a table to the southeast you’ll find Rotating Password List #2 - SMELLSLIKE. Now you can leave the building and either continue south across the cargo yard and ride an elevator up to an elevated platform and go through another large bay door to the south, but this will almost certainly require you to rely on stealth or a dialogue check, as your cover isn’t sufficient to reach the end.
Alternatively you can head back north to the structure you entered from, and go through the door to the east you bypassed earlier. From here you just need to head east a bit, then turn south to see two lines of cargo forming three corridors. Walk south down the middle corridor, jump over some crates, and climb a ladder to the right (west) when you spot it to reach the elevated platform mentioned earlier. You should have just enough cover to make this trip.
Either way, continue south through the large bay door and note a room to the left (east). If you’ve been fighting and/or looting, you’ll be relieved to find vending machines and a workbench in here. Restock, repair and when you’re ready leave the room and continue south through another bay door to reach The Pit.


(1 of 2) With a moderate Lockpick skill score you can use a shortcut
With a moderate Lockpick skill score you can use a shortcut (left), to reach the elevator to the next level. (right)
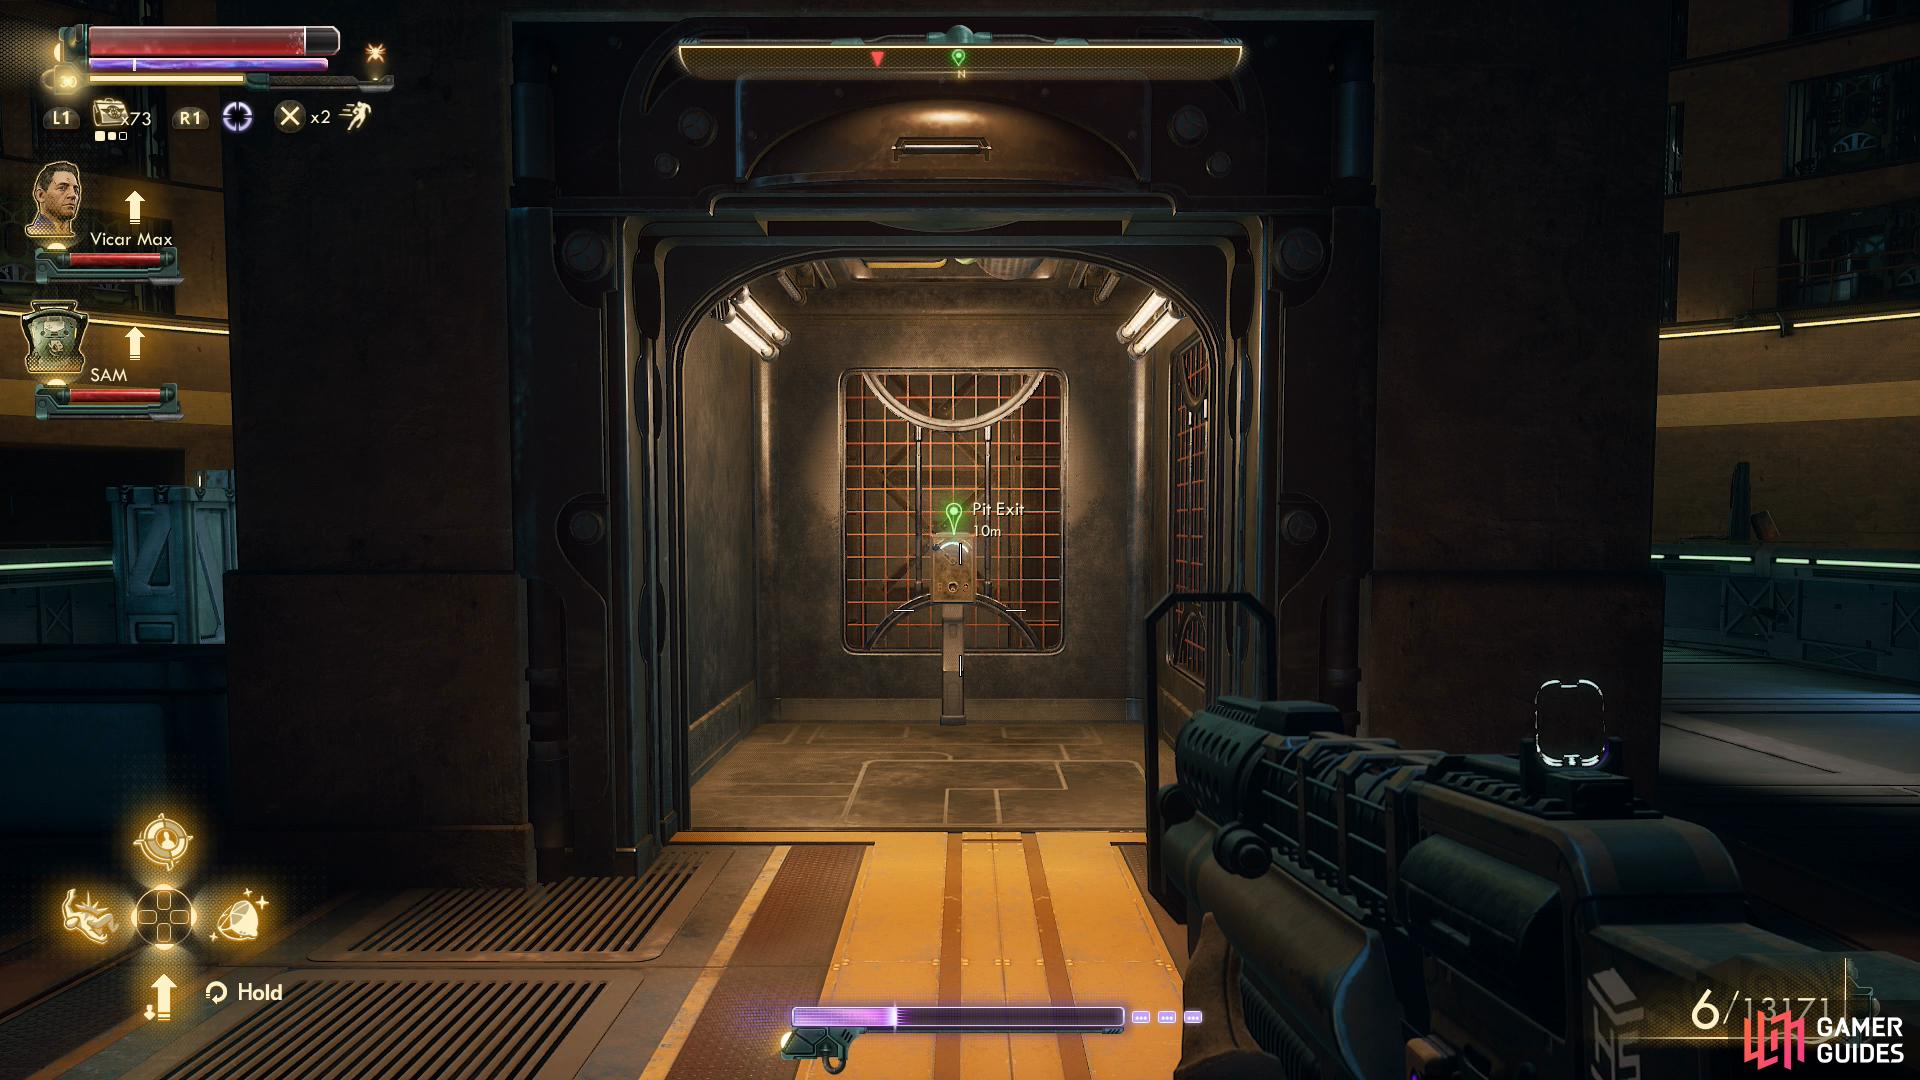
Tartarus - The Pit Lv.1
Once again you’ll have options. The quickest way through this circular level is to simply head east (clockwise) and go through a locked door [Lockpick 55]. Pass through the building beyond, then continue heading clockwise around the level to reach an elevator which you can ride up.
Quickest isn’t always best, however, as you can grab the third and final part of the rotating password here, if you’re willing to travel a bit more. From the entrance head west (counter clockwise) instead of east and when you pass a barricade, descend a ladder to a lower walkway. Continue southwest, then south to find another ladder, climb up it, then continue south to find a blasted hole in a wall you can crawl through.
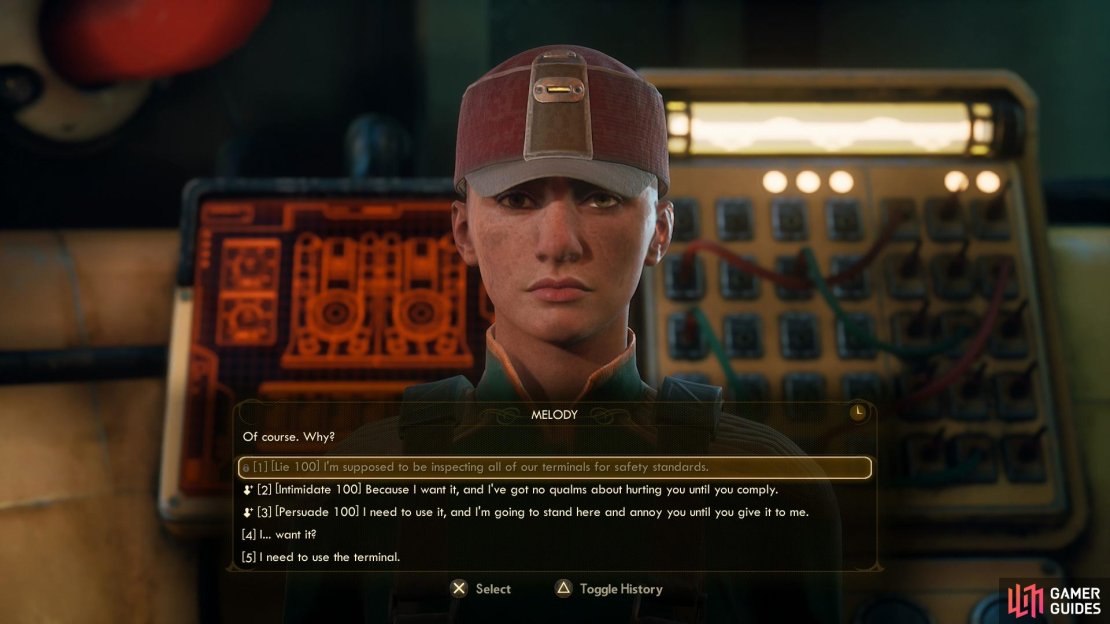


(1 of 3) Pass a difficult dialog check to get the password from Melody
Get through the hole in the wall and you can safely walk around - it’s still a restricted zone, but there are no enemies here. Continue southeast to reach a room full of terminal and two vending machines. Interact with a terminal along the northeastern wall and pick the option [Deliver Pacification Gas], only to be rebuffed, as you need a password. We know what you’re thinking, but no… the password fragments you’ve been finding are used later. Instead talk to a woman named Melody to the northwest and say “Hey, this terminal’s asking me for a passcode. Do you know it?”, then pass a [Lie 100], [Intimidate 100] or [Persuade 100] check to get what you’re after. Return to the terminal land deploy the gas, they look out the window to watch your wonderful subterfuge at work. Wait for the green mist to vanish and you’re good to go.
Now, about that other password. Search a table to the southeast to find the Rotating Password List #3 - BOARST. These guards are channeling some playground-level subversion, here.
You can now just exit the building via the eastern door and continue counter clockwise to reach the elevator - all your opposition on the floor should be dead if you used the gas. Changing floors will not replenish your cover, nor will the gas have killed the guards above, so be ready to… well, do whatever it is you’re set on doing to get through the place when you arrive.

(1 of 2) If you earn their trust, the Iconoclasts will join your assault on Tartarus.

If you earn their trust, the Iconoclasts will join your assault on Tartarus. (left), You can sneak past some enemies by to reach Chairman Rockwell. (right)
Tartarus - The Pit Lv.2
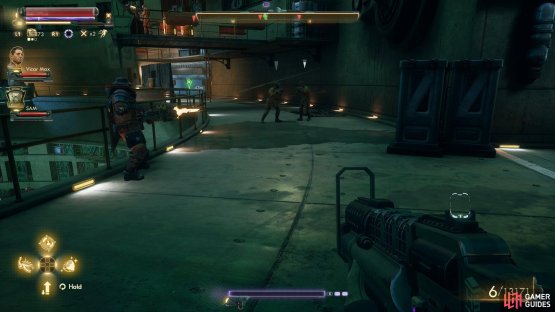
Shortly after you arrive, the Iconoclasts will arrive and lend aid, provided you left them on top of Monarch or allied them with Stellar Bay. If you rescued them, their numbers will include the Van Noys, potentially making this the strongest group of allies that’ll assist you in Tartarus. They should do an admirable job of clearing the foes throughout of most of this floor, if you’re lucky - useful allies!
Iconoclasts or no, barricades will block your way southwest (clockwise) so head north (counter clockwise) instead. Across from the bridge that spans this level you’ll find a large bay door, which is ultimately where you want to go. Be watchful for enemies and when the coast is clear aim to the northwest to find a door along the northern end of a tunnel which otherwise runs west. Go through this doorway to more easily bypass the guards or just fight your way west. Either way, at the end of the hallway you’ll find a door to the south which leads to a cargo room occupied by foes.
Even being optimistic, the Iconoclasts didn’t clear this out, and although the enemy density is high, there’s a lot of crate to hide behind. If you’re going to fight, station your companions in the room to the north, start out with a sneak attack, then retreat through the door to force them through a bottleneck. If you’re sneaking, make your way west, climb a ladder to reach an elevated walkway, then follow it south and watch the guards below. When the coast is clear, climb down another ladder then scramble through a door to the south.


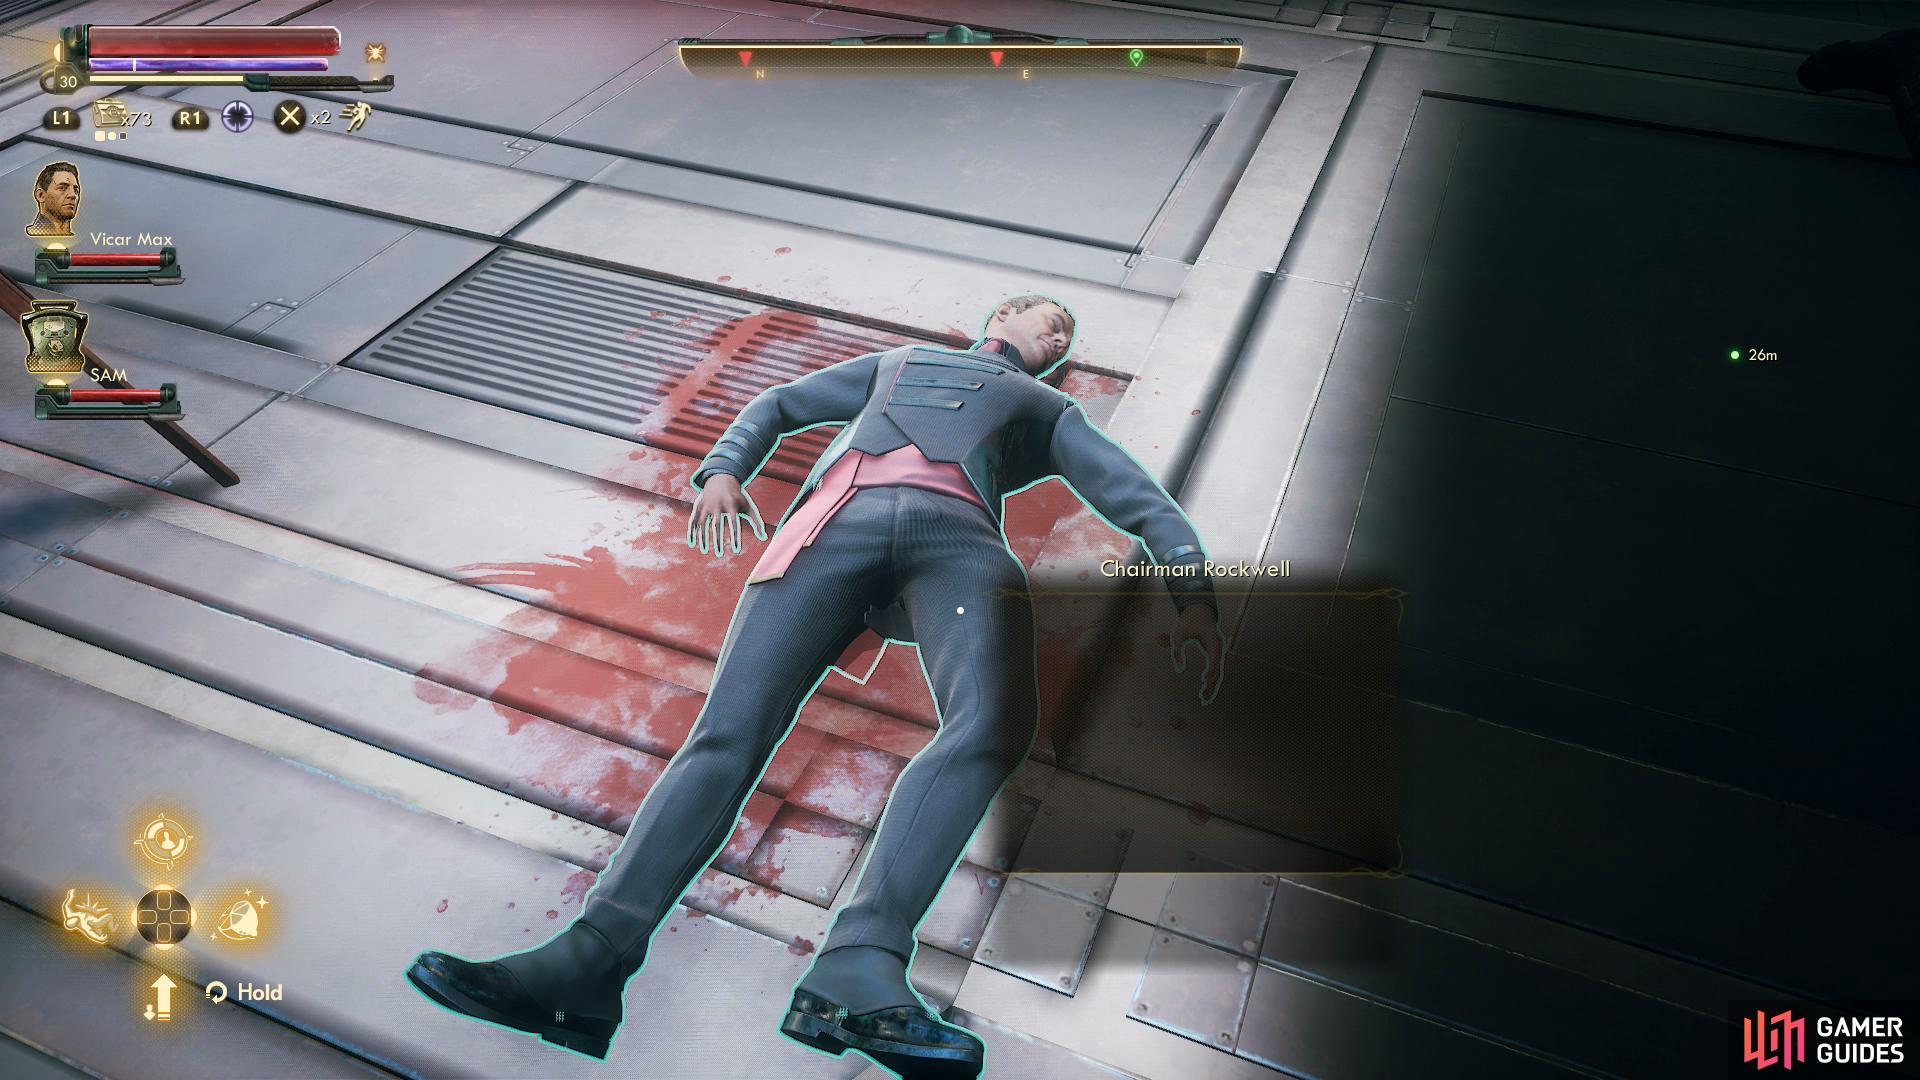
(1 of 2) If you sided with Phineas, Chairman Rockwell will be dead.
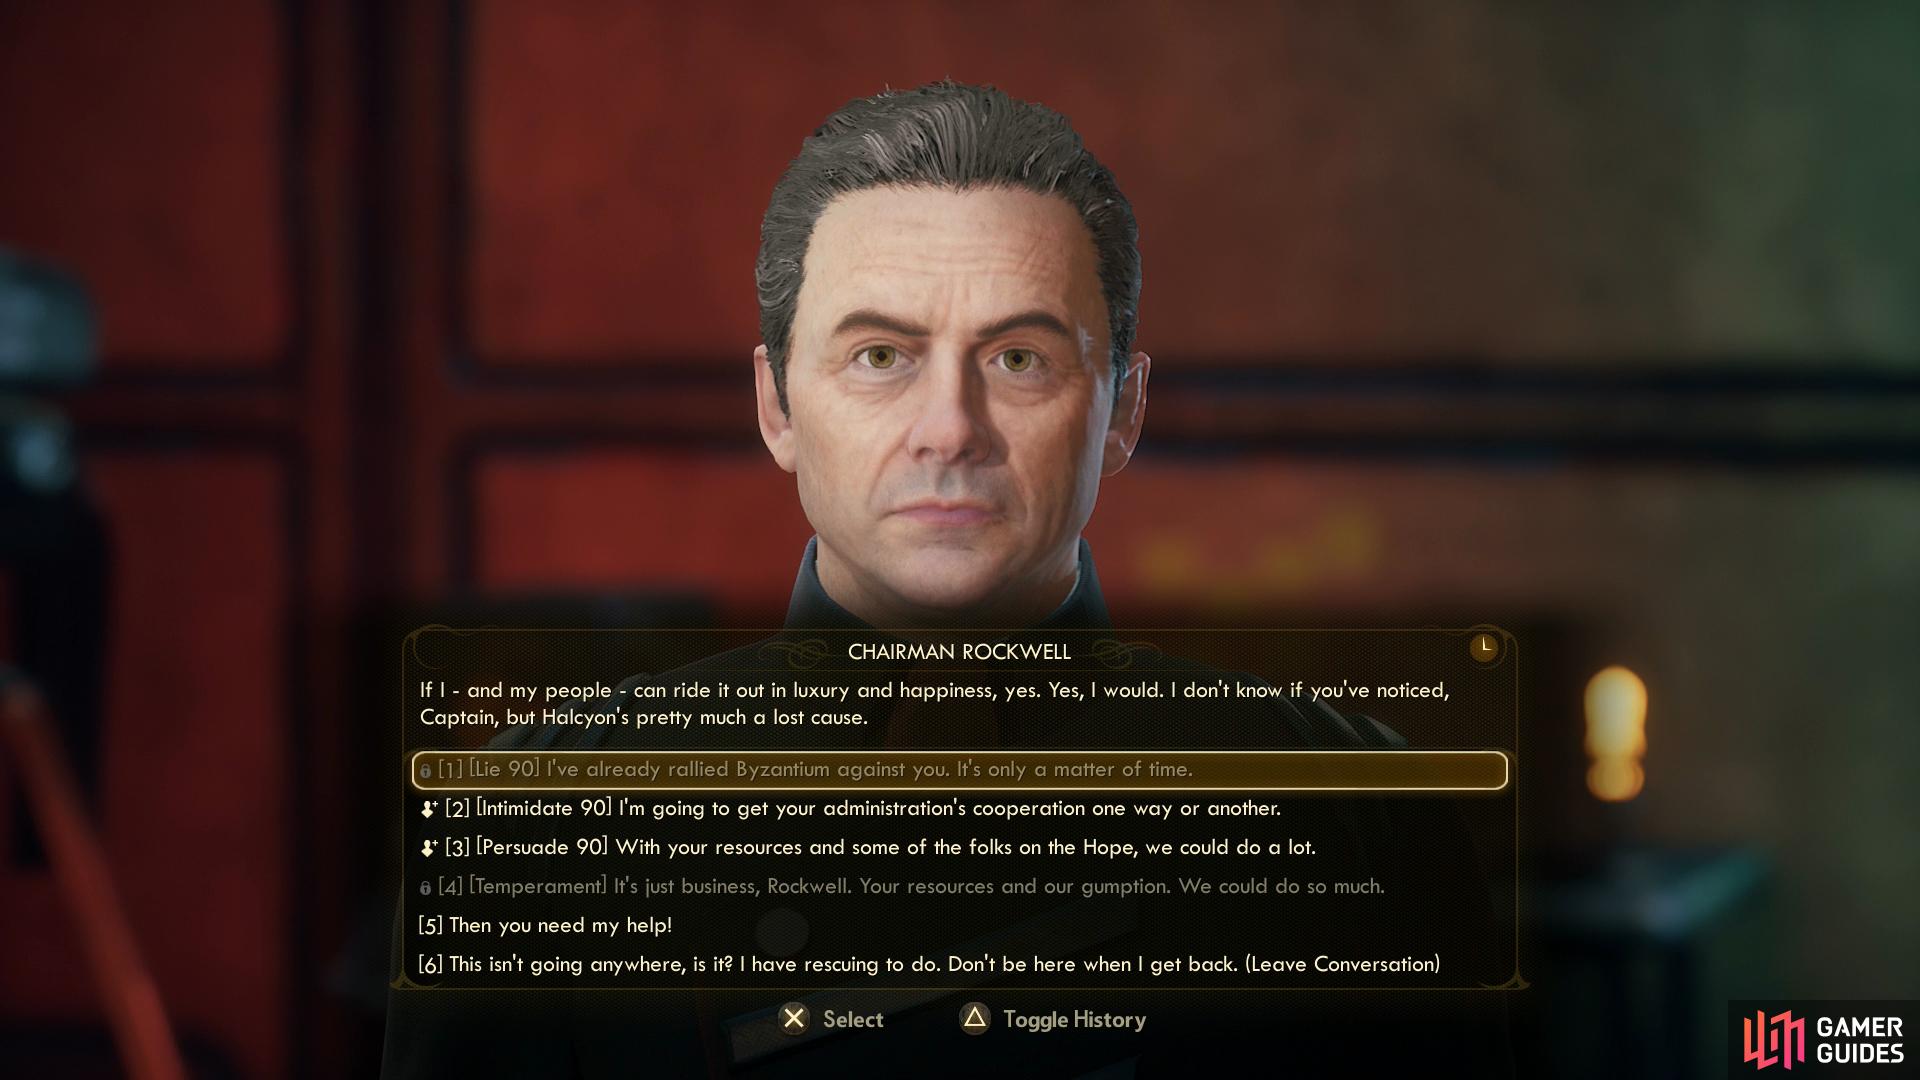
If you sided with Phineas, Chairman Rockwell will be dead. (left), Otherwise, he’ll be alive, and with a difficult dialog check you can convince him to work with you. (right)
In the room beyond, activate a terminal and pick the option [Unseal Door]. What you find beyond varies a bit based on what path you took. If you skipped the Hope to Terra 2, you’ll find a rather dead Chairman Rockwell. Guess the prisoners got their revenge?
If you skipped the Hope to Tartarus, Chairman Rockwell will be very much alive and both indignant and defiant at your presence. You can simply gun him and his robots down (don’t take the latter lightly - as Lv.30 Guardian Mechanicals, they’re some of the few foes with over 100 Armor in the game), talk to him and leave him alive (any option that end with (Leave Conversation)), or attempt to pass a [Lie 90], [Intimidate 90], [Persuade 90] or [Temperament] check and earn Rockwell’s promise of future aid… assuming you can take down Akande and rescue Phineas.
Read a terminal for some admittedly useless information, then exit via a door to the east. All you need to do now is turn southeast and ride another elevator up.

(1 of 2) If you gained their trust, Sanjar will send some MSI troopers to assist you.
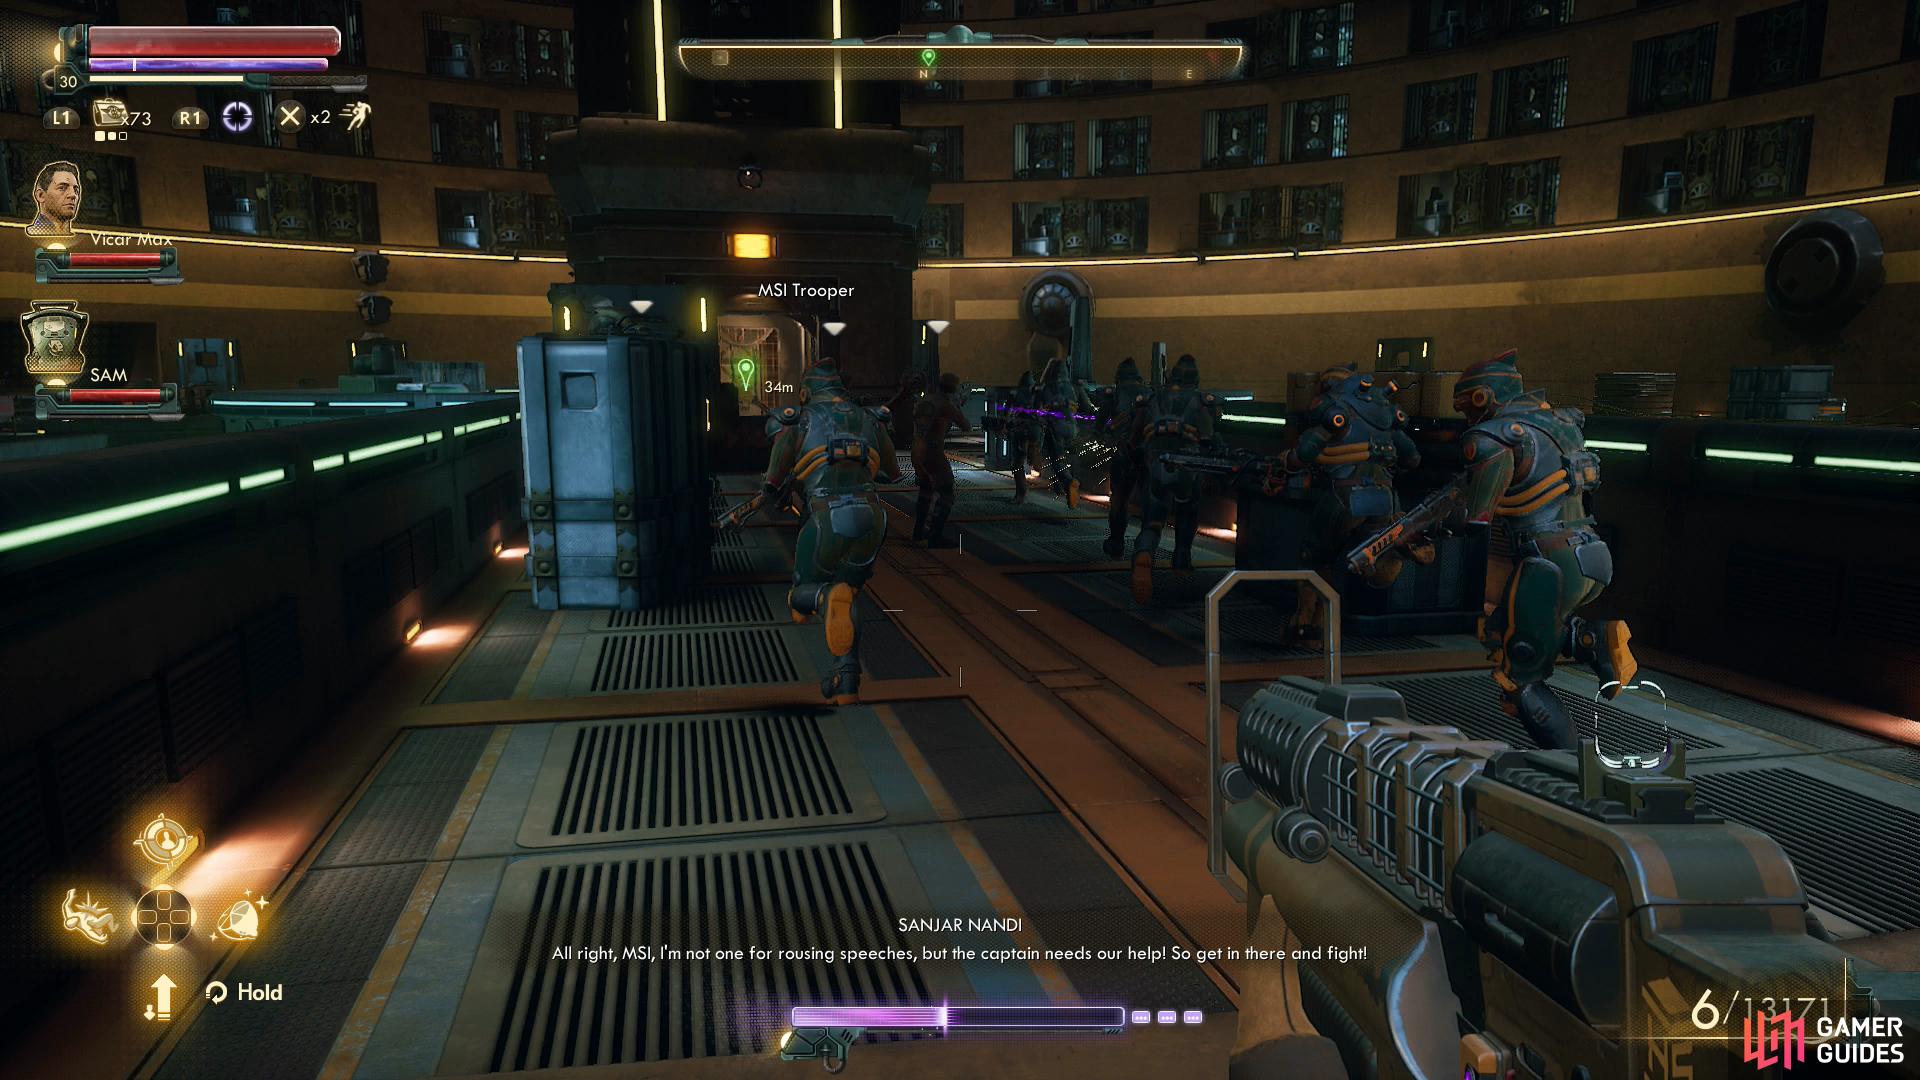
If you gained their trust, Sanjar will send some MSI troopers to assist you. (left), With their aid you can easily reach the elevator at the end of The Pit. (right)
Tartarus - The Pit Lv.3
Almost done now, honest!
From the elevator head south (counter clockwise) and if you left MSI in charge of Monarch (or allied them with the Iconoclasts) you’ll hear Sanjar rally the troops. Sanjar’s MSI troopers aren’t quite as potent as the Iconoclasts, but they should provide enough cover for you to reach the bridge, turn north and hop on the elevator. No need to fight if you don’t want to.
This is it, quite possibly the last bit of real gameplay left, depending on your skills, of course. Your companions will make some comments as they ride the elevator up and when you arrive, turn south to spot some screens in the distance.
Before what may be the final battle in the game, you’ll get a chance to chat with your antagonist. If you fail to convince them to stand down, you’ll head through a door to the left (east) to face the final boss - RAM. If you succeed, you’ll bypass this fight and instead be allowed through a door to the right (west). All that stands between you and ultimate victory are three dialogue checks… or some ominous, unknown foe.
If you skipped the Hope to Terra 2, continue with the header “Showdown with Akande”, below. If you skipped the Hope to Tartarus, continue with the header “Showdown with Phineas” even further below.


(1 of 4) Pass a series of skill checks
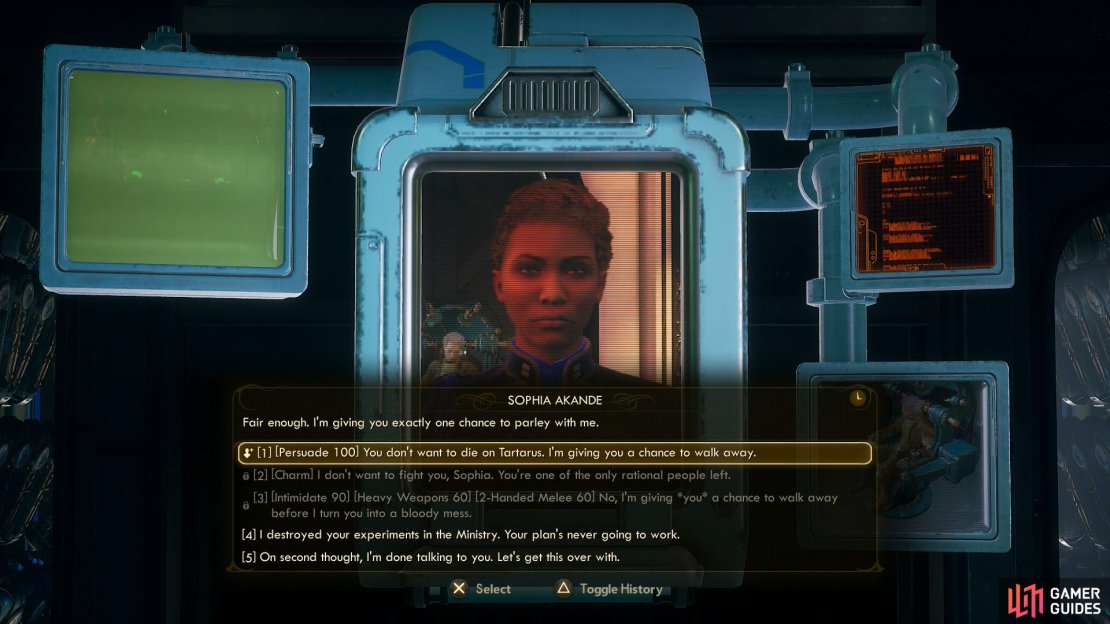
Showdown with Akande
Leave the elevator and head south towards the monitors to be graced by Akande’s ever-dour face. You can exchange words, but this conversation only has two outcomes: You’ll either provoke Akande or be unable to talk her out of a fight, or you’ll convince her to stand down.
Pass through three meaningless dialogue options and following that say I’m rescuing Phineas, and I’m going through you if I have to.“ or “Do your worst, you psychopath.” to pick a fight. No finesse required here - go through the door to the left (east) and skip ahead to the header “Boss - RAM”. This is also the outcome if you at any point later on have to settle for the dialogue option “On second thought, I’m done talking to you. Let’s get this over with.”, presumably the consequence of not being able to pass one of the skill checks.
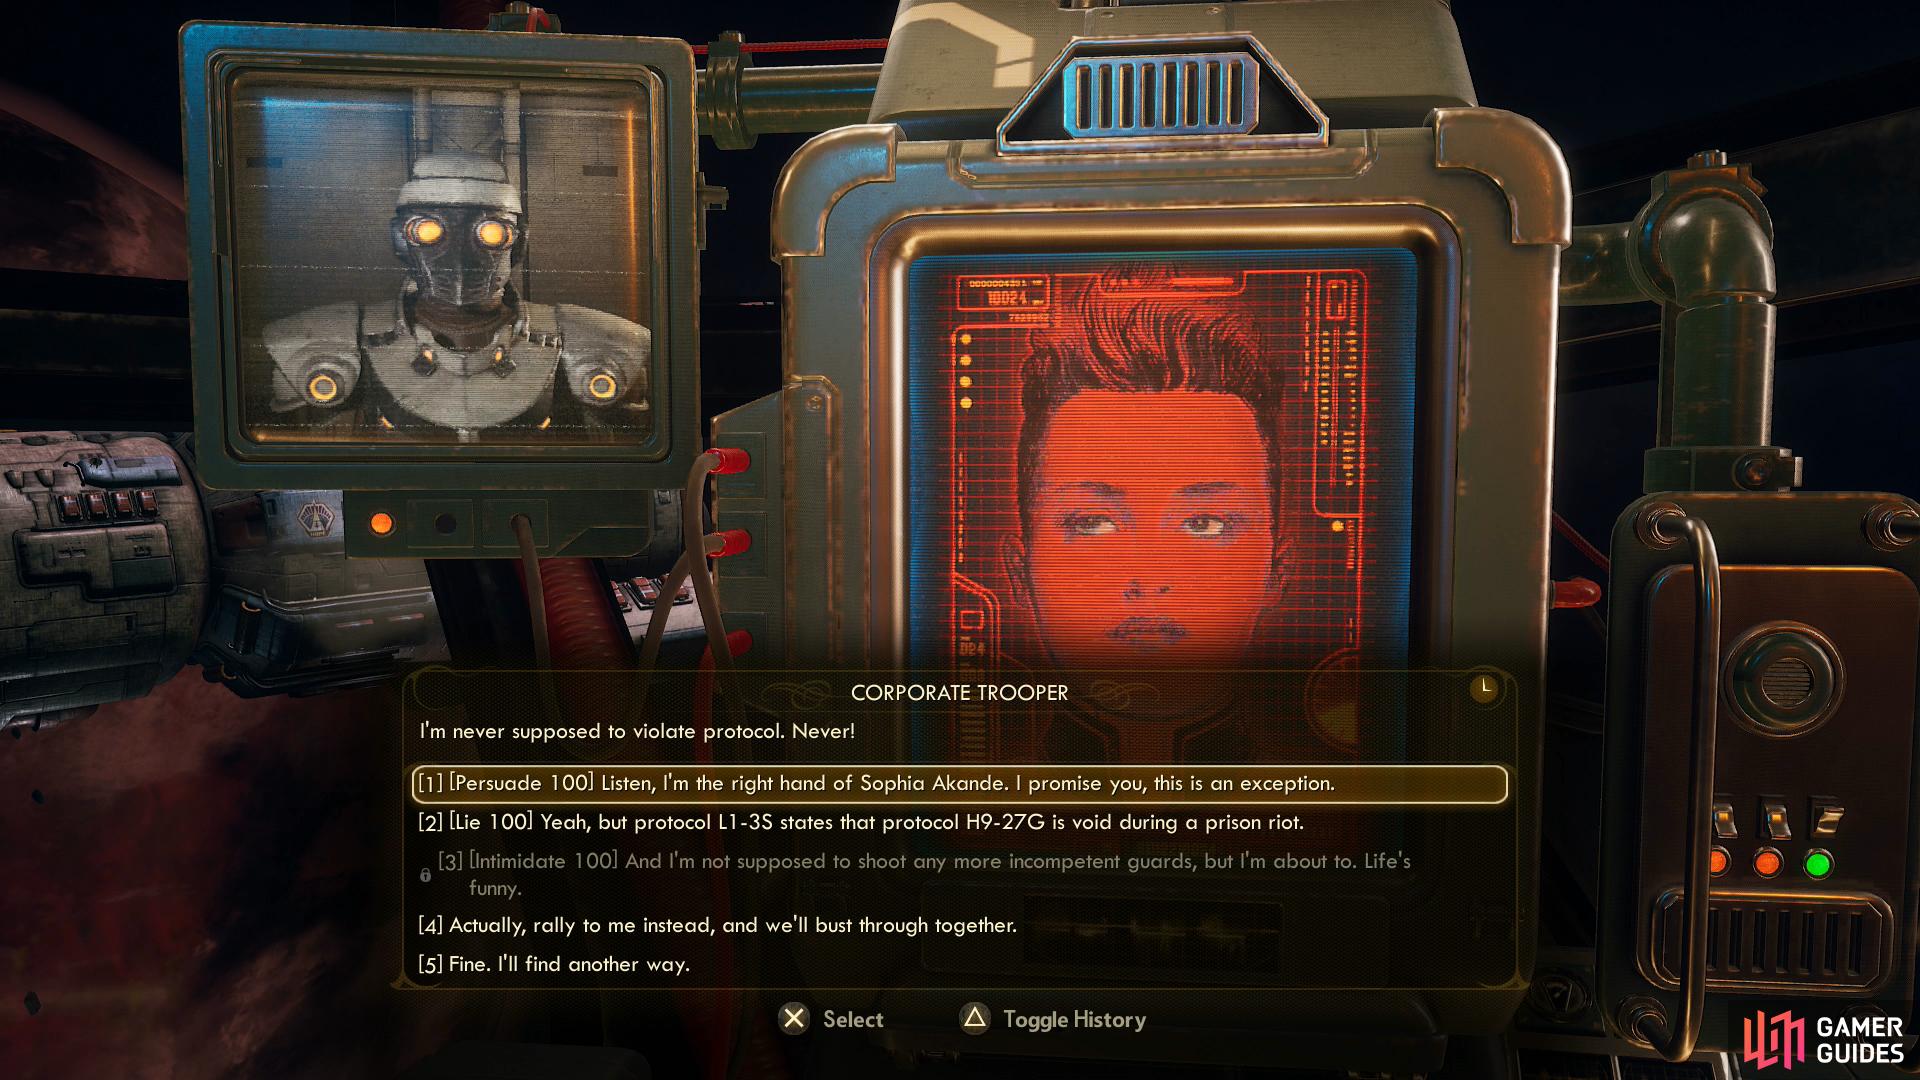
If at any point you say “Let’s talk about this.” you’ll start attempting to convince Akande to stand down. There are three stages of dialogue checks you have to pass, and each time you’ll get three choices - almost all of them require a skill score of 100, a combined skill check of multiple skills (usually in the range of 60-90 points) or an attribute check with requiring a +3 attribute. In the latter case, putting some alcohol or caffeine in your inhaler can help boost your attributes to where they need to be, just be wary that these buffs are temporary and you’re on the clock while you’re chatting. If you pass any one of the three checks in a series, you move on to the next.
The three series of three checks you’ll need to pass are:
-
[Persuade 100] or [Charm] or [Intimidate 90] [Heavy Weapons 60] [2-Handed Melee 60]
-
[Lie 100] or [Perception] or [Persuade 90] [Science 90]
-
[Intimidate 100] or [Temperament] or [Lie 90] [Hack 90]
If that sounds simple enough, great… but there is a little complication. Don’t worry, this is a good thing. In addition to the three skill checks and the dialogue option that ends the discussion and consigns you to a fight with RAM you’ll be able to mention her experiments, although the exact wording may vary depending on the condition you left the lab in (how much dimethyl sulfoxide you stole). This bypasses the current lists of options and instead gets you an alternate set of three questions:
- [Science 60] or [Hack 60] or [Engineering 60]
As you can see, these should be much easier to pass than the other ones. View them as what they are - an easier substitute for whichever series of questions you can’t pass. You can only do this once, but you can attempt this at any point when one of the series of three checks is up. After answering this optional question you’ll also get a [Perception] check, but it surprisingly doesn’t seem to have any bearing on the outcome.
If you successfully pass three checks, Akande will concede defeat and open the door to the right (west). Head through it, then south down the fancy hallway beyond, go up some stairs to the east, south and east before turning south through some doors. In the room beyond, you need merely grab The Chairman’s Key off the table and use it on the device to the south. Once Phineas is free, the game will end and you’ll get to witness the consequences of your actions.


(1 of 4) Pass a series of dialogue checks
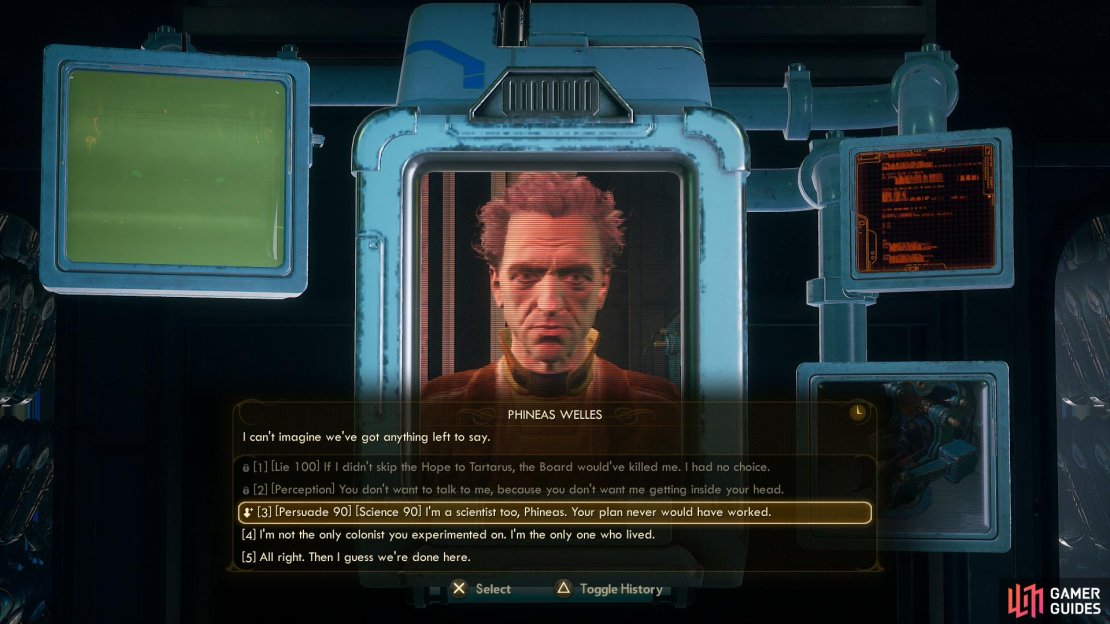
Showdown with Phineas
Leave the elevator and head south towards the monitors, which flicker to life and reveal a disappointed Phineas. He’s not really villain material, although he does his best to seem angry and indignant about your betrayal. He probably regrets a lot of his past experiments, but none, perhaps moreso than you. This conversation only has two outcomes: You’ll either force Phineas to stand up to you by ending the conversation (any (Leave Conversation) option), or you’ll convince him to stand down.
Talk to Phineas until you get the option to say “Let’s talk about this”, which will allow you to attempt to pass a series of three dialogue checks. For each series of checks you’ll get three choices - almost all of them require a skill score of 100, a combined skill check of multiple skills (usually in the range of 60-90 points) or an attribute check with requiring a +3 attribute. In the latter case, putting some alcohol or caffeine in your inhaler can help boost your attributes to where they need to be, just be wary that these buffs are temporary and you’re on the clock while you’re chatting. If you pass any one of the three checks in a series, you move on to the next.
The three series of three checks you’ll need to pass are:
-
[Lie 100] or [Perception] or [Persuade 90] [Science 90]
-
[Persuade 100] or [Intelligence] or [Intimidate 90] [Handguns 90]
-
[Intimidate 100] or [Temperament] or [Persuade 90] [Medical 90]
If that sounds simple enough, great… but there is a little complication. Don’t worry, this is a good thing. In addition to the three skill checks and the dialogue option that ends the discussion and consigns you to a fight with RAM you’ll be able to mention his experiments, which bypasses the current lists of options and instead gets you an alternate set of three questions:
-
[Science 60] or [Medical 60] or [Perception]
-
Or you can simply say “Except me.”, which bypassed the need to make a check this time.
As you can see, these should be much easier to pass than the other ones… especially the give away “Except me.” option. View them as what they are - an easier substitute for whichever series of questions you can’t pass. You can only do this once, but you can attempt this at any point when one of the series of three checks is up. After answering this optional question you’ll also get a [Perception] check, but it surprisingly doesn’t seem to have any bearing on the outcome.
If you successfully pass three checks, Phineas will apologize, an utterly broken, defeated man who after years of hardship finally had a success that promised to potentially undo his past mistakes and save Halcyon… only to turn on him in the end. After the screen goes blank, go through the door to the right (west). Head through it, then south down the fancy hallway beyond, go up some stairs to the east, south and east before turning south through some doors. In the room beyond, you need merely loot Phineas for The Chairman’s Key and use it on the device to the south. Once Sophia is free, the game will end and you’ll get to witness the consequences of your actions.


(1 of 3) RAM can be difficult to damage from the front due to its shield.
Boss - RAM
If you failed to convince either Akande or Phineas to surrender, you’ll be left with no other option but to go through the door to the left (east). Go down two flights of stairs, then through a door to find yourself in a small room with two doors. Your lack of options didn’t last terribly long.
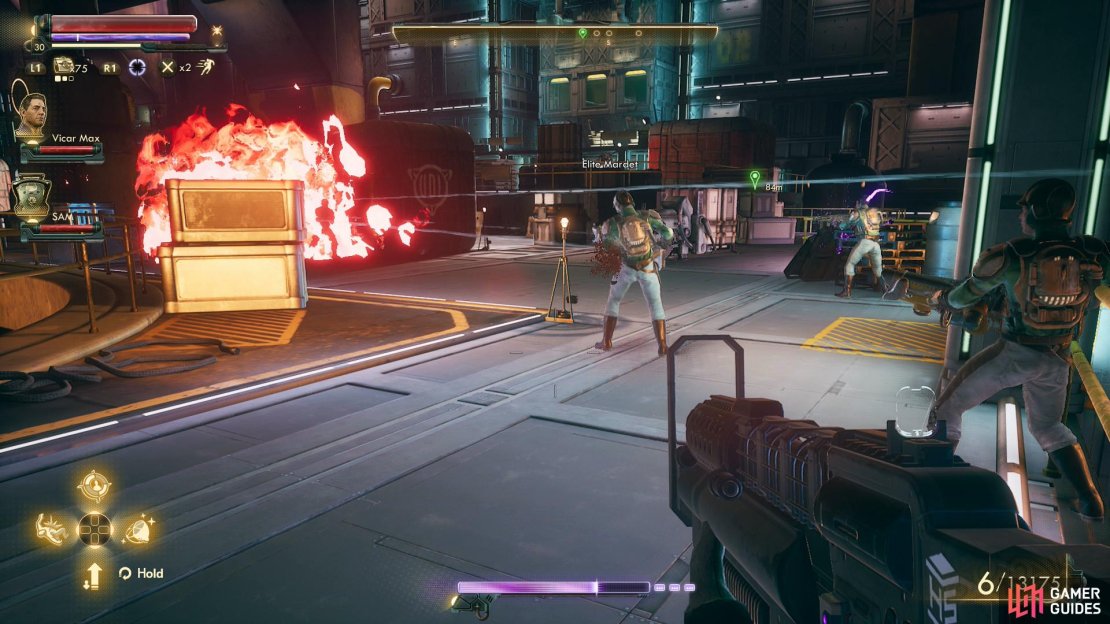
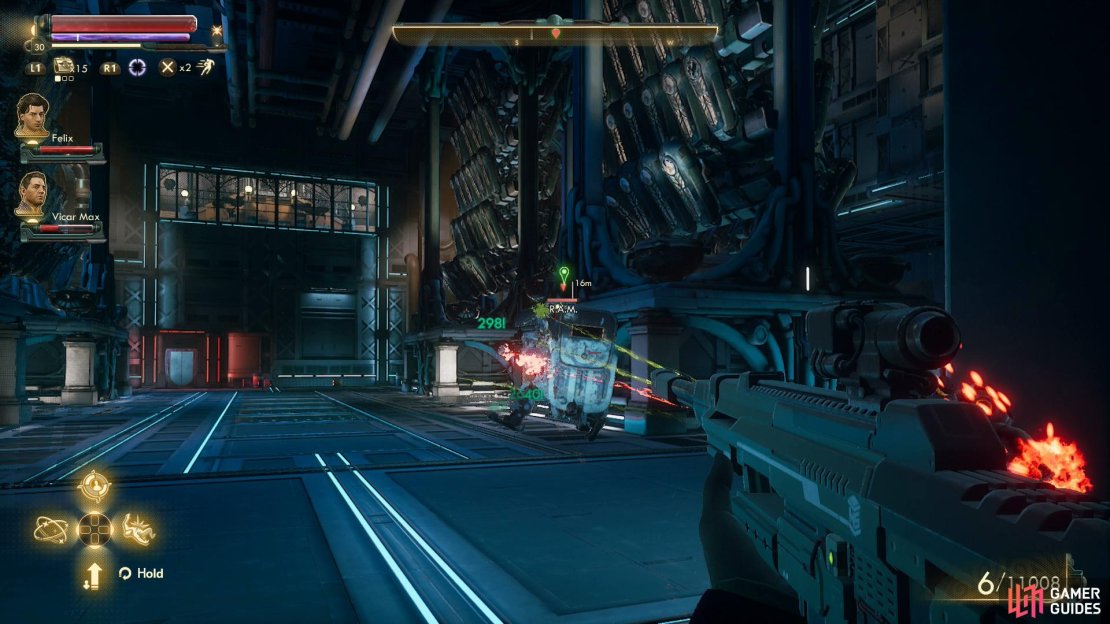
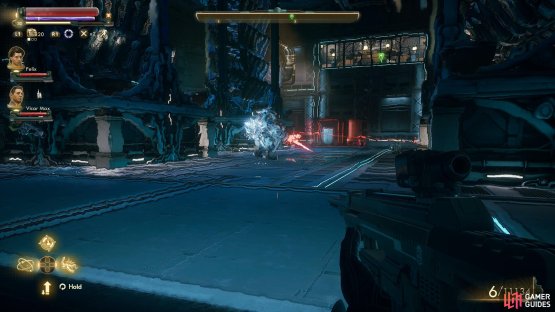
If you go through the door to the south you’ll find yourself in a large chamber, facing off against an odd, large automechanical named R.A.M. It can shoot plasma bursts from its right arm, and its left arm is employed holding a shield. Other than that, it has a dash attack, which gives off a distinctive high-pitched whine when it’s charging up. Its weakspots are on its back, and so long as you have companions it’s not terrible hard to flank, especially if you can trick it into charging, which sometimes leaves it vulnerable for a few moments. Otherwise slow and plodding, R.A.M. isn’t dangerous on its own, as you can simply run around and hide behind four pillars that occupy this room, pop out and shoot it when you have enough TTD and jump behind cover before it counterattacks.


(1 of 2) After RAM is injured sufficiently, a horde of combat drones will join it.
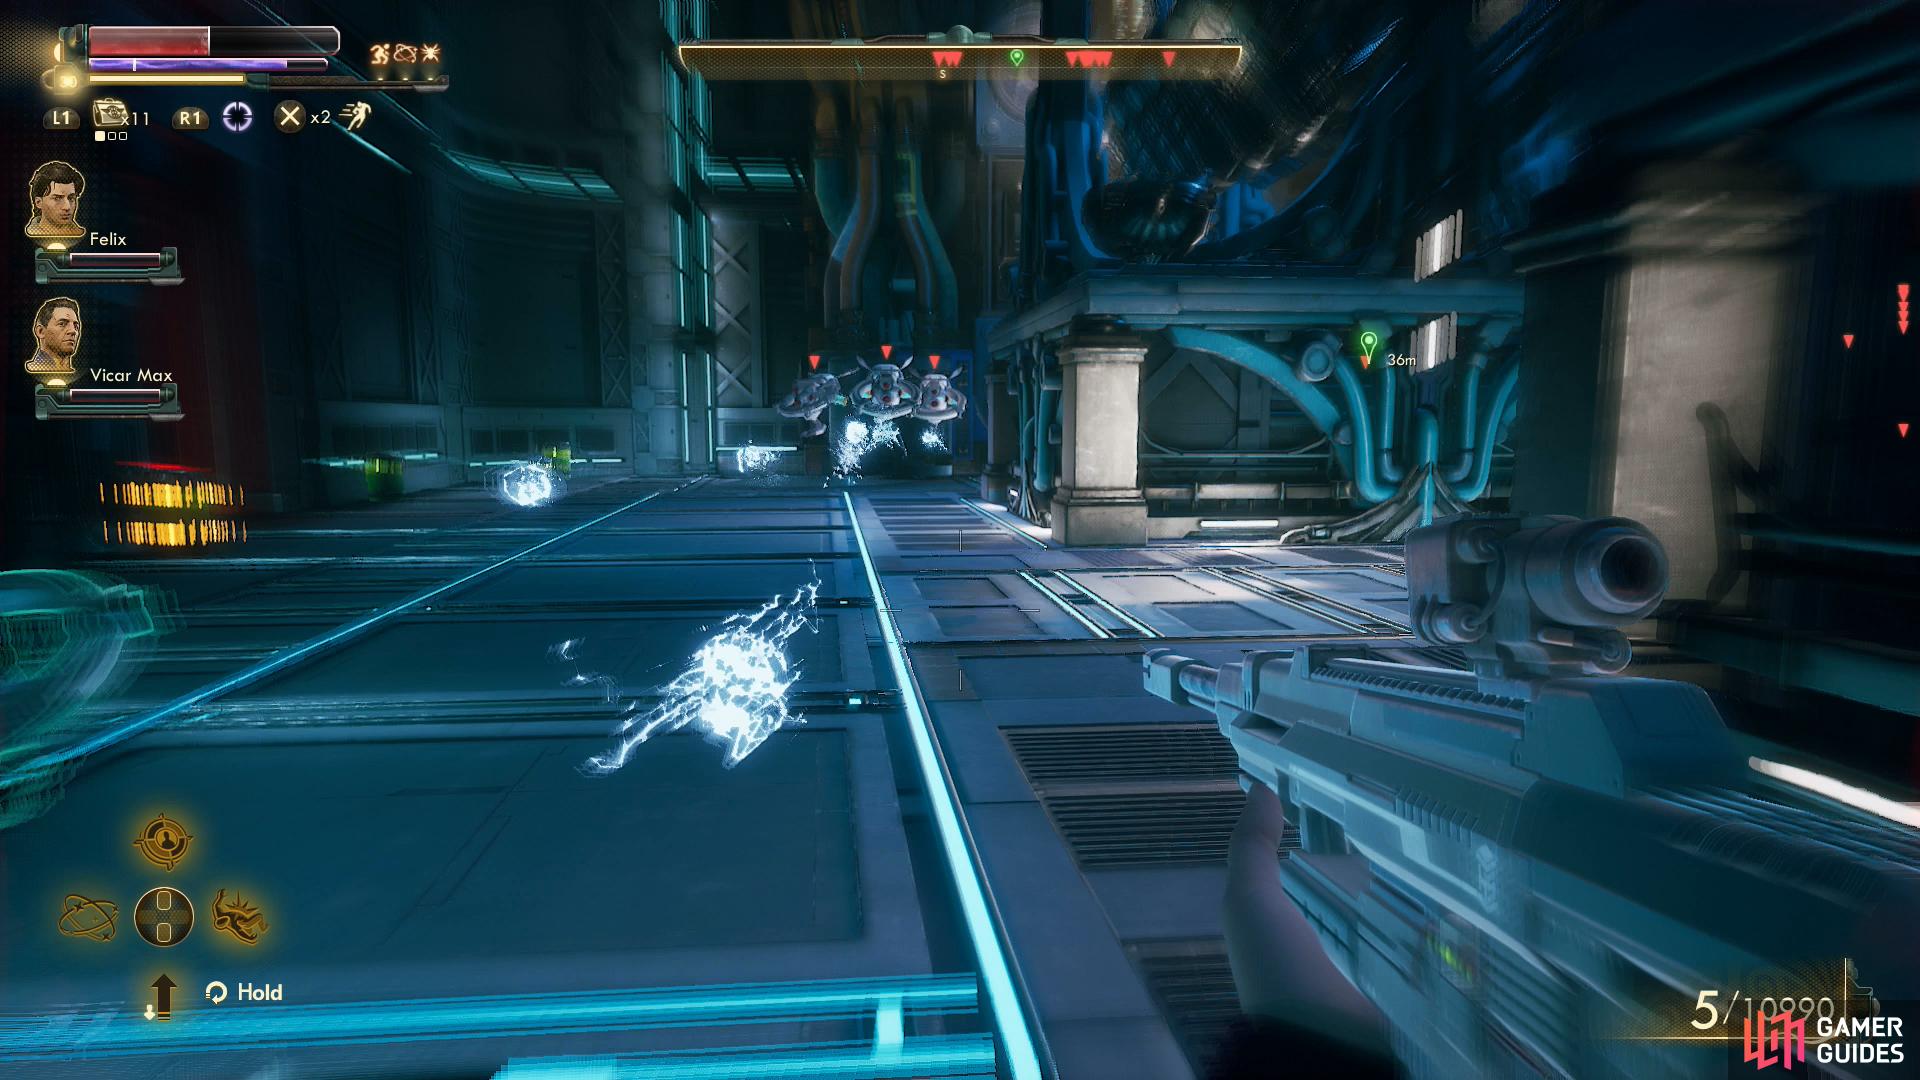
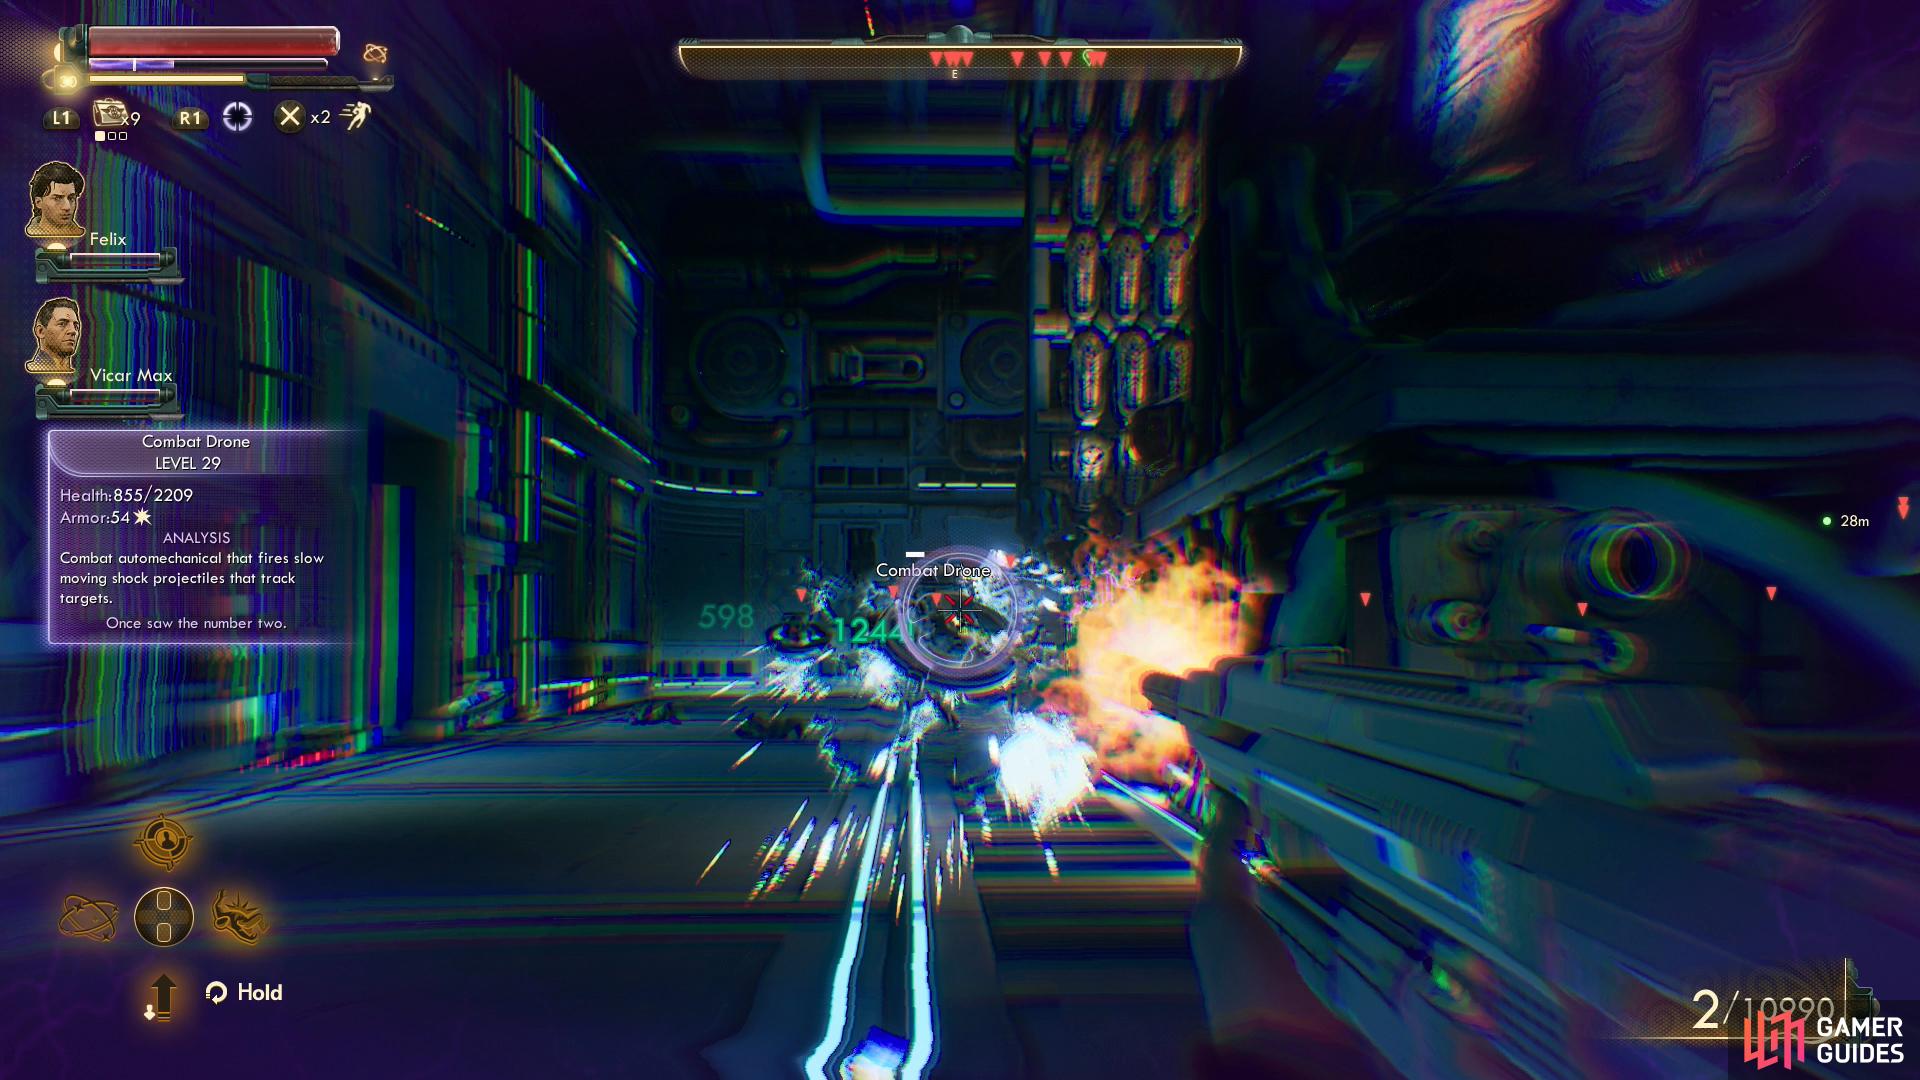
After RAM is injured sufficiently, a horde of combat drones will join it. (left), In higher difficulties, you’ll need to try to finish of RAM quickly, or perform hit and run attacks on the drones. (right)
Unfortunately, R.A.M. won’t be alone for long, as around half a dozen Combat Drones will be released from nearby rooms to attack you. These robots are far more dangerous collectively than R.A.M. is, as they’re much faster. Suffice to say, your companions probably aren’t going to perform well. On Hard mode we were able to pick these Combat drones off the same way we ultimately defeated R.A.M. - running laps around the exterior of the arena and using the pillars as cover. When we had enough TTD we’d stop running, take some shots at whichever Combat Drone rounded the corner first, then immediately run away, using our inhaler or reloading as necessary. It can be pretty hectic in Hard mode, while in Normal or Story difficulty you can afford to be a lot less timid.
Alternatively, depending on your skills and perhaps some actions taken earlier in Tartarus you can make the fight with R.A.M. much easier or even avoid it outright. To get through the door to the west you’ll need to pick the lock [Lockpick 100], and inside the room beyond you’ll find a terminal [Hack 89]. Once you have access to this terminal, you’ll have even more options at your disposal!
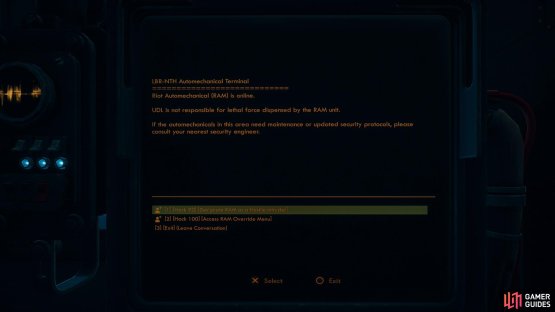
(1 of 2) Hack RAM’s control terminal to get access to various options
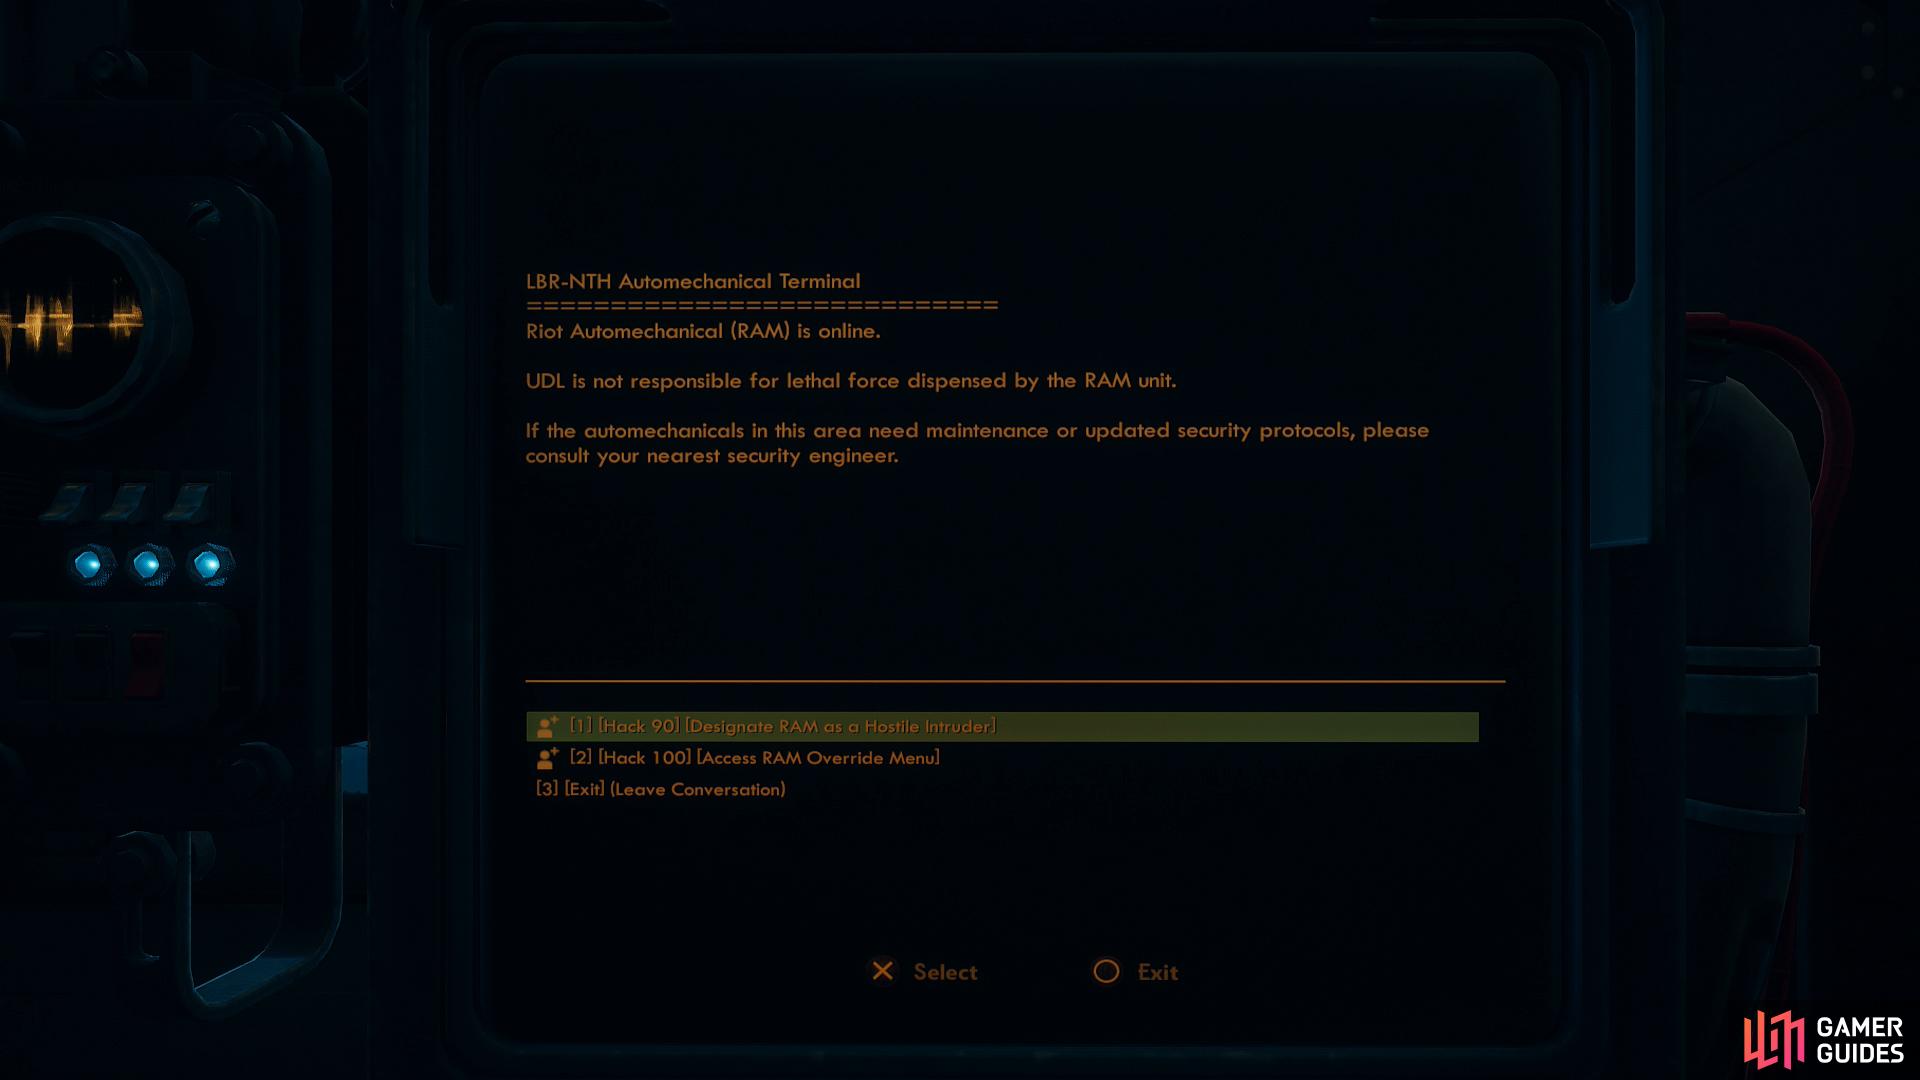

Hack RAM’s control terminal to get access to various options (left), including turning RAM’s combat drones on it. (right)
First, you can pass a [Hack 90] check to [Designate RAM as a Hostile Intruder], which will sic the Combat Drones on RAM. If you thought they were more dangerous than RAM, well… you may be right. The Combat Drones can actually defeat RAM, but worst case scenario is they merely severely damage RAM and you get to finish the bigger bot off without all its annoying Combat Drones.
Second, you can pass a [Hack 100] check to [Access RAM Override Menu]. Ah, the downsides of using automechanicals to do your dirty work… You have two options here, but let’s talk about the option to [Activate Weapon Safeties], which will weaken R.A.M. After this you can go fight the automechanical yourself, or try the previous option, making it much more likely that the Combat Drones will get the job done for you.
Third, from the [Access RAM Override Menu] you can choose the option to [Attempt RAM Shutdown Sequence] which will force you to pass a three-part authentication process. You remember that segmented passcode you could have found lying around? That’s what those were for. If you read the datapads, you can enter the appropriate password fragment and move on to the next step.
If you didn’t read the relevant datapad it won’t even be an option. Failing that you’ll have two other options, a [Hack 100] check to bypass the password will be present for each of the three following stages, but you can only bypass twice. Accompanying this [Hack 100] check will be a [Heavy Weapons 100], [Engineering 100] or [Science 100] check for the first, second and third questions, respectively. The suggested build/loadout for this section should be capable of bypassing twice and passing the [Science 100] check… but it should also have been capable to avoid messing with RAM in the first place.


(1 of 2) Once defeated, loot RAM for the Hibernation Chamber Key
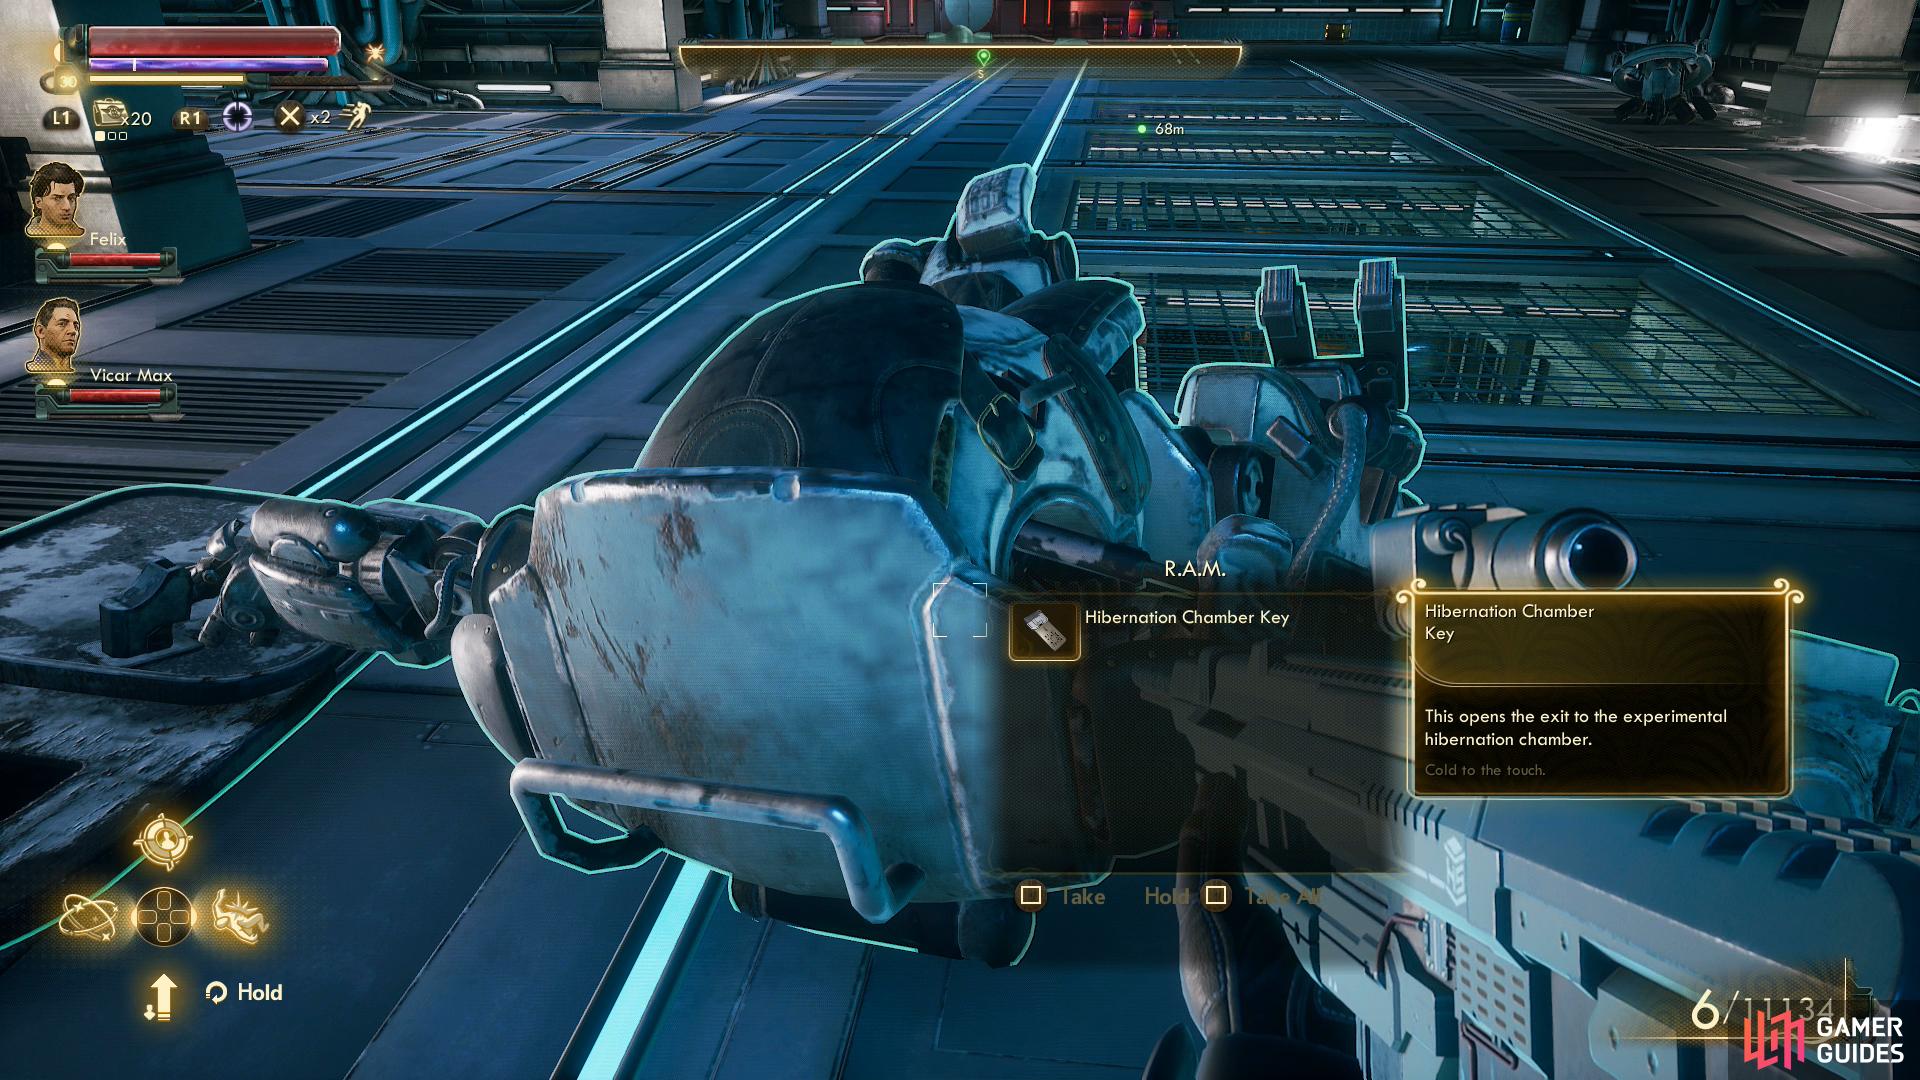
Once defeated, loot RAM for the Hibernation Chamber Key (left), then head upstairs and put down the antagonist. (right)
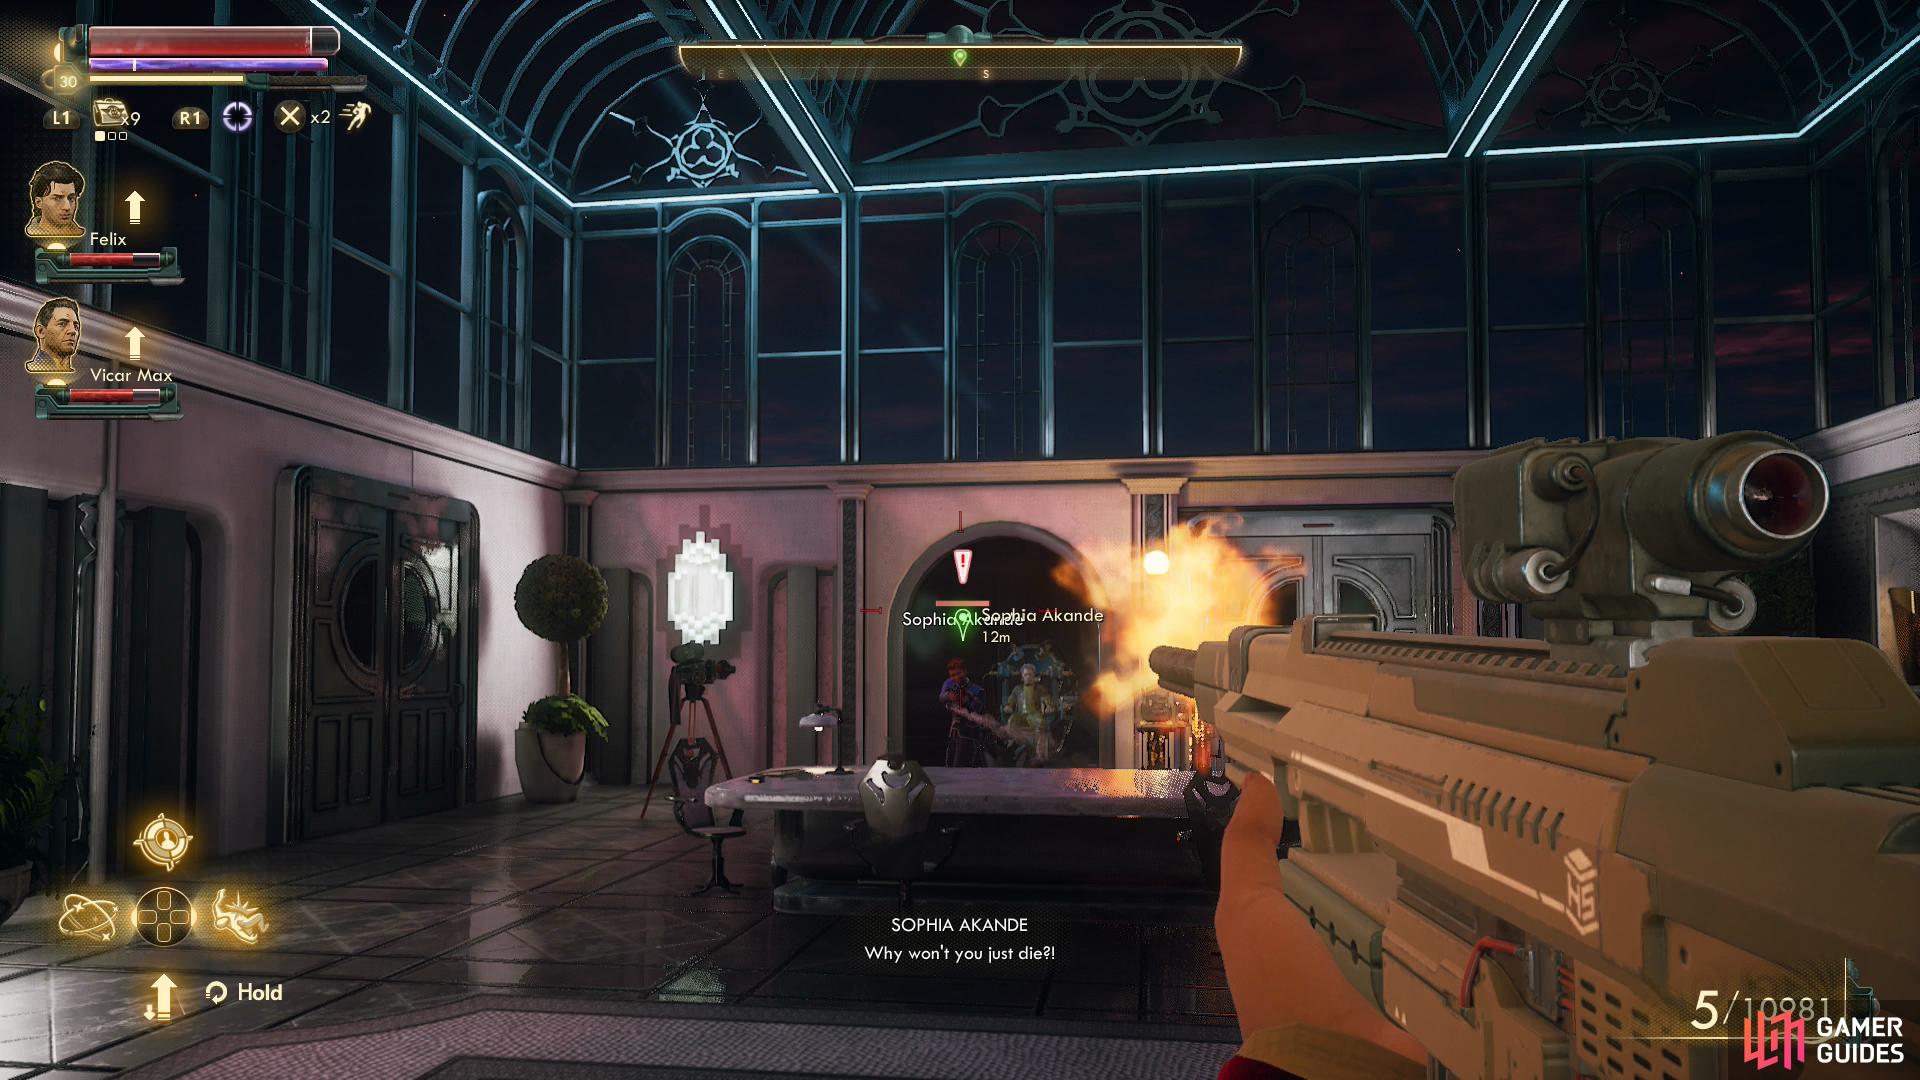
Once all the bots are scrap, loot R.A.M. for the Hibernation Chamber Key, then go through the door to the south. Ascend four flights of stairs, then turn south and west up two more before turning south through a doorway, where Phineas or Akande will their his last stand. This is more of a formality than a fight - shoot your foe, then loot their corpse for The Chairman’s Key, then free Sophia to watch the ending scenes your actions inspired.
No Comments