If you want to tackle this optional area then from the second bonfire in Huntsman’s Copse , take a right after the first arched bridge and run up the hill and take a right over the next arched bridge.
Watch out for the two undead that show up, but your bigger worry is the Torturer who’ll turn up to the party now as well. We found it was best to kill the two undeads super fast and then strafe around the Torturer once he’s in his predictable 3-hit combo.
This allows you to get a super easy critical-hit backstab in on him and that’ll do 90%+ damage or, preferably, outright kill it. Run up the hill, grab the loot and then walk left up the narrow passageway.
You need to be careful here as there’s four more Torturer’s up ahead but they’re hard to spot as they’re resting up on pedestals).
We strongly recommend that you lure them out one at a time by just getting close enough to the first one, strafe around it and then hit it from behind for a critical attack. The whip-bearing Torturer’s also like to use multi-hit combos so they’re also susceptible to backstabs as well.
The Rickety Wooden Bridge
Proceed towards the bridge once they’ve all been taken care of and if you look down and to the right you’ll spot a corpse down below. This is a great place to drop down on to this corpse where you’ll not only get a [Pharros Lockstone] for your troubles, but also a [Token of Fidelity] as well (perfect for those who want to enter the Way of the Blue - without having to fight anyone for access to it).
Then simply use a Homeward Bone to go back to the bonfire under the bridge, before heading back towards the wooden bridge (and as long as you don’t rest at the bonfire, the enemies won’t reappear).
Once you’re back on the wooden bridge, you need to watch out for the holes that you can fall down if you’re not paying attention. At the end you’ll notice a dark spirit with a huge Greatsword and a massive shield.
You can cheese this fight by luring him to the bridge and effectively push him off the side (or he may even do it himself if his path-finding AI goes all wonky.
At the end of the bridge look to your right for a corpse holding a super rare Sublime Bone Dust . Before stepping into the fog gate you need to be prepared as it’ll lead you straight into a multi-facetted boss fight.
If you happen to have any Alluring Skulls to hand then be sure to equip those (along with any good Lifegems). You’ll need to be very deliberate in your actions when you cross the fog as you’ll be up against numerous enemies and a boss that circles the arena constantly.
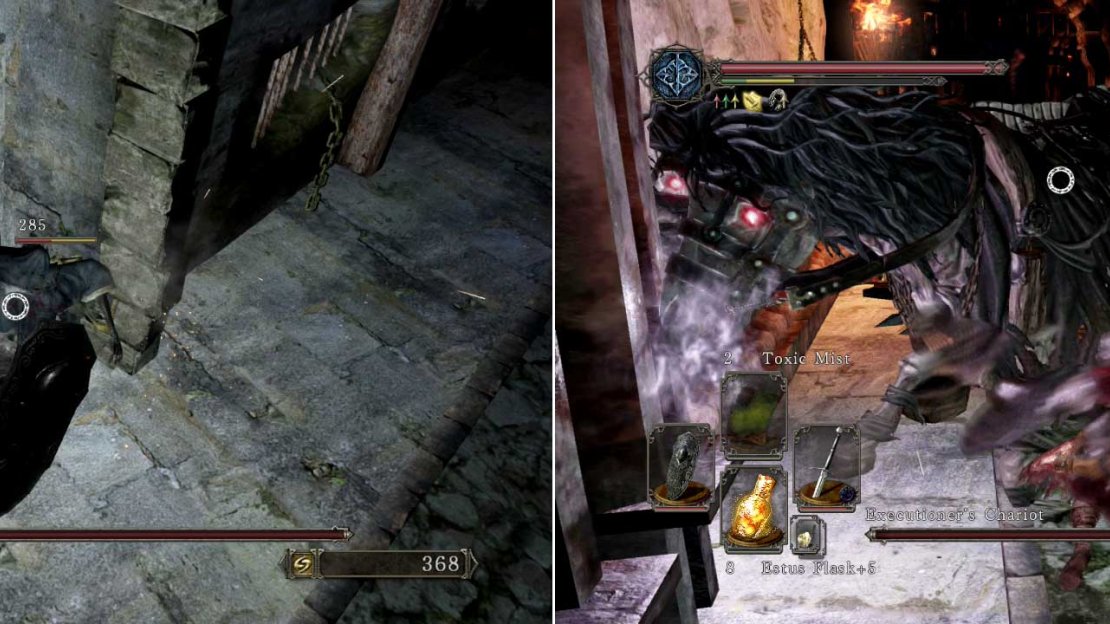
Boss Fight - Executioner Chariot
Kill the Necromancers ASAP and then attack the horse from the side.
This is a two-stage fight in which you first need to clear the arena of the two Necromancer’s and Skeletons (and the Necromancers will keep bringing the skeletons back to life until you kill them).
All the while, the boss in the Chariot will be circling around the oval arena and it’s fast and has very pointy spikes protruding from its wheels (note: these hurt if they hit you). So your first goal is to clear the arena of skeletons and then worry about the chariot!
- Use an Alluring Skull to pre-occupy the first set of skeletons as you run up the left-side of the arena. Once you see the flames coming down the wall rush into one of the open doorways and stay here until the chariot passes.
- If you’ve got a high level of Adaptability (and/or are feeling brave), then you can roll through the chariot’s spikes as they get close (saving you time waiting in a cubby hole).
- The first Necromancer can be found on the left side (about half way up). Kill him quickly before he can bring the fallen skeletons back to life.
- Now drop another Alluring Skull if any skeletons get too close again.
- The second - and final - Necromancer can be found in a right-hand doorway just opposite the lever.
- Once both of them are dead, mop up any remaining skeletons that come pay you a visit and then wait for the chariot to pass by once more.
- When it has, run out to the lever, pull it and make a dash back to the doorway you were just in.
- Now the real fight begins! As soon as the horse crashes through, go out and get a couple of quick hits in before it gets up.
- Stay to the side of the boss to bait it into using its turning bite or rear kick attacks (both of which you can roll backwards from to avoid).
- Be sure to be quick on your rolls as you’ve got very little room to manoeuvre here.
Once the boss is defeated, run up the left-side until you see a stairway on the left. If you continue up here then you’ll reach an NPC that you can interact with (if you have a Token of Spite then he’ll let you join his covenant - the Brotherhood of Blood ).
There’s also a bonfire here should you wish to ever warp back to this point again.

No Comments