The forest is a good start to your adventure as the challenges aren’t too insurmountable for your low-level character and there are some decent pick-ups to be had along the way (including really good armour and weapons).
We’ll start from the entrance path at Majula , so head down into the tunnel and then hang a right and double-back for a [Rusted Coin] in a metal chest. Go down, take a left, open the gate via the level and then after the wooden bridge, go left and down for a wooden chest containing a [Human Effigy] .
Running outside will bring you into the area proper, so hang a right and run up the stream (so you’re going back the way you came) and look to the right for a corpse holding a [Homeward Bone] and a [Soul of a Lost Undead] .
If you want to practice parrying and ripostes then the guards up here are perfect fodder for that, but first, make sure you grab the [Lifegem] by the tree and a bit further down, on the right, light the Bonfire .
Watch out for the archer around the corner (on the hill) as he’s got a seriously good aim and take out all enemies (including the one by the water’s edge that appears to be dead (hint: it’s not).
At the top of the ladder are more enemies, so hang a right, go up the ladder, kill the enemies up here and loot the upper area (jumping over any gaps), before going back down into the area with the tree again.
Kill all regular troops first, loot all corpses and then you can take on the Heide Knight that’s resting by the tree (he’s a completely optional fight). He’ll drop the [Heide Knight Sword] if you’re victorious.
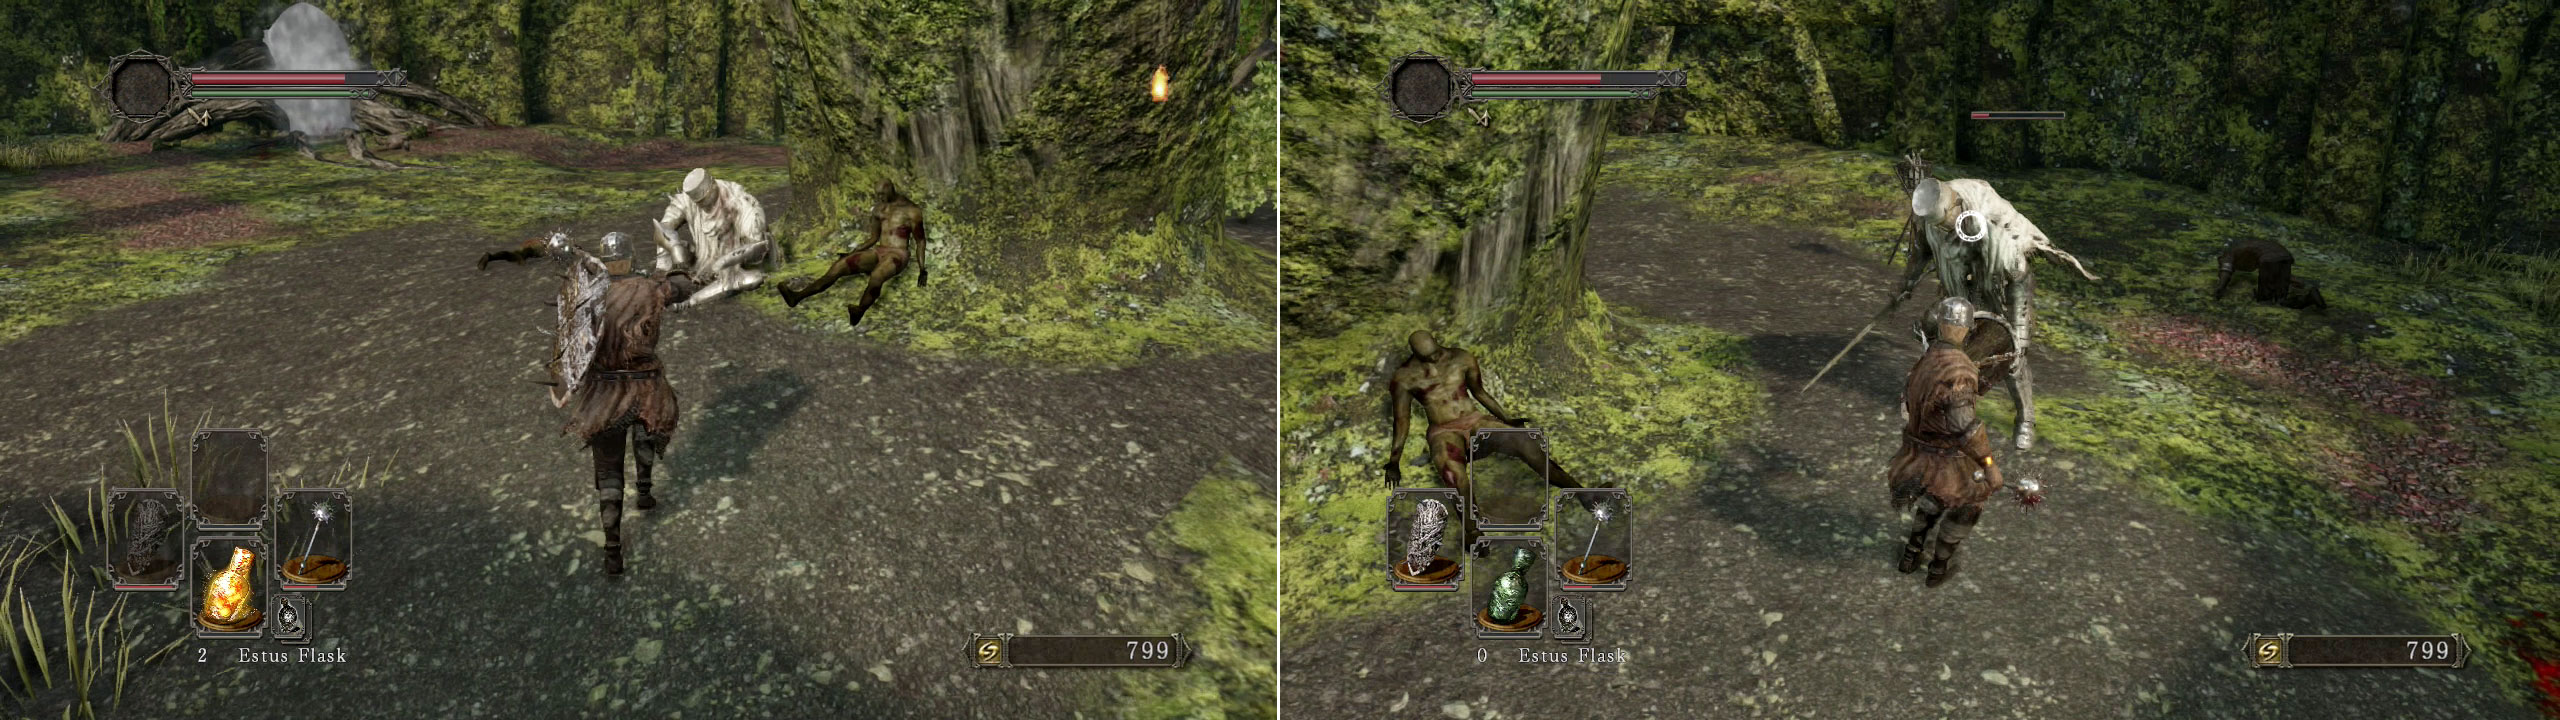
If you do decide to take him on then he’s pretty powerful at low levels so strafe backwards around the tree, bait him into an attack combo and only go in once he’s clearly in a ‘cool down’ state.
Once the area’s clear, walk through the fog gate (watching out for the enemy pretending to be dead nearby) and then go through the broken wall ahead to get the drop on a couple of enemies in here.
There’s [20 x Wood Bolts] behind the cabinet here; otherwise head outside and take out each of the enemies up the stairwell (just be careful of the guy up above the final stairwell who’ll throw bombs at you).
You can clear this area out if you want extra souls/combat experience, or you can clamber up the ladder in front of you to the upper level. In the interests of safety it’s wise to open the double doors in here and light the Bonfire in front of you before you do anything else.
To your left is the friendly NPC known as Merchant Hag Melentia who will gladly sell you lots of - useful - items. Spending 10,000 souls with her will also prompt her to give you the [Covetous Silver Serpent Ring + 1] for free (boosts soul drop rate by +10%). If you then exhaust all her talking options she’ll relocate to Majula where she’ll start selling an infinite number of small Lifegems to you.
Your first port of call now should be the stairwell behind Melentia, so go up, break the wooden door down with your weapon, grab the [Small Leather Shield] , [Repair Powder] , [Hand Axe] and [Lifegem] from the first room.
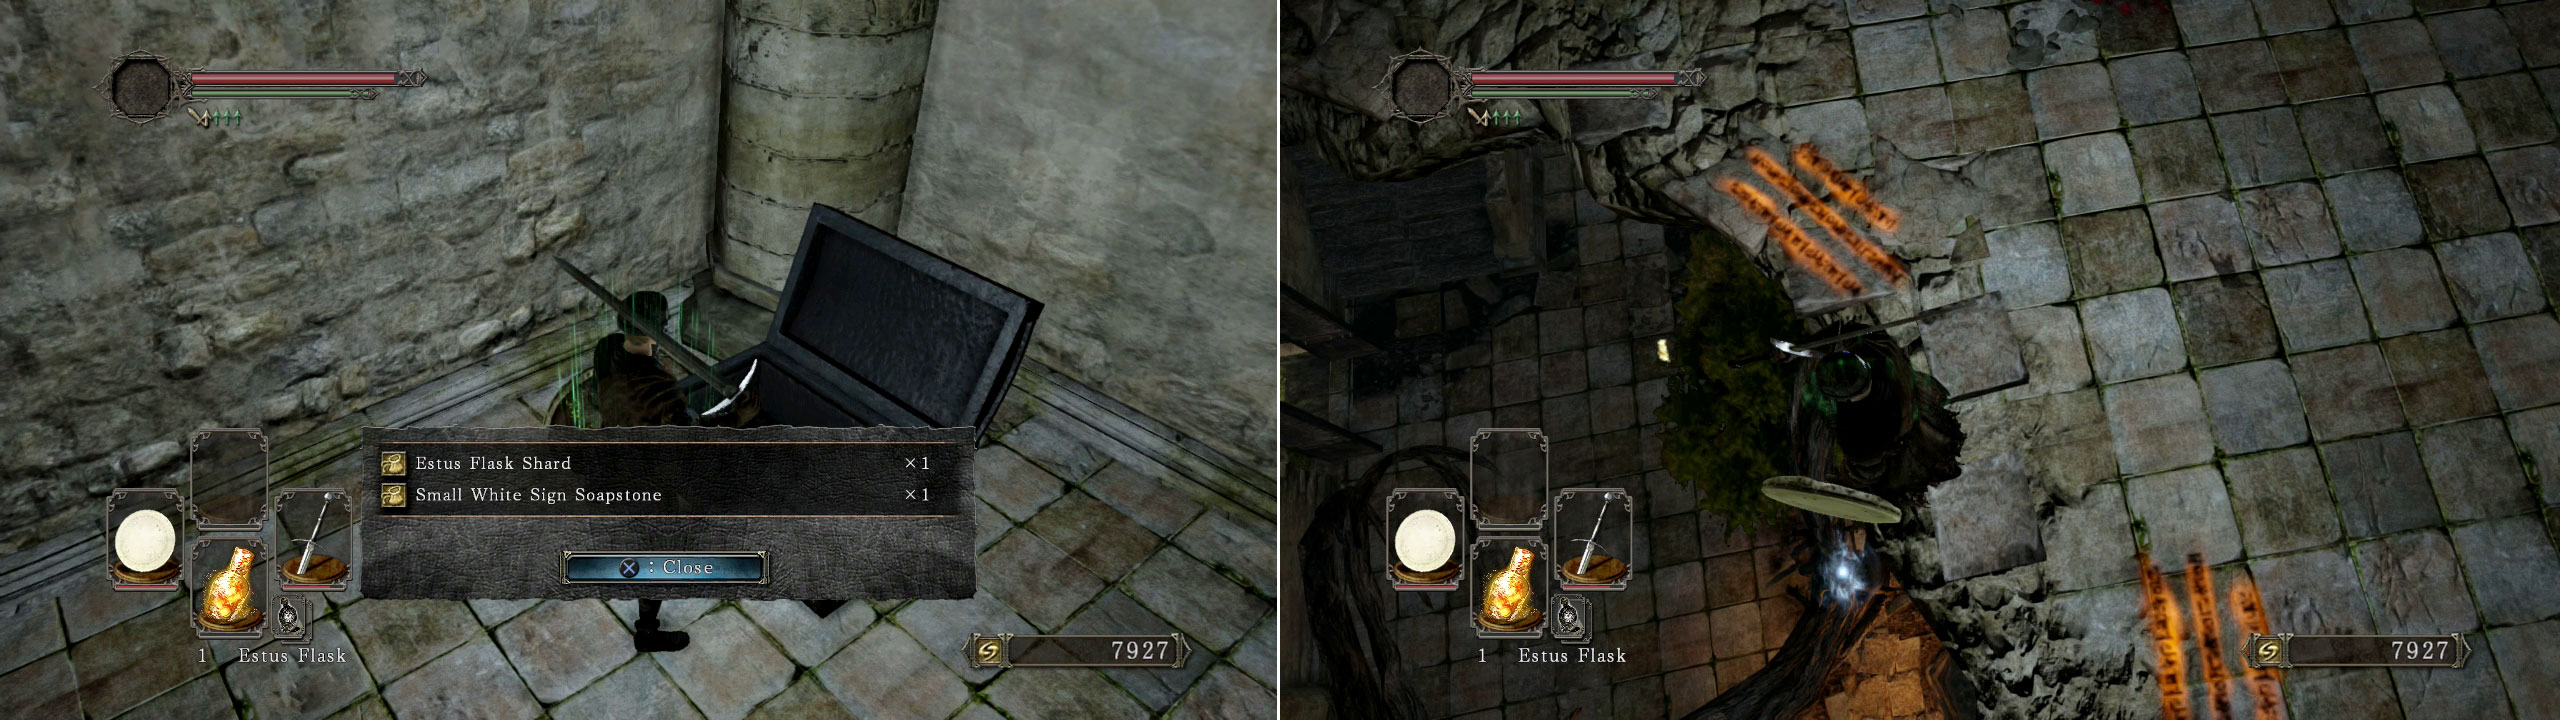
Kill the pretend-dead hollow on the floor and then in the next room and grab the very handy [Estus Flask Shard] and [Small White Sign Soapstone] from the chest. Be careful when you drop down the hole as there’s an easily missed [Divine Blessing] sitting on a tree branch (that requires a careful drop to get a hold of).
Normally you’d need a key to open this door, but you can smash this (and other basic wooden doors) down with your trusty weapon instead.
Save, then head back outside, through the double doors, and drop down to the scaffolding below. There’s a [Human Effigy] on a ledge you need to jump to, otherwise make your way down the tree, kill the infantry enemies down here and look for a cave on your left.
The fire on the ground will not hurt you (but those fast-travelling fireballs will )! So you need to time your run down this tunnel carefully. As a fireball hits the ground in front of you, run down and quickly open up the door on your left.
You’ll be invincible as you’re pushing the door forwards (so don’t worry too much about that), get inside and open the chest for a [Fire Longsword] . Be careful on the way back though as there’ll be a couple of guards in the tunnel now.
When you’re back outside, go up the hill and at the top is a corpse holding some [Lifegems] . Make your way up the ladder here and go in the hole in the wall to come back out by the stairwell you came out earlier. Get your way back up the ladder and then rest at the bonfire once more.
Now it’s time to head down the really long ladder ( hold the run button when on a ladder to slide down it faster, pushing run when on a ladder will cause you to drop off it completely). At the bottom take care of the two soldiers down here (be extra careful of the Halberd and shield hollow that comes from the walkway).
Cross through the fog gate and then step back inside, kill the hollow that ‘wakes up’ here and then be careful when you go back outside. On the right there’s an area with archers (who all have a stupidly accurate aim) and other soldiers.
Drop down to the pathway below you, and you can work your way around the wooden walkways (jumping off the roof in the middle to the platforms at the back) and then inside the tunnel nearby is a boulder (easy to dodge if you just let it roll past) and also a really handy NPC at the top of the tunnel.
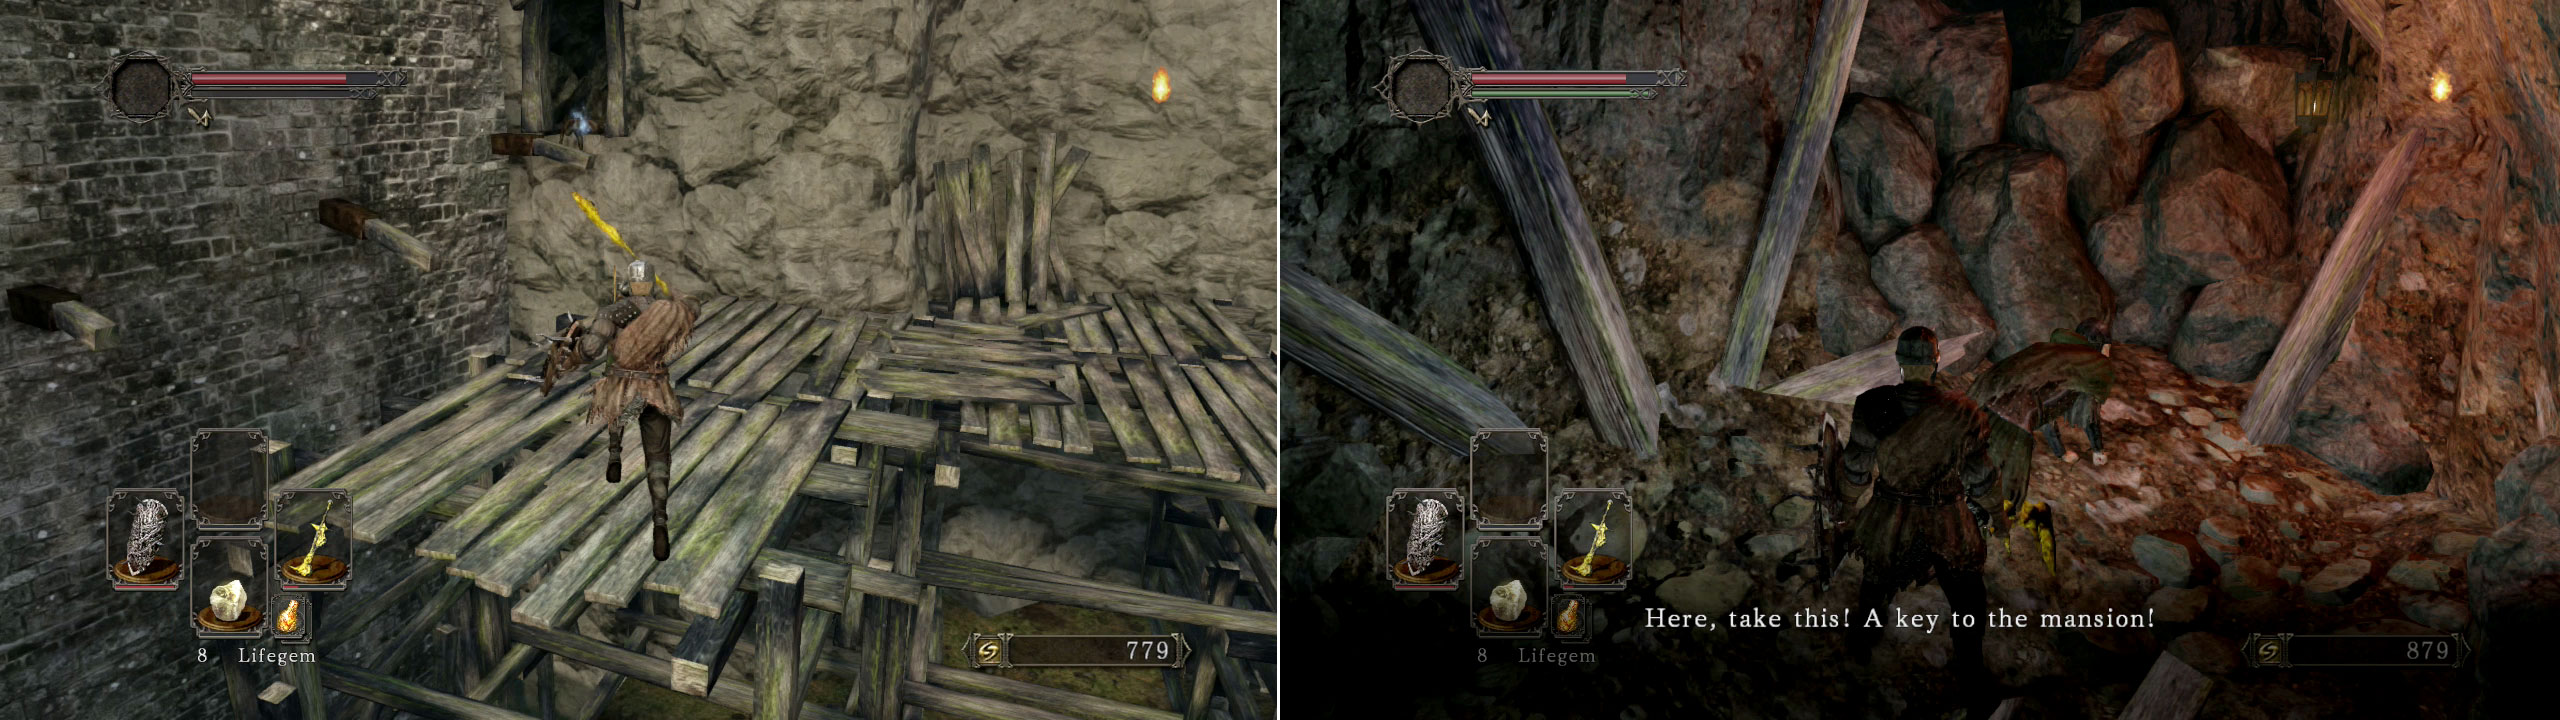
Make sure to jump across to the platform and also there’s a lot of dialogue to sit through until he gives you his key.
Cale the Cartographer will, eventually, give you a key to his home in Majula if you talk to him for long enough. Keep talking until he says he’ll see you there later. There’s also a useful [Amber Herb] on the ledge to your left as well. Back outside, clear up the lowest level for a [Titanite Shard] .
Inside you’ll find a [Pharros Lockstone] tucked away in the room opposite the entrance, [3 x Titanite Shards] and [3 x Torches] upstairs and finally downstairs in the basement there’s a skeleton that’ll drop a guaranteed [Effigy] when you kill it, another handy [Estus Flask Shard] on a corpse and a [Soul Vessel] in the metal chest (this allows you to re-allocate your stats if you speak to the Old Firekeepers at the start of the game).
Once you’ve powered up, head back to the forest (via warping at the Majula bonfire) and either run up the tree stump or use the shortcut in the wall we suggested earlier.
Be careful around the hollows up here (especially of the firebomb throwing one up on the platform by the shortcut). If you fancy your chances you can face another boss now, but it’s a one-shot chance as he’ll move to his ‘proper’ location if you die when fighting him here.
Basically, you can climb up the ladder on the walkway opposite the shortcut and standing up here for the first time will trigger the battle with the Pursuer boss dropping down into battle.
Win or lose, head down the ladder to the left of the shortcut and at the bottom you’ve got a few options now. First it’s wise to speak to Pate , an NPC with a potentially shady background. Ignore the open gateway for now and turn around and look for a hole in the wall to your left.
There are numerous ballistas in here that are trained on the opening (and you’d be correct in thinking they’ll fire at you once you enter). So run inside, immediately take a left and you’ll dodge the shots. Now take your time and watch out for the hollows that’ll come and attack you.
In front of the ballistas you’ll find a [Large Soul of a Lost Undead] , a [Blue Wooden Shield] and a [Great Soul Arrow] (magic spell).
Downstairs you’ll find a Trap Chest that will either shoot arrows at you (raise a shield to block) or throw out poisonous green gas (roll away ASAP to minimize damage). Inside you’ll find a [Titanite Shard] .
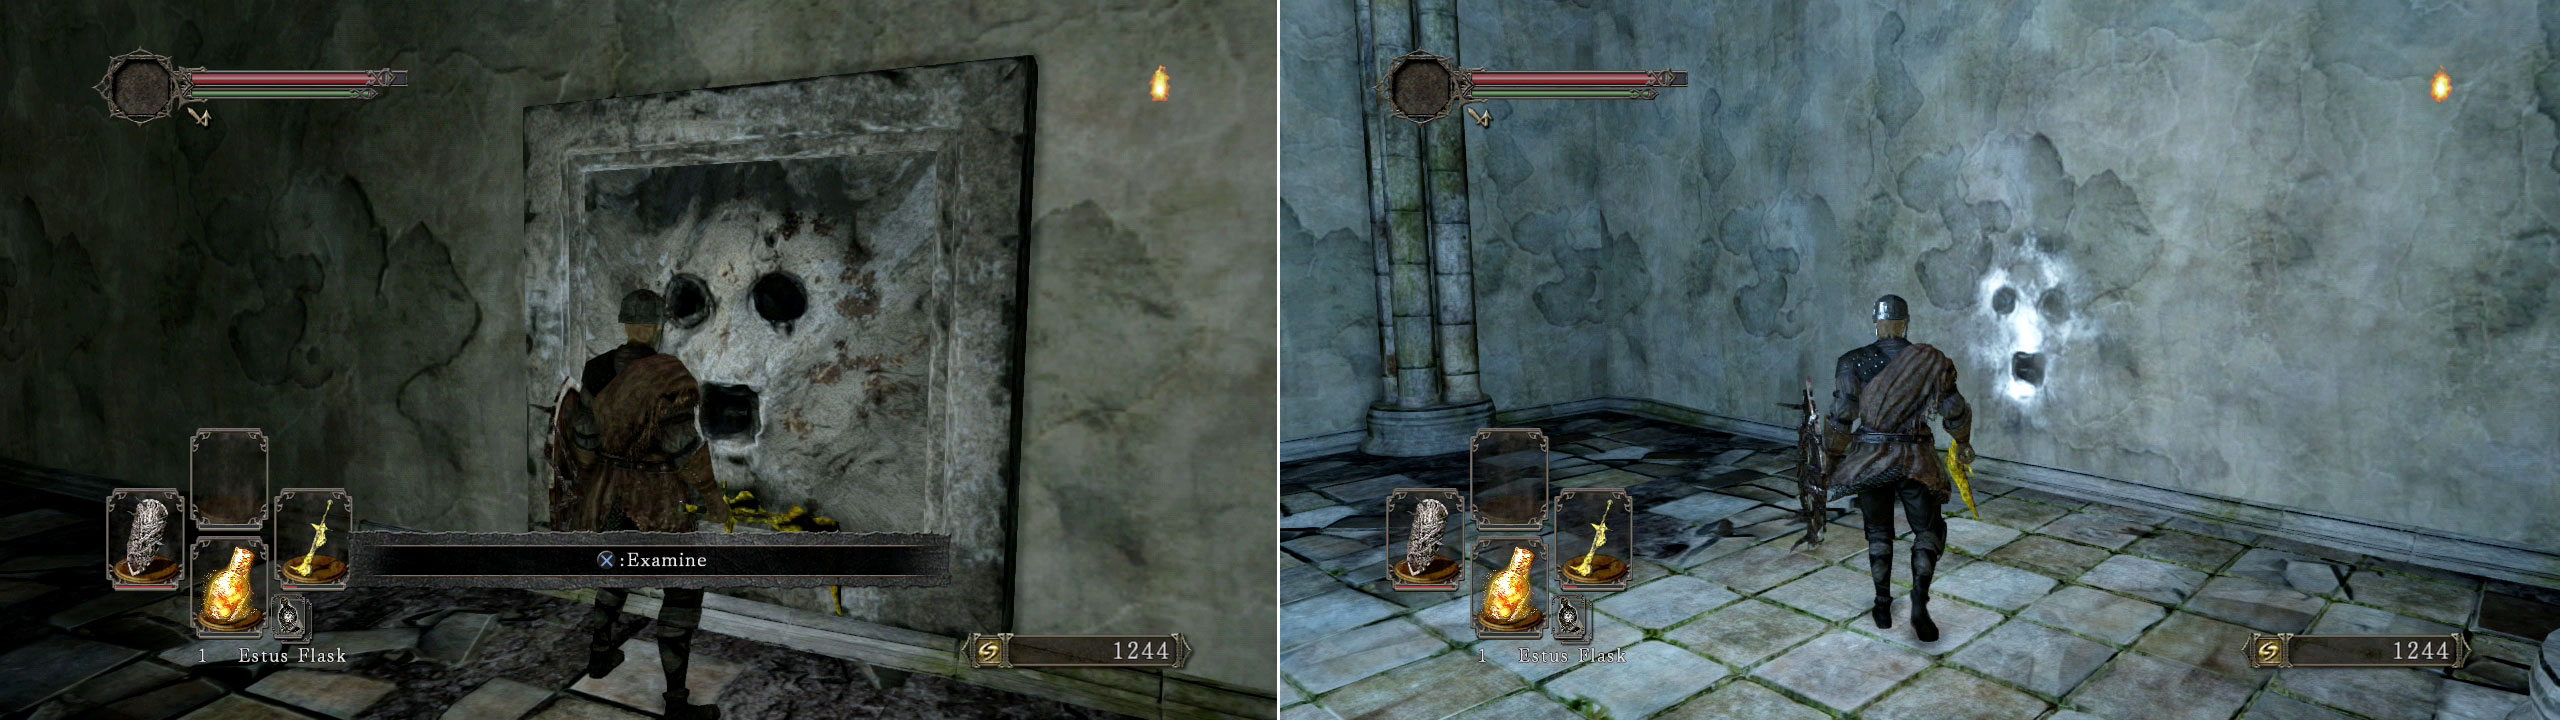
If you have a Pharros Lockstone on you then you can place it into the mouth of the statue on the wall here and it’ll reveal a hidden wall that you must strike to reveal a hidden room behind
Inside the Lockstone room you’ll find a rare [Titanite Slab] and the [Chloranthy Ring] (speeds up stamina recovery).
Once you’re done, look for a door in the corner of the room and you’ll find it doesn’t open from your side. If you attack the door, you’ll alert the guards behind it who’ll open it up for you (how nice of them) and once they’re all dead, pick up the [Life Ring] (raises max HP) and a [Large Titanite Shard] .
Climb back up the ladder and head out and through the archway. You need to be careful here though as there’s a couple of firebomb-throwing hollows up and to your left (and you’re surrounded by explosive barrels).
There’s a new enemy in front of you known as an ‘Old Ironclad Soldier’, it’ll try and smash your head in with its massive club (or flatten you with its metallic shell-covered back). Ignore it for now and then go through the next archway and climb up the ladder to your right.
Head left, climb up the broken part of the wall, destroy the carriage in front of you and then dispatch all of the hollows from the top of the stairs to the bottom.
![False Wall: There’s a hidden room at the very bottom of the stairs; so press the action button on the left wall and it’ll move away to reveal a chest with a [Sorcerer’s Staff] and an [Amber Herb].](/assets/guides/42/60421-1398294000.jpg)
False Wall: There’s a hidden room at the very bottom of the stairs; so press the action button on the left wall and it’ll move away to reveal a chest with a [Sorcerer’s Staff] and an [Amber Herb].
Clear out all the enemies here, mop up the final few enemies outside and approach the gate to make it shut. Now simply run all the way back to the broken part of the wall, drop down and speak to Pate again to be rewarded with the very helpful White Soapstone (allow yourself to be summoned)!
Note: You can also re-climb the ladder leading to the high wall again and hang a right where the hollows throwing the firebombs are residing for additional souls and items (including a metal chest).
Bait the Old Ironclad Soldier into slamming his club, back off and then go in during the cool down to get a few hits in. Simply rinse, wash and repeat until its dead. Hang a right in the adjoining room and up the stairs you’ll find a [Homeward Bone] .
Deal with the two Halberd Hollow soldiers up ahead and then run down to the end of the room. Bait all enemies down to the ground level (there’s a couple above you waiting to ambush you) and once you’ve picked them off; run up the broken giant sword for the much-loved [Halberd] weapon.
Head back down and step through the fog gate; from here you can run into the room on your right and be sure to kill the Crystal Lizard using overhead attacks (it’ll disappear after a few seconds if you don’t kill it quick enough).
Hang a right and then look down the stairs at the back of the room for a [Large Leather Shield] and some [Lifegems] . Make your way back out and go right, grab the [Fire Arrows] near the lift and open the gate in front of you.
This serves as a shortcut to the second bonfire (so we highly recommend that you save now). Slide back down the ladder after saving and, if you’re in human form, you can summon Pate to help you in the upcoming boss battle (if you’re hollow simply use an Effigy to turn back into human form - burning effigies only lowers your chances of being invaded whilst human).
Step onto the lift and then watch out for the hollow infantryman guarding the locked door on the left (it can’t be opened for a while yet). If you’re human you’ll see Pate’s white summon sign near the fog gate.
Boss Fight - Last Giant
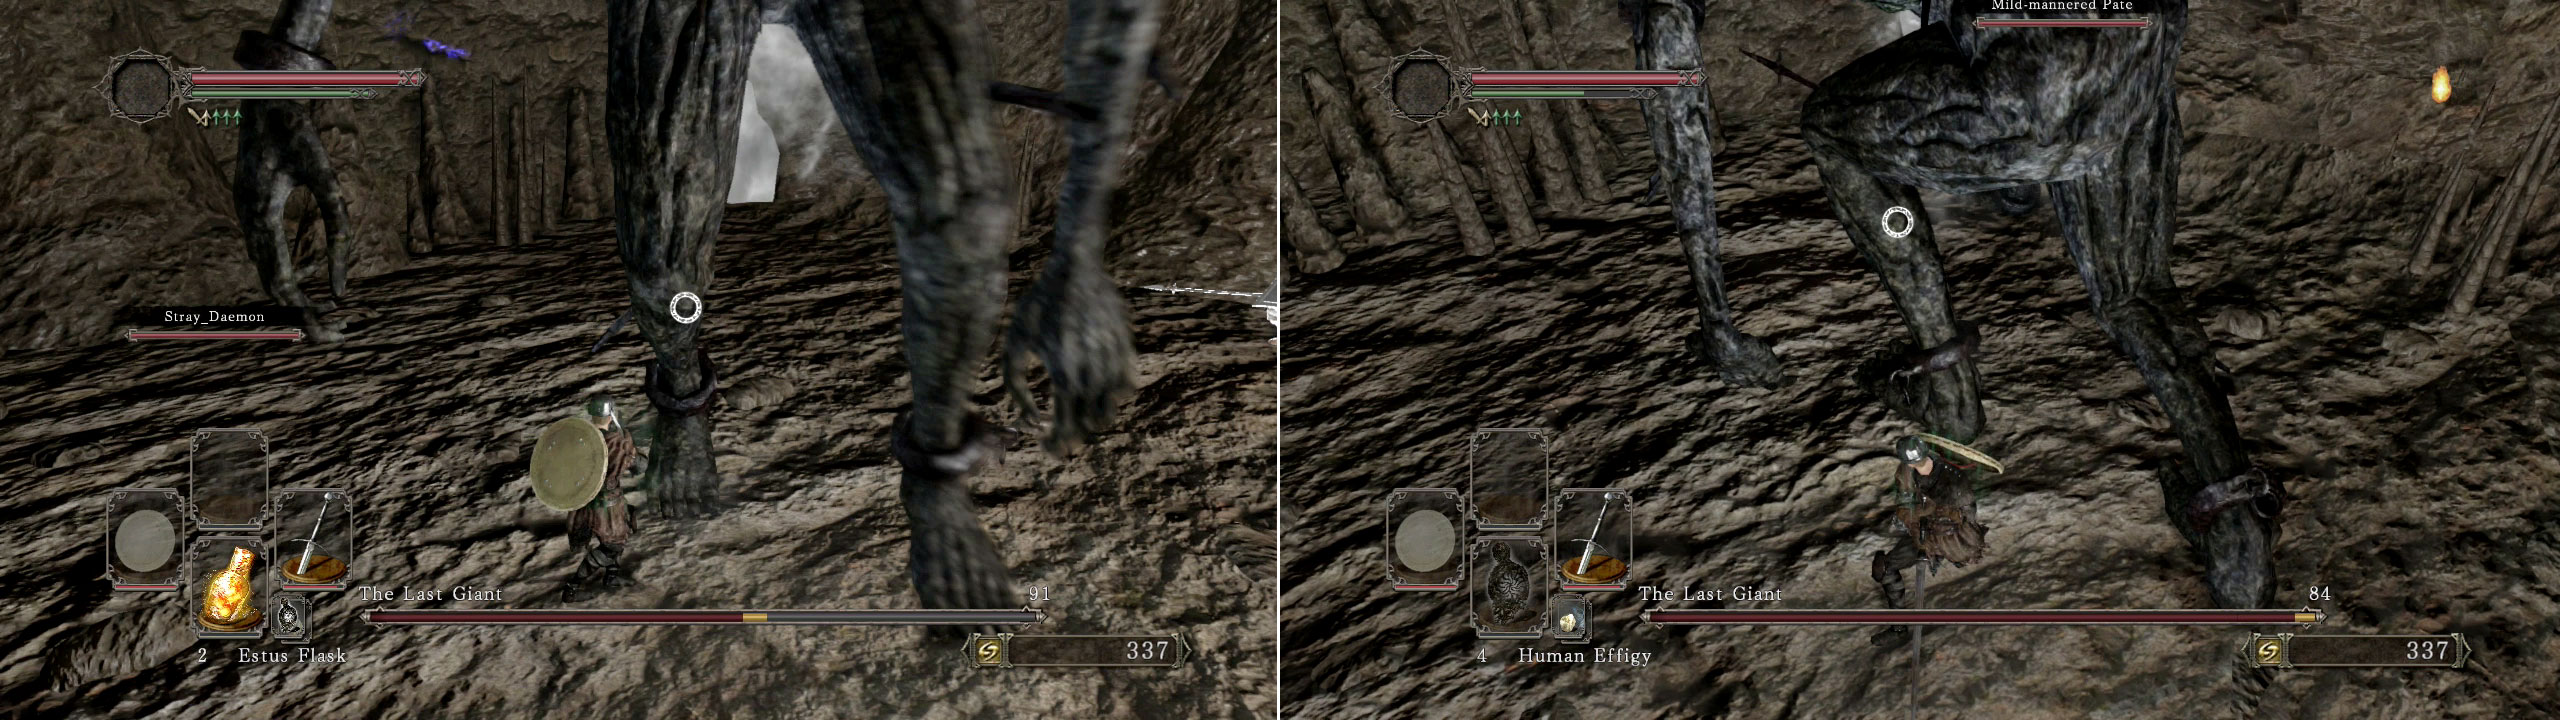
Whilst he’s one of the first bosses, he will do a serious amount of damage to you if he hits you. So here’s our breakdown of the best strategies and things to remember for this fight:
- Warning! If you summon an NPC or human in to the battle with you, you’ll increase the HP of the boss with each person summoned! If they die you then have an even harder task ahead of you as their bigger HP total stays!
- It’s best to lock-on and focus on his legs and then watch for which foot begins to rise. You’re best to roll out of the way of the foot-slam move and then hit its legs a couple of times.
- If the Giant sweeps its arms on the ground, simply stay right under the middle of it to avoid it completely ( don’t stand at the outside edges of his legs as the sweep attack will hit you)!
- It’ll eventually rip its arm off and try to bash you with it/sweep it along the ground. Staying under its bum will avoid these attacks and offer you more opportunities to hit it.
- If you summon Pate (and he survives the battle) then when you meet him later on in the game he’ll give you his armor).
If you want to earn some extra souls then use your white soapstone to leave a summons sign outside the boss room as this is a place where many new DS2 players struggle. You’ll earn 2,500 souls per kill (regardless of who actually kills the boss) and if you die beforehand you lose none! So allowing yourself to be summoned is a win-win for everyone!
The key will allow you to tackle another boss straightaway; but before you do that head back to Majula and level-up your character/chosen weapon as you like. When you’re ready, warp back to the second bonfire at the Forest and let’s go take out that second boss!
Slide back down the ladder and then go left through the opened doorway. Lure out the two Hollows guarding the doorway and pick them off before using your new key on the door to your right. Watch out for two more Hollow soldiers in here and proceed up all flights of stairs.
There’s a [Soul of a Namless Soldier] and a [Lifegem] up on the platform to your right. If you didn’t beat the Pursuer boss during the one-off encounter earlier then he’ll be just through nearby fog gate…
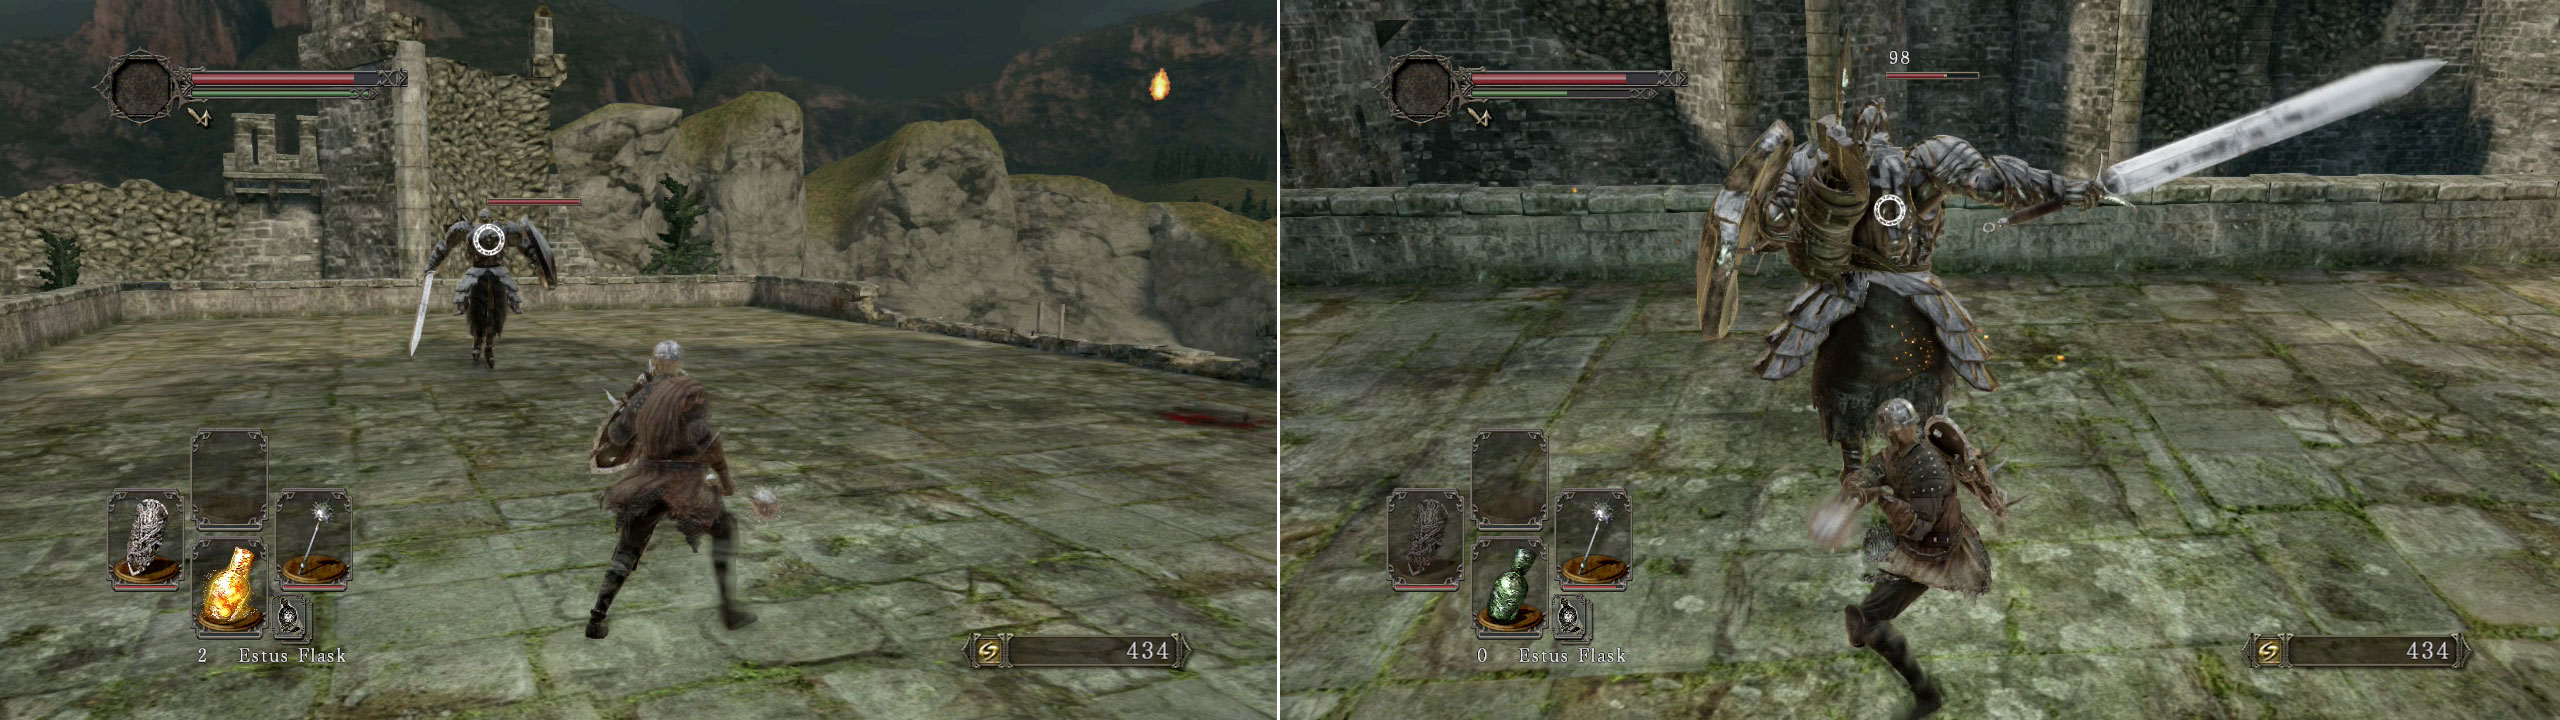
Boss Fight - Pursuer
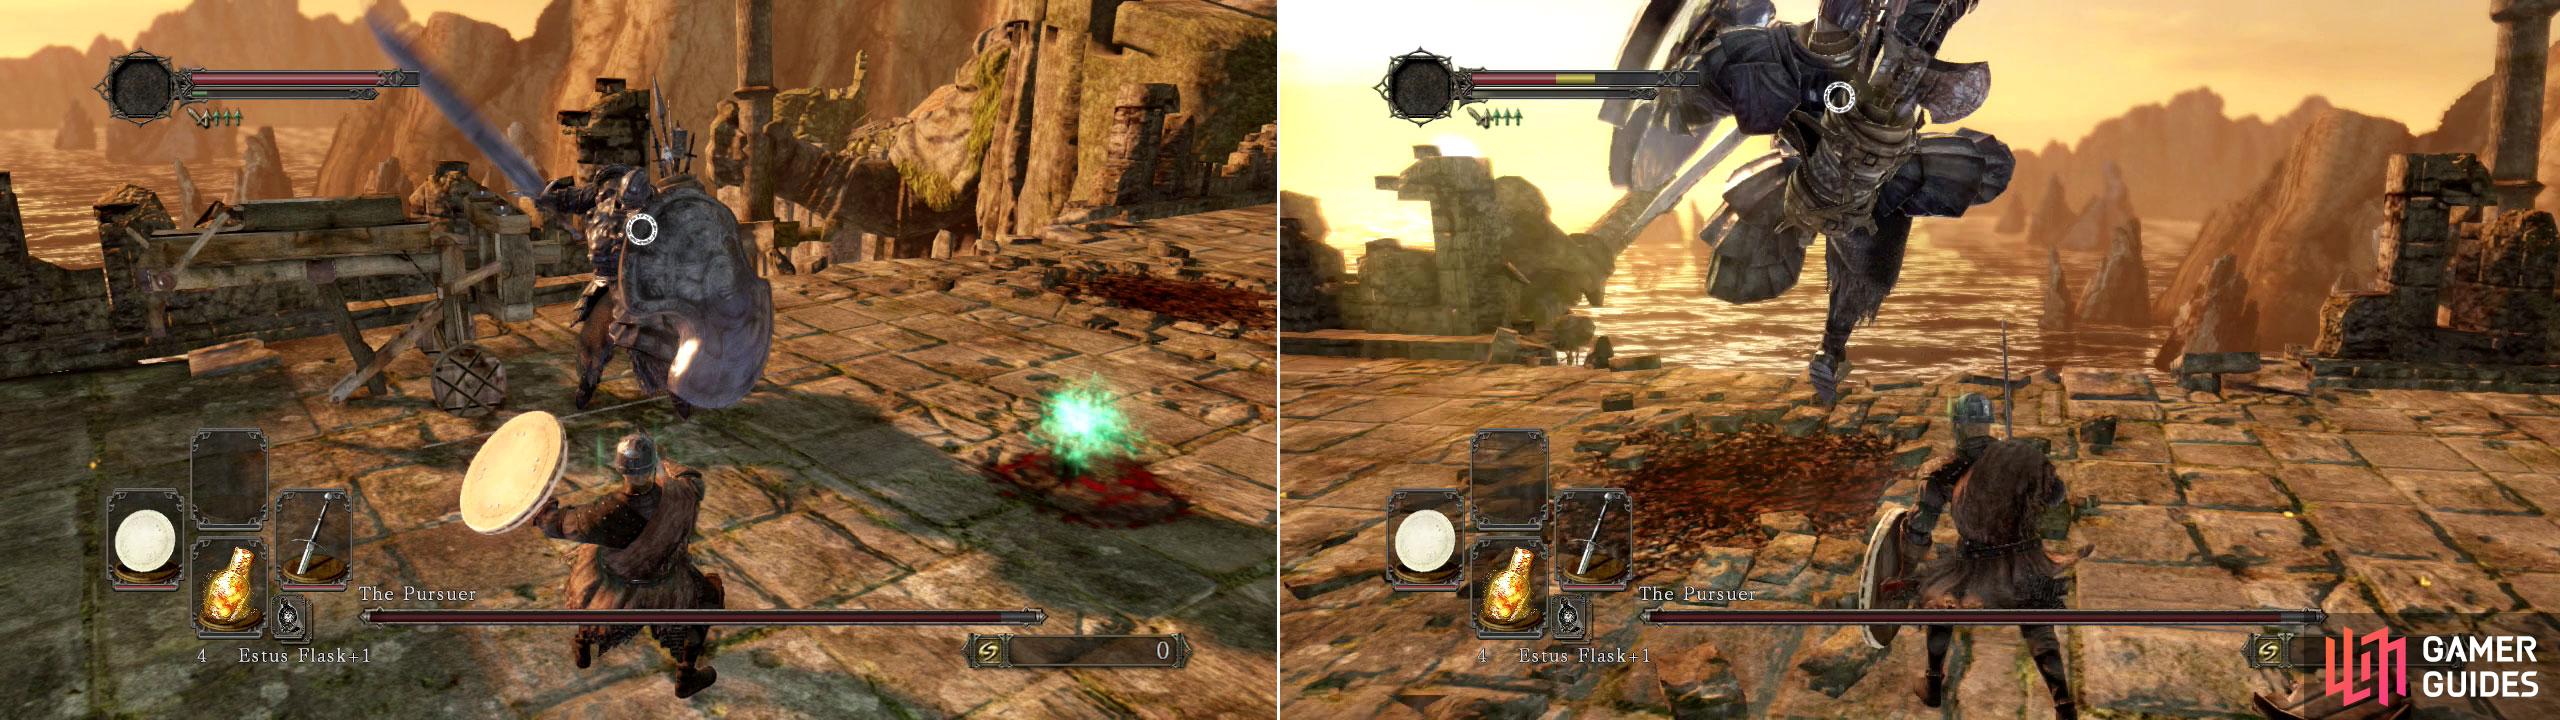
There’s two main ways to beat this boss and we’ll cover them both for you to try.
- Even carrying a 100% physical damage shield isn’t always enough to protect you here as his shield-bash move will likely drain 100% of your stamina; leaving you stun-locked and open for a critical attack.
- Therefore we found it was safer to roll under his attacks so you quickly end up behind him.
- His cool down periods can be fairly long on some of his attacks; so punish this with a couple of decent kits (but don’t be greedy)!
- Be wary of his three-hit combo that finishes with him jumping up in the air backwards; ready to do a powerful dropping slash attack.
- As with all bosses, be patient, don’t get greedy and roll behind him as often as possible to beat him.
High-Risk Tactic
There are two ballistas near where the Pursuer first spawns and it’ll fire three bolts if you use one. Each bolt does 330HP damage each and with the Pursuer only having 1,000HP then getting all three to connect will almost kill him in a single shot!
To get enough time to use the ballistas on him your best bet is to stand by the wooden cart in front of the left-hand ballista and wait for the pursuer to swing his sword at you. If you successfully parry his attack; he’ll be staggered for a few seconds.
This is just about long enough for you to run to the ballista and fire it at him (and he’ll be close enough for all three bolts to hit). If your parry attempt fails then be prepared for a good chunk of your health to go bye-bye. But it’s easily the most satisfying way to kill him.
With this boss over with, run up and look for the broken floor on the right. Drop down here and then look behind you for the much lauded Drangelic Set (the shield is a 100% physical damage reduction type and the sword is pretty decent too).
Item Mop Up
You can go back up to where you fought the boss from here and then sit in the bird’s nest to travel to a new area ( Lost Bastille ); but we’re going to suggest that you go back to the room just after the long ladder that leads to the second bonfire (and just before the fallen tree) and use the key in the locked door.
There are numerous items in here (including our personal favourite - the Bastard Sword) and another bonfire for saving at. Just be extra careful of the numerous Old Iron Clad Soldiers down here and the holes in the ground outside.
Once you’re finished with the item mop-up; it’s time to decide where you want to go to next…
No Comments