
There are a lot of minigames to be found in Final Fantasy VII Rebirth, some of which are entirely new. Queen’s Blood is a card game that has been created solely for Rebirth and on this page, we’ll navigate you through the necessary steps to completing all six Queen’s Blood challenges in the ![]() Gold Saucer.
Gold Saucer.
There are six Gold Saucer Queen’s Blood Challenges to complete in total.
Where to Find the Gold Saucer Queen’s Blood
Once you’ve made it to the Golden Saucer in Chapter 8 of Final Fantasy VII Rebirth you’ll want to progress through the story until Cloud reunites with a party member after a well-needed rest in the haunted hotel, then you’ll want to head on up to the Wonderment Square to find the ![]() 3D Brawler, Queen’s Blood, and
3D Brawler, Queen’s Blood, and ![]() G-Bike Minigames. Make your way over to the Queen’s Blood Station on the left and you’ll notice that this isn’t the same old game mode that you know and love, as the Gold Saucer has put its own spin on it.
G-Bike Minigames. Make your way over to the Queen’s Blood Station on the left and you’ll notice that this isn’t the same old game mode that you know and love, as the Gold Saucer has put its own spin on it.
How to Complete the Gold Saucer Queen’s Blood Challenges
There are a total of six Gold Saucer Queen’s Blood challenges that you’ll need to complete in order to claim all of the rewards and some of them can be quite the challenge, so below you can find a deck setup that we recommend as starting baseline for all of the challenges. However, we suggest that you adjust the deck slightly for most of the challenges.
| Card | Number |
|---|---|
| x2 | |
| x1 | |
| x1 | |
| x1 | |
| x1 | |
| x2 | |
| x1 | |
| x1 | |
| x1 | |
| x1 | |
| x1 | |
| x1 | |
| x1 |
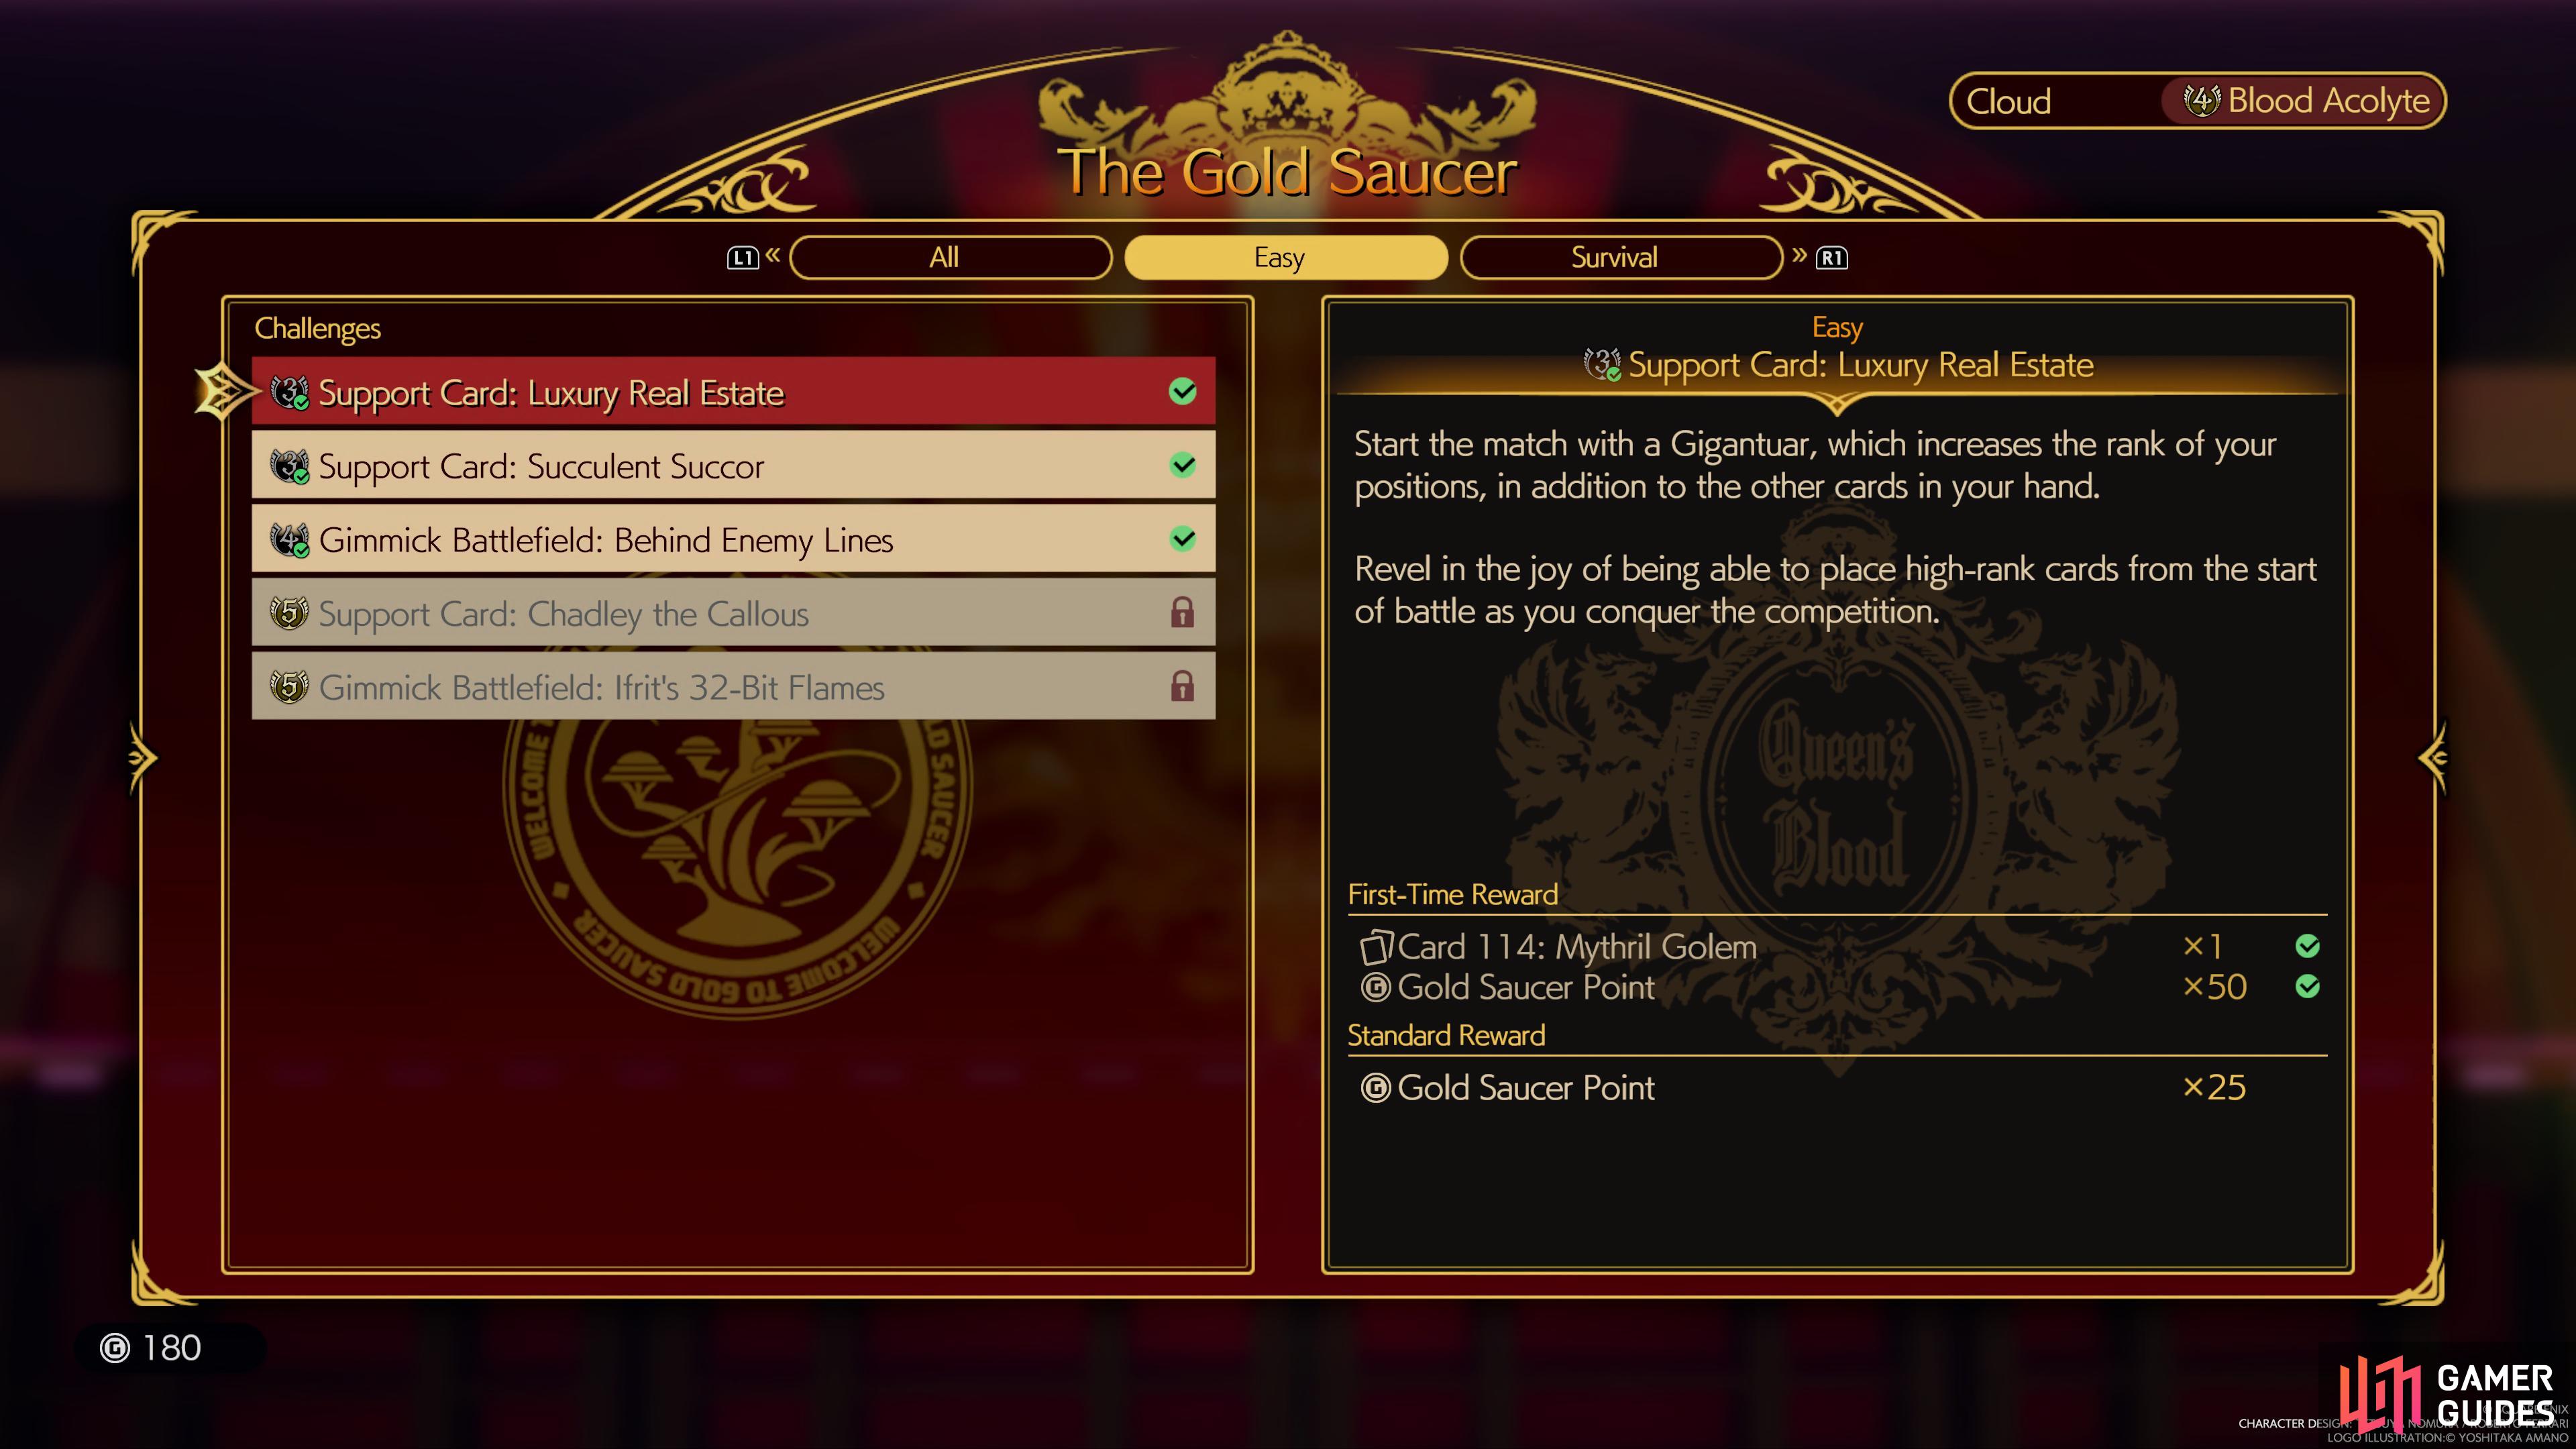
Support Card: Luxury Real Estate
To complete this challenge, you’ll want to slightly adjust your deck to include the ![]() 141 Dio card and then follow the steps below:
141 Dio card and then follow the steps below:
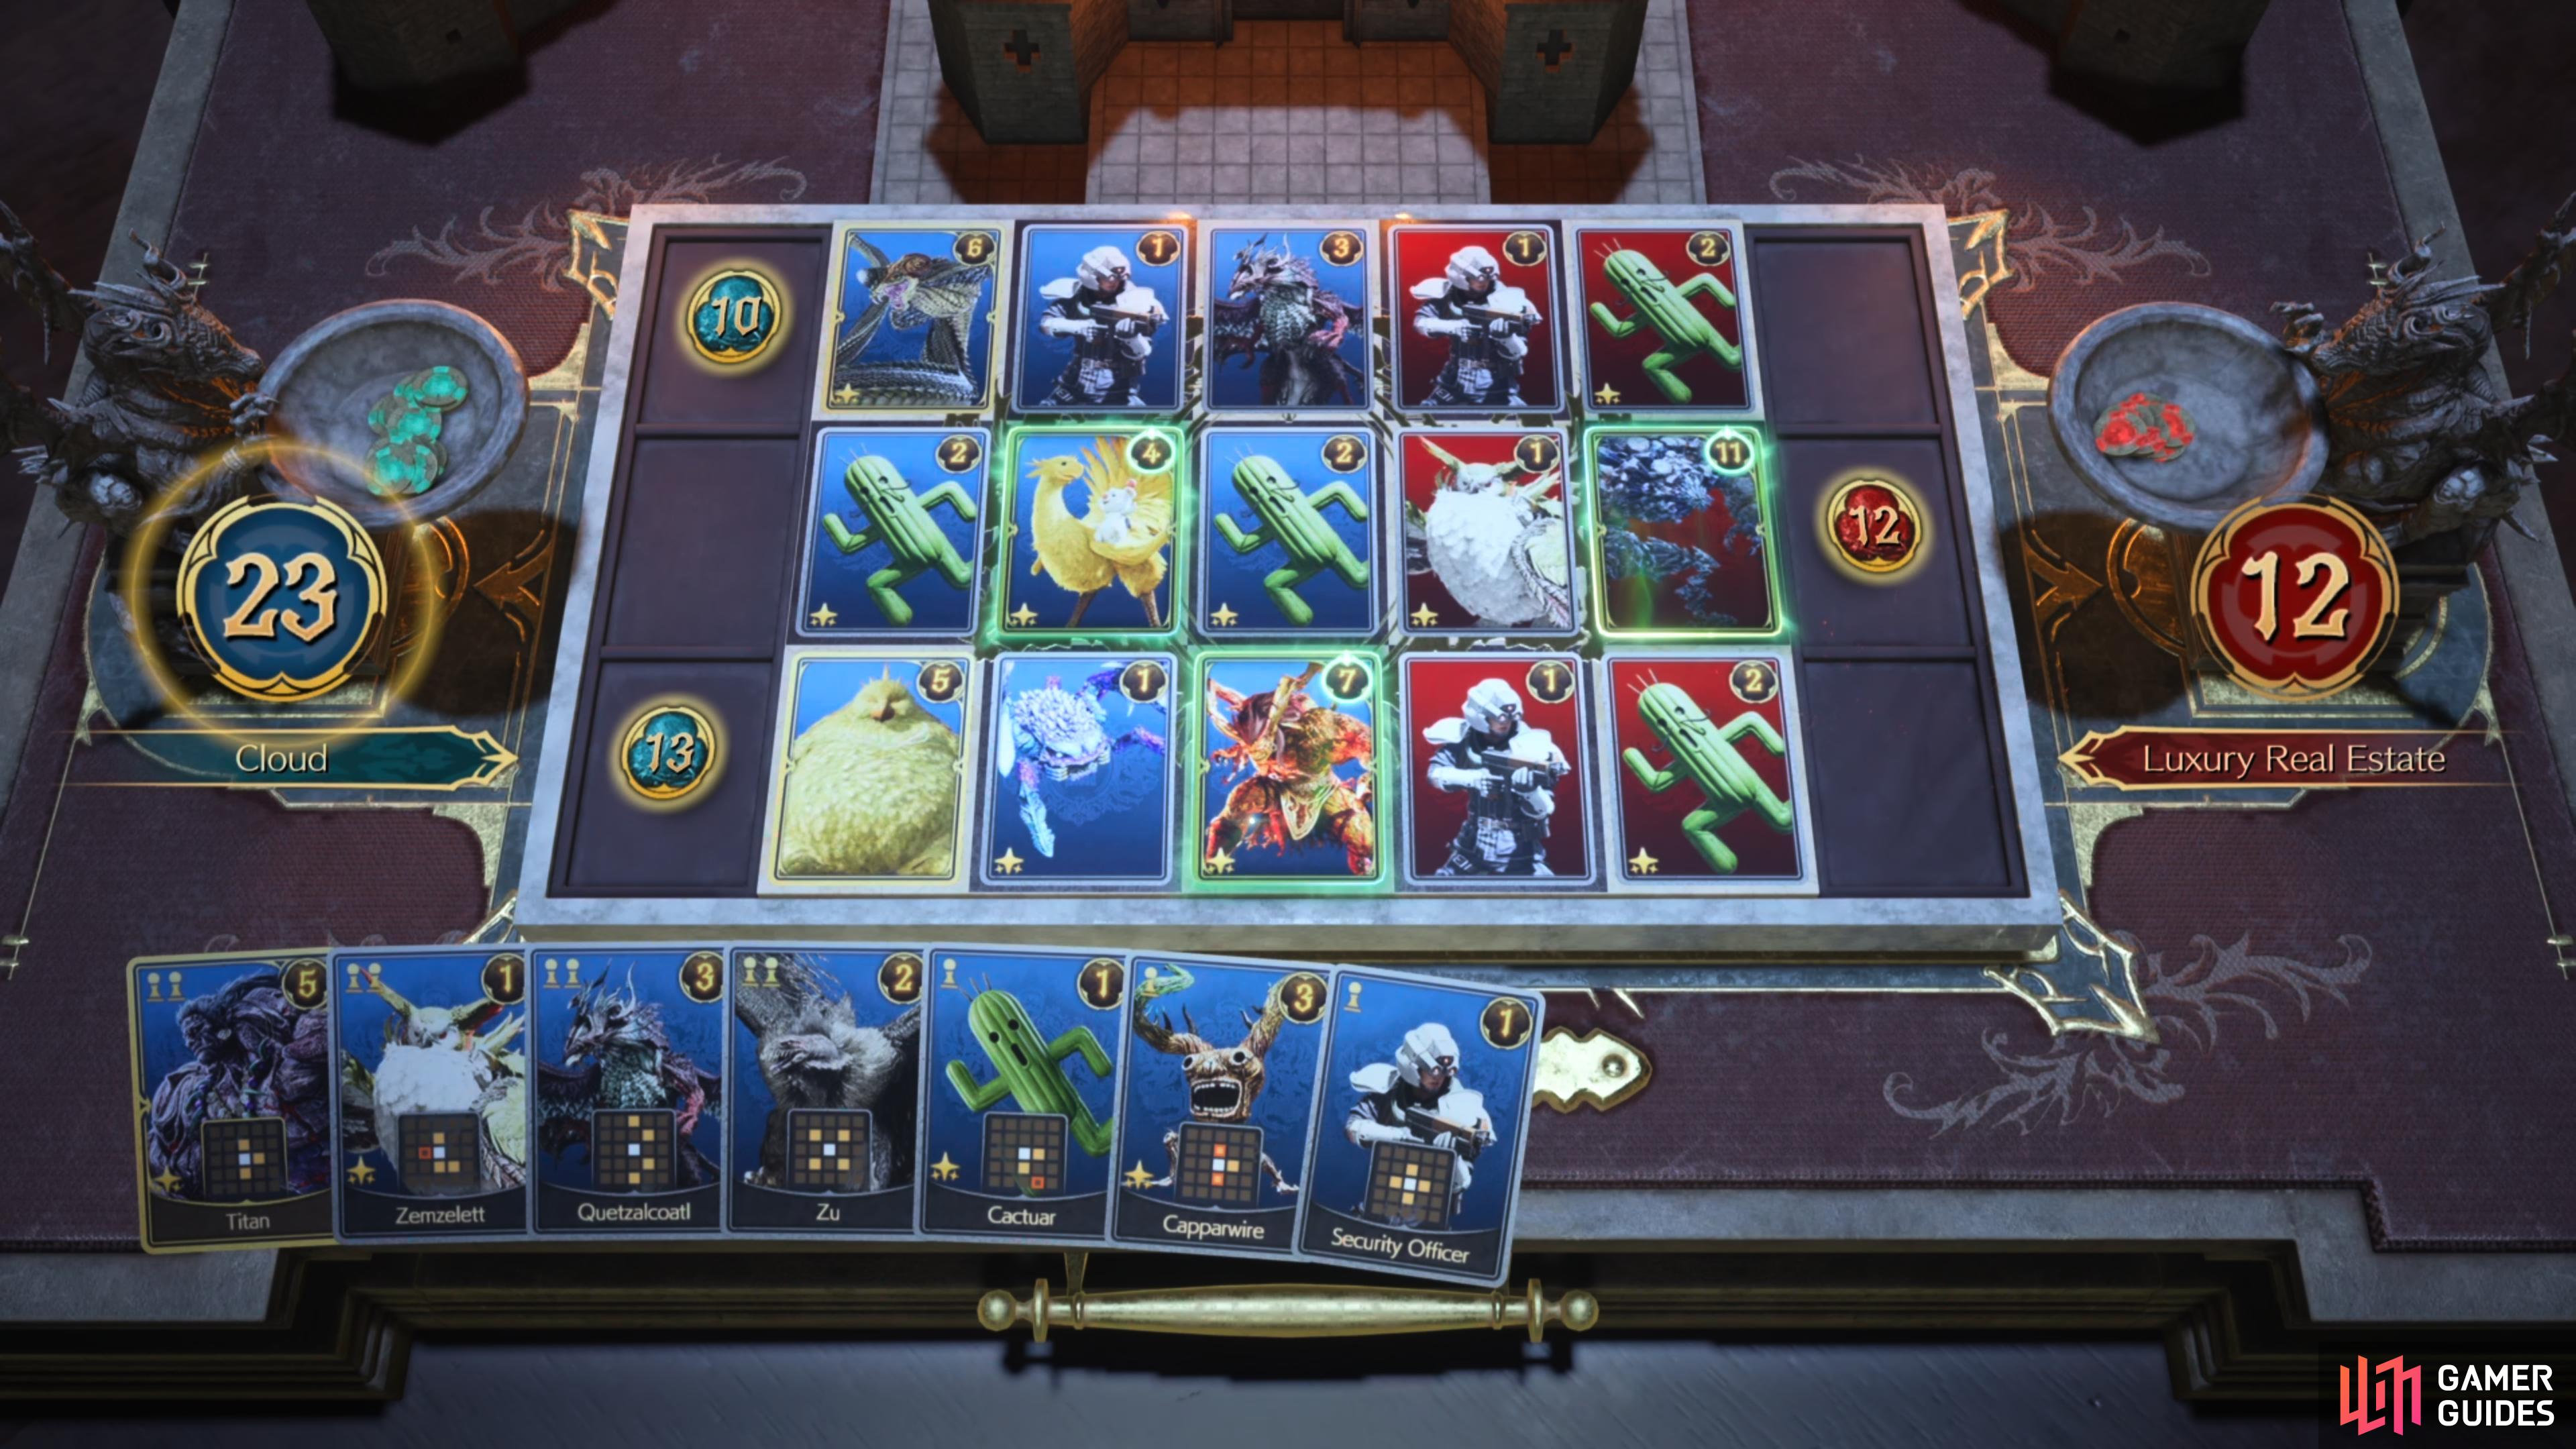
The Support Card: Luxury Real Estate Challenge will allow you to start the match with two Gigantuar Cards which increases the rank of your positions. As a result, you’ll be able to play high-ranking cards from the outset which will allow you to dominate the playing field. In order to complete this we recommend that you mulligan the majority of your cards until you have a starting deck that consists of more cards that cost three pawns, then you’ll want to place Gigantuars in the left and center tiles of the middle lane. By doing this you’ll be able to easily play high-ranking cards, such as Dio early on in the match (You can purchase this from the shops in the Gold Saucer).
Completing the Support Card: Luxury Real Estate for the first time will reward you with Card ![]() 114 Mythril Golem and 50 Gold Saucer Points. However, if you decide to replay this opponent, you’ll gain an additional 25 Gold Saucer Points per victory.
114 Mythril Golem and 50 Gold Saucer Points. However, if you decide to replay this opponent, you’ll gain an additional 25 Gold Saucer Points per victory.
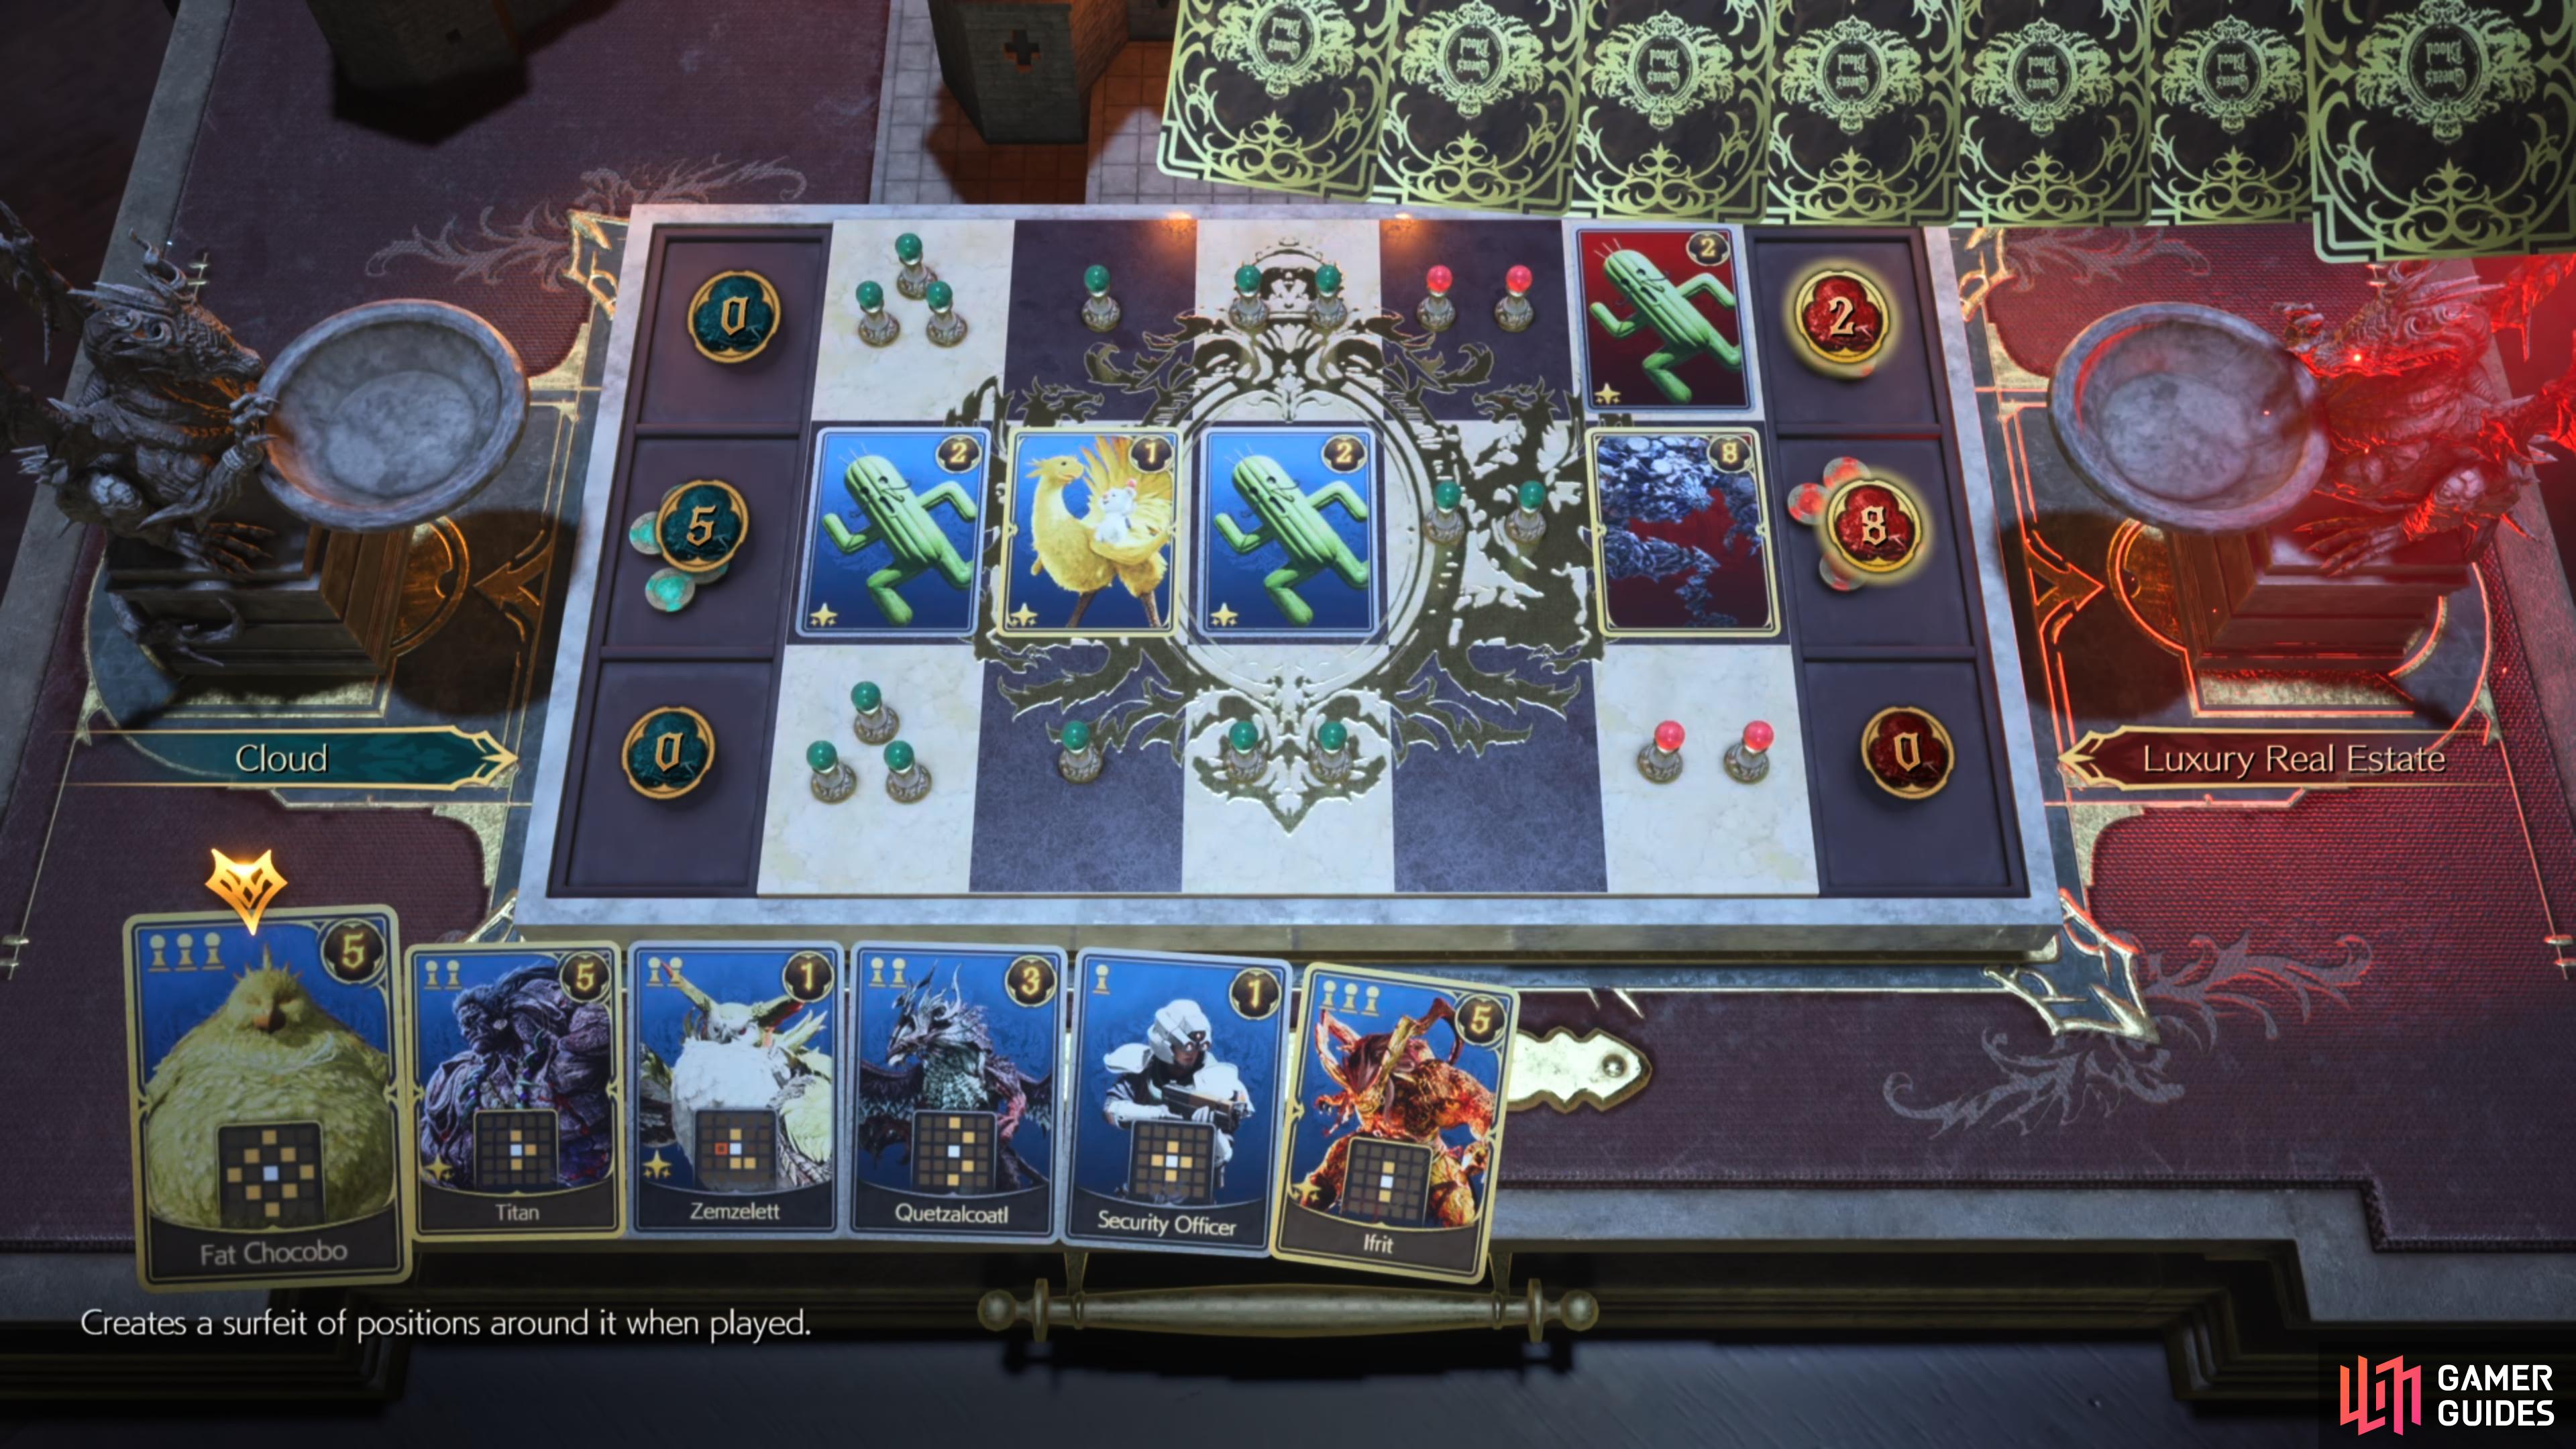
(1 of 2) Place the Gigantuar Card in the center
Place the Gigantuar Card in the center (left), to allow you to play high-ranking cards around it. (right)
Support Card: Succulent Succor
To complete this challenge, you’ll want to slightly adjust your deck to include the ![]() 107 Chocobo & Moogle,
107 Chocobo & Moogle, ![]() 095 Ifrit, and 141 Dio cards and then follow the steps below:
095 Ifrit, and 141 Dio cards and then follow the steps below:
The Support Card: Succulent Succor Challenge will allow you to start the match with a ![]() Cactrot Card which will enhance any cards already in play. To begin, you’ll want to mulligan your deck until you start with 107 Chocobo & Moogle, 095 Ifrit, and 141 Dio, as these will synergize with the Cactrot Card due to them all being buff cards. We managed to easily dominate this opposition by placing the two Cactrot Cards in the top left and bottom left tiles and then placing the Chocobo & Moogle, Ifrit, and Dio around them.
Cactrot Card which will enhance any cards already in play. To begin, you’ll want to mulligan your deck until you start with 107 Chocobo & Moogle, 095 Ifrit, and 141 Dio, as these will synergize with the Cactrot Card due to them all being buff cards. We managed to easily dominate this opposition by placing the two Cactrot Cards in the top left and bottom left tiles and then placing the Chocobo & Moogle, Ifrit, and Dio around them.
Completing the Support Card: Succulent Succor challenge for the first time will reward you with Card ![]() 116 Grasptropod and 60 Gold Saucer Points. However, if you decide to replay this opponent, you’ll gain an additional 30 Gold Saucer Points per victory.
116 Grasptropod and 60 Gold Saucer Points. However, if you decide to replay this opponent, you’ll gain an additional 30 Gold Saucer Points per victory.

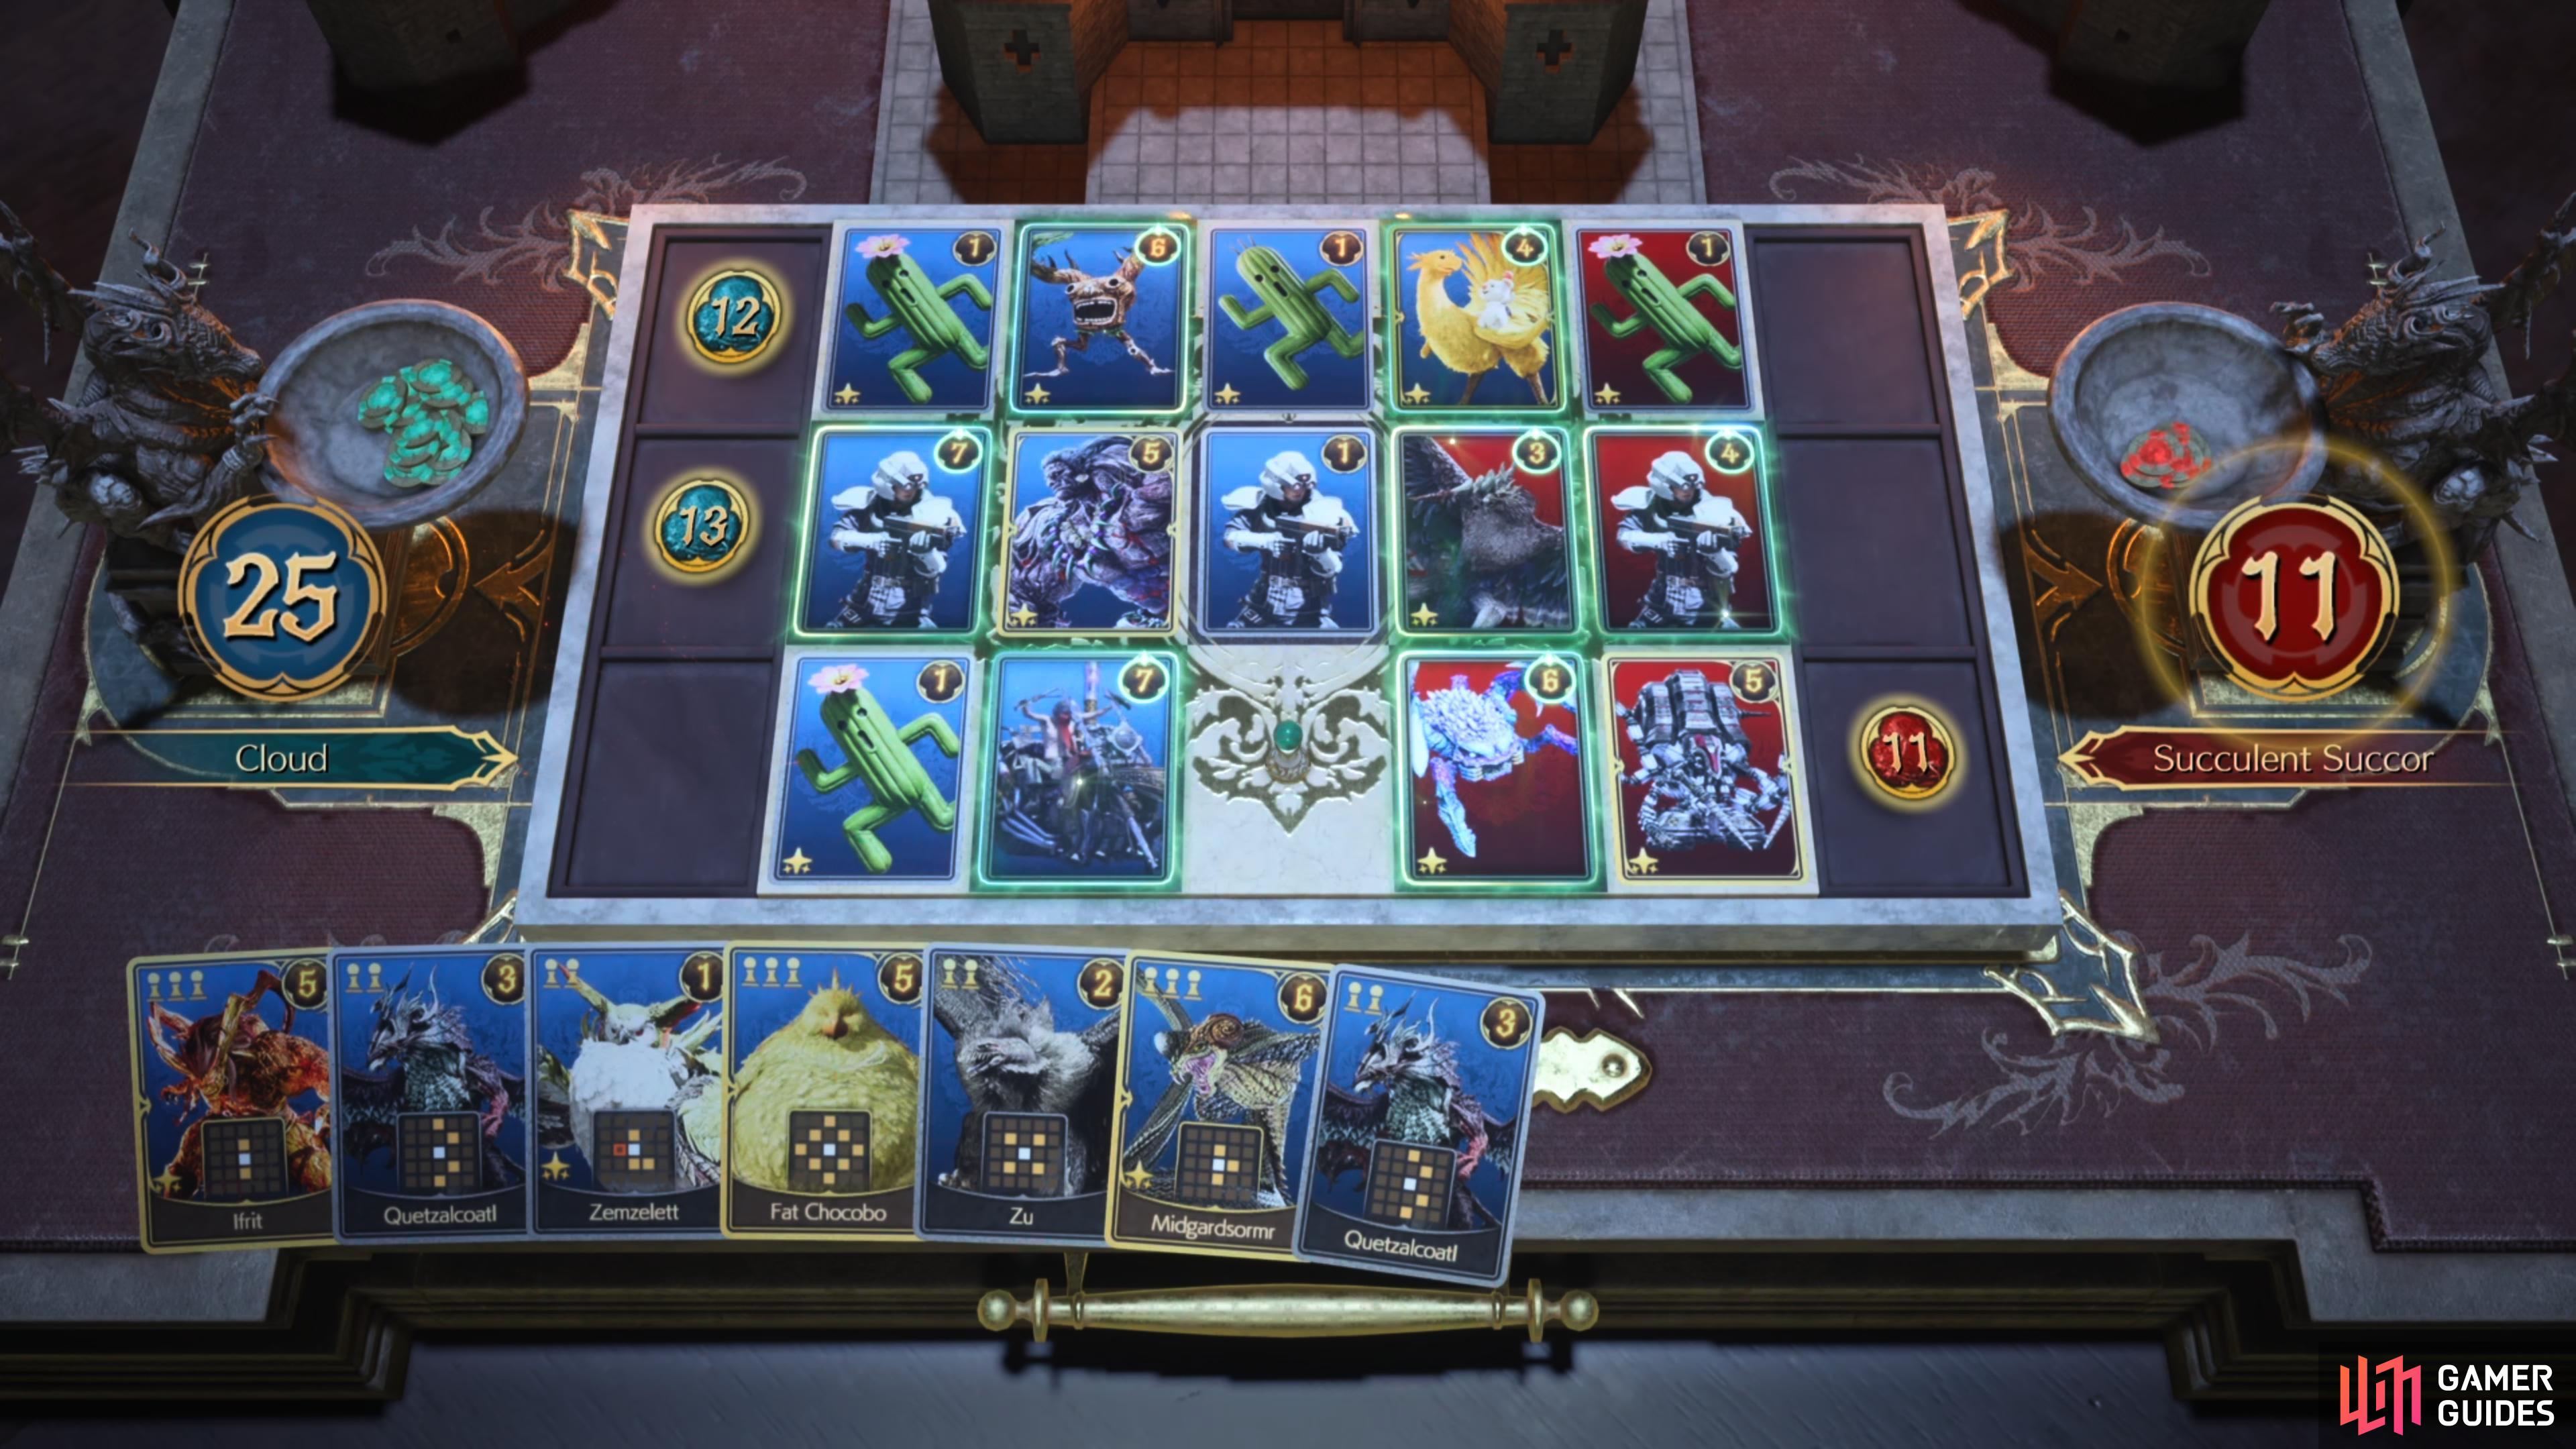
(1 of 2) Place the Cactrot Cards in the top and bottom left tiles
Place the Cactrot Cards in the top and bottom left tiles (left), to boost the points of any cards you play around it. (right)
Gimmick Battlefield: Behind Enemy Lines
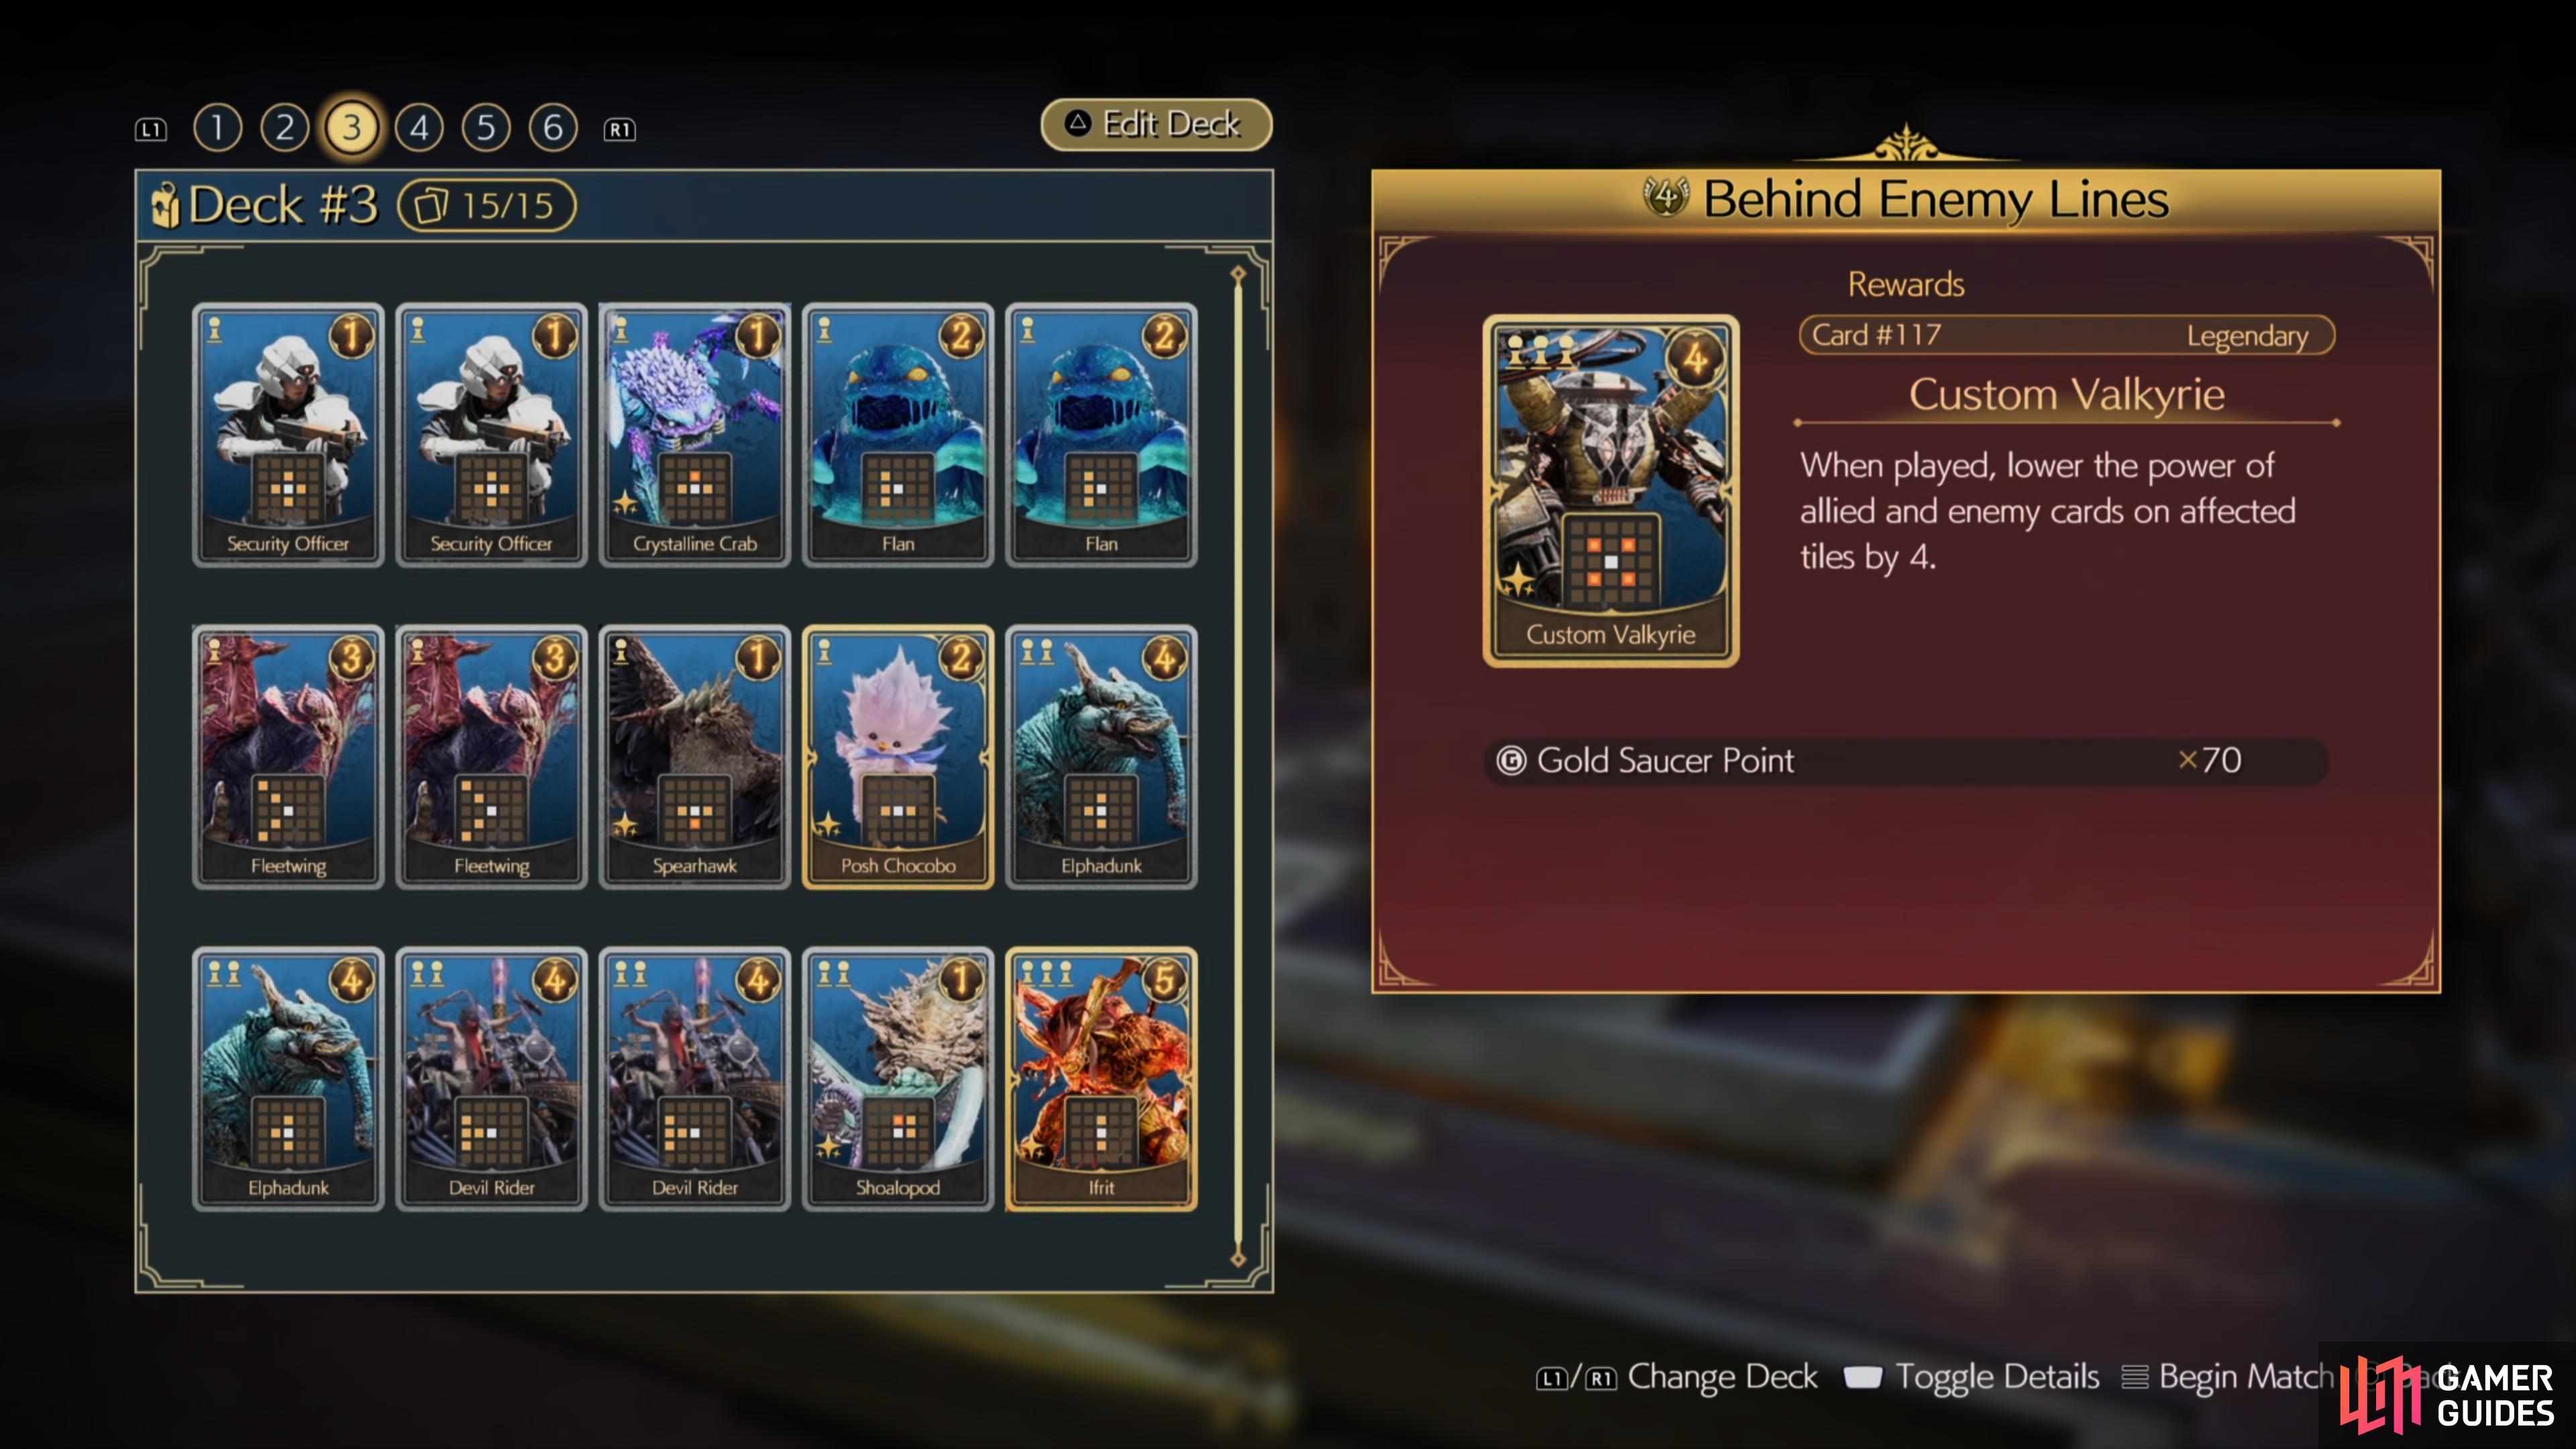
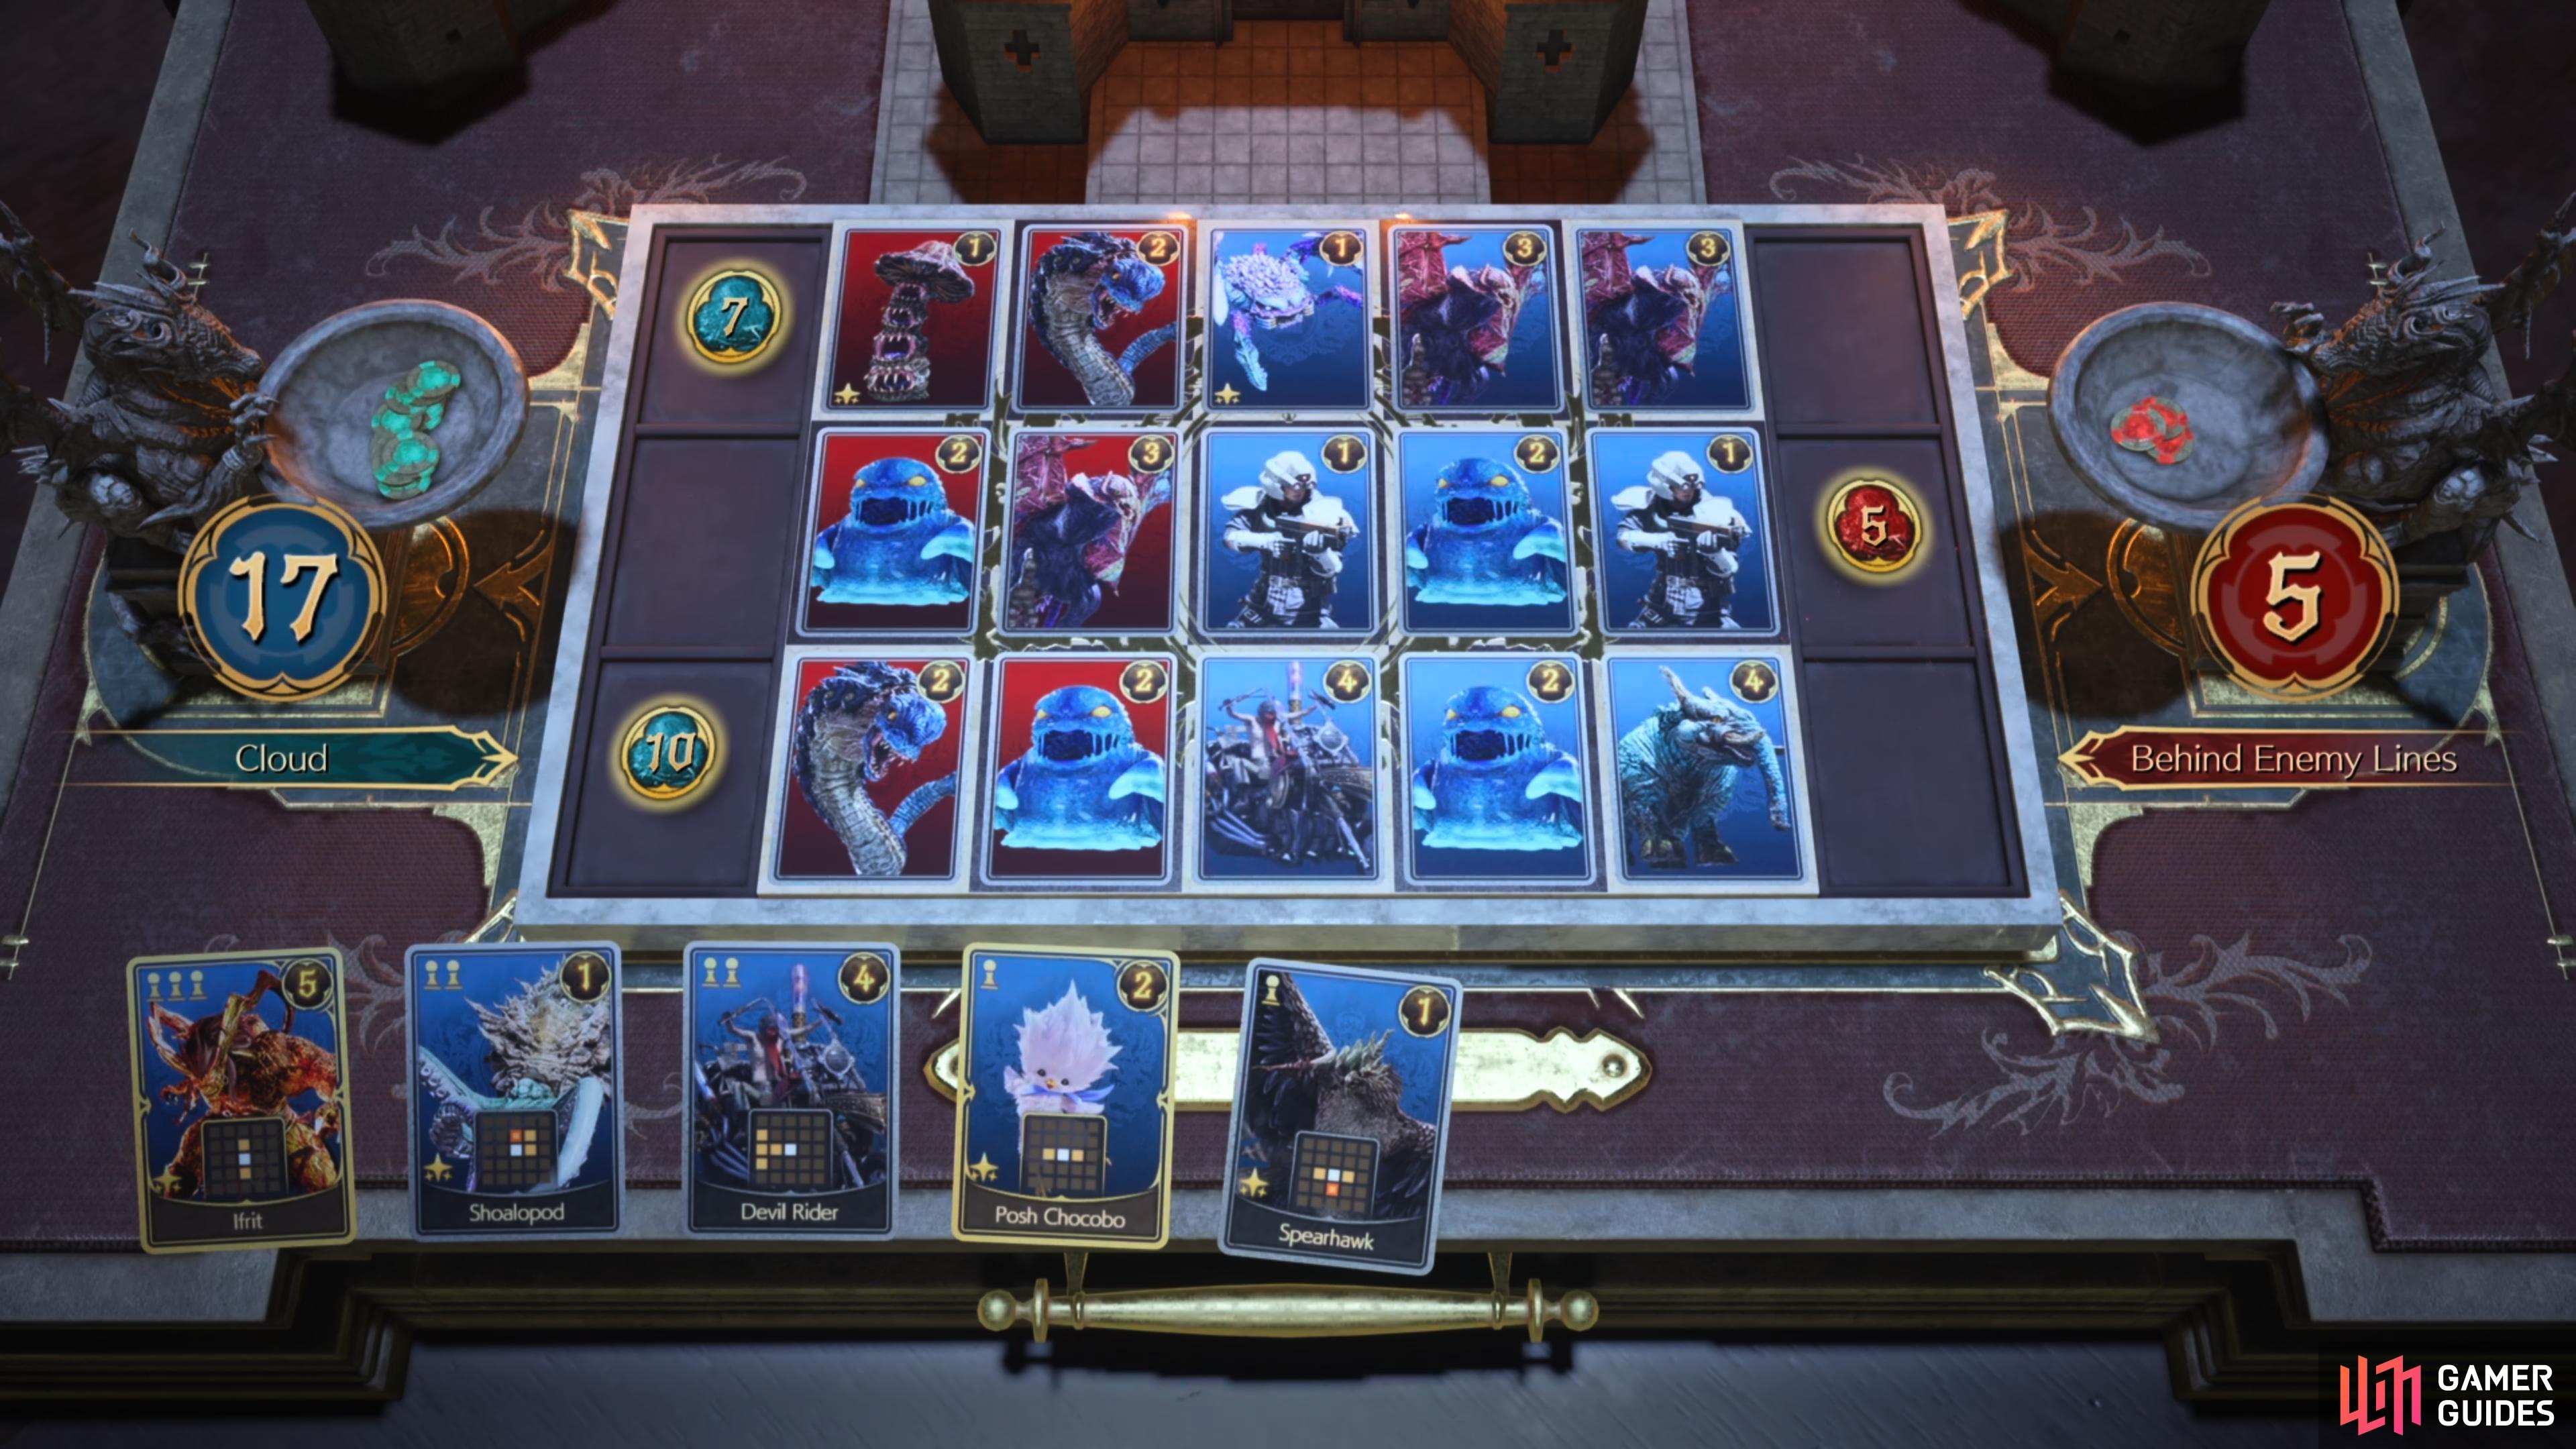
The Gimmick Battlefield: Behind Enemy Lines Challenge will make you begin the match on the opposite side of the playing field which will throw you for a loop. Unfortunately, the deck shown above won’t work for this challenge, so you’ll want a specialized deck that has cards that will claim tiles to the left rather than the right and you can find the perfect deck below. With this deck, you should be able to play the match as you would normally (with RNG hopefully being on your side) and easily win this battle.
The deck below should help with this challenge as all of the cards have left-facing tiles:
| Reward | Number |
|---|---|
| x2 | |
| x1 | |
| x2 | |
| x2 | |
| x1 | |
| x1 | |
| x2 | |
| x2 | |
| x1 | |
| x1 |
Completing the Gimmick Battlefield: Behind Enemy Lines for the first time will reward you with Card ![]() 117 Custom Valkyrie and 70 Gold Saucer Points. However, if you decide to replay this opponent, you’ll gain an additional 35 Gold Saucer Points per victory.
117 Custom Valkyrie and 70 Gold Saucer Points. However, if you decide to replay this opponent, you’ll gain an additional 35 Gold Saucer Points per victory.
(1 of 2) Use the deck shown here
Use the deck shown here (left), to easily complete the Behind Enemy Lines challenge. (right)
Support Card: Chadley the Callous
To complete this challenge, you’ll want to slightly adjust your deck to include the ![]() 046 Chimera,
046 Chimera, ![]() 042 Thug, and
042 Thug, and ![]() 021 Ogre and then follow the steps below.
021 Ogre and then follow the steps below.
The Support Card: Chadley the Callous Challenge will allow you to start the match with a Chadley Card which will allow you to replace one of your cards on the board and increase the power of the cards around it. We managed to defeat this stage by playing normally and then replacing the card on the second tile in the middle lane with Chadley to heavily boost the cards in all four corners. We recommend that you try using cards that have a higher power rating (046 ![]() Chimera, 042
Chimera, 042 ![]() Thug, and 021
Thug, and 021 ![]() Ogre for example) in the corners to maximize your score.
Ogre for example) in the corners to maximize your score.
Completing the Support Card: Chadley the Callous for the first time will reward you with Card ![]() 118 Gigatrice and 90 Gold Saucer Points. However, if you decide to replay this opponent, you’ll gain an additional 45 Gold Saucer Points per victory.
118 Gigatrice and 90 Gold Saucer Points. However, if you decide to replay this opponent, you’ll gain an additional 45 Gold Saucer Points per victory.
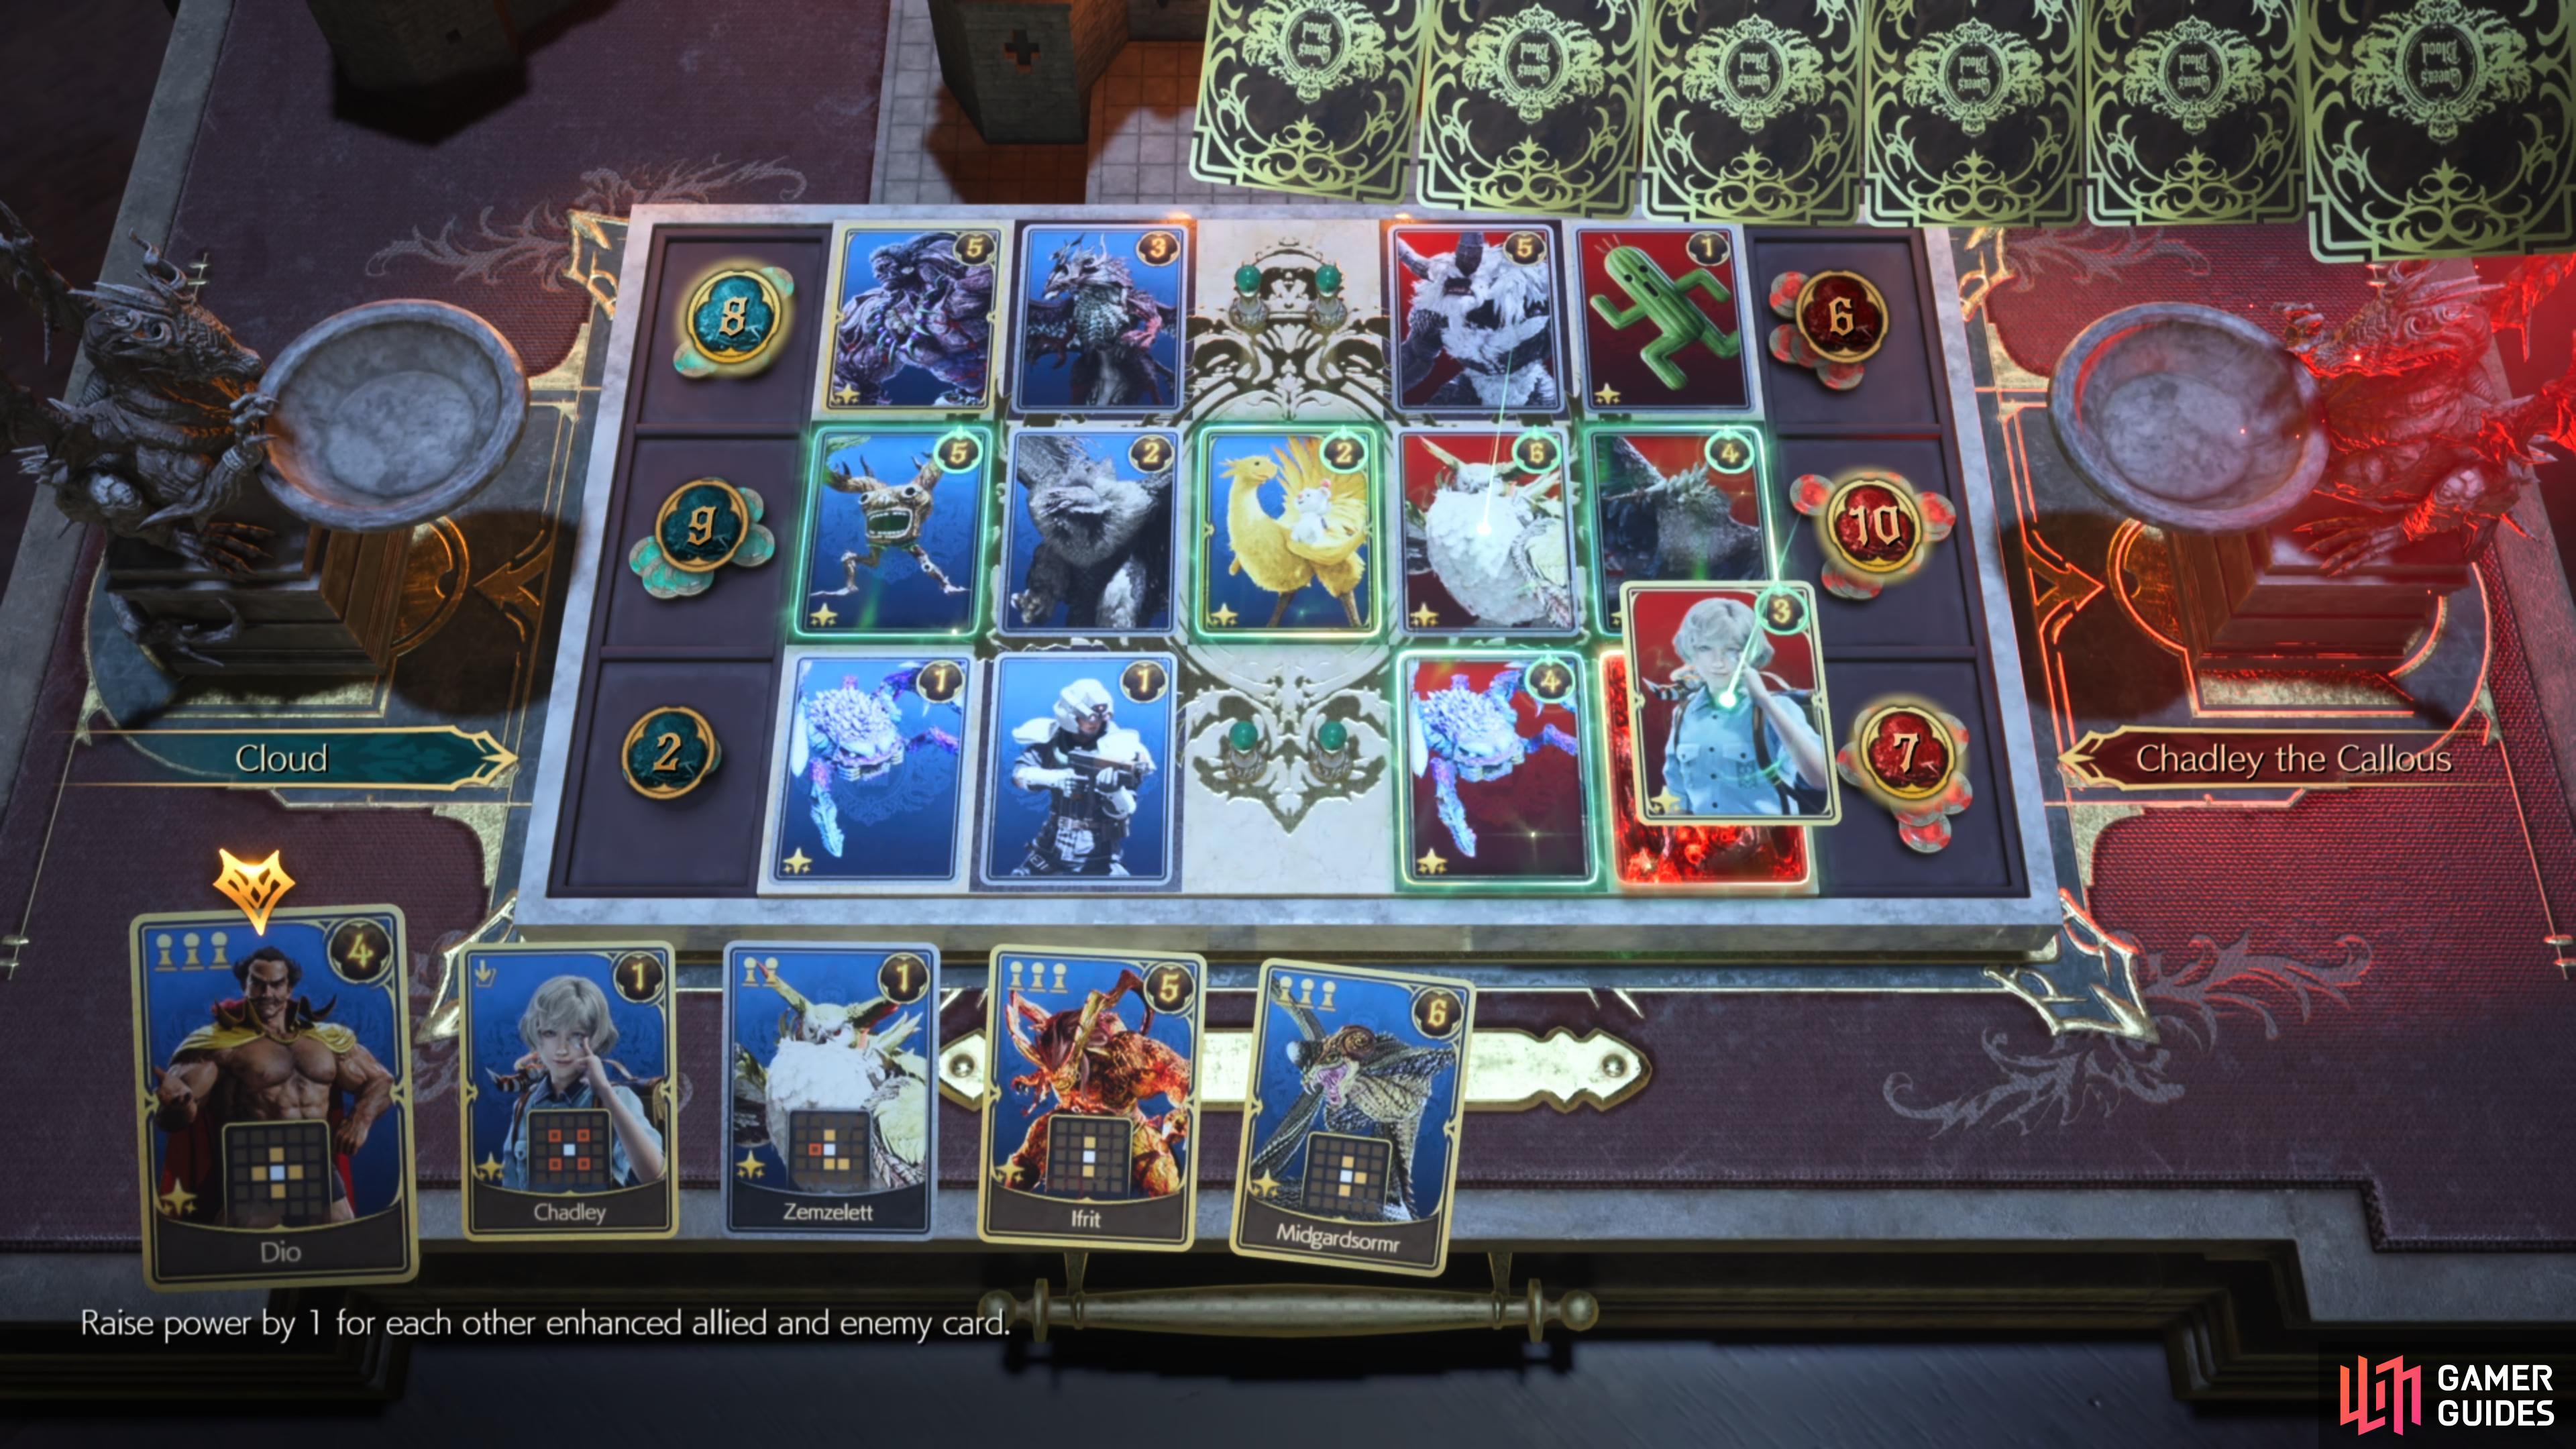
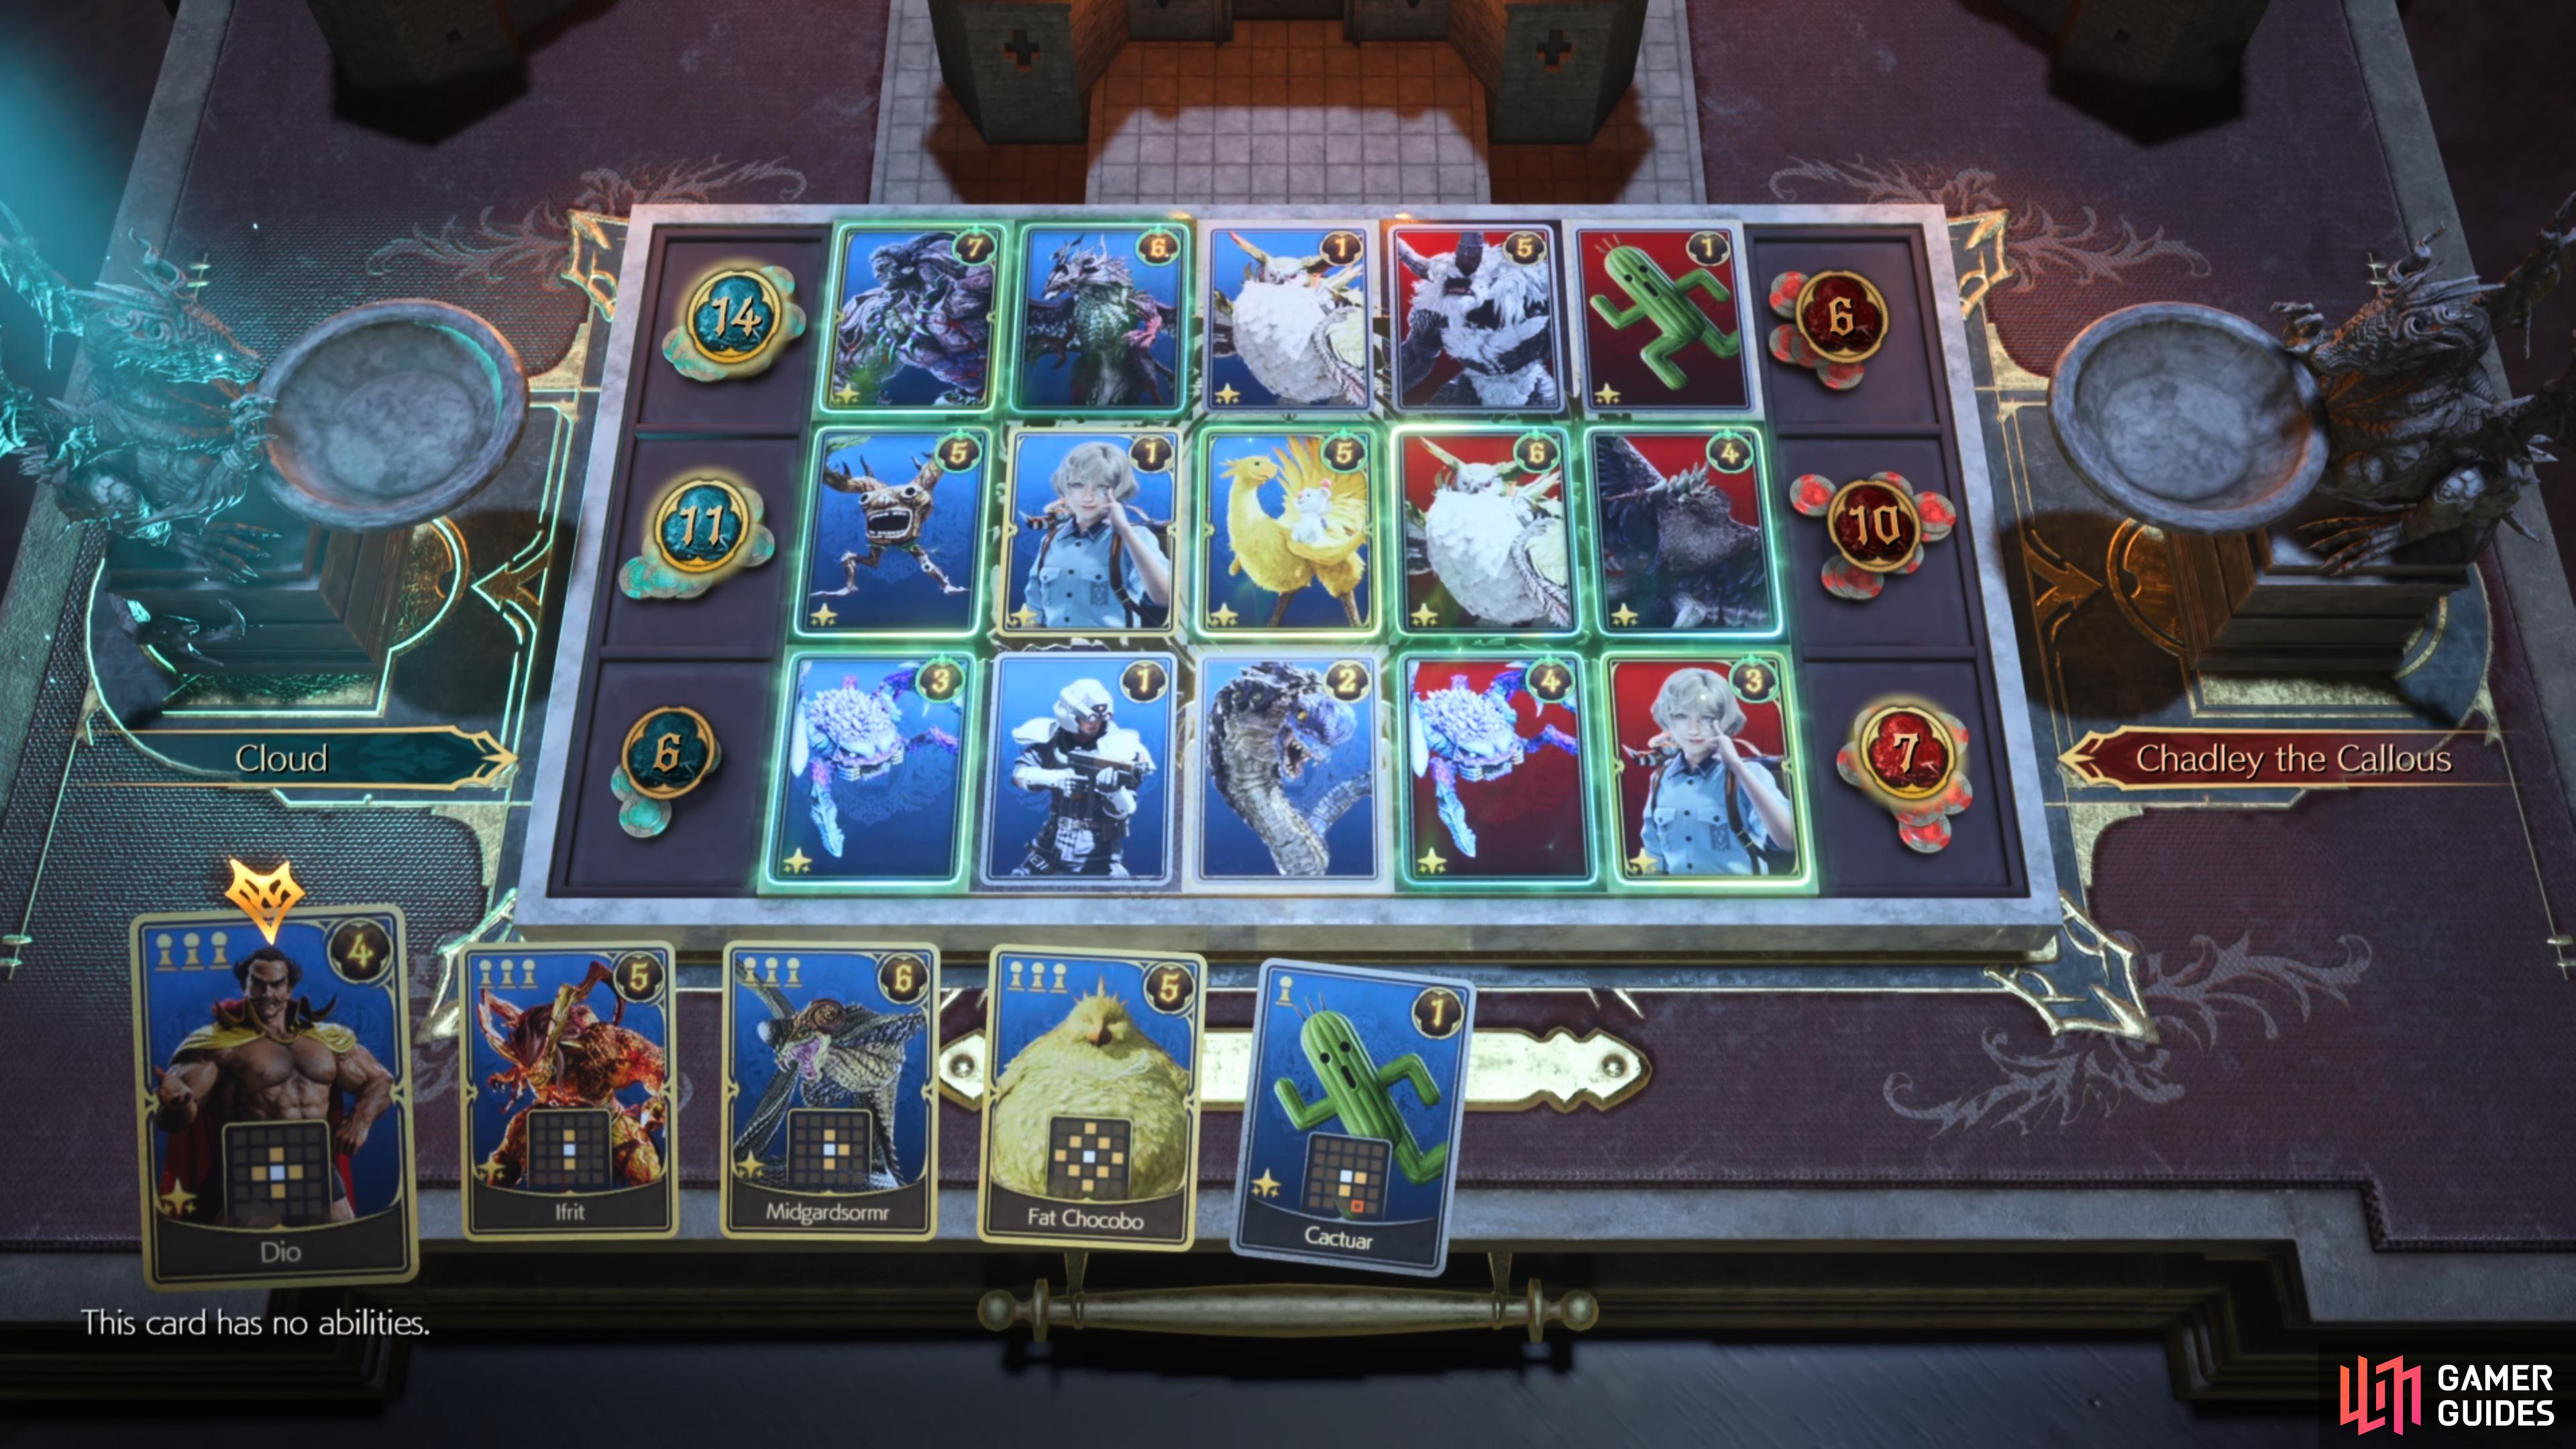
(1 of 2) Once your side of the board has been filled out
Once your side of the board has been filled out (left), place the Chadley card on the second tile in the middle lane. (right)
Gimmick Battlefield: Ifrit’s 32-Bit Flames
To complete this challenge, you’ll want to slightly adjust your deck to include the 095 Ifrit card and then follow the steps below:
The Gimmick Battlefield: Ifrit’s 32-Bit Flames Challenge will begin the match with a Polygonal Ifrit placed directly in the center of the battlefield. This will enhance any cards placed around it for both you and your opponent, so you’ll want to try and claim as many of the buffed tiles before they do. We managed to complete this challenge by starting the match with cards that have the ability to claim more tiles, such as the ![]() 001 Security Officer, 107 Chocobo & Moogle, and
001 Security Officer, 107 Chocobo & Moogle, and ![]() 013 Crystalline Crab. As you progress through the match, you’ll eventually be able to start using cards that require more pawns, such as 095 Ifrit and the
013 Crystalline Crab. As you progress through the match, you’ll eventually be able to start using cards that require more pawns, such as 095 Ifrit and the ![]() 108 Fat Chocobo which will allow you to heavily boost your score if placed in any of the buffed tiles.
108 Fat Chocobo which will allow you to heavily boost your score if placed in any of the buffed tiles.
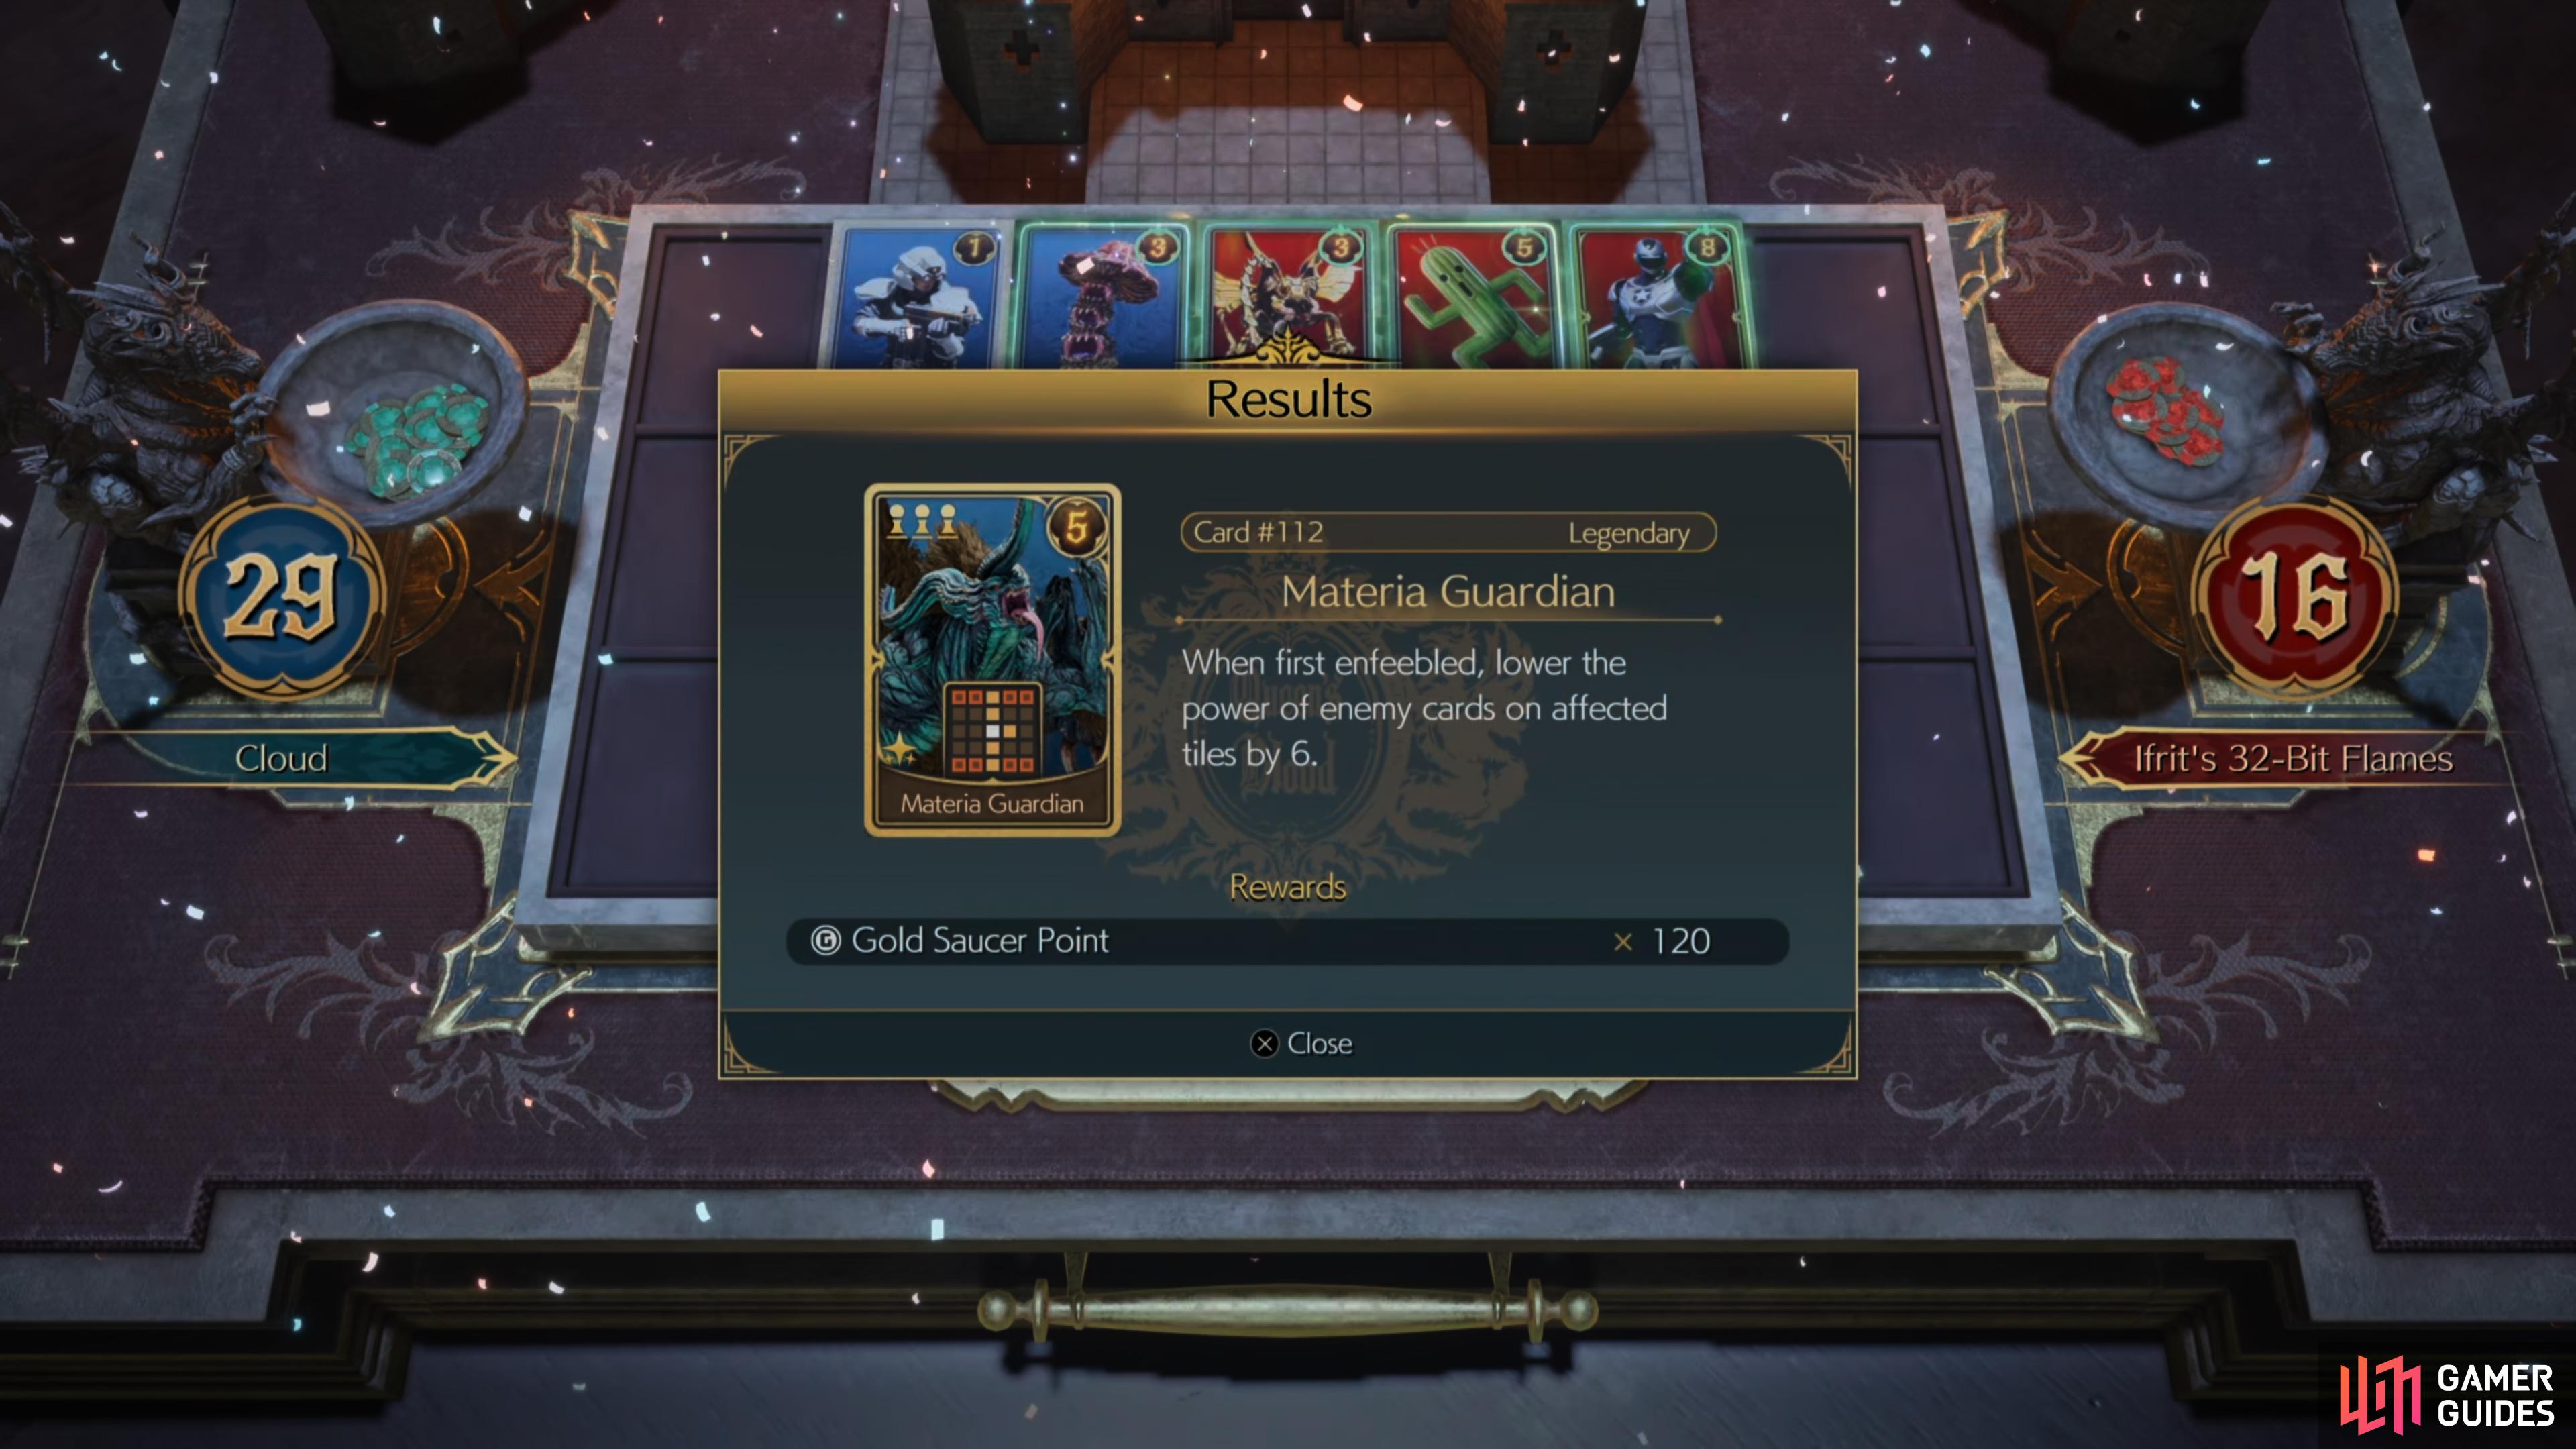
Completing the Gimmick Battlefield: Ifrit’s 32-Bit Flames for the first time will reward you with Card ![]() 112 Materia Guardian and 120 Gold Saucer Points. However, if you decide to replay this opponent, you’ll gain an additional 60 Gold Saucer Points per victory.
112 Materia Guardian and 120 Gold Saucer Points. However, if you decide to replay this opponent, you’ll gain an additional 60 Gold Saucer Points per victory.
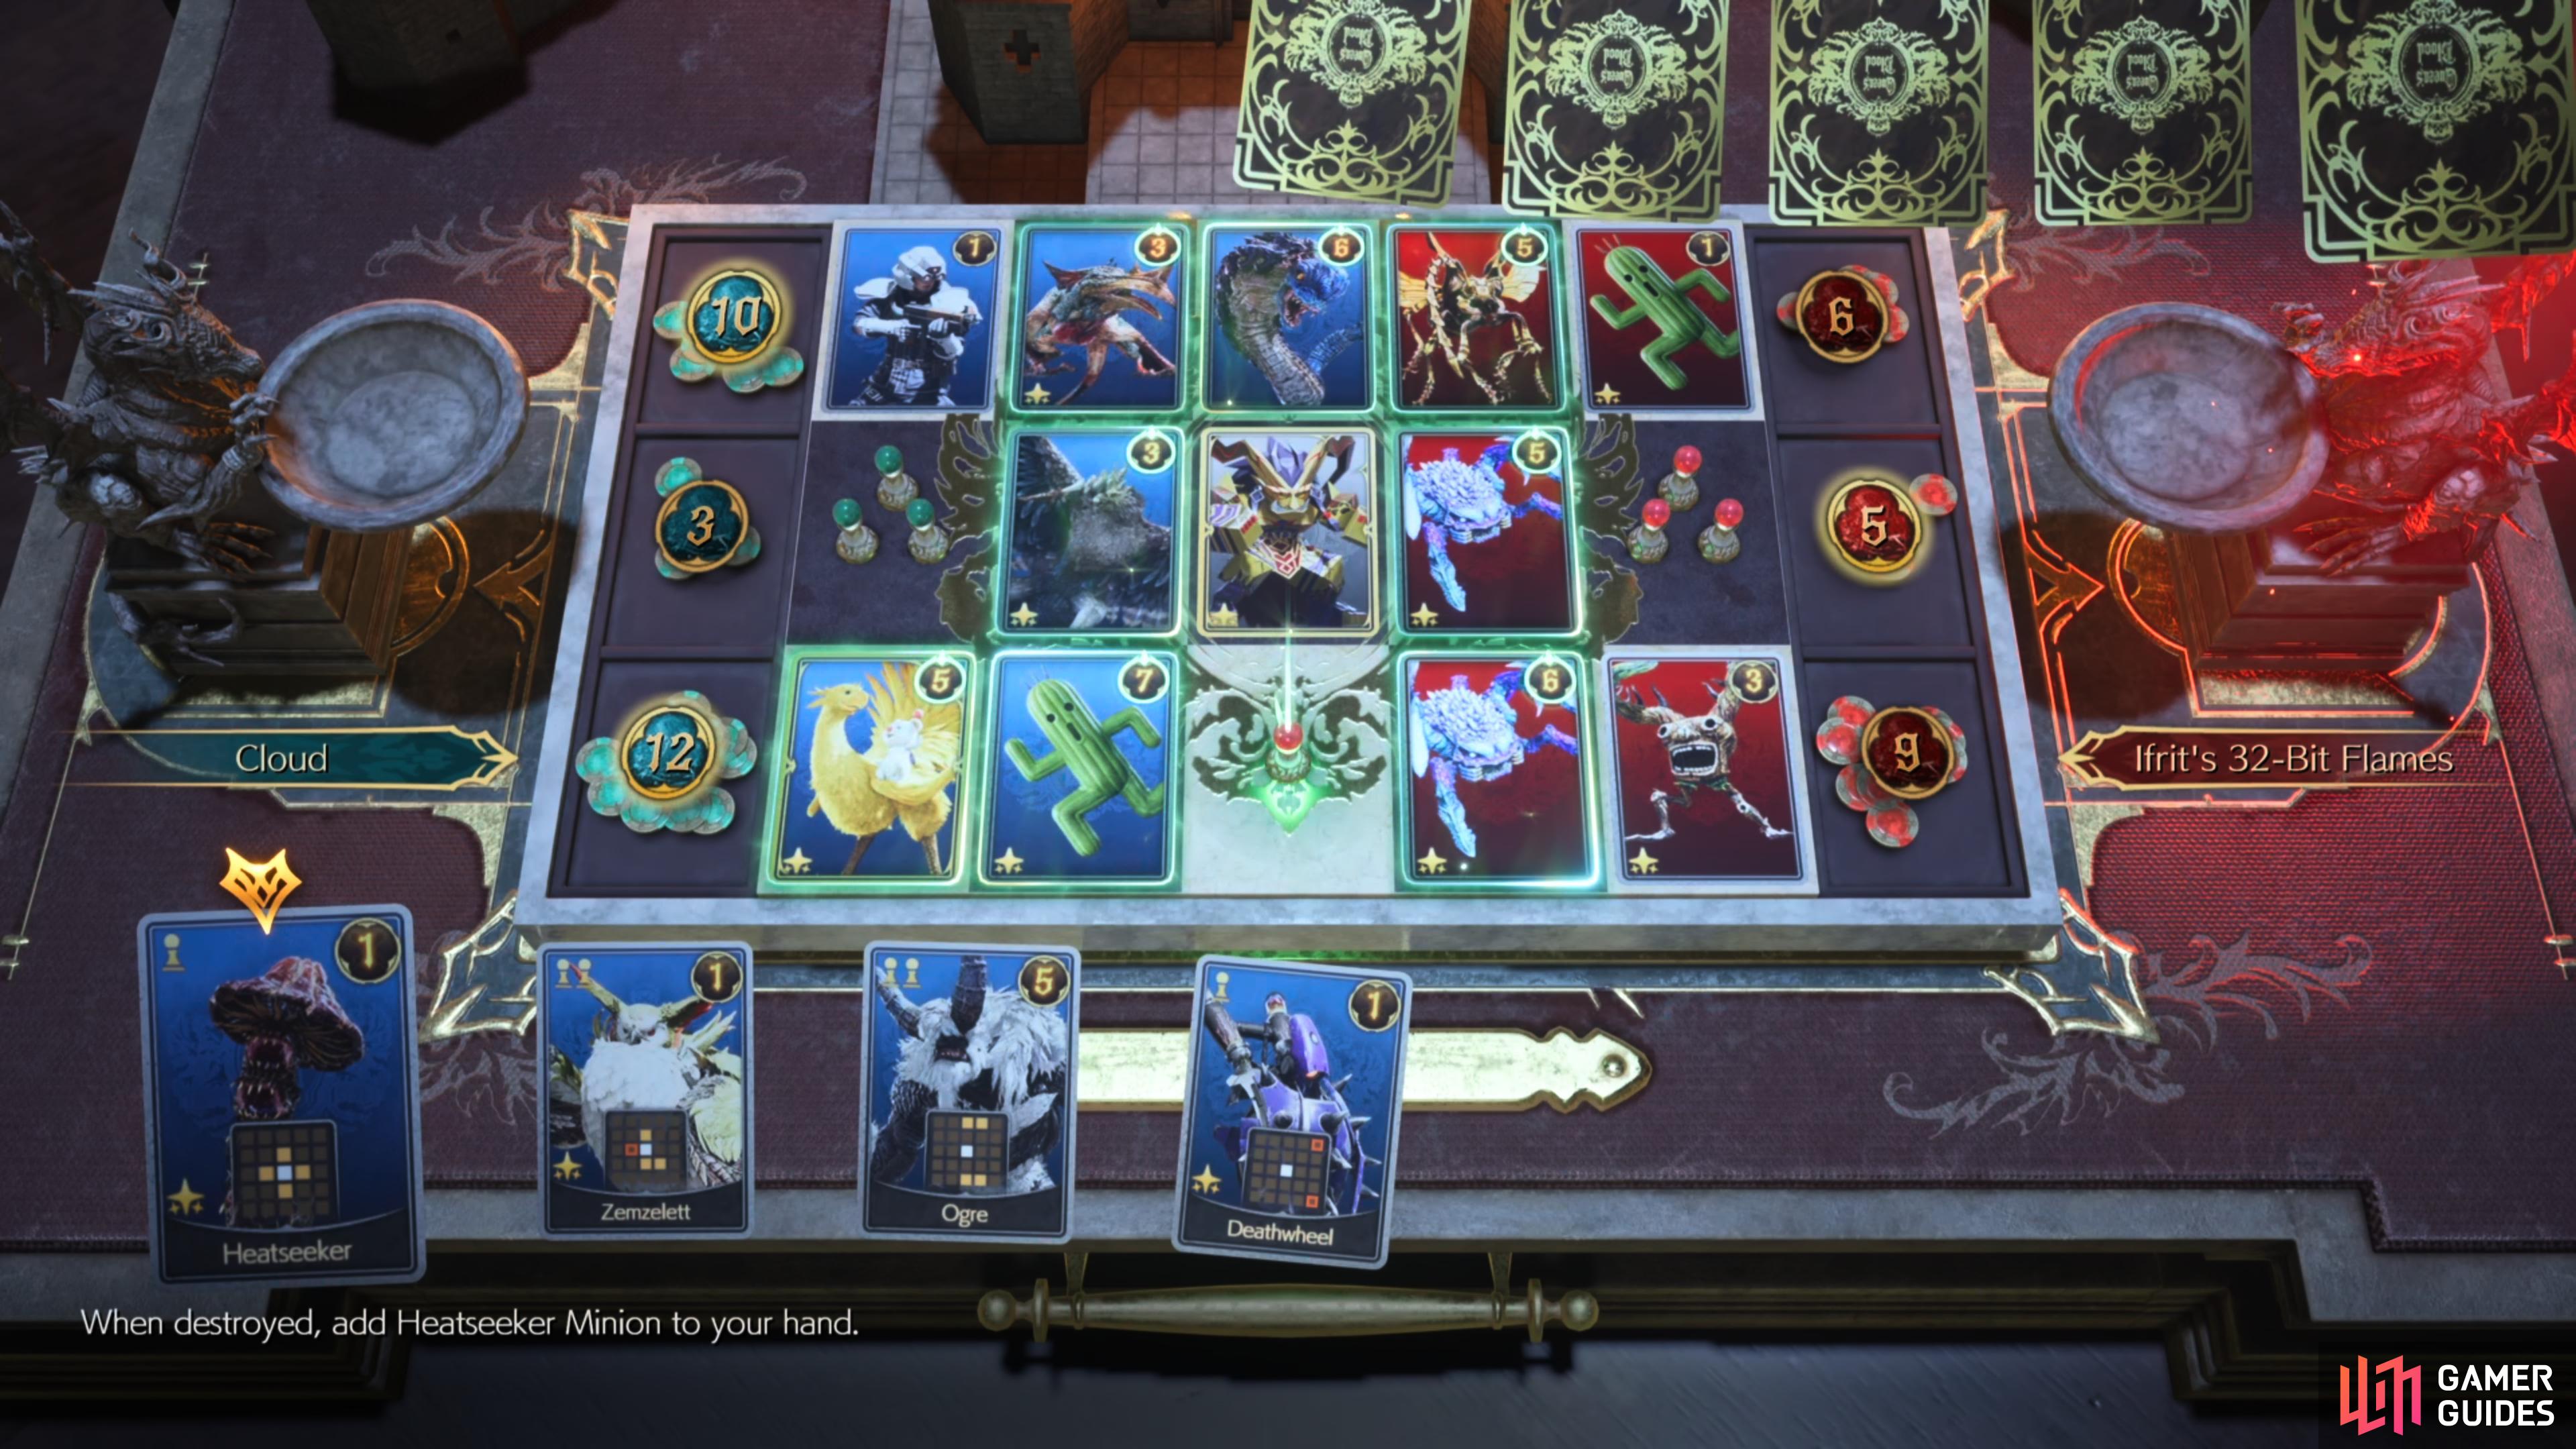
(1 of 2) Claim most of the buffed tiles
Claim most of the buffed tiles (left), to be victorious and obtain the reward. (right)
Boot Camp Challenge
To complete this challenge, you’ll want to slightly adjust your deck to include the 141 Dio, 021 Ogre, 042 Thug, ![]() 098 Titan, and 095 Ifrit cards and then follow the steps below:
098 Titan, and 095 Ifrit cards and then follow the steps below:
The Boot Camp Challenge will require you to secure 50 points across three rounds to achieve the max rank (10 at the lowest rank) and each round’s gimmick will be similar to that of previous challenges. To do this, you’ll want to follow the tips provided above for that specific challenge but adjust your deck to include cards that will give you more points, such as ![]() 016 Devil Rider, 021 Ogre, and 042 Thug, then accompany these with buff cards like 141 Dio, 098
016 Devil Rider, 021 Ogre, and 042 Thug, then accompany these with buff cards like 141 Dio, 098 ![]() Titan, and 095 Ifrit. Additionally, the Boot Camp will give you a set number of cards per each round, so you’ll want to mulligan any that don’t offer very many points before you start.
Titan, and 095 Ifrit. Additionally, the Boot Camp will give you a set number of cards per each round, so you’ll want to mulligan any that don’t offer very many points before you start.
Completing the Boot Camp Challenge for the first time will reward you with Card 120 Sephiroth and 210 Gold Saucer Points if you manage to hit a minimum of 50 points. However, if you decide to replay this opponent, you can earn a total of 140 Gold Saucer Points every time you reach a minimum score of 50 (35x GP - 10, 30x GP - 45, 60x GP - 50).
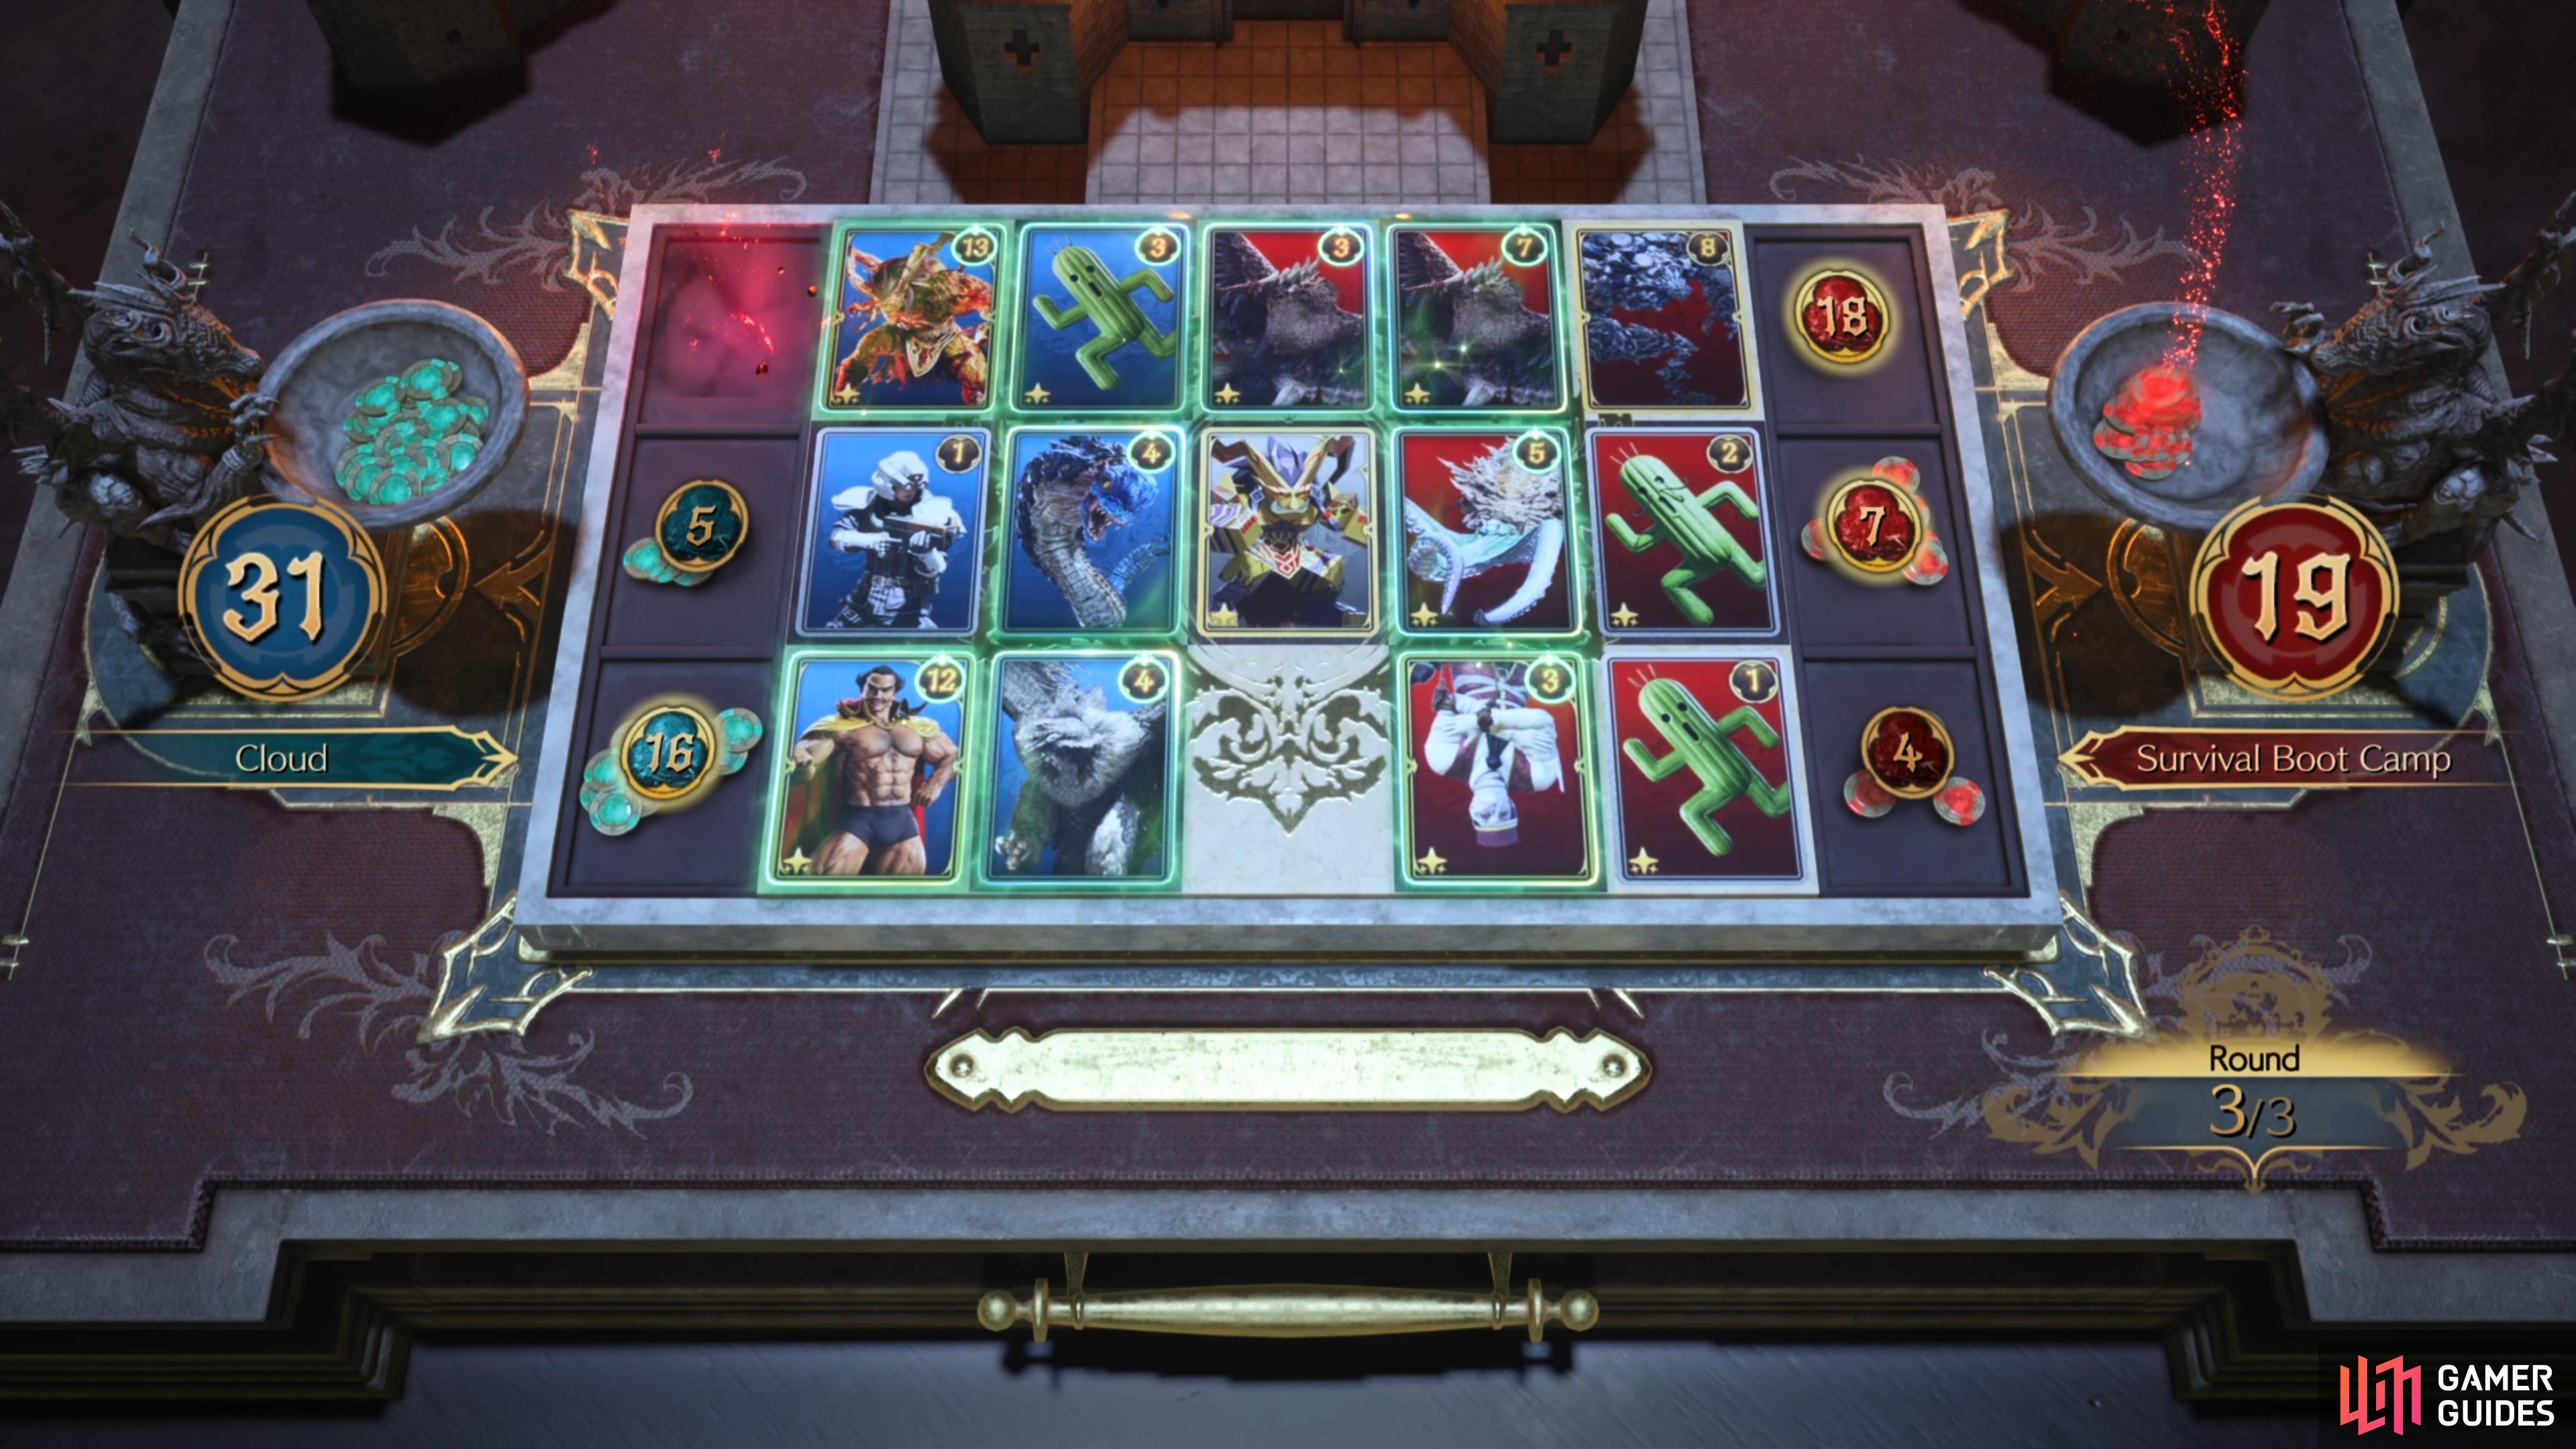
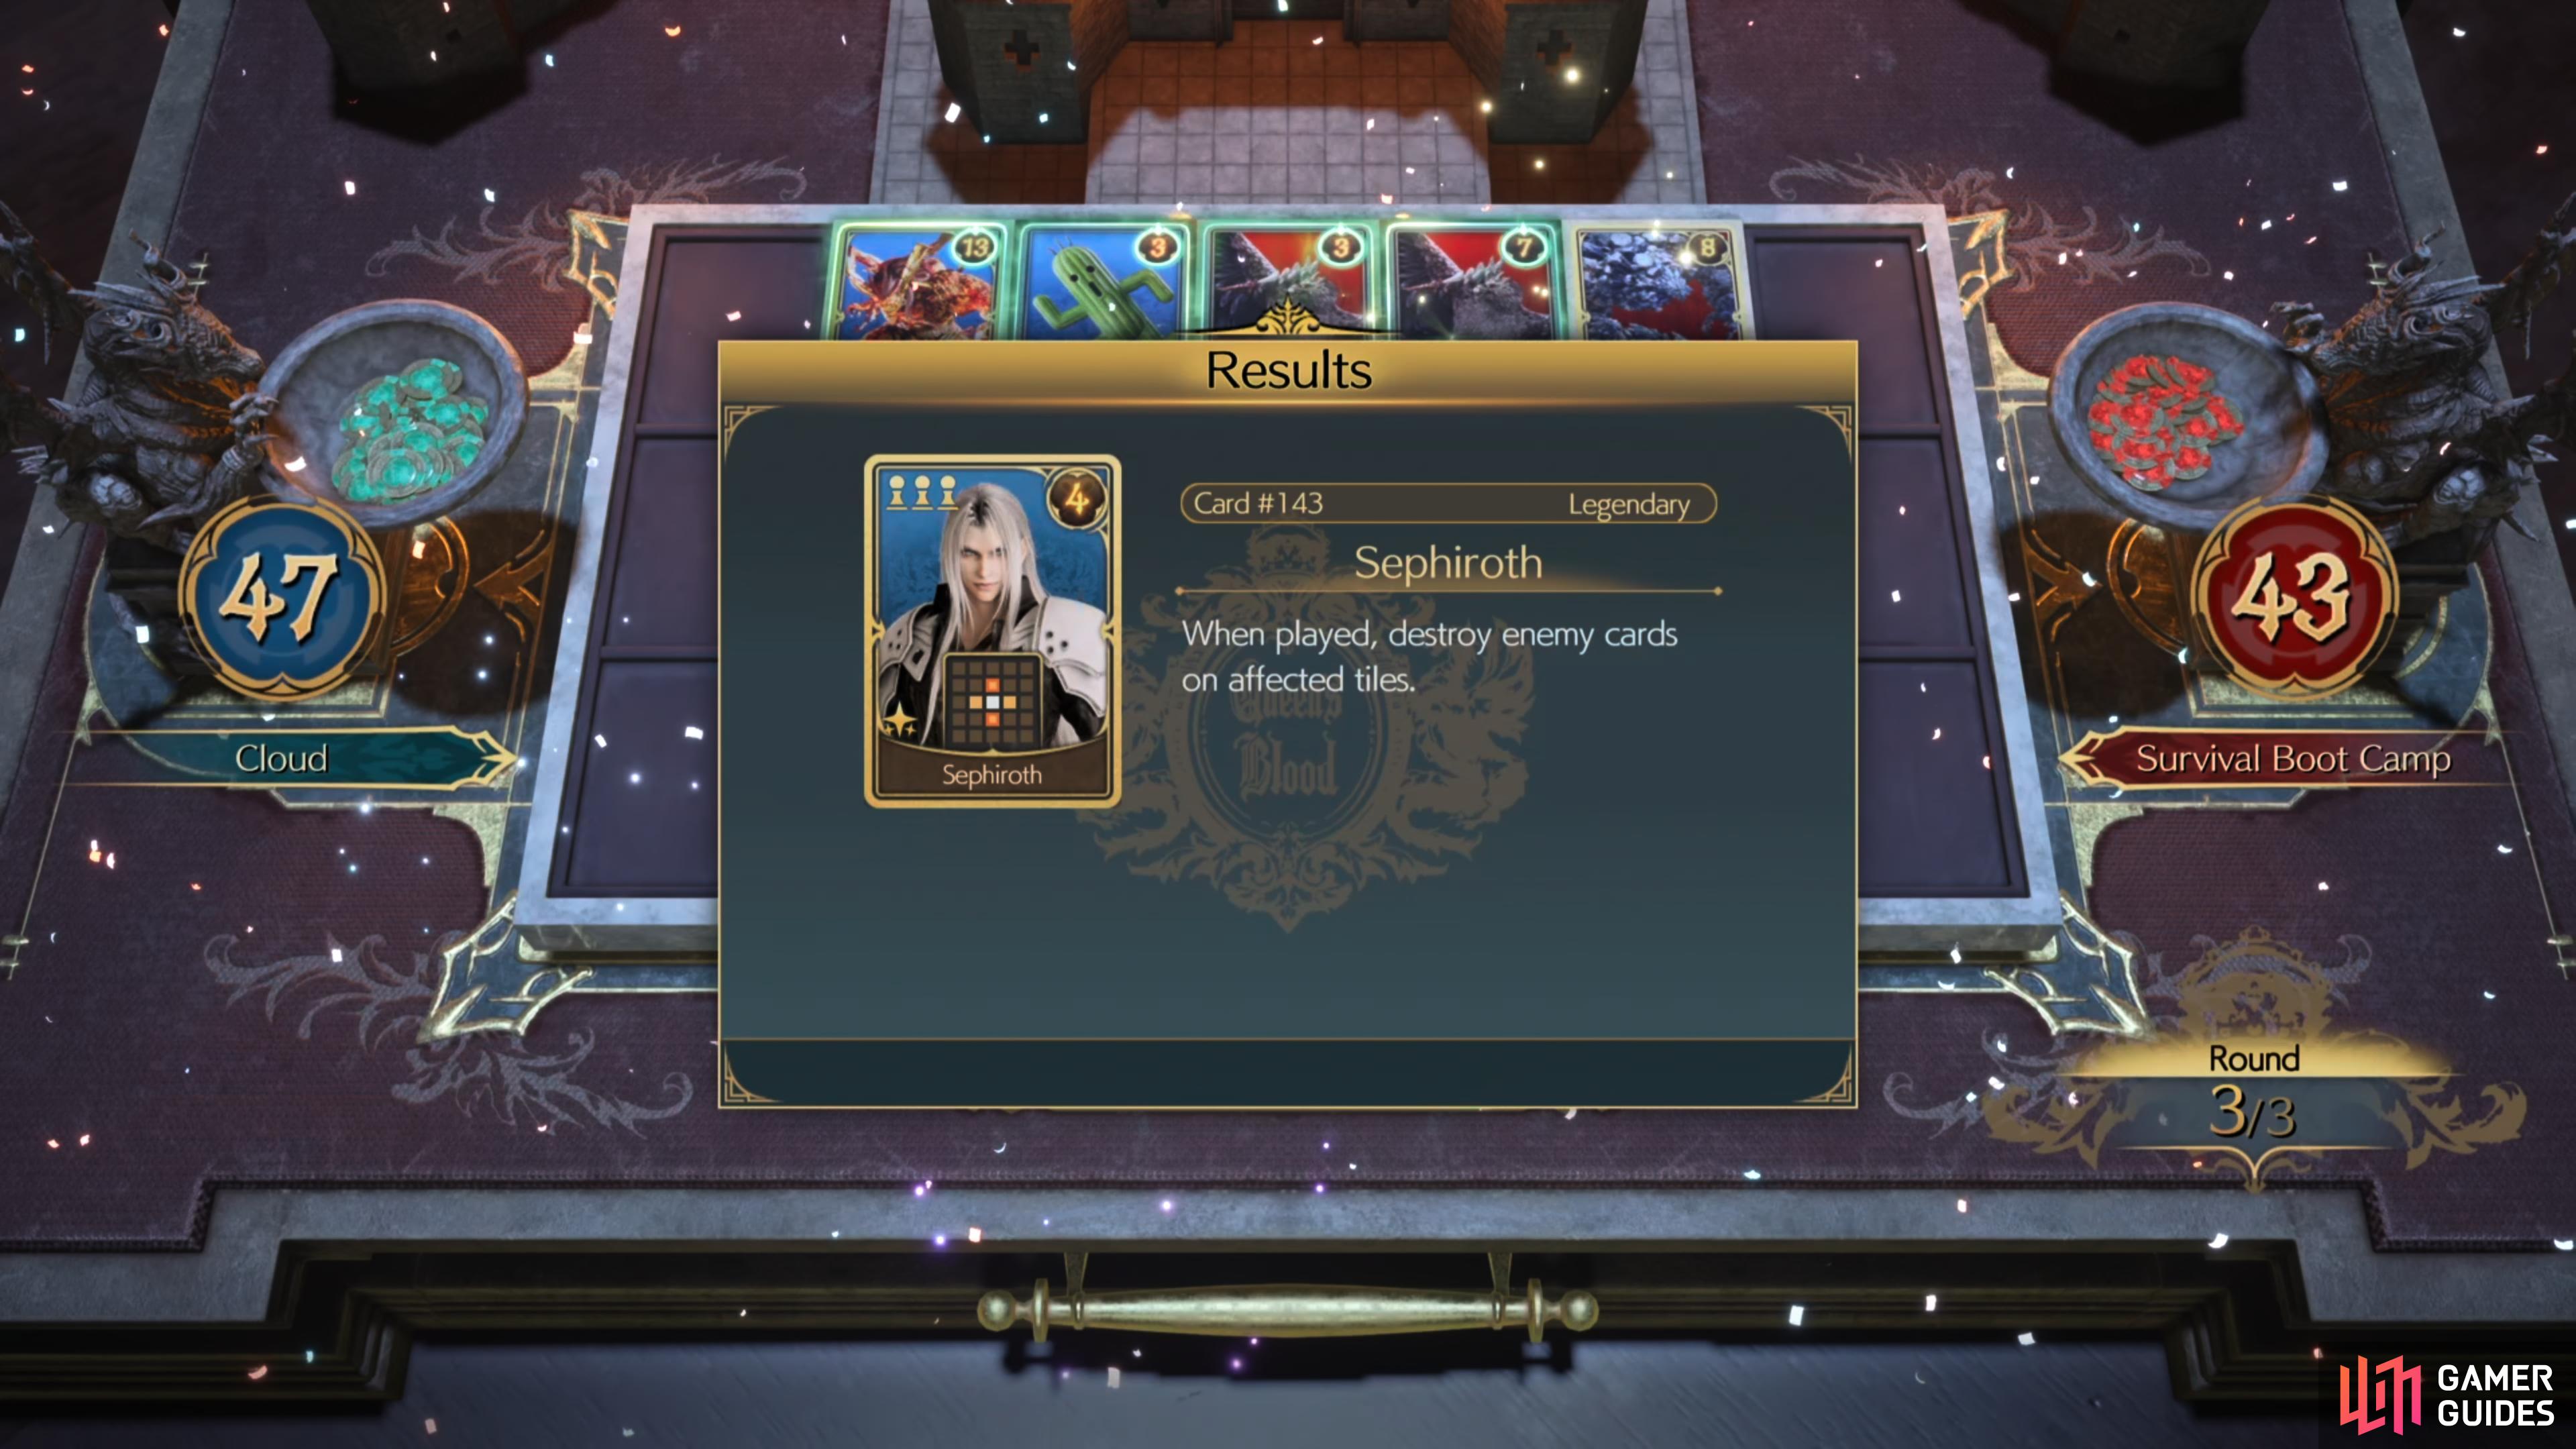
(1 of 2) You’ll need to have at least 10 points
You’ll need to have at least 10 points (left), to obtain the sephiroth card. (right)
More Final Fantasy VII Rebirth Guides
Rebirth has so much to offer so if you’re feeling lost, or just want to find out more about new features, tips and tricks on the combat system, or how to beat certain minigames, be sure to check out the links below!


 Sign up
your recommended deck only contains 14/15 cards. and the only "guiding" is to use the 2 cards that the game gives you, has no information about how to play that deck, no placement strategies/tactics, no optimal starting hards or indication of which cards could be mulliganed for an easier win. You can do better than this..
Hey Spikey415, thanks for the feedback. Ultimately, Queen's Blood is RNG and what worked for us might not work for you, but I have updated our page to feature more suggestions for each challenge which should help. :)