It’s time to finally shut down this contraption for good! Walk up the stairs and don your Hologuise, turning you into Qwark, then stand on the pad with his symbol to open the door. Jumping or attacking while the Hologuise is on will break it, and if you’re in the vicinity of enemies, then they will come after you. For now, follow the path with the Hologuise on and wave to the guard when prompted to disable the barrier, then quickly destroy the Warbot to disable the security for that small area. For the next part, there will be one guard walking around on a higher elevation, in addition to the one behind the barrier. Whenever the first one turns around, quickly jump to the higher elevation, then put the Hologuise back on to keep incognito.
Go and wave to the guard at the end, then swiftly take them out. For the next one, simply wait for the single guard to turn around before jumping to the platform where you can wave to it (don’t attack yet). Don your Hologuise and go through the door to find a lot of enemies this time, so walk over to the end of the room with the security alarm and take out the Warbot there, then concentrate on the bigger one as it rushes to the alarm. After taking them all, it seems the doors on this level are all locked, so you’ll need to find another way to get farther inside. Look at the structure in the middle of the room to see that it has bars you can grab onto, so use them to get to the middle platform, then look on the one side to find more bars.
When you get to the side of the room with the alarm, a Warbot will come out and patrol, so stay dangling on the ledge until it turns its back and you can quickly take it out. In the next room, walk along the catwalk as Qwark and take the elevator down to find three Warbots patrolling the room. Move to the end with the alarm and whenever you’re ready, start blasting the fools. However, the fight doesn’t end there, as more Warbots will storm in and try to set off the alarm., so you’re going to need to quickly take them out before they can do that. When you go into the next room, you’ll see two Warbots walking around statues of Drek.
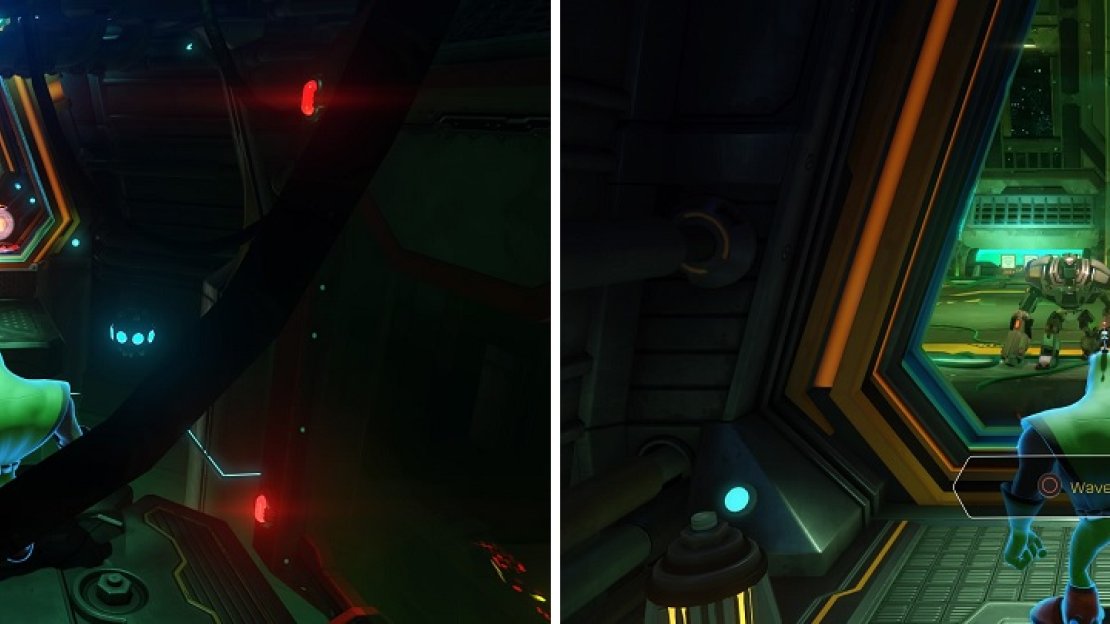
Some instances will require you to deactivate the Hologuise to get through some hazards (left). To progress, you’ll need to wave at guards to get rid of barriers (right).
The best time to start attacking is when the enemy closest to the alarm is on the opposite side of the statue, as this will give you time to kill it before it can reach the alarm. After killing the two in the room from the beginning, more will spawn just like in he previous room. You’ll know you’re finished when the laser grid blocking the doorway at the far end disappears. The next stealth segment is a little trickier, as you have to time your jumps whenever the guard at the end turns around, but you also need to be careful about not hitting the mines that are moving back and forth in between each platform. The mines will go away once you wave to the guard.
The penultimate room looks a little tricky, as there is a forcefield preventing you from going straight ahead. However, if you look to your left as soon as you enter, you will see a Magneboots track, which you can use with your Hologuise on. The bad part is that you’ll have to time your trek, as the track is perilous and filled with moving mines and lasers that phase in and out. Once you pass it all, kill the Warbot and move into the final room. There’s nothing different here from the last few rooms with multiple Warbots patrolling it, as once you take out the ones already there, more will come out from the doors. The slight difference, though, is that there will be some dog robots mixed in, as well as a few Warbots with jetpacks. Once you’re finished with them all, solve the Trespasser puzzle to locate the gravity stabilizer.
There’s only one path for you to follow here, with a lot of enemies in your way for you to defeat. When you get to the big area, go off to the right and find the Thruster Lock to disable the forcefield and extend a bridge to the north, where you’ll be fighting plenty of resistance. You’ll want to be careful here of the bombardiers on the platforms above, as they can be hard to miss amidst the chaos. Also, you will able to find a RYNO Holocard on top of one of those very same platforms. You’re in the final stretches and if you need to go to other planets for anything, do so via the teleporter. Otherwise, replenish your health and ammo at the vendor and go north into the room, taking the elevator to a Trespasser puzzle, then it’s time for a boss fight!
BOSS - Captain Qwark
This boss fight starts out relatively simple, although the boss himself has a lot of health, so you’re going to need some heavy firepower to whittle his health bar down. You have a pretty big arena to run around in, so there’s no worries there, plus ammo boxes will respawn on the edges of the arena. The boss will fire his blaster at you, but it will only be in one direction, so you can either outrun it or simply jump over it to avoid taking any damage. His only other attack in the first stage will be throwing a bomb onto the ground, that detonates and sends out a shockwave across the entire arena, so just jump over it when it gets close.
At around 75% health or so, things start getting a little more complicated, as the boss will throw in two new attacks. The first is the Groovitron (doesn’t seem to use it too often), which will make Ratchet dance uncontrollably, although you are still able to jump to avoid attacks. In order to cancel this move, which will go on indefinitely, you need to hit the disco ball whenever it comes down to ground level. The second attack involves him firing Warmonger rockets into the air, which will then split up and rain down onto the arena in random locations. Luckily, these locations are all marked, so you can easily avoid the markers.
The bad thing about the second new attack is that he will likely continue using the beginning two attacks, making it a little bit difficult to keep an eye on the targets as you need to be on your toes to avoid them. His final attack that he’ll introduce happens around 40% or so, which will be Agents of Doom. He’ll toss out one of those robot things that spawn enemies, with these ones being the Agents of Doom. Before you get overwhelmed, quickly destroy the spawner and any other Agents, then get back to work on the boss. Once you bring his health down to about 10%, the battle will end.
After the battle is over, you’ll be forced right into the next part of the game, which is a grindrail section. It’s pretty simple, as long as you know that whenever you see another track parallel to the one you’re riding, then you need to switch to it. Also, there will be mines on the tracks, so always keep an eye out for them to hit with your wrench. Lastly, whenever you see a big gap in between tracks, get ready to Swingshot over them. Eventually, you’ll reach the end and be thrown into another boss fight!
BOSS - Dr. Nefarious
Well, Nefarious certainly has a nice looking mech, and this fight is definitely challenging. The first thing you’ll surely notice is that you have your Jetpack available in this battle, meaning you’ll have a lot of mobility. Something you might not see right away is that there are multiple platforms similar to the one you start out on, which will come into play not long into the fight. You will always want to keep moving in the battle and not really stay on the platforms for long (except for the first), as you will see with the second phase, so keep in the air with the Jetpack and only land whenever you need to refuel or restock ammo.
Nefarious uses three attacks for the first part of the battle, one of which are blaster shots similar to the last battle, except he will be coming after you with them. If you happen to stay close to him too long, Nefarious will put his suit’s hands together and then unleash a shockwave to both damage and push you away. Lastly, he can also fire off a consistent laser that he will sweep across the screen; you can easily avoid this by staying a certain height before he does it, then moving up or down accordingly while he uses it.
At about 80% health, Nefarious will fly into the sun, recharge 10% of his health and then crash back onto the platform; should you get hit by this, then you will be instantly killed. After crashing onto the platform, Nefarious will be incapacitated for a few seconds, so unleash what you can on him, but he will then get up, break the platform in two and toss it into the sun. This is the time you need to relocate to another platform, but whenever you do, you will see that some Warbots will be there waiting for you. Quickly take them out before Nefarious catches up and starts unleashing his own attacks to complicate things.
As you get to the second platform, Nefarious will add another attack to his repertoire. He will launch mines onto the platform that will continually suck you in, making it nigh impossible to escape without taking a lot of damage; hitting them with any weapon will detonate them, such as the Proton Drum. At 40%, he will launch into the sun and do the same thing as before, triggering the third and final phase, with there being one new attack. Nefarious will launch a bunch of purple mines into the air, then make them home in on you. They will continually do this until they are destroyed; the Pixelizer and/or Combuster are ideal for getting rid of them. All that’s left in this battle is to reduce his health to zero, winning the battle and finishing the game!
Congratulations on finishing the main story, but if you’ve ever played a Ratchet and Clank game before, then you know that there’s more to come. After the credits roll, you’ll see a message that you’ve unlocked Challenge Mode, as well as the Insomniac Museum. The latter, as mentioned, is accessible from Grim’s garage on Veldin via a teleporter (in Challenge Mode). Challenge Mode can be selected from the main menu and is basically a New Game+ mode. Not only is it more challenging, but you can gain access to more powerful versions of your current weapons, which are called Omega variants. All weapons and a few gadgets will carry over, such as the Map-o-Matic, but others don’t, such as those locked to story progression.
You can purchase the Omega versions from any vendor, as long as you have leveled the normal version to level five and have completed the Holocard set for that weapon type. The other thing that Challenge Mode introduces is the Bolt Multiplier. Basically, as you kill enemies, the multiplier will increase gradually, up to a maximum of x20, increasing the number of bolts you get from crates, destroying objects and killing enemies. The catch is that any time you take damage, the multiplier will reset back to zero and you’ll have to build it back up again.


No Comments