

Battle on the Big Bridge
San Fransokyo is a sprawling metropolis home to the Big Hero 6, a team of super heroes. Sora’s wonder is shortlived however as the Heartless once again crash the welcome party. Hiro and Baymax will aid you for this battle and their help is welcome indeed. The first encounter is simple enough, simple combos will take down the Tireblades with little hassle. The second encounter is a little more tricky, Polecannons line the road and you’ll need to use the Cover Shot situation command as you make your way up the road. Go from car to car as you use Cover Shot to take the Pole Cannons out and you’ll face your final encounter here against a Metal Troll.
This massive brute will inflict huge damage with any strike that connects with Sora, be on the guard at all times. You can choose to take it head on and unleash combos on the Metal Troll or you can play it safe by taking cover behind the cars and using Cover Shot to inflict massive damage.
| Character | Ability |
|---|---|
| Goofy | Armor Slot |
| Donald | Hyper Healing |
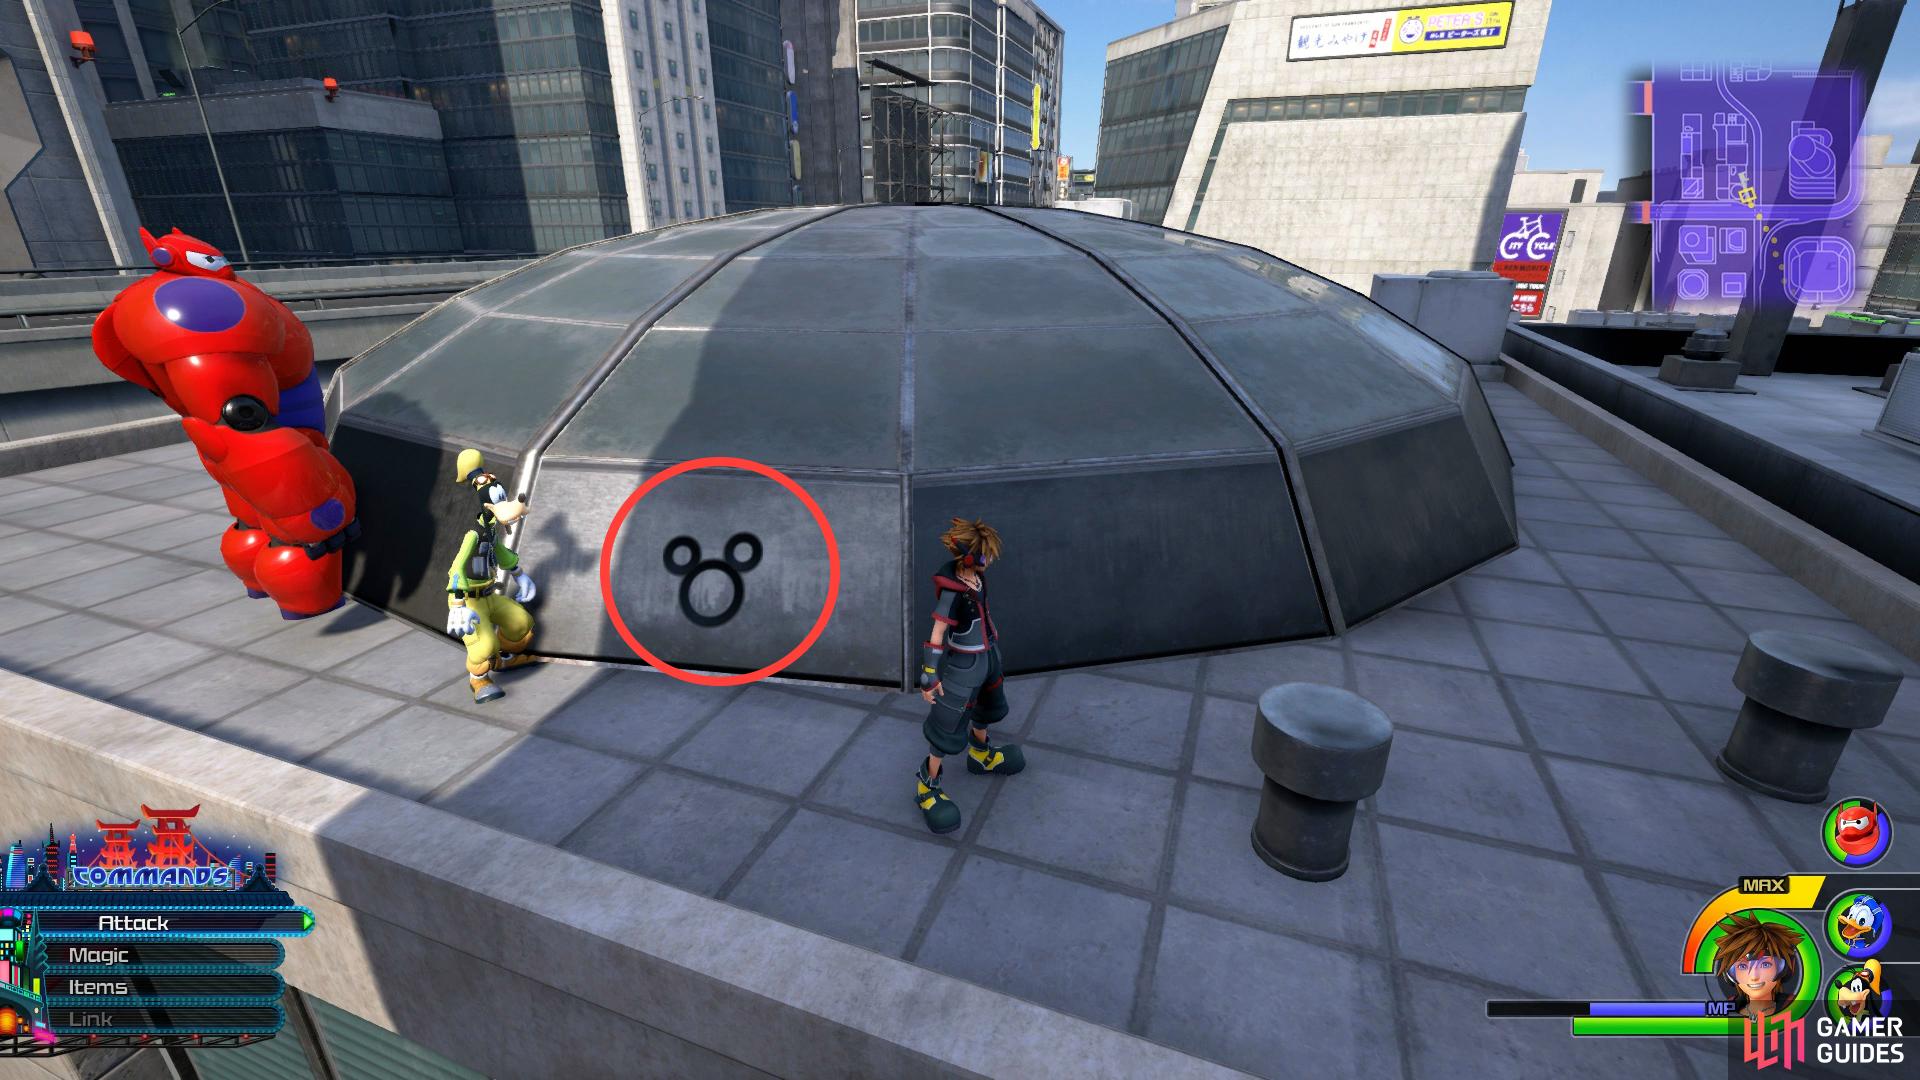
Following the battle, you’ll find yourself in Hiro’s Garage and meet the rest of Big Hero 6. Before you do anything, take a look behind Baymax to spot Lucky Emblem #1 on the wall, this should be your 90th and award you with another elusive Orichalcum+. Make use of the Moogle Shop if you need to and then when you’re ready, speak to Hiro to begin the course.
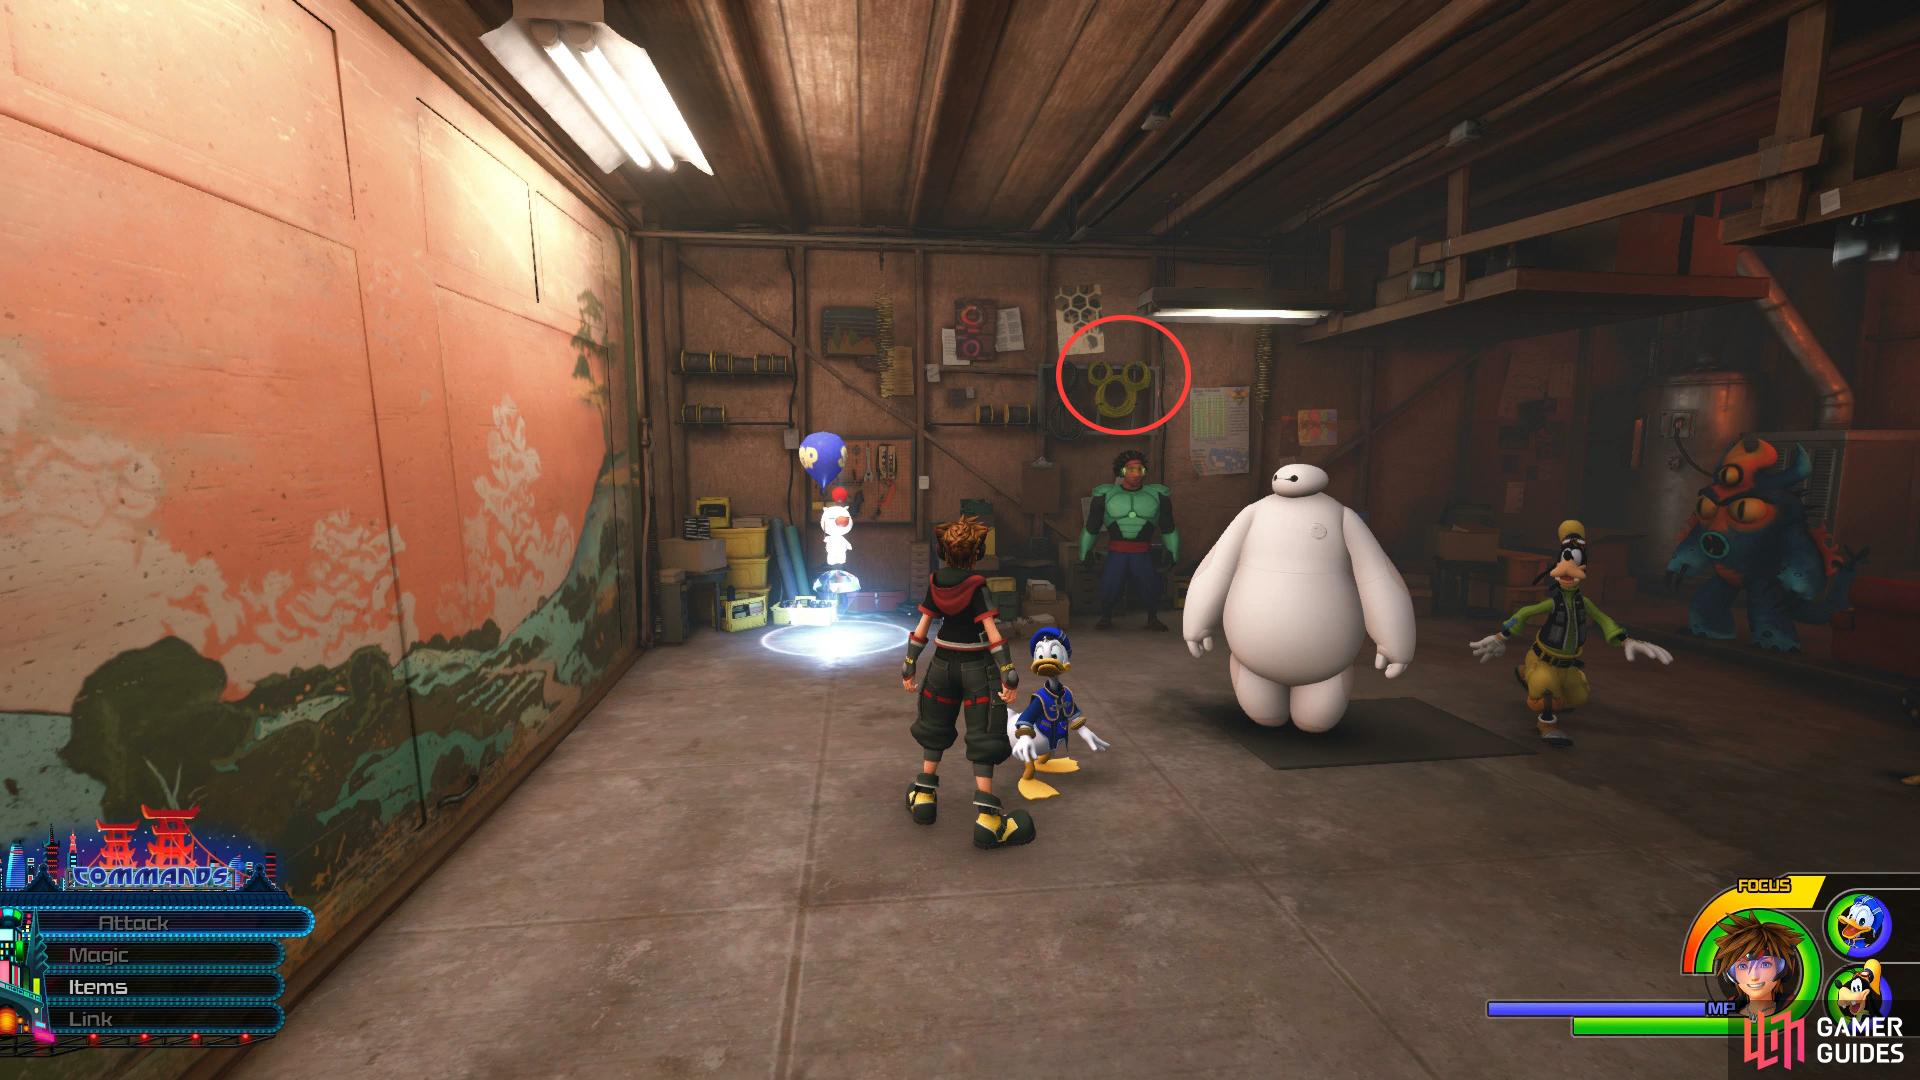
Look on the board to the right of the Moogle Shop to spot a Lucky Emblem.
The City
In the City itself, Hiro has set out a course of rings for Sora to pass through. You’ll find purple arrows directing you to hard to see rings and you’ll need to make good use of all of Sora’s movement abilities. There’s no penalty or high score to chase here and at certain intervals you’ll need to stop and defeat enemies before continuing. The biggest obstacle here is the final stretch, when Hiro indicates for Sora to fly. Sora’s only means of traversing here is to use Airstep and travel from fish to fish, wait for the rings to line up and activate it.
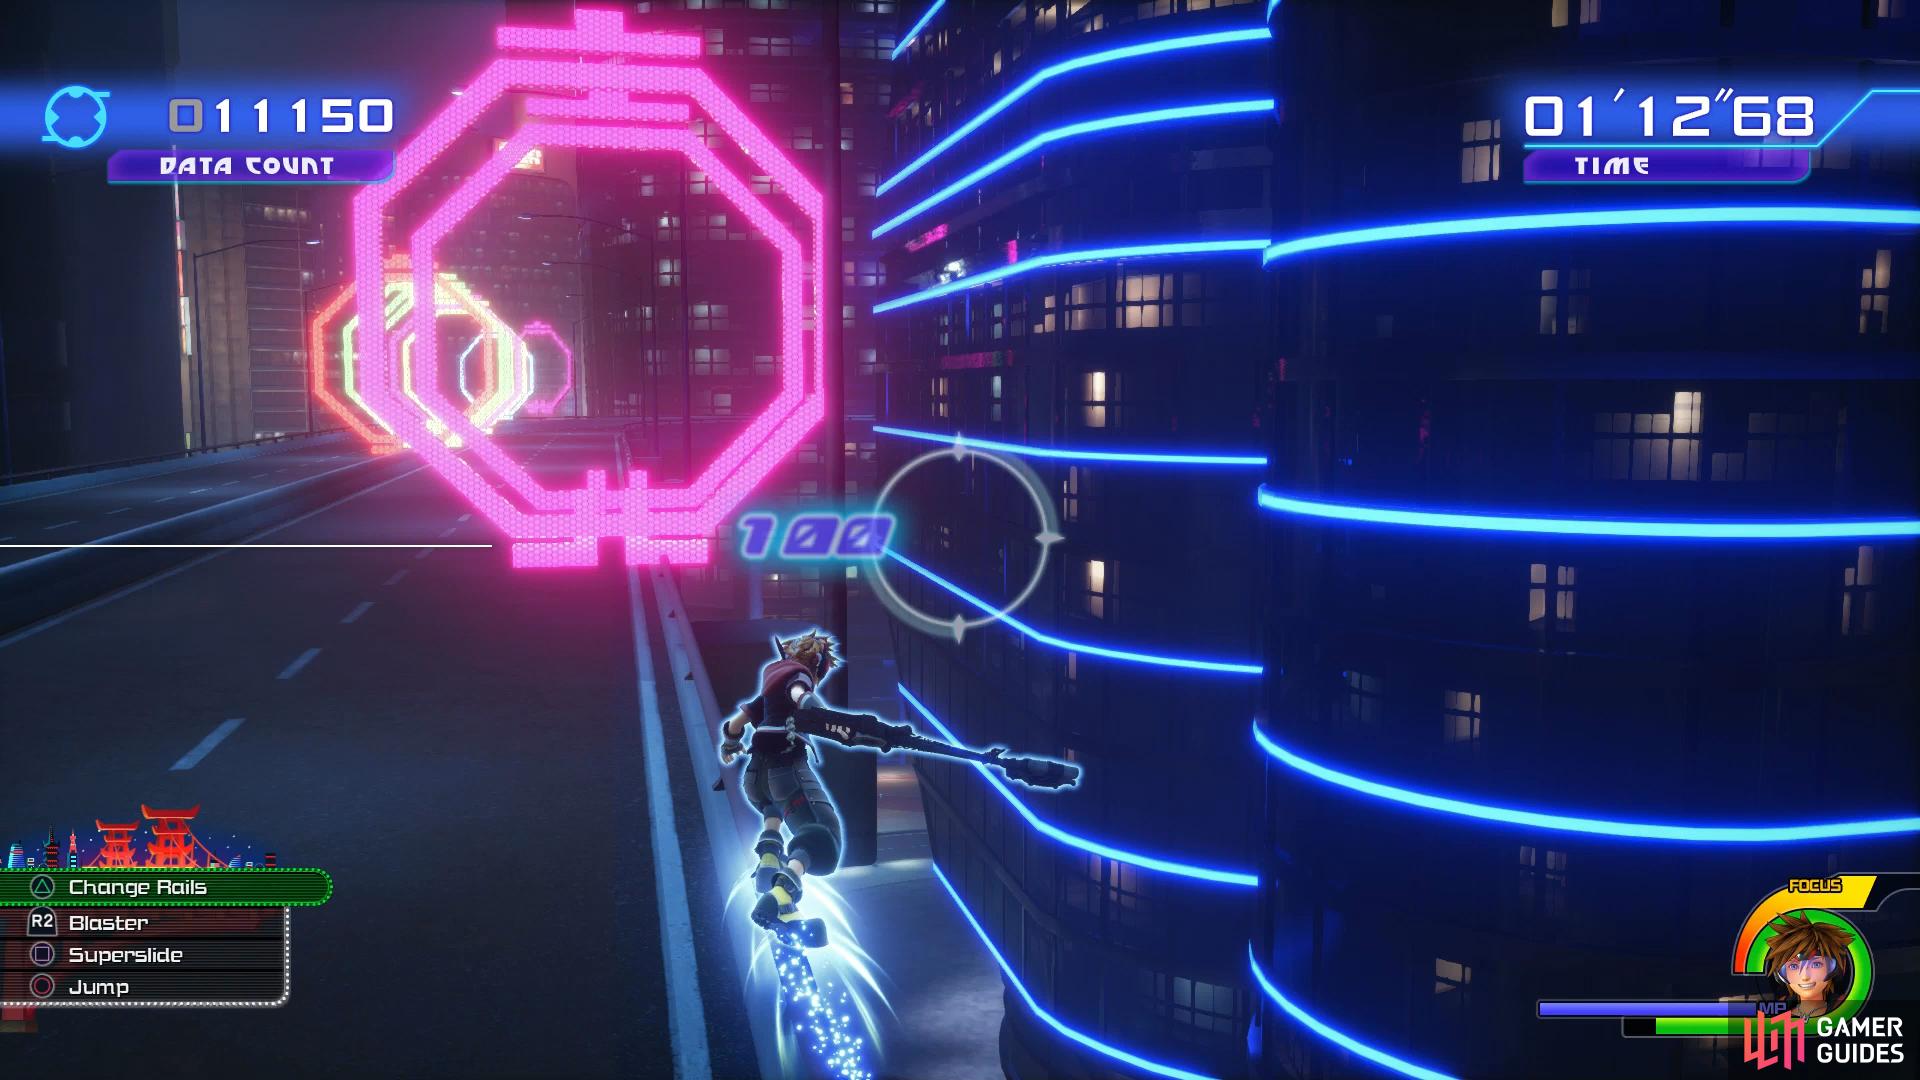
The larger rings offer a higher haul of points.
The Big Hero 6 will glean new possibilities from Sora’s actions and you’ll obtain the ‘Ohana Heartbinder, this will allow you to call on the power of Stitch to aid you in battle. You’ll find yourself back in Hiro’s Garage preparing for the next assault. Take a look at the Moogle Shop again while here to discover two new Photo Missions have opened up. Once you’re ready for the next encounter, talk to Hiro once more and return to the City.
Exploring the City
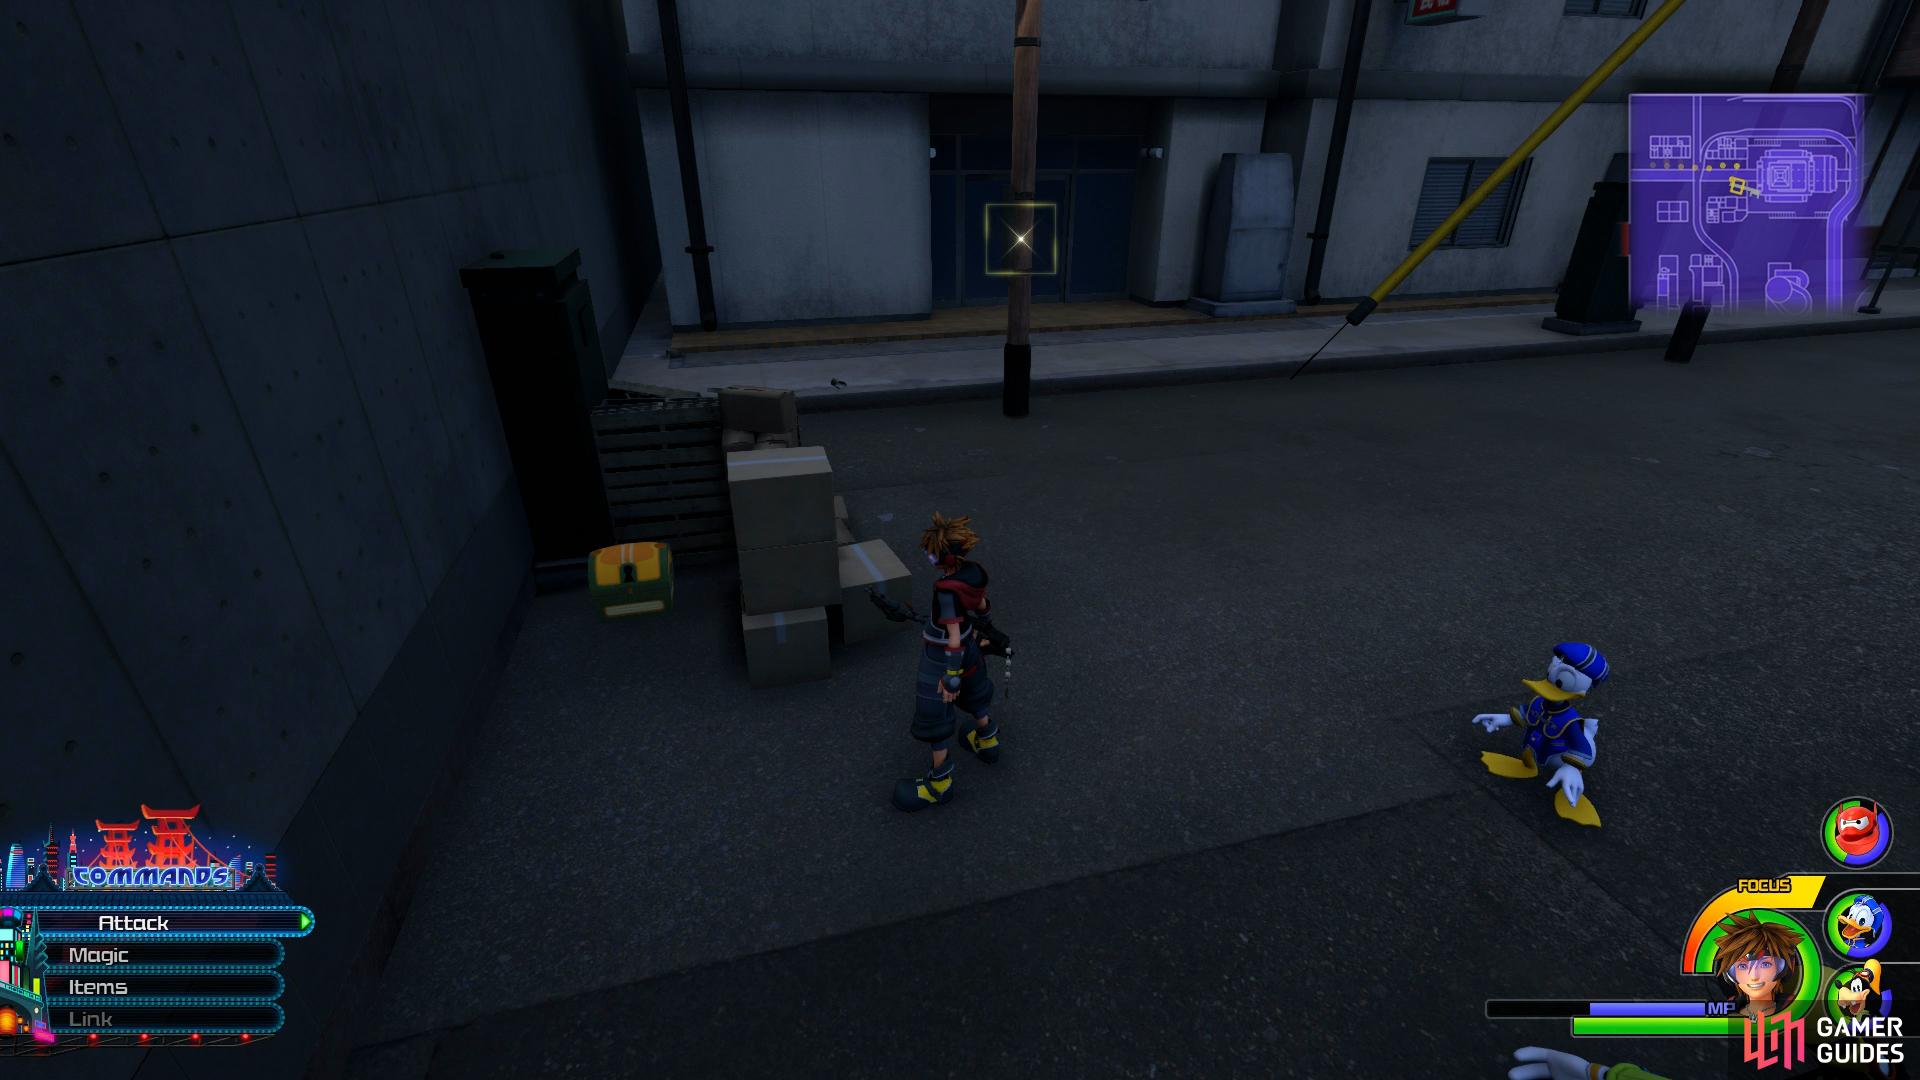
With the City in an uproad following the Heartless attack, you’ll find yourself up against an initial group of Heartless. Once defeated, open the nearby chest to obtain Treasure #3 - Map: The City. Although you have an objective here and Hiro will remind you (to an overbearing degree), you can explore the City for Treasures and Lucky Emblems.
Head south from your current location and to the next building where you’ll find another chest containing Treasure #7 - Phantom Ring. Continue south and keep to the building to your right as you follow it around the corner to find another chest, this one containing Treasure #21 - Damascus.


(1 of 2) Search behind the billboards on this roof to find this chest
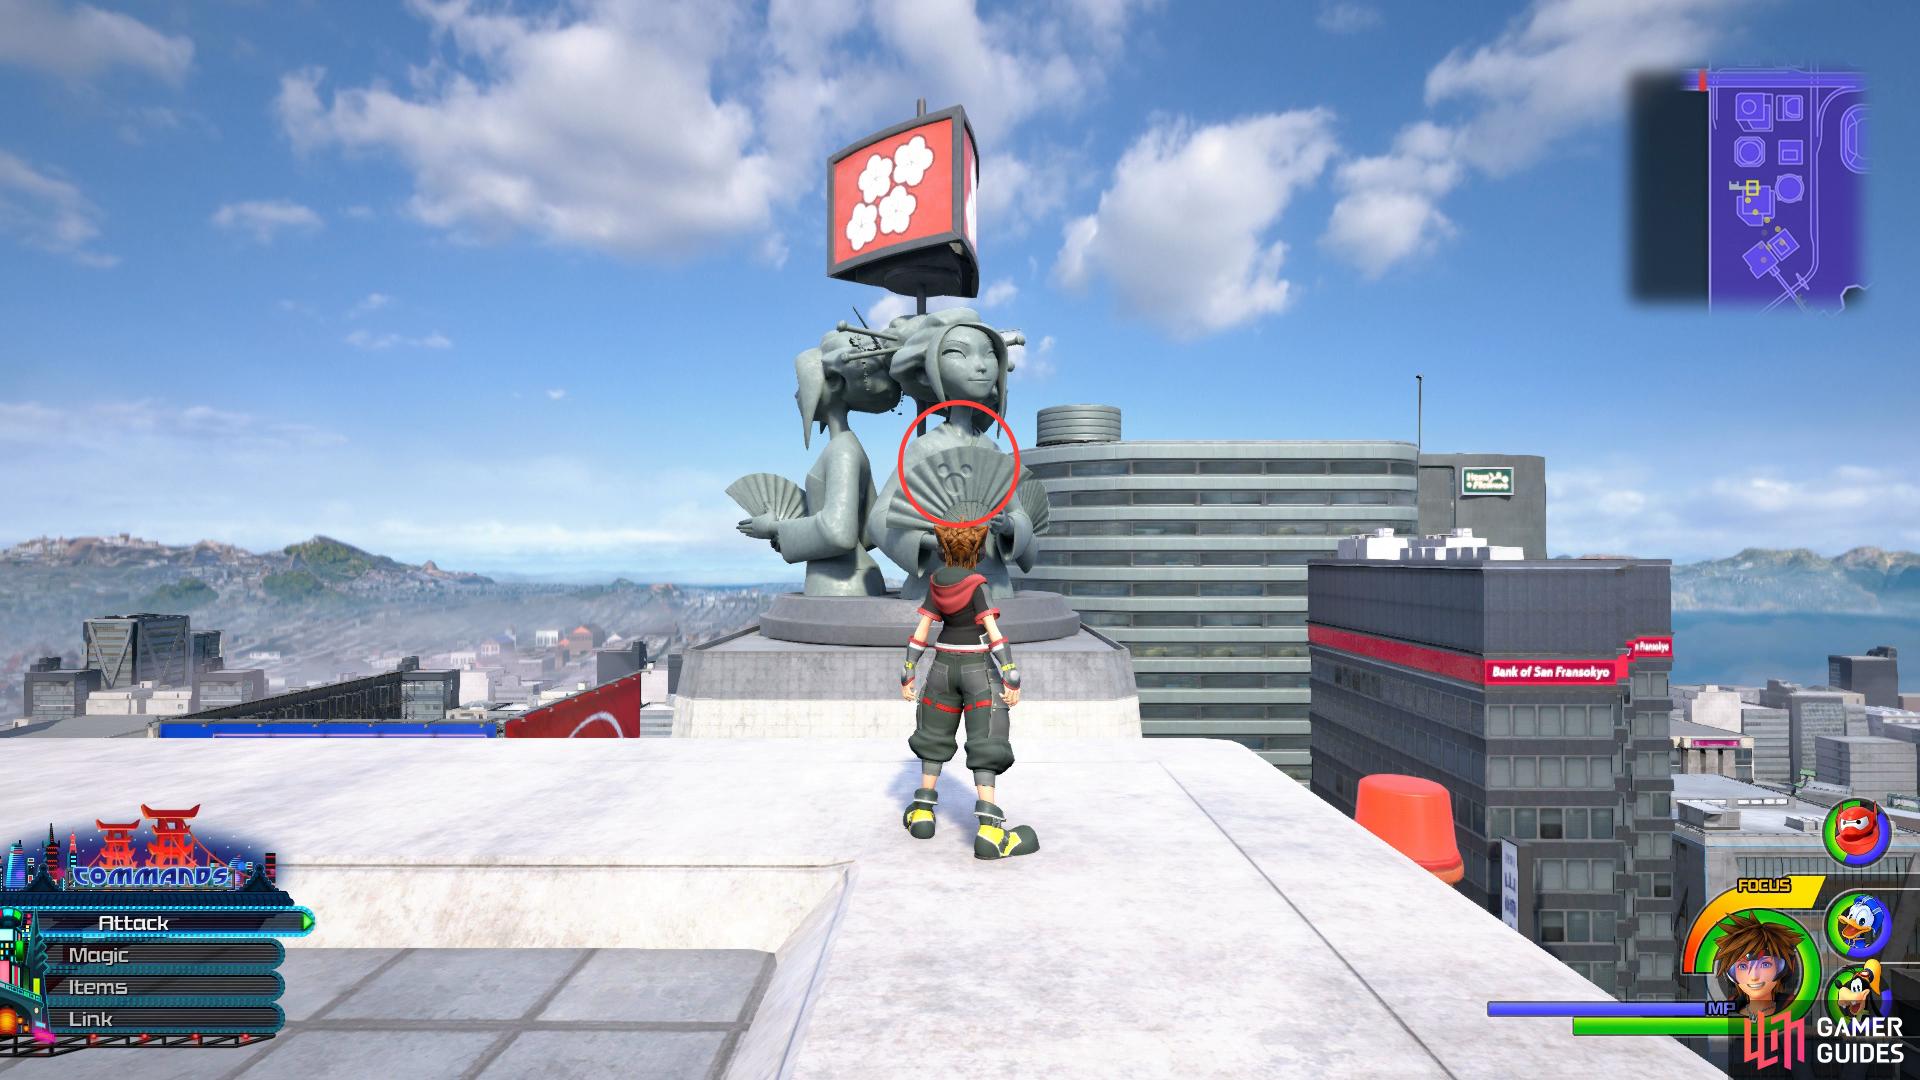
Search behind the billboards on this roof to find this chest (left), while a Lucky Emblem is engraved in the statue of the women. (right)
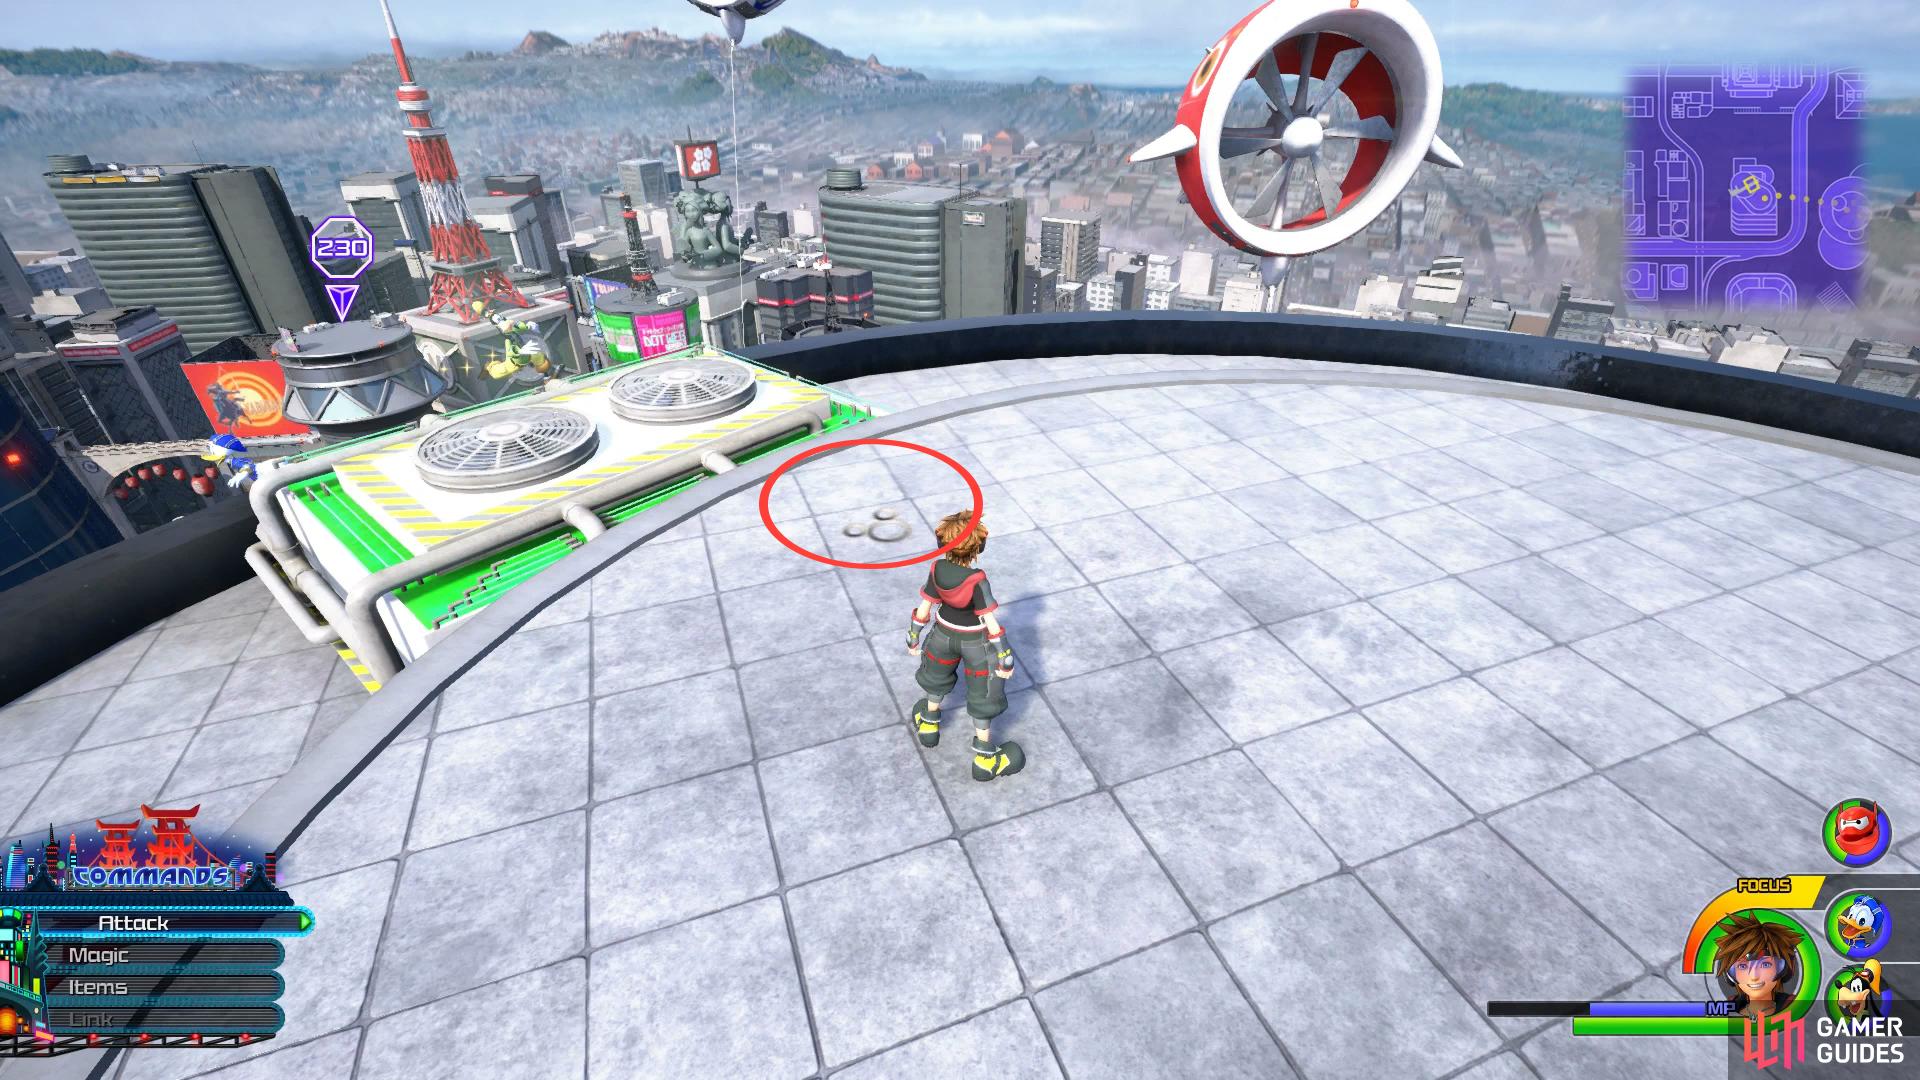
Run up the southern most building now and you’ll find the area enclosed in billboards, in the southeast corner here lies another chest containing Treasure #31 - Mega-Potion. Run up the next building to the northwest of your location and you’ll find another chest, this one containing Treasure #35 - Classic Kingdom: How to Play Baseball. While you’re here, turn to the west to face the statue of women on top of the building and snap Lucky Emblem #4 on the fan.
Drop back down to the ground and head to the far south of the area, where you see the exit of the area and follow the southern wall along to find a chest containing Treasure #20 - AP Boost. Run up the wall this chest sat against and on to the walkway above. Use this to jump to the head of the chef statue and then turn the camera to the east to spot Lucky Emblem #2 in the form of red bushes. Drop down the statue to the beams that support it and you’ll find another chest, this one containing Treasure #27 - Buster Band.


(1 of 2) Look down from atop the chef statue to spot this Lucky Emblem

Look down from atop the chef statue to spot this Lucky Emblem (left), you’ll find a collection of three chests on the rounded billboard building. (right)
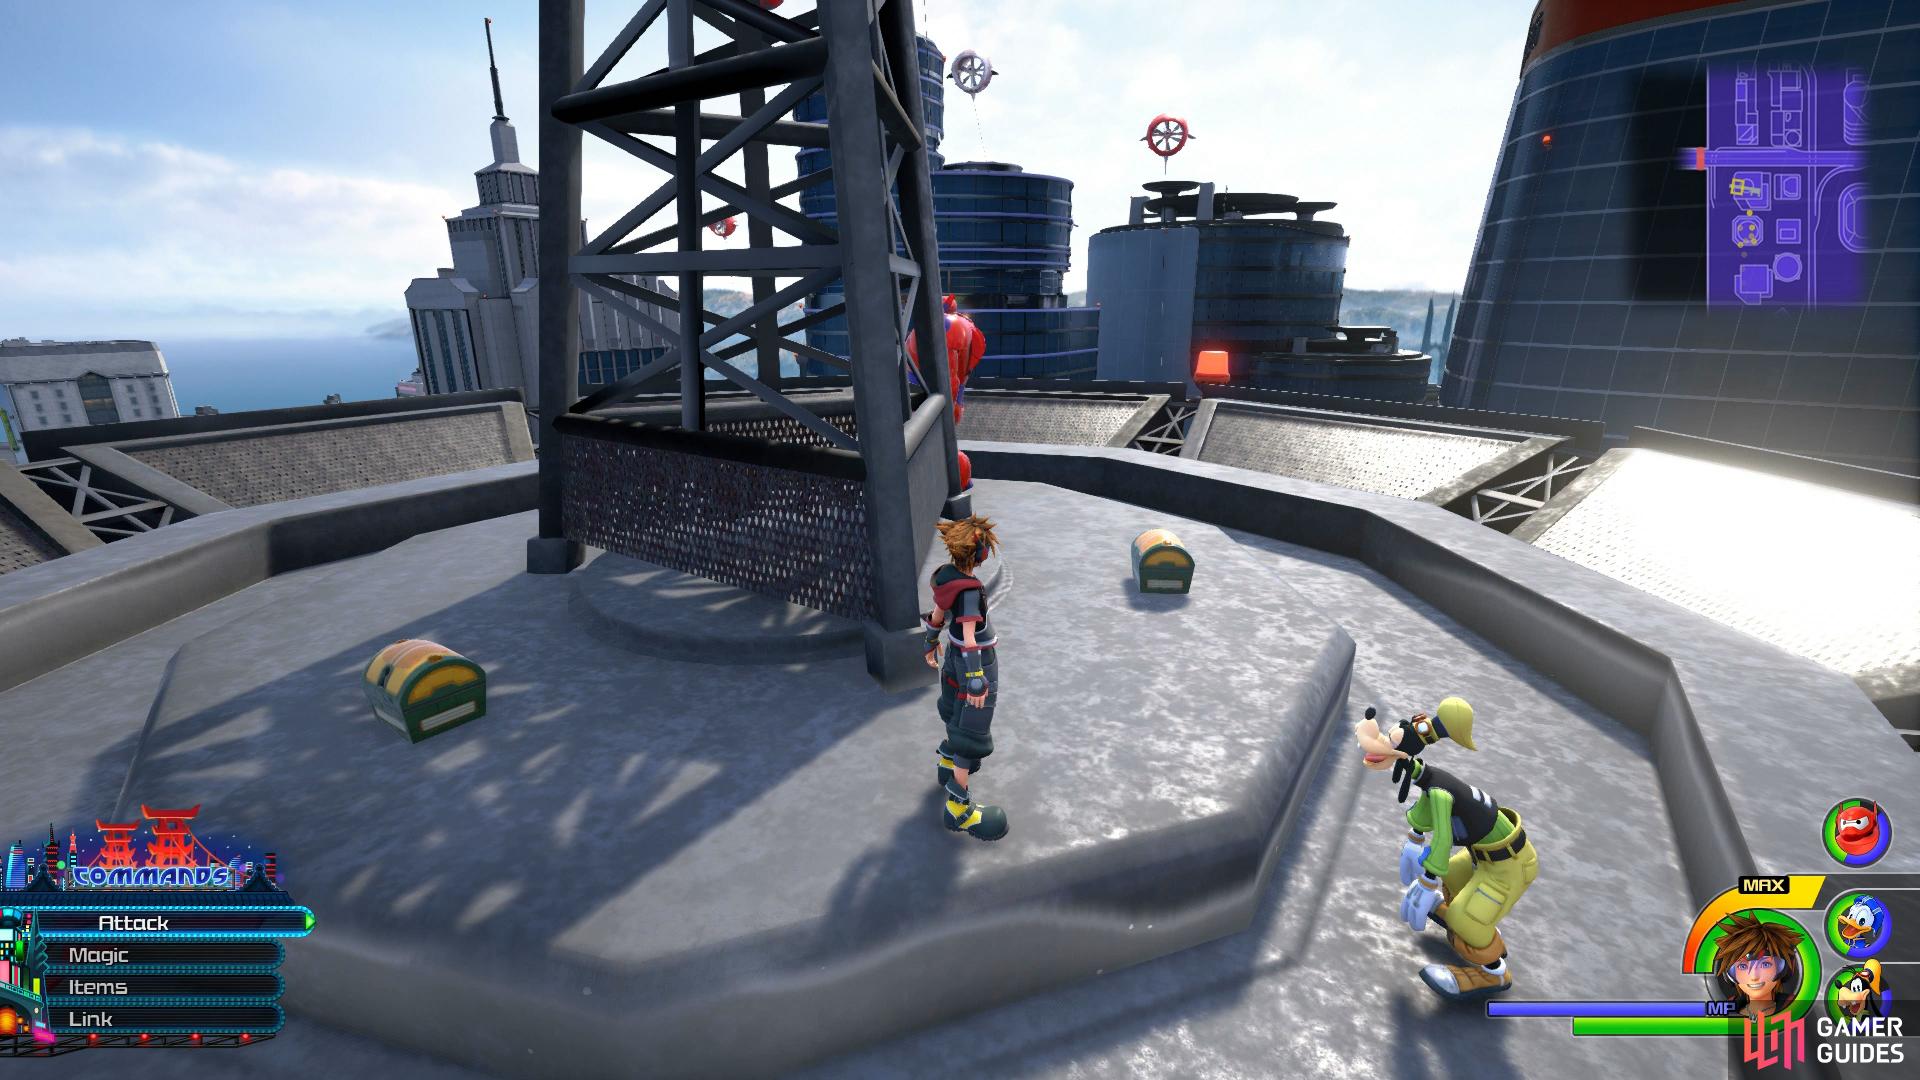
Make your way back to where you found Treasure 35 and head to the building to your north, covered in circular billboards. You’ll need to Airstep from the previous chest but when you land, you’ll be rewarded with three chests containing Treasure #11 - Mega-Potion, Treasure #12 - Thundaga Trinket and Treasure #18 - Mega-Ether. Drop back down to the ground here and head towards the western exit, you’ll see a road leading up to the highway, under this road is a chest containing Treasure #4 - Hi-Refocuser.
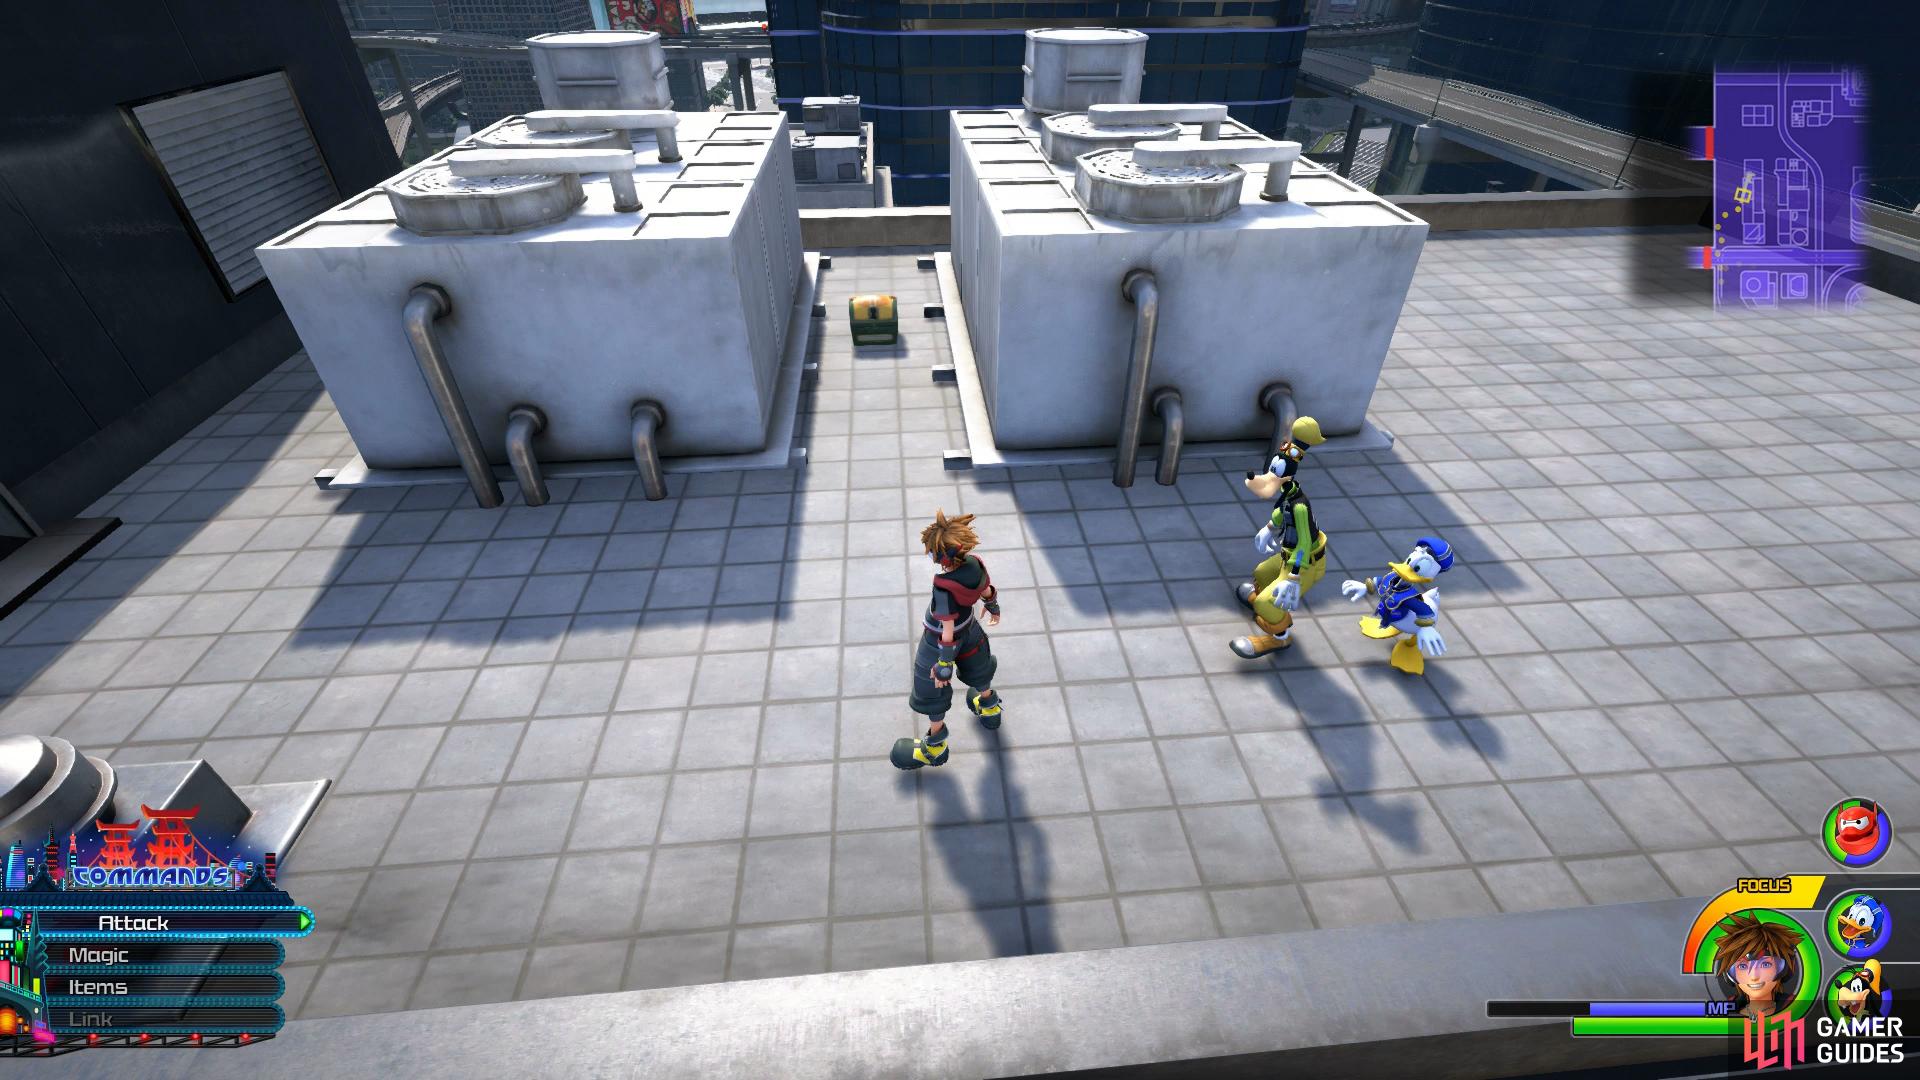
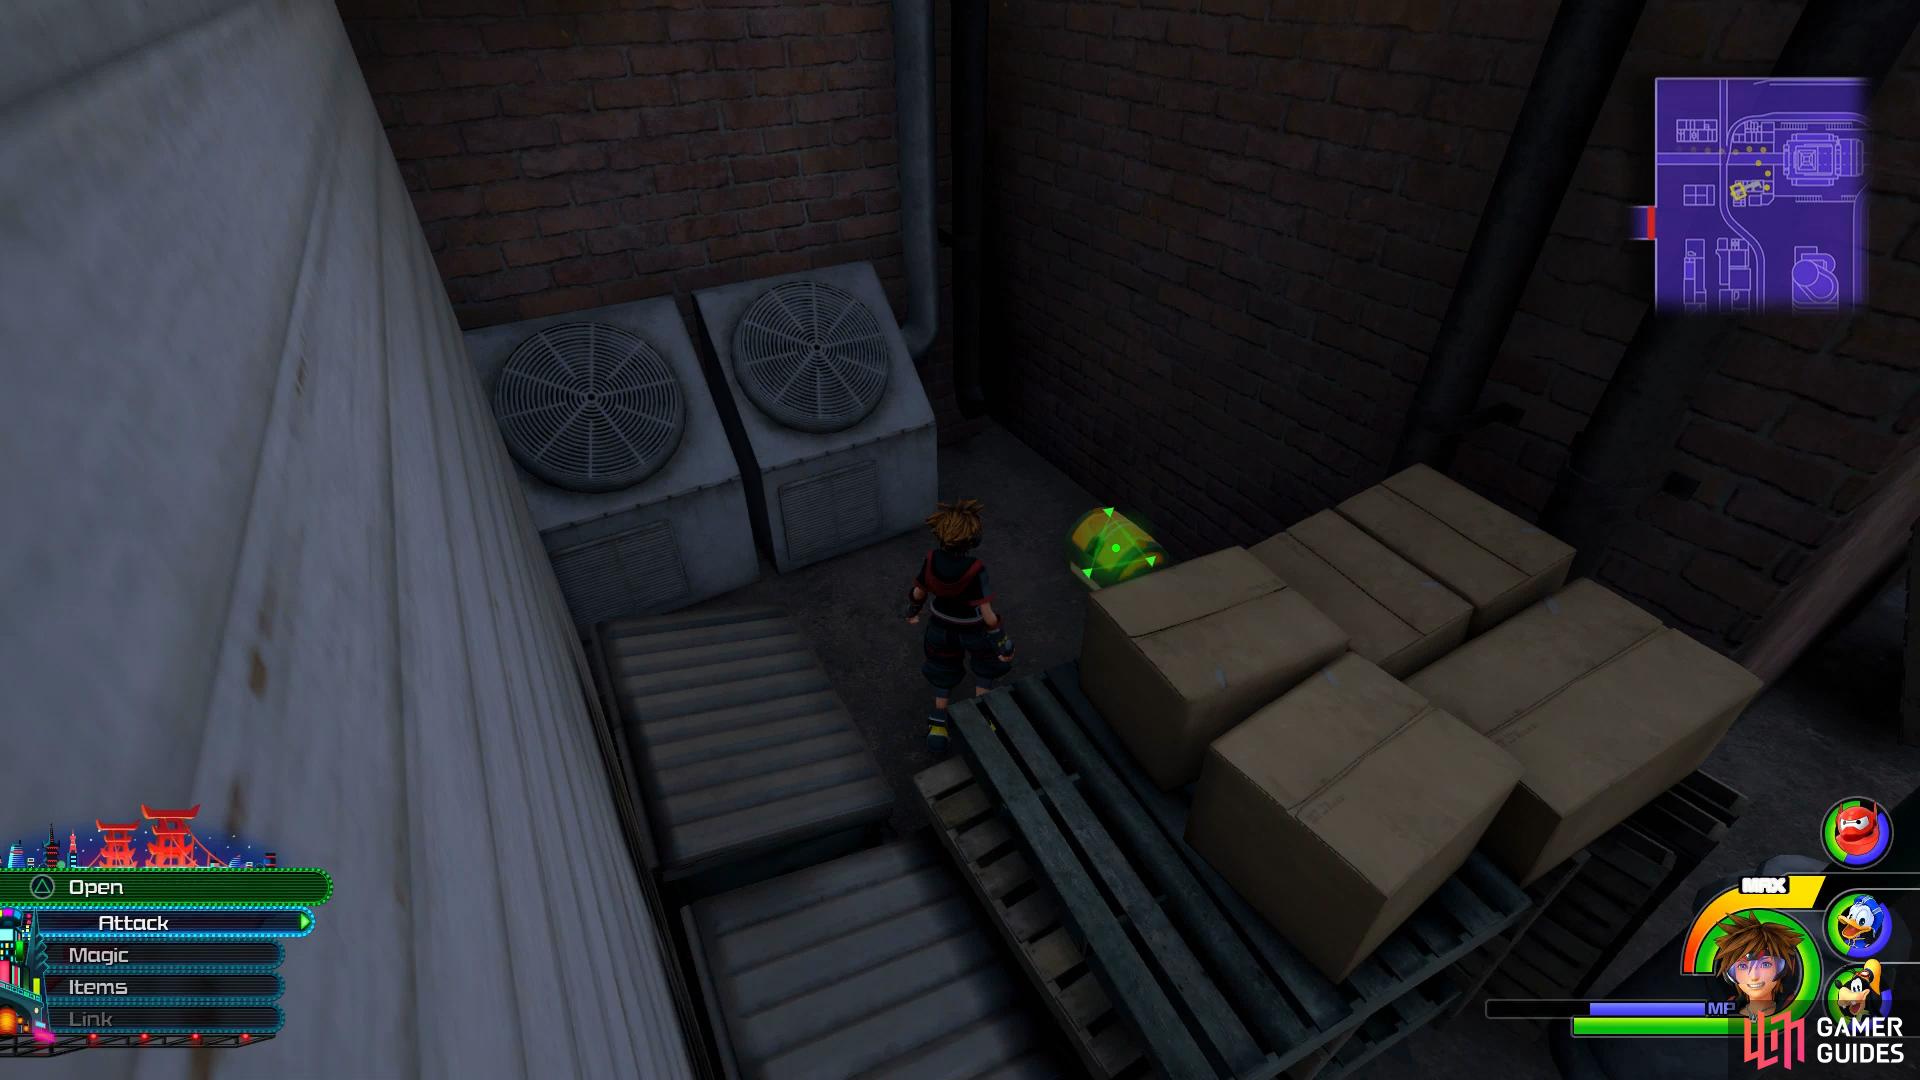
Continue north from here and run up the building to your right that’s situated between both of the eastern exits. You’ll find two air conditioning units here and in the middle of them, a chest containing Treasure #8 - AP Boost. North of this building, below you, is a helipad with a chest containing Treasure #34 - Classic Kingdom: Mickey’s Mechanical Man. Head over to the buildings to your east now and head to the northern most point. Look down to spot a green roofed and house and drop down to it, you’ll find a chest here containing Treasure #17 - Hi-Ether.


(1 of 2) This chest lurks between two air conditioning units
This chest lurks between two air conditioning units (left), while you’ll find another two chests around this pillar. (right)
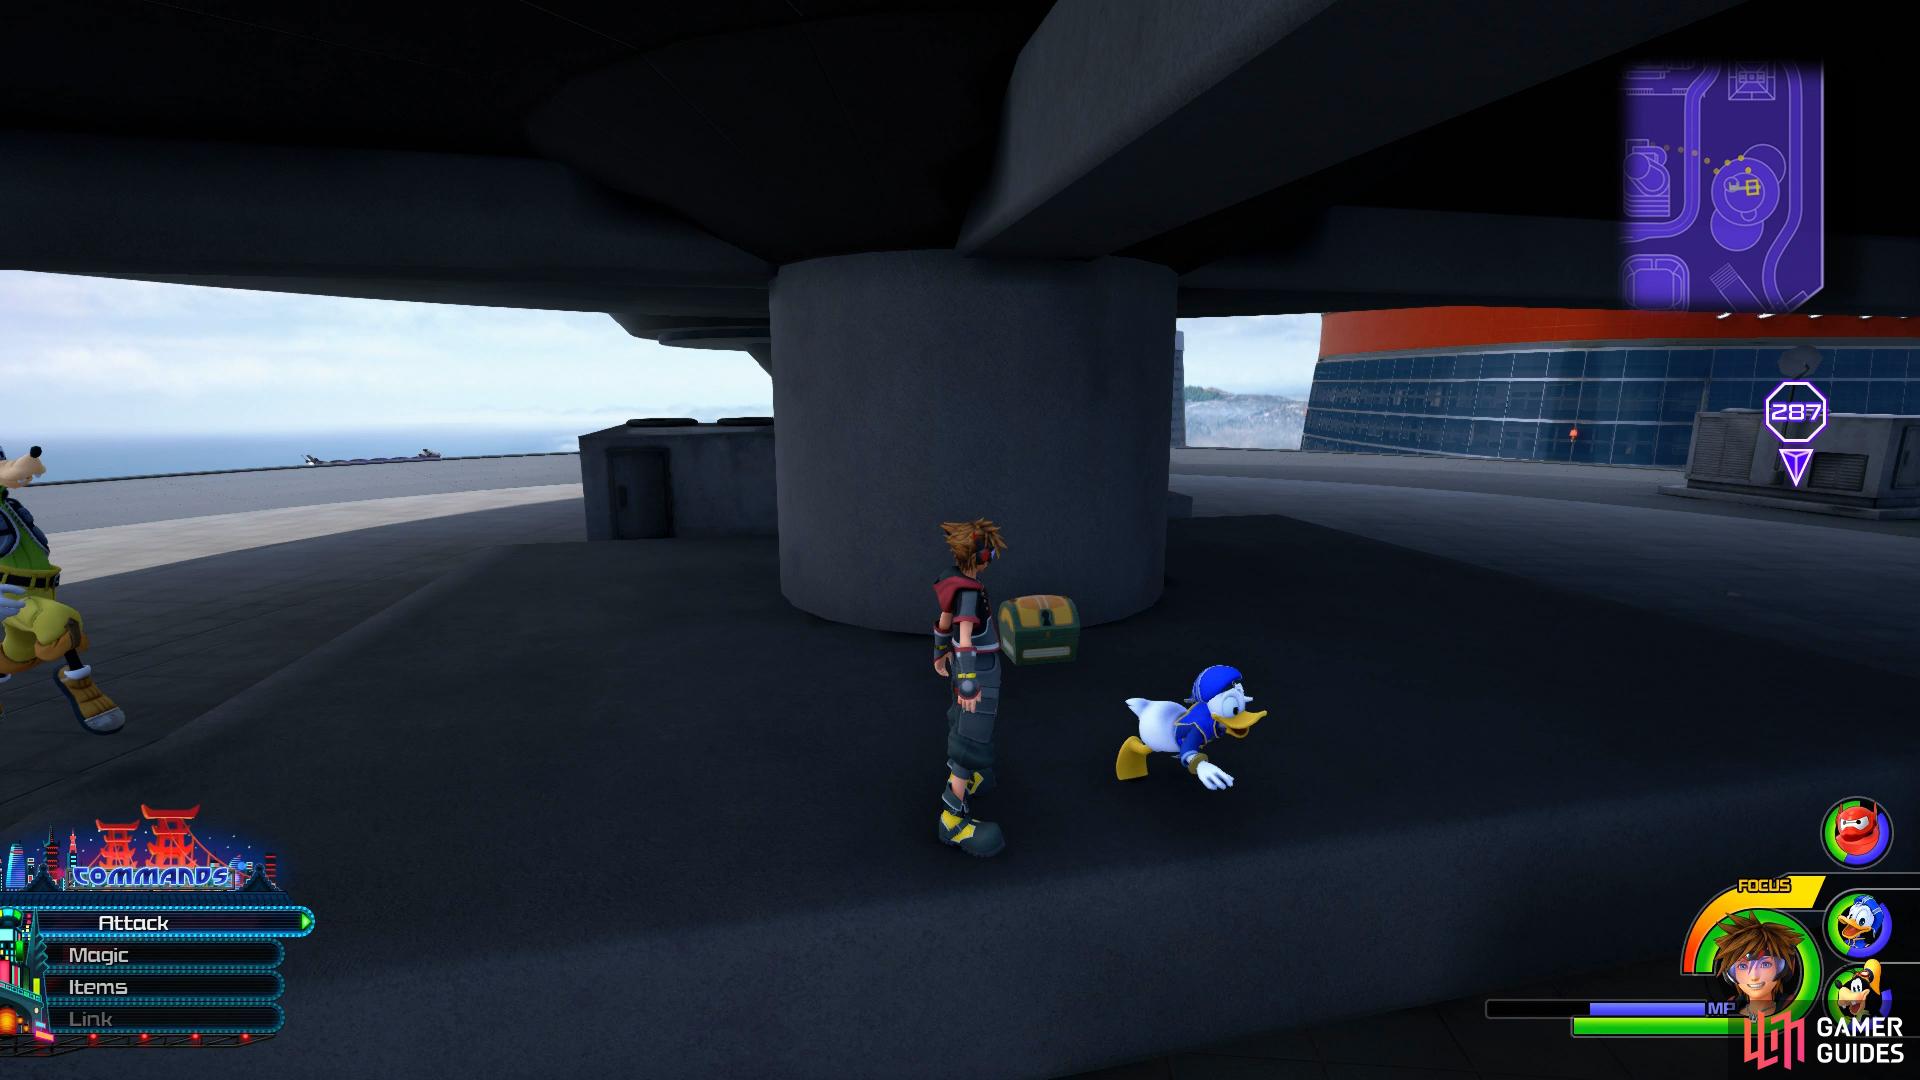
Continue to the east and up the next building to find another chest behind the billboards, open it to obtain Treasure #24 - Hi-Refocuser. Keep heading east and over to the circluar building on the map, running up the wall to reach the roof. Under the central pillar here is another chest waiting to be plundered, inside you’ll obtain Treasure #1 - Aegis Chain. Head behind this pillar to find another chest well hidden, this one contains Treasure #30 - Midnight Anklet. While you’re here, pull out the Gummiphone and snap a picture of one of the flying fish fans to complete Photo Mission #17.
Make your way to the roof of the next building to your west and at the very highest part, next to the western fan, is Lucky Emblem 6 on the ground. Drop down to the north of this roof and reach the lowest roof, you’ll find another chest here containing Treasure #9 - Mega-Ether. Drop down to the ground now and head to the southeastern side of this building to find a chest tucked away between two vending machines, open it to obtain Treasure #23 - Divine Bandanna.


(1 of 2) Look near the fan to find this Lucky Emblem on the ground

Look near the fan to find this Lucky Emblem on the ground (left), Strike the advertising board from above to reveal a chest. (right)
Return to the west and head between the two rows of buildings, keeping to the eastern side as you head north. You’ll find a small alcove here with a chest containing Treasure #26 - Electrum. Turn to your south from this alcove and you’ll see a small platform you can jump up to, there’s a chest here containing Treasure #16 - Magic Boost. Head east once more, this time under the highway and you’ll eventually come upon a circular signboard. Run up the nearby building to get enough height and then drop down to strike it from the air. You’ll reveal a large chest here containing Treasure #36 - Classic Kingdom: Mickey Steps Out.
This is the final Classic Kingdom game you’ll find and as such, recording a High Score on each of the games (by playing a single round and then quitting) will reward you with a Trophy and the Classic Tone Keyblade.


Make your way now to the far northwest of the City and climb to the top of the building there to find a chest containing Treasure #14 - Storm Fan. Drop down to the ground now and head south to where the railway passes over the street, under here is another chest containing Treasure #13 - Elixir. Head down the street to the east of the railway (the street to the south of where you found the previous chests) and you’ll find some boxes at the end, look behind these to discover a chest containing Treasure #5 - AP Boost.


(1 of 2) Search behind the boxes here to find this chest
Search behind the boxes here to find this chest (left), on the street south of this, drop into the alley to find another. (right)
Run up the building to the south here and then drop down into the alley on the other side, another chest lies in wait here containing Treasure #32 - Damascus. As you go to leave this alley, you’ll spot some boxes on your right, jump over these to find another chest, this one containing Treasure #29 - Strength Boost. Run up the building once more and head north across the railway to the collection of buildings north of it, the eastern most building here has a chest hidden here containing Treasure #15 - AP Boost.
Drop down to the street to the south once more and make your way over to the taxi, on the side of the door is Lucky Emblem #10. Make your way onto the railway track itself now and head east into the tunnel. As you enter it, stop grinding and land in the central path, you’ll notice Lucky Emblem #9 in the guise of the light shining through.


(1 of 2) Search the door on this taxi for a Lucky Emblem
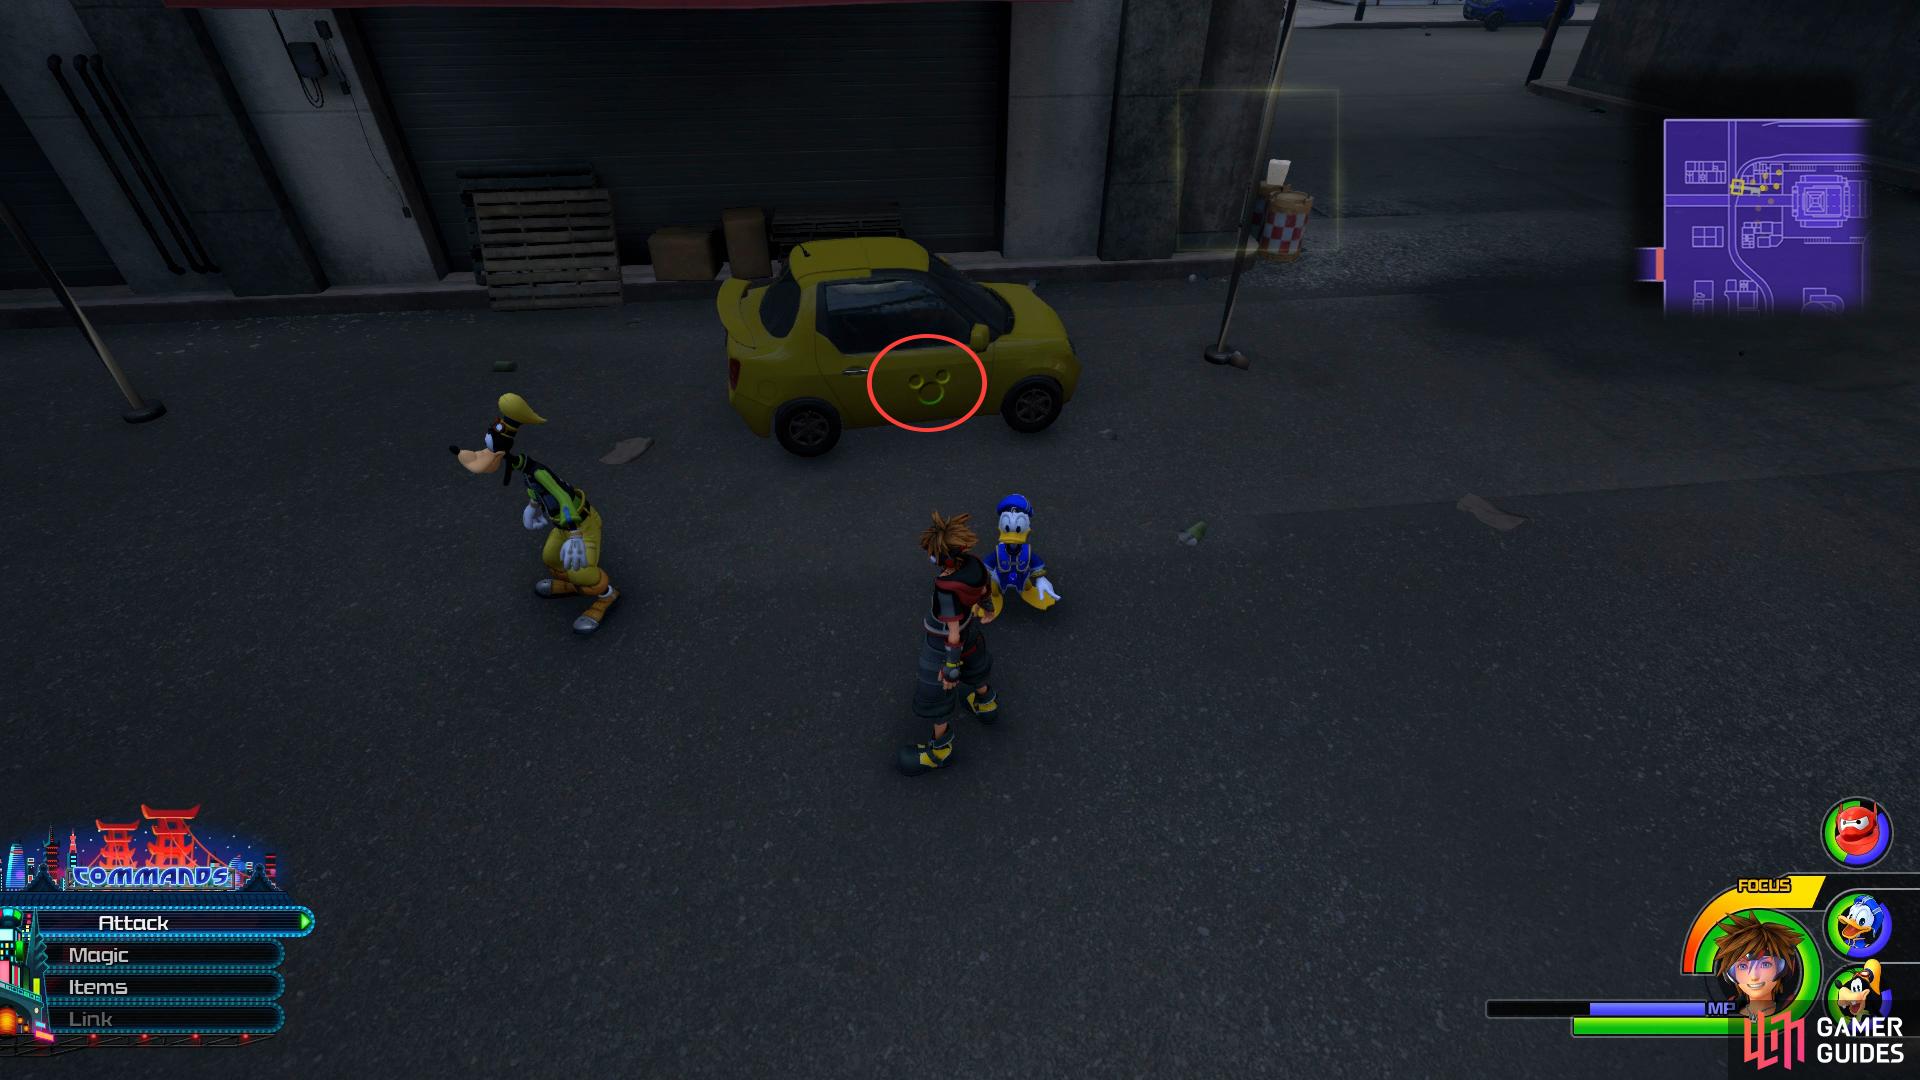
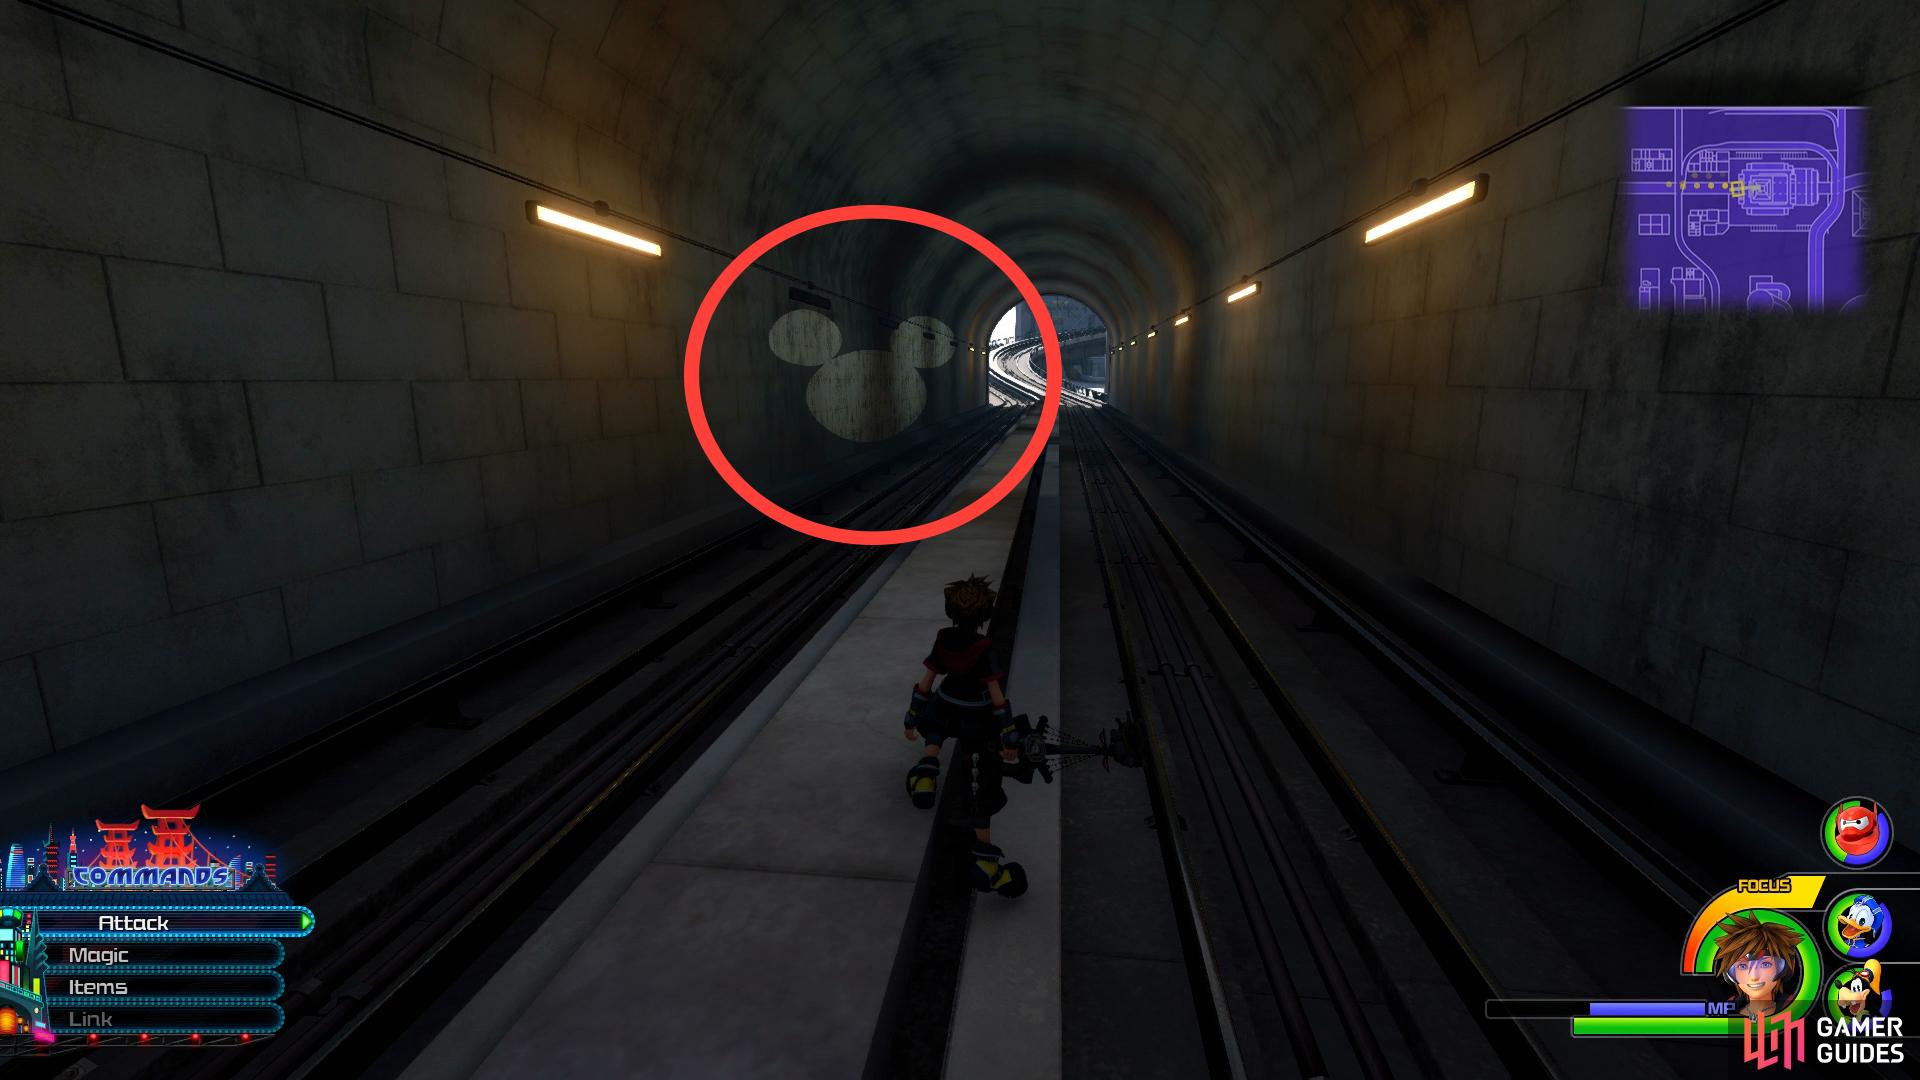
Search the door on this taxi for a Lucky Emblem (left), while another can be found in the railway tunnel. (right)
Exit the tunnel from the same way you entered and run up the side of the tunnel to a ledge with another chest, this one containing Treasure #28 - Magic Boost. Continue to run up the wall on the same side and you’ll reach another ledge with another chest containing Treasure #33 - AP Boost. Drop down the eastern side of the building now and drop to the south of the railway near the tunnel entrance to find a chest against the wall, open it to obtain Treasure #10 - Adamantite. Drop down to the ground from here and head around to the other side of the building (so you’re facing west) and you’ll spot Lucky Emblem #8 on the stairs ahead.


(1 of 2) A Lucky Emblem is marked out on these stairs
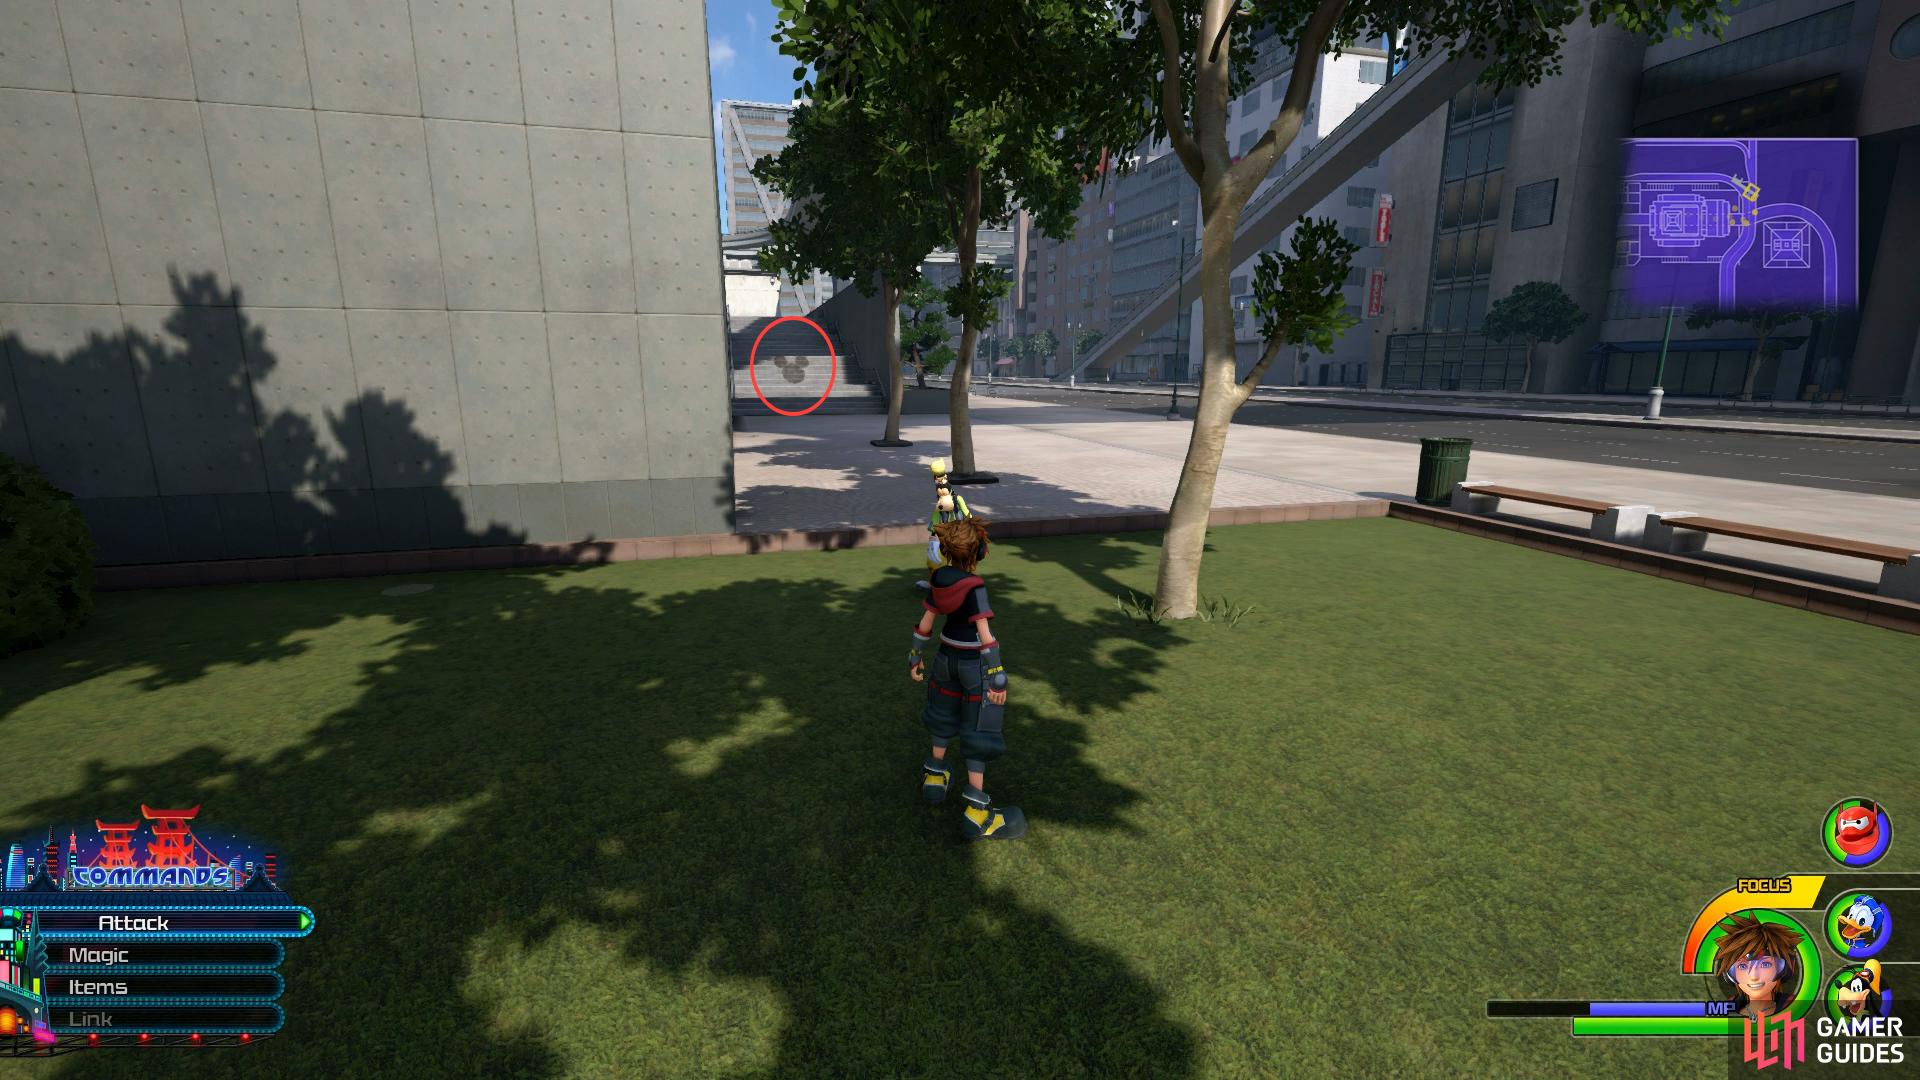
A Lucky Emblem is marked out on these stairs (left), while another can be found at the highest point of this building. (right)
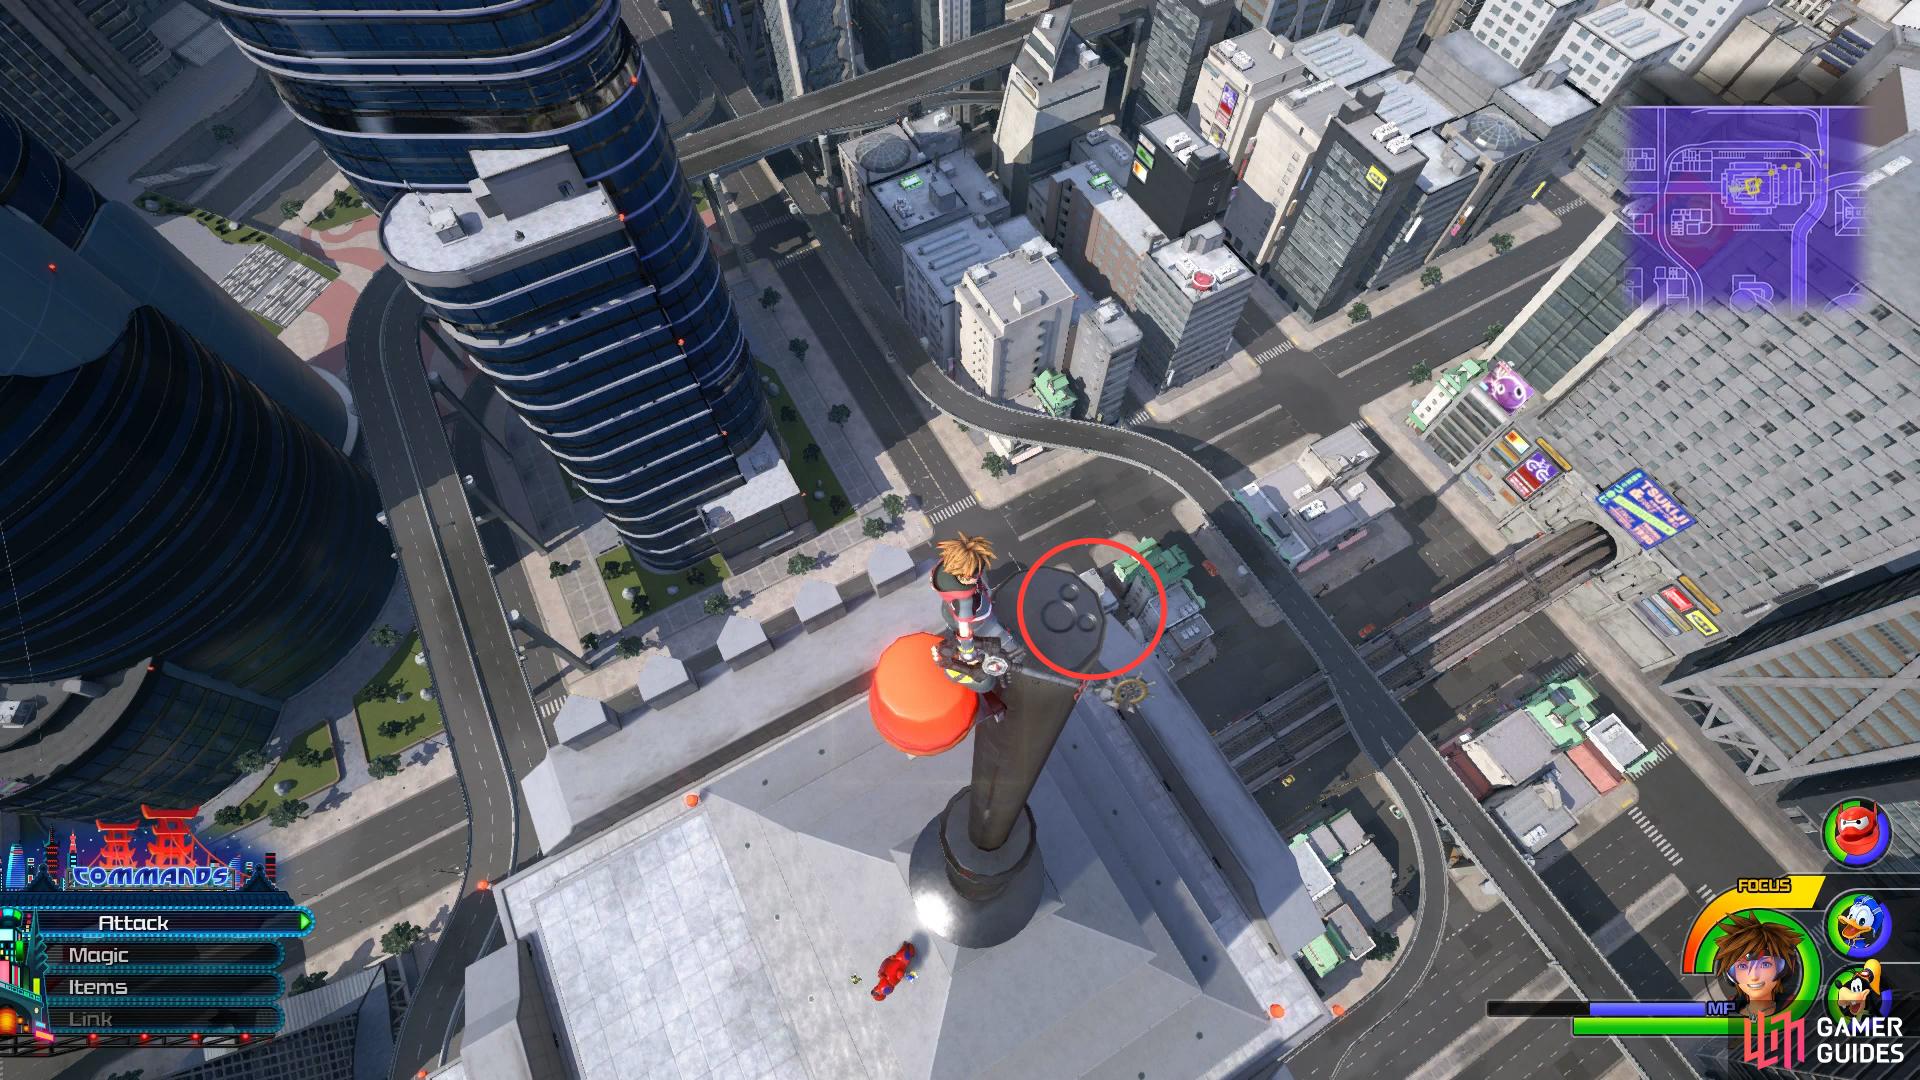
Return to the top of the building you’ve been circling around and at the very top, use Airstep to reach the pole on top, Lucky Emblem #11 is engraved on the top. Head to the tall building to your east and drop down the northside until you’re where the railway passes by it, a chest sits on top of a platform nearby containing Treasure #6 - Electrum. Run up this building now and at the very top you’ll find another chest, this one containing Treasure #19 - Nirvana+.
Turn your camera to face the south from this location and you’ll spot a blue fish fan you can Airstep to. Once atop the fan, jump to the highest point of it and you’ll spot Lucky Emblem #7. Drop down to the parking lot to your northeast now and search behind the advertising boards to find a chest containing Treasure #22 - Adamantite.
Head to your south to another building (ignoring the circular buildings from before) and run up the southern side of it. As you pass the lettering on the building, you’ll reach a platform with a chest right in front of you, open this to obtain Treasure #2 - Skill Ring+. Drop down to the northwest and pass under the highway, you’ll be able to run up the pillars providing the support here and on top of the one to the north is the final chest containing Treasure #25 - Star Charm. Run up the northern building closest to this chest and you’ll see a circular frame in front of you, head around it to the right to spot Lucky Emblem #5 engraved on it.


(1 of 2) This Lucky Emblem is hidden on this fish fan
This Lucky Emblem is hidden on this fish fan (left), while another can be found on the roof of this building. (right)
There’s nothing left to cover in The City until you finish the World’s storyline so you can focus on the plot at this point. At long last, listen to Hiro’s babbling and head to the marker that is highlighted by the AR device. You’ll be ambushed by a group of Mechanitaurs, a slightly tougher variant of the Satyrs you’ve defeated already. The arena is small however as a barrier surrounds the rooftop, use this to your advantage and unleash multiple casts of Thundaga to whittle down the enemies.
| Character | Ability |
|---|---|
| Donald | Max HP Increase |
| Goofy | Damage Control |
Boss: Catastrochorus
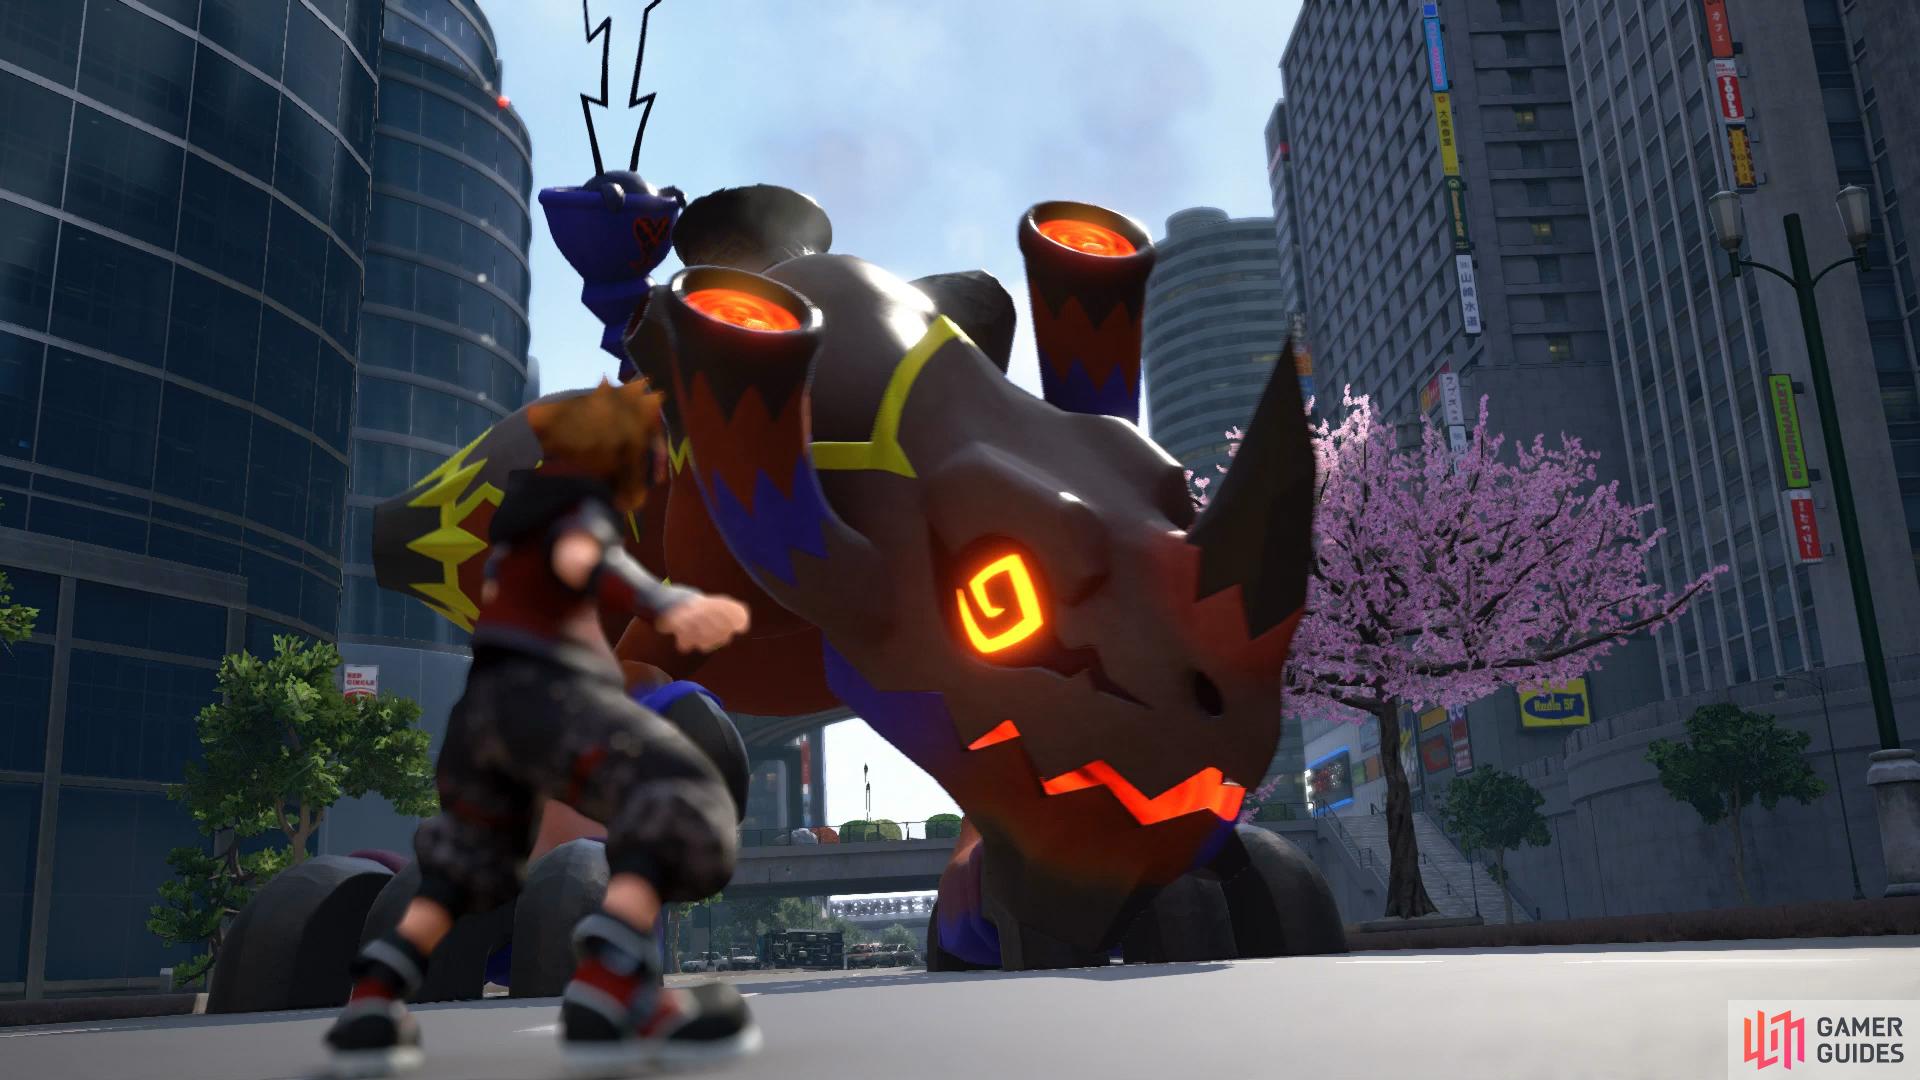
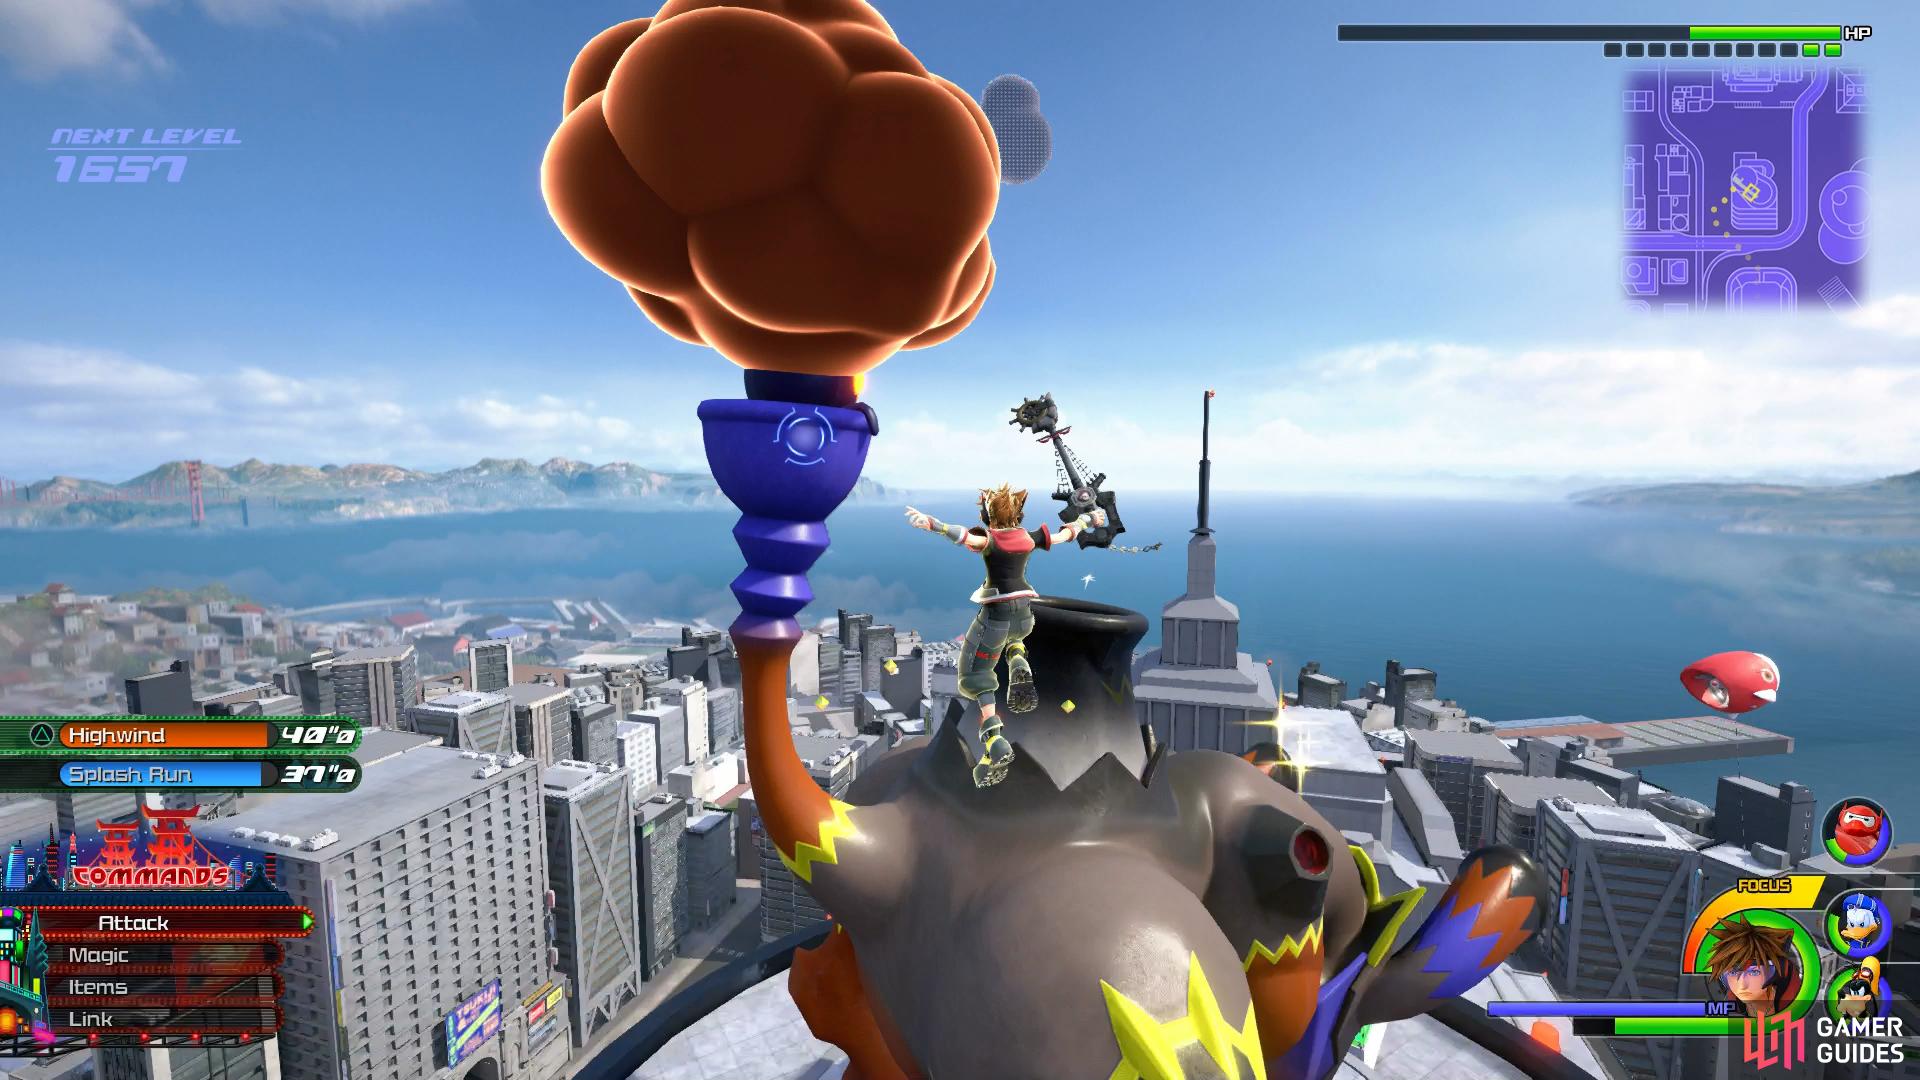
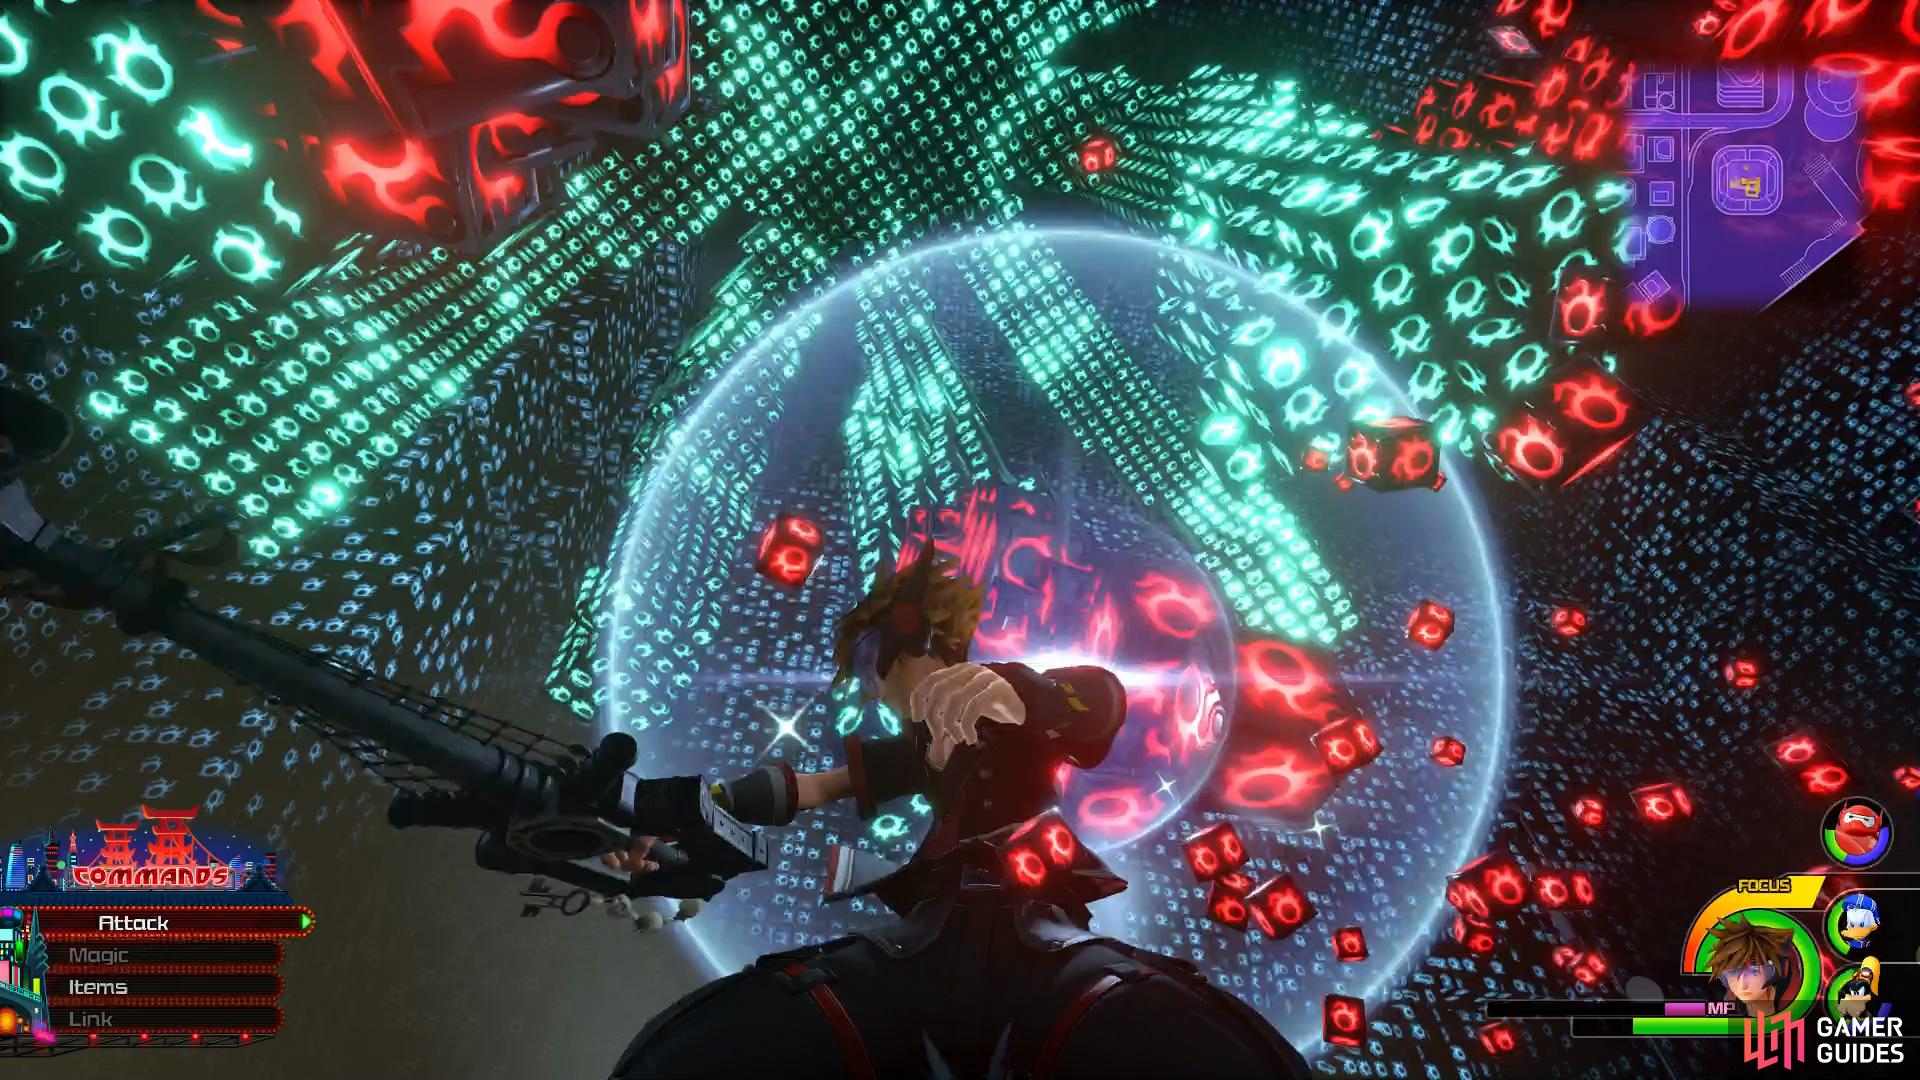
The previous battle was just a warm up, the Catastrochorus is the real adversary here. As you may expect from this Giant Heartless, it hits very hard so make avoiding it’s attacks your primary focus and don’t get too greedy with your attacks. During this first phase, the Catastrochorus will charge at you and ram you with it’s horn, jump high and Air Slide away to avoid the attack and counter with your own combos. The Catastrochorus will also charge it’s energy and errect Armor to surround it, use a Situation Command at this point to bring it down and resume your assault.
The Catastrochorus gains the ability to breathe Fire during this phase of the battle and sling Thunder spells from it’s tail, if your HP drops below half, be sure to Cure right away. Finally, Catastrochorus will stomp around the arena shooting molten rocks out of it’s backs, again be on the move to avoid this attack. Your primary way of dealing damage during this phase is to focus on your Situation Commands. Not only are you invulnerable during the start of such attacks but you’ll be able to deal major damage with relative ease. Once you strip it’s armor, you’ll stun it and be able to deal massive damage to the volcano on it’s back.


(1 of 2) You’ll need to avoid the Molten Rocks during the second phase

You’ll need to avoid the Molten Rocks during the second phase (left), stay locked on to the tail during the final phase and keep up the Air Combos. (right)
Once near death, the Catastrochorus retreats to the rooftop of a nearby building. Make your way up to the roof of the same building while avoiding the Thunder strikes that come your way along with any Heartless that dares to attack. At this point, the tail becomes your focus of attack, use the Catastrochorus’ head to reach it and stay locked on to pummel it with Air Combos.
| Character | Ability |
|---|---|
| Sora | Firaga |
Taking on the Darkubes
Be sure to assign that Firaga spell to your shortcuts and then take off after the marrauding Microbots, you’ll find them in the far northwest corner of the City. This will begin an unwinnable battle, attemp to land a few blows but prioritize safety until the cutscene triggers.
You’ll be up against the clock to assist the rest of Big Hero 6 while Hiro works on exposing the weakness of the Darkubes. Begin by heading to Honey Lemon’s position due to it being the closest of the bunch. You’ll notice that Honey Lemon’s grenades have trapped the Darkubes momentarily, each color corresponds to your magic so for example using Blizzard on the blue grenade, Fire for the red grenade. Use magic on all of the grenade blasts and upon blasting the last one, Honey Lemon will wrestle free and get to safety.
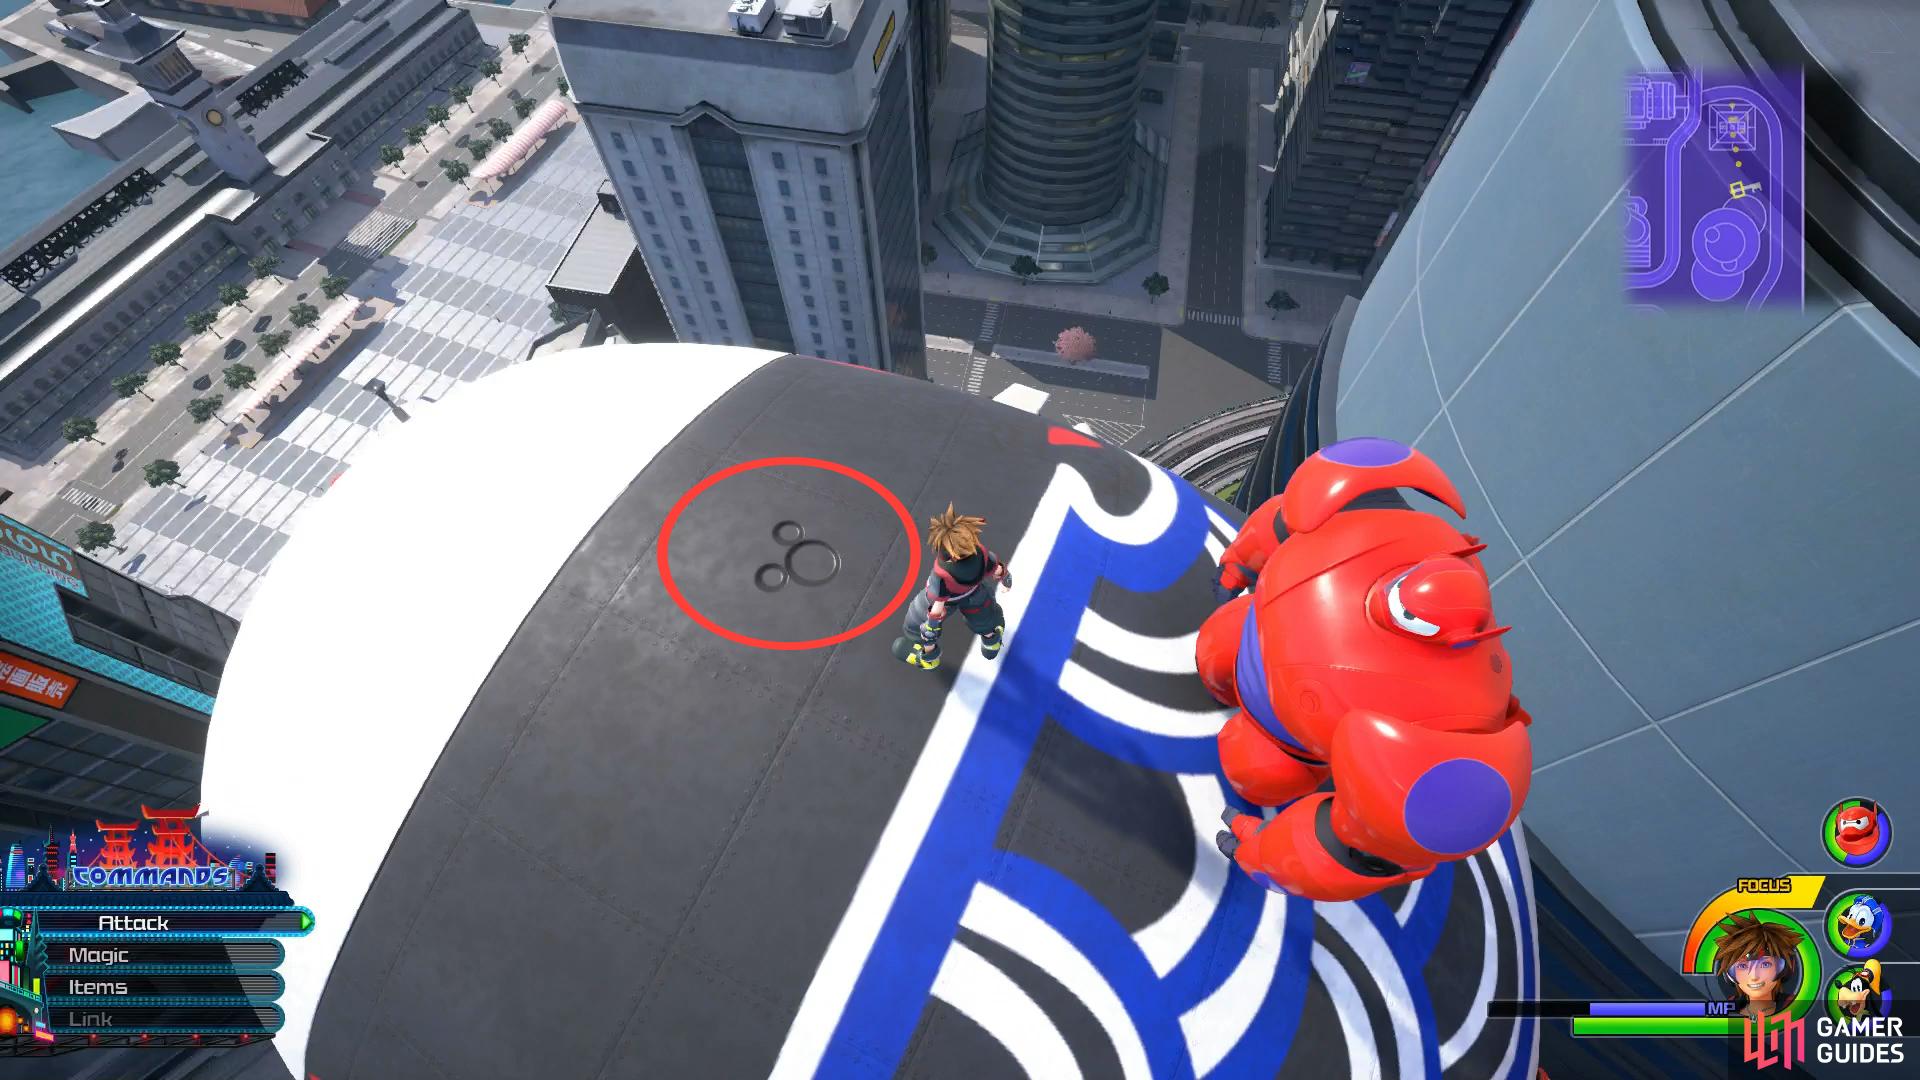
Make your way northeast to Wasabi’s position next, who is high atop a skyscraper. You’ll discover that Wasabi is trapped in the large ball, use the nearby vents to shoot into the sky and then strike the cube from above as your falling. Once again, this is enough to break Wasabi free and he’ll join Honey Lemon and get to safety.


Next on the list is Fred, who you can find on the ground to the southeast of your location. Dispatch the Pole Cannons here and then use Flowmotion to swing around the poles to destroy all of the connecting arms. Once you’ve swung around all four poles, Fred will break free and join the others.
This leaves you with just Go Go to assist and as you may have noticed, her position is constantly moving. Before heading over to her however, head up the road to the north of your position to find the large red ball from earlier. Jump on top of it to begin rolling it and head to Go Go’s position. You’ll notice that Go Go herself is in a massive rolling Darkube so roll the red ball into it’s path to break it open and free the last of the Big Hero 6 and obtain Hero’s Glove.
| Character | Ability |
|---|---|
| Sora | Superslide |
Make sure you’re well prepared before you head to the location on your AR device, once you reach the location you’ll finally be able to take on the Darkubes.
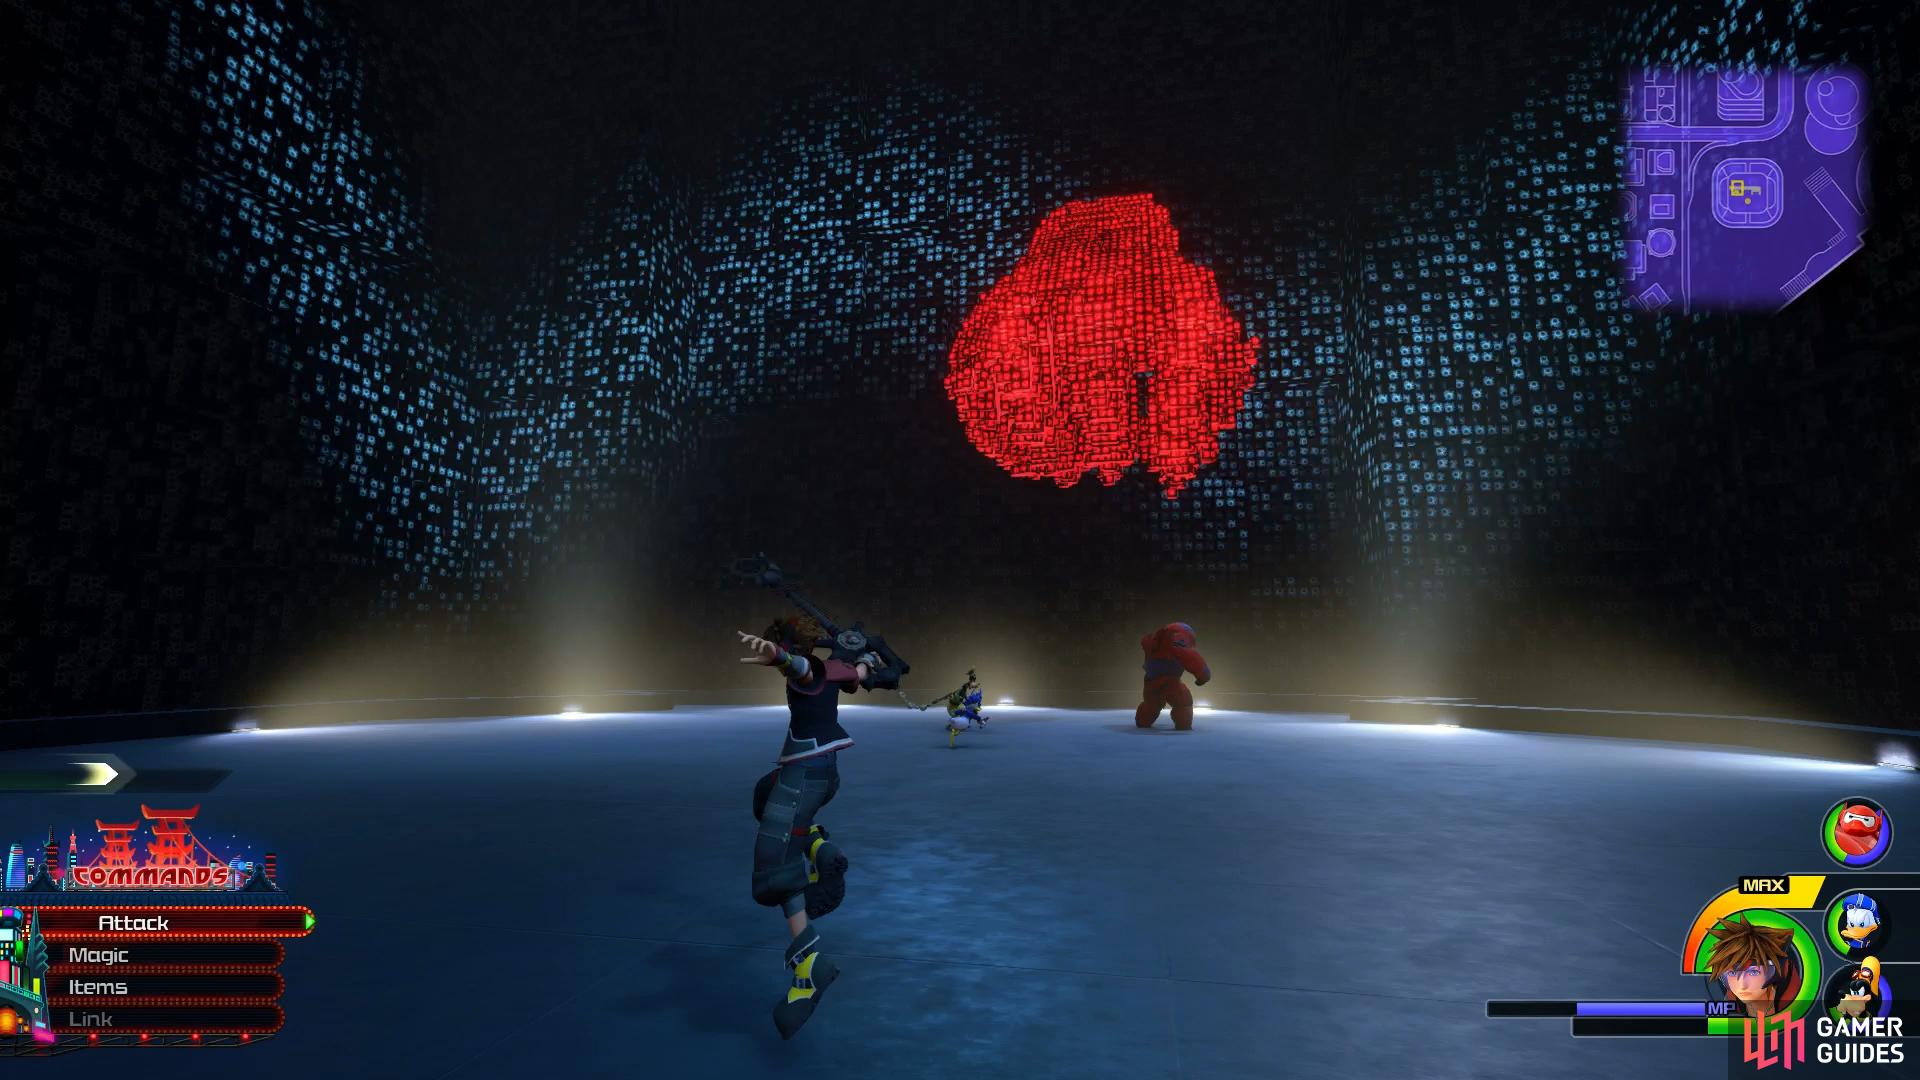
Boss: Darkubes
The Darkubes can only be damaged when it’s core is exposed which appears when it’s in it’s heart form. At all other times, you need to be diligent in dodging the various attacks coming your way. To begin with, you’ll notice red tips on some of the arms of the Darkubes, these will shoot lasers at you that can be blocked or dodged easily. After firing off a few shots, they’ll combine to fire off a larger beam in your direction.


(1 of 2) Get ready to doge to the side when the Darkubes forms a fist
Get ready to doge to the side when the Darkubes forms a fist (left), all of the lasers can be blocked with careful timing. (right)
The fist attack from your earlier encounter will return, this is indicated by the hand glowing red, be prepared to dodge to the side or Air Dodge if you’re in the air. Finally, the Darkubes will drop from the sky in a clump and spin around the arena, keep on the move to avoid the attack. The battle is a lot simpler than it may seem as you’ll alternate between an offensive phase and a defensive phase while the Darkubes core isn’t exposed.
| Character | Ability |
|---|---|
| Sora | Armor Slot |
| Goofy | Withstand Combo |
Following the events with the Darkubes, you’ll find yourself back at Hiro’s Garage to prepare for the final battle. Once everything is in check, speak to Hiro one final time and return to the City again.
Boss: Dark Baymax

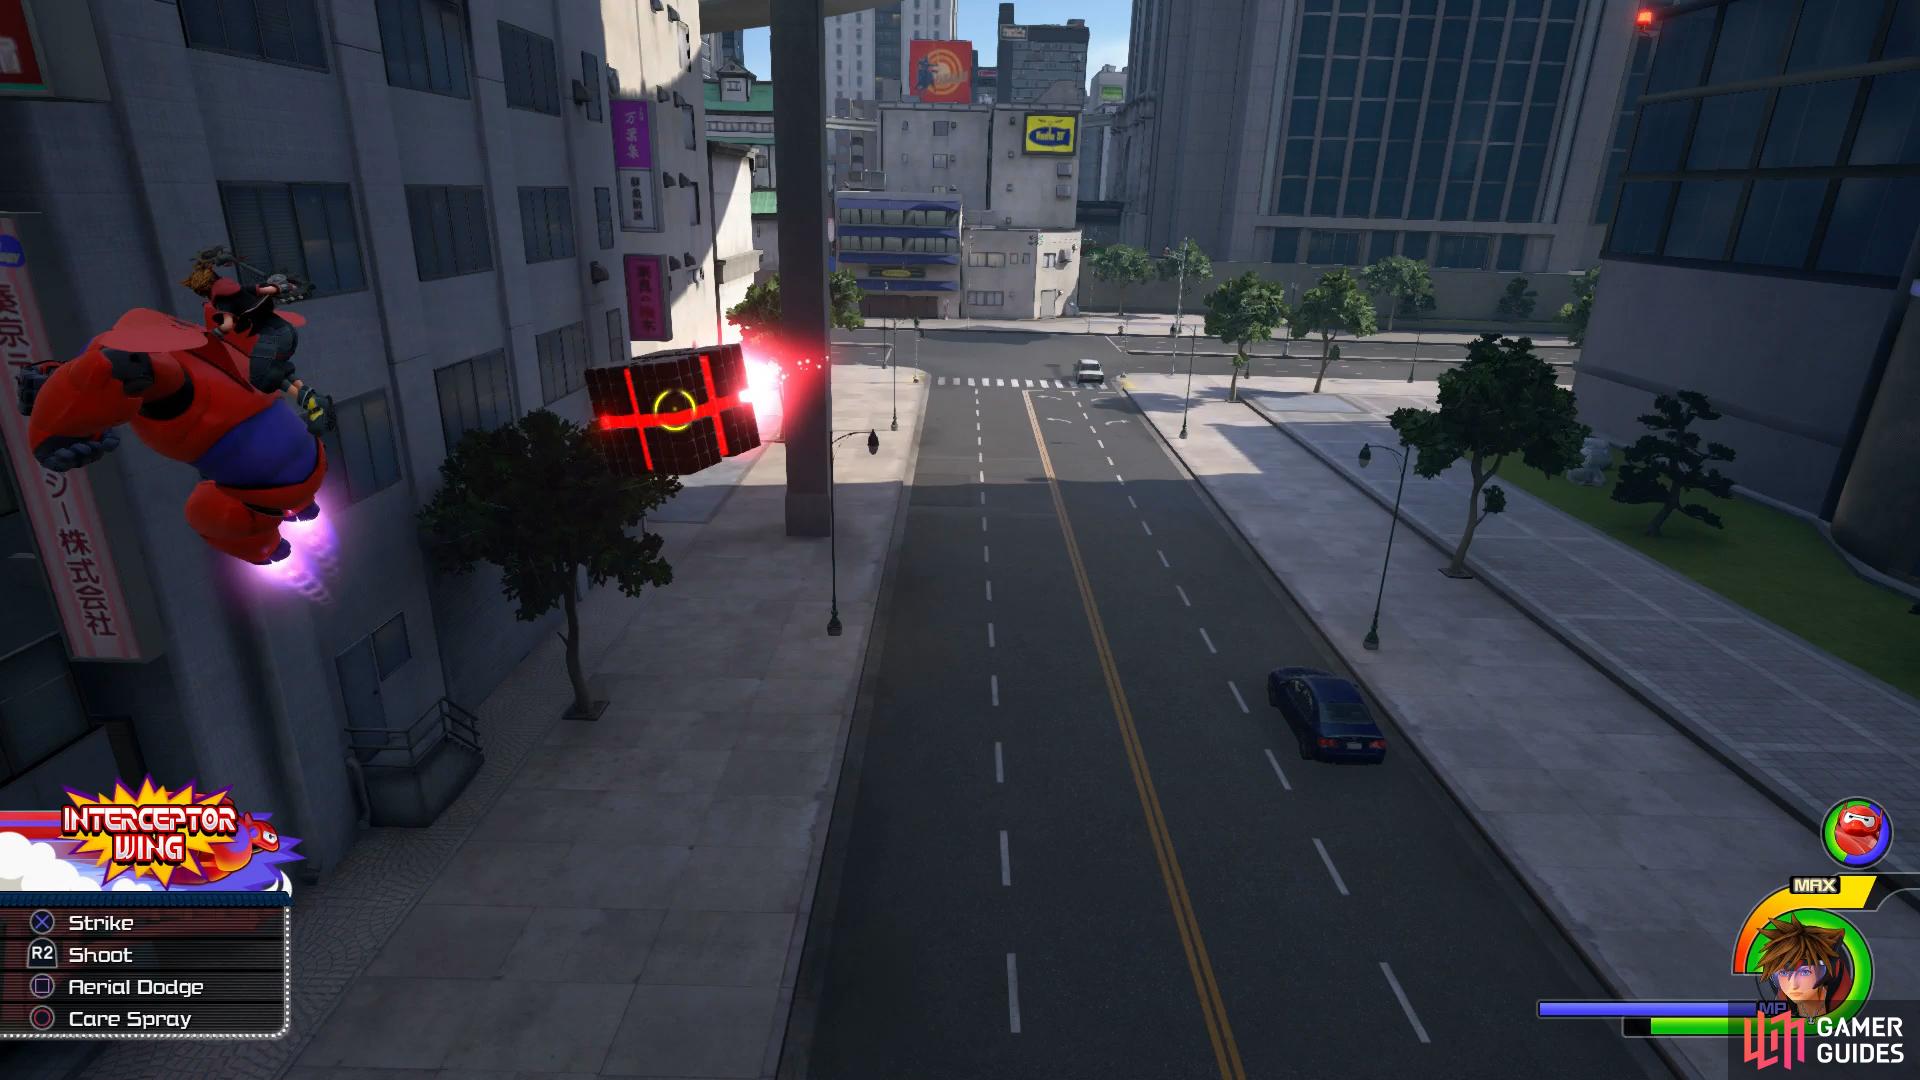
The second Baymax has been corrupted by the Organization and it’s up to Sora to subdue it. You’ll fight this battle in the skies, riding Hiro’s Baymax as you chase down Dark Baymax. Sora can strike with his Keyblade at any enemies that may get too close, this should be used as a last resort. Your primary form of attack will be to shoot while using Aerial Dodge to avoid anything that come’s your way. Finally, Sora can use the Care Spray ability to recover some lost HP, don’t neglect this aid.
As for Dark Baymax, he’ll begin by leaving connecting mines behind him as he soars through the sky. These are simply to both dispatch by shooting and avoid. Once you see four large Darkubes surround Dark Baymax, get ready for them to home in on you. Wait for them to get close and then strike with the Keyblade to send them hurtling back at Dark Baymax and deal heavy damage.


(1 of 2) Strike the Darkubes back during phase one
Strike the Darkubes back during phase one (left), while deflecting the flurry of them in phase two triggers a powerful Situation Command. (right)
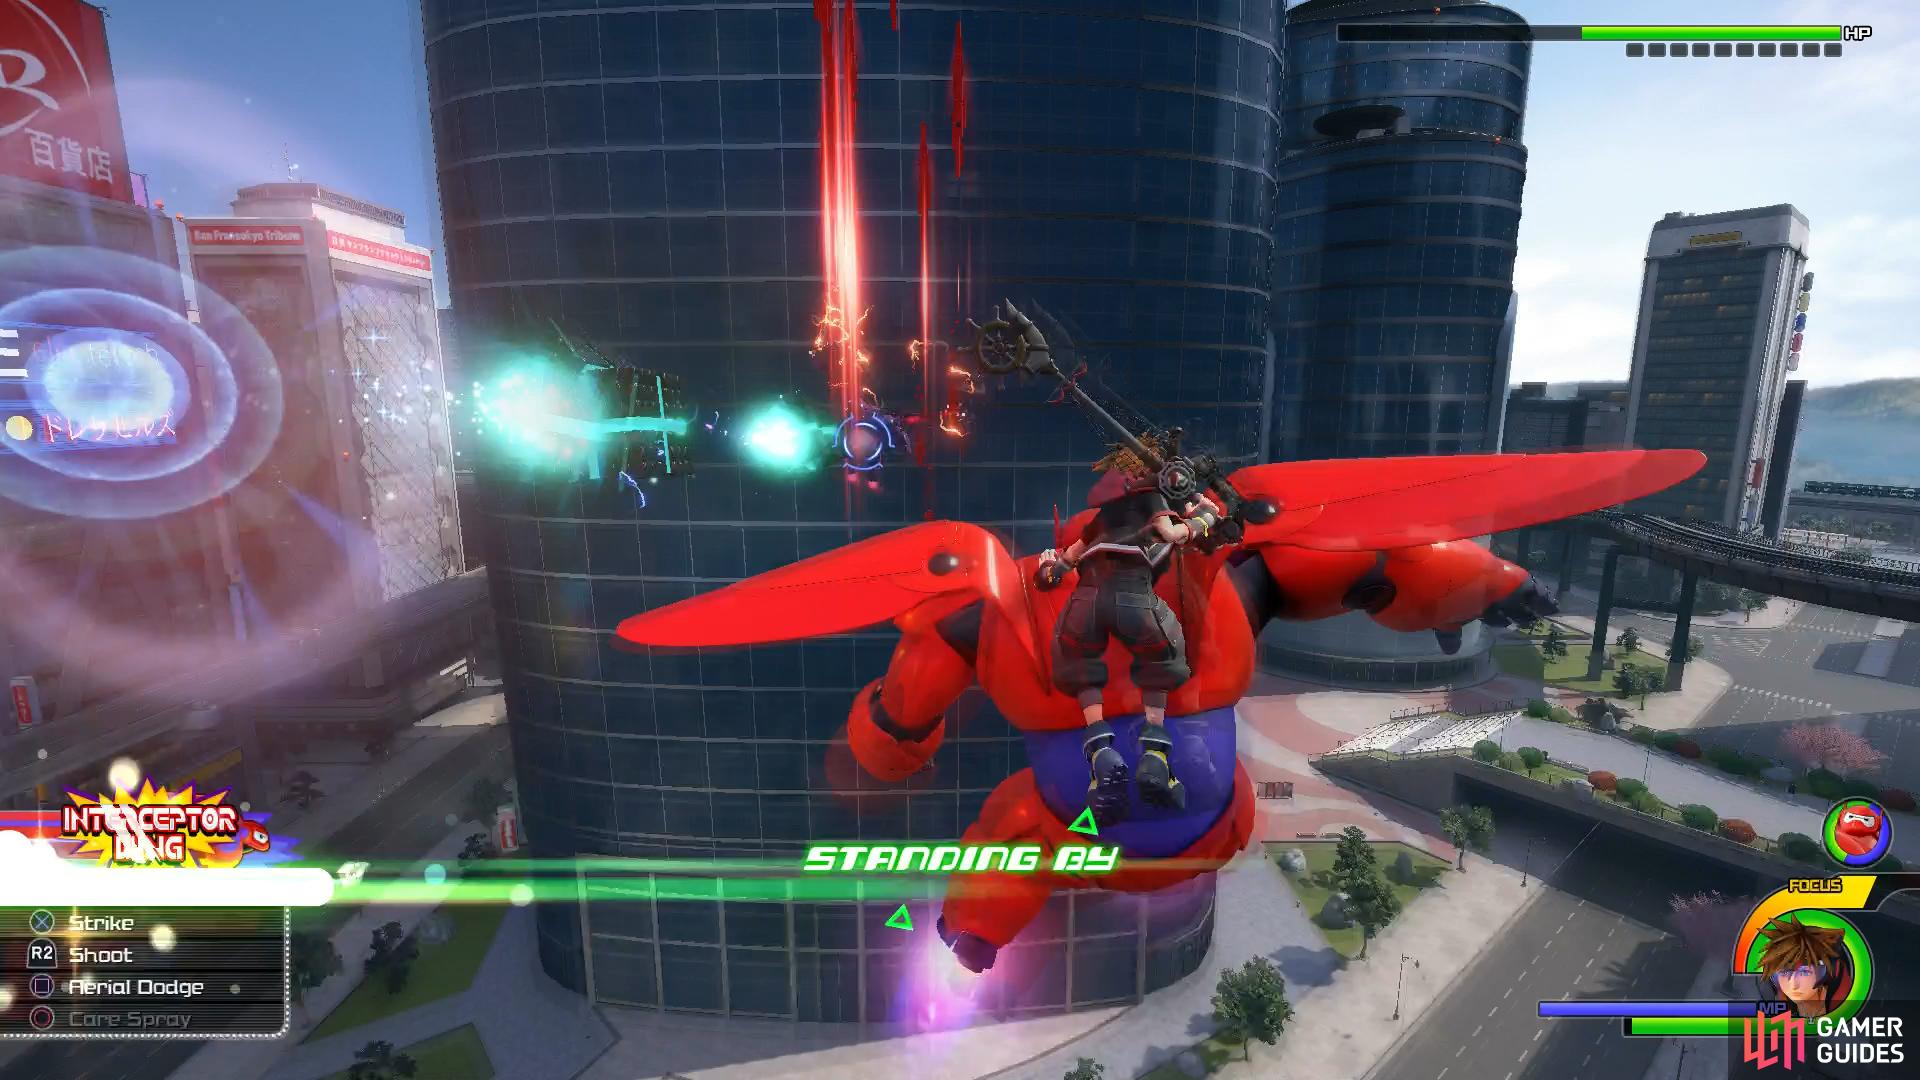
After dealing around half of Dark Baymax’s HP, you’ll enter the second phase of the battle. The chase will be over and Dark Baymax will attack you directly. You’ll have more control of Baymax at this point as you can fly all around the screen. Dark Baymax adds a punch attack to his arsenal, keep your distance and Air Dodge to the side to avoid this. At times, he’ll combo punches so be ready to transition straight into another Air Dodge at a moments notice.
He’ll also shoot larger beams at you which need to be Air Dodged and finally, he will rain down Energy Beams from the sky, stay on the move while this attack plays out before resuming your assault. When you see Dark Baymax shoot the Darkubes at you, if you’re successful in repelling all of them at him then you’ll be able to trigger Sky Strike, a heavy hitting attack that will deal massive damage to him. As long as you keep on the move during the entire battle and use Cure Spray as needed, you should have no problem ending the Dark Baymax threat.
| Character | Ability |
|---|---|
| Sora | Aerora, Max HP Increase |
Following the events that occur after Dark Baymax’s defeat, you’ll obtain the Nano Gear Keyblade and unlock new Flash Tracer courses in the city.


Before you depart from San Fransokyo, there’s a few more matters to take care of. Warp to the South District at Night (this is important) and climb the building next to you and walk over to the northern corner, facing the camera to the north. You’ll spot Lucky Emblem #3 on the bill board of the building to the north of you. If you’ve been following this walkthrough, this will be the last Lucky Emblem in the game and you’ll obtain the fantastic Mickey Clasp along with a Trophy.
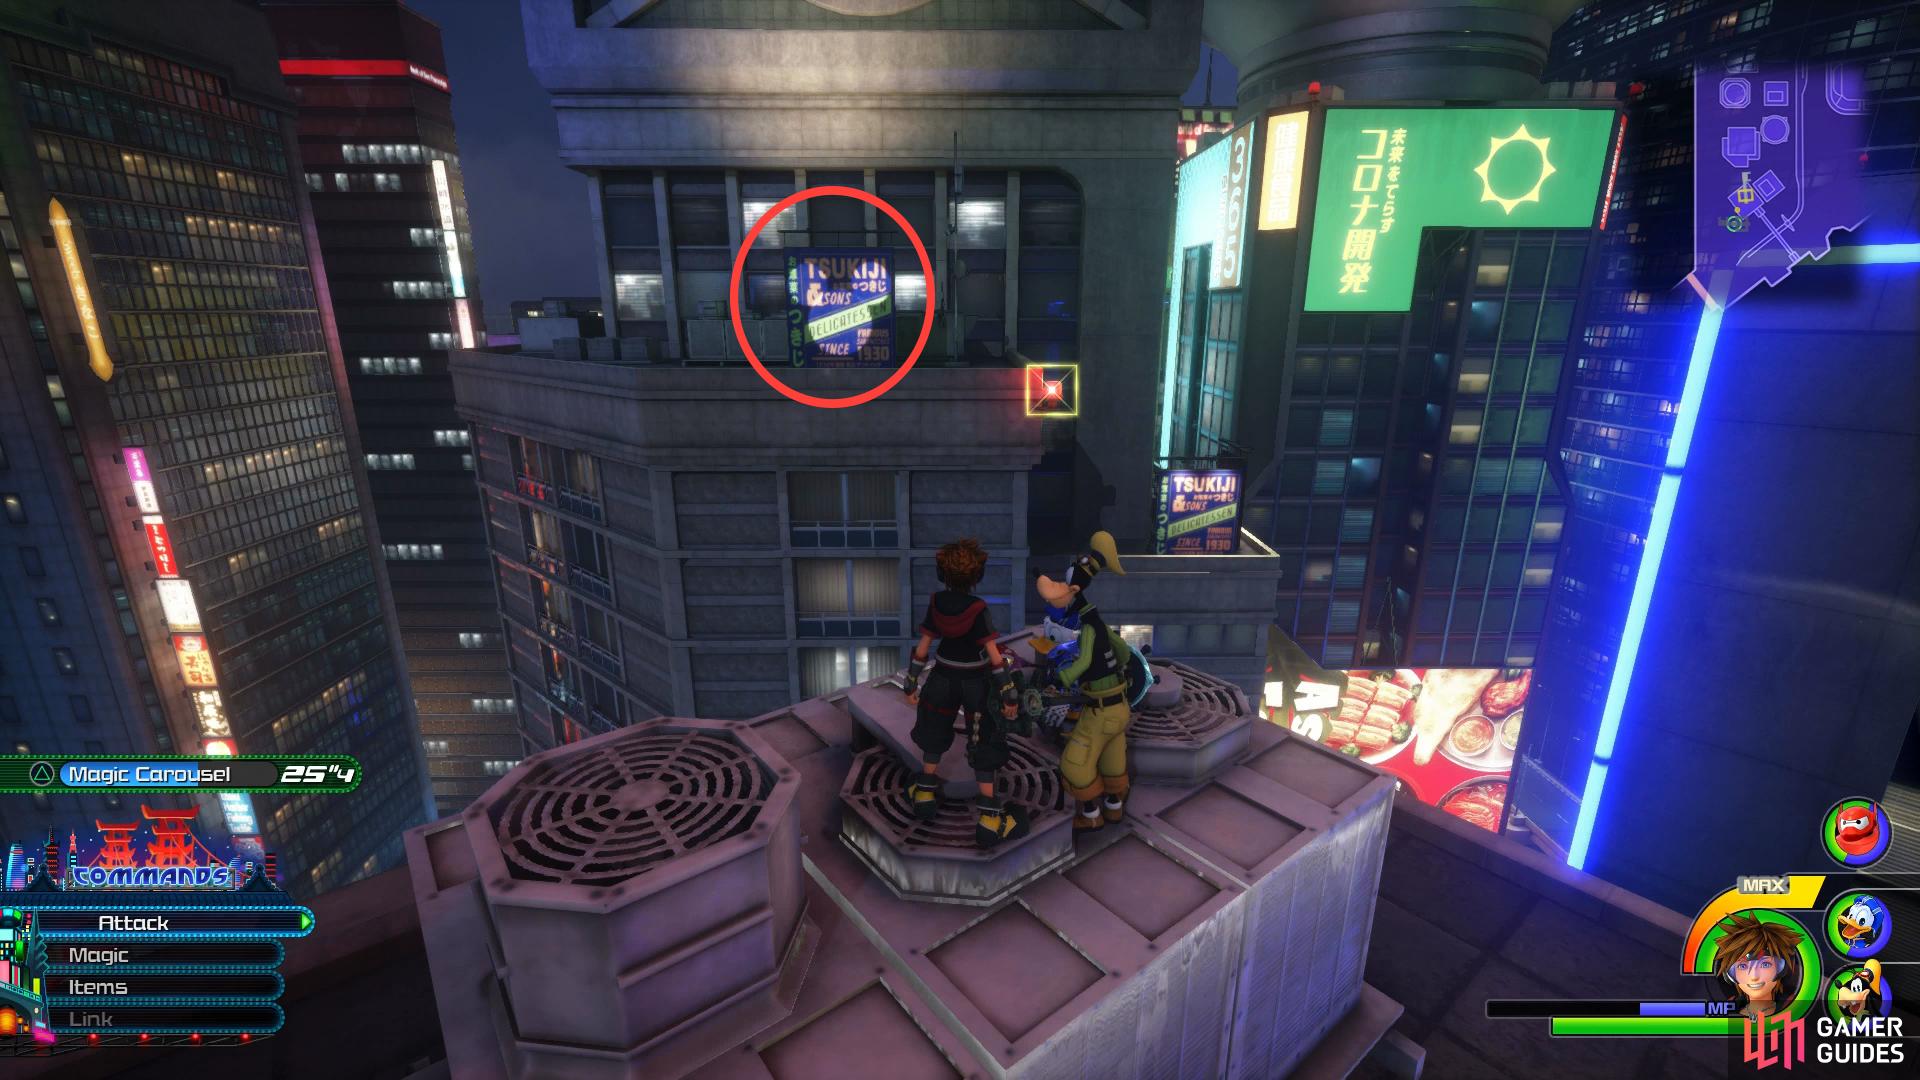
This should be your final Lucky Emblem in the game.


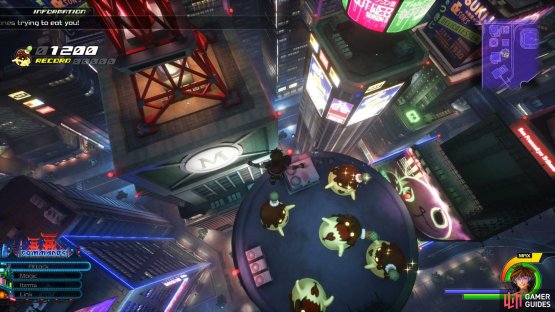
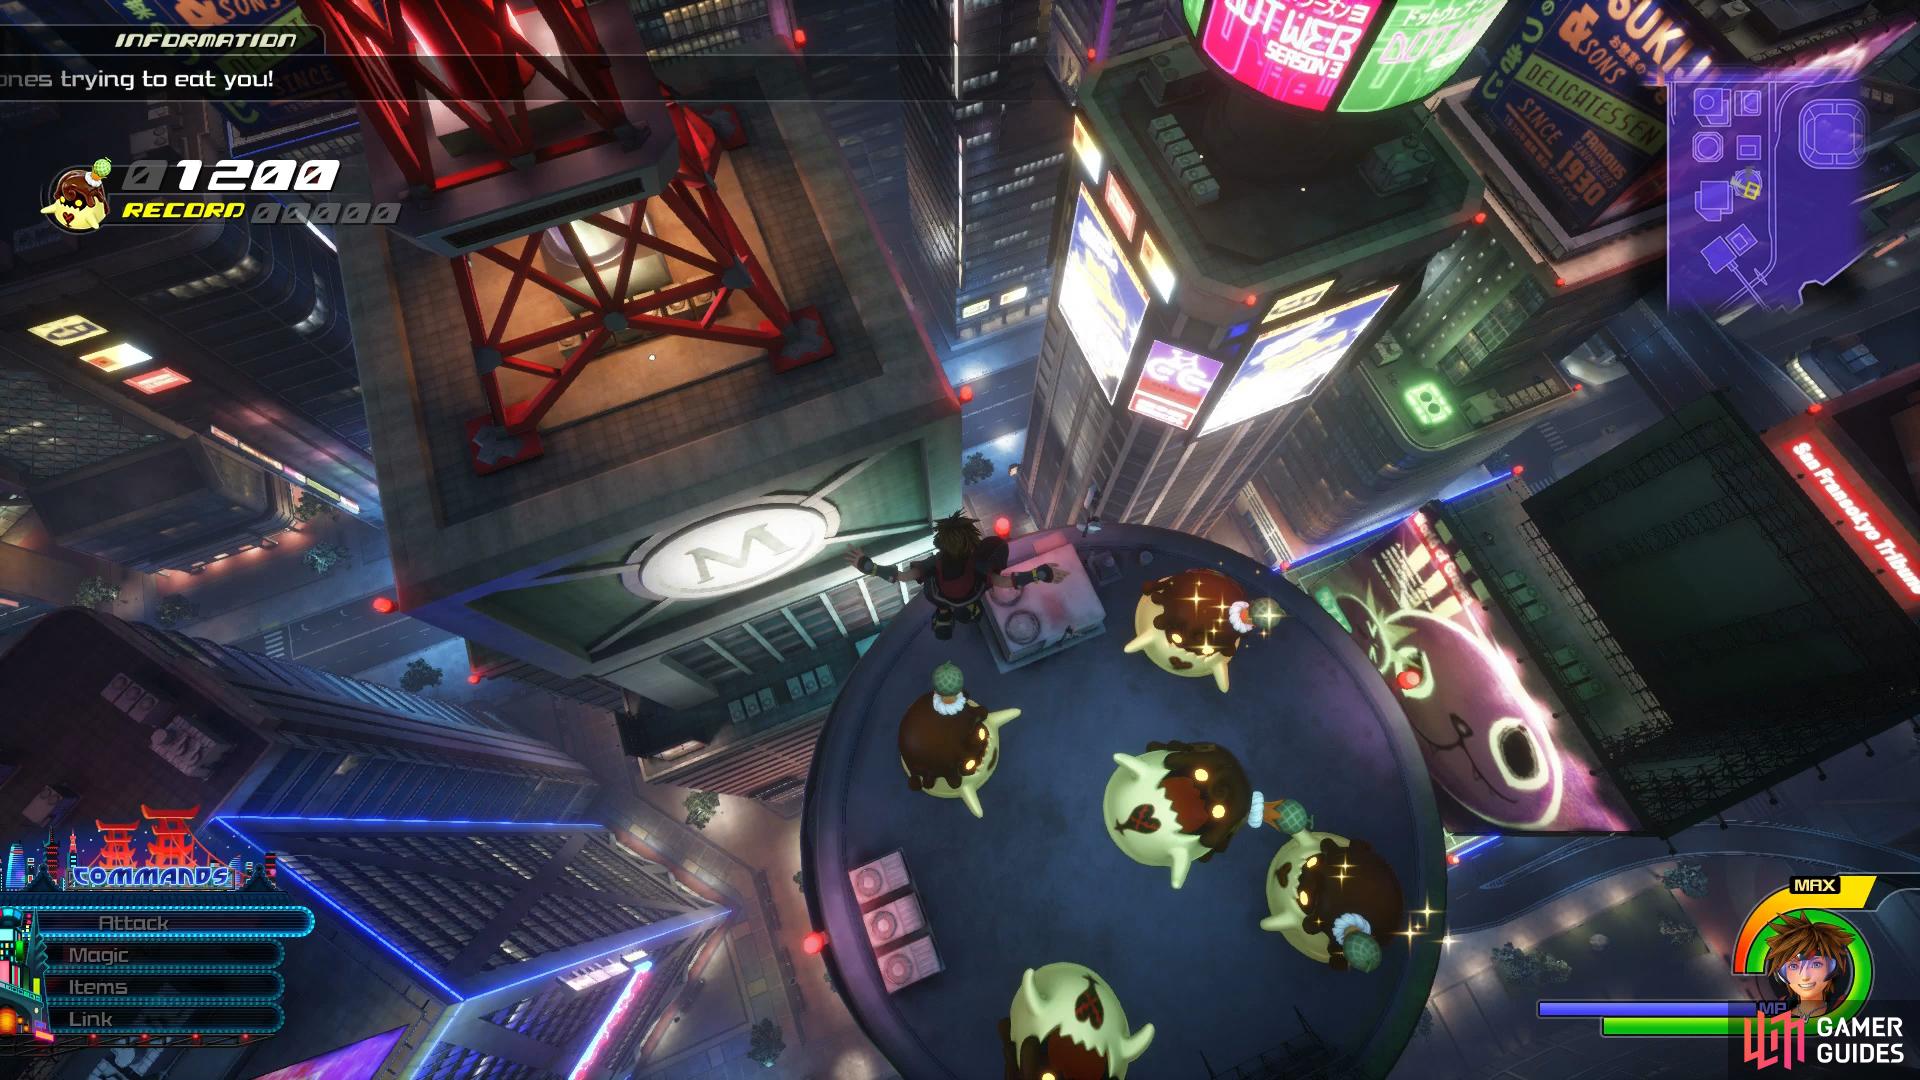
Honeydew Flan
The final member of the Flantastic Seven awaits you nearby, run up the building to the north of you and then over to the next building to the east.
Your task this time around is to bounce on the Flans to gain points, simple enough, right? The twist to this is that you can only bounce on each Flan once, after which they will open their mouth to swallow you if you use it again. In order to keep your score up, you’ll notice a particular Flan with a golden sparkle above it, land on this once to be sent over to another building with more Flans to bounce on.

(1 of 2) Bounce on the Flan with sparkles above it to move to another building
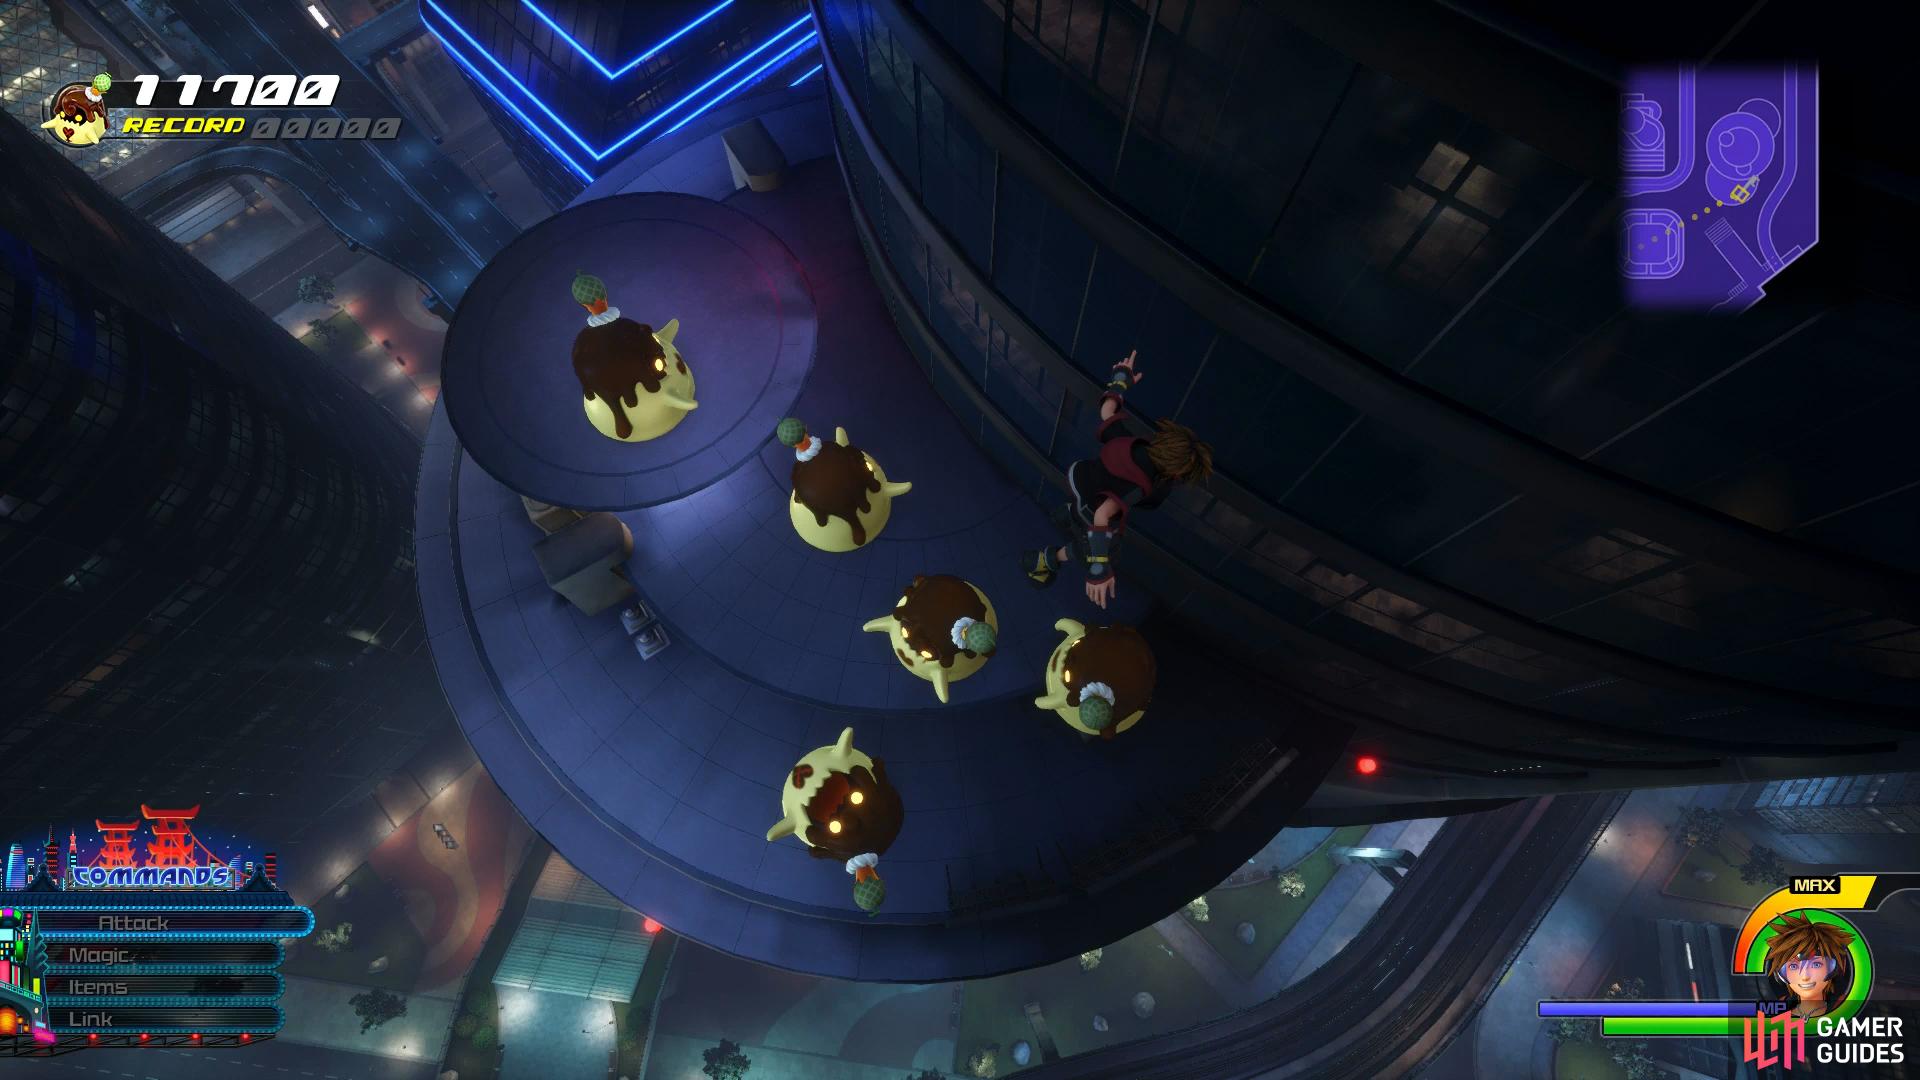
Bounce on the Flan with sparkles above it to move to another building (left), this building is arguably the most difficult. (right)
There’s no particular strategy to this minigame, it’s all down to trial and error as you get used to how the falling and bouncing works. Attempt to bounce to the right on the first building, often this leads to an easier route across the buildings. Your goal for this minigame is 15,000+ in which you’ll obtain Melon x3 and the Attraction Extender ability. If this is your last of the Flantastic Seven, you’ll also obtain a possible two Trophies, one for winning all of the minigames and another for collecting every possible Ingredient (if you’ve been hunting them all down).

No Comments