
Although it’s more of a tutorial, you can still fail the Prologue in Frostpunk 2, and if you haven’t played these types of games, you most likely will. Failing the Prologue will act as a game-over, which means you’ll have to start over again or load up one of your older saves. On the flip side, there is an achievement for playing it perfectly. Read on to find out how you can get through the Prologue unscathed, and how you can unlock the No lesser evil achievement.

The Prologue sets you up in a barren wasteland with nothing more than a Dreadnought.
Table of Contents
If you want to jump to a specific objective, click on the links below.
Fight the Cold
For the Prologue, you’re under a time limit where you must ensure that you meet the requirements of the objectives by the time the Whiteout arrives in 88 days, or you’ll receive a game over. Even on the easiest difficulty, this isn’t a simple task, mainly due to reaching the stockpiling of the food objective in time.
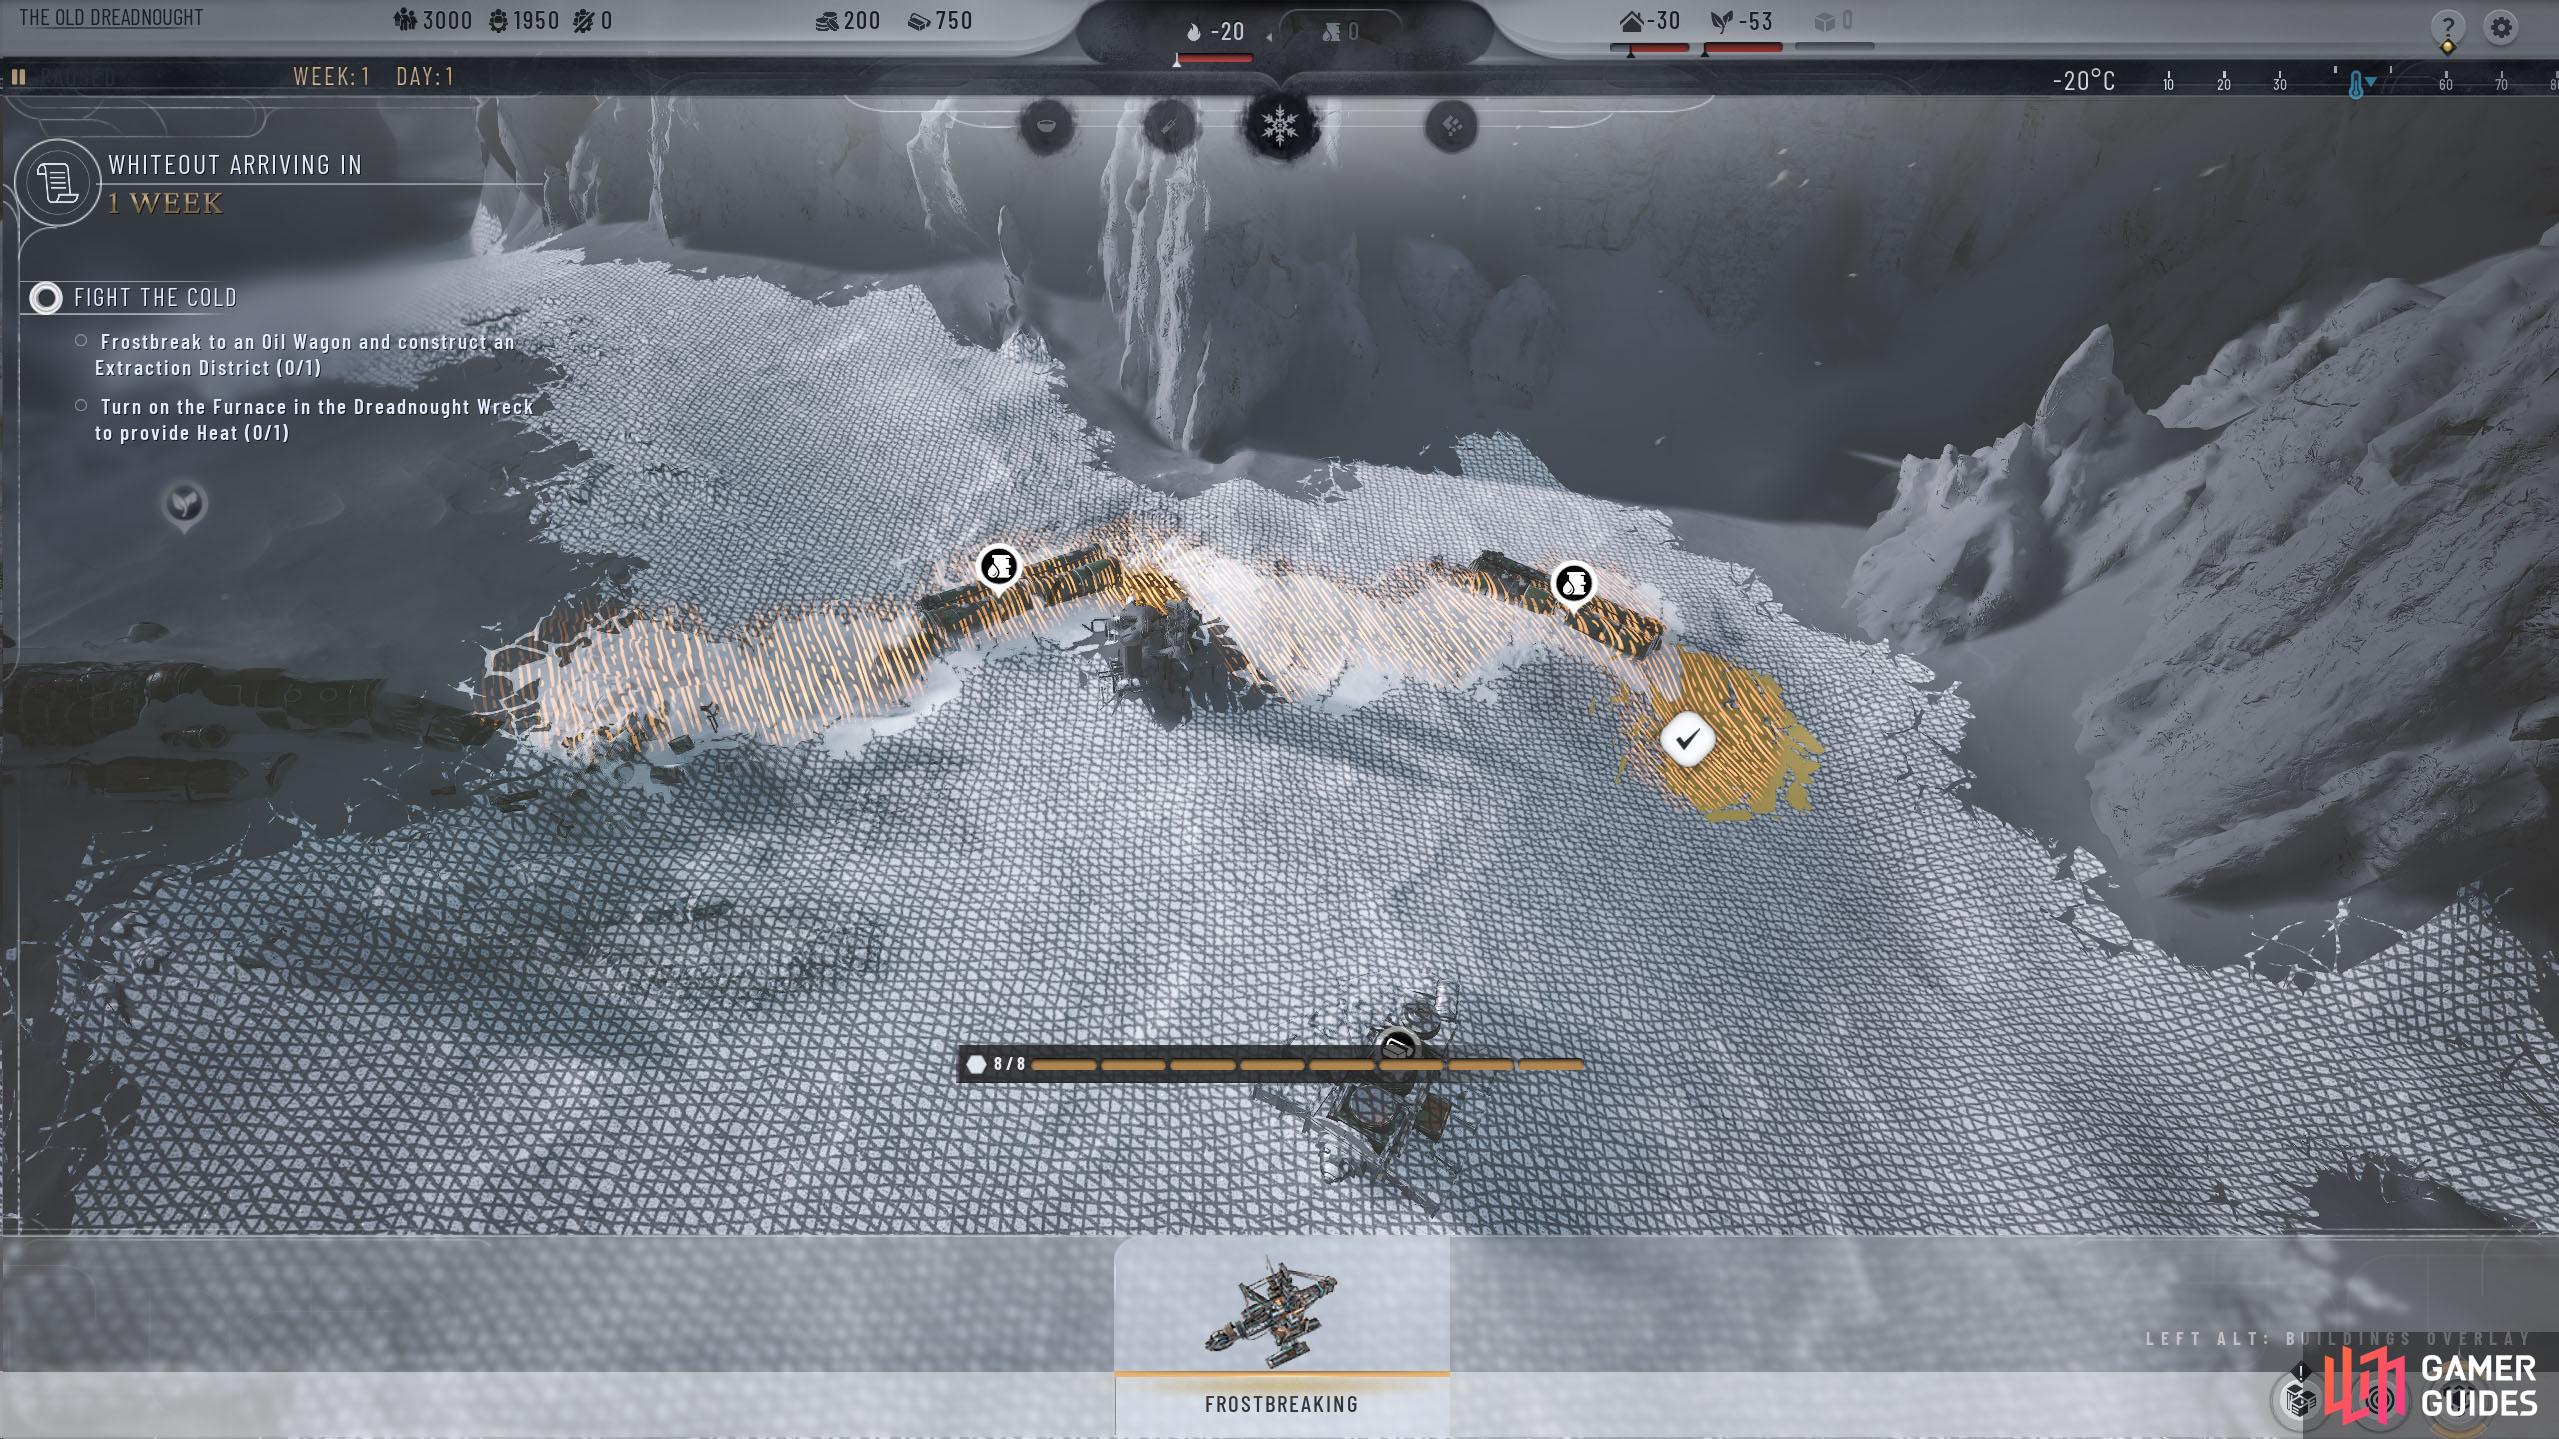
Frostbreak to an Oil Wagon and construct an Extraction District
You start in a frozen wasteland with only a Dreadnought to your name, and this is turned off due to the lack of fuel. Your first objective is to make a path to an Oil Wagon so you can build an Extraction District on top of it to procure some fuel for the Dreadnought.
The first thing you need to do is to build a path from the Dreadnought to an Oil Wagon, which can be found just to the right of it. To do this, press  (default) to enter Frostbreaking mode and select a white tile next to the Dreadnought and select eight tiles, with one of them being the Oil Wagon. Each time you Frostbreak a path, it has to be eight tiles, so use enough to connect the Dreadnought to the first Oil Wagon and then place the rest going over to the second Oil Wagon further to the right. When all eight tiles are selected, click on the tick to confirm it.
As you can’t do anything until the paths have been made, fast-forward the game until it does by pressing  . When the path is complete, you will need to create an Extraction District.


(1 of 2) Select the Frostbreaking tool, and click on eight tiles from the Dreadnought to the Oil Wagon.

Select the Frostbreaking tool, and click on eight tiles from the Dreadnought to the Oil Wagon. (left), Now, select the Districts tool and place an Extraction District starting on the resource. (right)
Pause the game, select the “Construct Districts” button in the bottom right (or press  ), and select the Extraction District. These can be placed on any material you want to acquire in the world and will be transformed into Prefabs, which are used in the creation of almost anything you build in the game. Once you’ve selected the Extraction District, you’ll need to select three tiles before you can construct it, similar to Frostbreaking. However, the first place you will want to click is where the material is, in this case, the Oil Wagon. From there, you can place it around the resource. When you’ve placed it down, speed up time again until the construction is complete, and then pause again.
| Quickjump |
|---|
| Table of Contents |
Turn on the Furnace in the Dreadnought Wreck to provide Heat
Now that you have the Oil, click on the Dreadnought, and turn it on via the small button to the left of the heat gauge. If you’re unsure of what any of this means, hover your mouse over any part to get an in-game explanation. Once this objective has been completed, you’ll get three more objectives, with one of them being optional.

When you have the Oil, select the Dreadnought, and turn the generator on.
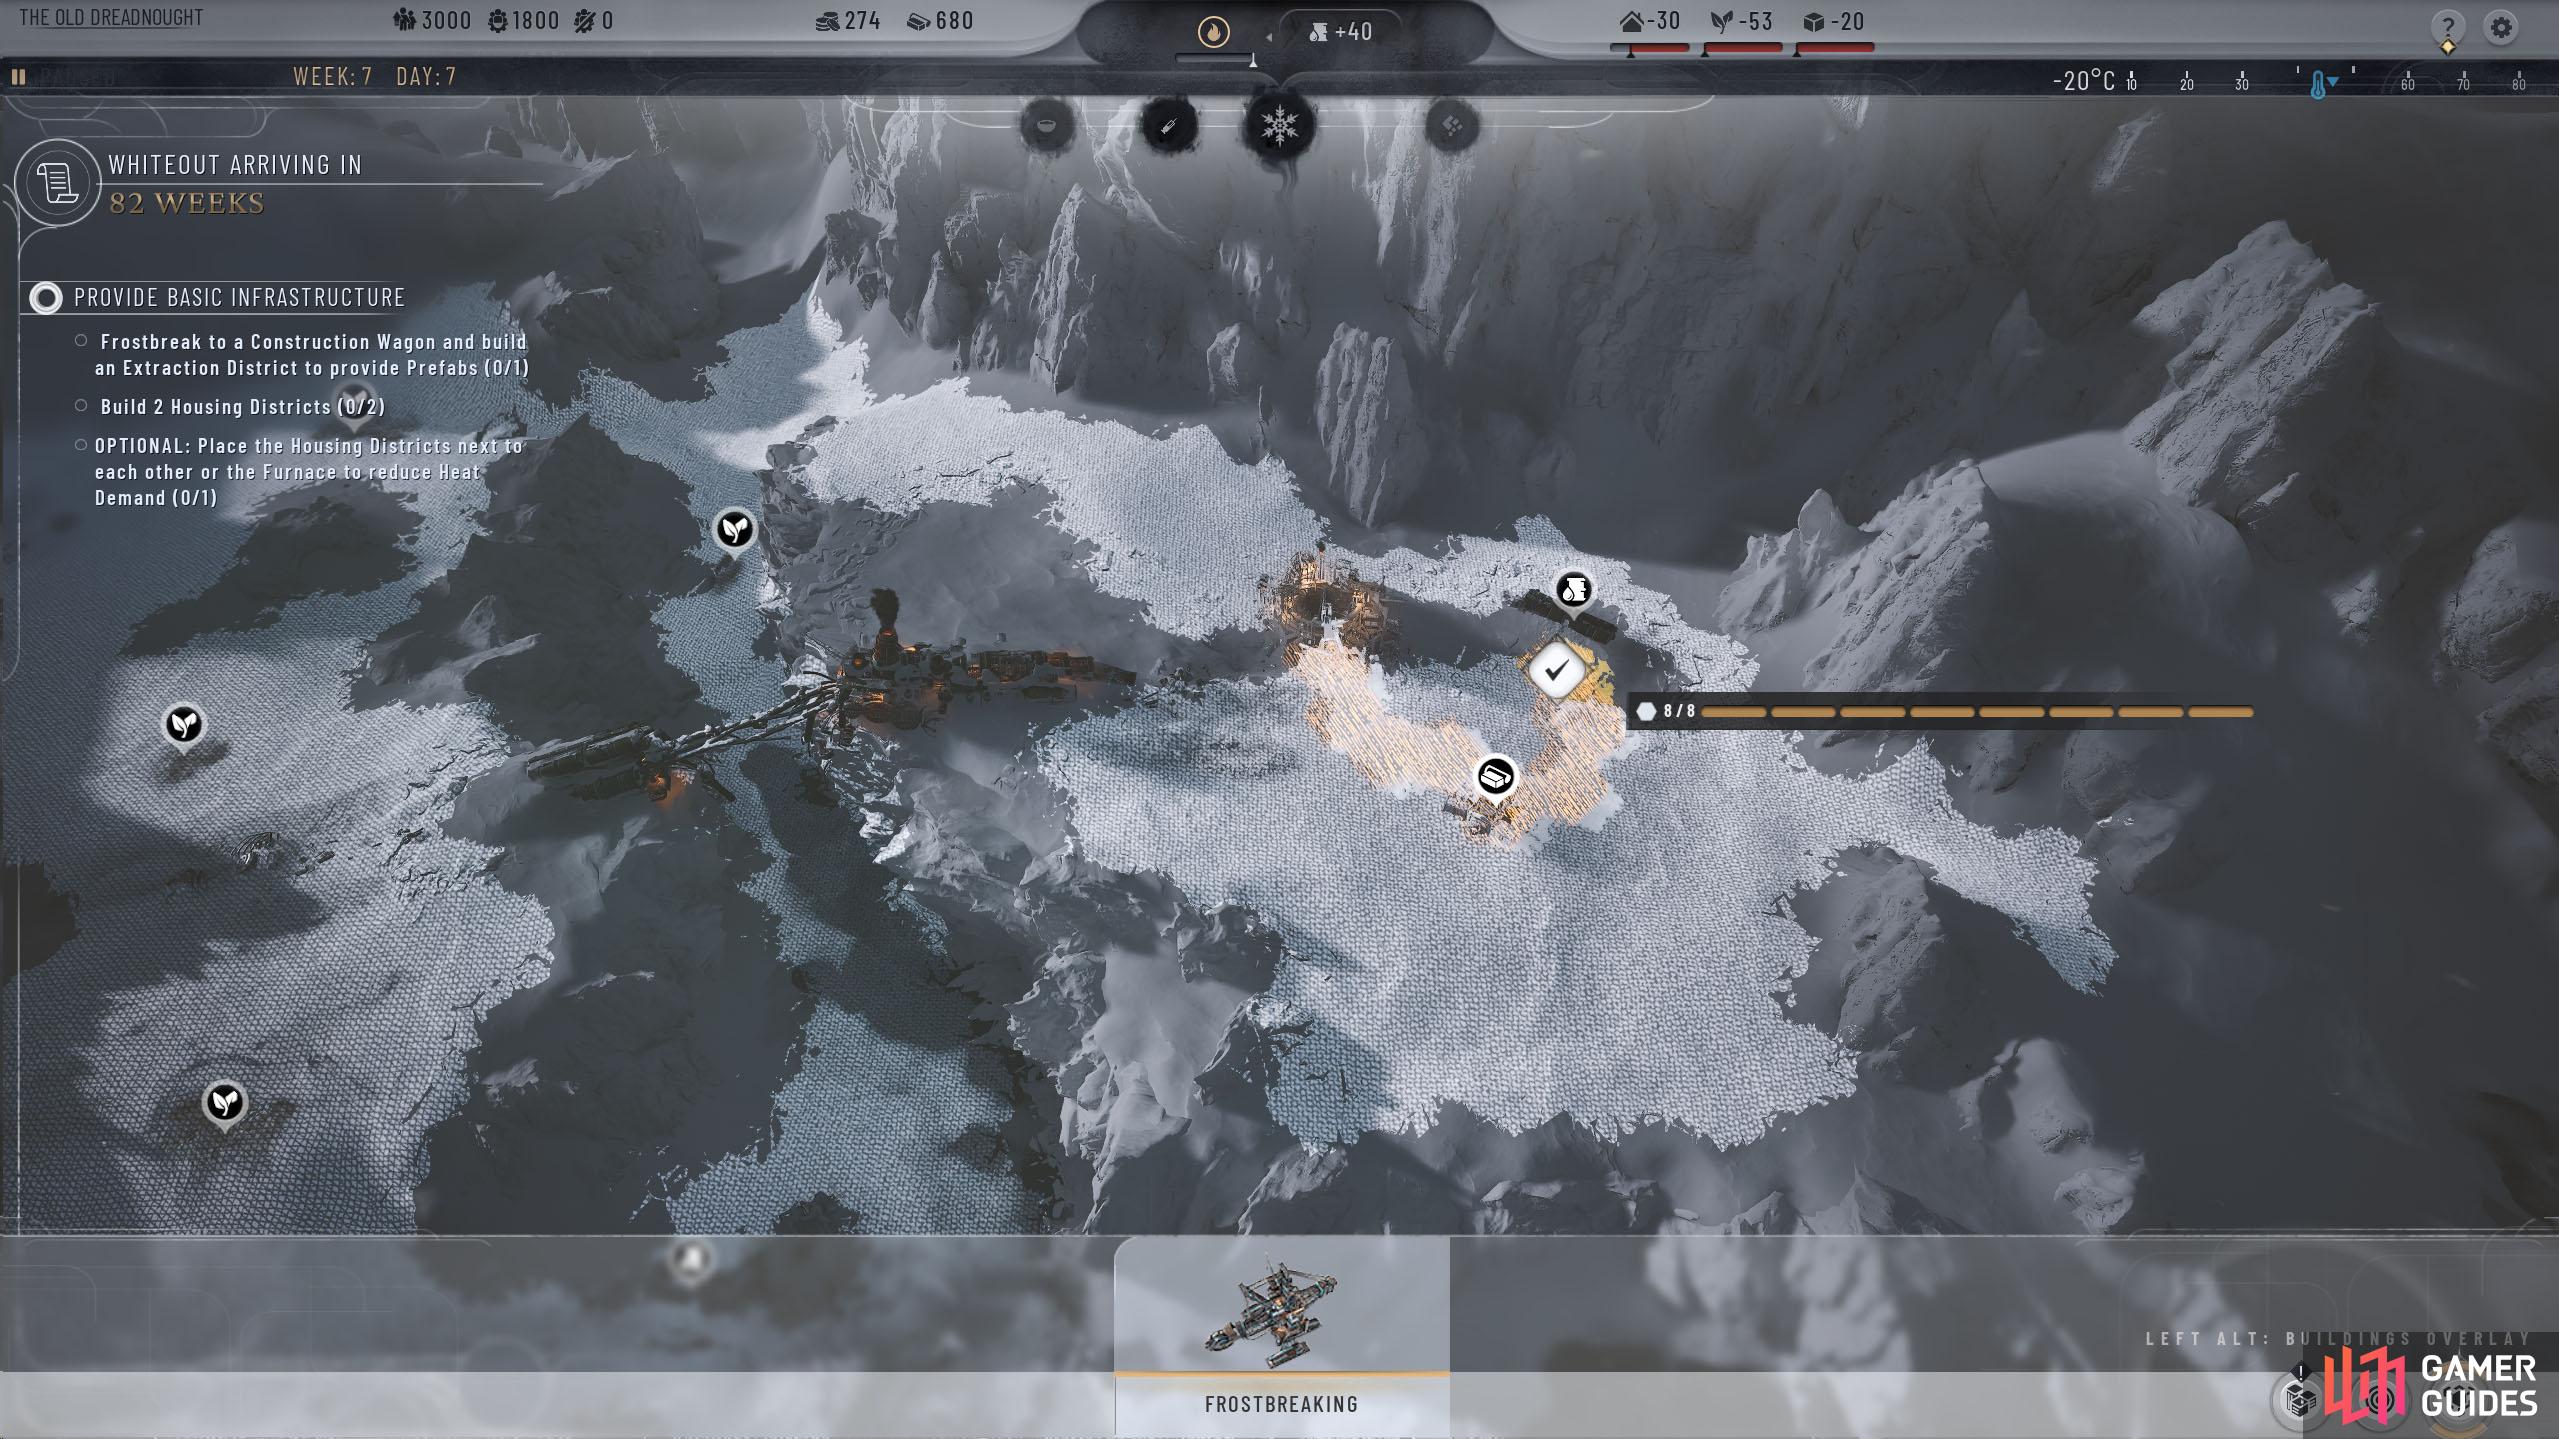
Provide Basic Infrastructure
The next main objective is to build a basic infrastructure by building Housing Districts. To do this, you’ll need the materials (Prefabs), which brings us to the first objective.
Frostbreak to a Construction Wagon and build an Extraction District to provide Prefabs
If you zoom out a bit and hold  , you can hover over the different icons to find a Construction Wagon, of which there are two, one under the Oil Wagon, and one in the lower area of the map. For now, frostbreak a path to the Construction Wagon under the Oil Wagon you placed the Extraction District on. You can create a path from it. Now that you have access to it, place an Extraction District on top of it to begin extracting its materials. This objective will be complete once the construction is finished, so for now, begin building the 2 Housing Districts.

(1 of 2) From the Oil Wagon, Frostbreak a path to the Construction Wagon to the south.

From the Oil Wagon, Frostbreak a path to the Construction Wagon to the south. (left), Now place an Extraction District on it, starting at the Construction Wagon. (right)
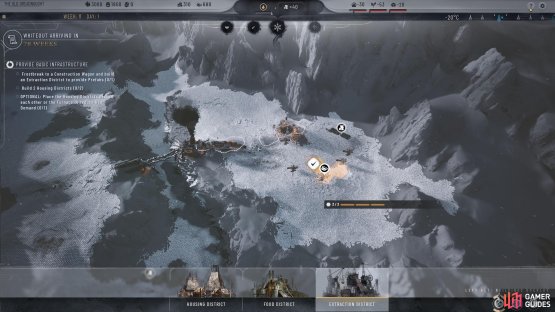
Build 2 Housing Districts
The Housing Districts is the first building you can find under the Build Districts section (where the Extraction District is). The best way to do this is to place one district above the Dreadnought and one below it as that is the only source of Heat you have access to in the Prologue. When placing the District, you’ll see a blue area of effect displaying which tiles are affected by Heat. Place the first District above the Dreadnought using the three blue tiles and place the other three directly above them.
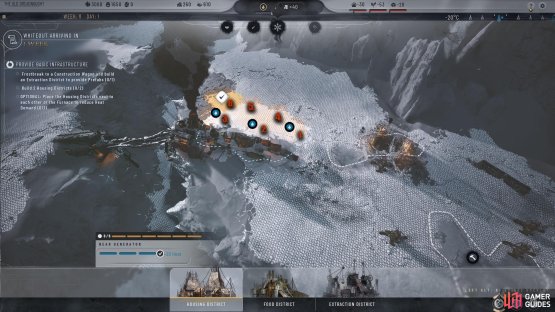
For the second Housing District, frostbreak six tiles below the Dreadnought to the right and place the District the same way as the first, with three tiles being in the blue area and three below it. Fast-forward time until they are complete, and you’ll complete all the objectives, including the optional one.


(1 of 2) Place the first Housing District on the first three tiles above the Dreadnought and the next three above them.
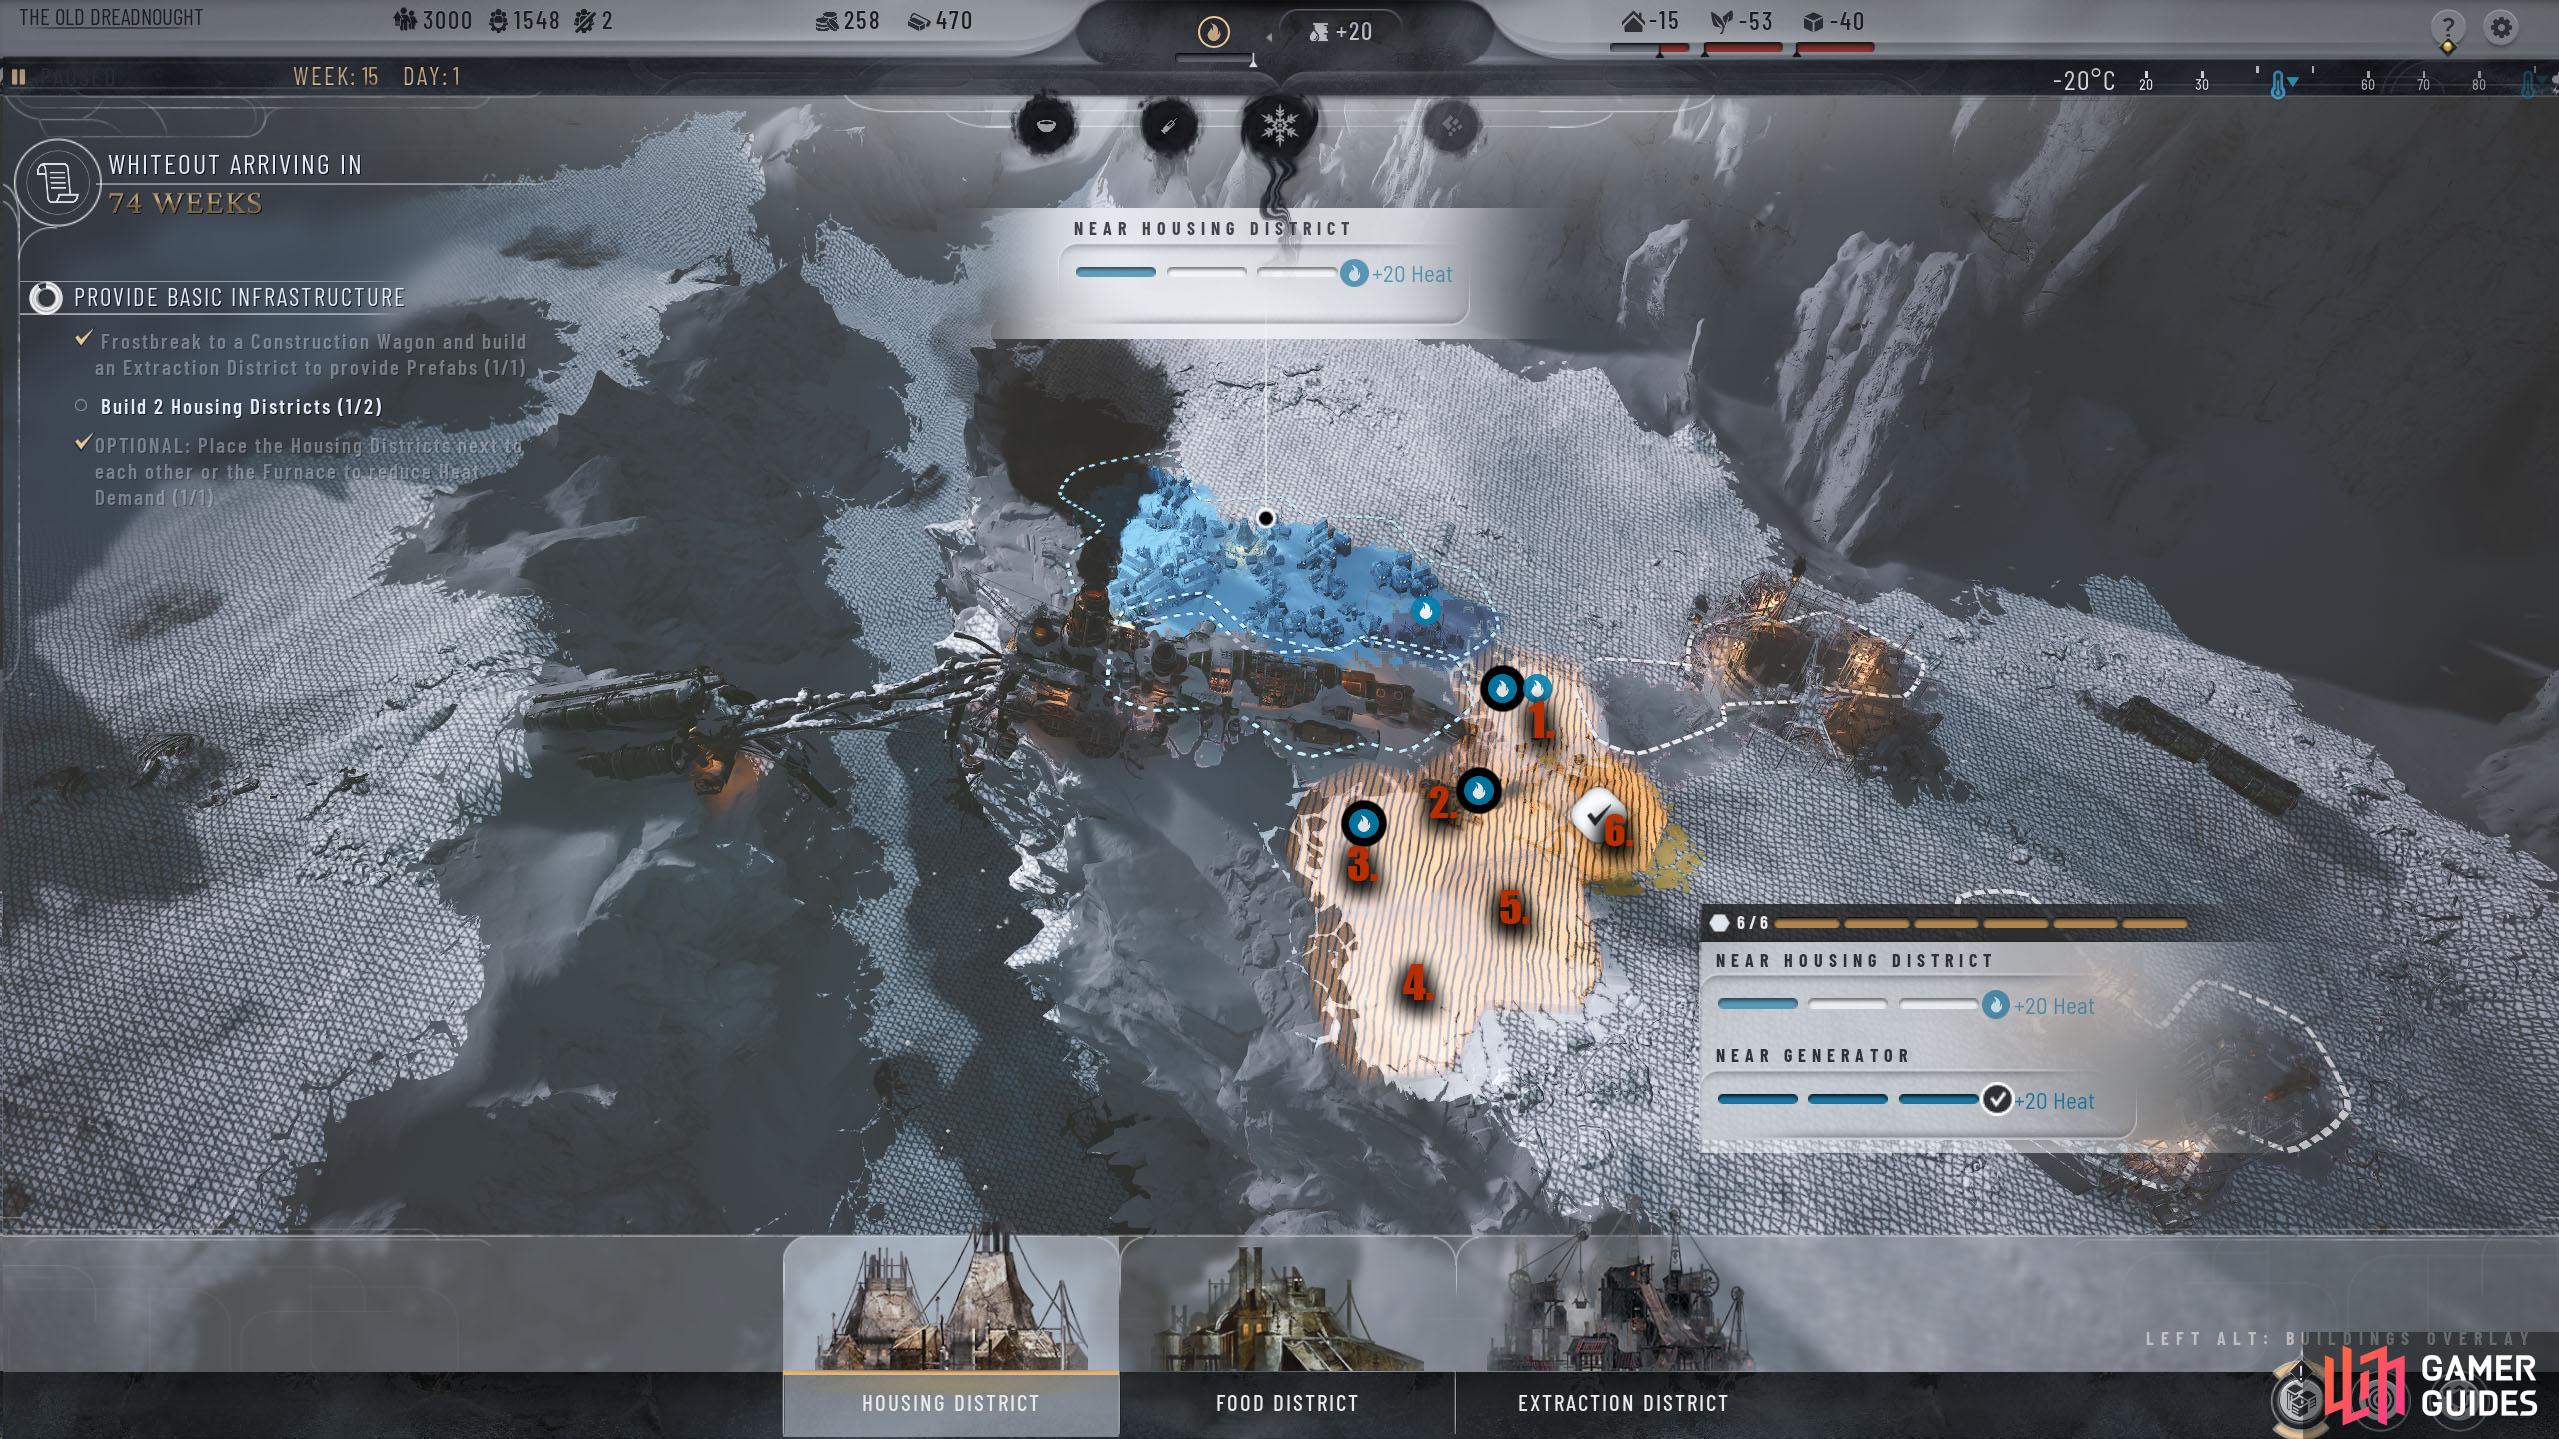
Place the first Housing District on the first three tiles above the Dreadnought and the next three above them. (left), Do the same with the second district, but place it below/right of the Dreadnought. (right)
| Quickjump |
|---|
| Table of Contents |
Gain Access to Food
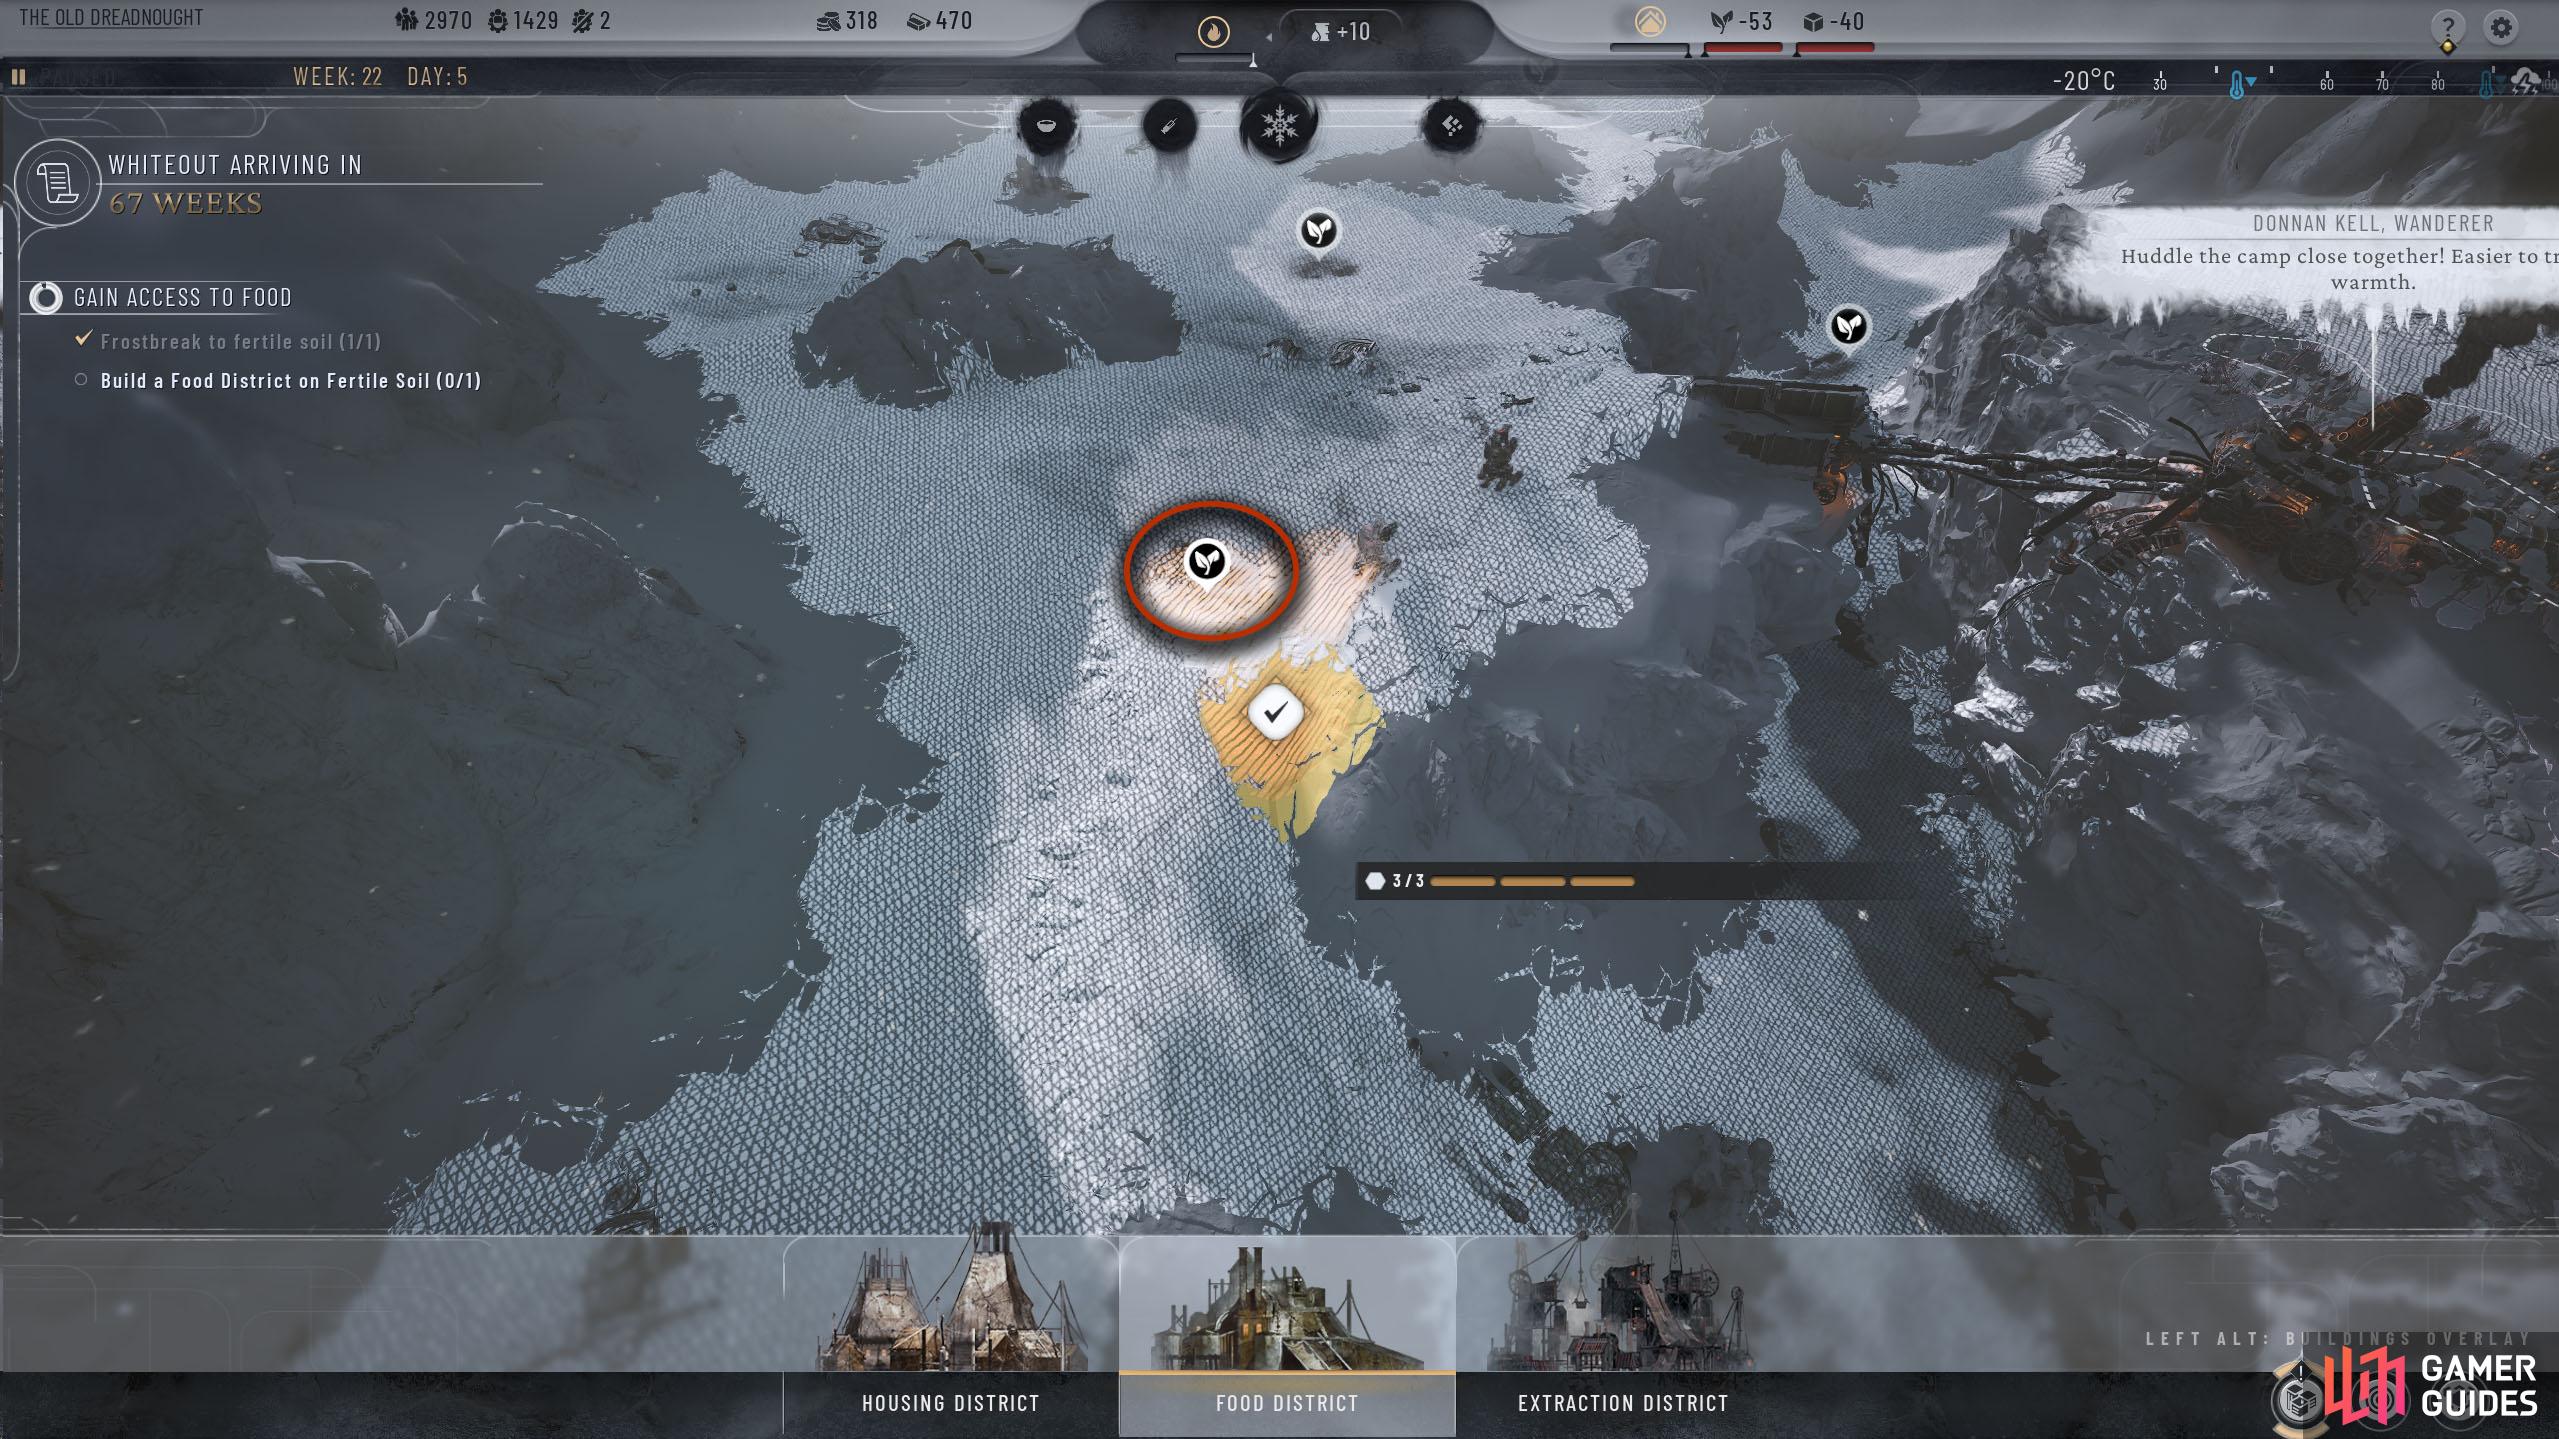
Now that you have a small community, you need to keep them fed. To do this, you’ll need to frostbreak to a Fertile Soil node and place a Food District on top of it.
Frostbreak to Fertile Soil
Select the Frostbreaking tool, hover over to the left side of the Dreadnought (opposite side from the Oil Wagon), and place eight tiles leading down and left going through the Fertile Soil, ending near the southern Oil Wagon. The reason for this is you want to get to the Seal Colony as soon as you can.
Build a Food District on Fertile Soil
Once the path has been created, fast-forward time if you need to, and then select the Food District and place it over the Fertile Soil resource you just created a path through. Although you’re not told to do this, we recommend creating another path from the left side of the Dreadnought leading up through the Fertile Soil, going toward one of the Maintenance nodes, and then place another Food District over that Fertile Soil.
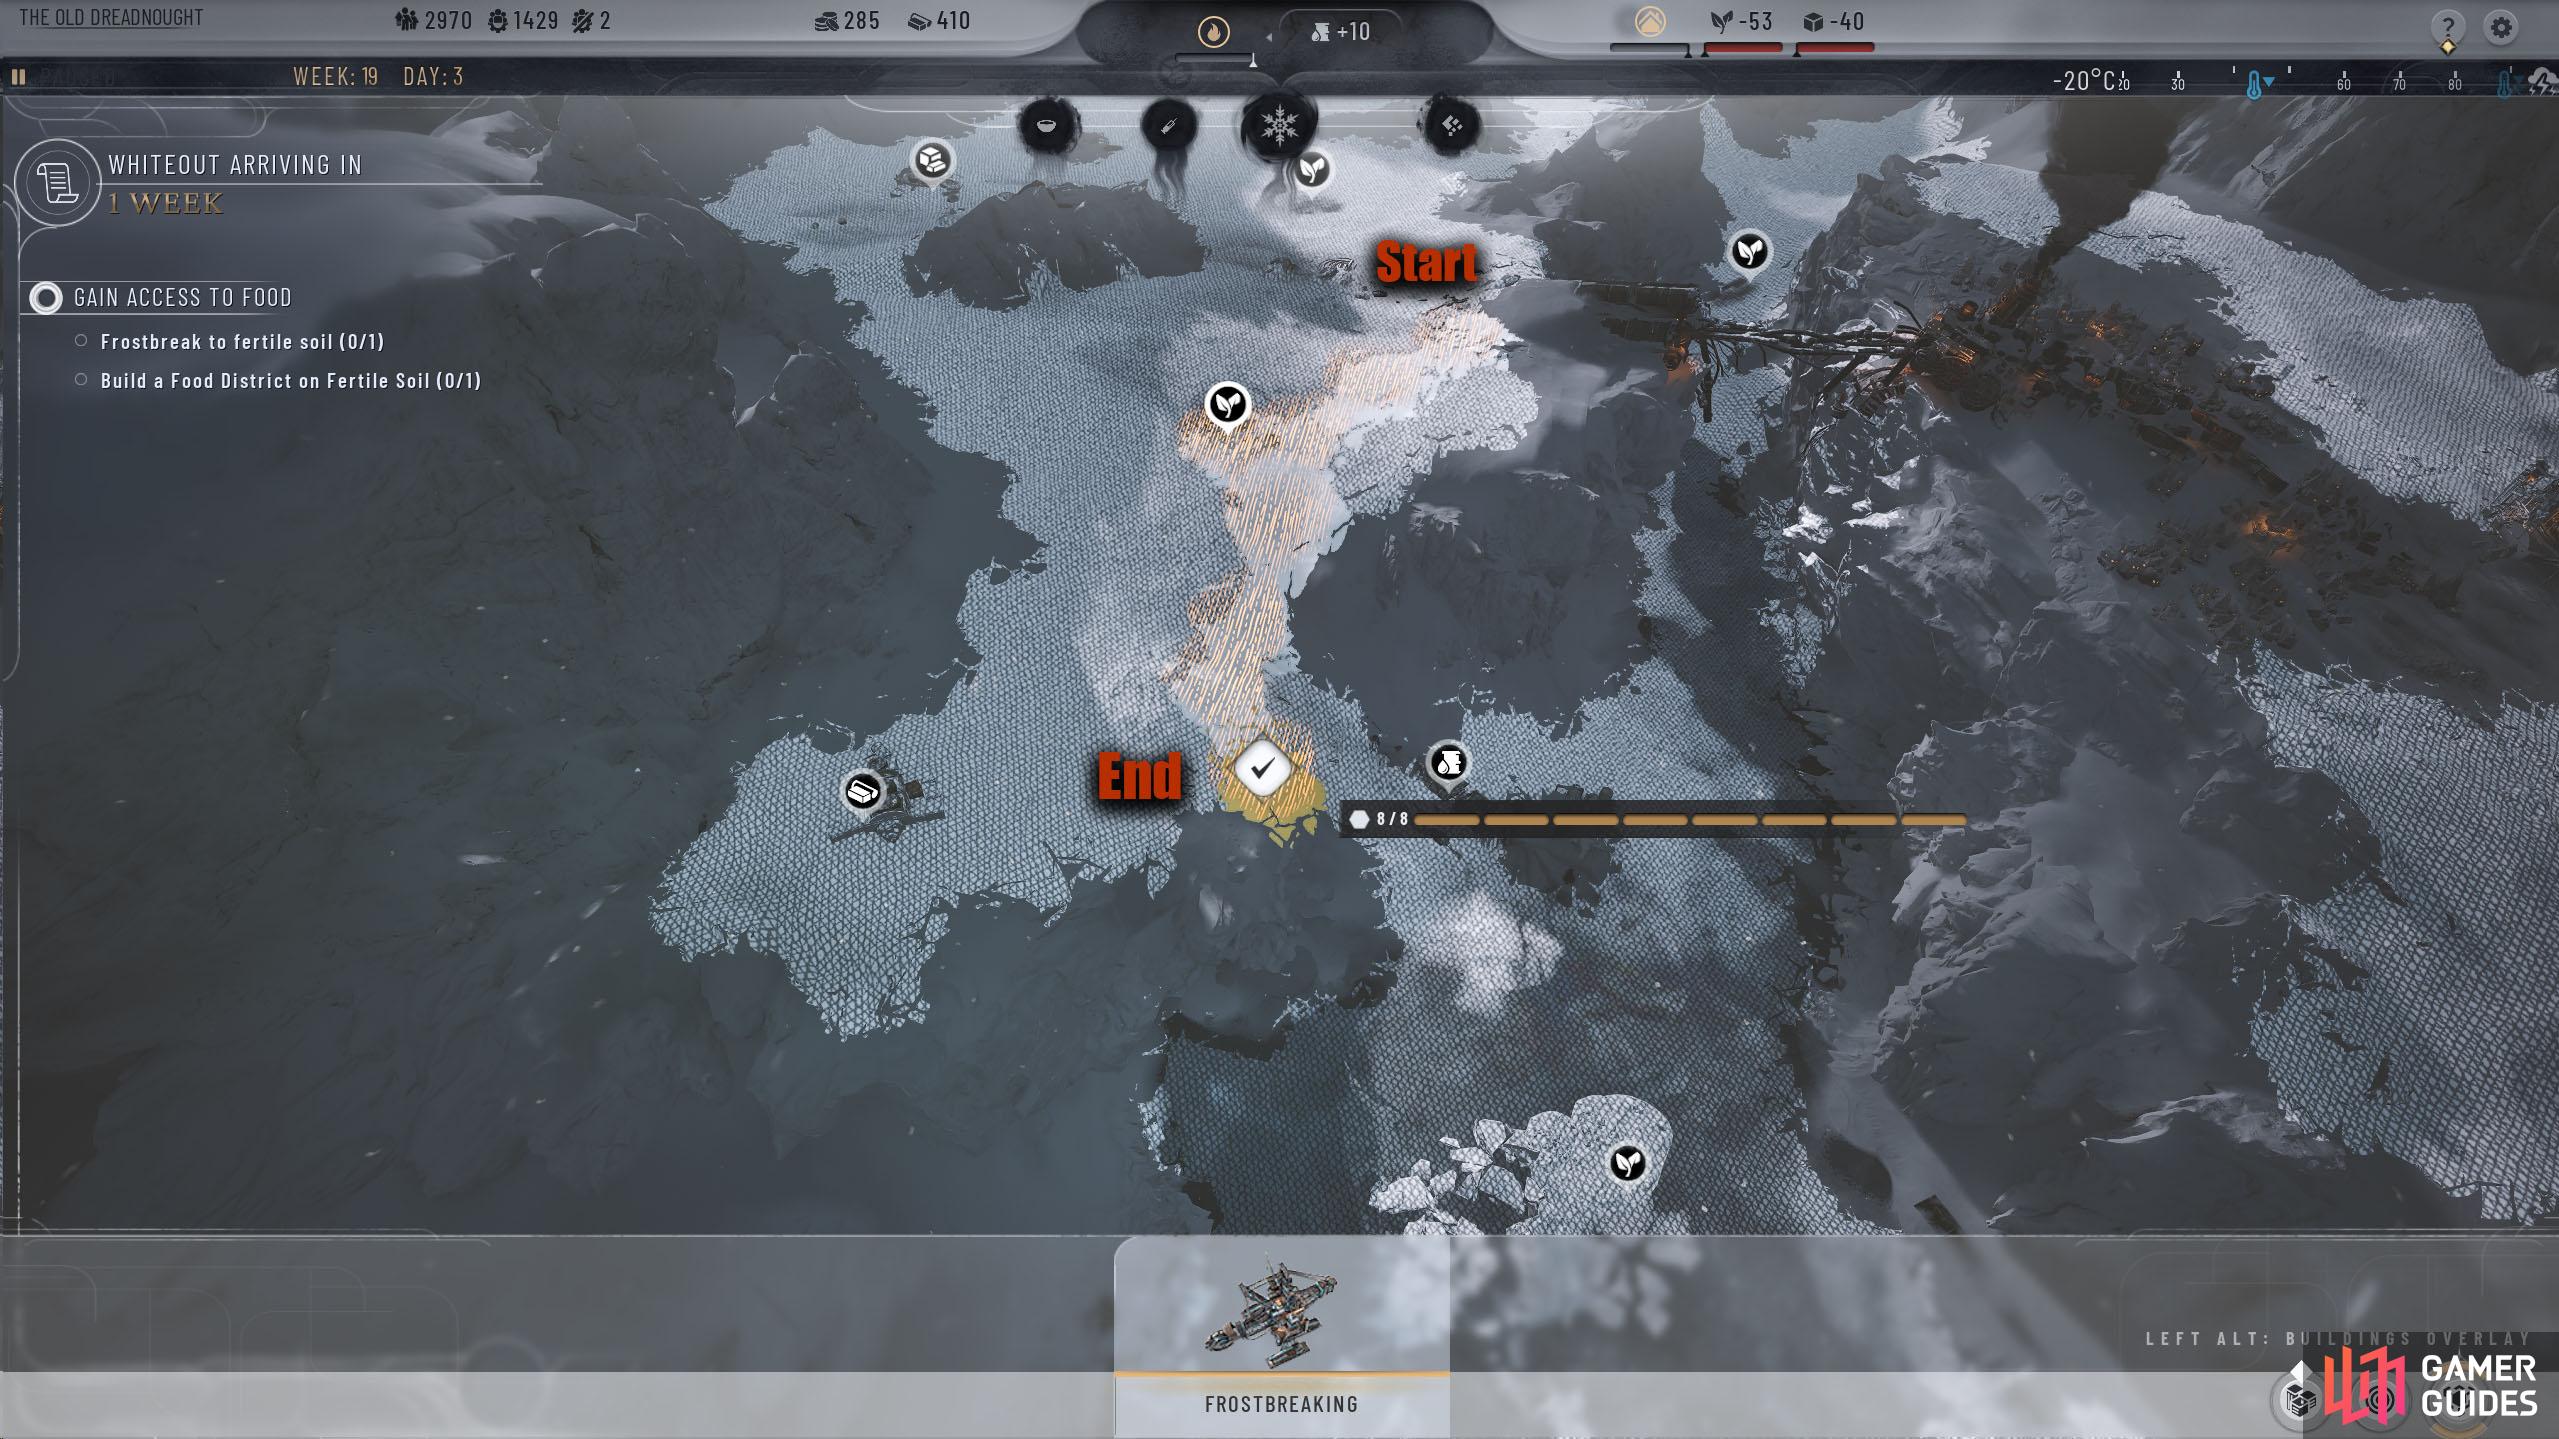


(1 of 2) Start the path on the left side of the Dreadnought and end it in the south.
Start the path on the left side of the Dreadnought and end it in the south. (left), Go to the District menu and select Food District and place it over the Fertile Soil. (right)
| Quickjump |
|---|
| Table of Contents |
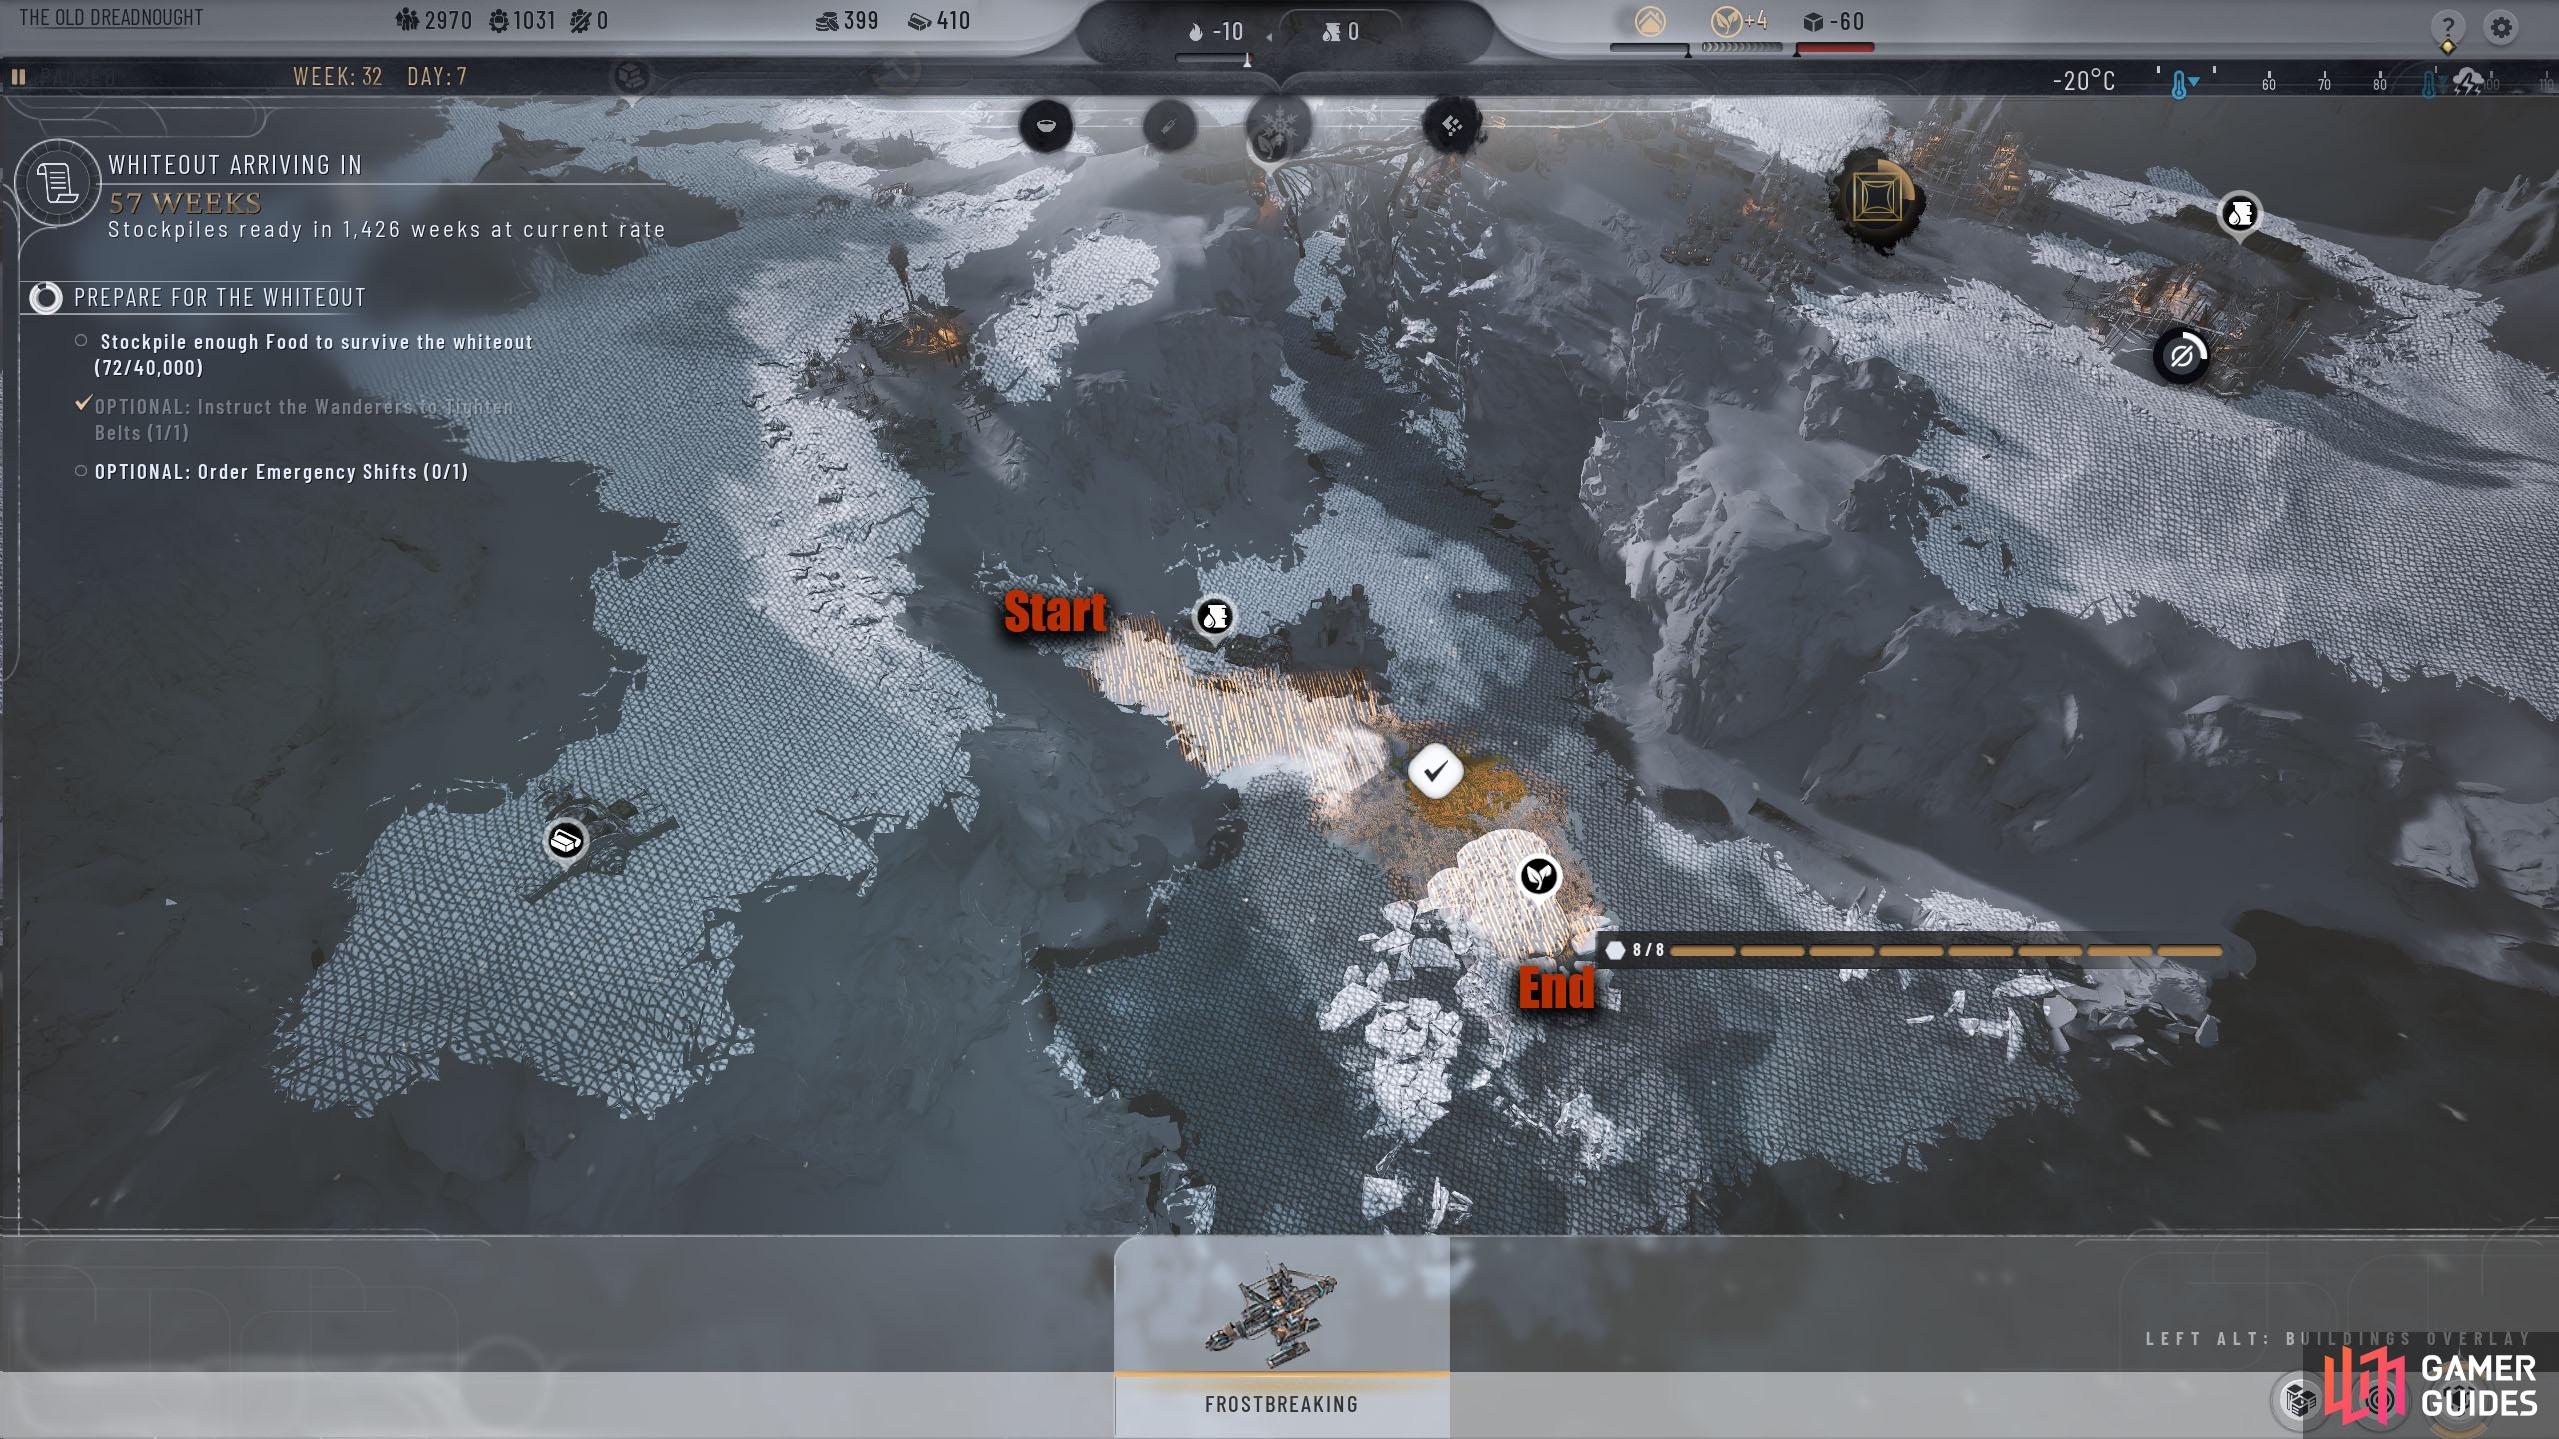
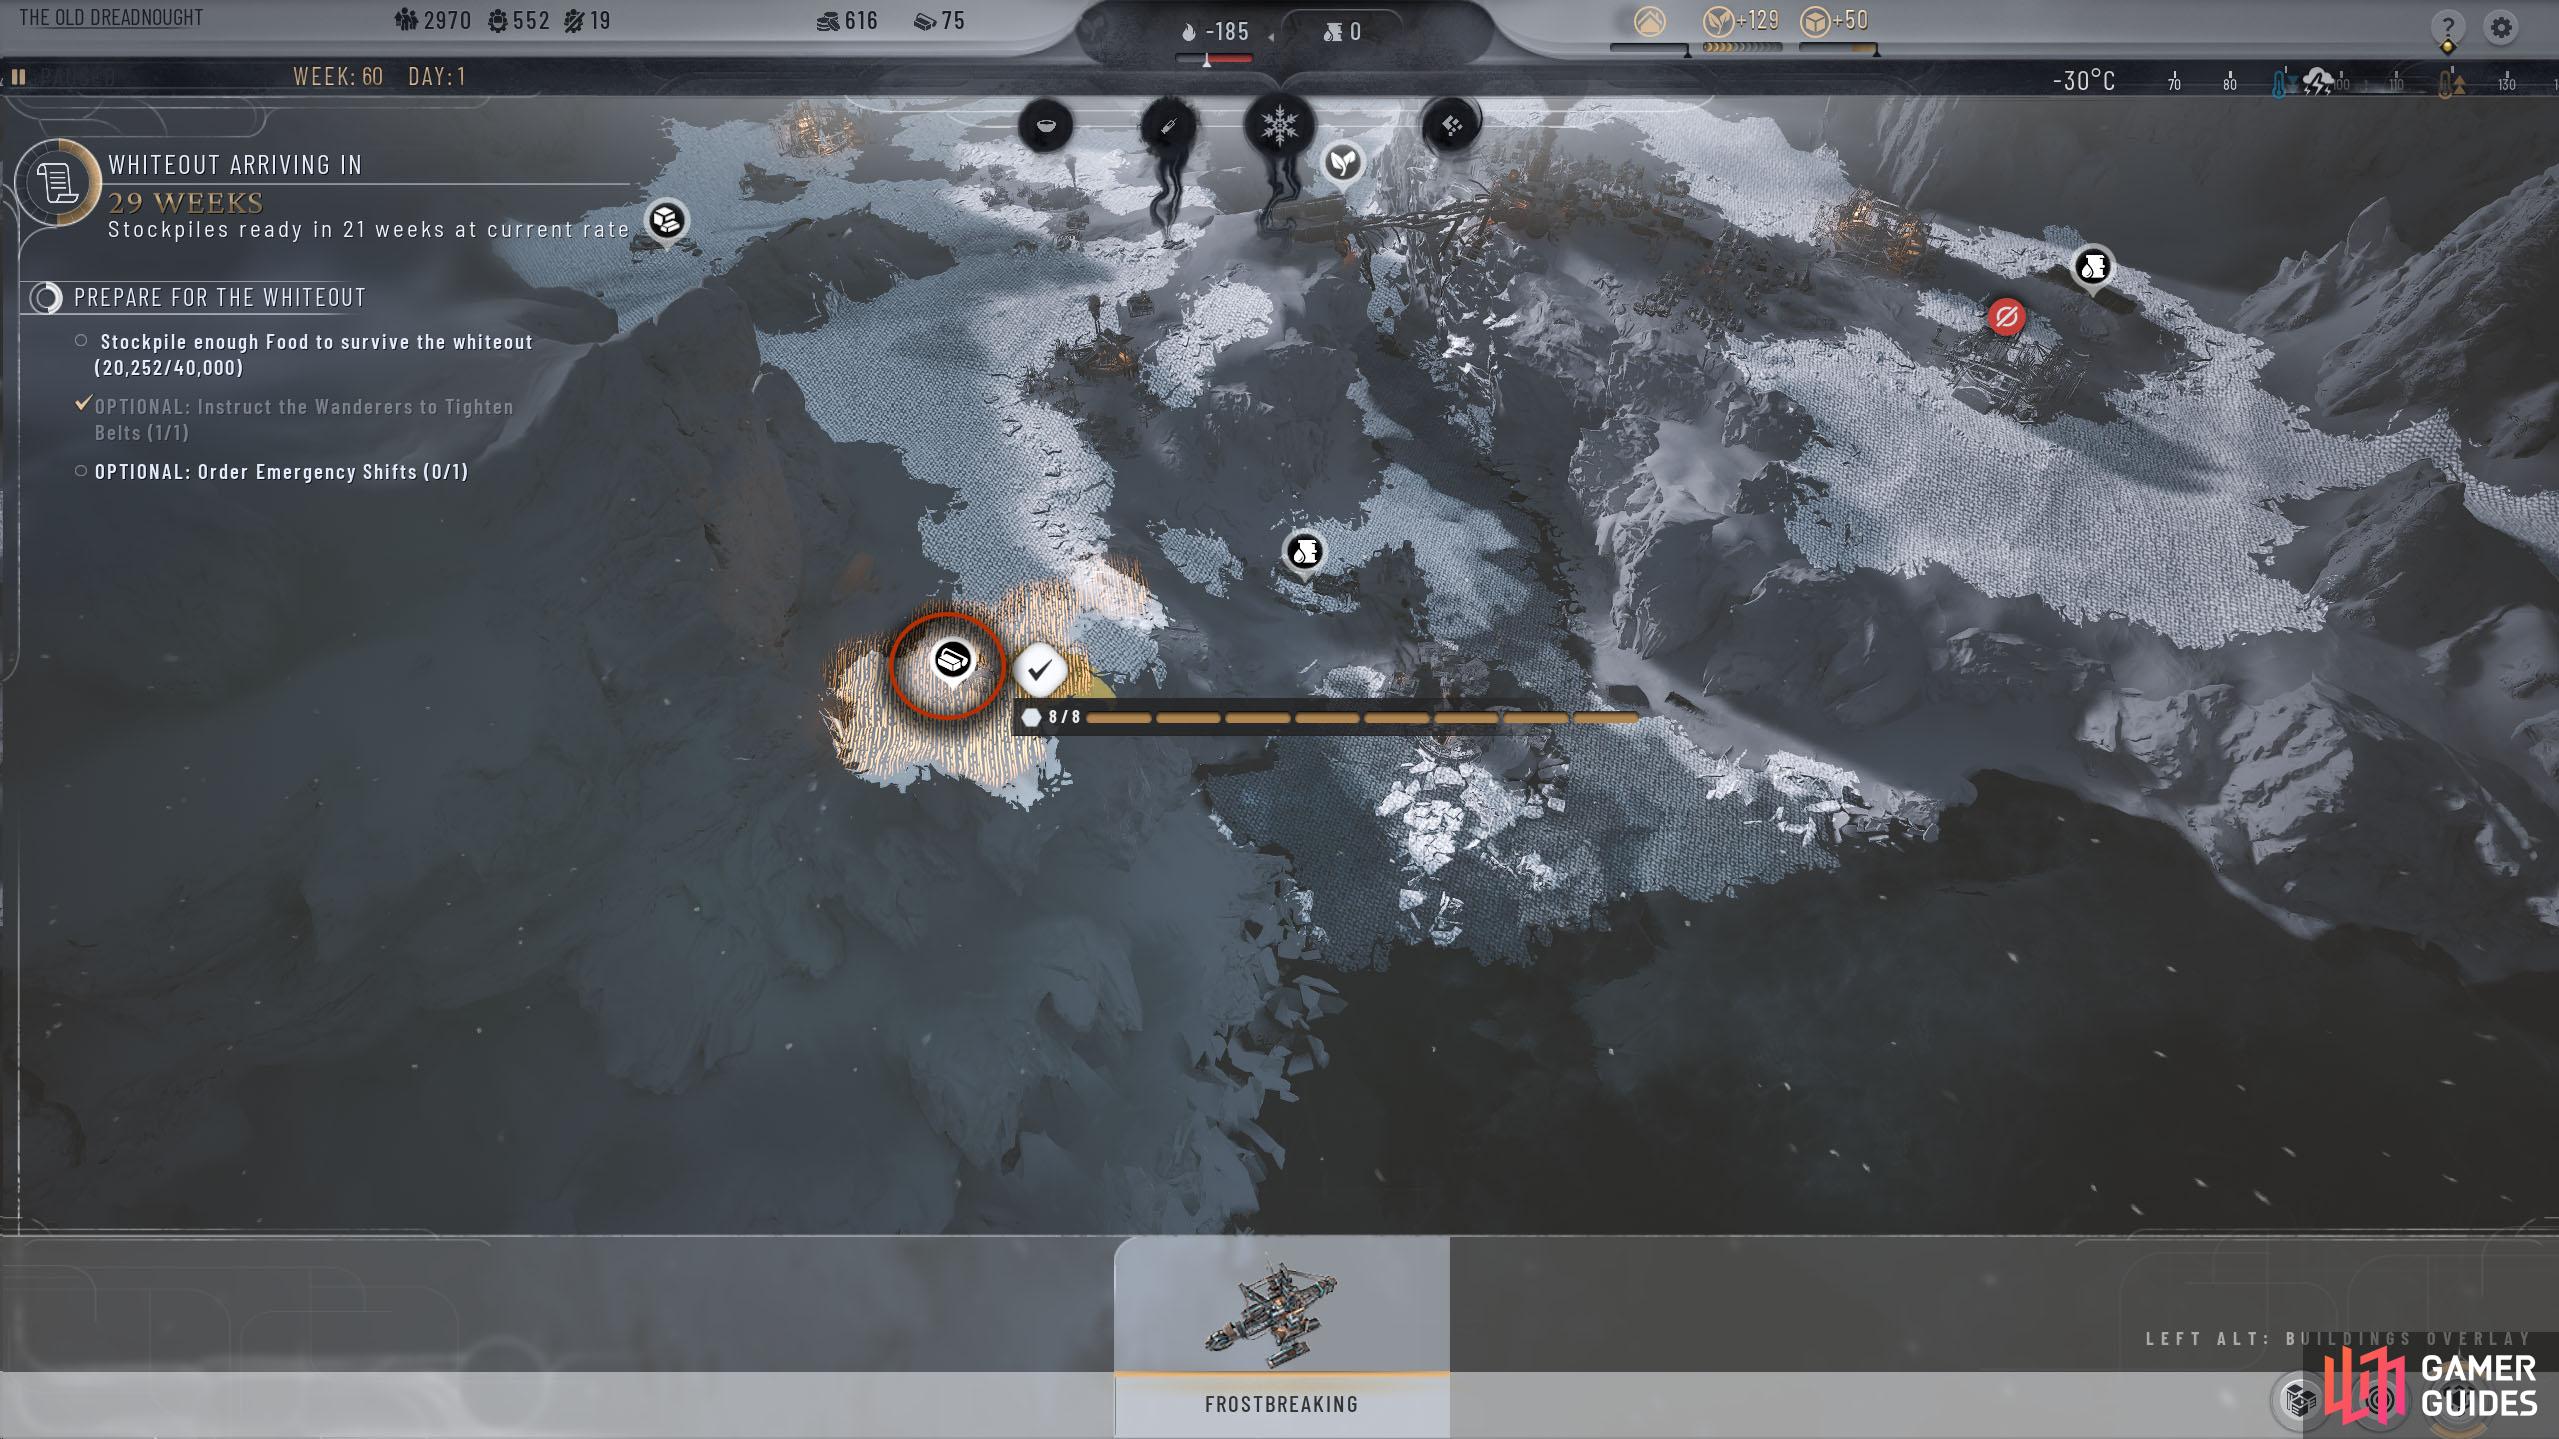
Prepare for the Whiteout
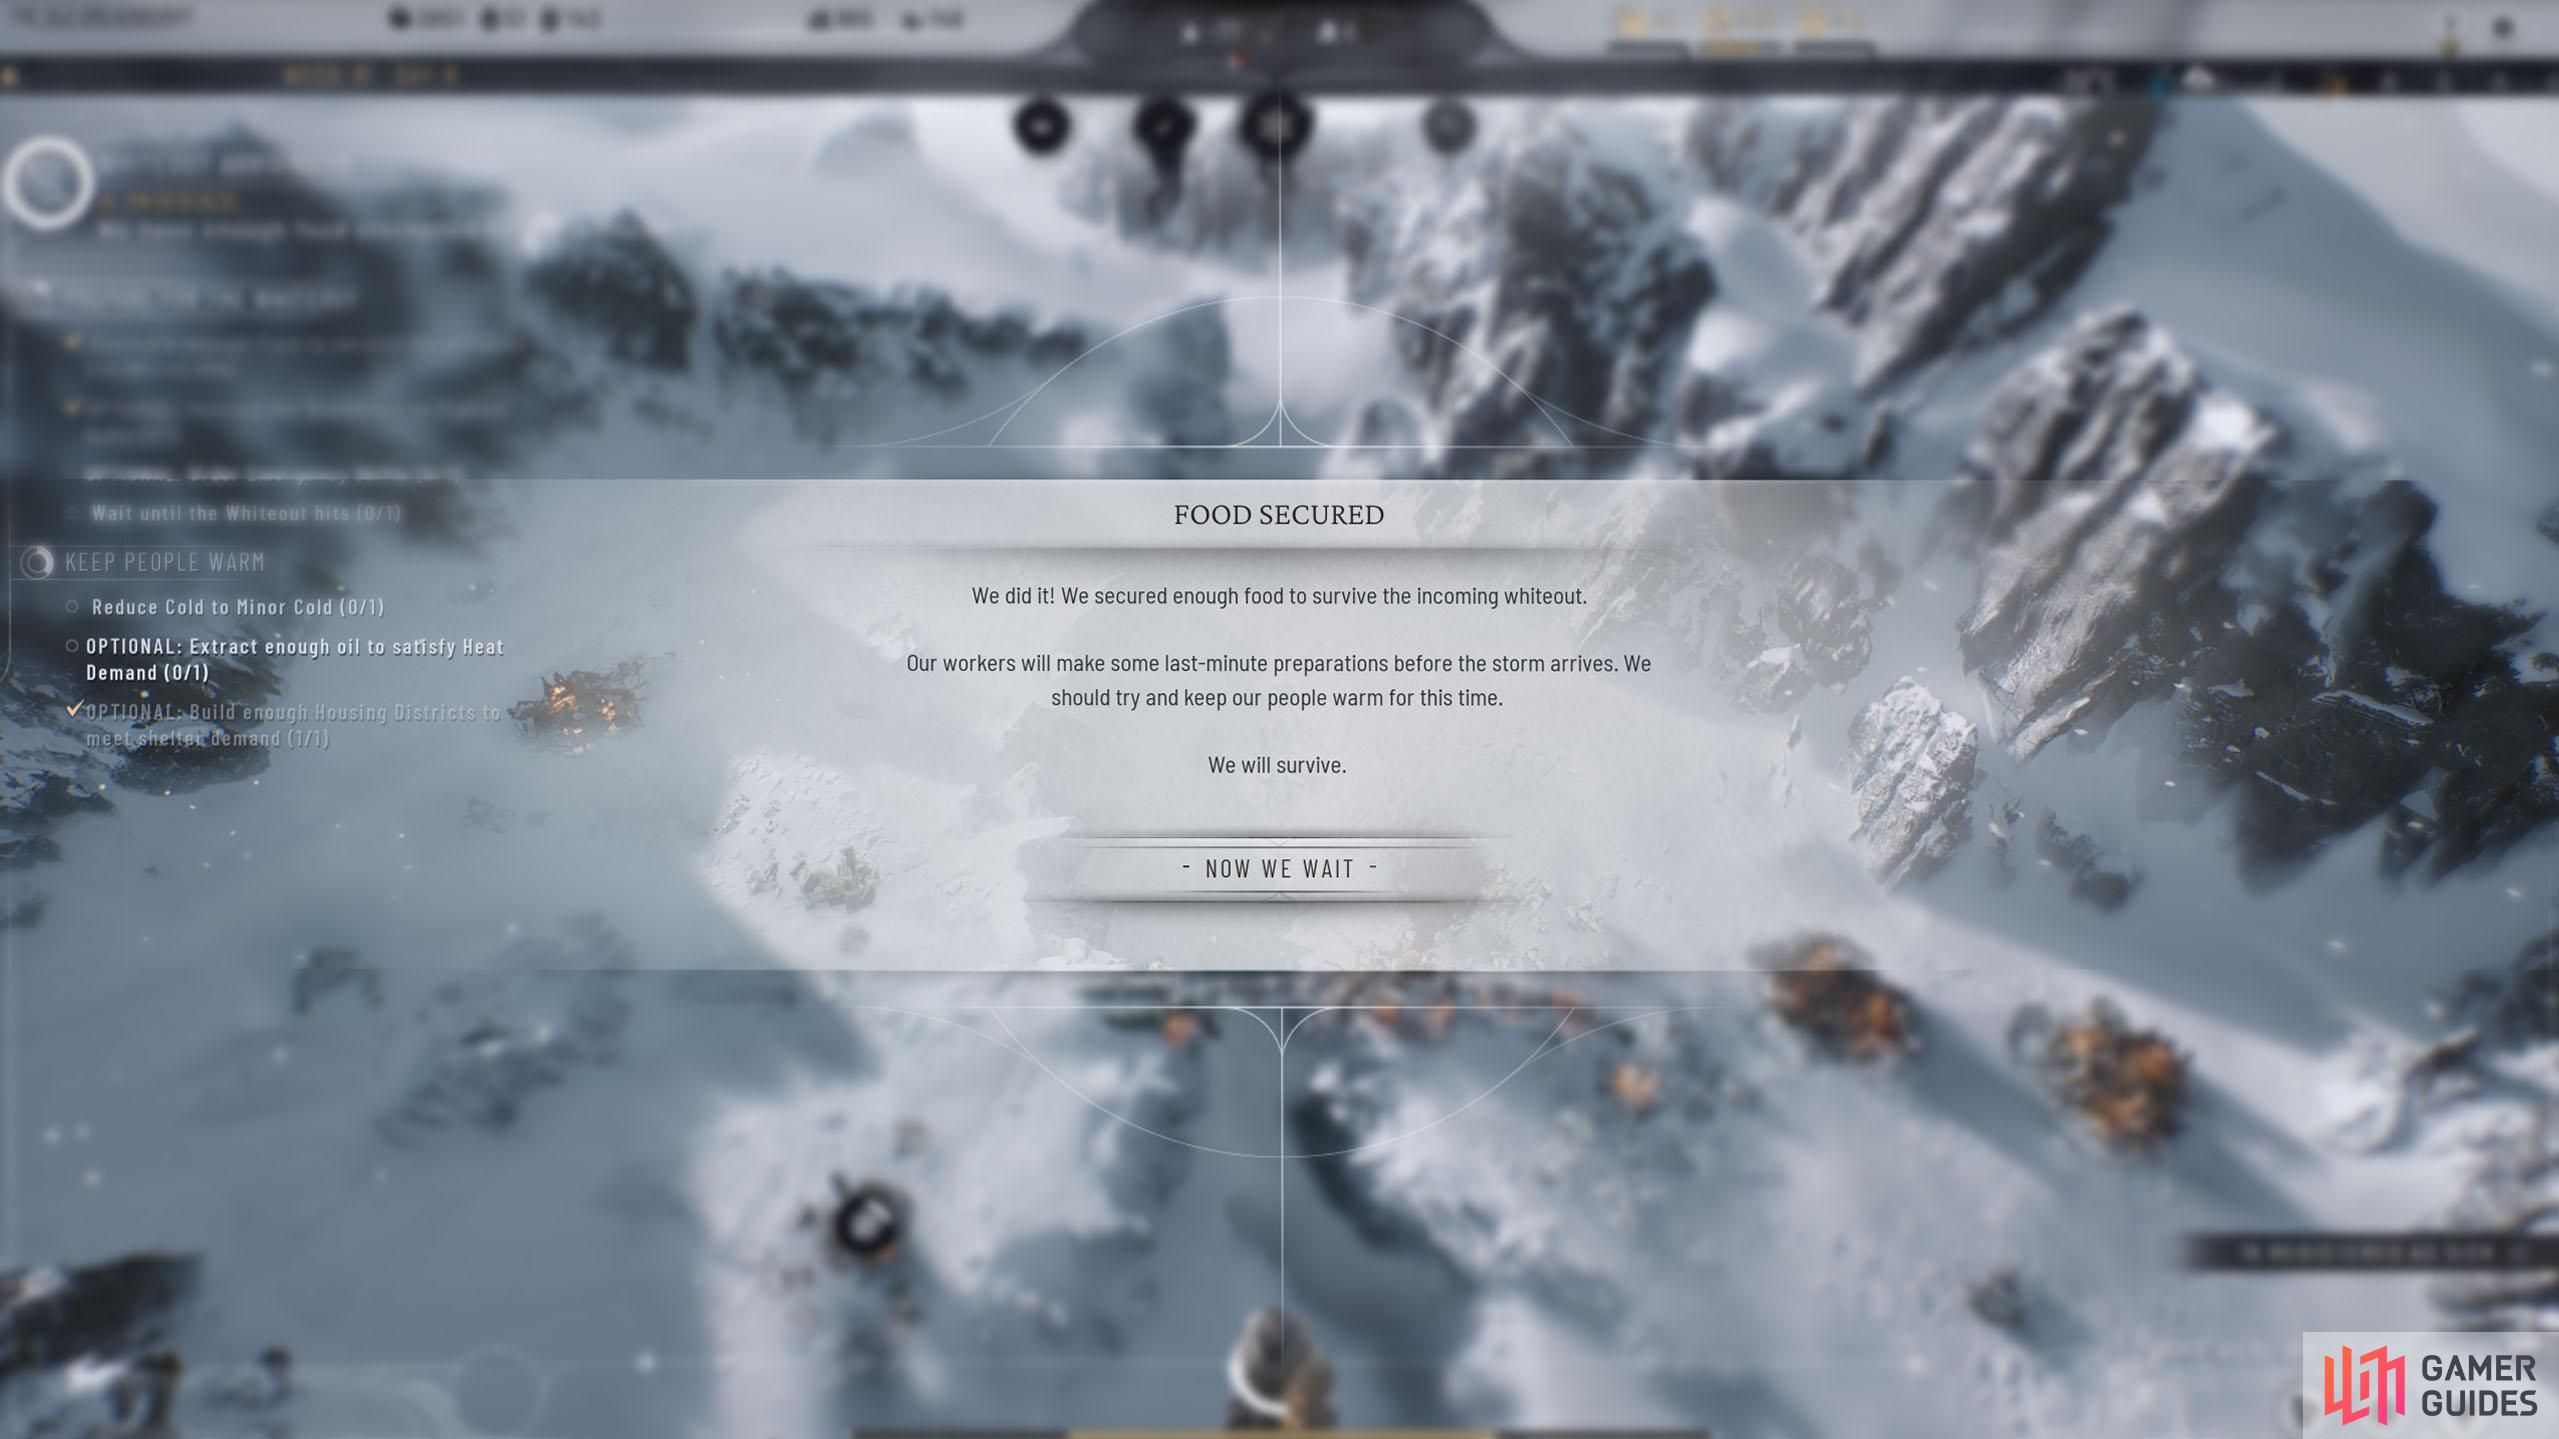
This is the most difficult part of the Prologue, as you’ll need to stockpile 40,000 Food to survive the impending Whiteout. You should have around 60+ days to prepare for this if you’ve been pausing in between tasks, even with speeding up the time for construction.
Stockpile enough Food to survive the whiteout
Whilst you prepare for this event, you’ll get notifications from the community from time to time. These are indicated with black icons that sometimes have a golden timer going around the edge of the icon. Selecting these can give you more options, and for the sake of the Prologue, you’ll get one advising you to tell the Wanderers to “tighten their belts”, or instill “Emergency Shifts” in the worker districts.
This will give you a further two optional objectives, which are just that. You don’t need to instill the Emergency Shifts, but we do recommend you tell the Wanderers to tighten their belts. You can do this by selecting the Wanderer Community in the center bottom of the screen and selecting Tighten Belts. These options will have a negative (or positive) effect on the community, but for the Prologue, it doesn’t matter.


(1 of 2) Click on the icons that appear from time to time to get more objectives.

Click on the icons that appear from time to time to get more objectives. (left), Select “Tighten Belts” to have the Wanderers ration their food to save it for the whiteout. (right)
| Quickjump |
|---|
| Table of Contents |
Seal Colony
Now that you have some spare time, Frostbreak the path to the Seal Colony at the bottom of the map. This is the difference between failing the Prologue or passing it. Once you’ve created the path, place a Food District over it immediately. Once you’ve done that, place a Food Stockpiling Hub over the Seal Colony found in the center button in the bottom right ( ) to begin stockpiling the food. You’ll want to do this for the other Food Districts you have, as they will stop at a specific number, which stops you from reaching the required 40,000 food.


(1 of 3) Build the path down to the Seal Colony in the south.
| Quickjump |
|---|
| Table of Contents |
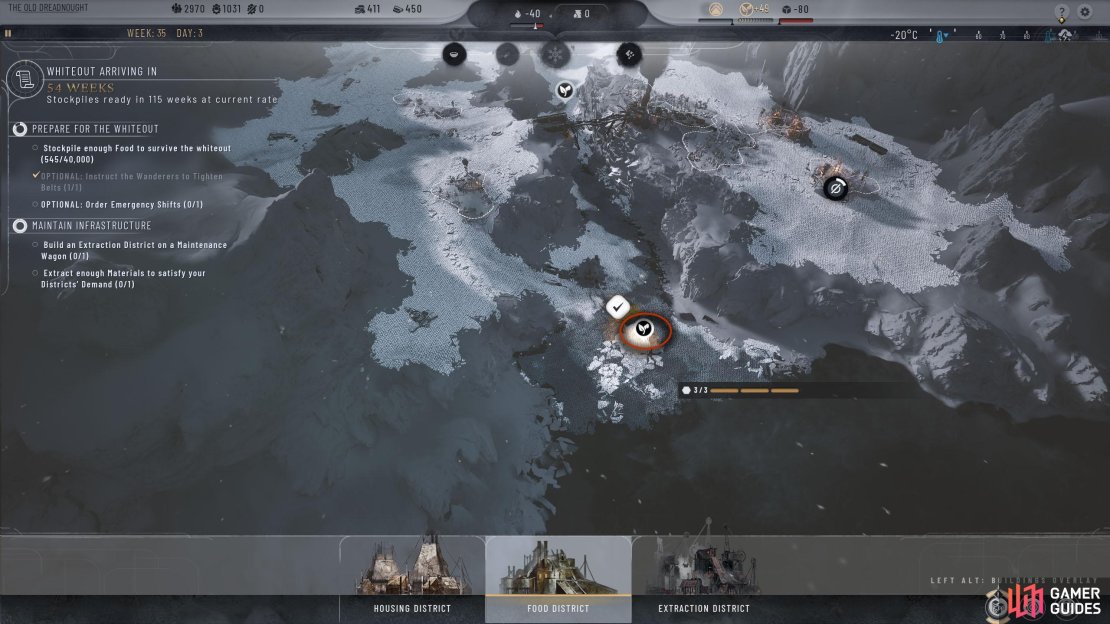
Maintain Infrastructure
During this period, you’ll get requests from NPCs who’ll require you to do stuff for them, with the first one being the Against the Element’s Squalor. Promise to gather more materials to get a couple of new objectives. Frostbreak a path to the Maintenance Wagon to the left of the Dreadnought, near the Food District, and then place an Extraction District on top of it to complete the objective.
Repairs
If any of your Districts get damaged from overuse, simply click on the red icon, and then click the spanner icon to repair them. This is important because they’ll become deactivated while in disrepair, causing you to lose out on valuable resources.


(1 of 3) By clicking on the notifications, you’ll get “Against the Elements”. Make sure you promise to get more materials.
| Quickjump |
|---|
| Table of Contents |
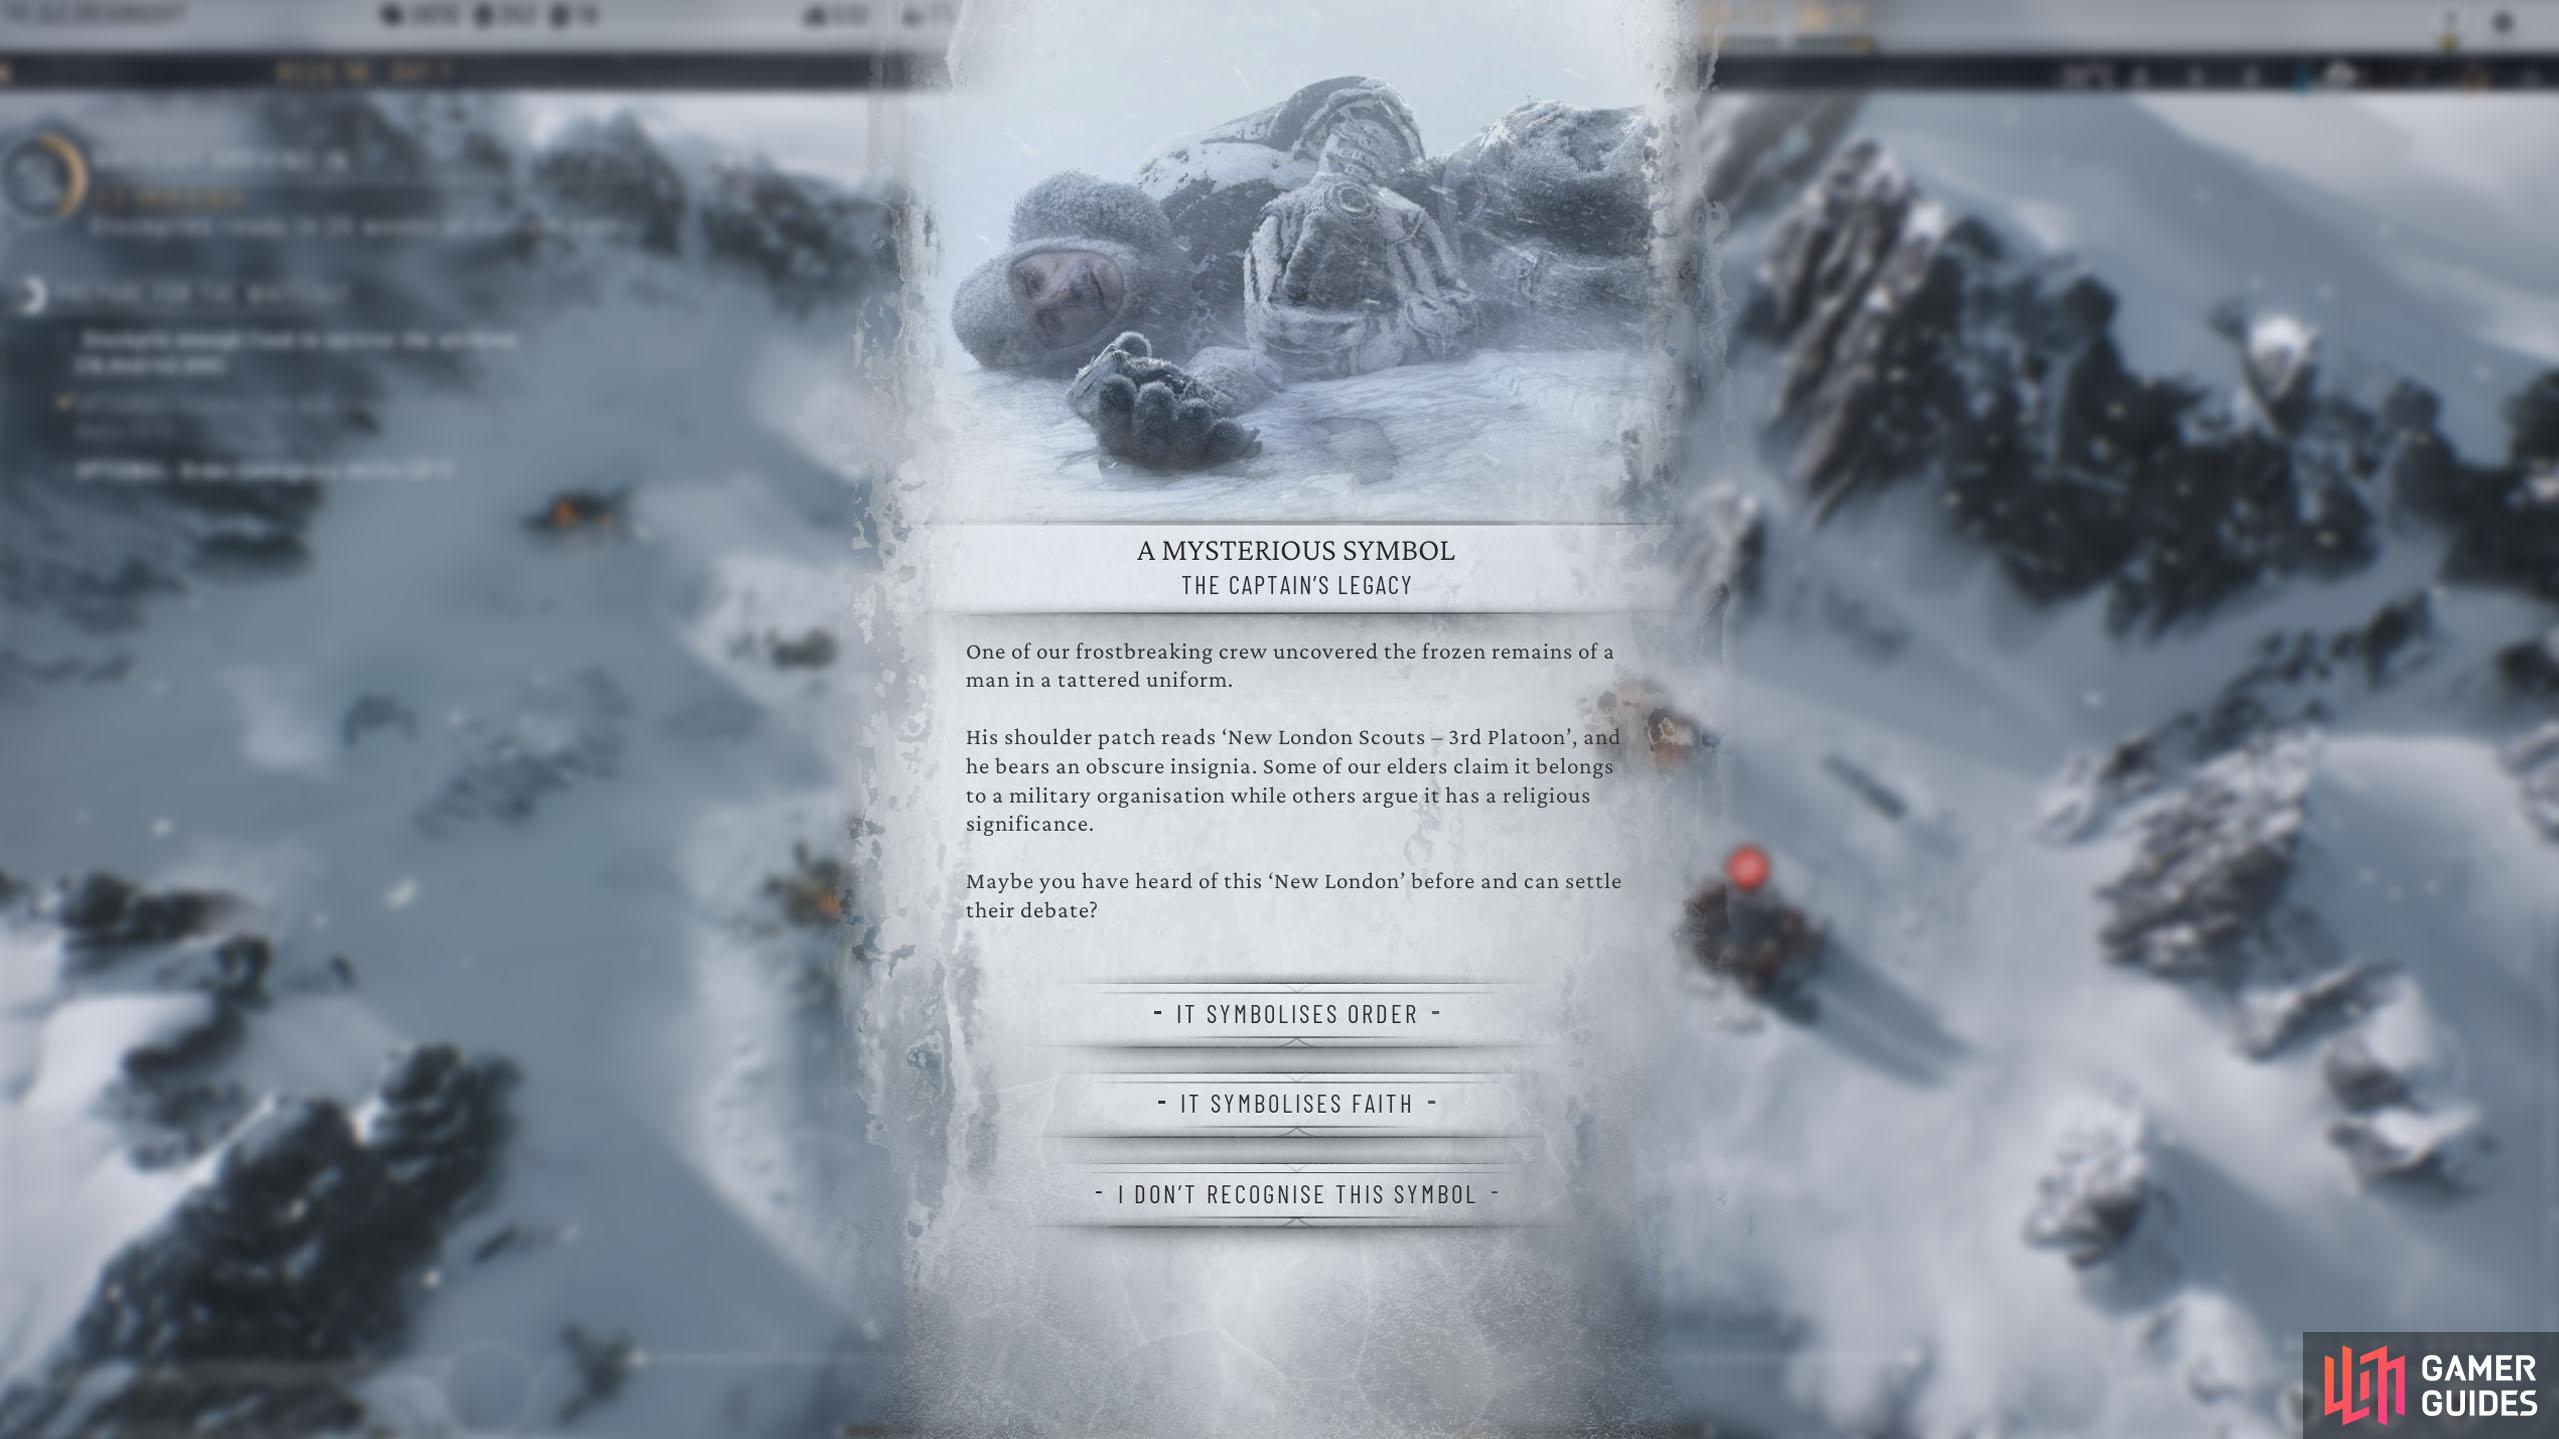
A Mysterious Symbol
At one point, you’ll get a notification that you must click, called The Mysterious Symbol. This gives you an important choice to make that determines one of the communities you’ll have access to early on in Chapter 1. If you select “It symbolizes Order”, you’ll get the Stalwart community, selecting “It symbolizes Faith” gives you the Faithkeepers community. The final option, “I don’t recognize this symbol” won’t choose a faction specifically, but you’ll end up with the Faithkeepers still.
Running Low on Prefabs
If you’re running low on Prefabs, and the odds are, that you are. Make a path to the Construction Wagon to the left of the Seal Colony. However, you’ll need Prefabs to construct an Expansion District. By now, your Oil Wagon District has run out of resources to gather, so you can demolish the building to recoup some scraps and Prefabs, allowing you to create another District on top of the Construction Wagon.


(1 of 2) Selecting the top option will give you the Stalwart faction in Chapter 1 while the bottom two will give you the Faithkeepers.
Selecting the top option will give you the Stalwart faction in Chapter 1 while the bottom two will give you the Faithkeepers. (left), When you run low on Prefabs, make a path to the Construction Wagon to the left of the Seal Colony, and extract it. (right)
| Quickjump |
|---|
| Table of Contents |
The Whiteout Draws Near (No Lesser Evil Achievement)
This is one of the more important choices you’ll get in the Prologue, and completing it with the correct choice will give you an achievement. Your choices are: Slaughter the Seals, Let Our Elders Go, or Don’t Resort to Extremes.
The first two options will make your reaching the 40,000 Food goal more achievable, however, if you select the last option, and still complete the Prologue, you’ll get the No Lesser Evil achievement, and by using our guide, you will have no problems meeting the goal, so select the bottom option “Don’t Resort to Extremes”. If you’ve messed something up and are struggling, choosing the other two options will help you course correctly, but you will miss out on the achievement.
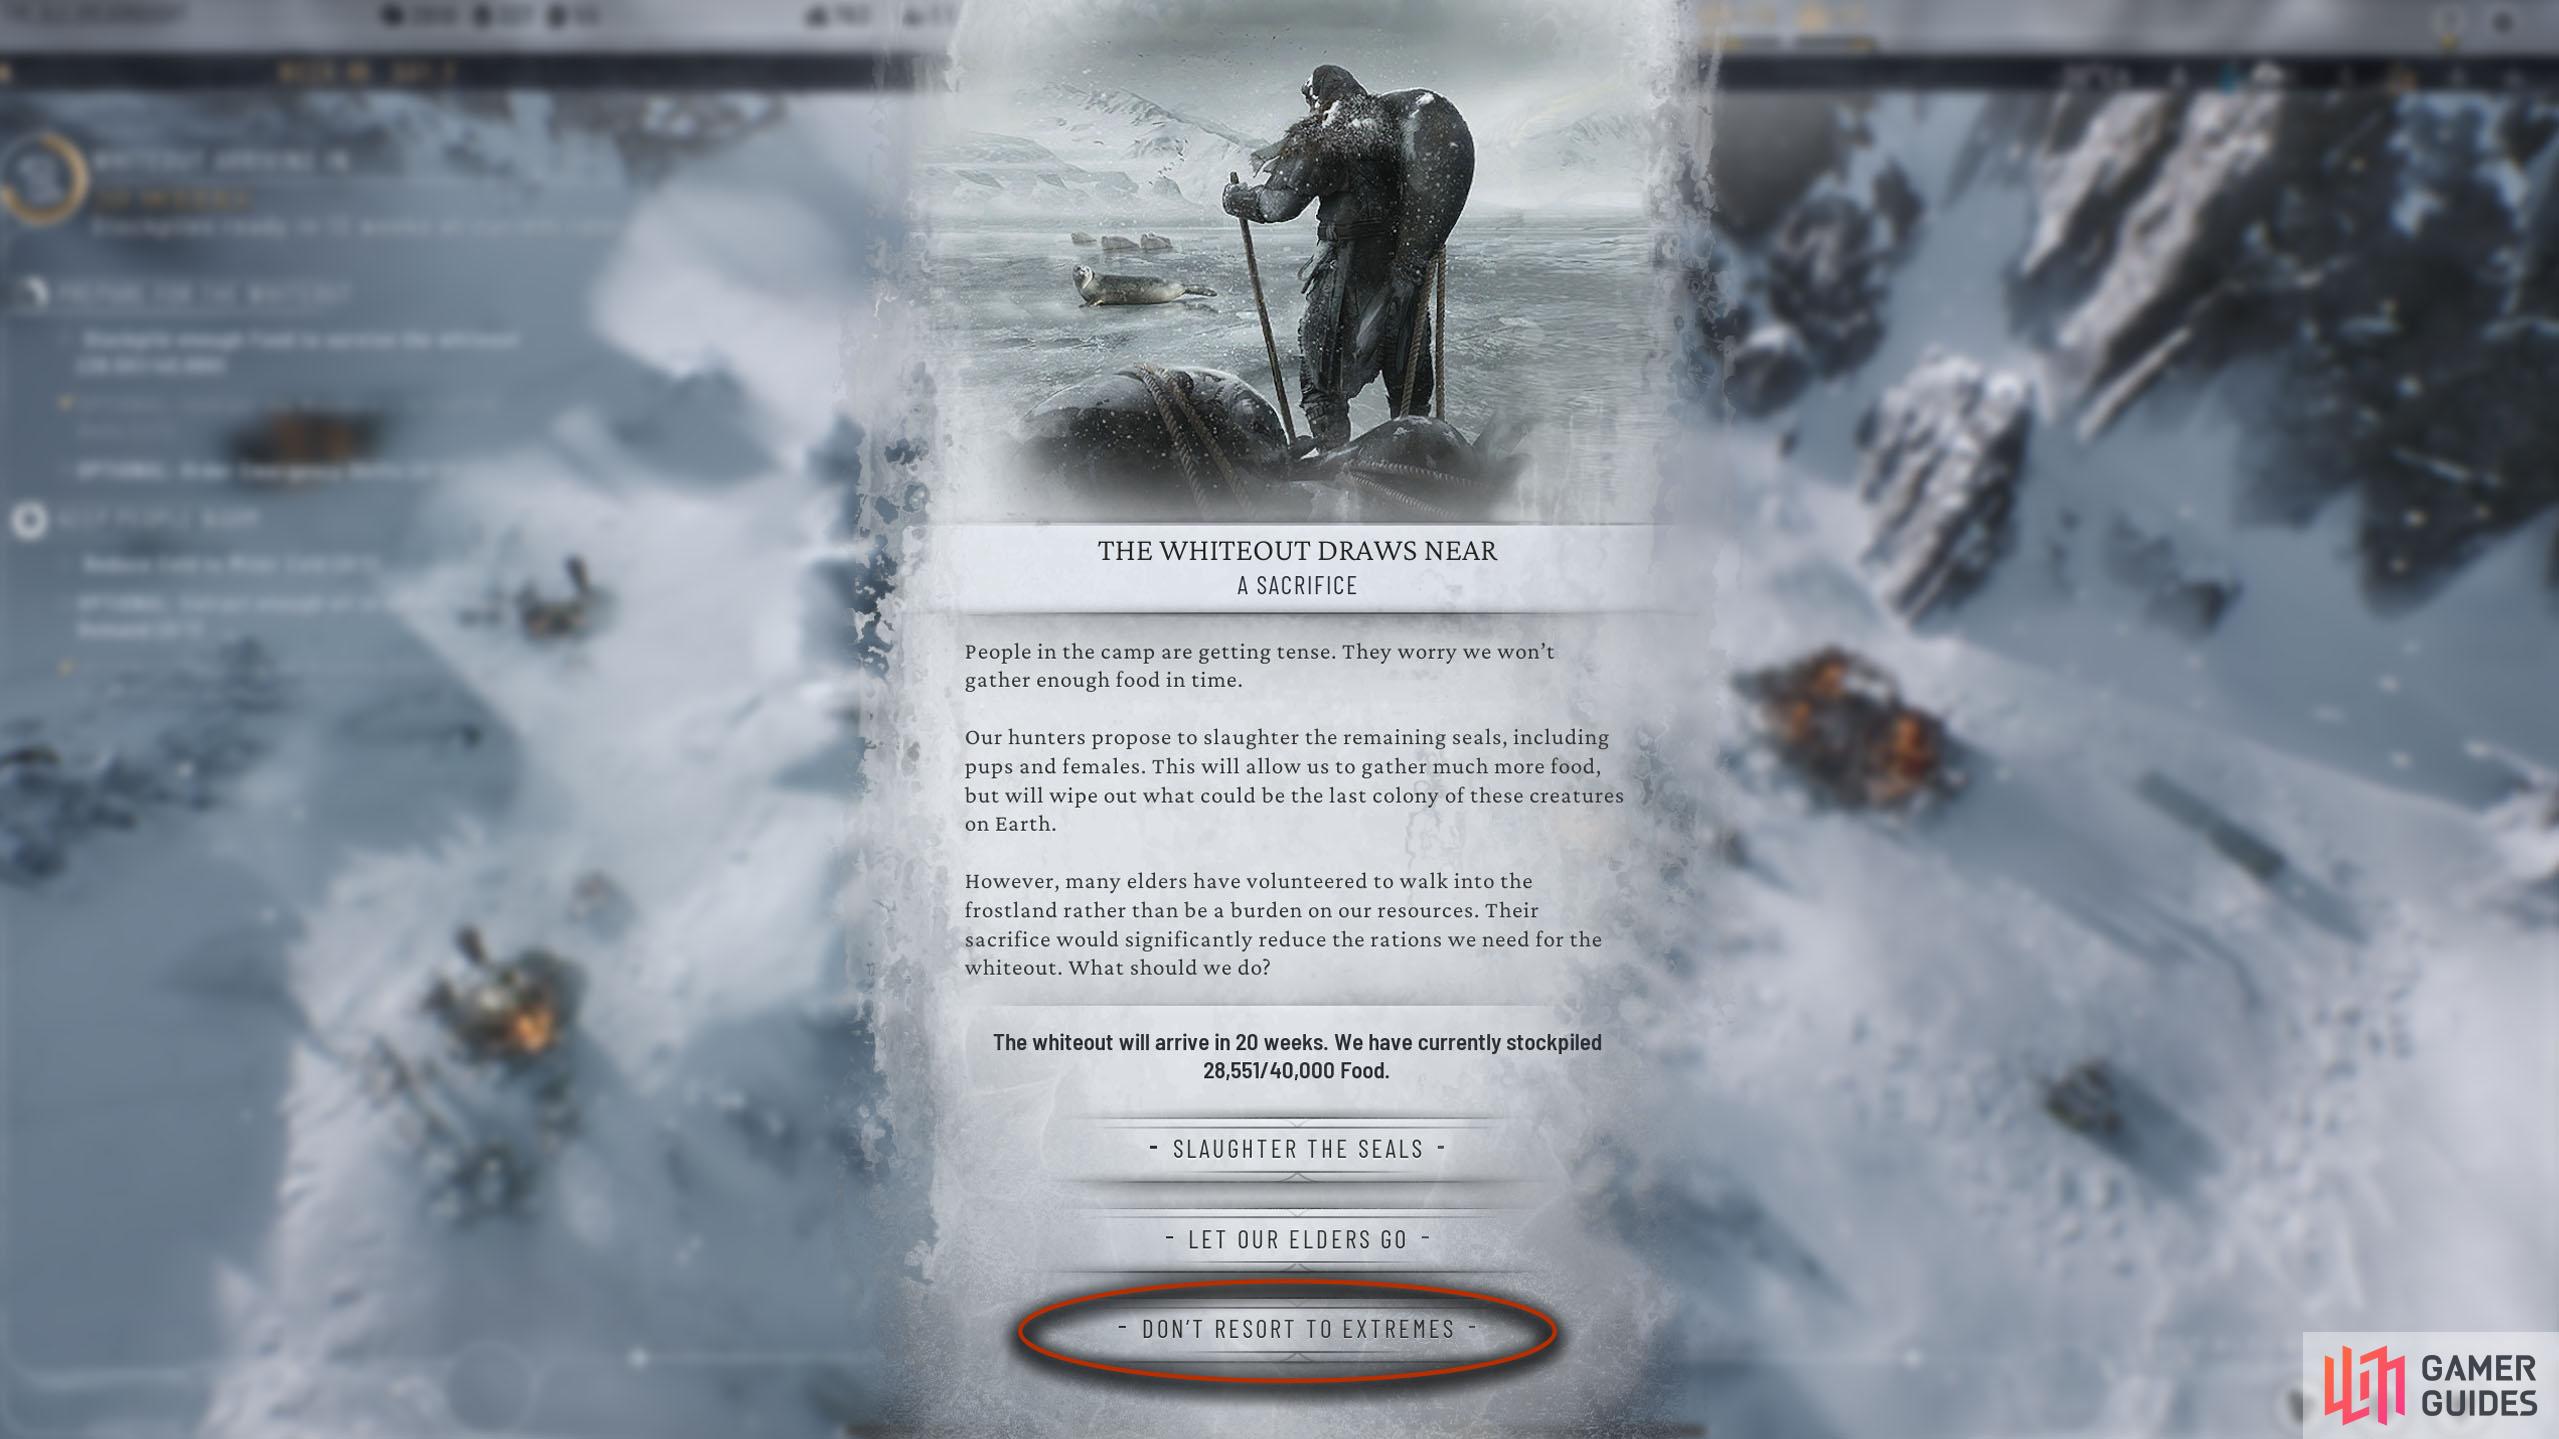


(1 of 2) When you get The Whiteout Draws Near event, make sure you select “Don’t resort to extremes” for the achievement.
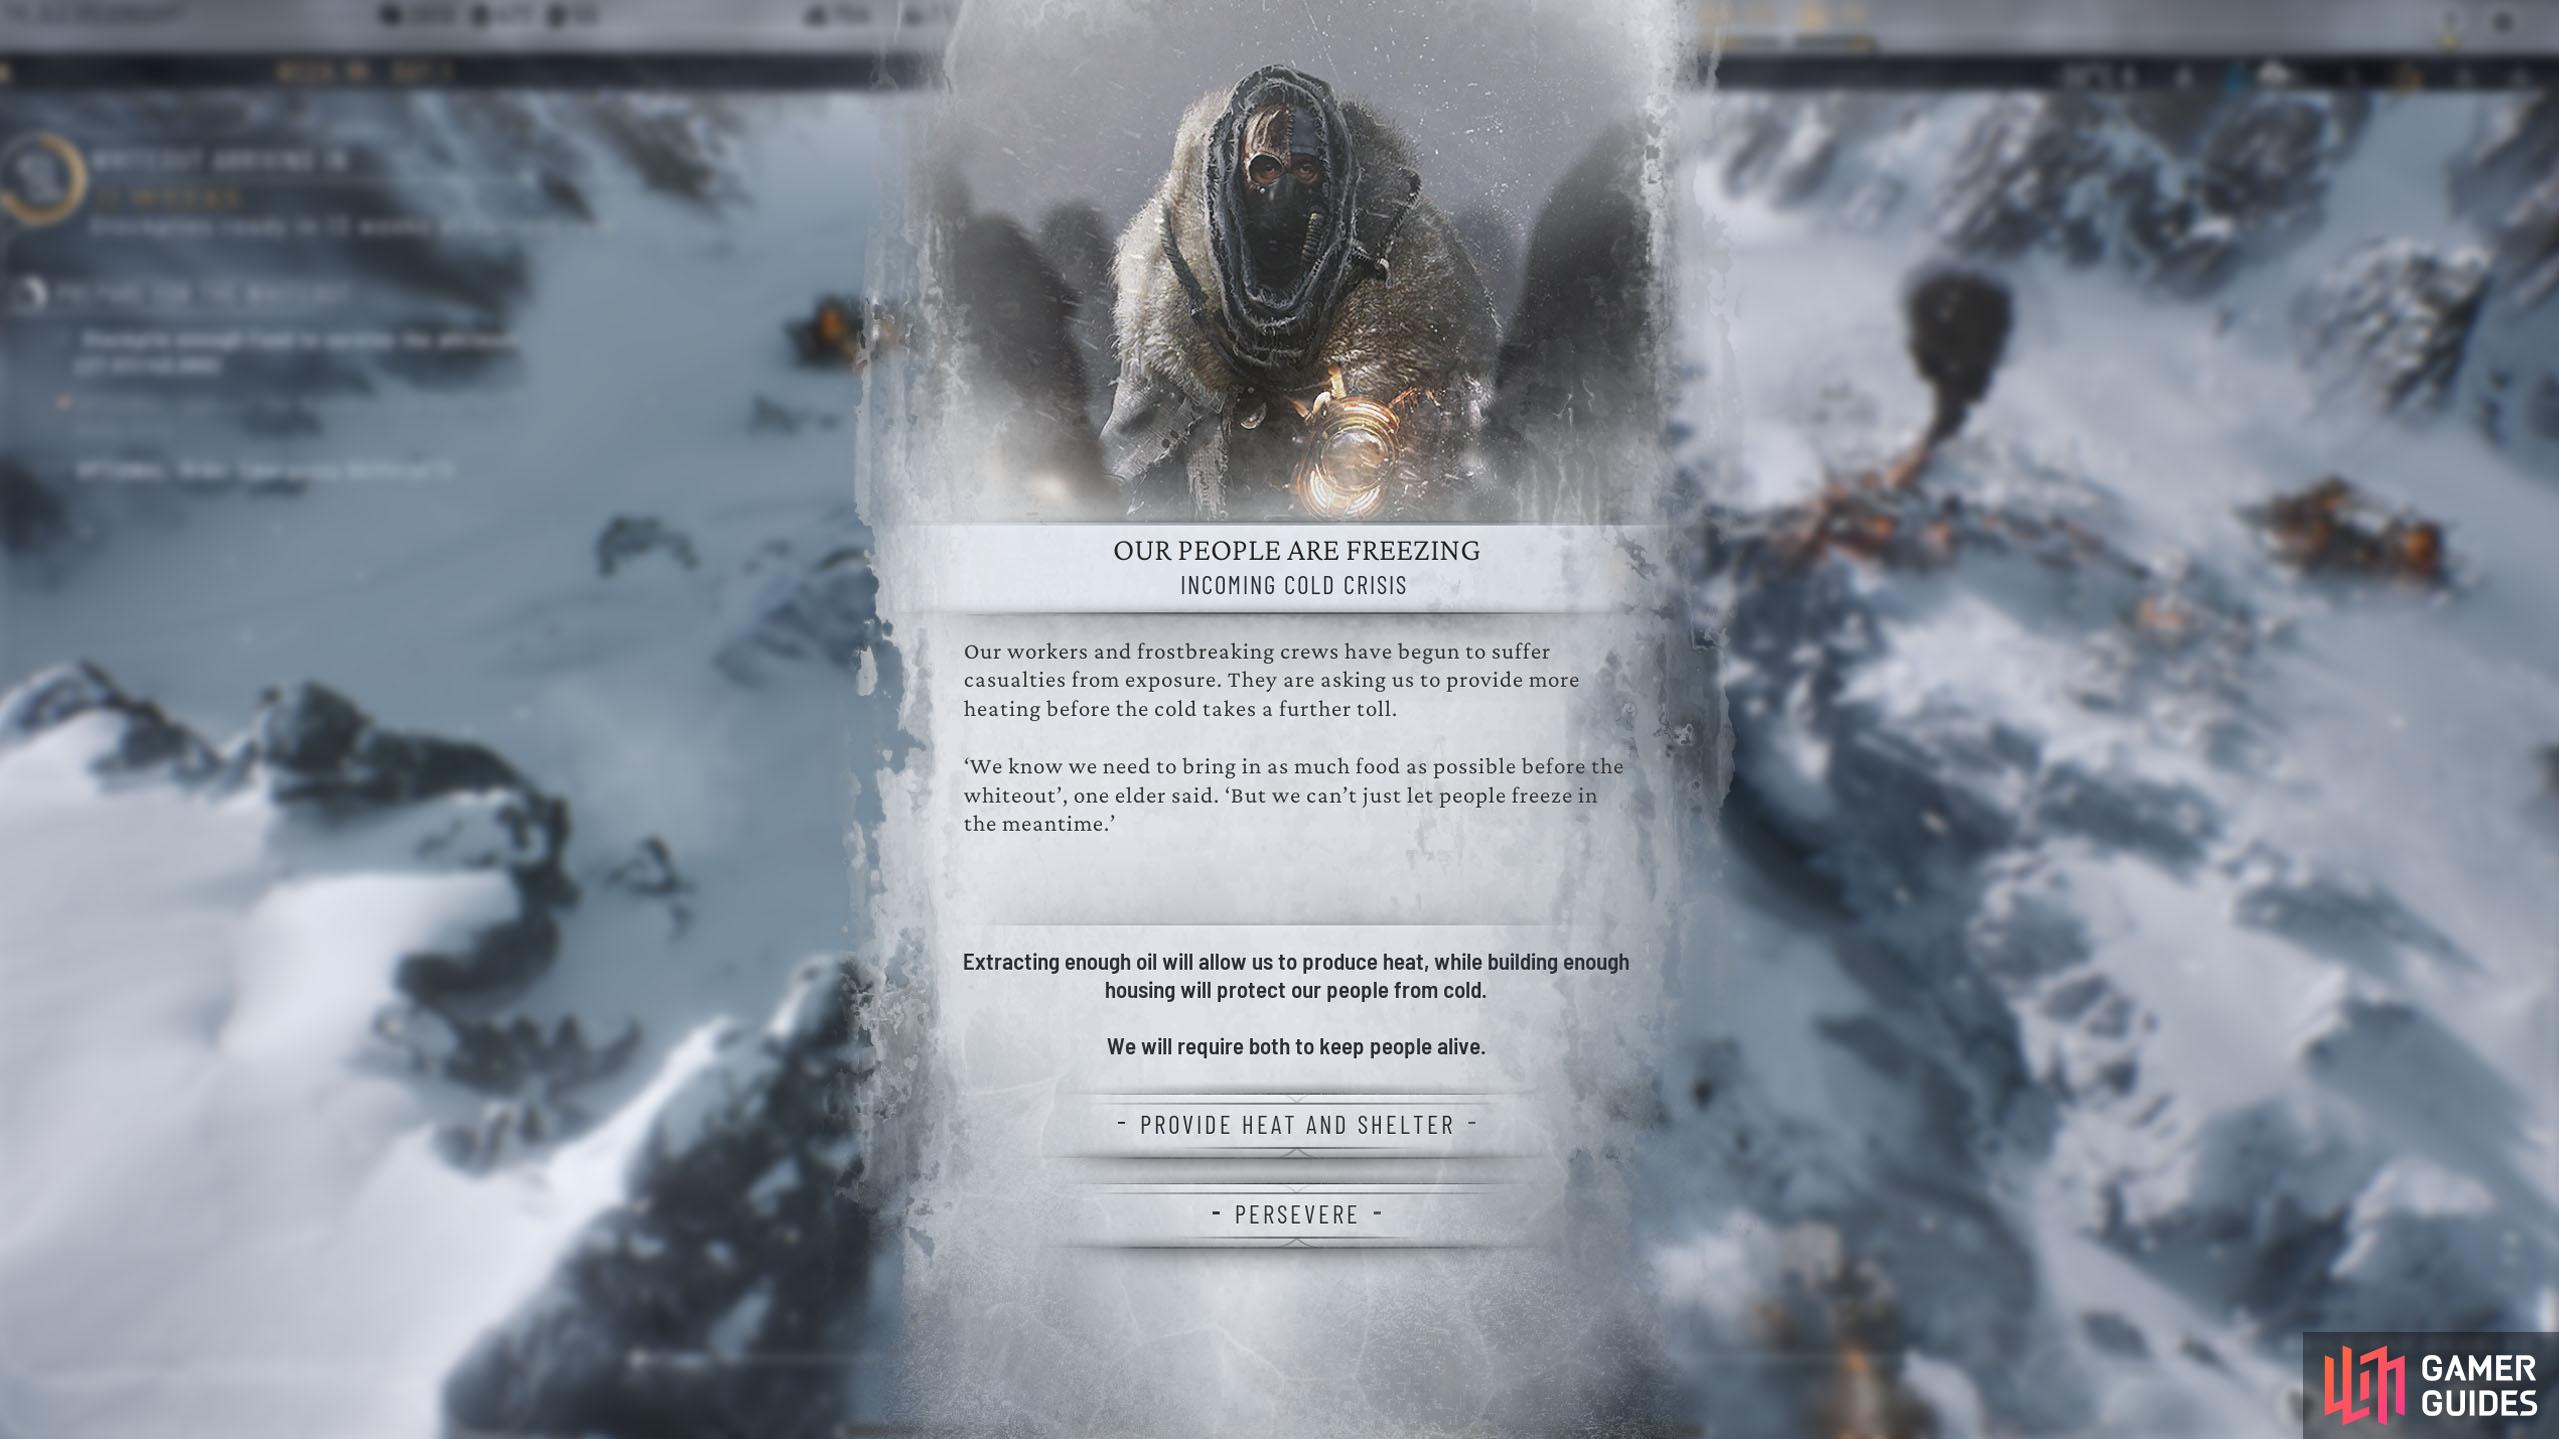
When you get The Whiteout Draws Near event, make sure you select “Don’t resort to extremes” for the achievement. (left), A bit later, you’ll get another event “Our People are Freezing”, where you’ll need to Keep People Warm. (right)
| Quickjump |
|---|
| Table of Contents |
Keep People Warm
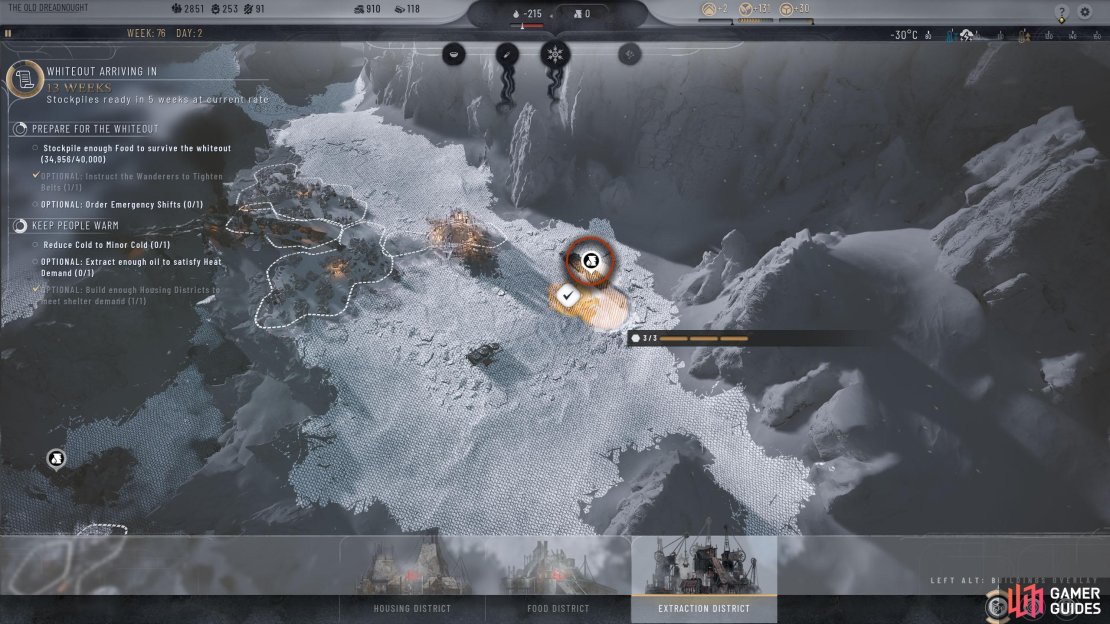
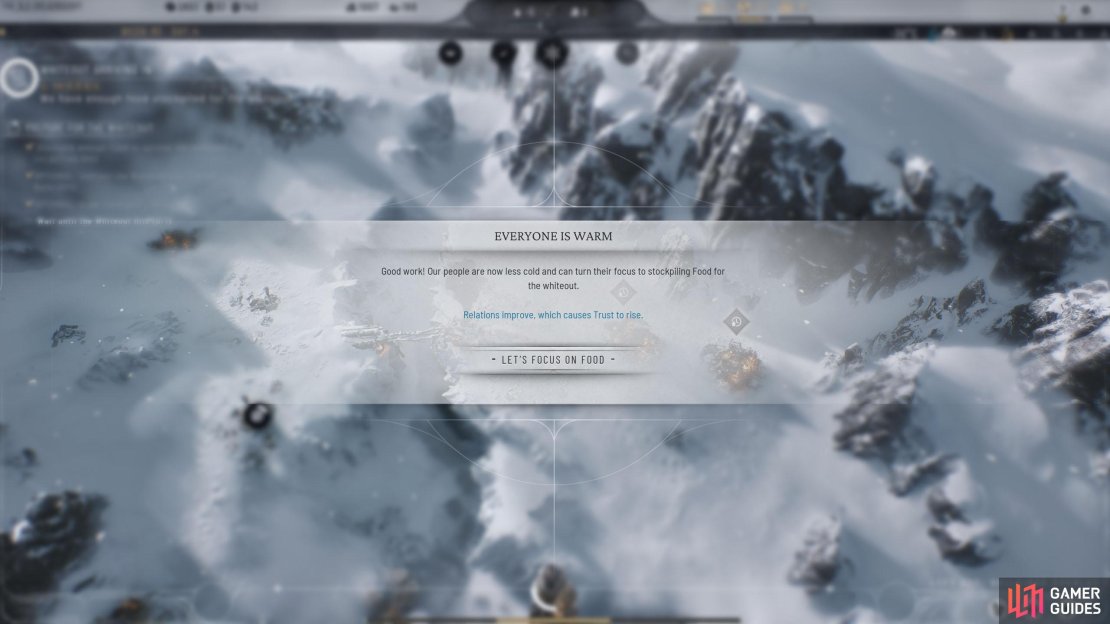
The problems just keep coming, huh? This objective will be added after interacting with one of the many notifications from the community. This particular issue has three goals, with two of them being optional. The second optional objective should be already met by having two Housing Districts that you did at the beginning of the Prologue, and the second Optional objective is how you’ll solve the main objective.
Do you remember the second Oil Wagon next to the first Oil Wagon? Well, we built a path to it earlier. If you didn’t do this, do it now. Now place an Extraction District on top of it, and set both Oil Districts to do Emergency Shifts. This will increase disease risk, but you’ll need this to do the next part. Now, head over to the Dreadnought, select the Generator, and set it on overdrive. This will provide the added warmth needed to keep people warm, and the extra shifts at the two Oil Districts will provide enough fuel to keep it running in this condition.


(1 of 5) Place an Extraction District on the other Oil Wagon next to the first one you did.
| Quickjump |
|---|
| Table of Contents |
Against All Odds
By now, you should have met the goal of acquiring 40,000 Food with around six to seven weeks to spare, while also fixing the other problems during this difficult period. This is all without slaughtering the seals, or letting the elders go.
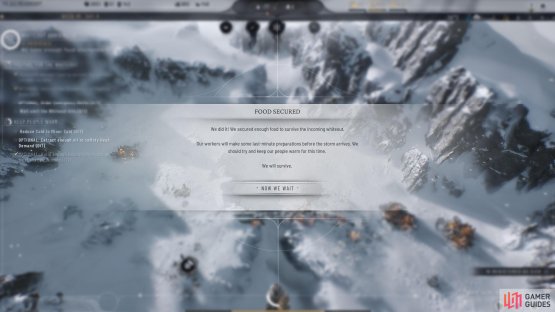

(1 of 2) With about six weeks left, you’ll complete the Food Stockpiling goal.
With about six weeks left, you’ll complete the Food Stockpiling goal. (left), Now speed up time until the whiteout arrives to complete the mission. (right)
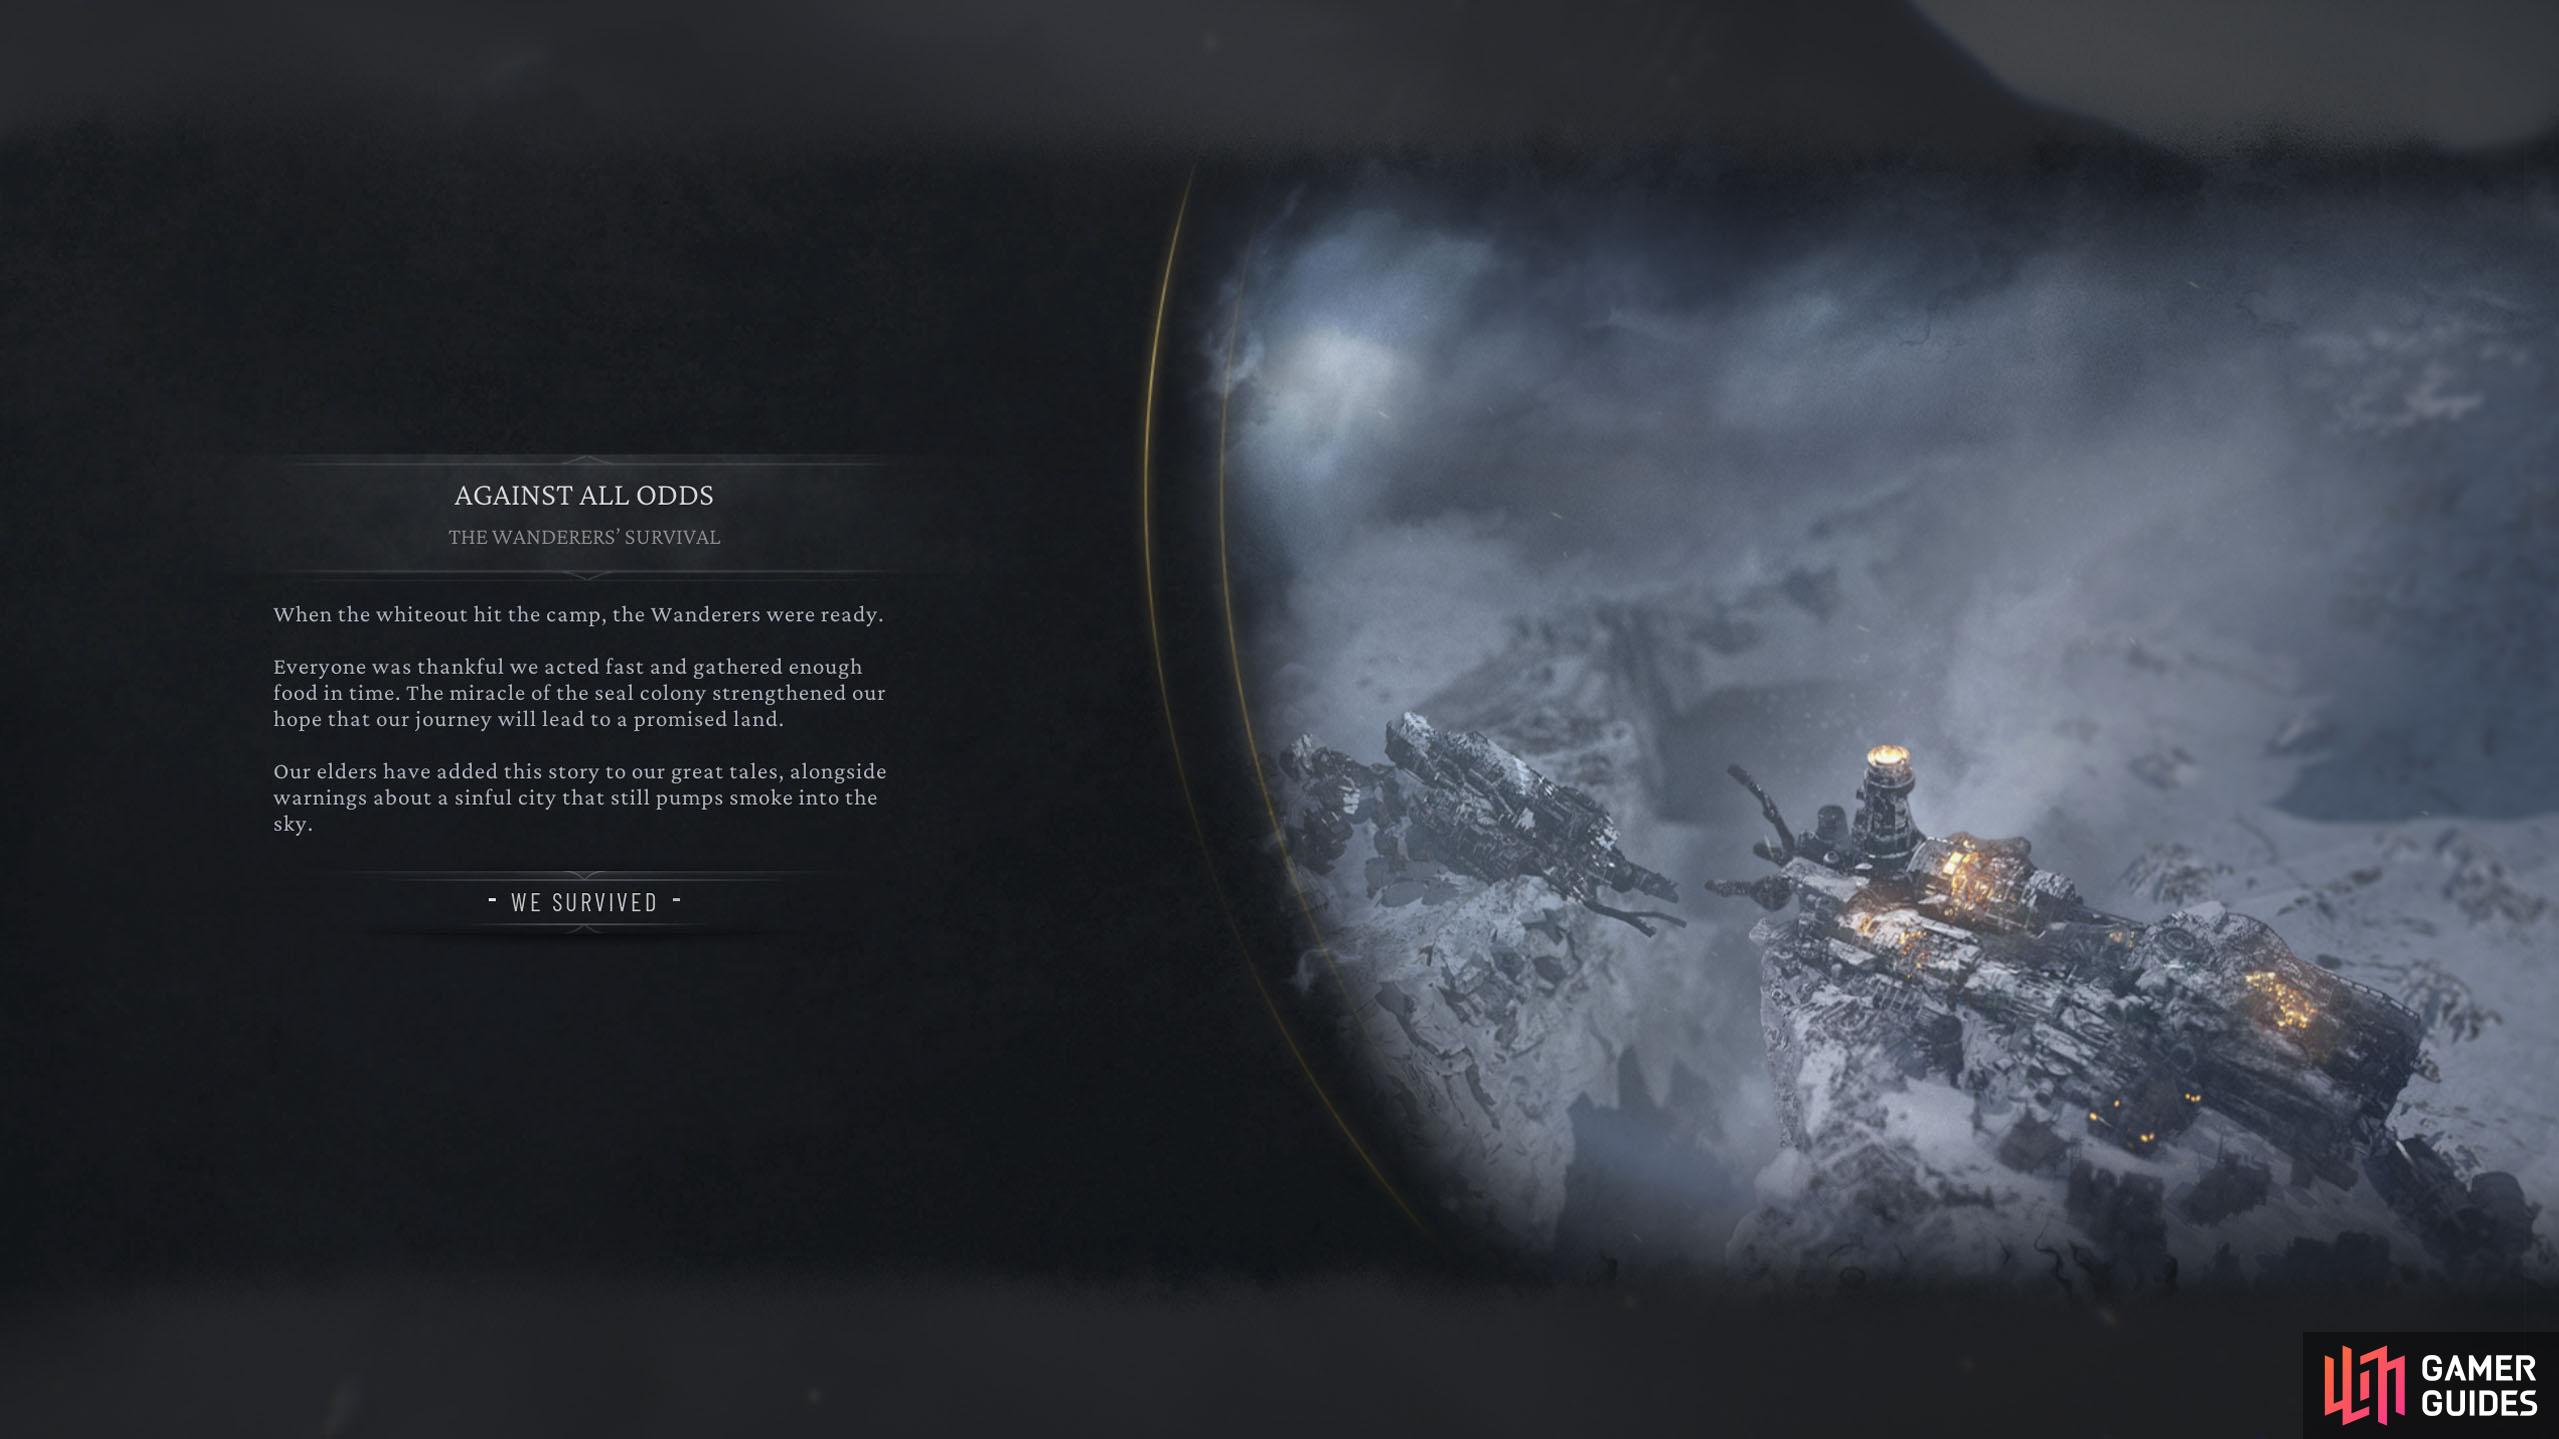
All that there is to do now, is speed up time and wait for the whiteout to come. You and the Wanderers will survive the impossible, but your challenges have only just begun.
No Comments