
December 24th
Before you head off to Mementos, you will check your exam scores and if everything was right, then you should be the top of your class, earning you three points in Charm (which is useless, all things considered). You will automatically head to Mementos and enter the very first floor, but double back to the entrance for now. Your target is to get to the end of Sheriruth, which you should have done already, since the final request took you there. Before opening the door to the Depths of Mementos, it’s time to work on the Persona Compendium a little bit, focusing on the last two Treasure Demons, Hope Diamond and Crystal Skull.
Hopefully you have a Treasure Trap, as that will help them to spawn for this method. Travel to the end of Sheriruth and climb back up to the 13th floor here, popping a Treasure Trap. Drive around and look for a Treasure Demon, using the map option to return to floor 14 if you don’t find one. Whenever you do find a Treasure Demon, get into battle and check to see if it’s one of the two you need. If it is, then use your special gun attack (Up, then Triangle) to knock it down, then talk to recruit it. If it isn’t the one you’re looking for, then escape the battle, get into battle with another enemy, escape that battle and the Treasure Demon will be back at the same spot. Finding a Treasure Demon seems to take up the most time with this method, but it hopefully shouldn’t take too long.
Depths of Mementos
From the bottom floor of Sheriruth, go through the previously locked door and you’ll come to Iweleth, which is just a single area with a large door. It’s important to note that this is a point of no return, so if you have anything to do in the regular part of Mementos, do not go through the giant door in Iweleth. When you’re ready, go on ahead and you should arrive in some huge area, which acts as a lobby, where you can swap out party members and visit the Velvet Room. You should notice that both Justine and Caroline both standing outside of the Velvet Room door. Speaking with Caroline will allow her to heal your party’s wounds, including both HP and SP.

The last two Treasure Demons can only be found on the last few floors of Sheriruth once you finish the seventh Palace.
It’s important to note that this area of Mementos is not randomly generated. Follow the path to a group of people, then jump down and up to reach an opening that will allow you to go further. It should be said that the Depths are pretty linear, with not much in the way of diversions, although there are a few chests you can grab. Once you pass through the opening, hop down and continue north until you come to a roundish room with a cutscene. You will be forced into a fight here, against two Pagan Saviors. They will usually cast Revolution (makes everyone’s critical hit rate go up for three turns), then either attack normally or use God’s Hand. They are weak to wind, so it shouldn’t take too long to defeat them.
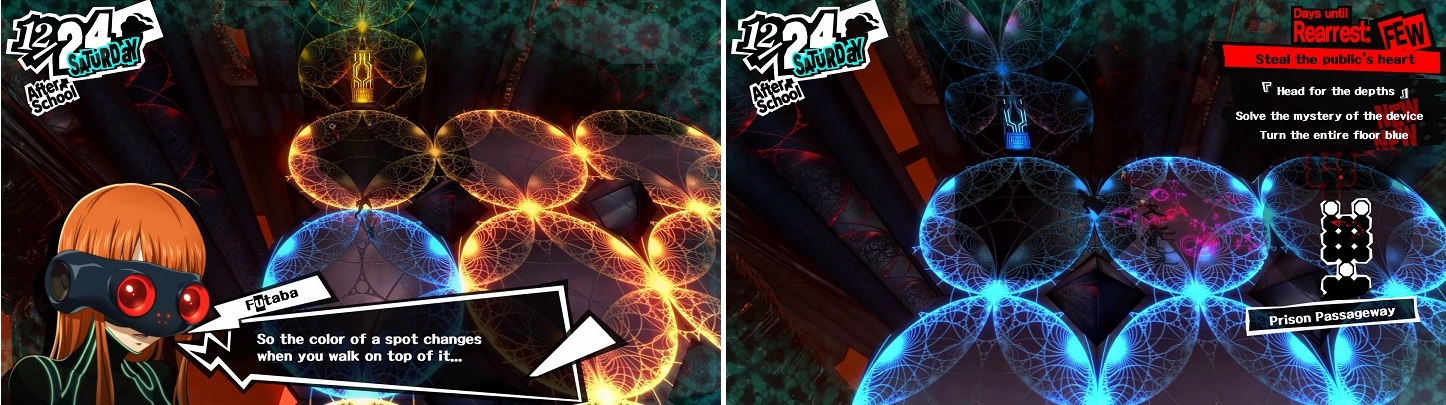
After the battle, continue north and you will eventually run into some kind of activation panel. Press it once to have the floor light up and you’ll have to press it again, which will shut it off. After turning it on a second time, Futaba will have you move onto one of the lights, which will make it turn blue. This little puzzle basically has you stepping on all of the lights and turning them blue, then returning to the panel and pressing it, which will lower a wall that allows you to continue on with the dungeon.
One possible solution for this first puzzle is from the panel, head east, east, south, west, south, west, north and north. Press the panel again to lower the wall and some guards will spawn behind you. As soon as you regain control, turn around and attack them so you don’t get ambushed. The enemies might be random, but in case they’re not, Wandering Revivers are weak to Bless skills, and the Hedonistic Braggart can only be knocked down by a critical from a physical/gun attack. In the area beyond the wall that was lowered, you can grab a chest with a Homunculus in it in the northwest corner (will take an insta-kill attack if the main character is hit by one).
Go through the door to the east and hop down the “stairs,” noting there’s an enemy at the bottom, so don’t get ambushed. Follow the path afterwards to a second light puzzle, where one of the lights will already be blue. There’s no difference here, so go the following route to open the next “door.” start by going east, then east, east, west, west, north, south, east, west and west. With the wall down, continue following the path west, taking care of the enemies along the way, until you come to a third light puzzle. For this one, start by going south, then south, north, east, south, south, north, west, north and north. Enter the door and navigate your way in the next room to the edge of the map, opting to go down when prompted.
Prison Passageway 2
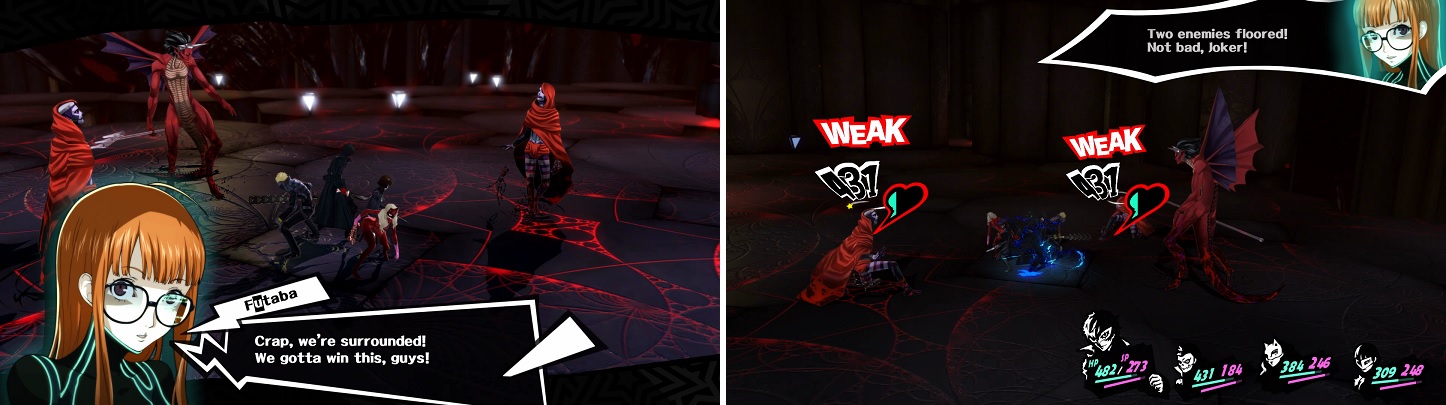
In this new area, you will encounter some familiar faces, but that is cut short by some guards ambushing your little reunion. Unlike the first encounter in the cell area, you will regain control shortly after the guards find you, so you will need to attack them before they manage to ambush you. Unfortunately, no matter what you do, you will have to do battle with three sets of enemies, but they should all be enemies you’ve seen before in this dungeon. Continue on after that, taking care of the enemies that are in the open, then climb the stairs, entering the door at the top.
Step onto each light to change them from orange to blue (left), with the goal being to turn them all blue (right).
You should spot an enemy with a red aura ahead of you and if your security meter is at 0%, you should be able to jump across the gap and easily trigger an ambush. As you keep going to the east, a Shadow will appear out of nowhere, so watch out for that. Go north, sticking to the eastern side of the map, and you will find a chest in the northeastern corner, containing a Bead Chain . The northwestern corner is a dead end, so venture the only other way you can, preferably ambushing the one enemy from a higher ledge when you can.
Enter the door just beyond to come to a new area, where you can drop down to find some more Shadows. See that small room near where you dropped down? That is a Safe Room and you can actually travel back to the beginning, where you can get a nice free heal from Caroline. Head back down to the safe room and be careful exiting it, as you might aggro the one guard just outside of it. There are two ways to go here, southwest or to the north, but you won’t be able to progress to the north yet, so go southwest to find a lone Shadow guarding some object.
Agree to fight it to encounter the Abyssal King of Avarice. This is a fairly easy battle, despite the enemy absorbing physical/gun/curse skills. However, it takes some good damage from all other sources and is also weak to nuke and psy skills. It knows Megaton Raid, which you will be familiar with at this point, as well as Gigantomachia, a party-wide physical attack that can deal some damage. Of course, this little mini-boss shouldn’t really get more than one attack off, so quickly finish it off. Grab the Vermilion Disk from behind the Shadow, then continue north.
You will come to another light puzzle here, but don’t activate the panel just yet. Instead, locate the gate in the middle and insert the Vermilion Disk you just acquired into it, opening up a space you can walk on. Now, activate the panel and go south first, then east, south, west (into the opened area), east, north, west, west, south, south, east, east, north, north, west, and finally north. Go through the door and use Morgana to head to the next area.
Prison Passageway 3
You’ll have another short scene in the first room here, with some guards coming to actually ambush you. The Wandering Revivers are ones you’ve fought already (weak to Bless), but the Missionary of Depravity should be new. This enemy isn’t weak to anything, but will block curse attacks. The Missionary knows fire attacks, as well as physical ones, so you know what’s coming from it. The best thing to do here is quickly take out the Revivers, as they know Brain Jack and will also buff the Missionary with Rebellion, which increases its critical hit rate.
Your first battle with the Missionary will be an ambush favoring the enemy (left). The Revivers are weak to Bless and should be taken out immediate (right).
The area beyond where you fought the Missionary will have quite a number of enemies patrolling it, including some new ones like the same Missionary you just fought (Belial). Watch out for the trio in the larger area, as they might be a little close enough to trigger a back-to-back battle. When you get to the next activation panel, don’t push it just yet, but look at the gap just west of the panel. It’s not marked on the map, but you are able to walk across this gap, which will prove important in solving the puzzle.
Also, there will be a new mechanic thrown in on this puzzle and beyond, which will be shown as white dots on each floor light. Basically, every time you move onto a piece of floor with a light, one of the white dots will disappear. If all of the white dots disappear and you haven’t arrived back at the activation panel, then you will fail that puzzle and have to start over from the beginning. You will get told this after failing once or solving the first puzzle with this mechanic. Now, go ahead and activate the panel, then start by going west across that previously mentioned gap, then west, south, south, east, east, north and finally north.
Enter the door after solving the puzzle and you will be in a new area, with a puzzle right there. However, you can’t solve this yet, so ignore it and head north, defeating the enemy in the way. Past the single Shadow will be another puzzle, which behaves similarly to the previous one, with the limitations and all. Note that this area has two similars in the floor, both of which will be used. Start by going east, then east (gap), east, south, north, south, west, west, west (gap), west, north and finally east. Beyond the door will be another Vermilion Disk, which can be used to do the previous puzzle you just skipped.
Head back there and place the Disk in the slot, opening the gate that will allow you to pass through east to west (and vice versa). Activate the panel now, then start by going east, then east, west, west, south, east, east, north, north, west, west and finally south. Watch the Shadow on the other side of the wall once it goes down, then jump down to the bottom, noting there are two more Shadows down there. Head through the door when you’re ready, eliminating the three Shadows patrolling the immediate area. Past those three enemies will be a series of light puzzles, three in fact.
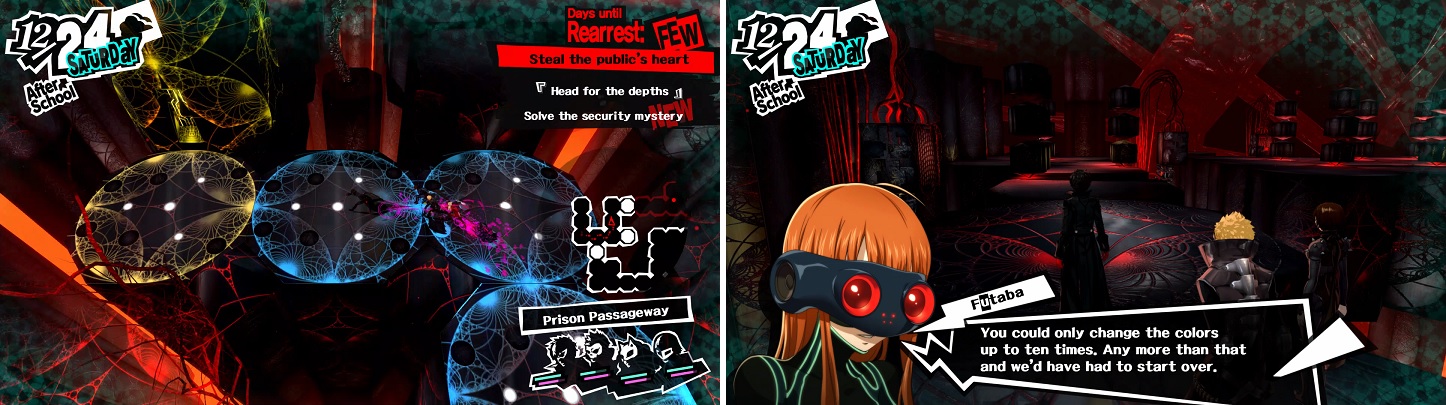
The light puzzles will have a limitation thrown at you later (left), with Futaba explaining that limitation after solving the first one (right).
It doesn’t matter what order you do them in, but to keep it simple, start with the eastern one first. Activate the panel, then go south, north, north, south, north, east, west and south. After you finish, go ahead and do the western puzzle next. Start off by going east first, then head east, south, south, west, west, north and north. The final puzzle will of course be the northern one. Activate the panel, then go west, south, north, west, south, south, south, east, north, north, north, and east. Exit to the north, using the Safe Room to go back to the beginning and ask Caroline for some sweet healing, then follow the path by the safe room to encounter some scenes and a boss.
| Puzzle # | Solution |
|---|---|
| Puzzle 1 | S, S, E, N, E, N, W, W |
| Puzzle 2 | E, E, E, W, W, N, S, E, W, W |
| Puzzle 3 | S, S, N, E, S, S, N, W, N, N |
| Puzzle 4 | Insert Disk, then S, E, S, W, E, N, W, W, S, S, E, E, N, N, W, N |
| Puzzle 5 | W (gap), W, S, S, E, E, N, N |
| Puzzle 6 | E, E (gap), E, S, N, S, W, W, W (gap), W, N, E |
| Puzzle 7 | Place Disk, E, E, W, W, S, E, E, N, N, W, W, S |
| Puzzle 8 (East) | S, N, N, S, N, E, W, S |
| Puzzle 9 (West) | E, E, S, S, W, W, N, N |
| Puzzle 10 (North) | W, S, N, W, S, S, S, E, N, N, N, E |
BOSS - Treasure of Mementos?
Well, this battle is a lost cause, as you won’t be able to actually win it. The boss’ only attack will be Arrow of Light, which only hits one character for some decent damage, so keep a check on your health. Once you deal enough damage to the thing, it will use Will of the People, shooting its health back to full. There will be a scene after this happens, then the fight will resume, where things will pretty much play out the same way as before. Once the boss turns gold, it will be over and a bunch of scenes will happen.
You’ll end up back in the Velvet Room, where more scenes will happen, as well as another “battle.” After this battle is over, continue watching (or reading) and the Fool Confidant will finally reach max rank. If you’ve done everything in the guide up until now, you should have maxed out all of the Confidants, earning you a trophy. Now, you will have to make another important decision that will affect the ending you receive. Take the offer and you will end up witnessing a bad ending, but if you refuse, then you will finally be on the True Ending path.


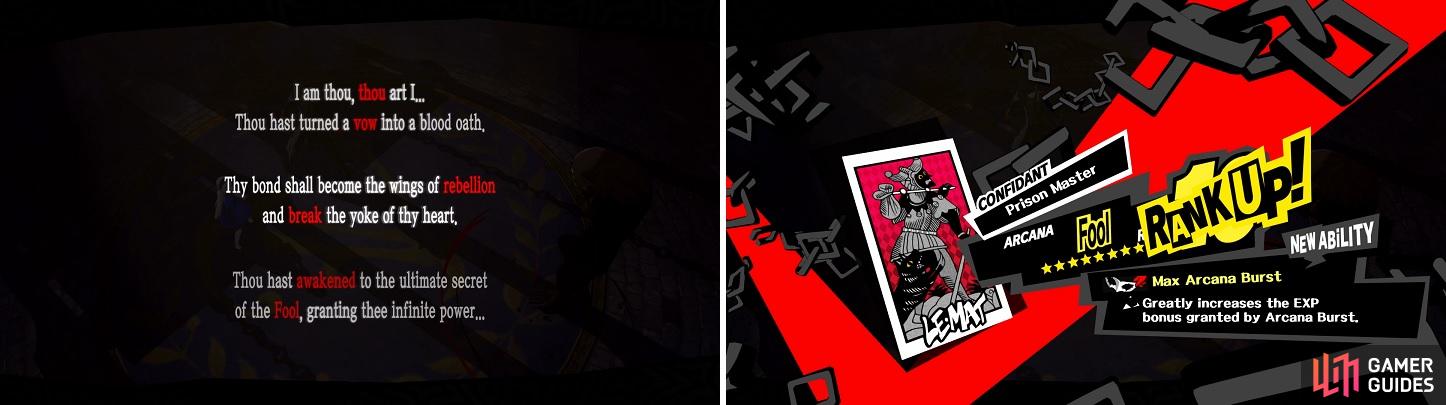
If you played your cards right, the Fool Confidant should be the last one you maxed out.
Some more scenes will happen, then you have to go and find your teammates. They will be located in cells at the end of the hallways, so speak with them (choices don’t matter) until you free them. Once everyone is free (someone seems to be missing), you’ll meet back up in the Velvet Room and learn some more about the story. When you’re ready to go, follow Morgana up the stairs and you’ll be back outside. Things are definitely winding down now.
No Comments