
Lower Port Hallway
Enter the big room, clearing it out if you want and you will find that three of the four doors are locked, meaning the only exit you can take for now is the southwestern one. Keep going south, as the other doors are locked, and you will find yourself in a small area with another statue switch. The two doors leading out of here are locked, so turn on the switch (it’s off from last time) and use the small vent near the southern locked door to go into the room to the west. You are still a mouse here, so you won’t be able to open the door to the north, but you can unlock the one door you bypassed.
Do that, go turn the statues off, then take the door in that room you were just in before. Unlock the door just to your east, then continue west, clearing the hallway of any enemies. The room that is in the northwest corner of this area here has a small vent on the southern side, which can be used to reach the small isolated hallway that’s behind a locked door. So, you will need to double back to the switch, hit it, then return to the room already mentioned to get through the vent and grab the chest with a Spirit Choker . With that out of the way, you can continue on with the Palace.
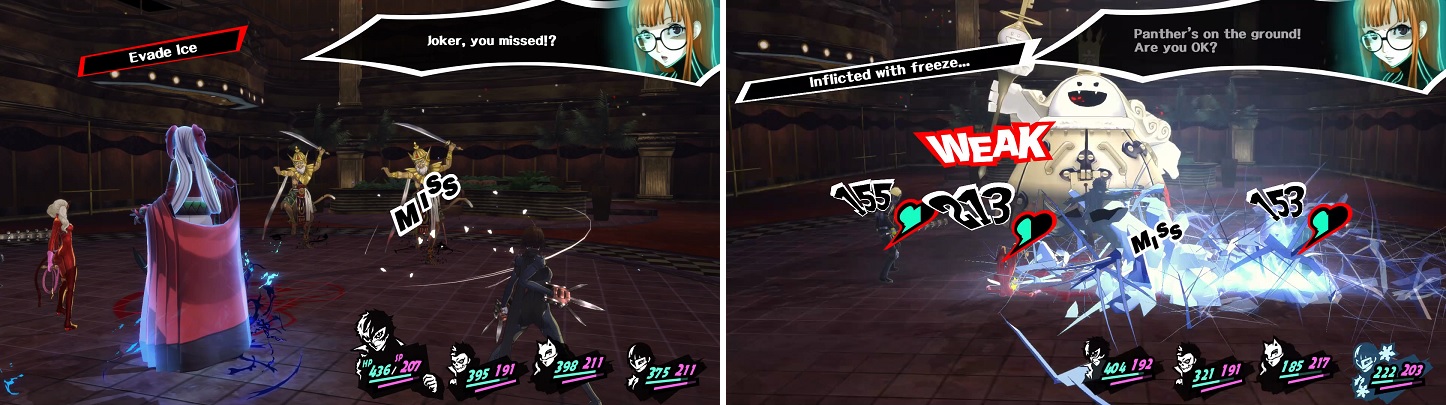
The Hanuman shadows are weak to ice, but they also have Evade Ice (left). King Frost has no weaknesses and can blast your party with Mabufudyne (right).
From that room where you crawled through the vent as a mouse, head east and follow the hallway to another door you can unlock, then go north from there. Keep going and you’ll eventually reach the northwestern room, which has another switch for the statues. Hit it if the statues aren’t on, then double back east a tiny bit to spot another vent you can go through. Watch out for the wandering Shadow in the room below and once you take care of it, unlock the door to your west. With that now unlocked, disable the statues and go into the eastern room with the one enemy (time your entry to get an ambush).
Unlock the door to the adjacent room, then return to the switch and hit it again to turn the statues on. Now, head to the middle room and enter the right room from it, where you can crawl through the small vent to get into the upper hallway. Head to the room to the southeast of your current position and you should now be able to crawl through the vent, into the hallway to the east that you couldn’t get to before. You can finally unlock the one door to your south and enter the big room as a mouse. Carefully navigate your way to the southern end of the room, where you find another vent for your small stature. Don’t forget to shut off the statues using the switch here, as well as unlock the door to the north, before you board the elevator.
Mid Port Hallway
The elevator will bring you to the Side Deck area, where you might notice another duct to your east. However, this is an exhaust duct and you can’t crawl through it, so ignore it and continue west to a Safe Room. As you go west, the Cleaner will appear once again and send three Heretic Goats after you. These are the same ones as last time, so whip out your Bless skills to quickly take them down. Once the battle is over, head to the end of the dock and enter the door to come to another area with more mice-inducing goodness. This area is a little more compact, though, so it shouldn’t provide too much trouble.
Head into the first room and if you go west, you will become a mouse, meaning you can’t progress because of the doors. So, from the first room, go north and use the small vent on the west side to get to a non-mouse room, being careful of the enemy Shadow patrolling. From there, go west another room (mouse), then south through a vent, and unlock the door there. Return to the middle room of the second from the bottom row of rooms, going west and then north. The northern door here is locked, so continue east two times and north into the northeastern room, which has the statue switch.
Unfortunately, don’t press it yet, as that will cause you to get stuck for now. Instead, from the room with the switch, go south one room and west once, passing through the vent on the northern end. You can unlock the one door on the western side and then go back to shut off the statues, which will make things a little easier briefly. Make your way back to the northwest corner to find another elevator, which will bring you to back to the Central Hall, near where you entered the restaurant area.
Finding the IT President
Hmm, you’ve pretty much been all over the ship, but you haven’t found any inkling of where the IT company president is located. Since he is a shut-in, you can use the fact that he needs to have food delivered as your ticking into his room, so go back to the dining hall and look for a waiter inside that will spill the beans about his location. It appears he is located above the Side Deck area, so head back there by either retreating to a safe room and fast travelling, or by doubling back through the Mid Port Hallway.
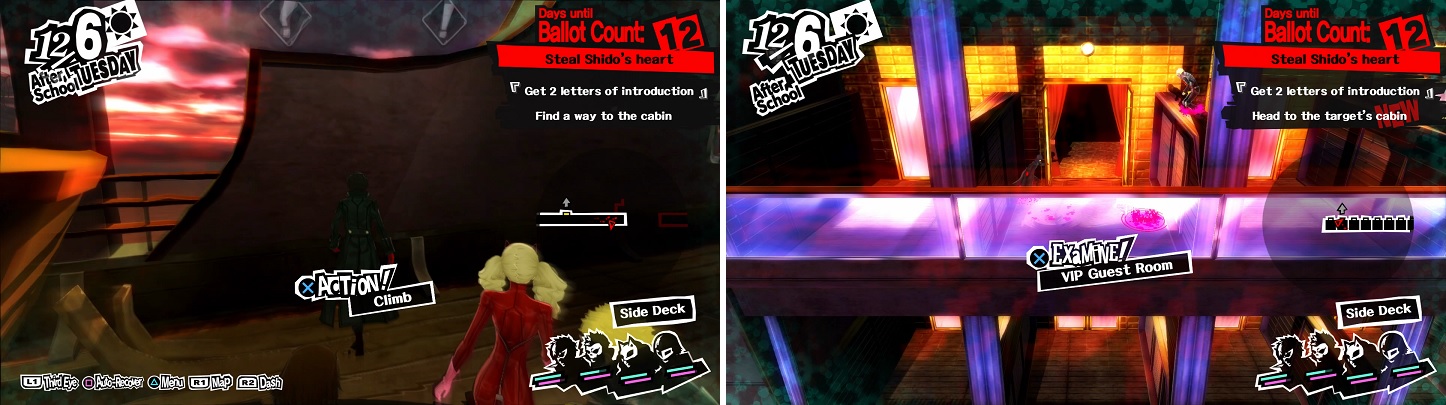
You will be able to climb your way to the IT President’s room on the side deck area.
Note that there is an enemy Shadow patrolling the Side Deck now, which you will likely need to defeat to get to the duct with the foul-smelling odor. Just across from that, if you use your Third Eye, is a spot where you can climb up to lead you straight to the IT president’s room. Watch the scene that occurs and get ready for another mini-boss fight. This fight can be very easy, as you can manipulate the Shadow IT President into pretty much not attacking a single turn. The reasoning behind this will be the two Scandalous Queens that accompany him.
Knock down the President with a nuclear skill (he’s weak to those), then use psy skills on the Queens to knock those down, allowing you to initiate an All-Out Attack, which should hopefully finish off the latter enemies. This will make the IT President waste his turns by summoning more of them, so you can repeat this process ad nauseum until you finish the fight. The IT President will be the fourth letter of introduction, so there is one more left, the Cleaner’s.
Exit the room by climbing back down, making sure to go and save at the nearby safe room (heal both HP and SP here), then go through the vent to make your way to the Engine Room. As soon as you drop down, you will be right by the Cleaner, who will send another group of Heretic Goats for you to fight (four this time). Do the same thing as every other time. It seems the Cleaner has run off again, so give chase to find a locked chest ( Bead Chain and Diamond ) and the Cleaner in a room you can’t access. Go around to the side room, climb on the boxes and go through the vent to finally reach and fight the Cleaner.
BOSS - Shadow Cleaner
For what is essentially a mini-boss, the Cleaner can be a troublesome fight. He gets two actions per turn, usually using one of those turns to apply a debuff (Rakunda) or buff (Tarukaja). He doesn’t have any resistances or weaknesses, so just use whatever attacks you want, preferably your strongest ones. As for his attacks, he has Maeigaon (Curse skill), so try not to have a Persona weak to that on your main character, Myriad Slashes, and Mudoon. He also uses Foul Breath, but none of his attacks have ailments attached to them. The biggest problem will be Mudoon, as it instantly kills a character, but they might be able to endure it thanks to their Confidant bonuses.
There’s not really much to say beyond the above, as the battle is fairly straightforward. Use Marakukaja to boost your defenses and Tarunda to lower the Cleaner’s attack; you can also use Sukunda to lower his accuracy/evasion and Rakunda for defense, but attack is the main priority here. Around 50% of his health, the Cleaner will upgrade Rakunda to Marakunda, meaning your whole party’s defense will be dropped. He will also upgrade to Stagnant Air, which is useless considering the above mention with Foul Breath, and Heat Riser, which boosts his attack, defense and accuracy/evasion, so make sure you debuff those as soon as possible.
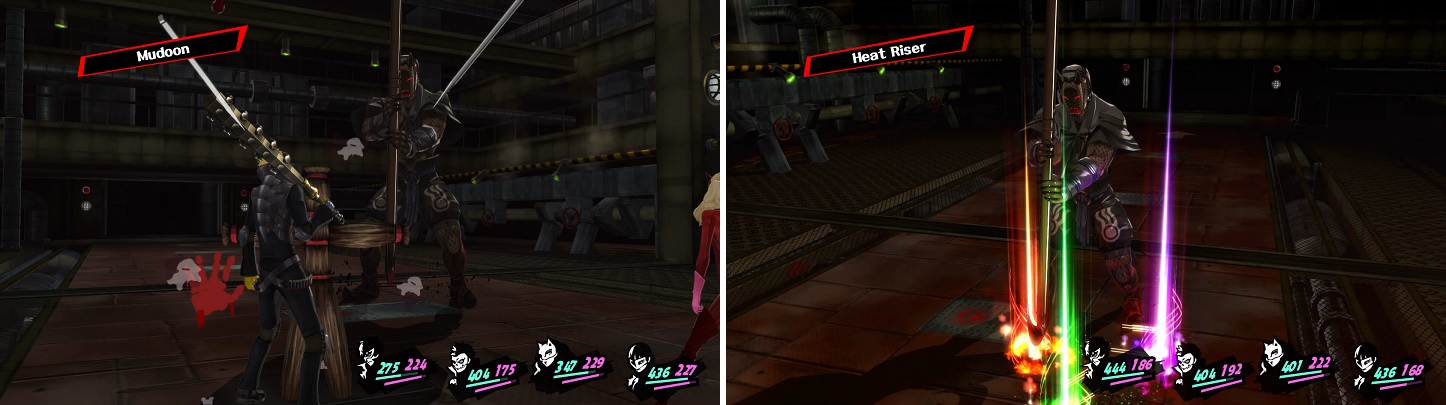
The Cleaner can instantly kill a character with Mudoon (left). Make sure you debuff him if he happens to use Heat Riser (right).
Once you take care of the Cleaner, he will just go off without much resistance, and you will have gotten your final letter of introduction. Before you leave this room, make sure your health and SP are full (or pretty high), then go to exit. As you are leaving, you will run into a familiar face and have to fight two powered-up normal enemies. The Traitor will use Call of Chaos to make them stronger and the enemies will use Desperation to increase their attack, but their defense will drop. They will only attack physically, which will hurt a lot, but you can attack using whatever skills you want, as they have no weaknesses/resistances. Equipping a Persona that nulls or repels physical attacks can be good here. After winning that fight, it’s time to battle the Traitor themself.
BOSS - The Traitor
The Traitor’s attacks might be a bit familiar to you in this battle, and you are free to use whatever skills you want, as you don’t have to worry about resistances or weaknesses here. You’ll see skills such as Kougaon and Eigaon, as well as Megaton Raid. Once the boss’ health gets lower, they will begin using Charge in conjunction with Megaton Raid, as well as Megidolaon, which is Almighty damage against the whole party. This fight is fairly easy, but make sure you’re healed up near the end, as there will be another battle.
BOSS - The Traitor (Part 2)
Welp, the Traitor is certainly a lot stronger and gains a lot more attacks, as well as being able to attack twice per round. The fight kind of takes place in three phases, with the first one being the phyical one. The boss can use Tetrakarn to block a physical attack, so it’s a wise idea to have a Persona who can block physical attacks so you can disable the Tetrakarn. This lets characters like Ryuji or Yusuke use their physical attacks on the boss without having to worry about healing the damage caused by the reflection.
For the first phase, the boss has Brave Blade (single target), Deathbound (party) and Negative Pile (single target). The biggest problem is Negative Pile, as it can possibly inflict Despair, which will not only deplete SP each turn, but will kill the character on the third turn. The boss can also use Desperation, which you might recognize from the double demon fight right before fighting this person, but it seems the boss tends to only use this if they manage to inflict a critical hit on a character.

Equip a Persona that nulls physical to get rid of the Traitor’s Tetrakarn (left). When the Traitor uses Desperation, you can do some major damage to them (right).
Once the boss’ health reached around 60% or so, they will switch over to phase two and begin using a second set of skills, revolved around magic. There is Makarakarn, which repels one use of magic, but it will be easier to break since your party members should be able to block their own element (thanks to maxing out their Confidants). You will also see Eigaon, Maeiga and Maragion, all of which are skills you should be familiar with at this point in the game. The only things you have to be careful is not using a Persona weak to curse skills, as well as fire skills (Yusuke is also weak to fire skills, so watch out if you’re using him).
Eventually, the boss will unleash their ultimate attack at around 20% or so of their health. They will waste a turn glaring at Joker, then use Laevateinn on the subsequent turn, dealing pretty good damage against Joker only. As usual, using Tarunda and Marakukaja in a combo will help reduce the damage done by the boss, and should be the number one priority for buffs, although Rakunda will definitely help chip away at the boss’ health a lot more quickly. Don’t be afraid of using some SP items, in case you’re running low on it, thanks to having to basically do three boss battles in a row.
When the Traitor has finally been put down for good, watch the scenes that unfold after the battle. You will finally be finished with the exploration section of this Palace, so you can head back to the entrance and leave if you want.
No Comments