Head straight for the galleon and then climb the ledges up for a view of the whole ship graveyard. Turn right to follow the edge of the cliff and climb the ledges of the cliff on the right and then turn around and jump to the porous wall to find the Jade Flower Pendant .
You can now follow the path until you spot Sam running from Nadine’s men.
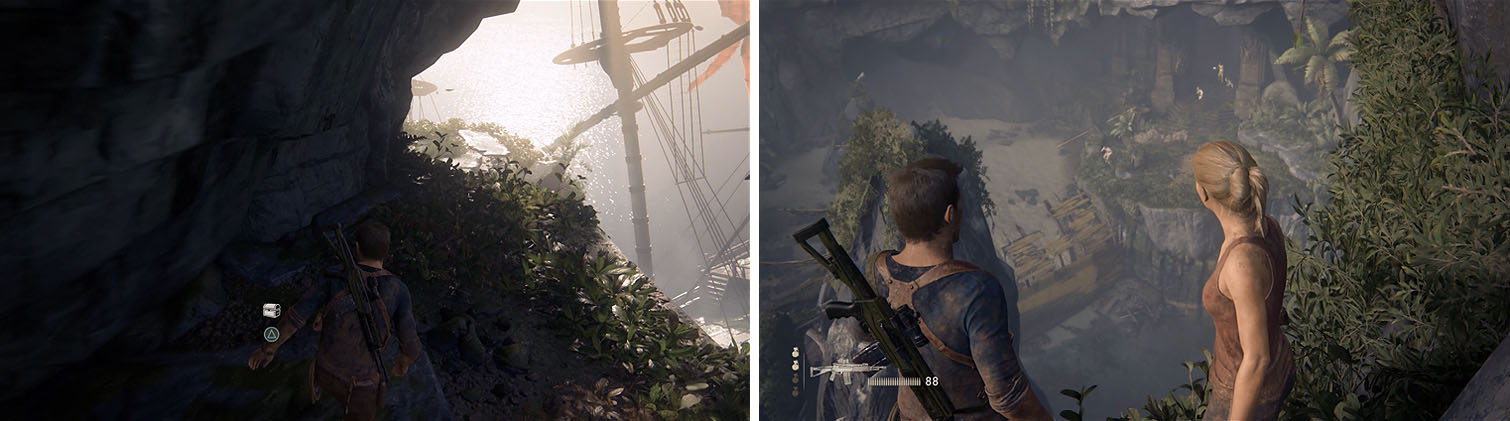
Make sure to get the treasure and then continue until you spot Sam.
Two men will appear on the ledge below you, so perform a vertical takedown of the first and then melee strike the other.
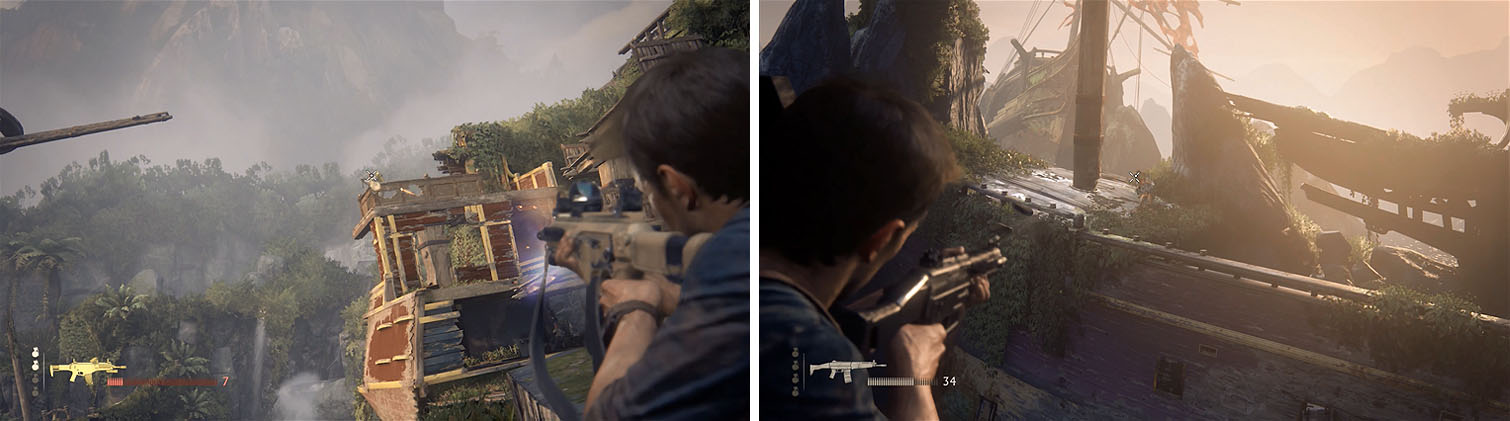
More enemies appear on the deck of the galleon below. Use the crate for cover or the wooden fence on the platform to the right as you fire on the enemies below, taking the sniper out on the upper deck of the galleon.
The cover will blow apart under heavy enemy fire and you’ll need to move down the platforms on the opposite side of the rocks to find more cover. Advance toward the front of ship and take cover behind the sandbags or the cabin and prepare for a second wave of enemies.
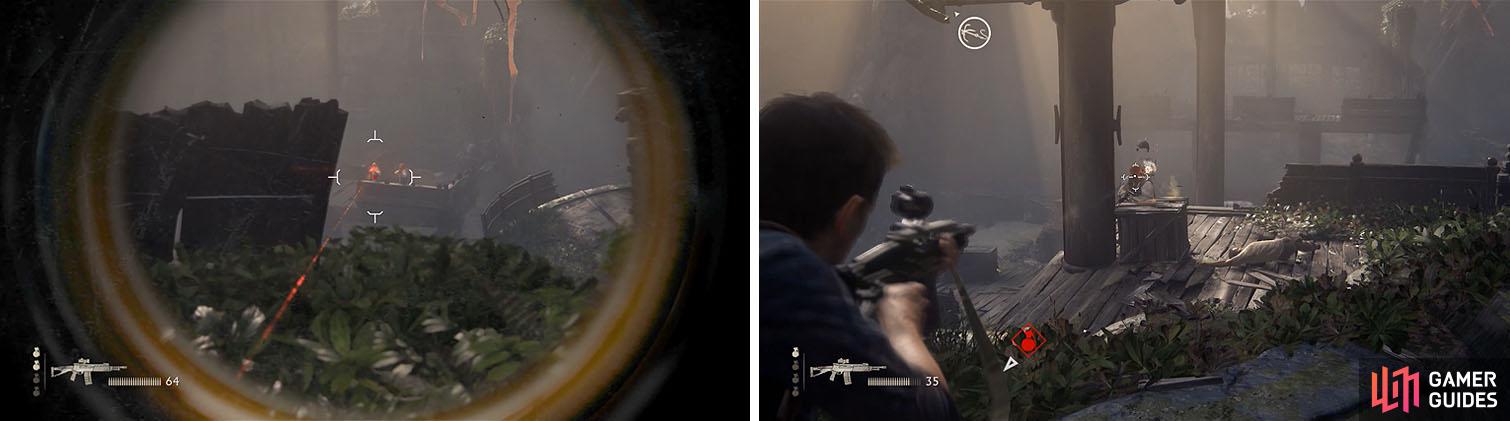
Focus on the sniper first with a scoped weapon, if you have one (left). The remaining enemies can be taken out as you advance forward (right).
Watch out for another sniper while you toss grenades at the two heavily armored enemies with the DShK and then take out the minor enemies.
Once the area is clear you’ll want to take a moment to grab the Barok .44 on one of the crates and the China Lake GL from one of the enemies in the water and then enter the hull of the next ship.
Take cover next to the pillar and attack the enemy on the upper level, who also carries a grenade launcher, and then focus on the armored unit with the shotgun. The remaining enemies can be taken out with simple handguns and make sure to pick up the China Lake GL from the enemy’s body on the upper level before you head to the back of the ship.
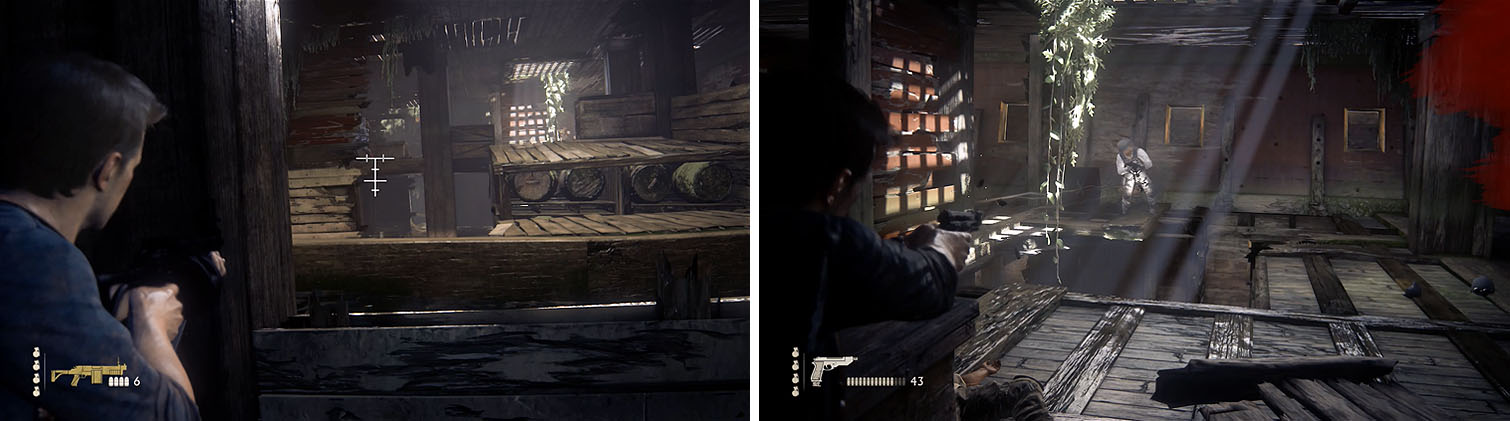
Take out the enemy with the grenade launcher on the upper level first (left) and then deal with the remaining enemies (right).
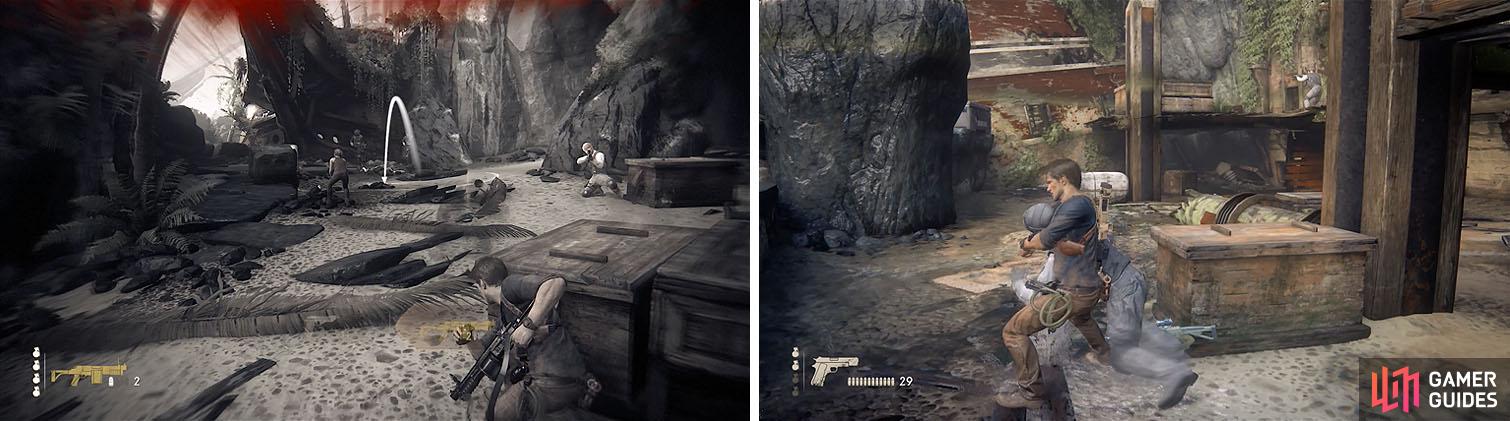
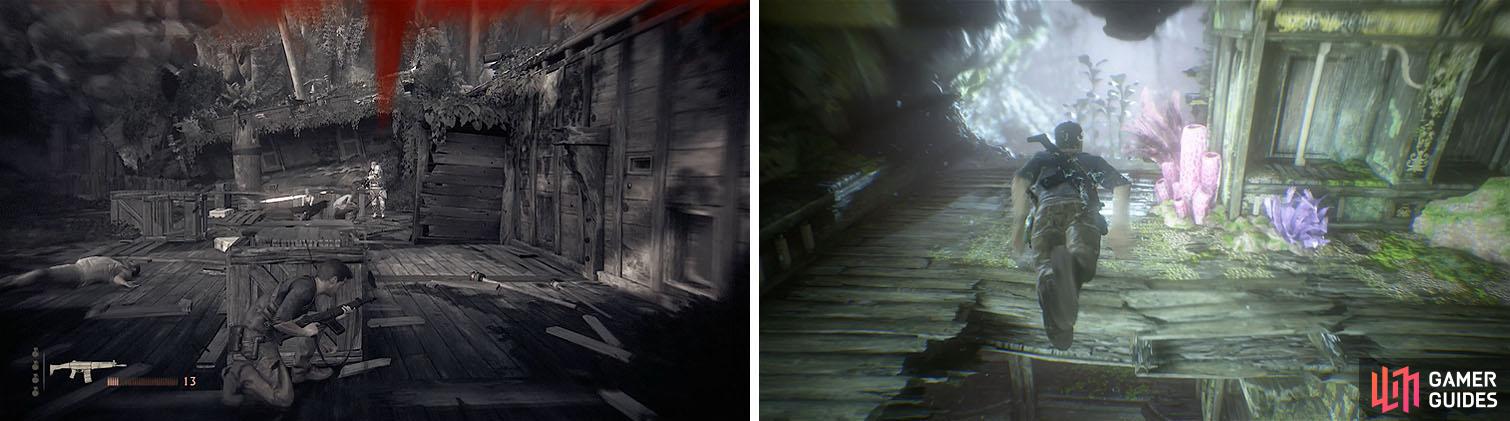
Raise the beam and fire a grenade at the enemies running after Sam, who will turn around and see you no matter what you do, and then take cover behind the crates. Reinforcements including two shotgun enemies will drop down from the bow of the ship in the back of the area, so deal with the armored units first before they get too close and then finish off the minor foes.
You can now jump over the rocks behind the ship to spot Sam and then enter the fight by stealth attacking a few enemies. You’ll only get to kill a few before you’re spotted, so finish off the remaining enemies with gunfire and then grab the Barok .44.
Watch out for the shotgun reinforcements (left). In the next area try and kill some enemies with stealth (right).
When you climb up to Sam a RPG will tear through the ship’s deck and place you right in the midst of some heavy hitting enemies. Take cover in the cabin and use the Barok .44 to get rid of the RPG first, as you can’t easily progress with him firing on you, and then exit and hide behind the ledge just outside.
Advance forward while dealing with the other enemies and make your way to the RPG that was dropped by the enemy. Use the RPG to take out the enemies with the grenade launchers on the opposite ship, but make sure to save at least one for the upcoming battle.
Deal with the RPG enemy to advance (left) and then target the enemies on the opposite ship (right).
Cross to the other galleon via the mast or by swinging across with the grappling hook and quickly take cover behind the crates on the left. A number of enemies and a DShKs will fire on you from the upper level, so use grenades and the RPG to take them out quickly.
Another wave will enter the area, but ignore them and follow Sam and Elena and then run for your life until Nate is separated from the others.
Swim through the hole in the ship and up to the surface for a breath and then dive again and head through another hole on the lower level and surface once again. There’s no time to stop as the ship is sinking quickly, so when Nate automatically dives back underwater swim straight through the hole that the camera is pointed out to eventually exit the ship.
Defeat the DShK with grenades or a rocket launcher (left). You’ll then need to swim through the hull of the sinking ship (right).
When you exit you’ll be on a beach with a number of enemies. Try and get as close to the shore as possible before you’re seen and take cover behind the crates.
You’ll want to advance along the left part of the area to a small ledge with some Shoreline crates, as hanging back will result in a turret truck firing on you while you try and advance after defeating the first wave.
As you reach the crate a group of enemies should drop down on the opposite side of the area in one large group, ideal for tossing a few grenades, and the turret truck will move forward. Once the enemies are cleared you can rush over to pick up an RPG from the crates where they dropped down and fire upon the truck.
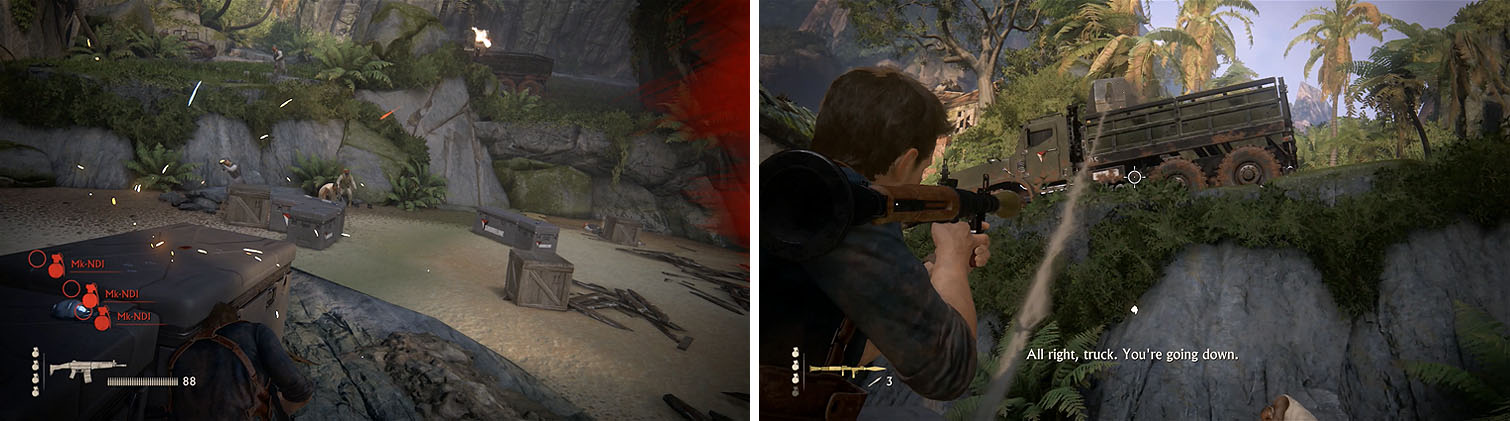
When you reach these crates a group of enemies will drop down (left). Grab the RPG nearby and shoot the turret truck for some revenge (right).
Enter the building behind the truck and another will join the fight. Climb the building and run away from the truck until you can take the stairs on the left.
Head up the tower on the right when you hit a dead end and then jump to the adjacent roof when it begins to fall. You’ll need to run toward the camera until the truck busts through the wooden platform and then grapple the beam when the camera returns behind Nate to cross to another platform.
Keep moving through the alley as the truck races after you - this guy has to be the worst driver ever - and then fire the RPG at it when Sully tosses it down.
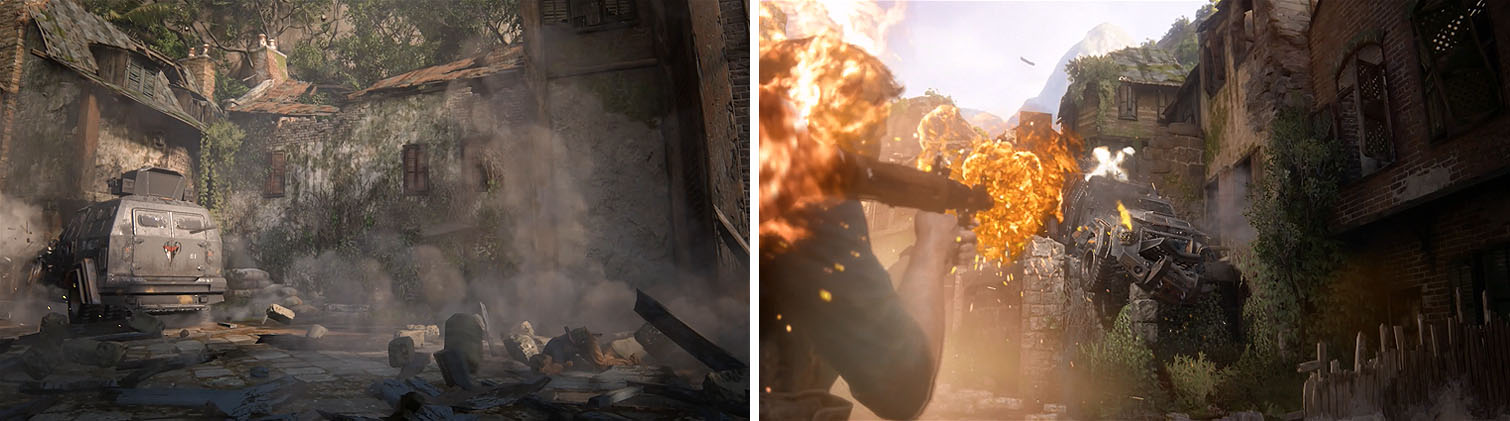
Run away until you encounter Sully and then finish off the second truck.
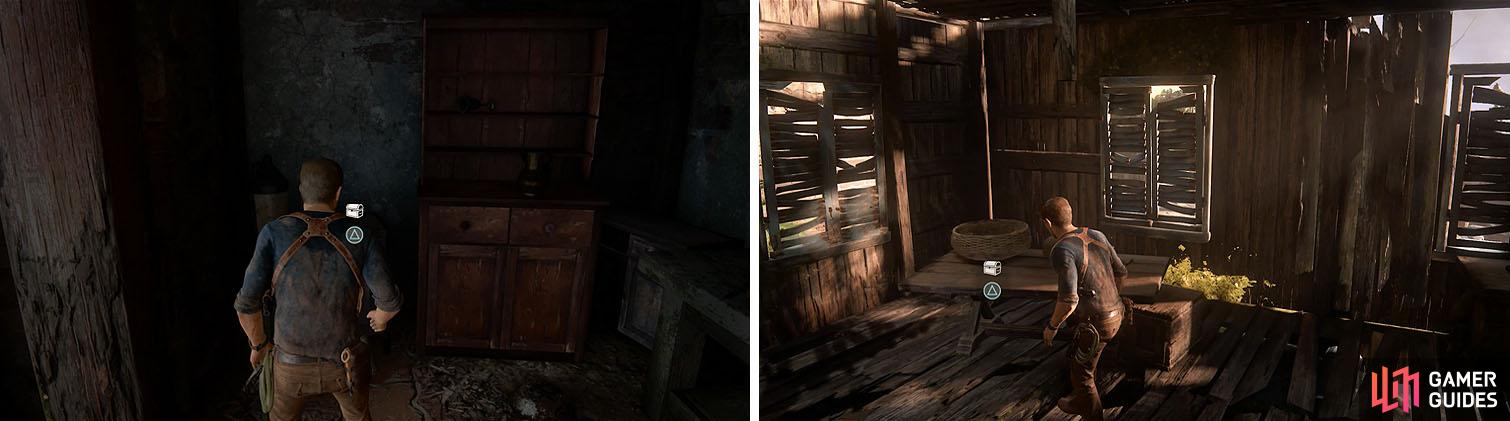
Jump up to Sully for a scene and then follow the group down into another part of the colony. When you head down the stairs make sure to circle around to the left and enter the building to find the Stoneware Bearded Jug inside and then follow Sully to get a view of the plane.
Drop into the water and pass under the collapsed bridge and then pass through the supports on the right. There’s a hole in the bottom of the building that you can climb up to collect the Stout Jade Vase and then drop back into the water and continue right up the stairs.
Don’t miss the two treasure in the colony after regrouping with the team.
You’ll need to push the cart to reach the ledge above and then enter the building and climb up the crates to drop through the window on the upper floor.
Examine the lift and the platform across the way and then wait for Sam to suggest moving the large beam to jump to the platform. Grapple the bottom of the lift and pull the team across and then swing out and pull yourself up to the metal bar. You can now swing to Sam’s hand and jump left to reach solid ground again for a short scene.
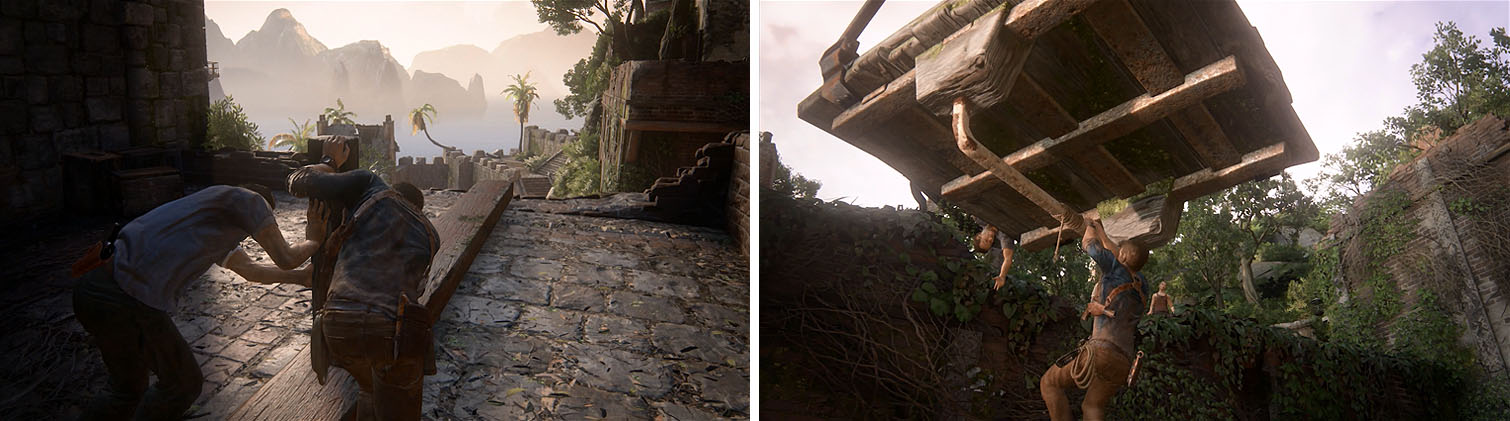
You need to push the beam to get to the adjacent platform (left) and then rappel up the rope after getting the group across (right).
Pass through the arch and enter the second building on the right to find a Journal Note on a table in the second room and then enter the third building and head upstairs to find the Painted Spouted Vase .
Exit into the plaza with the statue and enter the broken wall of the building on the other side of the street to find the Mughal Perfume Bottle and then push the cart to complete the chapter.
No Comments