
How to Defeat all Bosses within Zelda: Link’s Awakening
This page will give you in depth guidance on how to defeat every Boss within your adventure through Koholint Island.
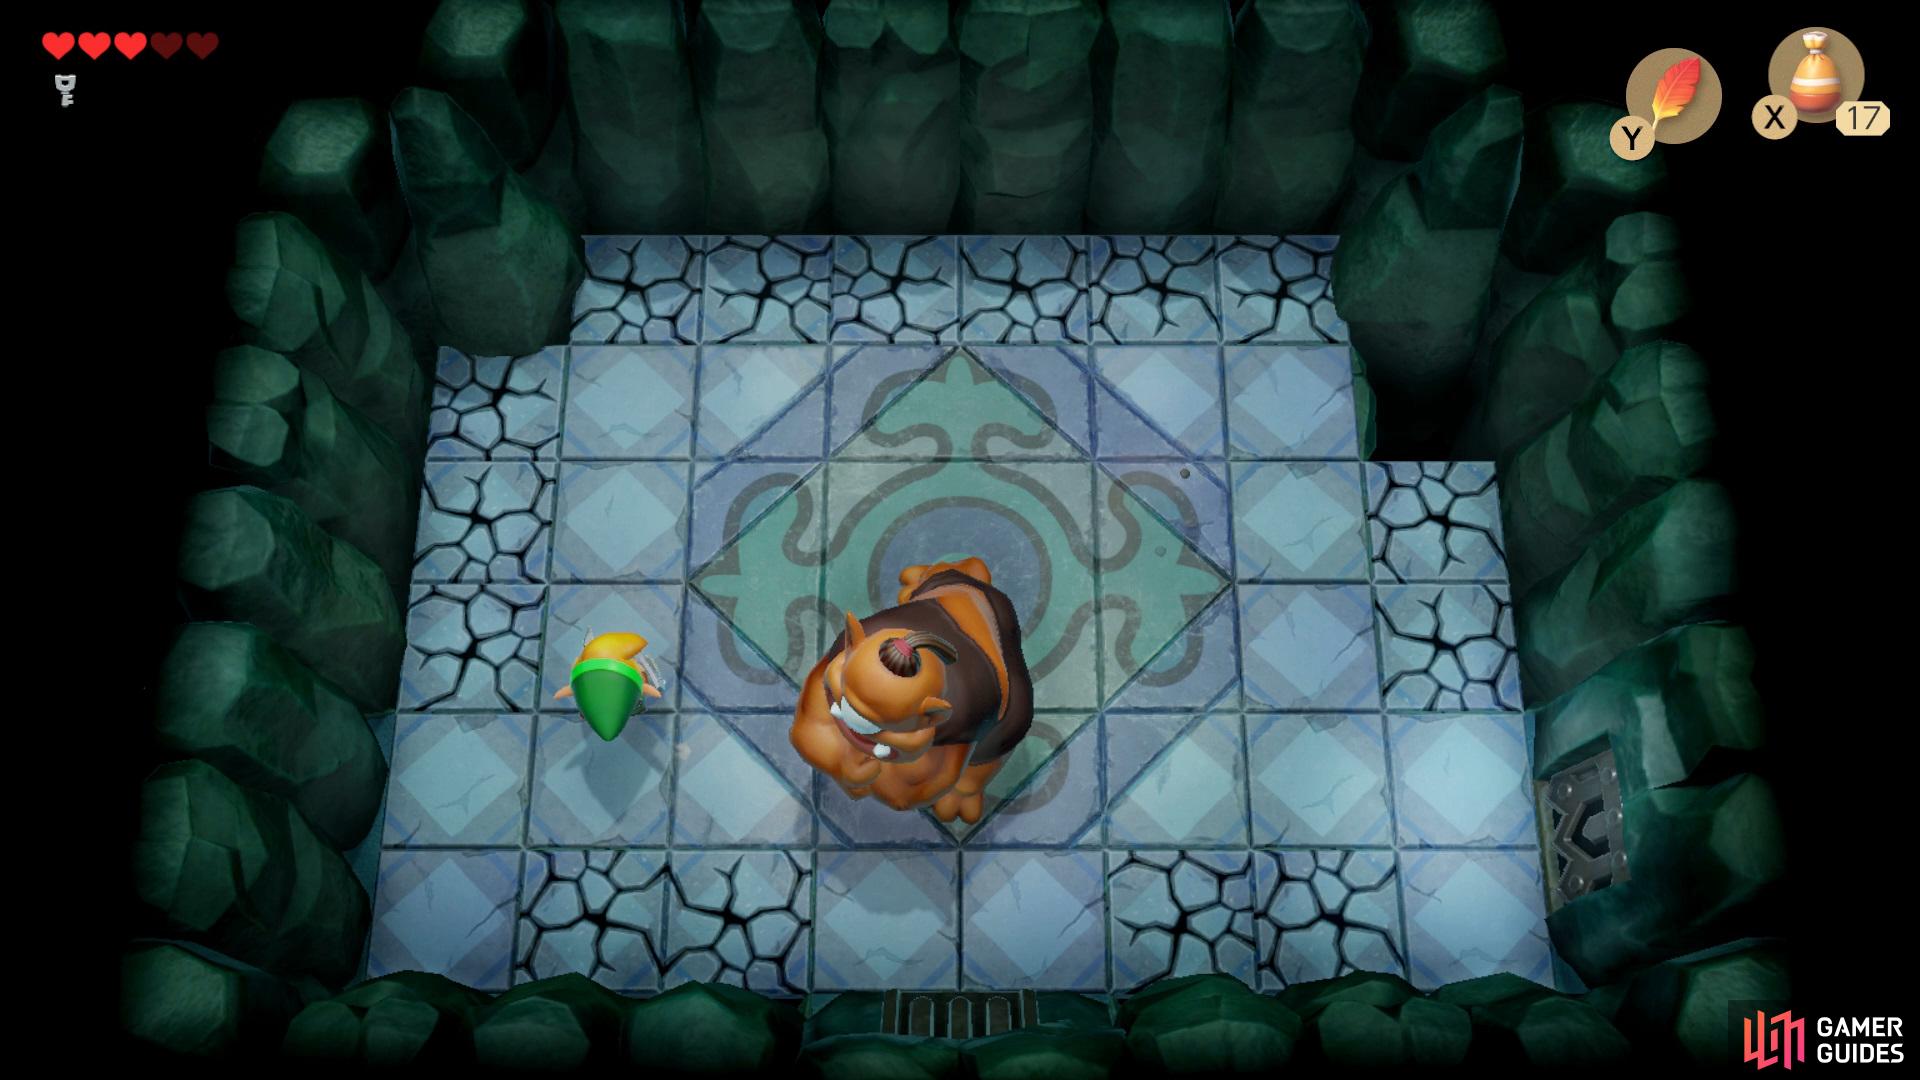
Tail Cave
Mini-Boss: Spiked Roller

(1 of 2) Wait for the boss to push a column towards you and hop over it,

Wait for the boss to push a column towards you and hop over it, (left), then go in for a couple of swipes at him. (right)
Inside you’ll face off against this dungeon’s mini-boss, in order to beat him you’ll need to wait for him to push a spiked column towards you and hop over it, which will now open up a chance to get a couple of hits on him, repeat this a couple times to kill him.
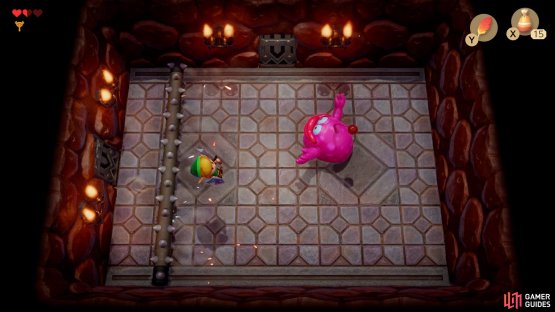
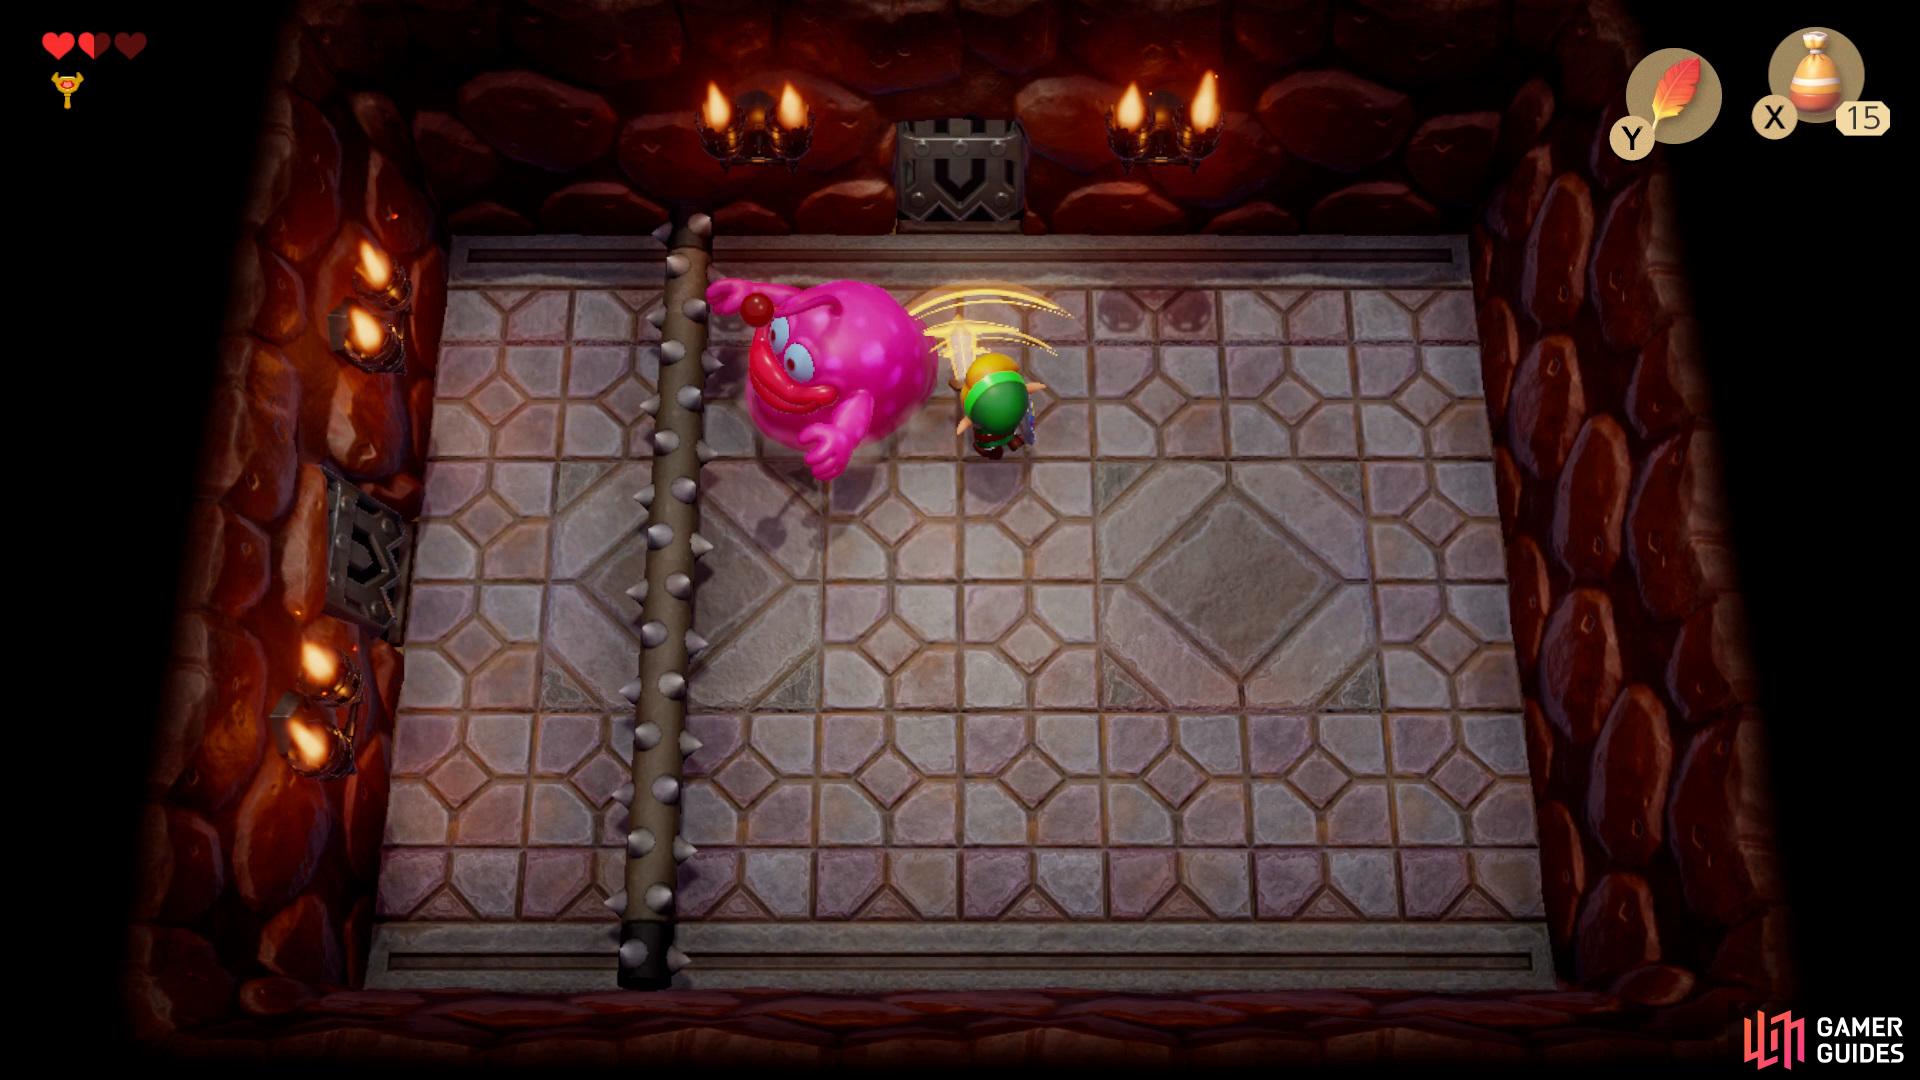
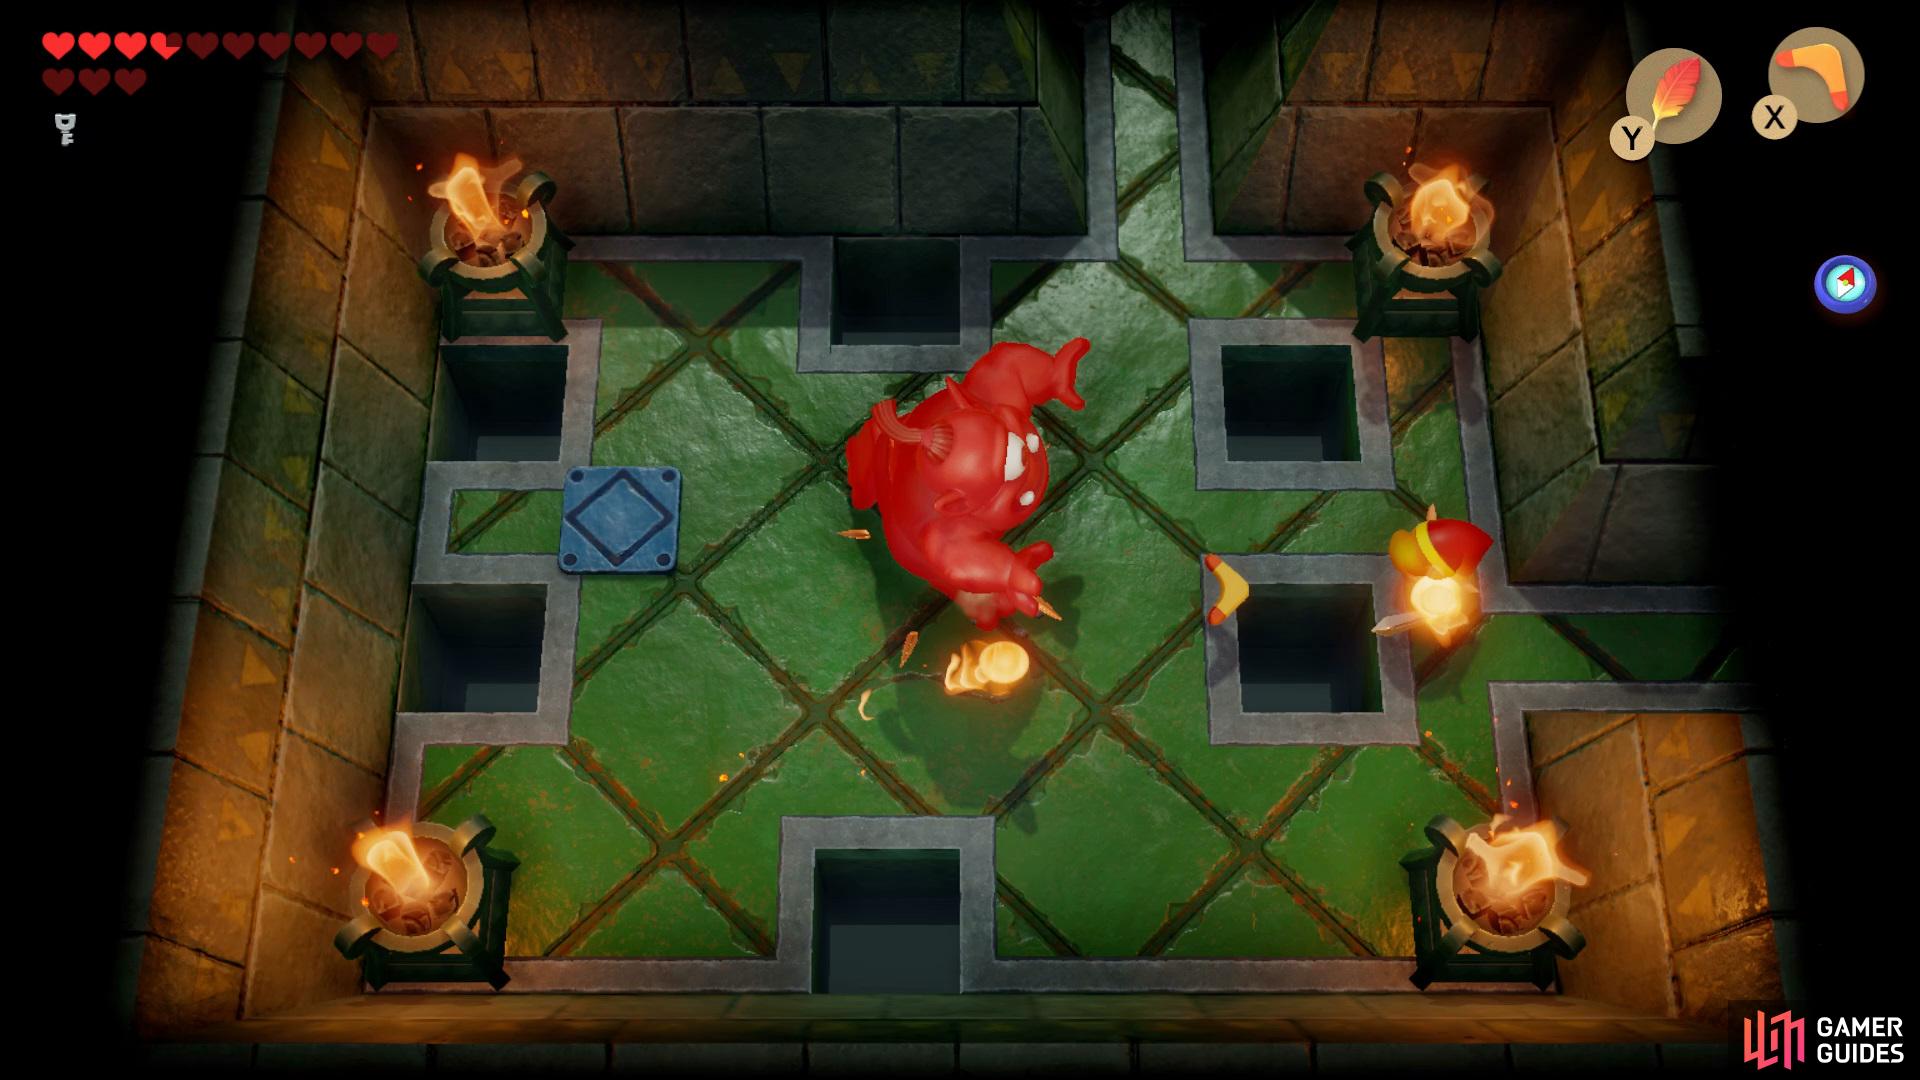
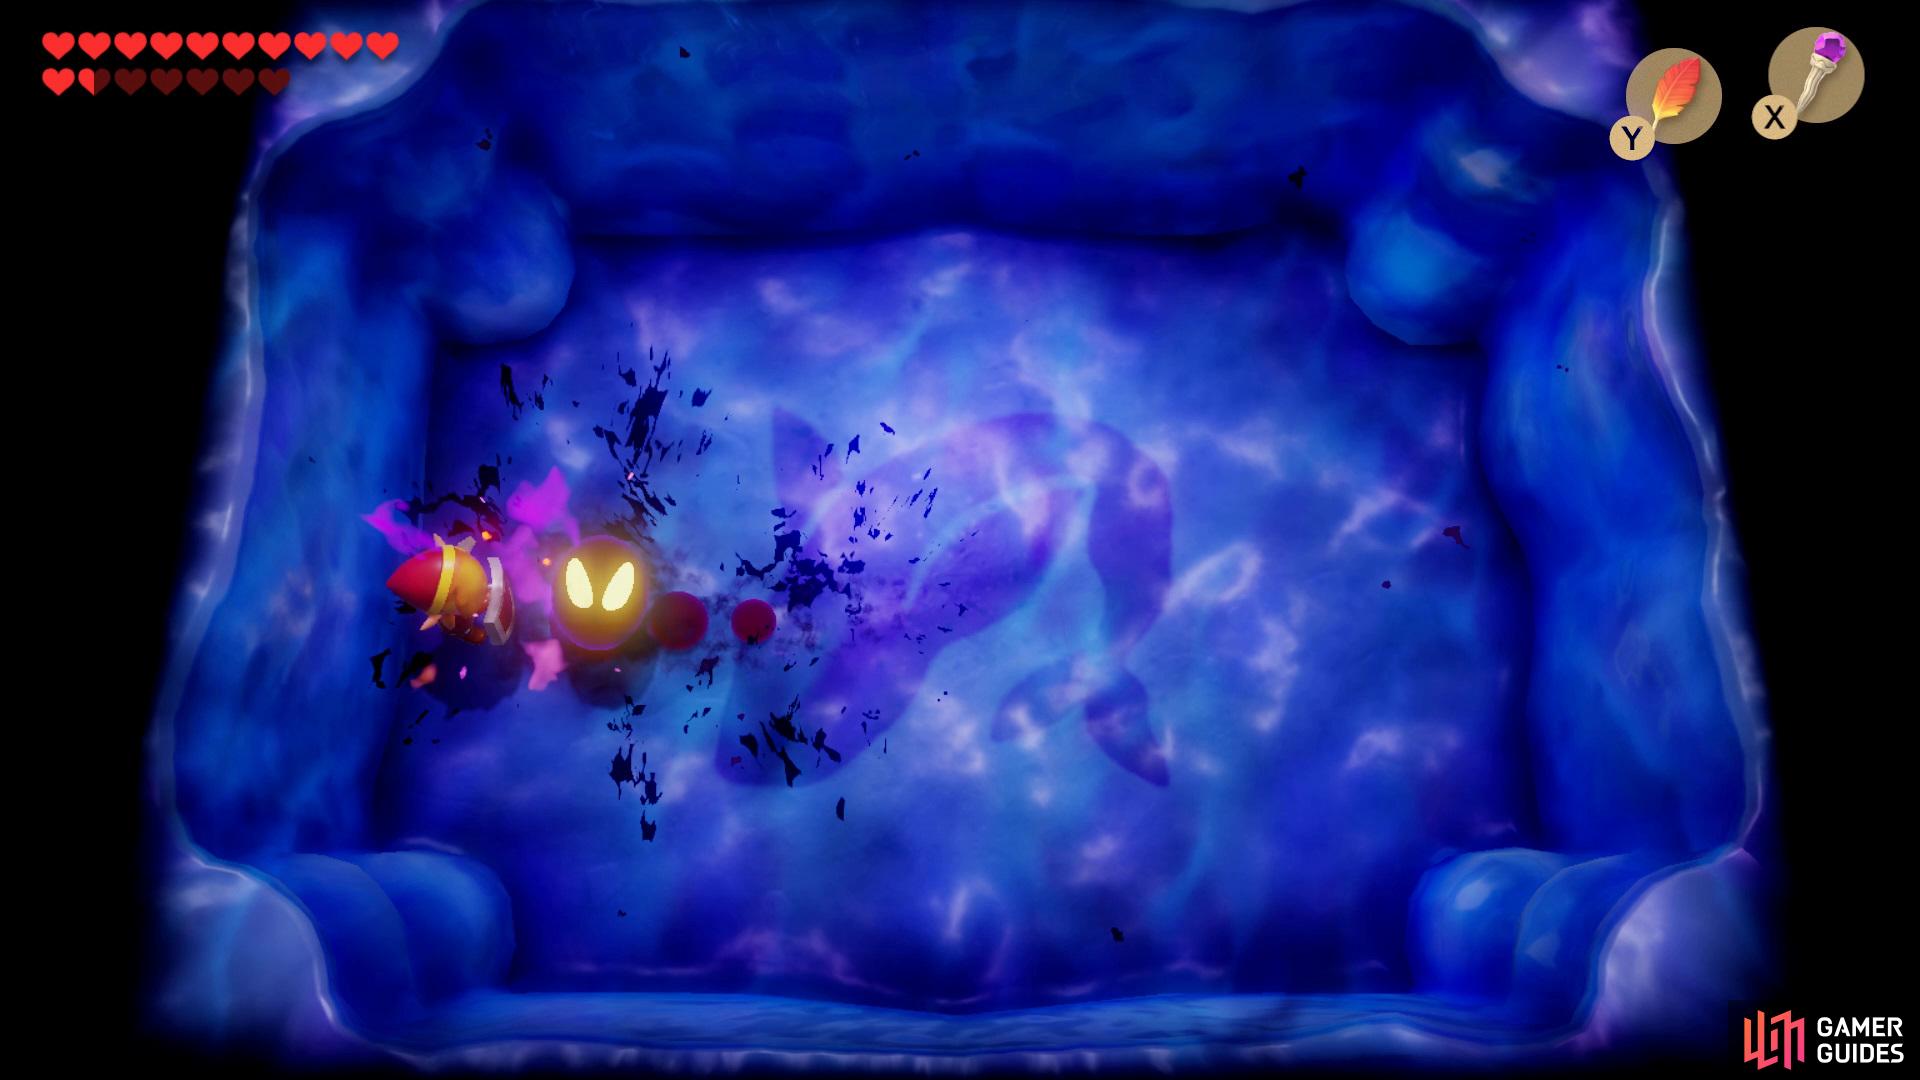
Boss: Moldorm


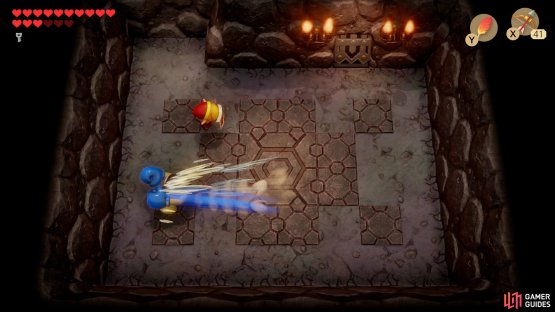
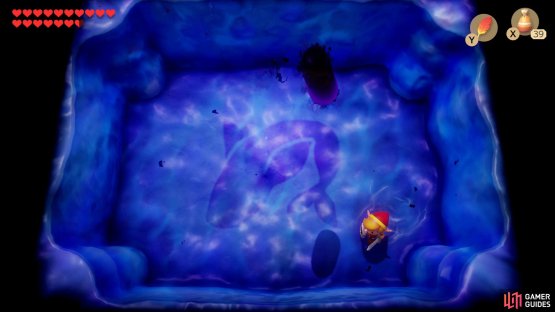
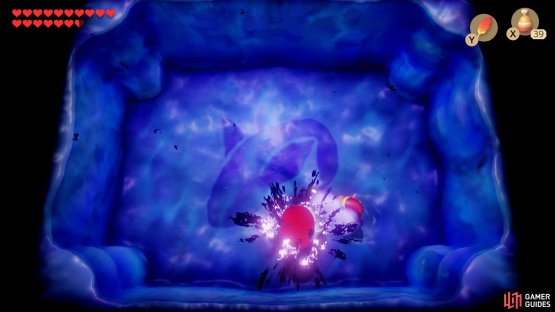
(1 of 3) Keep your distance from Moldorm until the end of his tail is red,
In order to defeat this dungeon’s Nightmare you’ll need to keep your distance until you see the small purple part at the end of his tail, quickly run to it and get a couple of hits and Moldorm will cover it temporarily, wait until it’s back and strike it again. You’ll need to repeat this four times to kill it.
Bottle Grotto
Mini-Boss: Hinox


(1 of 2) In order to defeat Hinox you’ll need to keep moving around the arena,
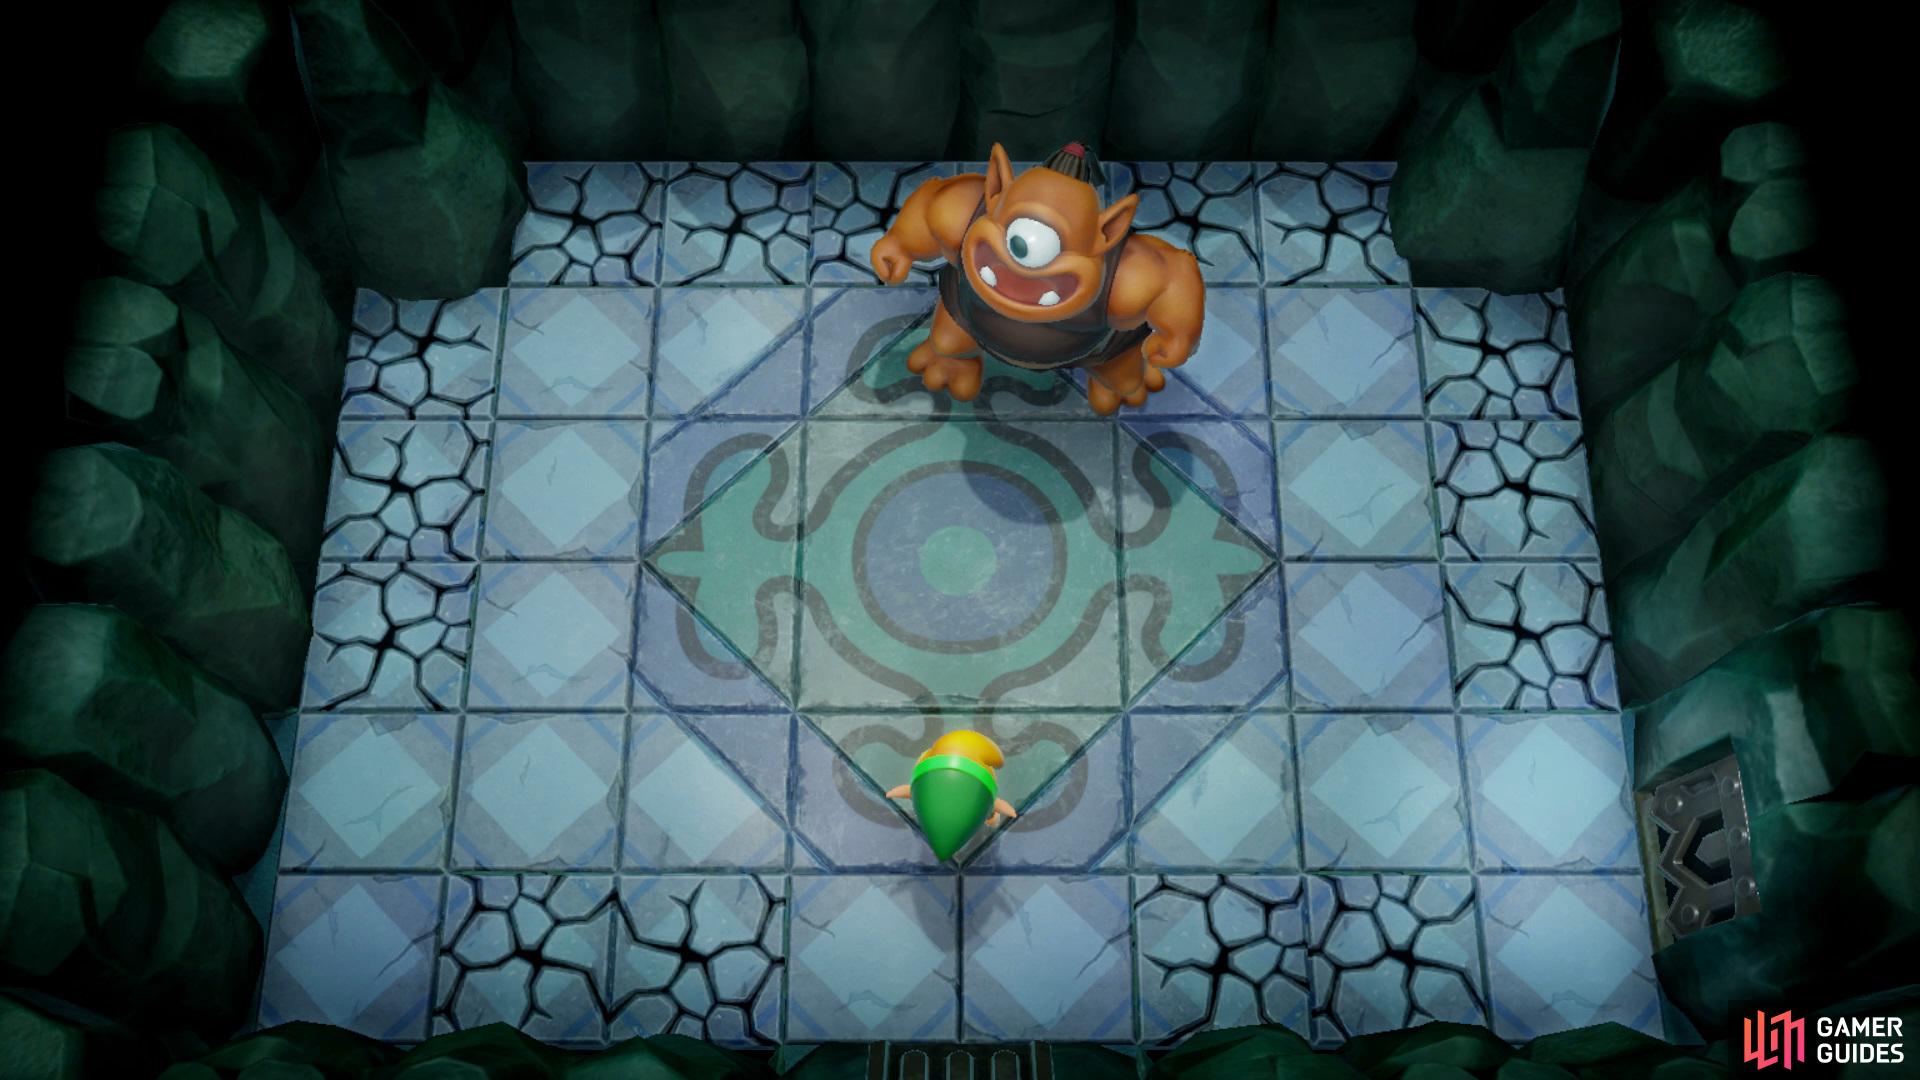
In order to defeat Hinox you’ll need to keep moving around the arena, (left), keeping out of the way of his grab attack. (right)
In order to defeat Hinox you’ll need to move out of the way of his grab attacks and then hit him, repeat this until he is slain. Be wary while you’re dodging his attacks however as the cracked floor will give way if you stand on it for too long.
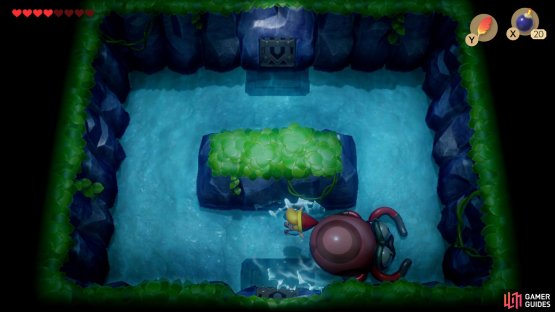
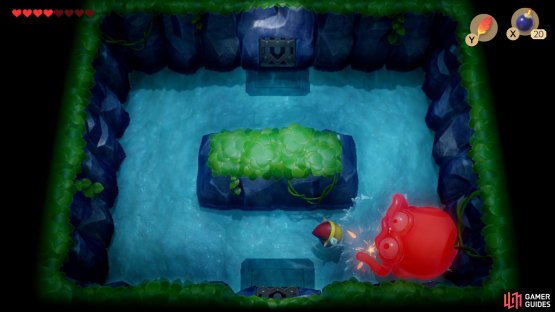
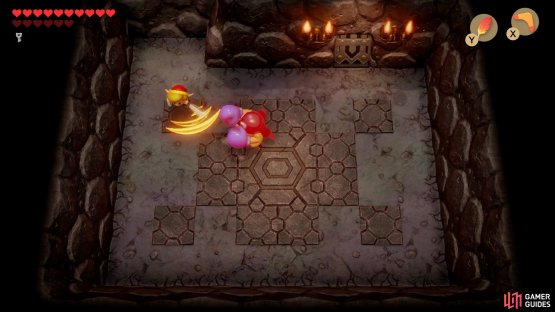
Boss: Genie


In order to defeat the Genie you’ll need to dodge his fireballs by circling the arena then wait for him to hide in the bottle and hit it once, now pick up the bottle and launch it at the wall. You’ll need to repeat this a few times until the bottle breaks allowing you to finally defeat the Genie.
Key Cavern
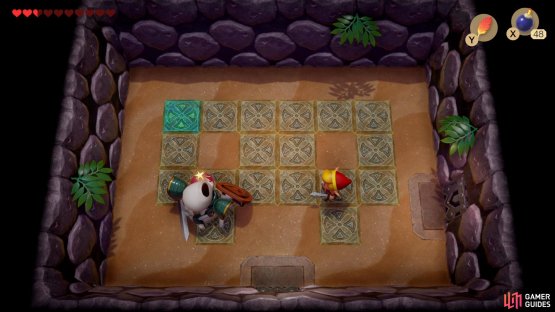
Mini-Boss: Dodongo Snakes

(1 of 4) Place a bomb in front of the Dodongo Snakes mouth to make them eat it,
In order to defeat the Dodongo Snakes you’ll need to wait until they’re facing you and then place Bombs infront of them so they consume it.
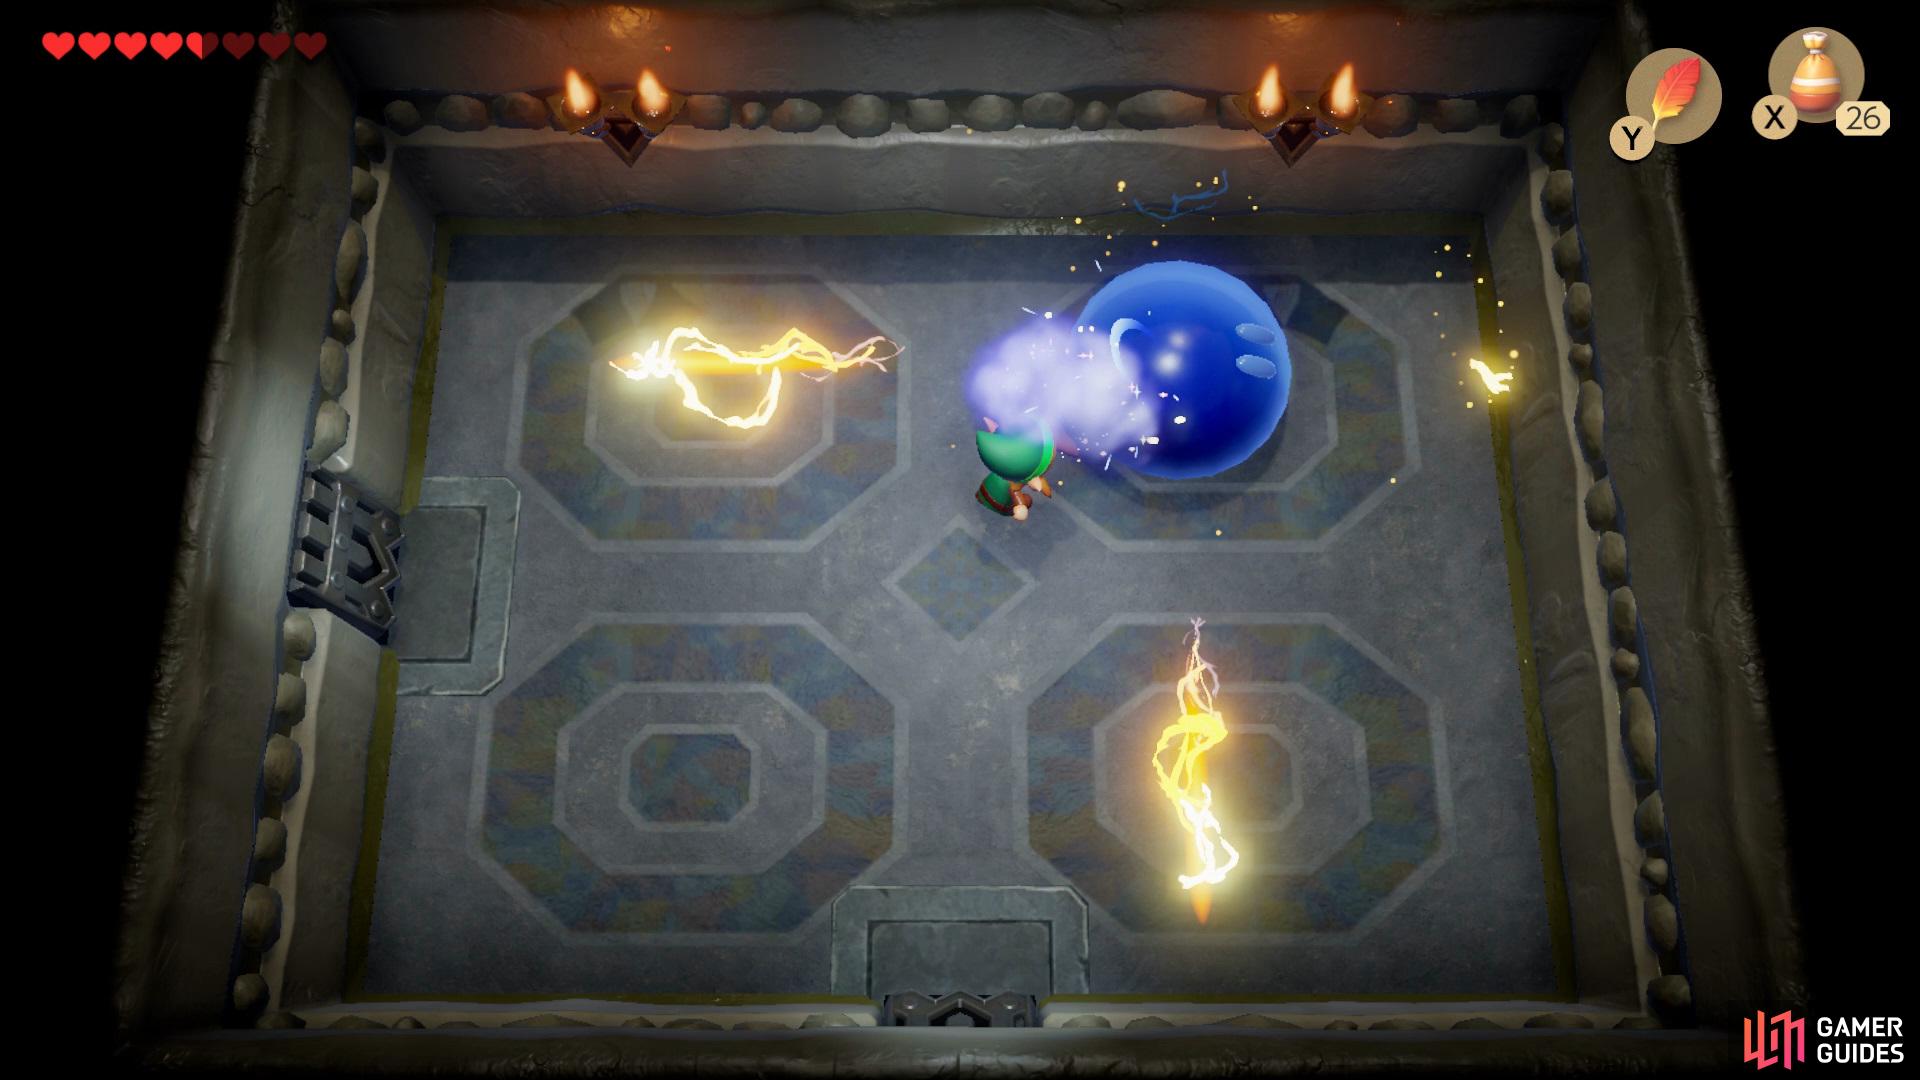
Boss: Slime Eye

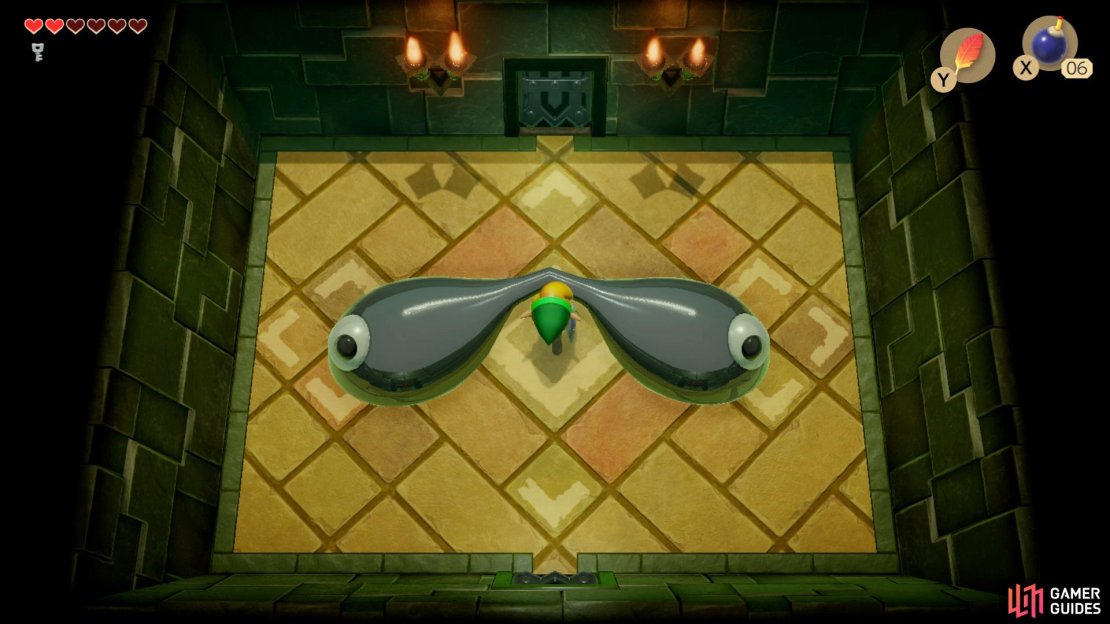
(1 of 3) In order to defeat the Slime Eye you’ll need to hit one of the eyes to stretch them apart,
To begin the fight, dash into the wall to cause the Slime to come down, keep hitting one of the eyes until they stretch apart and then dash through the middle to split them apart.
Keep focusing all your attacks on one of the eyes until it’s killed, but beware they will jump up into the air and try to land on your head, so you’ll need to pay close attention to the shadows on the floor in order to dodge them in time.
Color Dungeon
Mini-Boss: Giant Buzz Blob
Get close to the Giant Buzz Blob and sprinkle Magic Powder over him.
In order to take it out you’ll need to get close and sprinkle Magic Powder over him to cause him to turn blue allowing you to deal damage. Whilst you’re trying to close the distance you’ll need to keep an eye out for the Lighting attacks that he can do.
Mini-Boss II: Stone Hinox

Place Bombs in front of the Stone Hinox to deal damage to it.
In order to defeat the Stone Hinox you’ll need to dodge the rocks that are falling down and place Bombs in front of him, repeat this a few times to kill him.
Boss: Hardhat Beetle


(1 of 2) Dodge the Beetle’s fire attacks,
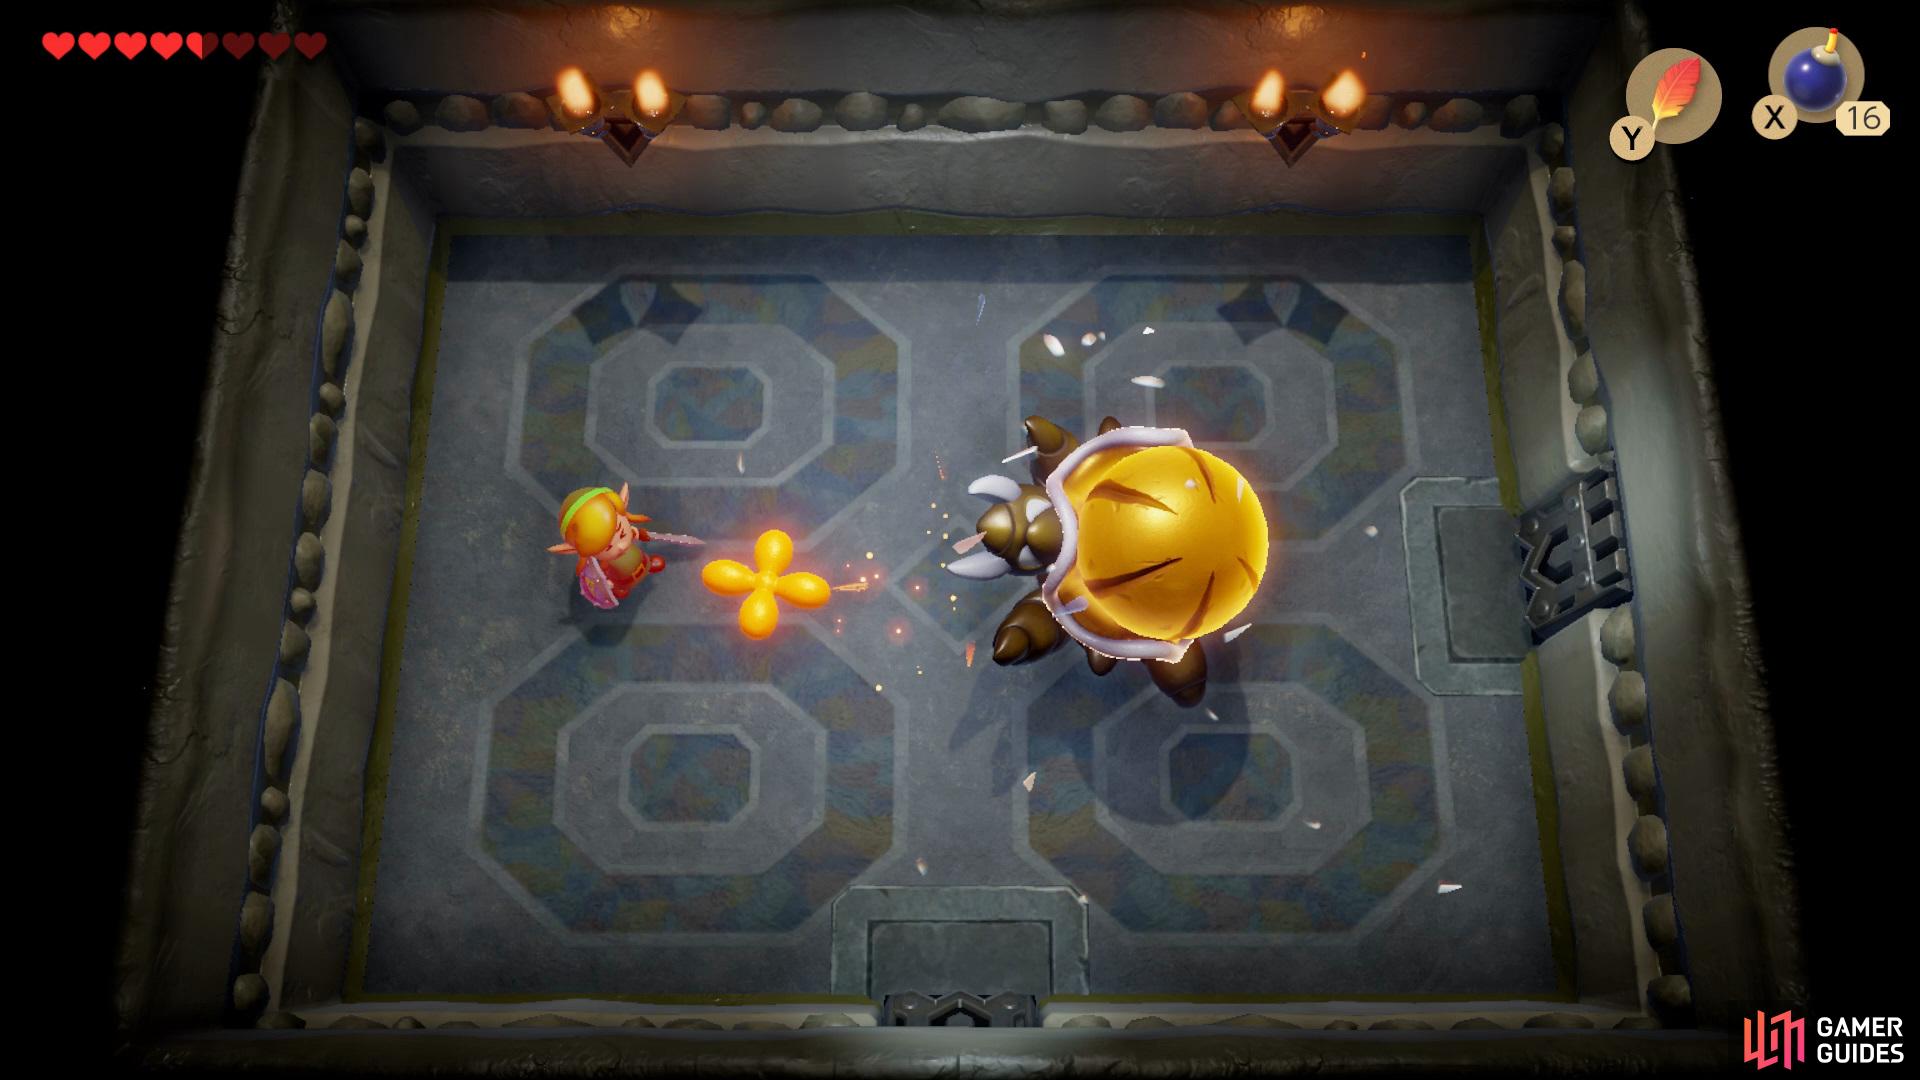
Dodge the Beetle’s fire attacks, (left), and keep attacking it until the shell turns red and then give it a few more hits to kill it. (right)
In order to defeat the beetle you’ll need to continue hitting it whilst moving out of the way of its attacks. Eventually the Beetle will turn to a red which will indicate ita’s nearly dead.
Angler’s Tunnel
Mini-Boss: Cue Ball
(1 of 2) Hop over the Cue Ball as it charges towards you,


Hop over the Cue Ball as it charges towards you, (left), and then start hitting with your sword as it turns around. (right)
Once you’ve entered the room above you’ll face the Cue Ball, in order to defeat it you’ll need to wait for it to charge at you and then hop over it, causing him to smash into the wall giving you a few seconds to get a couple hits onto his back, repeat this until it is dead.
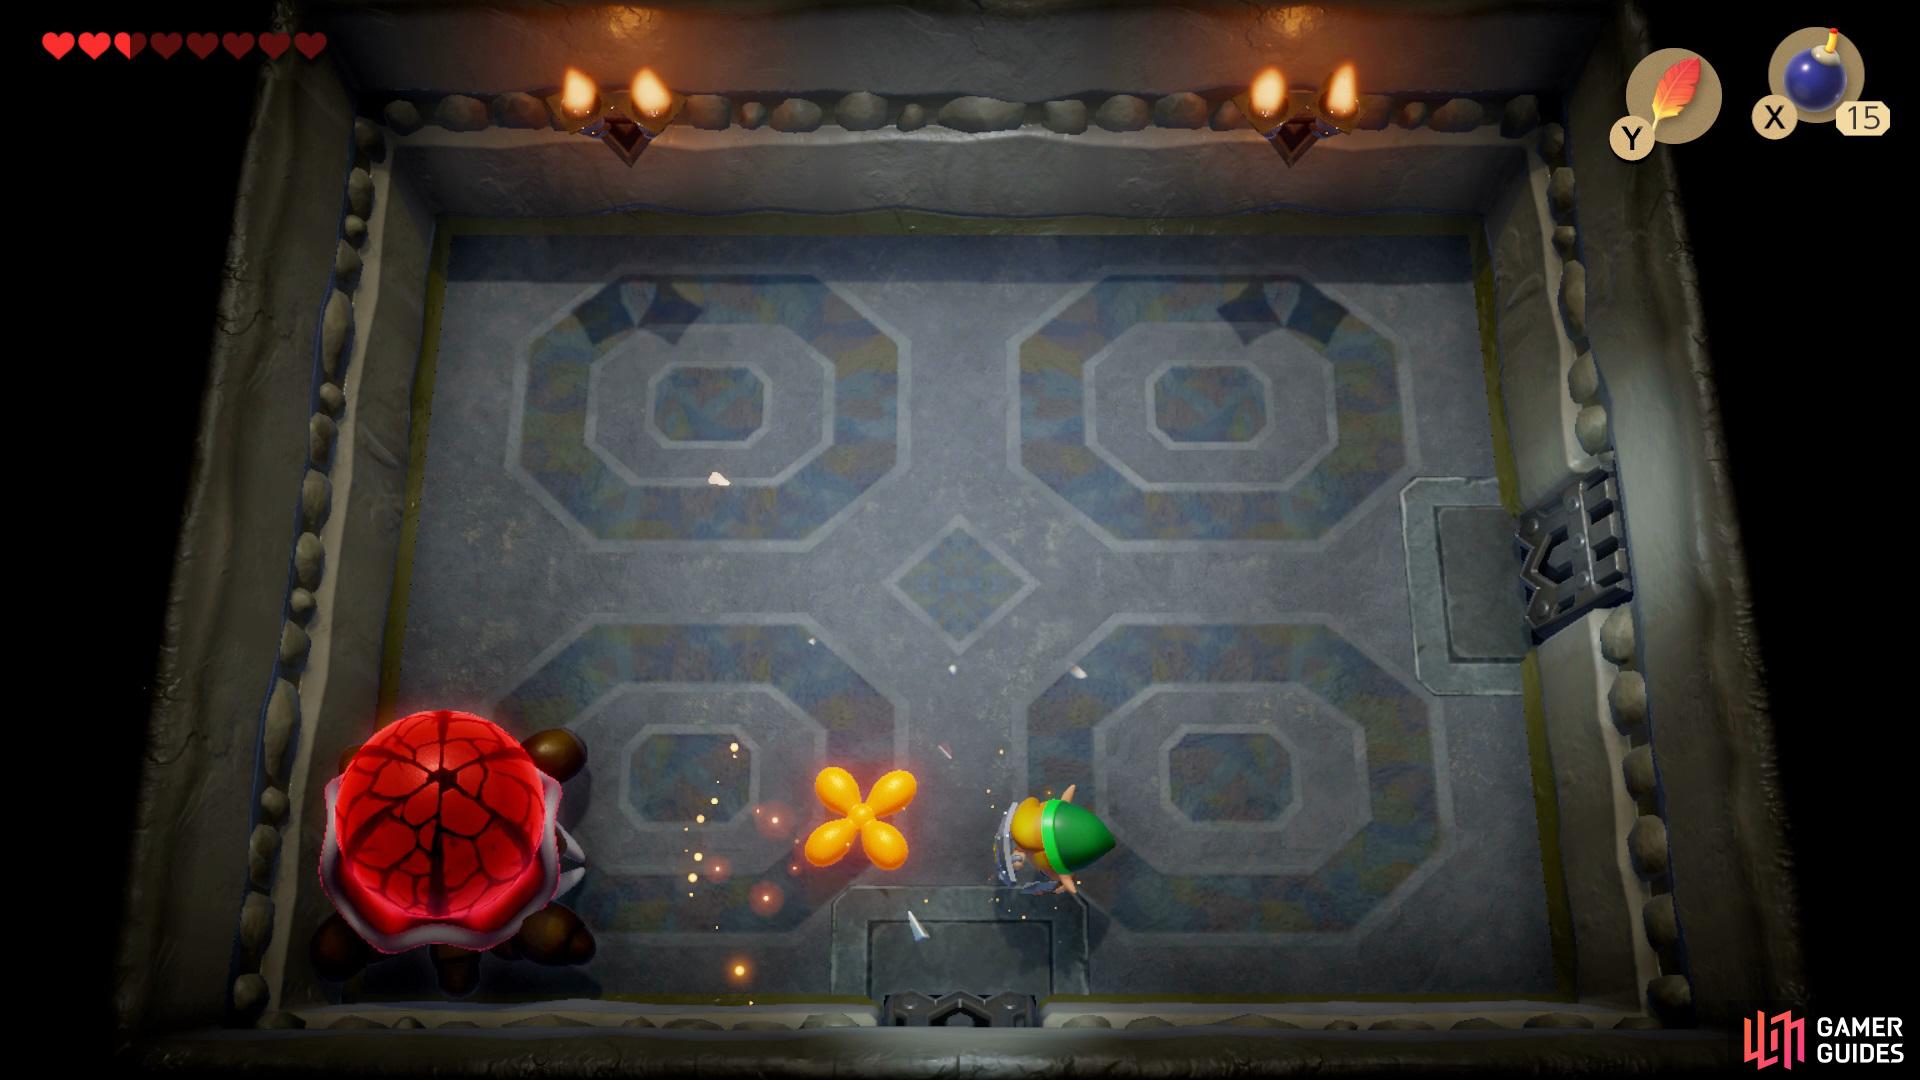
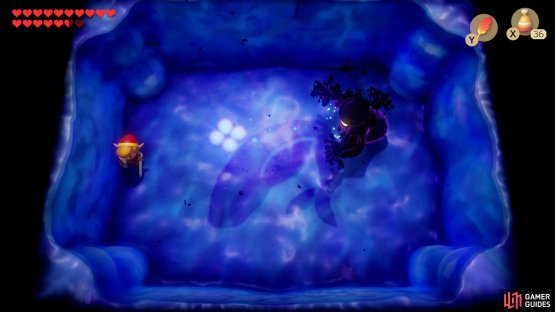
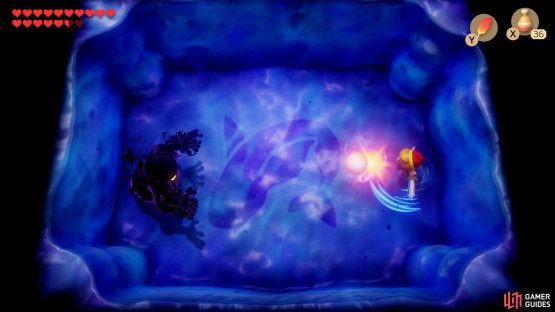
Boss: Angler Fish
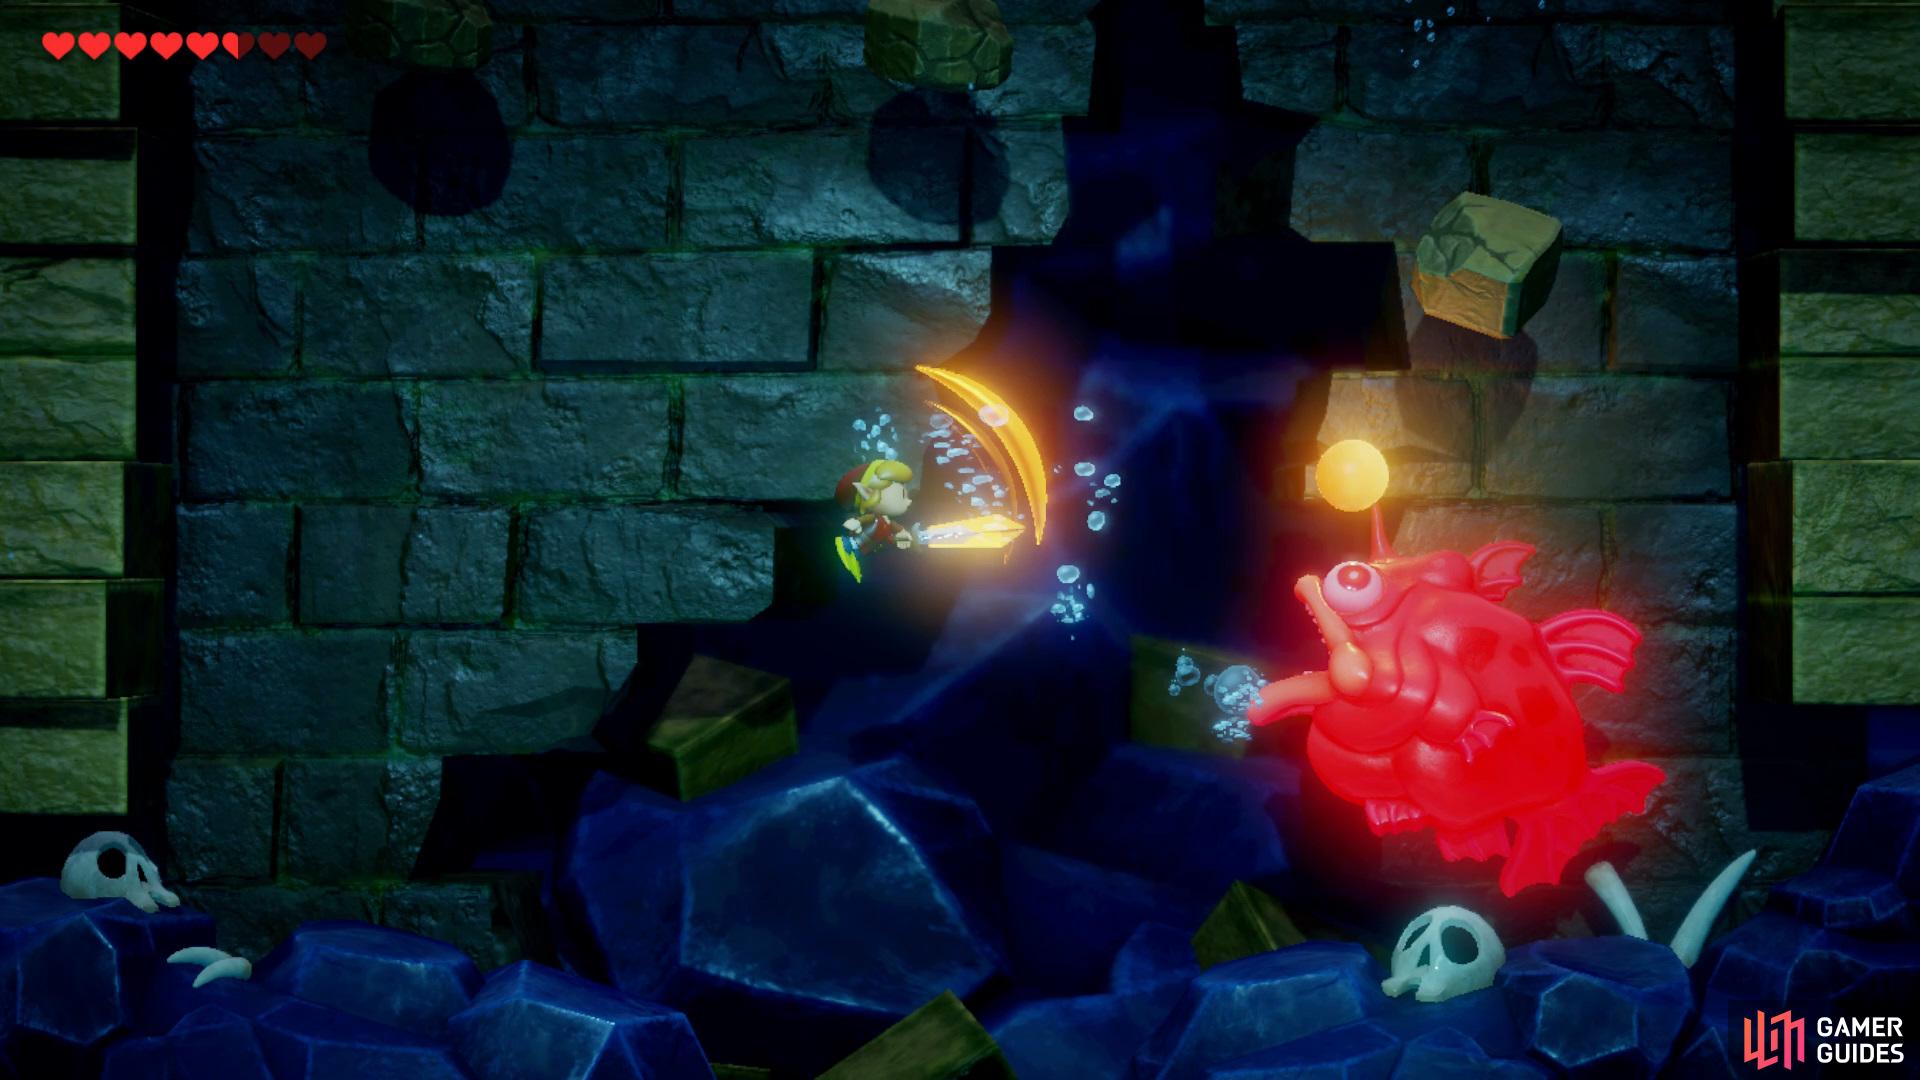
Move out of the way of the Fish and then turn around to attack it.
In order to defeat the Angler Fish you’ll want to move out of the way it when its coming towards you and then attack its head as its turning around, after you’ve done this a few times it’ll spawn some friends, kill them and continue attacking the Angler Fish until its dead.
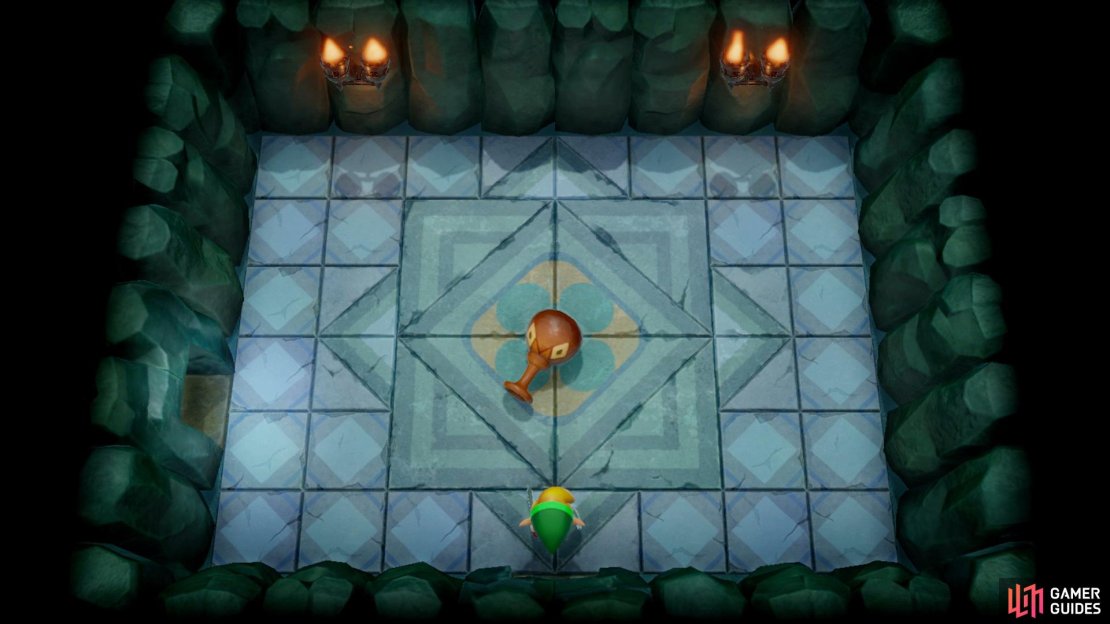
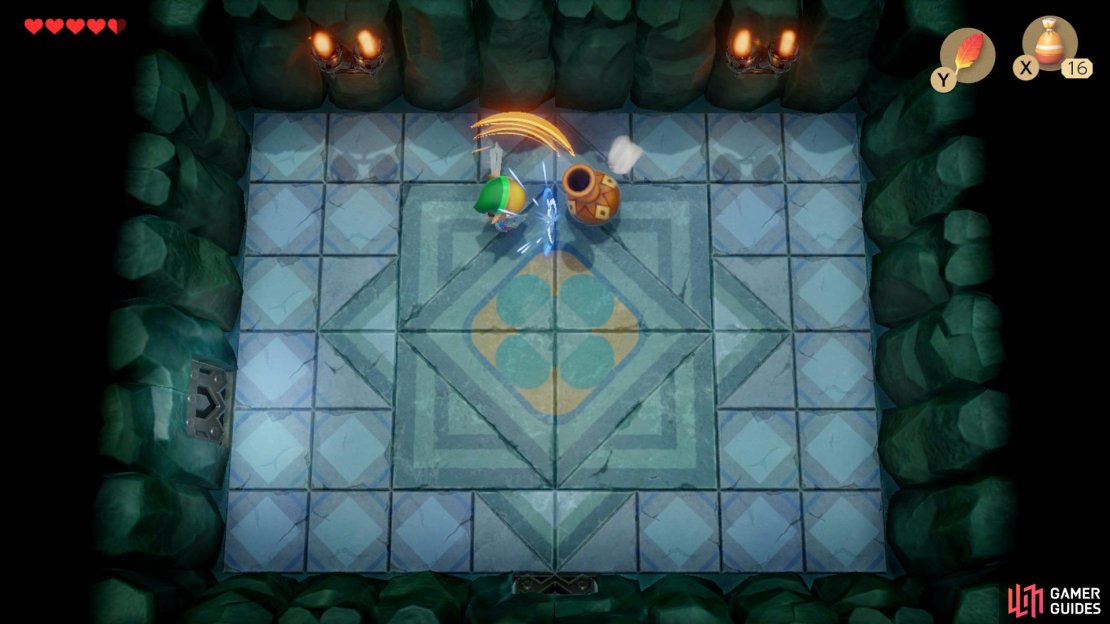
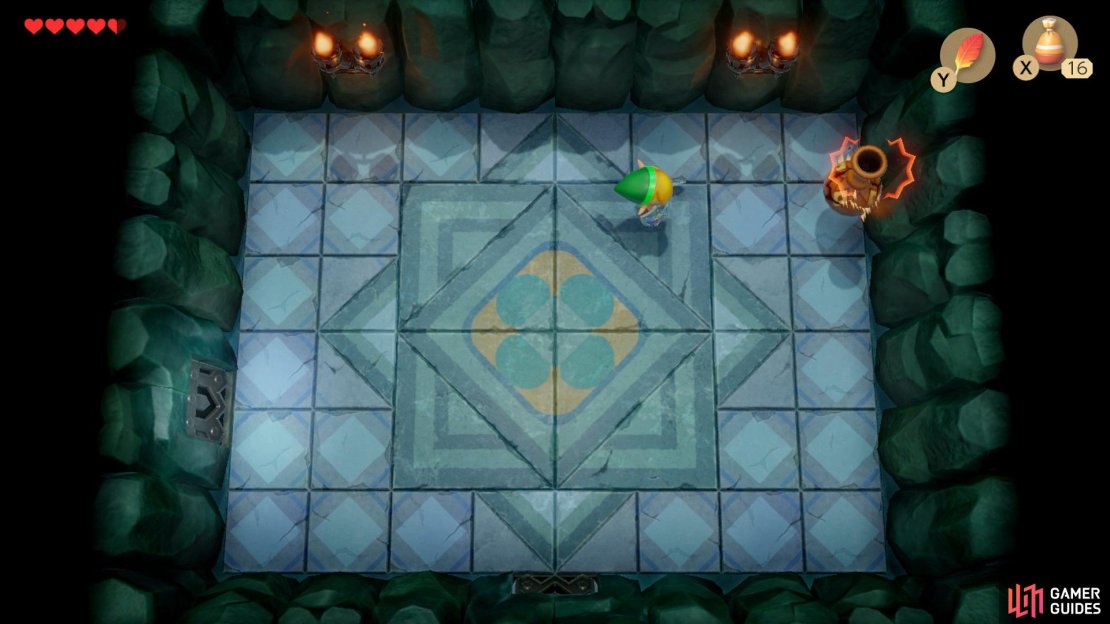
Catfish’s Maw
Mini-Boss: Master Stalfos
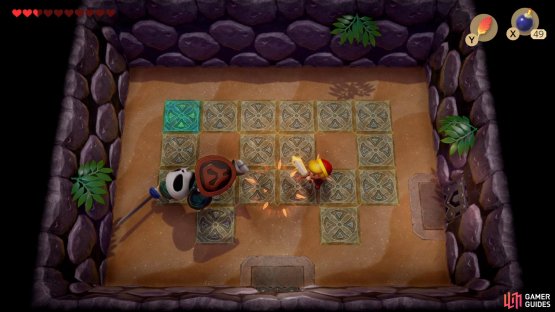
(1 of 2) Counter Master Stalfos’s attacks to cause him to fall,


Counter Master Stalfos’s attacks to cause him to fall, (left), then place a bomb near his body to damage him. (right)
In order to defeat Master Stalfos you’ll need to wait for him to go in for a swipe with his Sword where you’ll then need to quickly counter by hitting him before he damages you, if countered correctly the Boss will fall to the ground allowing you to place a bomb near him, repeat this until he escapes.
Mini-Boss II: Gohma

(1 of 2) Deflect the Gohma’s Orb attacks with you Shield,

Deflect the Gohma’s Orb attacks with you Shield, (left), then shoot them in the eye with you Arrow when they open it. (right)
In order to defeat the Gohma’s you’ll need to keep your Shield up at all times, wait for them to stop and open their eyes, deflect the orb they shoot at you and fire an arrow into the eye, repeat until they’ve been defeated.
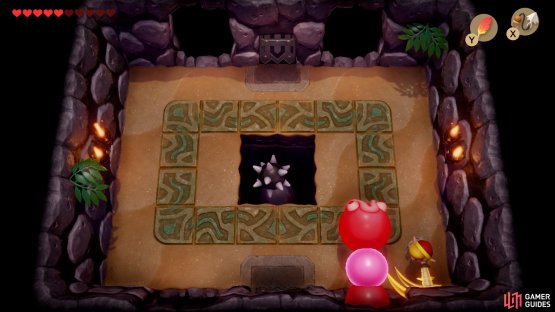
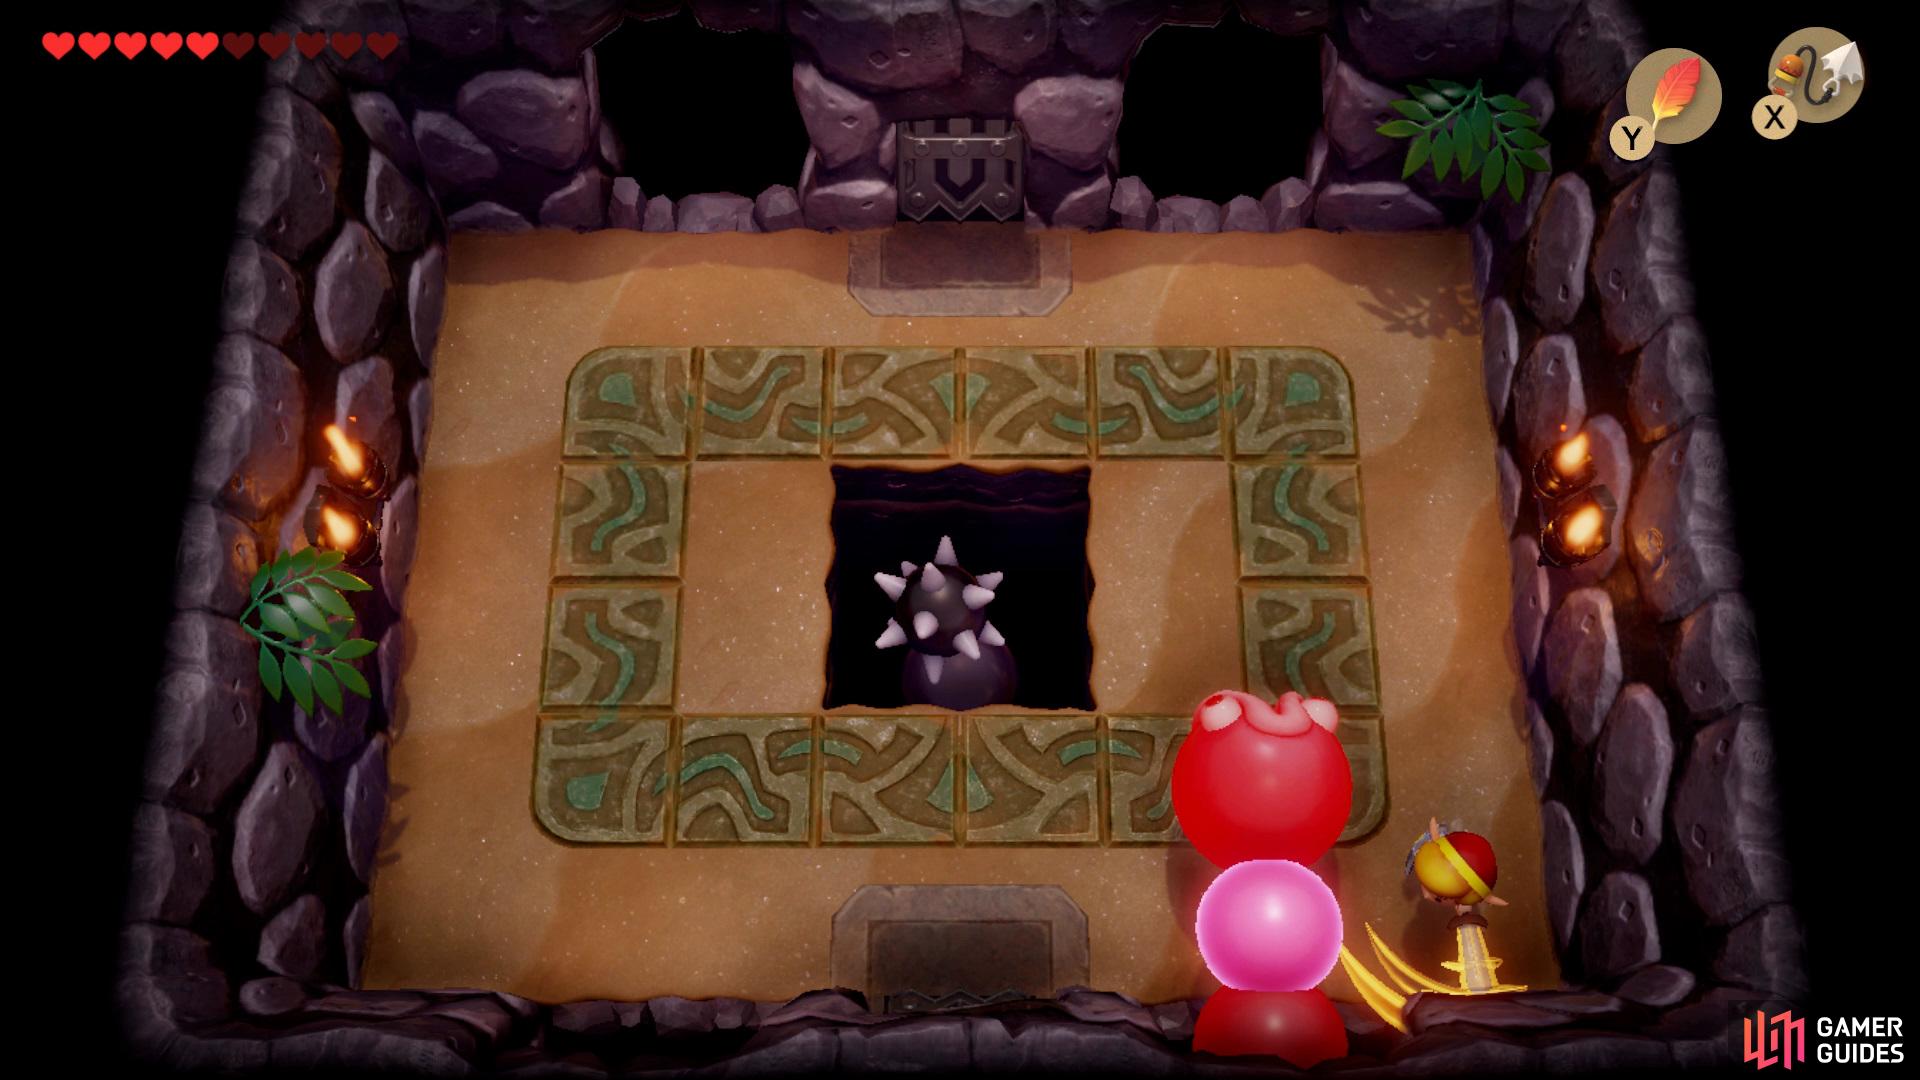
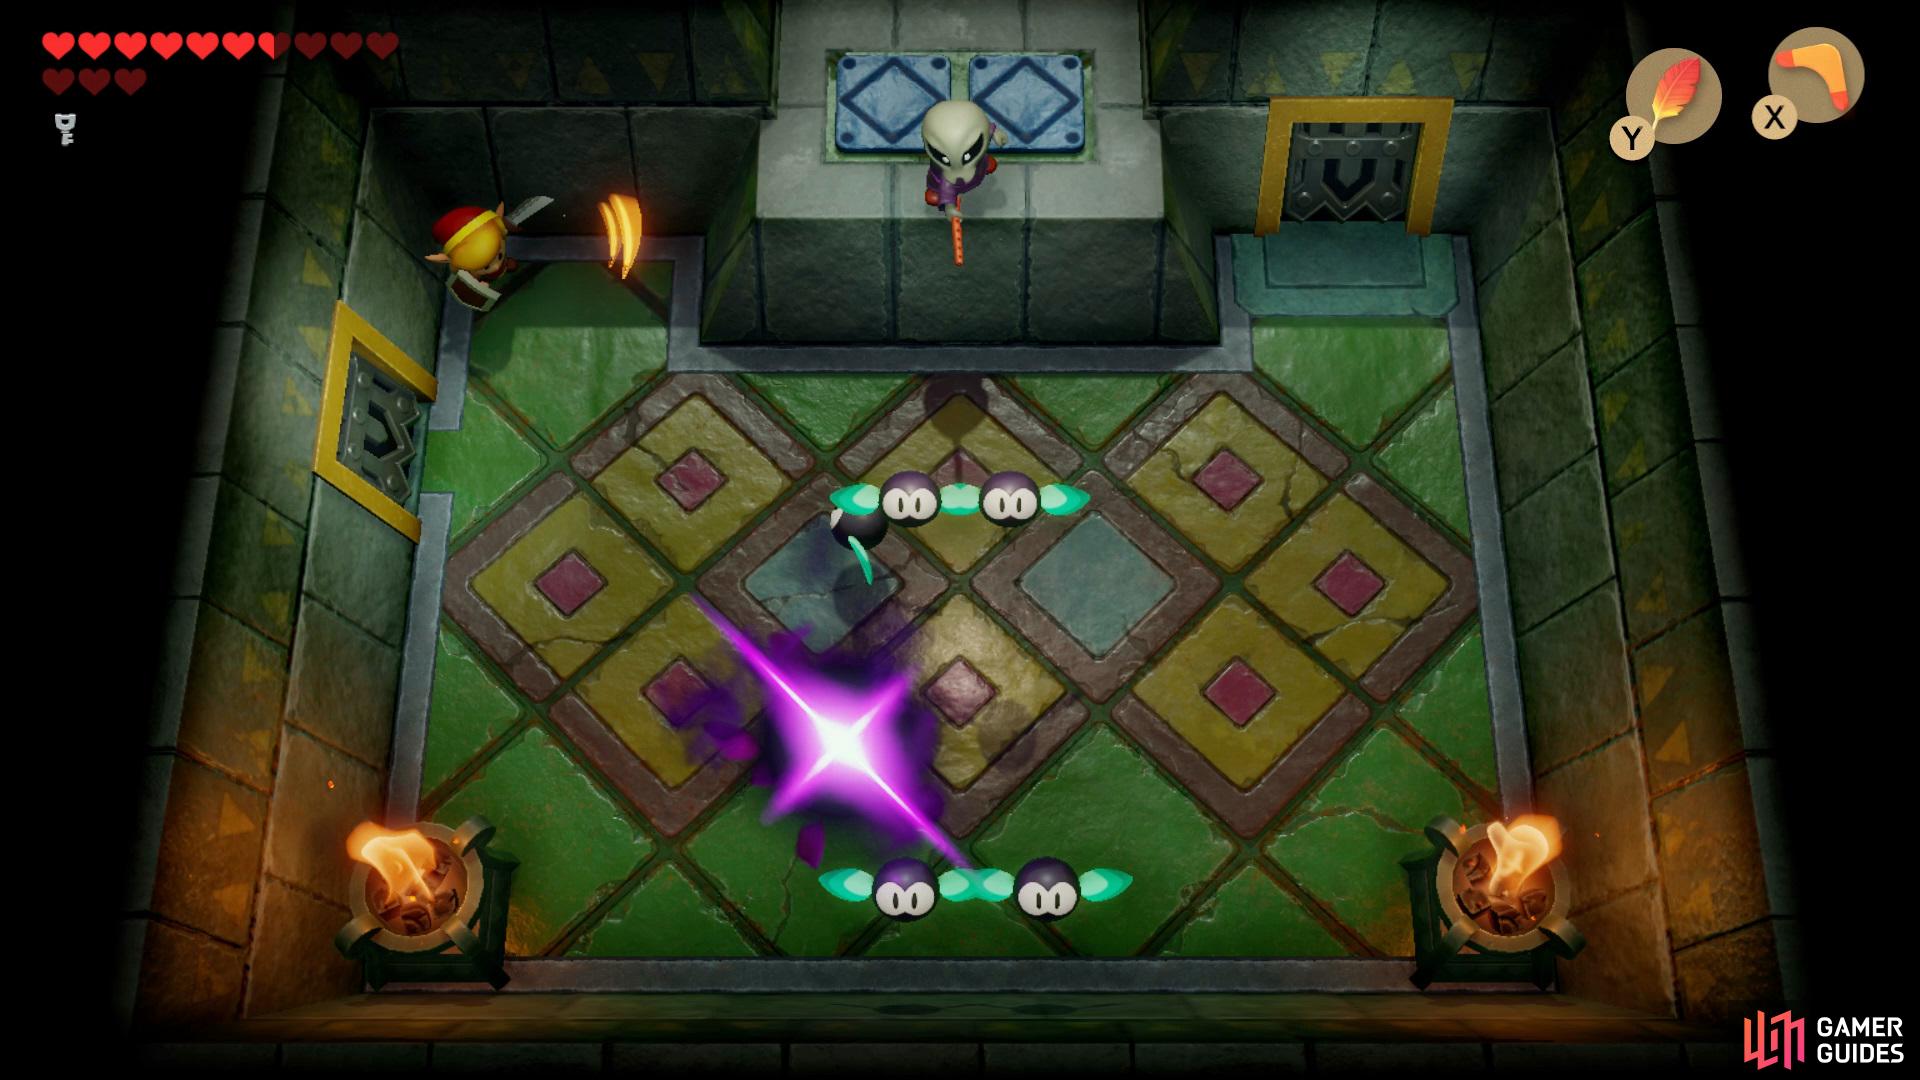
Boss: Slime Eel
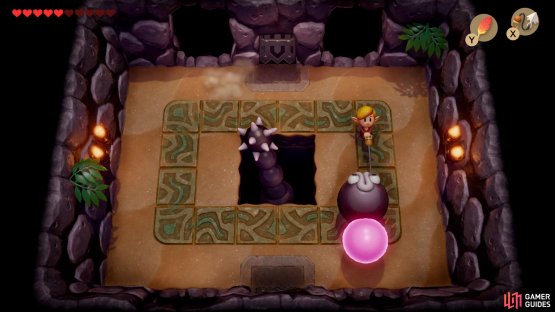
(1 of 2) Use the Hookshot to pull the Slime Eel out of the hole,

Use the Hookshot to pull the Slime Eel out of the hole, (left), and then attack the pink weak spot. (right)
In order to defeat the Slime Eel you’ll need to wait for him to poke his head out of one of the four corners in the room, then use the Hookshot to stretch him across the room, quickly attack his glowing red neck before he slips back into the hole. You’ll also need to watch out for the smaller enemy that will pop out when you use the Hookshot, just keep your distance until he explodes. Whilst repeating the process above, you’ll need to hop over his tail as it comes towards you.
Eagle’s Tower
Mini-Boss: Red Hinox
Stand on the opposite side of a Hole so the Hinox can’t reach you then fire your Boomerang at him.
In order to defeat the Red Hinox you’ll want to stand to the right of a hole so he cant reach you then keep throwing Boomerangs at him.
Mini-Boss II: Grim Creeper
Wait for the Bats to come towards you and then spam your Sword Attack to kill them all.
In order to defeat the Grim Creeper you’ll need to stand in any corner and keep using your Sword attack to kill them.
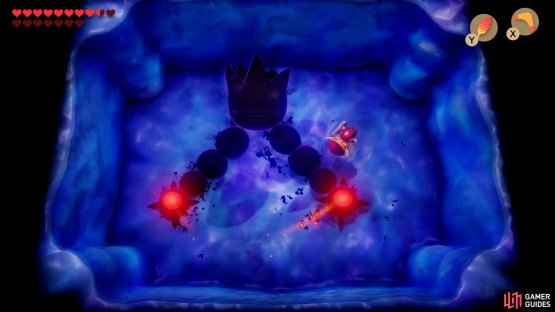
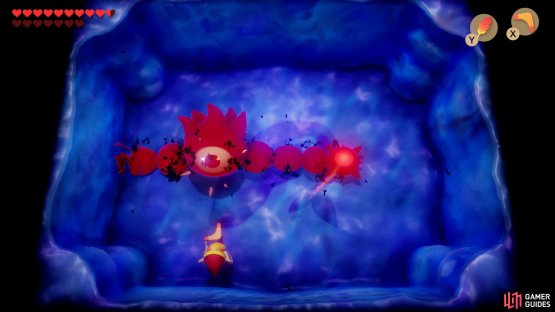
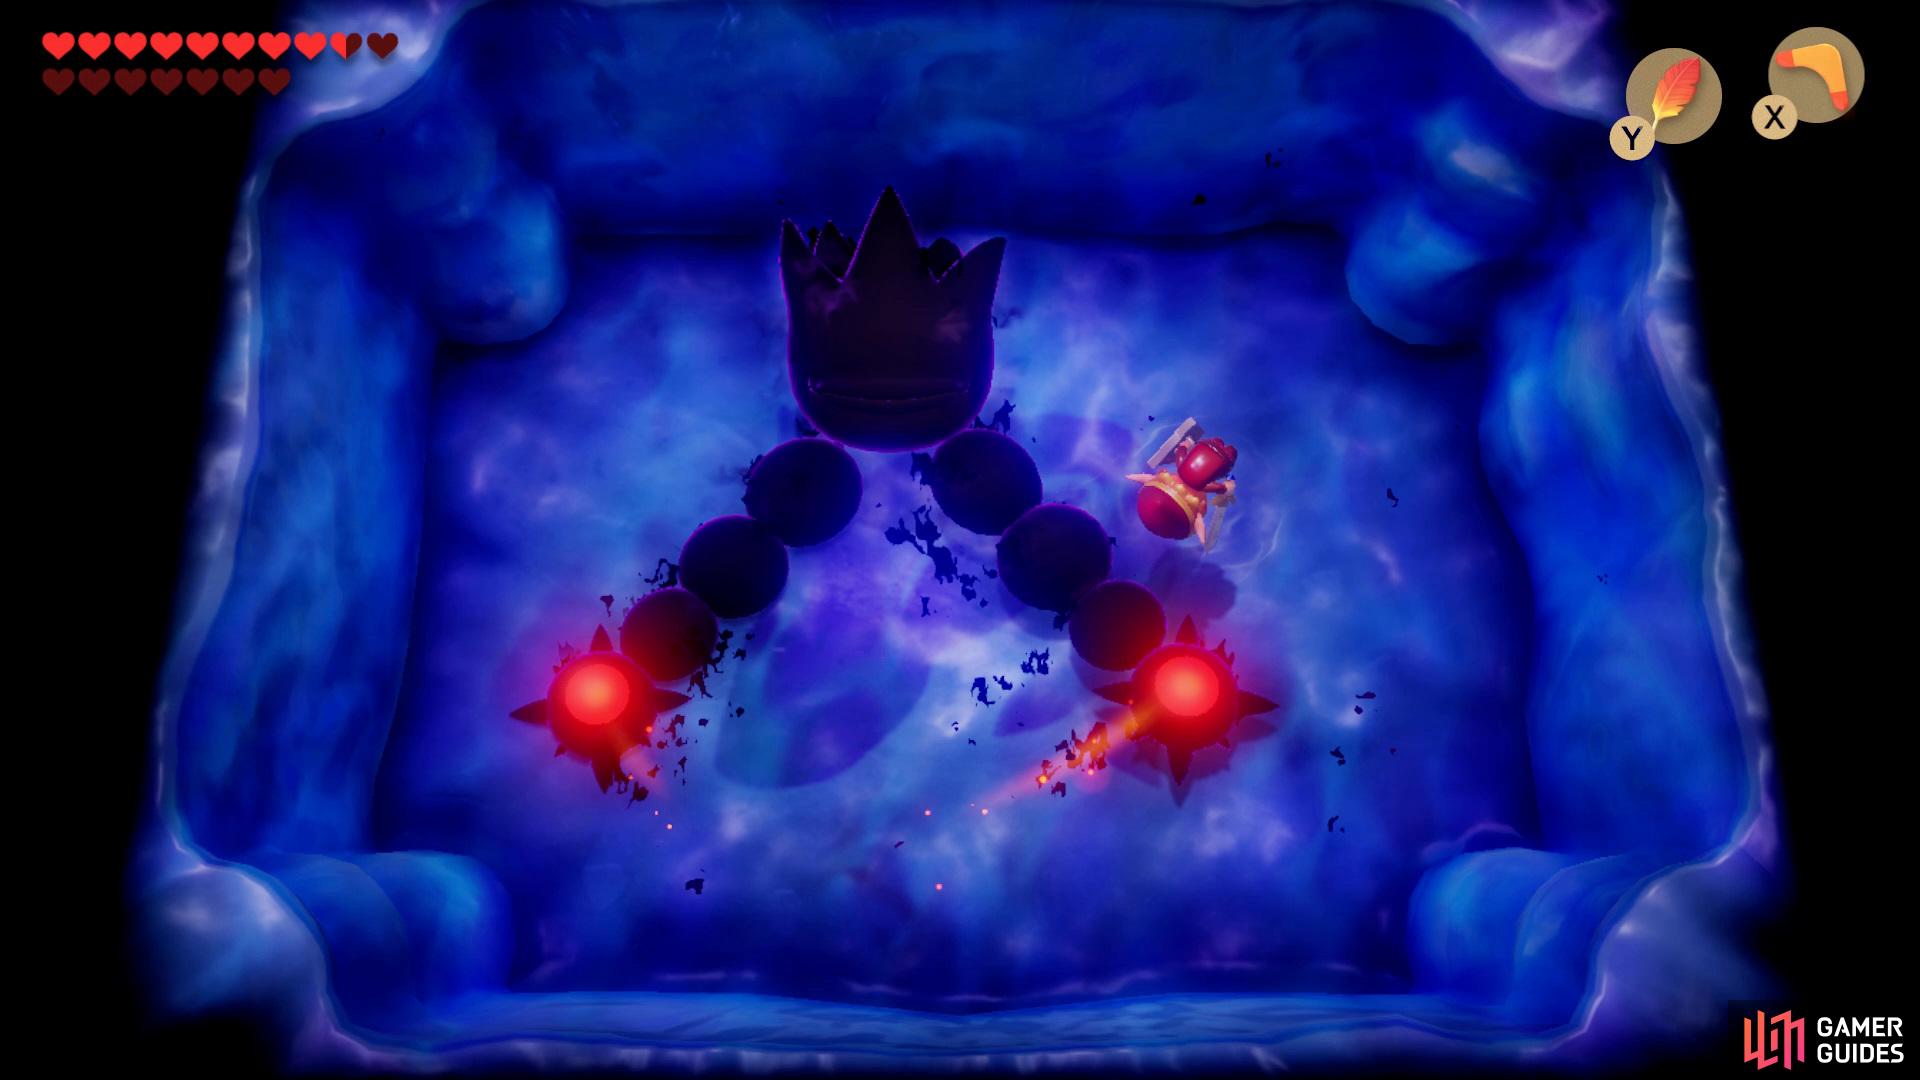
Boss: Evil Eagle
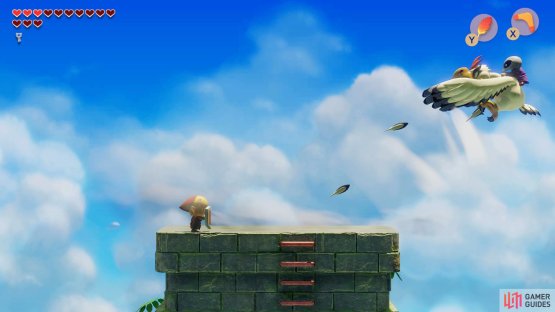
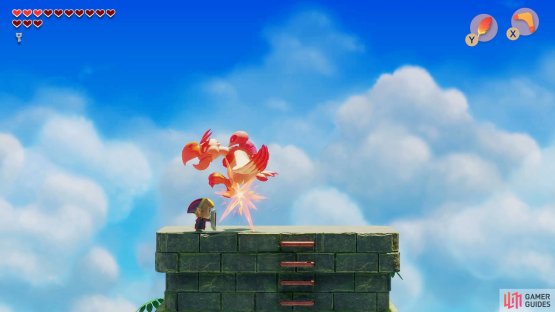
(1 of 2) Hop out of the way of the falling feathers,


Hop out of the way of the falling feathers, (left), then attack the Eagle when he comes closer to you. (right)
In order to defeat the Evil Eagle you’ll need to wait for him to come closer to you and then hit him a few times with your Sword, but whilst you’re waiting for him to come down you’ll need to watch out for his wind attack that will push you off the tower, if this happens climb back up but watch out for the the falling feathers.
Turtle Rock
Mini-Boss: Blaino
(1 of 2) Wait for Blaino to rush you,


Wait for Blaino to rush you, (left), then quickly attack him with you Sword. (right)
In order to defeat Blaino you’ll need to wait for him to sprint towards you then quickly dodge out of the way of it’s attack then hit him with your Sword.
Boss: Hot Head
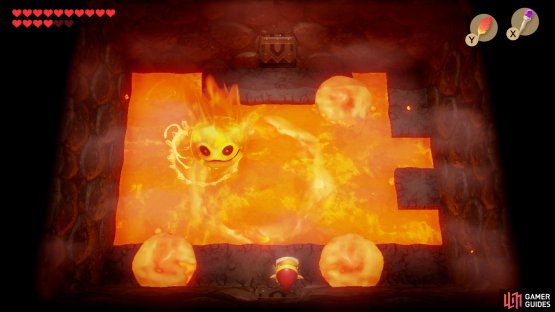

(1 of 2) Dodge the fireballs,

Dodge the fireballs, (left), and then fire your Magic Rod at him. (right)
In order to defeat the Hot Head you’ll need to wait for him to bounce out of the lava and keep shooting him with your Magic Rod until he has been slain.
Wind Fish’s Egg
Boss I: Giant Zol
(1 of 2) Move out of the way of the Zol when it attempts to jump on you,


Move out of the way of the Zol when it attempts to jump on you, (left), then pour Magic Powder over it when it lands. (right)
In order to defeat the Giant Zol you’ll need to move out of the way before he lands on your head then quickly pour some Magic Powder over him.
Boss II: Agahnim’s Shadow
(1 of 2) Move out of the way of the white orbs before they hit you,

Move out of the way of the white orbs before they hit you, (left), then use your Sword to deflect the flames balls back at him. (right)
In order to take him out you’ll need to stand opposite him and use your Sword to deflect his ball of flame back at him, but beware, he likes to change up his attack every now and then and throw four white orbs at you, quickly move out of the way before they hit you as they can deal a fair amount of damage.
Boss III: Moldorm
Hit the Moldorms tail to kill it.
In order to defeat the Moldorm you’ll need to wait for him to slide past you and then attack him with your Sword.
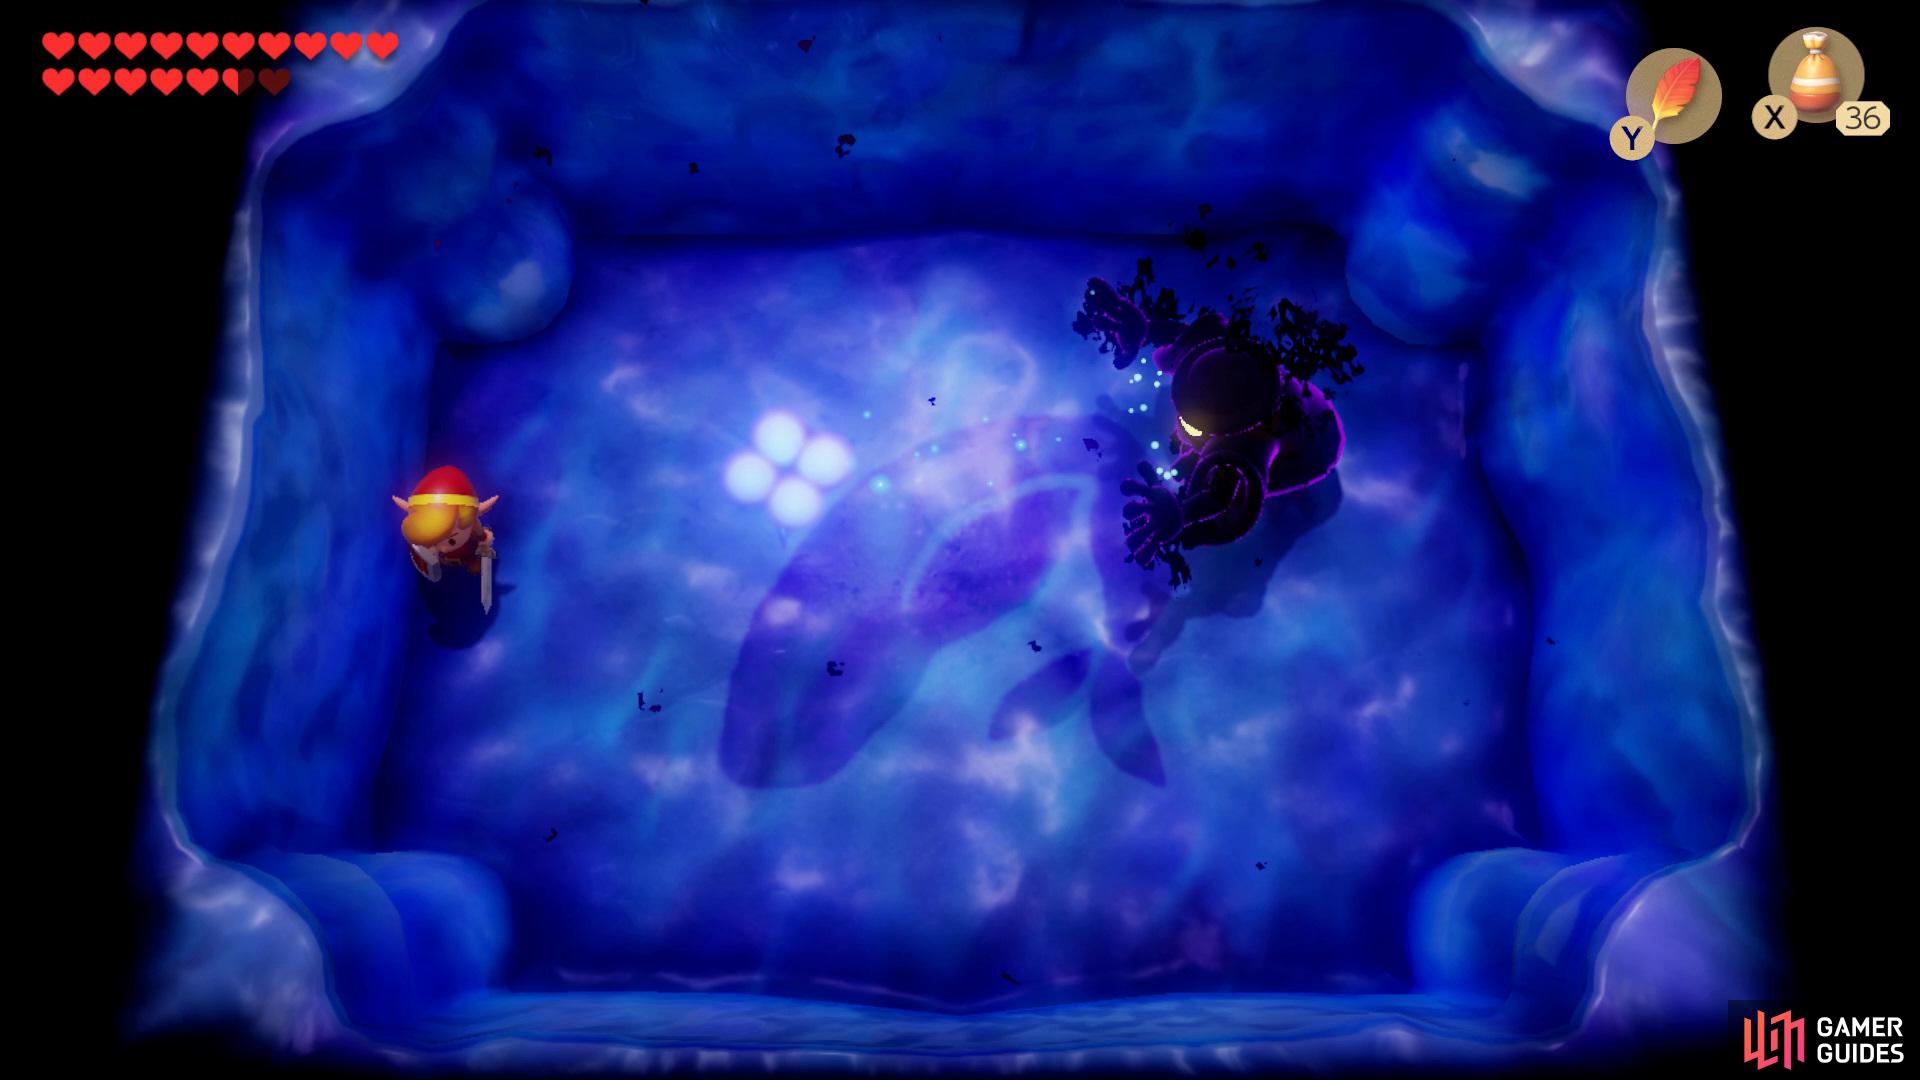
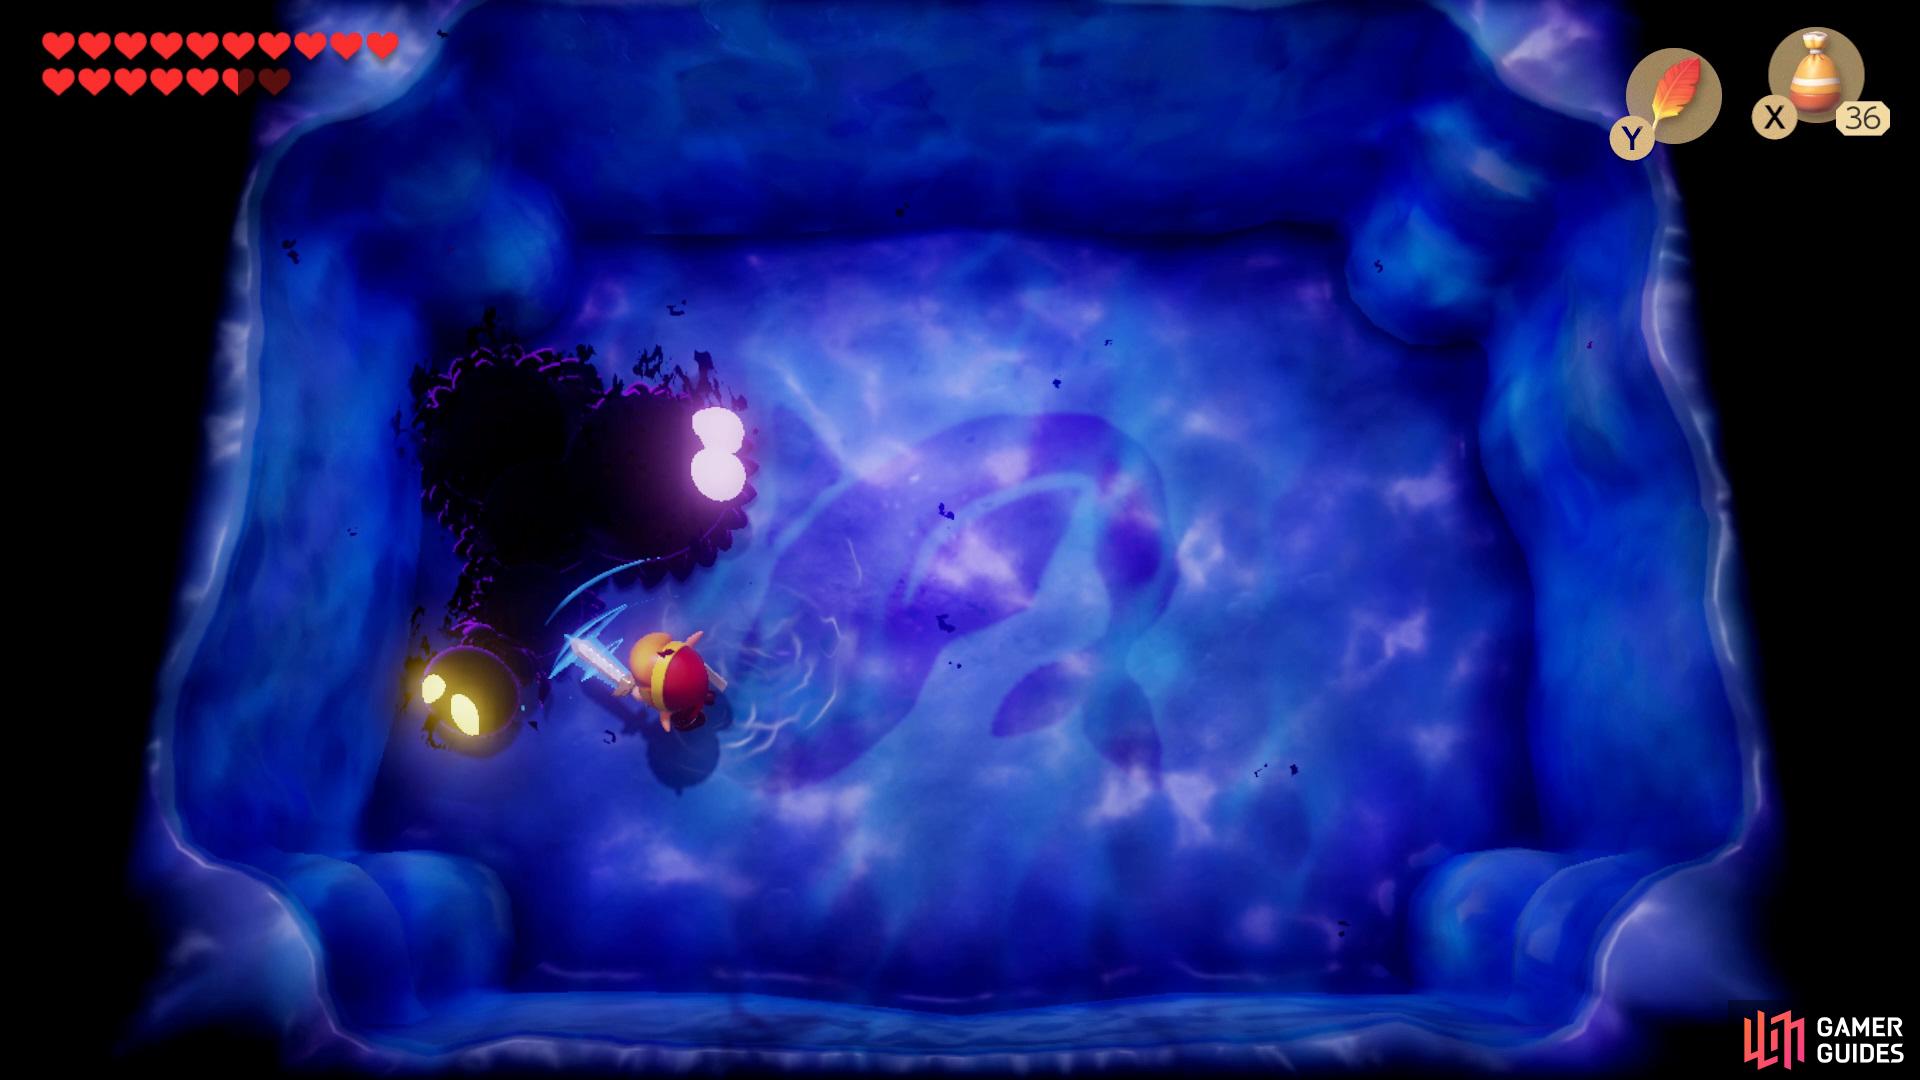
Boss IV: Shadow of Ganon

(1 of 2) Dodge the Ganon’s bats,
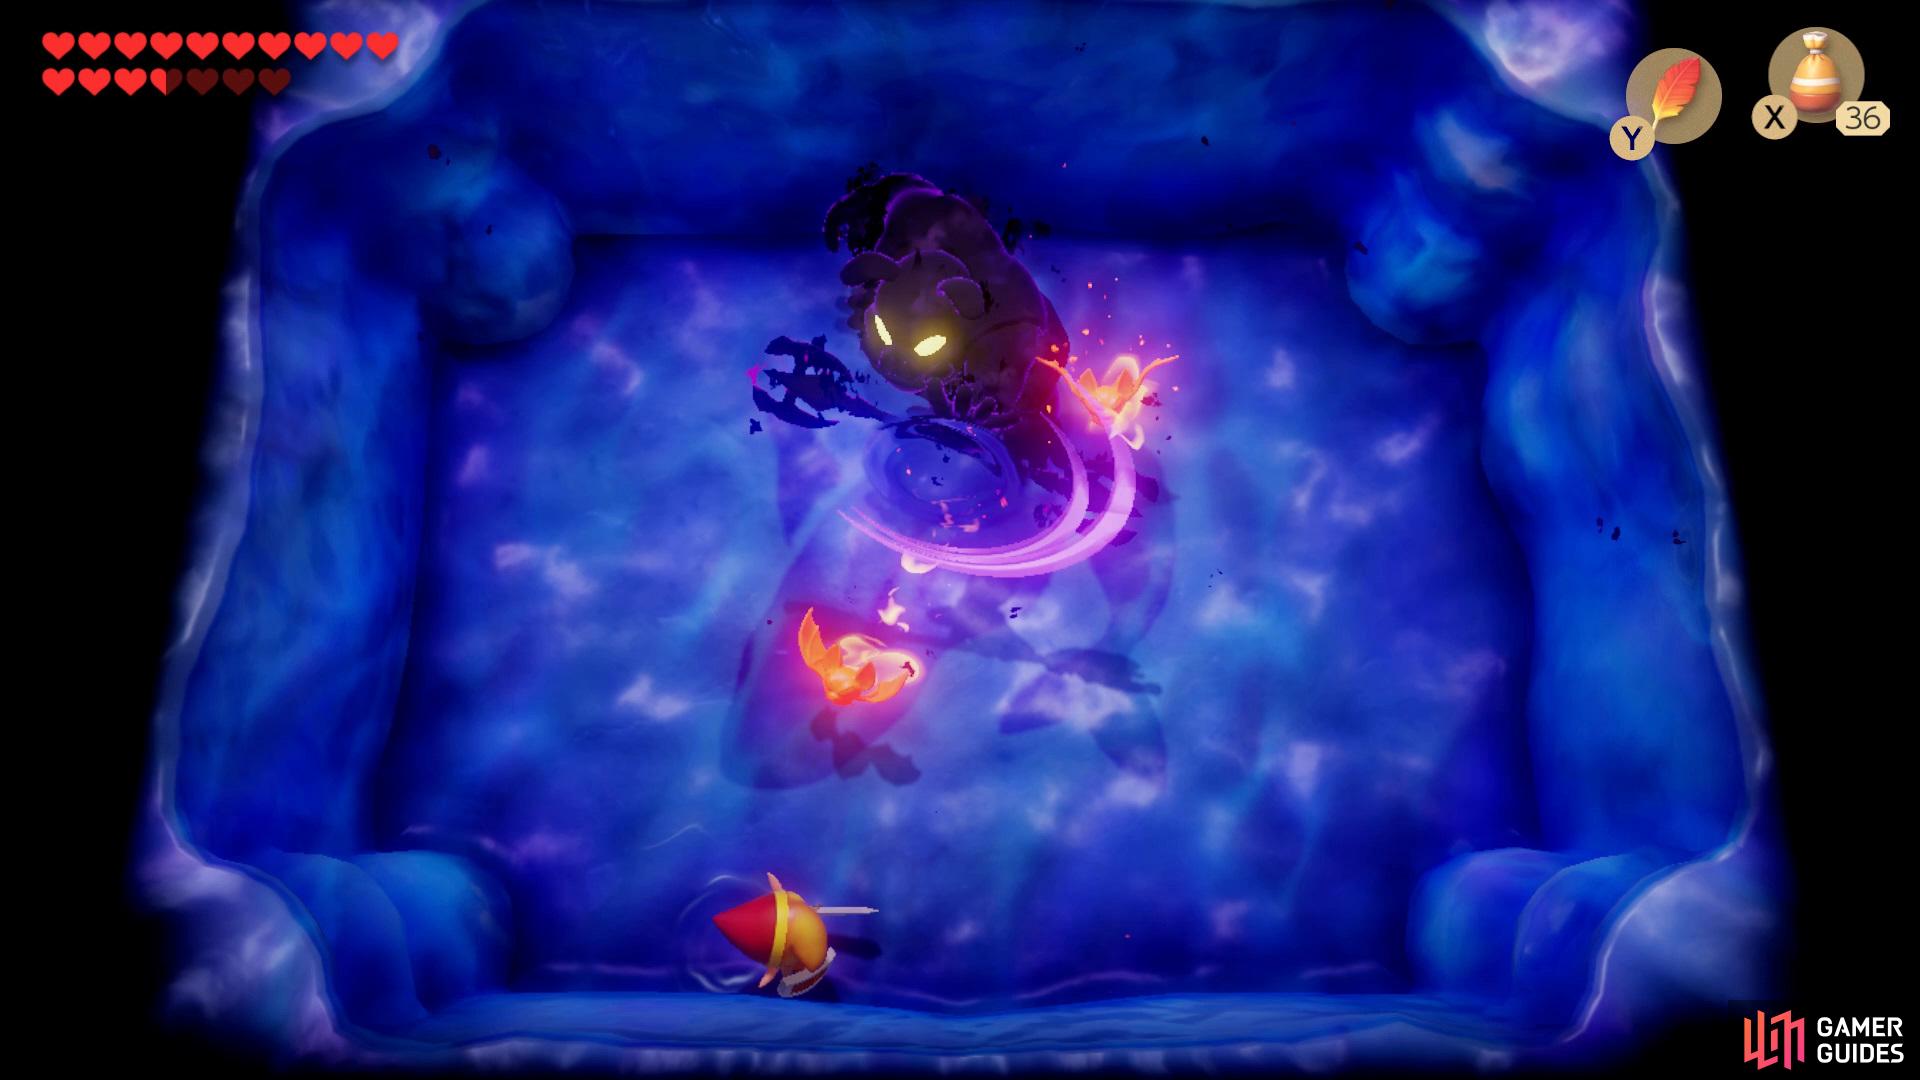

Dodge the Ganon’s bats, (left), then go in for a spin attack when it throws his weapon at you. (right)
In order to defeat the Shadow of Ganon you’ll need to dodge all the bats and wait for him to throw his spinning weapon at you then quickly sprint over to him and perform a spin attack, repeat this cycle until he has been slain.
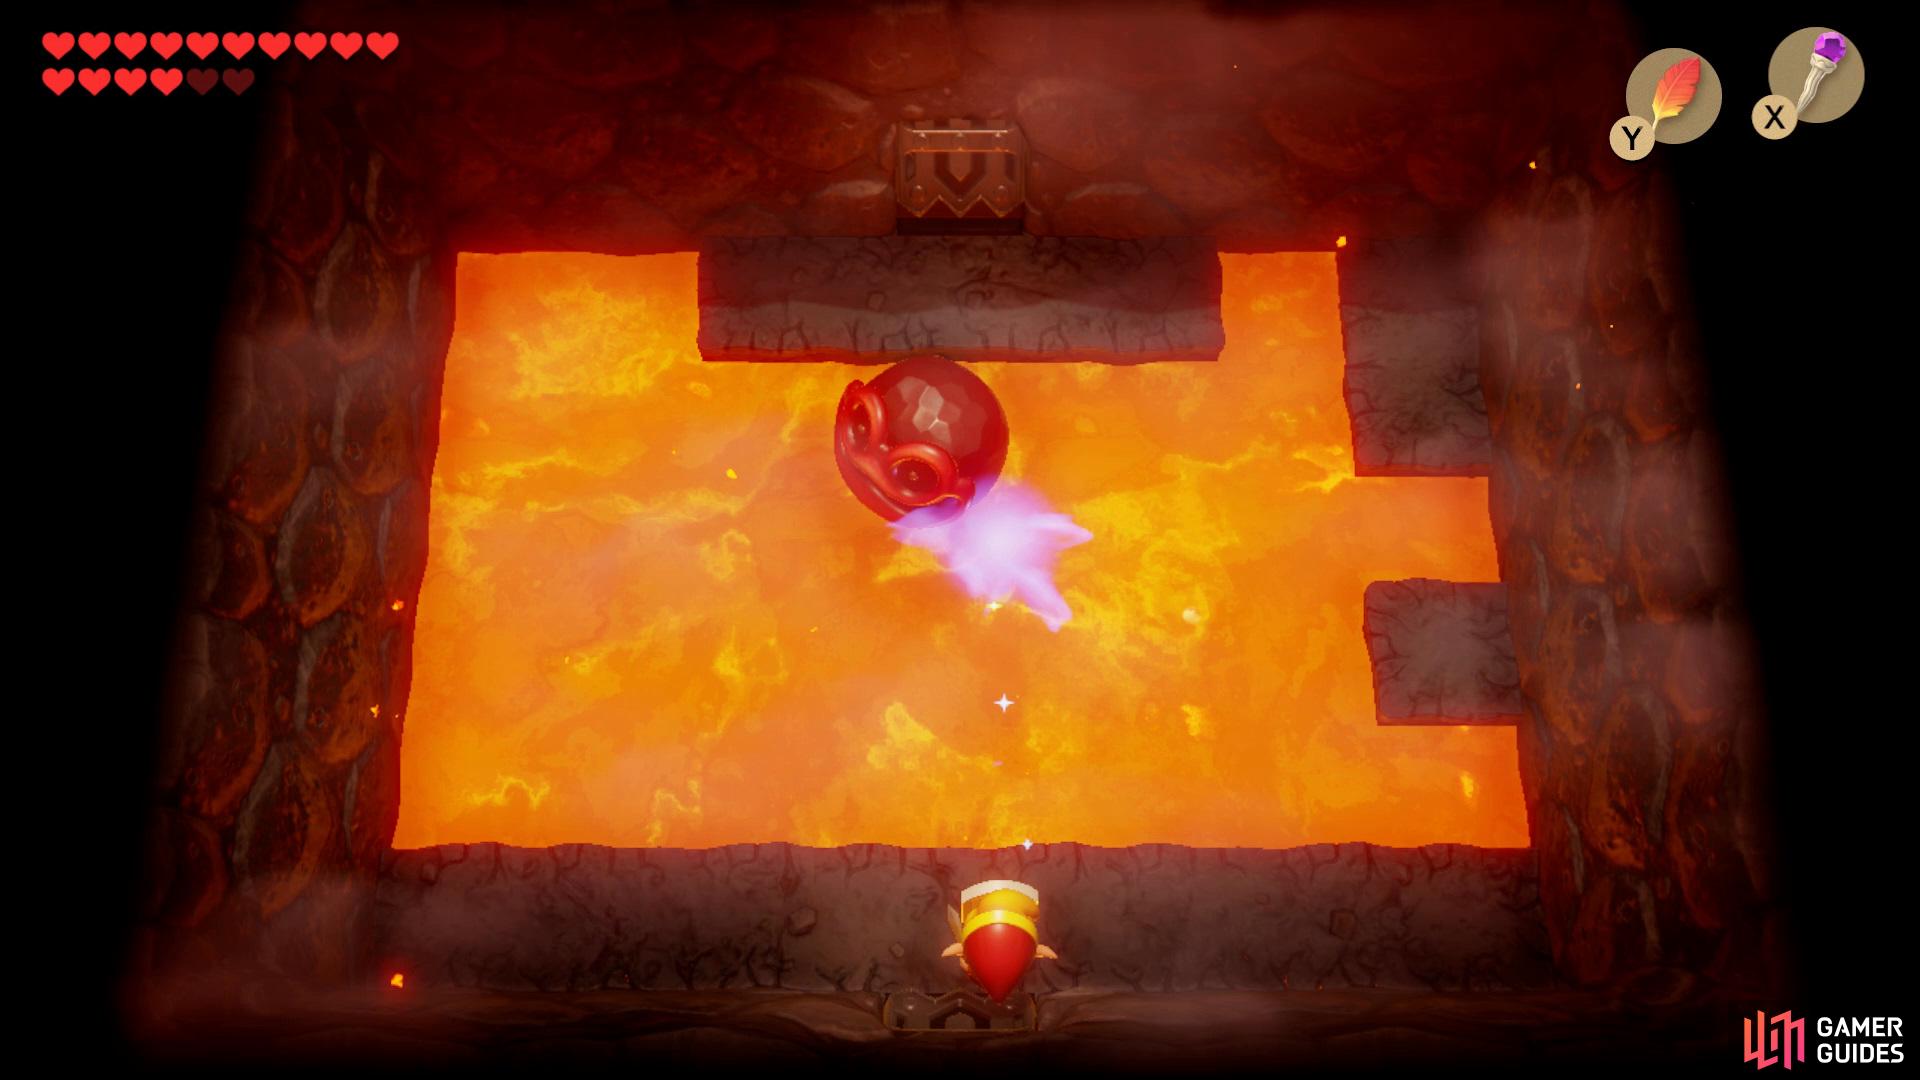
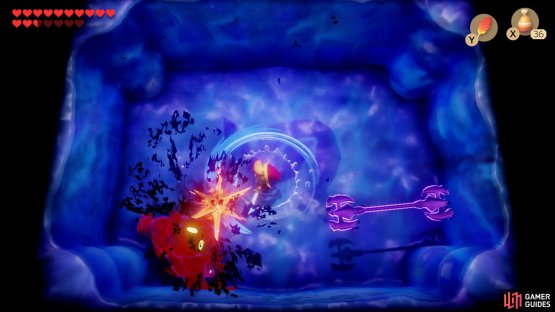
Boss V: Lanmola’s Shadow
Pour Magic Powder over the Lanmola to defeat it.
In order to take him out simply stand in any corner of the room and use your Magic Rod against him as he approaches you.
Boss VI: Dethl
(1 of 2) Hop over the Dethl’s arms,

Hop over the Dethl’s arms, (left), then launch your boomerang into his eye when it opens. (right)
In order to defeat Dethl you’ll need to stand to the bottom of the room and hop over his arms, then use a Boomerang and launch it into his eye when it opens.
No Comments