
General Tips
-
Complete the Game - It’s a good idea to finish the game before attempting an S-Rank run, so you know your way around Raccoon City.
-
Practice - If you find yourself struggling to finish the game with the S-Rank time limit, keep trying again and again, shaving off a little more time every run.
-
Acquire the Infinite Rocket Launcher - Before jumping into an S-Rank Run, you may want to consider farming up 62,400P for the Infinite Rocket Launcher, as this will make you run go a lot smoother.
-
Return to the Title Screen - If you die during your S-Rank run, you’ll want to return to the Title Screen, as hitting continue will waste more time whereas reloading the save resets it.
-
Practice Dodging - The easiest way to bag an S-Rank is to Dodge past most of the encounters you face, so you may want to spend a while in an easier difficulty learning how to time it perfectly.
Downtown > Sewers
Once you’ve loaded Jill’s Bedroom, you’ll want to head straight into the Bathroom to turn off the tap, then go into the Bathroom again, now answer the phone. Escape from the Nemesis and head up to the Parking Garage Roof, now follow Carlos into the Subway. After you’ve made it out of the Subway, head into the Kite Bros Railway Subway building to pick up the Fire Hose, then go back and put out the blaze.

(1 of 2) Head to these three locations to reactivate the Circuit Breakers
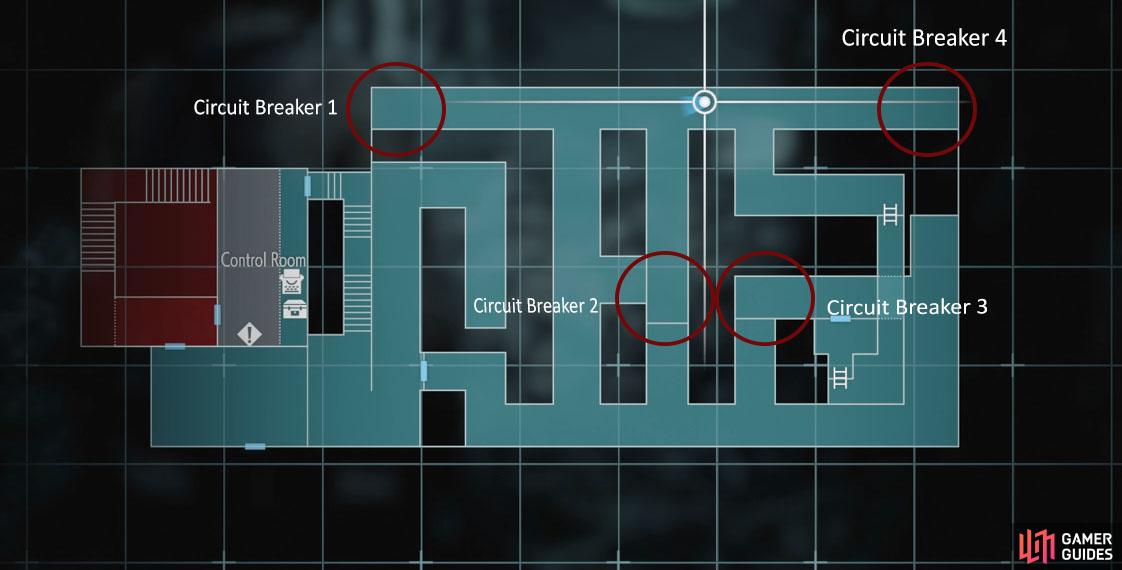

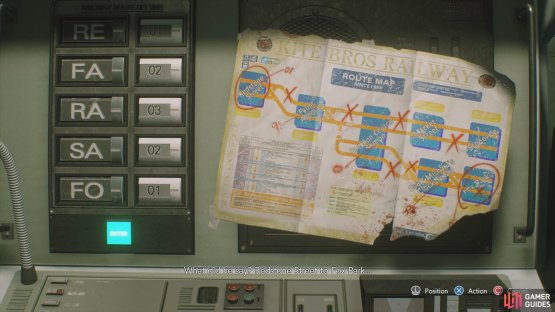
Head to these three locations to reactivate the Circuit Breakers (left), then go back to the Bros Railway Subway building and input the combination above (right)
Head into the building ahead and grab the Bolt Cutters, then continue along until you reach the Subway Power Substation. Collect the Lock Pick from the corpse and then head into the Substation to reset all four Circuit Breakers. Reactivate the power in the Control Room, then go back into the Bros Railway Subway building to set the train on route for Fox Park by inputting the following order.
FA-02
RA-03
SA-02
Once you’ve completed the puzzle, go into the side room to acquire the Shotgun, then return to the Subway to meet up with Carlos. Finally, escape from the Nemesis and crawl through the vent to drop down into the Sewers. Refer to the Downtown page if you seek further guidence.
Sewers > Police Station
Follow the path along to the right and enter the Sewers Lab to pick up the Battery Pack, then return back to the area where you slid down and climb up the ladder. Use the Battery Pack to get through the door, then do a loop around to take it back. Ignore the room on the right and drop off the ladder to the left, use the Battery Pack one final time to get out of the Sewers.
Sprint away from Nemesis and work your way up to the top of the Demolition Site to begin your first boss battle. Refer to the Nemesis page for an in-depth guide on how to defeat him.
Once you’ve defeated Nemesis for the first time, follow the path along and go inside Kendo’s Gun Shop to pickup Kendo’s Gate Key. Head through the Gate and sprint away from Nemesis until you reach Carlos back at the Subway. Following the cutscene you’ll transition over to Carlos at the Police Station. Refer to the Sewers if you seek further guidance.
Police Station > Hospital
Upon entering the Police Station, you’ll want to head up to the 3F to collect a Key, then return to the 1F and open up the Safety Deposit Room. Input 104 into the control panel to acquire the Battery, then go into the 2F Shower Room to pick up an Electronic Gadget off the wall. Combine it with the Battery in your inventory, then place it back onto the wall and wait for it to explode. Finally, head into the S.T.A.R.S Office and then try to exit the room to transition back over to Jill in the Subway Tunnel. Refer to the Police Station if you seek further guidance.
Go into the Safe Room on the left and pickup the Grenade Launcher off the barrel, then head outside and cross the bridge to face the second Nemesis battle. Refer to the Nemesis Stage 1 page for an in-depth guide on how to defeat him.
Hospital > Underground Facility
Upon defeating Nemesis Stage 1, you’ll transition back over to Carlos in the Hospital to find a Vaccine for Jill. Follow the path along and grab the Tape Player off the reception desk outside the voice-authentication door room, then go into the Treatment Room on the 2F to collect the Audio Cassette Tape. Combine this with the Tape Player in your inventory, then open up the voice-authentication door on the 1F, now interact with the computer to acquire the Vaccine.
Return to the Makeshift Sickroom to give Jill the Vaccine and then you’ll need to fight of a hoard of Zombies for a while. After you’ve taken out all the enemies, you’ll transition back to Jill. Exit the Sick Room and follow the path on the right to take the lift down into the Underground Facility.
Underground Facility / NEST 2
Once you’ve used the lift, follow the path along until you enter the Underground Storage and then do a loop around to collect the three Fuses. Take the lift up and interact with the terminal in the center to initiate a cutscene, then follow Tyrell. Unfortunately, Tyrell didn’t make it, so you’ll need to follow the path ahead and go up the stairs.
Enter the room on the left and interact with the computer on the right to acquire the USB, then go back downstairs to open up the door on the left with the USB. Proceed into the room and head upstairs first to pick up the Culture Sample, then go back into the room and head through the door in the back corner.
Head down the stairs and push in the power source to allow you to open up the door, then take the lift up ahead. Enter the room on the left to find the Liquid-filled Test Tube from the freezer.
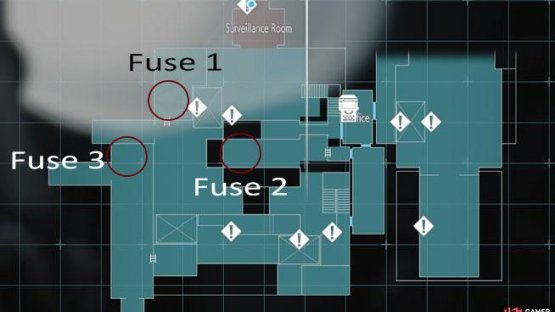

(1 of 2) Head to these three locations to find the Fuses needed for the lift

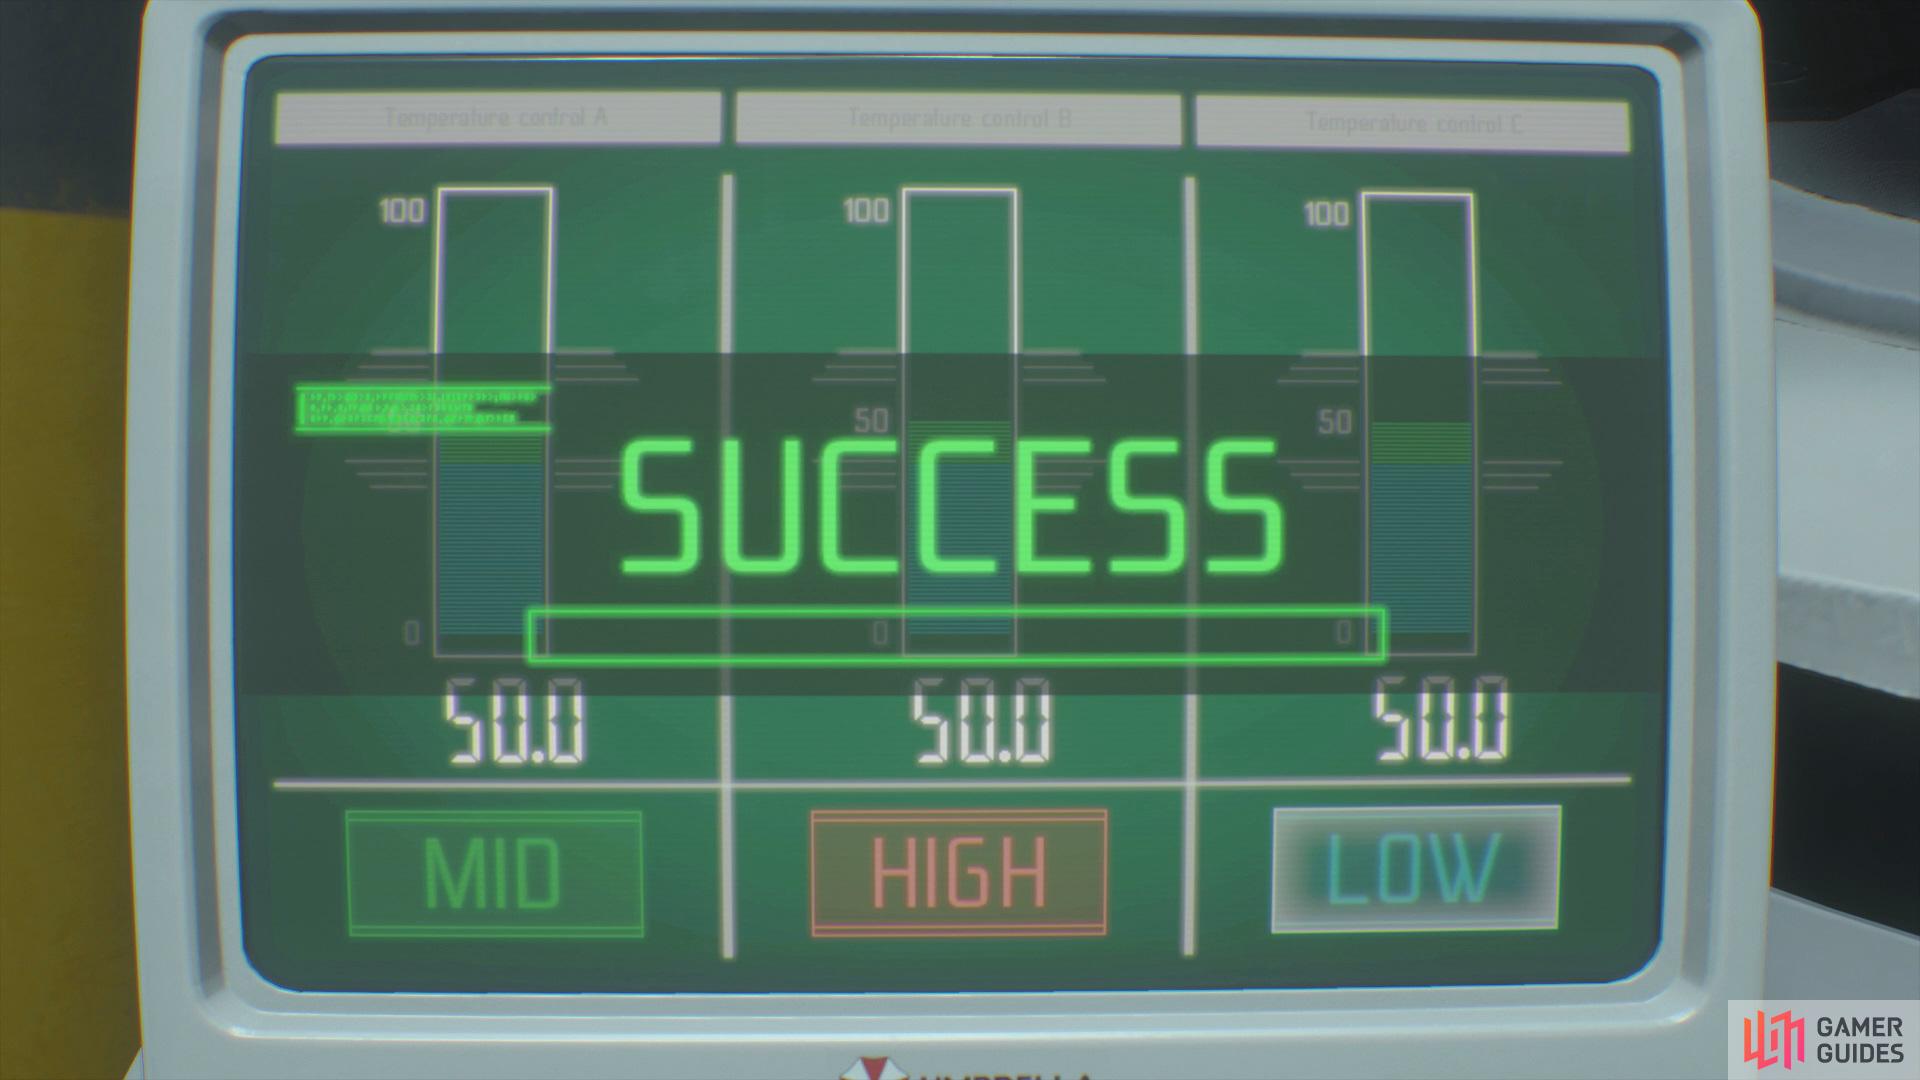
Head to these three locations to find the Fuses needed for the lift (left), then input the combination above to create a Vaccine. (right)
Return to the room where you got the USB and place the Vaccine Base into the Machine, set the levels to, Mid, High, Low to create the Vaccine. Crawl through the vent and then keep the analog stick held up to get away from the Nemesis. Finally, head through the Safe Room and follow the path around to battle the Nemesis again. Refer to the Nemesis Stage 2 page for an in-depth guide on how to defeat him.
Once you manage to take him out, follow the path ahead to tackle the final form of the Nemesis. Refer to the Nemesis Stage 3 page for an in-depth guide on how to defeat him. Climb up the ladder and take the lift up to take out Nicholai to complete the game.


Tips and Advice (Inferno)
Once you’ve beaten the game on Hardcore/Nightmare and got an S-Rank on Standard, you’ll now have the option to play the game once more on Inferno to get another S-Rank. However, this is a lot easier than you may think, as if you have the Infinite Rocket Launcher unlocked you’ll be able to destroy every enemy/boss with no problem at all.
The only major difference you’ll need to worry about on this difficulty is the disabled Autosave. To deal with this, you’ll want to do a run through the game to refresh your mind on where the boss battles take place, so you know when to do a hard save on your S-Rank run. For example, Demolition Site Rooftop is a great place to save your game as it’s right before the very first Nemesis battle.

No Comments