(1 of 2)
Boss
| Name | Class | Level | Items |
|---|---|---|---|
| Risen | Swordmaster | 20 | Brave Sword |
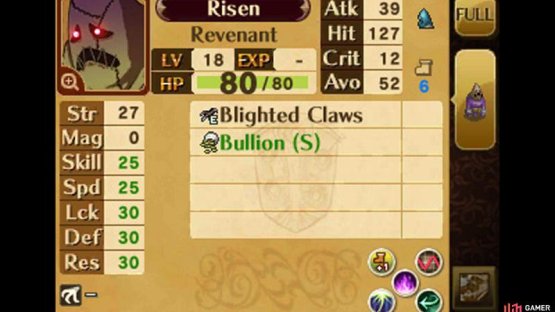
| Risen (x5) | Revenant | 18 | Blighted Claws, Bullion (S) |
| Risen (x2) | Revenant | 20 | Blighted Claws, Bullion (S) |
New Units
| Name | Class | Level | Recruit |
|---|---|---|---|
| Palla | Falcon Knight | 20 | Defeat all 7 Revenants |
Strategies for all difficulties
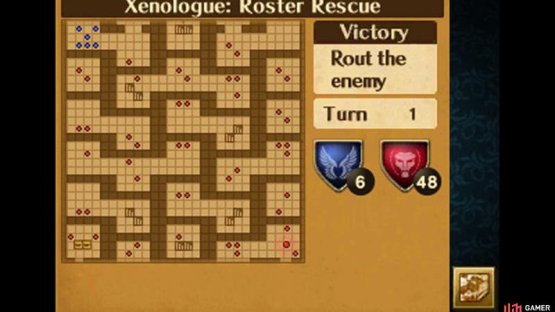
The roster–a mysterious document containing your army’s dirtiest secrets–has been stolen by gigantic Revenants. Your task, whether you choose to accept it or not, is to kill all of the Revenants before they escape the ruins and spread the secrets to the world.
To make things extra difficult, you must give chase while walls magically open and close. Should any of the Revenants manage to escape, you can still beat the map, but you won’t get Palla.
Compared to the previous two missions, this one is a little more straightforward, despite all the complications. With the right preparations, stopping the Revenants won’t be a difficult task–the only problems are dealing with the numerous reinforcements, as well as navigating the ever-changing labyrinth.
Before diving into the mission, bring at least 2 or 3 (ideally, highly mobile) units with the Galeforce skill–these will be the ones chasing after the Revenants. Also, stock up on strong weaponry and Elixirs.
The layout of the ruins means you’ll be splitting up a lot and you’ll want units who can deal damage reliably, plus a way to quickly heal units. If you’re fielding flying units, watch out for the Snipers (there will be reinforcements too); give them the Bowbreaker or Iote’s Shield skill if available.
(1 of 2) A good reason to give chase if there was one.
A good reason to give chase if there was one. (left), (right)
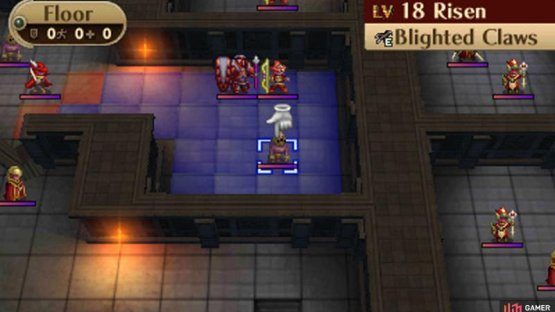
On your first turn, the walls south of the two starting positions will open up. On the west side, send two units south and one unit east; on the east side, send two units west and one unit south.
Should you have two extra units, send them east and west as well, so they can meet up and pair up later. If you have ranged units, it might be useful to place them in the range of the enemy’s ranged units, so you can defeat them on the enemy’s turn.
Turn 2, the walls further south will open, while the walls that opened during Turn 1 close up. Have your units who went south handle the newly revealed enemies.
Take caution of the Generals with Vengeance (deals extra damage when at low HP), Pavise and Aegis (halves physical and magical damage respectively). Units waiting behind still-closed walls should standby until further notice.
On Turn 3, the walls to the left and right of the starting positions will open up, while the walls that opened during Turn 2 will close up. The units in the now-closed rooms should get into position and standby for now. Meanwhile, the units who can move toward the centre should carefully march in.
Be prepared for reinforcements on the coming turns; plug in the nearby stairs if possible. During the enemy’s next turn, 2 Tricksters will appear from the northern stairs, and a Swordmaster and Sniper will appear from the stairs to the north-west.
(1 of 2) Don’t let these ugly mugs out of your sight!
Don’t let these ugly mugs out of your sight! (left), (right)
Turn 4, the wall further south from the northern stairs will open, the next wall south of the east starting point will open and the walls that opened during Turn 3 close up.
The unit heading south from the east should head down and prepare for pursuit. Meanwhile, the 3 or 4 units near the centre should work together to take out the new enemies and reinforcements. On the enemy’s next turn, the same reinforcements as Turn 3 will appear.
When Turn 5 arrives, a whole load of walls will open up. The two units heading south from the west should split up and carefully break into territory; on the next turn, they must be ready to begin pursuit. Similarly, the unit heading south from the east should charge straight through, with Galeforce, and kill the boss.
Finally, the central units should hold off the reinforcements, plugging in more stairs if necessary. On the enemy’s turn, the same reinforcements as before will appear, plus a Sniper and General by the eastern stairs.
Turn 6 is when things start getting serious. The unit to the south-east should kill the two nearby Revenants, lest they reach the edge of the map and leave. The two units heading south from the west need to carefully manoeuvre further south to catch up with their nearly Revenants–ready to kill on them next turn.
As before, the central units should continue to stand their ground. During the enemy’s turn, two Tricksters will appear from the south-western stairs and two Generals will appear from the south-eastern stairs.
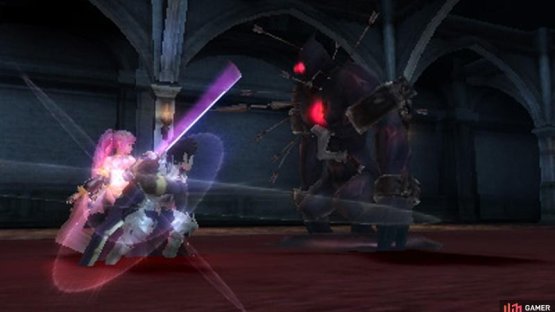
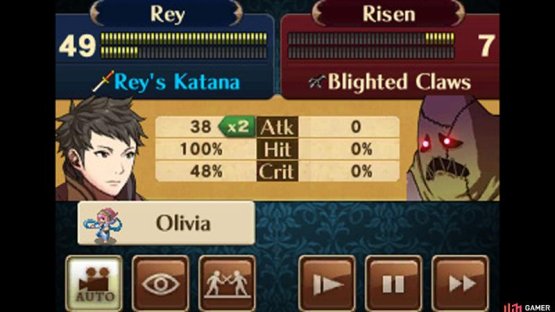
(1 of 2) When it’s time to fight the Revenants, don’t hold back! (But try to stand one square away.)
When it’s time to fight the Revenants, don’t hold back! (But try to stand one square away.) (left), (right)
Turn 7 is the last time where you need to be anxious. The two units to the south-west should kill the two Revenants before they escape the map, while the unit to the south-east should kill the last Revenant and begin moving north-east to regroup with the others.
The central units should mop up the nearby enemies and begin moving out to help the others further down south. On the enemy’s turn, the same reinforcements as Turn 6 will appear; the units pursuing the Revenants may need help handling all the new enemies.
Before Turn 8 begins, two more giant Revenants will appear from the south-most stairs; they will attempt to escape the map from the north-most stairs. No more reinforcements will appear from now, so your job is to mop up the remaining enemies and intercept the Revenants.
Your central units should be in a perfect position to stop the Revenants. Just be aware that these Revenants have better stats than the earlier ones and they have Counter, so remember to hit them from afar to avoid taking damage.






No Comments