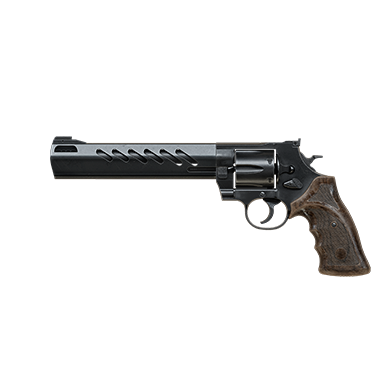
Description
With its high caliber, this revolver is often marketed as a hunting weapon, proving equally effective against African buffalo and Zone chimeras.
Weapon Stats
 Damage
100
 Penetration
3
 Rate of Fire
0
 Range
Range
3,000
 Accuracy
1
Compatible Ammunition and Mods
Upgrades
Interactive Map Locations

1. The Zone Map
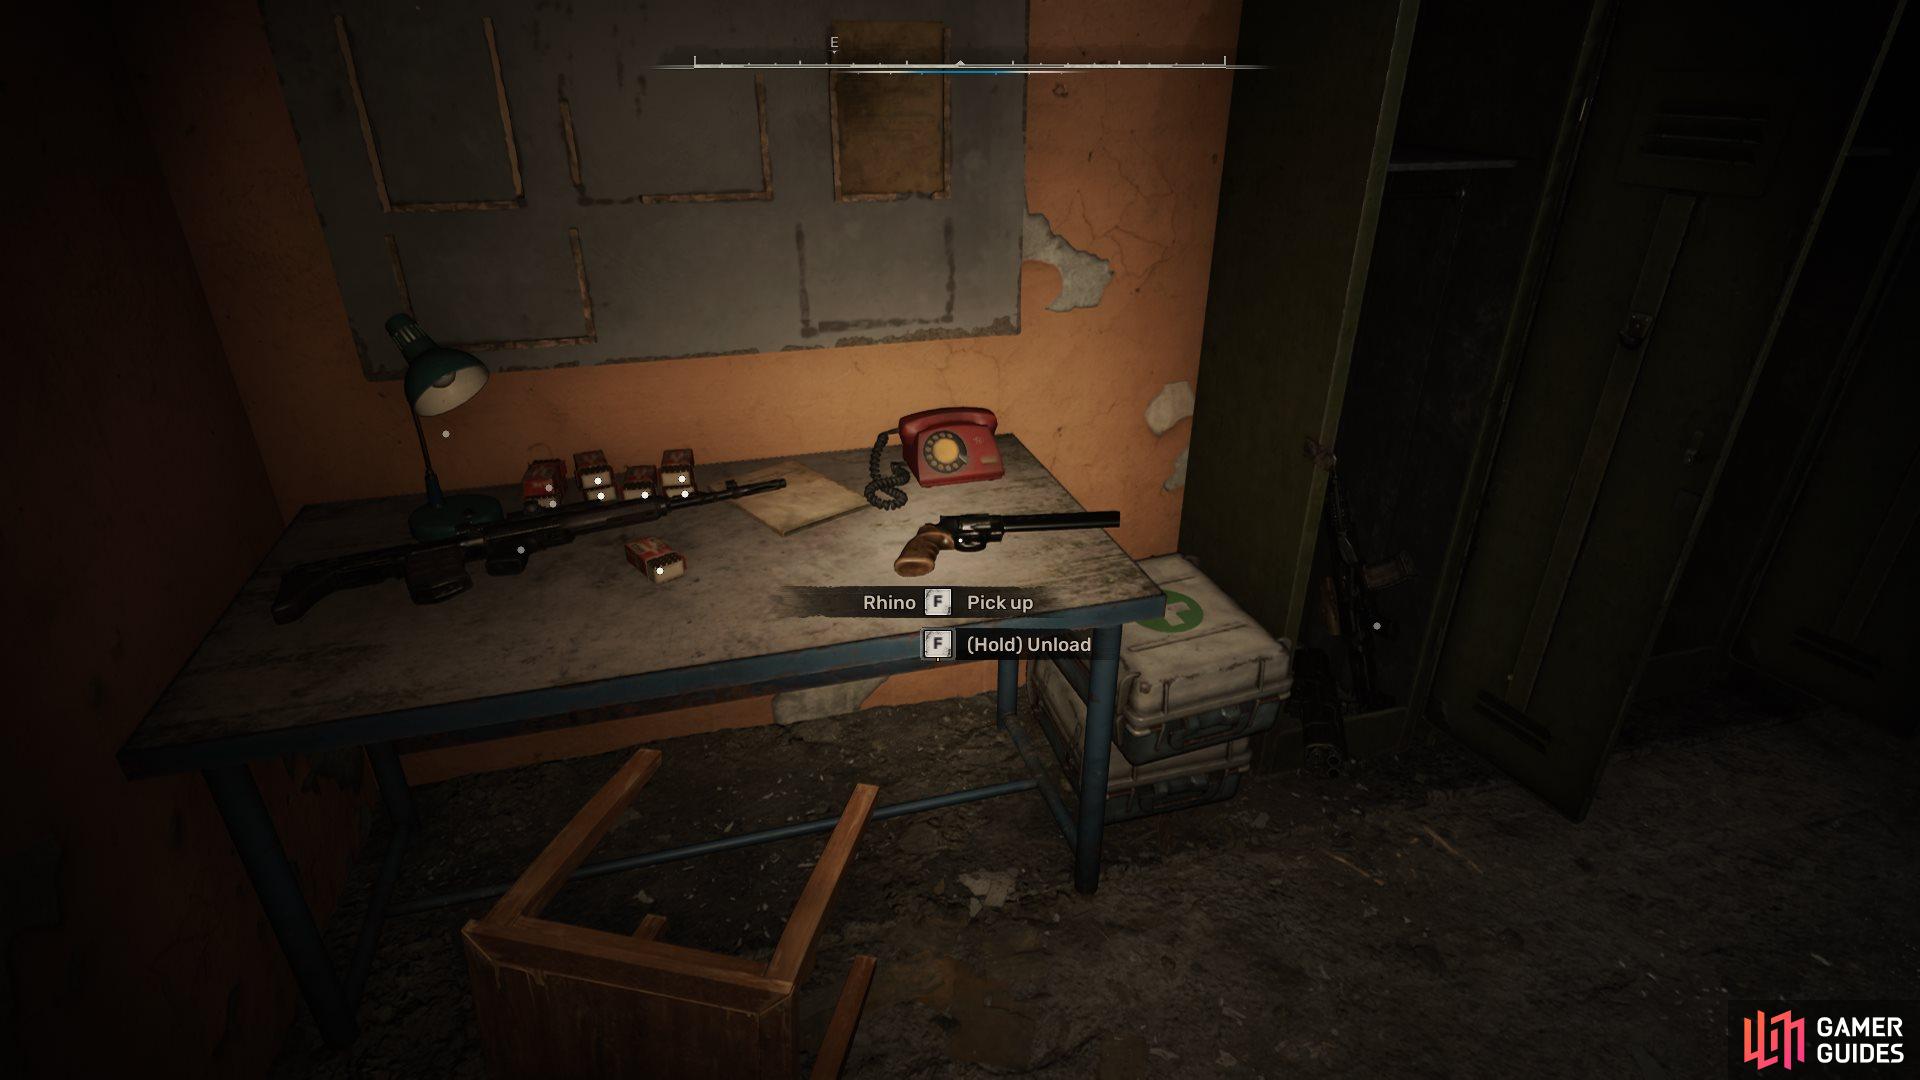
On a desk in the basement. To get inside, peek through the shelves of the room above to shoot a plank, then drop through the hole.
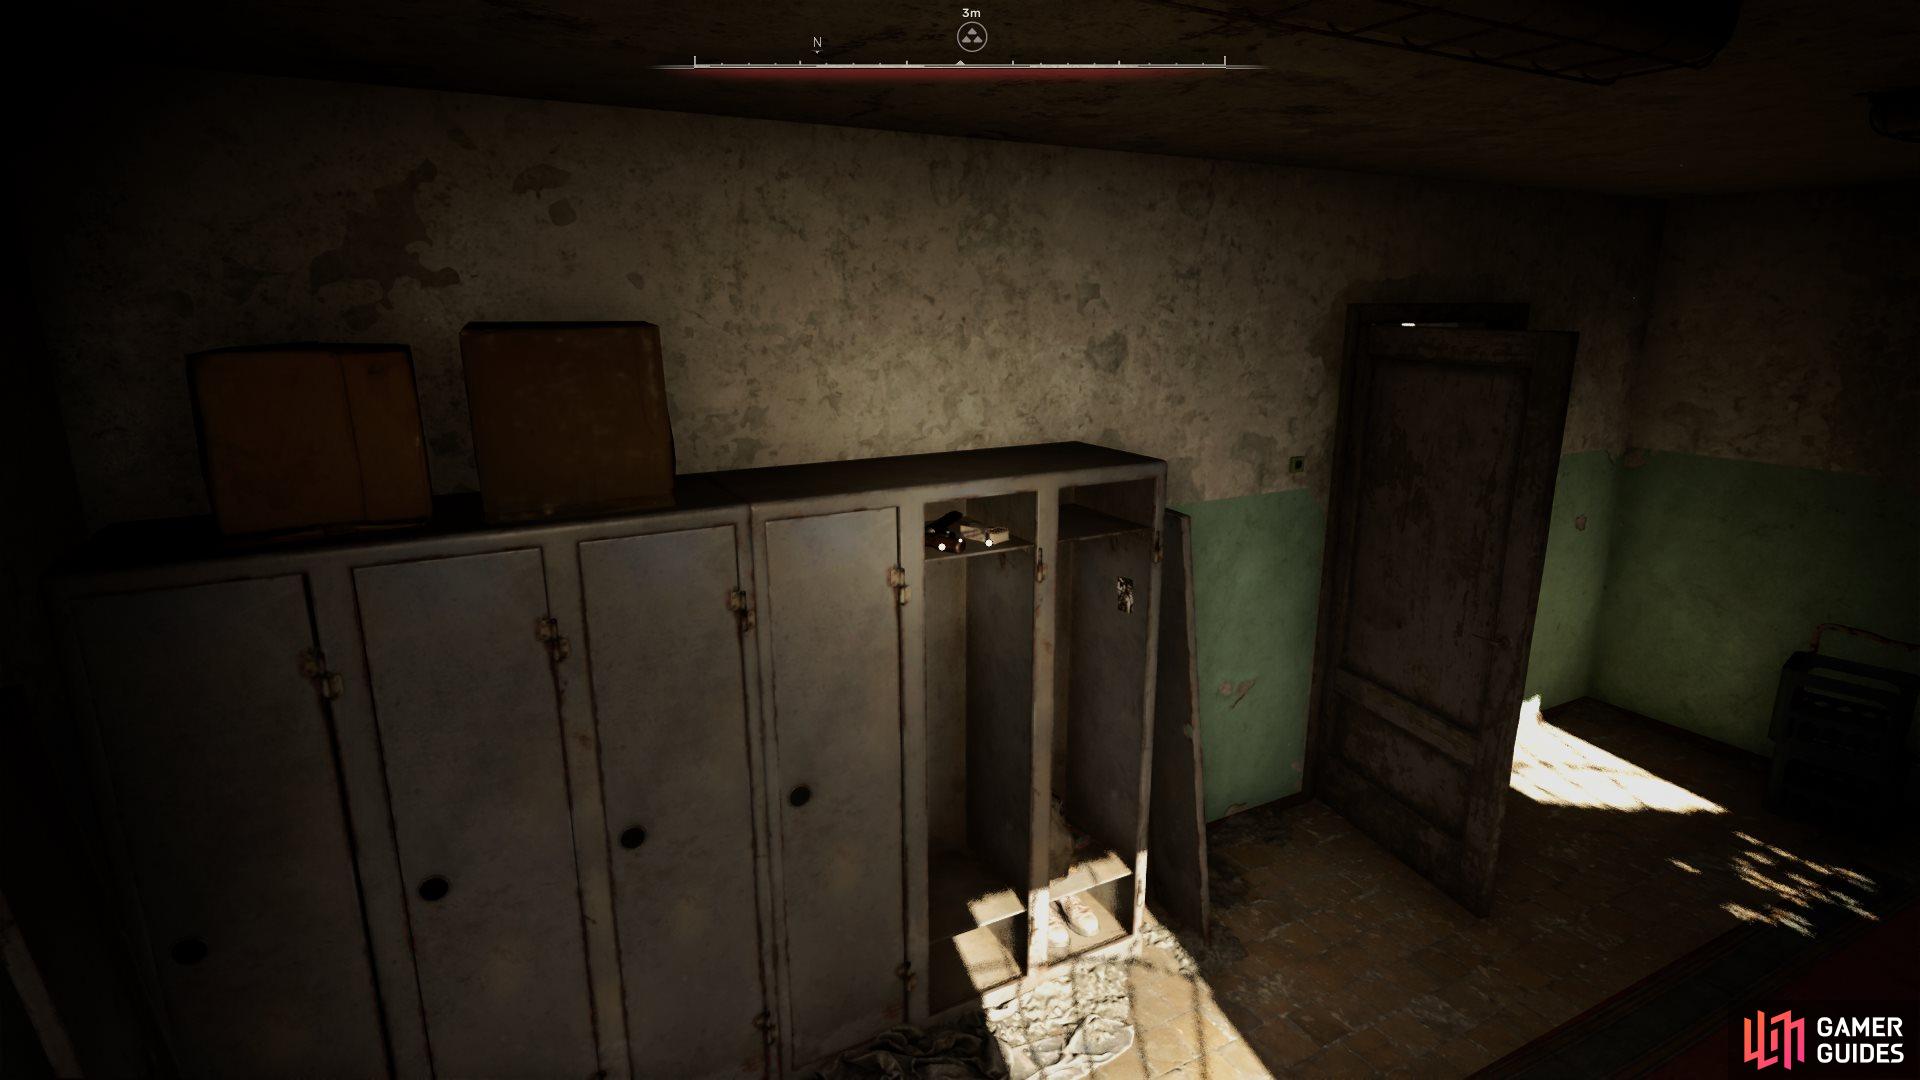
2. The Zone Map
In the top compartment of a locker in the building’s southernmost side-room.
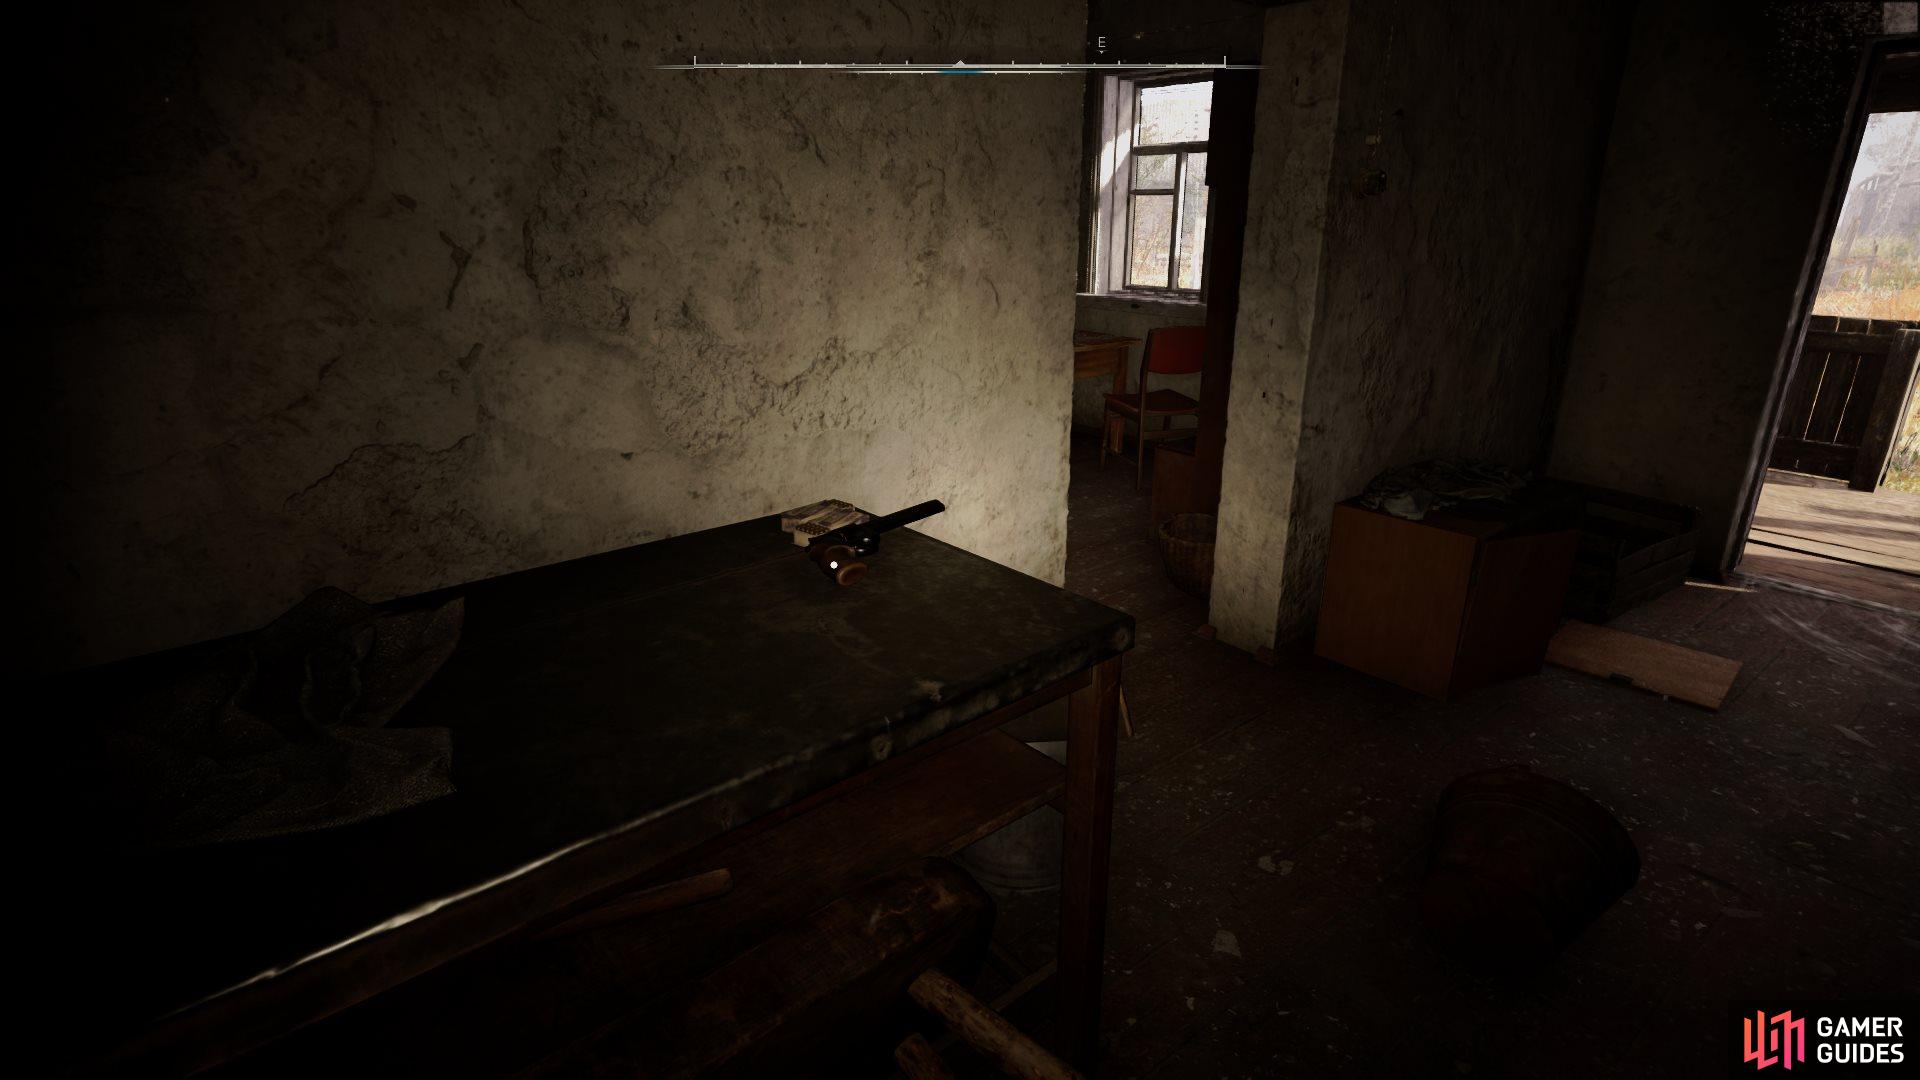
3. The Zone Map
On a desk inside the locked house. To get inside, jump through a hole in the roof via the hill behind the house.
5. The Zone Map
On a table, found soon after clearing out the underground base’s first large room and proceeding through a few corridors. Can only be accessed during a late-game main quest.
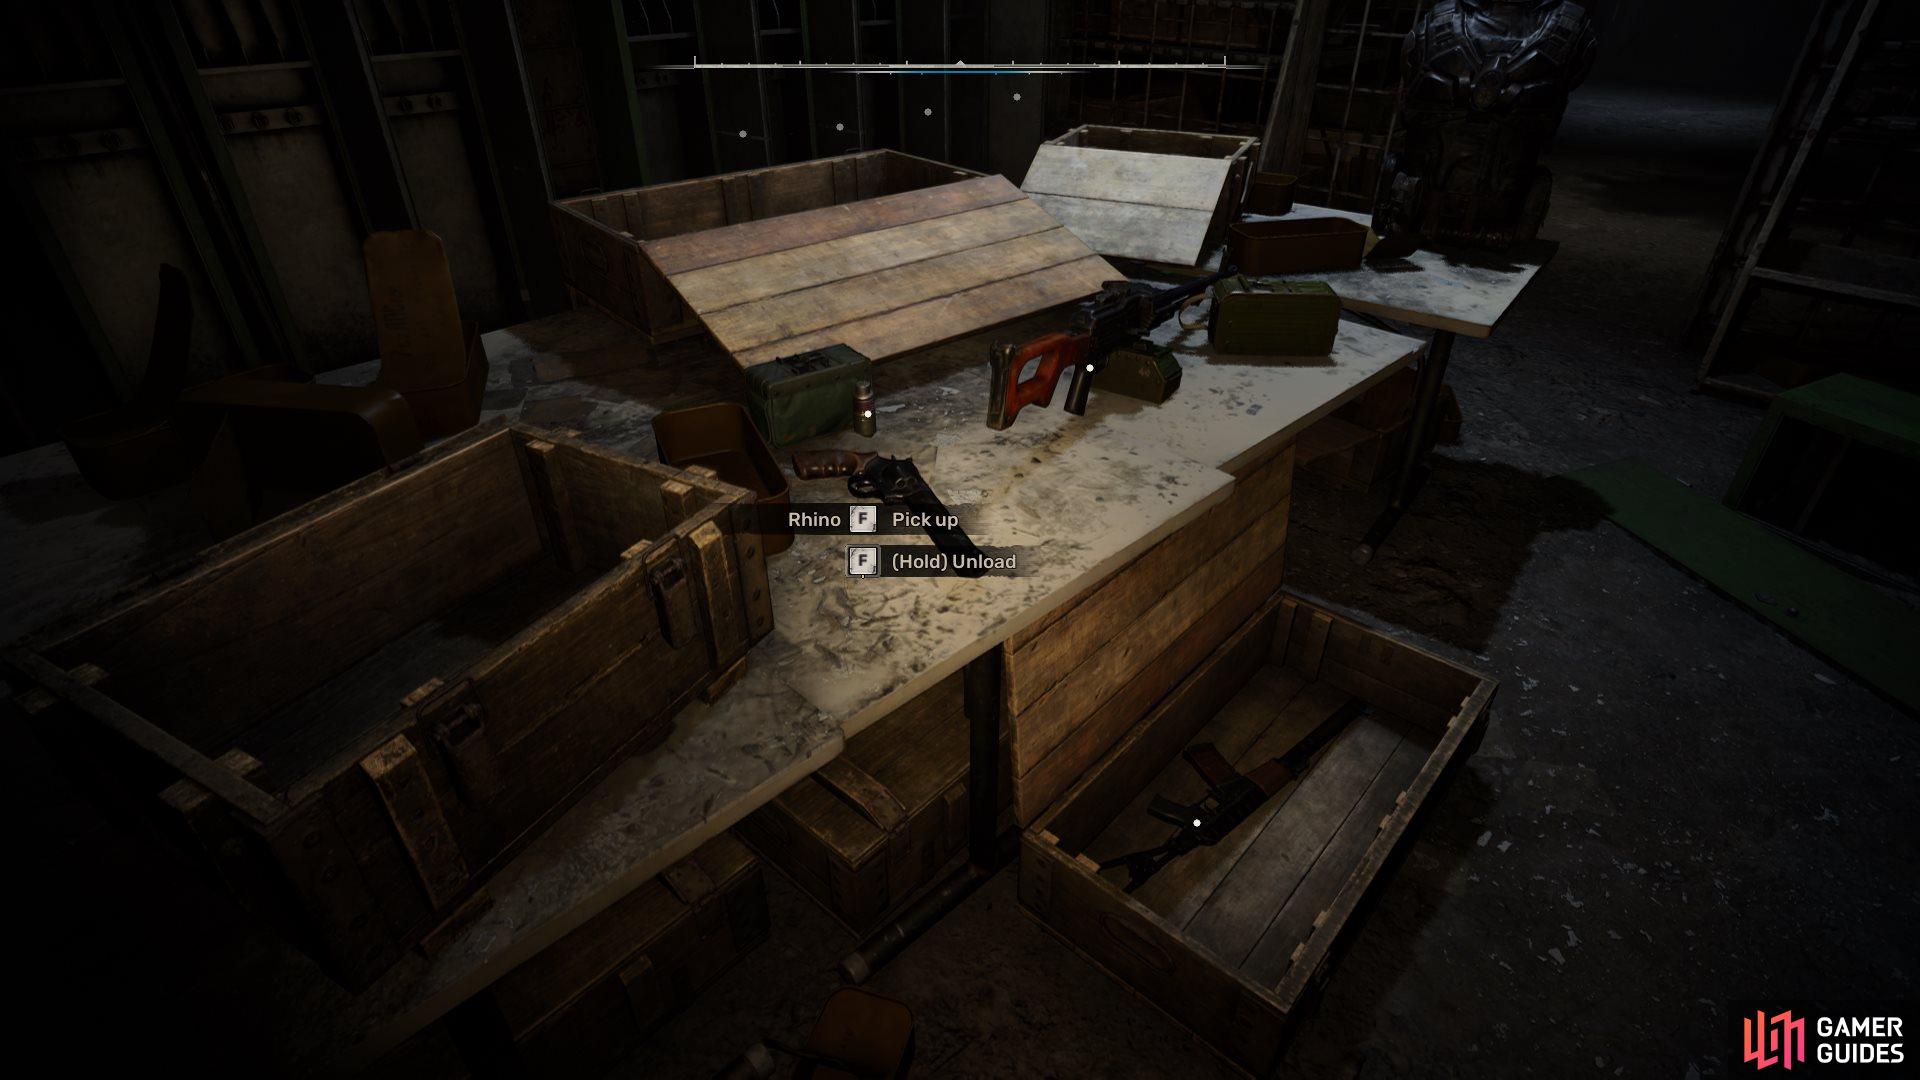
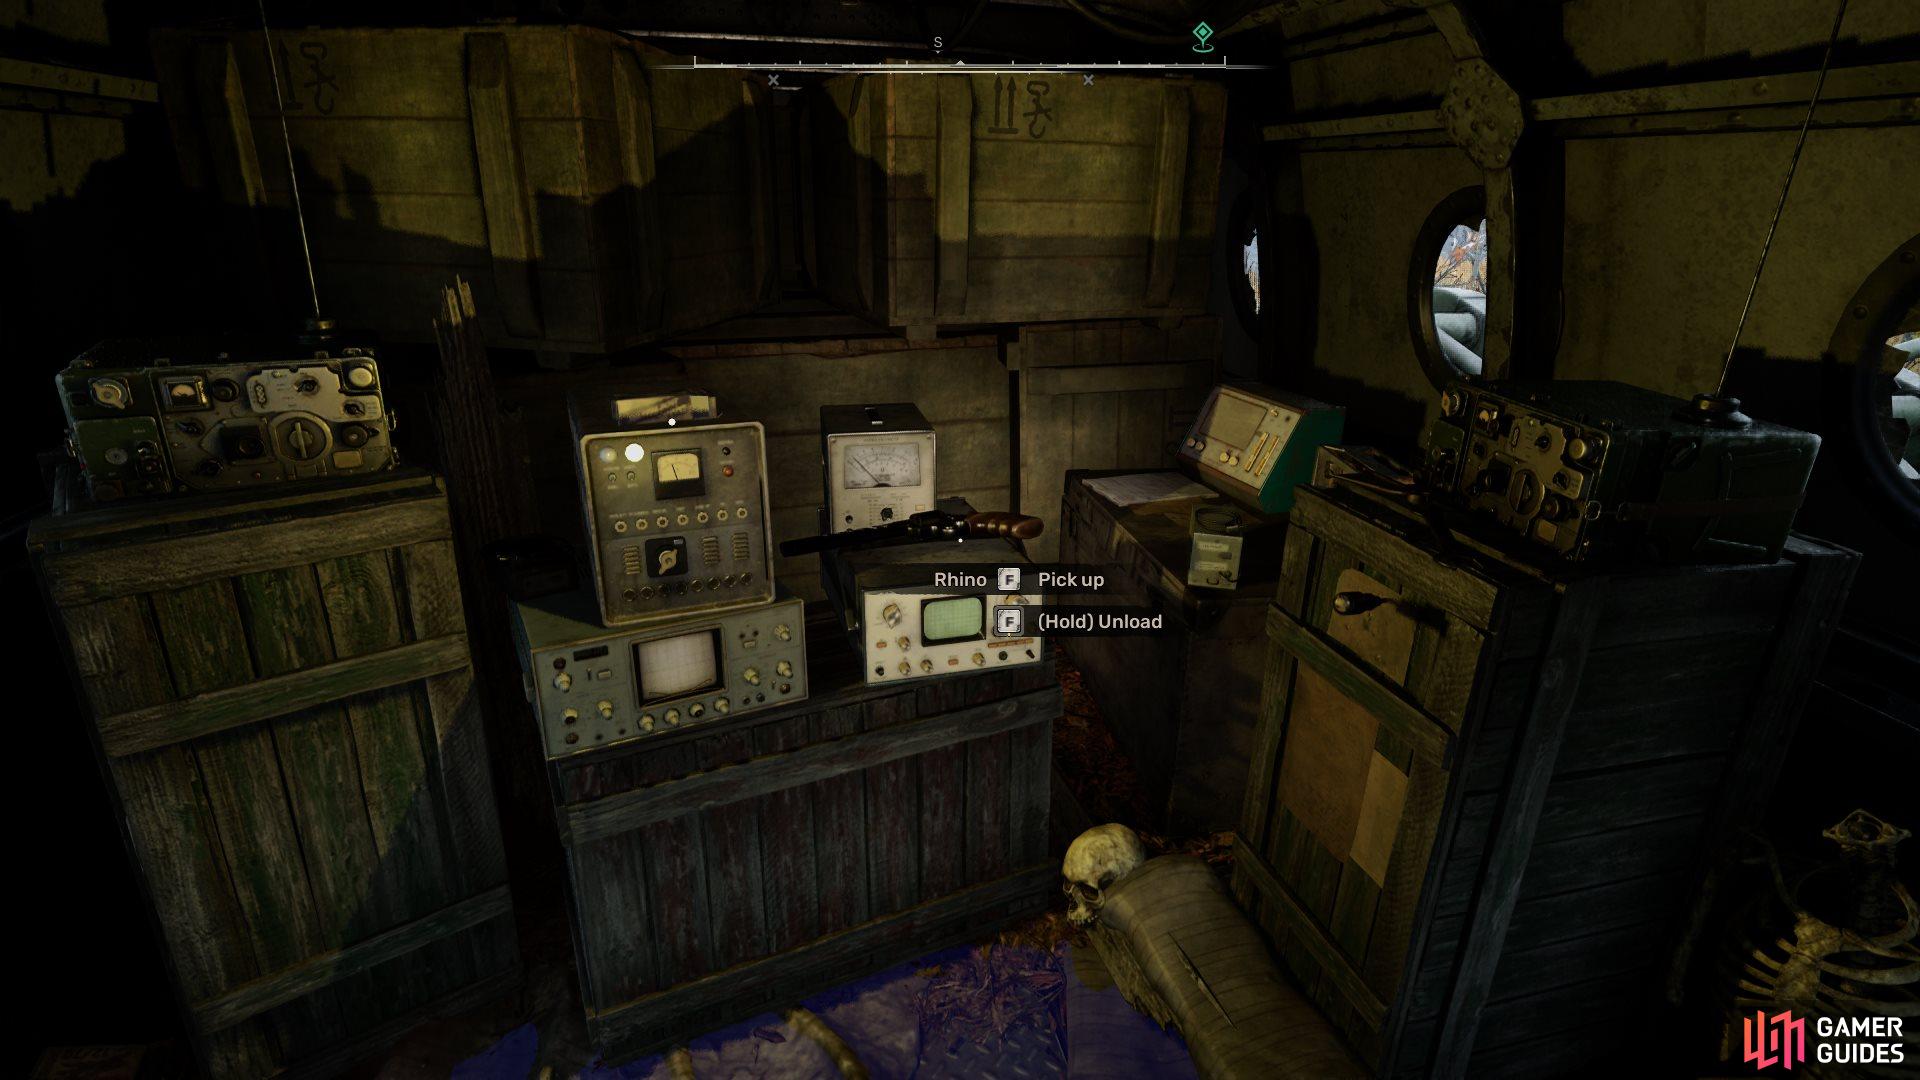
6. The Zone Map
Found deep in the underground base, on a table in an armory you’ll enter soon after navigating an anomaly-filled storage room. Can only be accessed during a late-game story mission.
No Comments