
Kingdom 2 only has four quests, with the first pair beginning after Mission 23 - A Wanted Criminal while the latter two - including this one - begin after Mission 28 - Garrison Liberation Mission 2. Like many earlier quests, this is a one-turn affair tasking you with clearing the map, but unlike previous one-turn missions, you can control more of the variables. This gives you more possible solutions while preventing a clear step-by-step approach from guaranteeing a victory. That said, we can still guide you in the right direction, and this page will provide a walkthrough for Quest 9 - Recovering A Lost Treasure in Persona 5 Tactica, providing tips and strategies for completing the quest in a single turn.
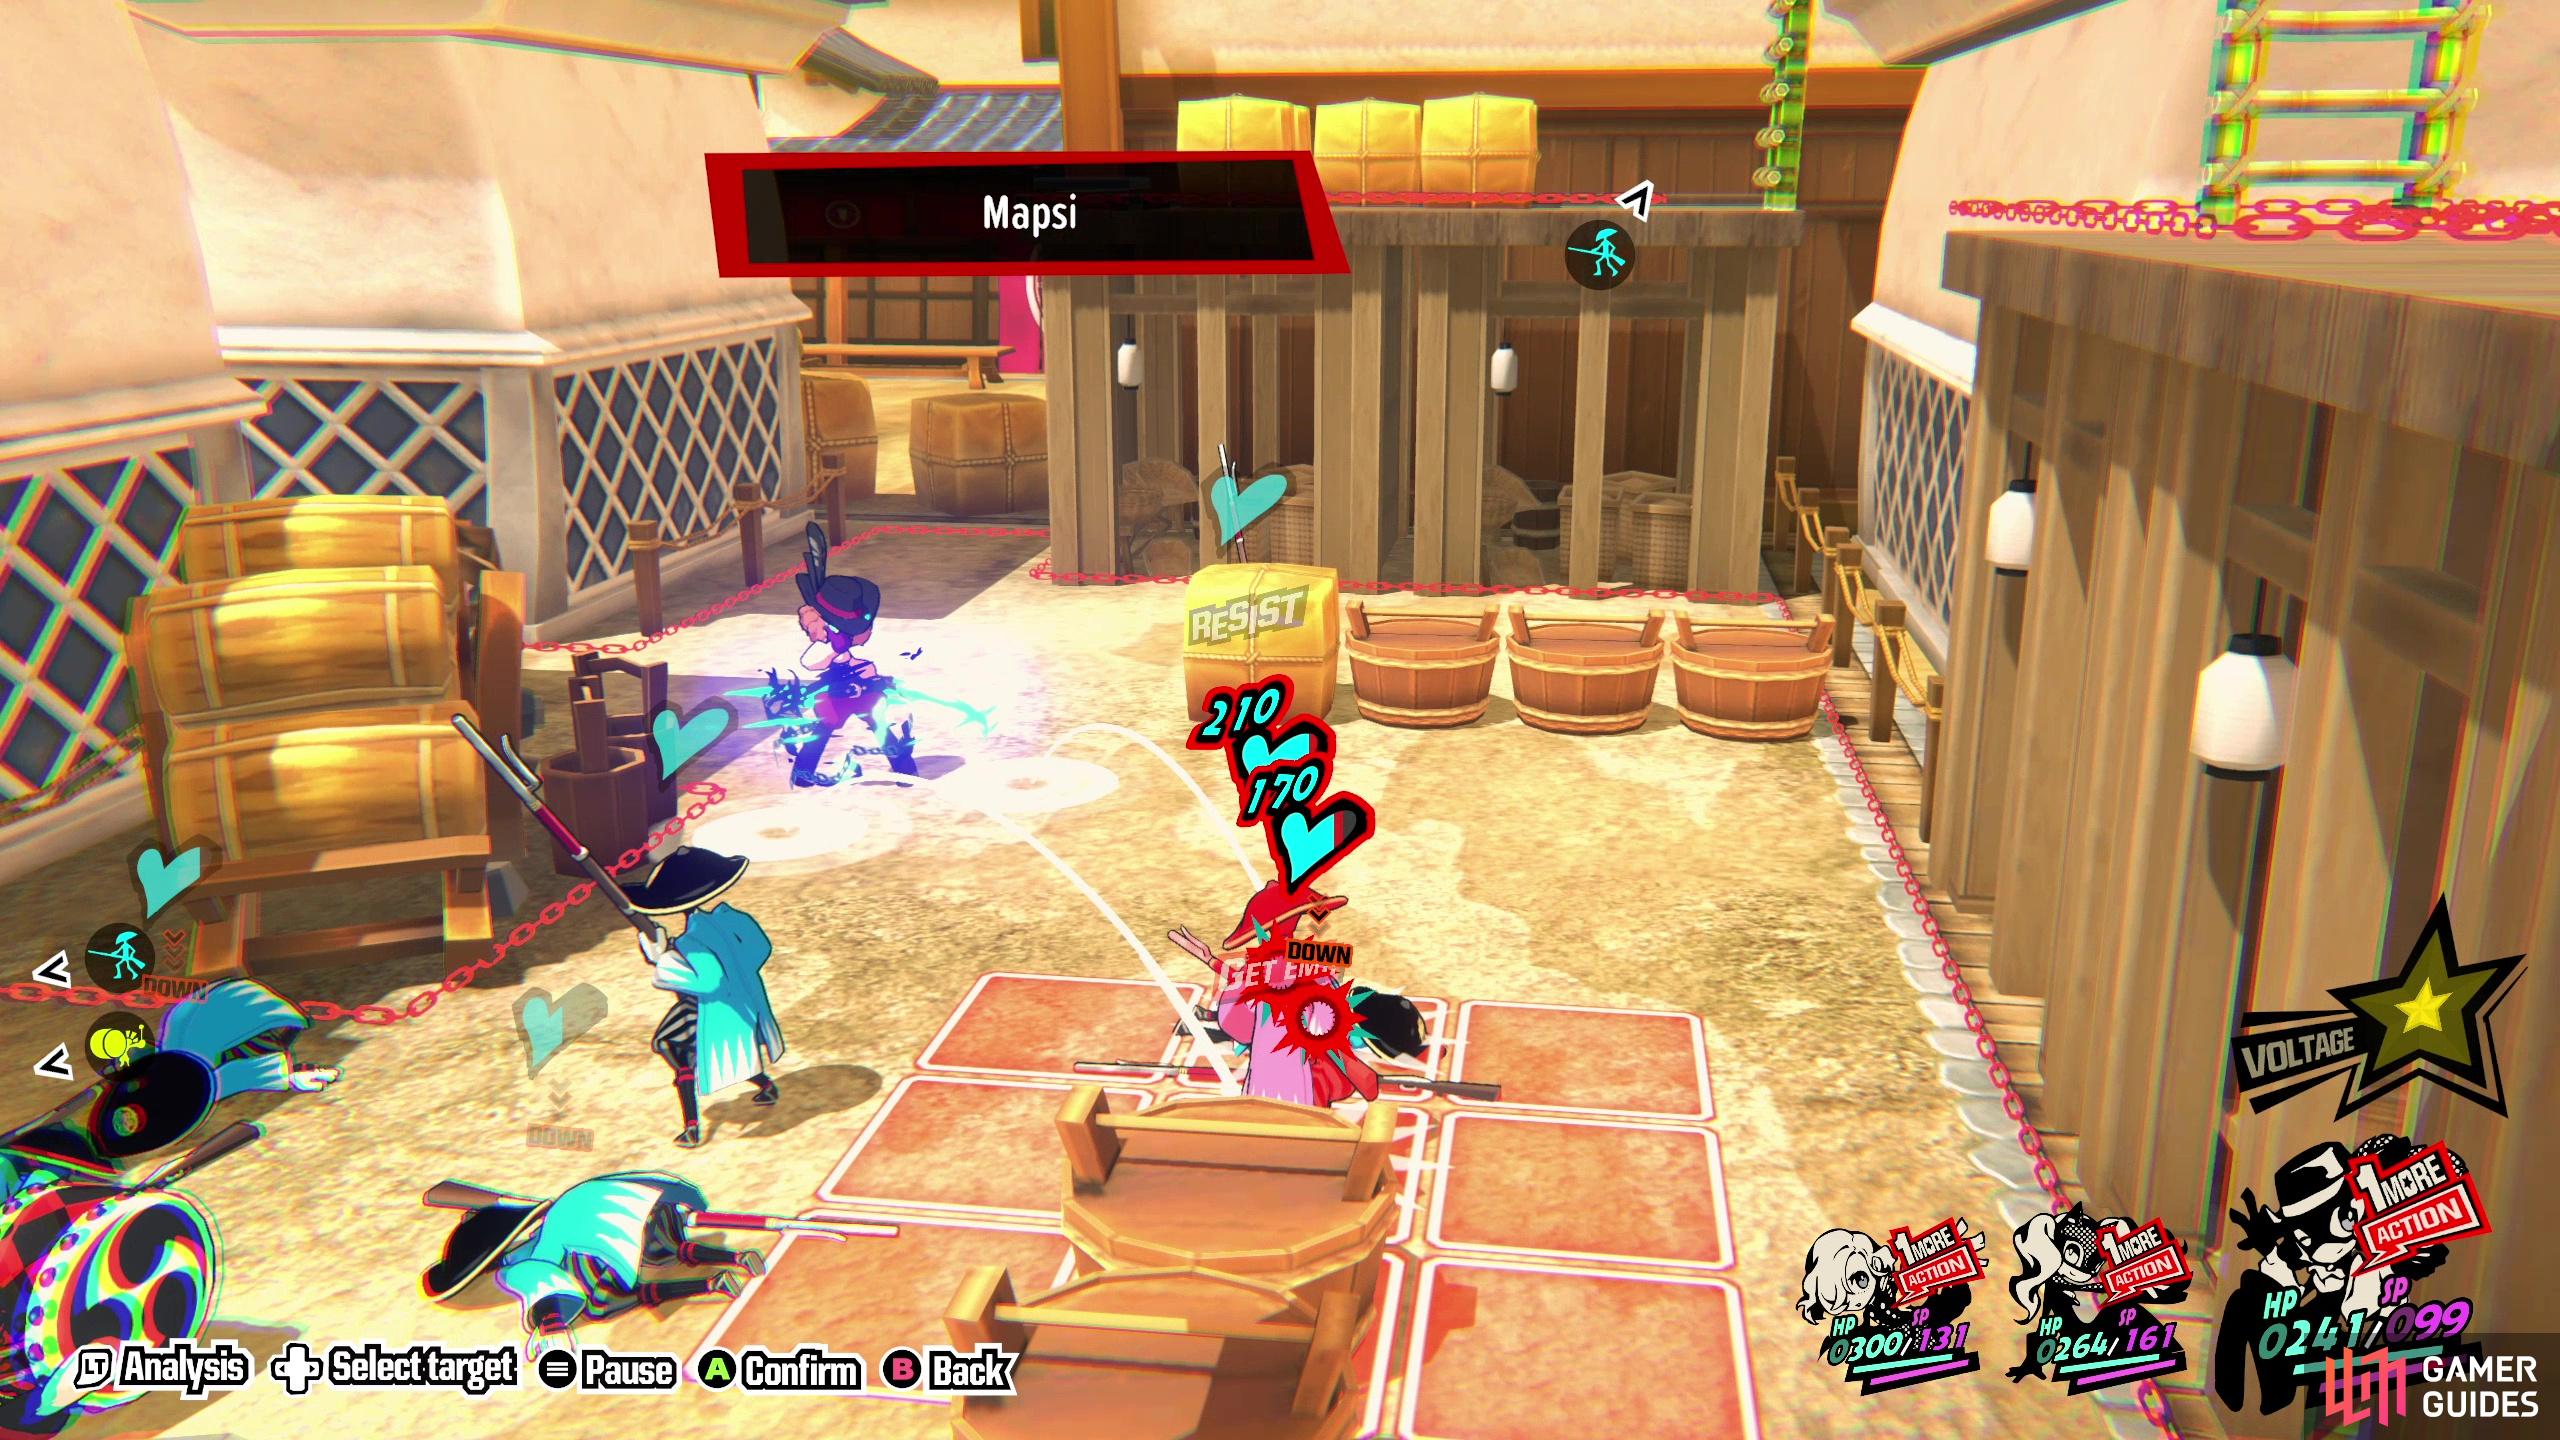
(1 of 2) You have a good deal of freedom for Quest 9, as you can choose which characters to bring (among the females) and the order in which they’re selected determines where they start.
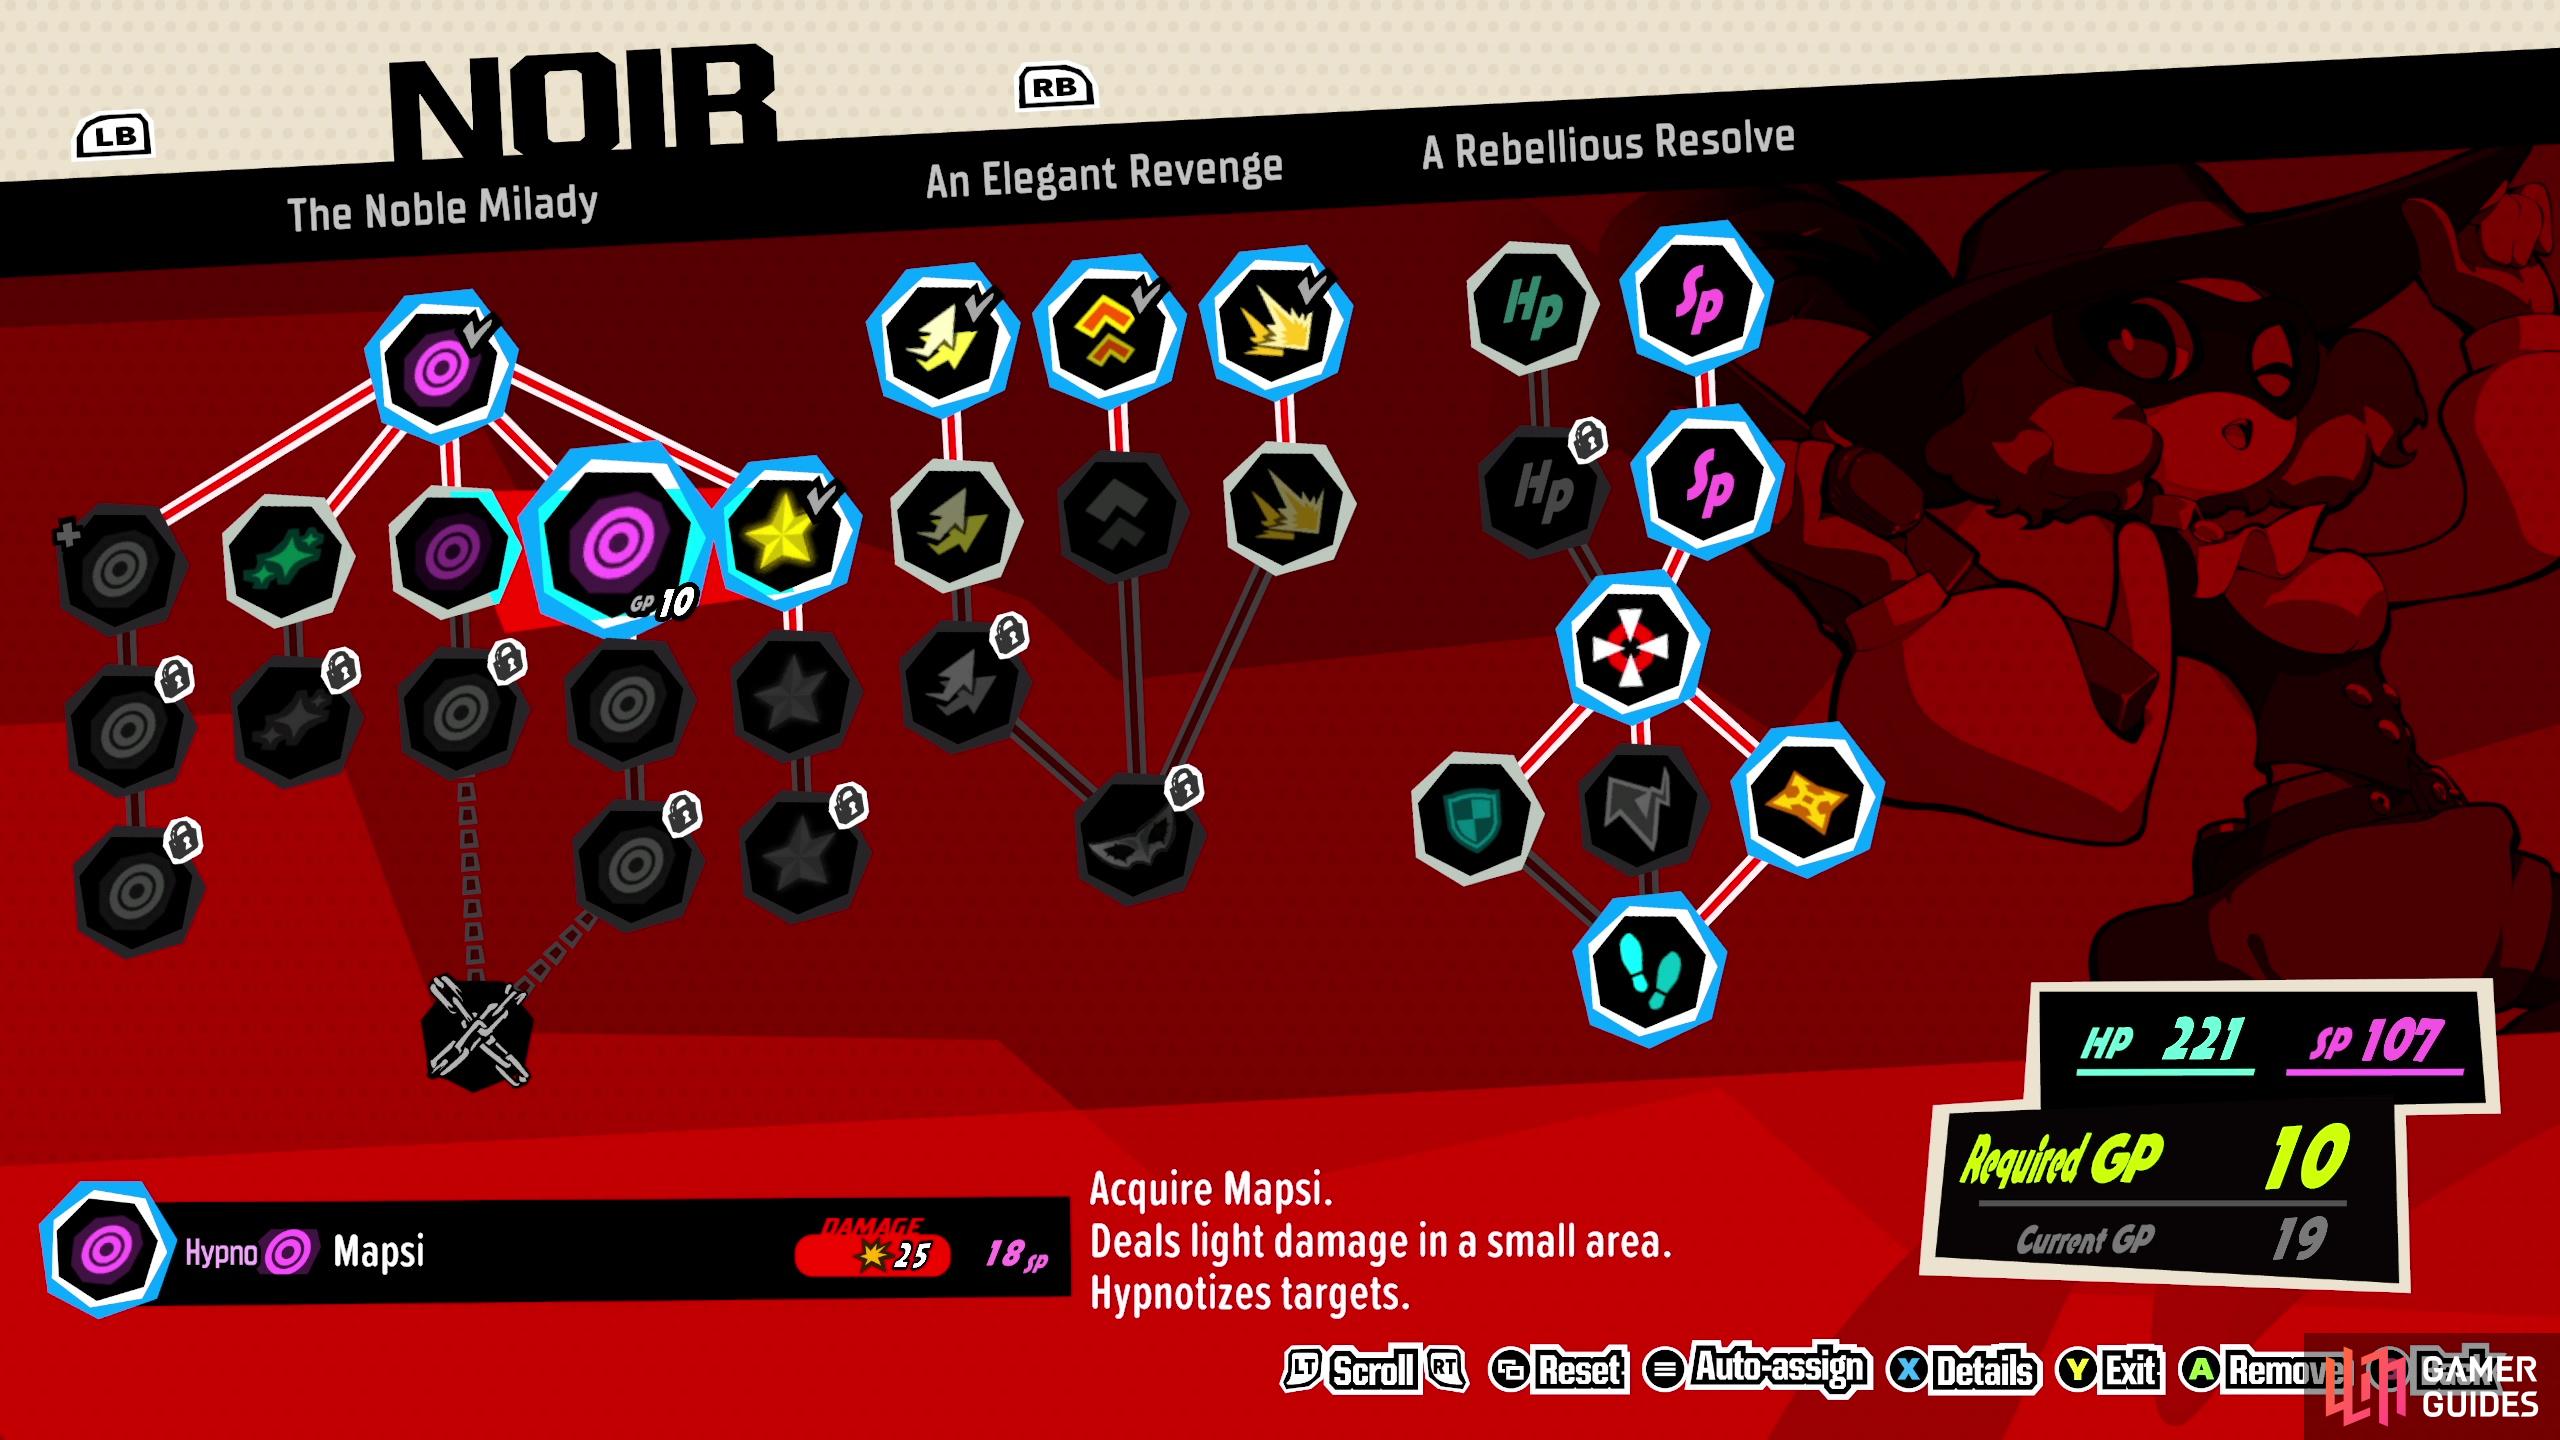
You have a good deal of freedom for Quest 9, as you can choose which characters to bring (among the females) and the order in which they’re selected determines where they start. (left), The real MVP in this battle is likely going to be the Mapsi spell - bring Haru along or equip a persona that grants this spell. (right)
Quest 9 - Recovering A Lost Treasure Preparation and Strategy
| Party | Conditions |
|---|---|
| Any 3 females | Defeat enemies in 1 turn |
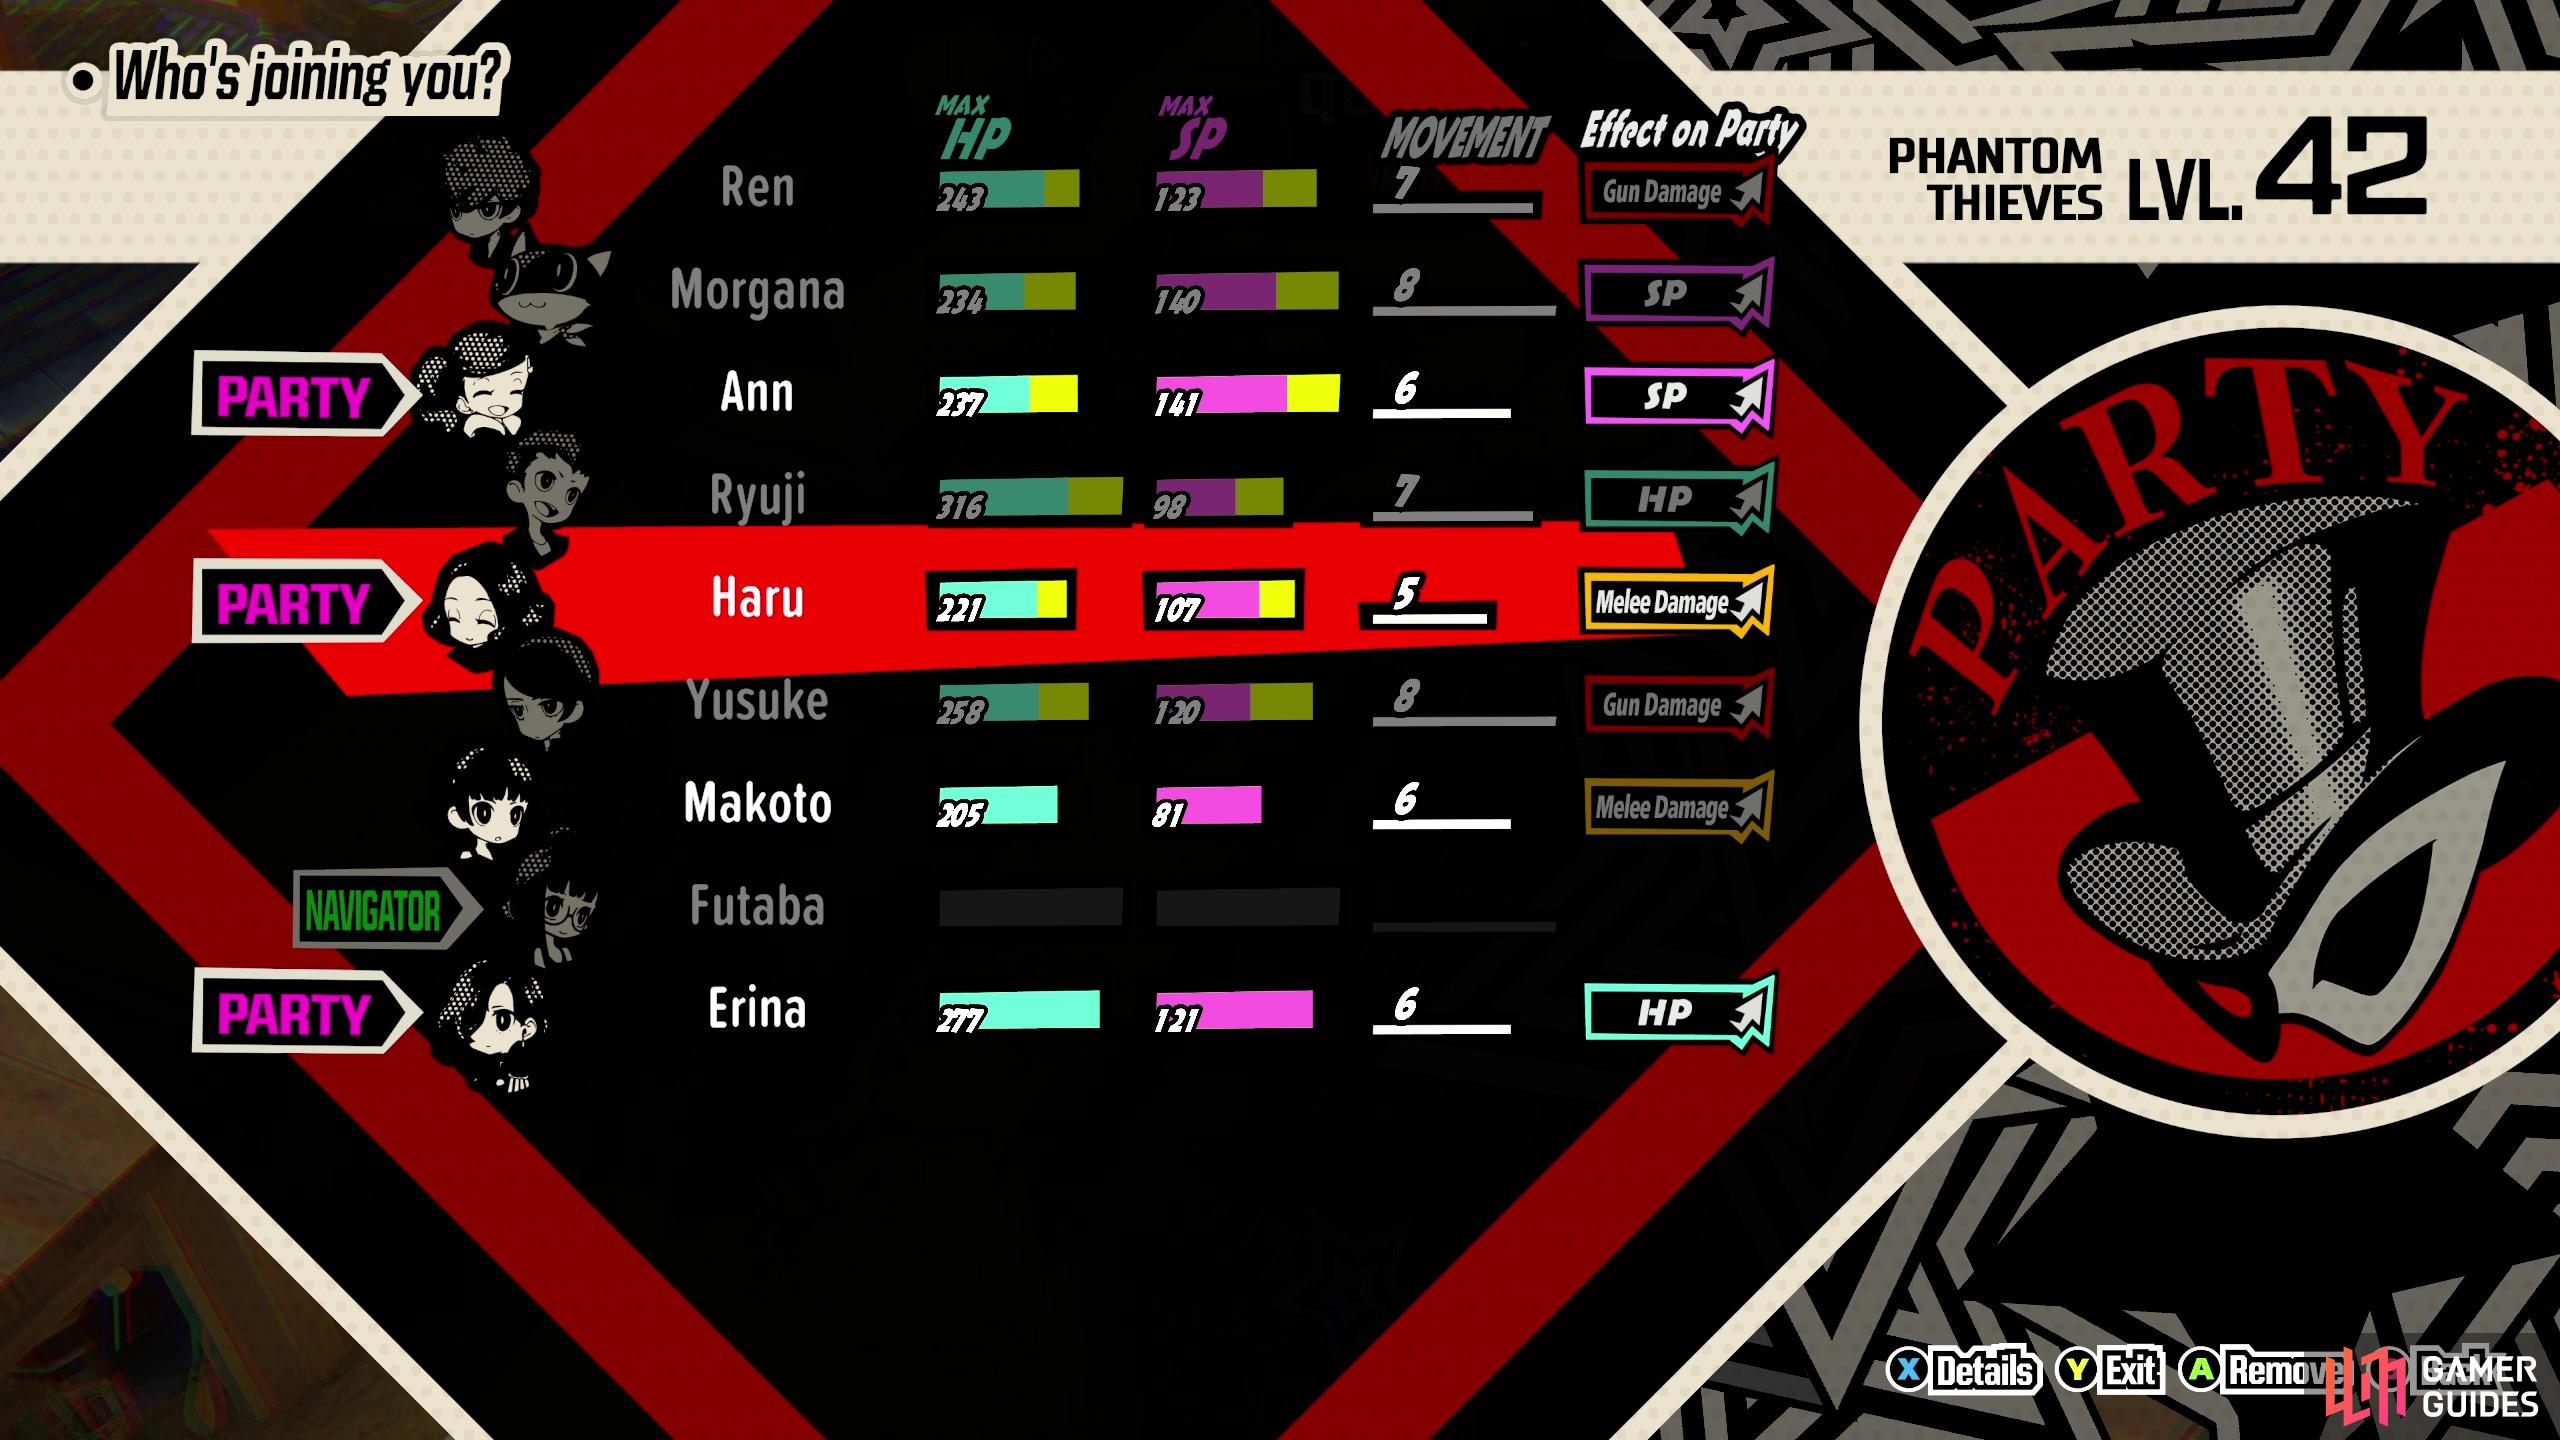
The first thing that should jump out at you with the quest is the party options - you’re limited to the four female characters (Ann, Erina, Haru, and Makoto), but you can choose any three of them for this quest. More importantly, you can choose which order you include them in your party, which will determine their starting positions - an option you didn’t have in previous one-turn quests. This is a huge boon, but it also adds some variables that may obscure solutions to the task at hand. For better or worse, previous quests limited you while also giving you the tools you needed to accomplish the task. This quest loosens the leash and gives you the option to solve things your own way or fail through poor preparation.
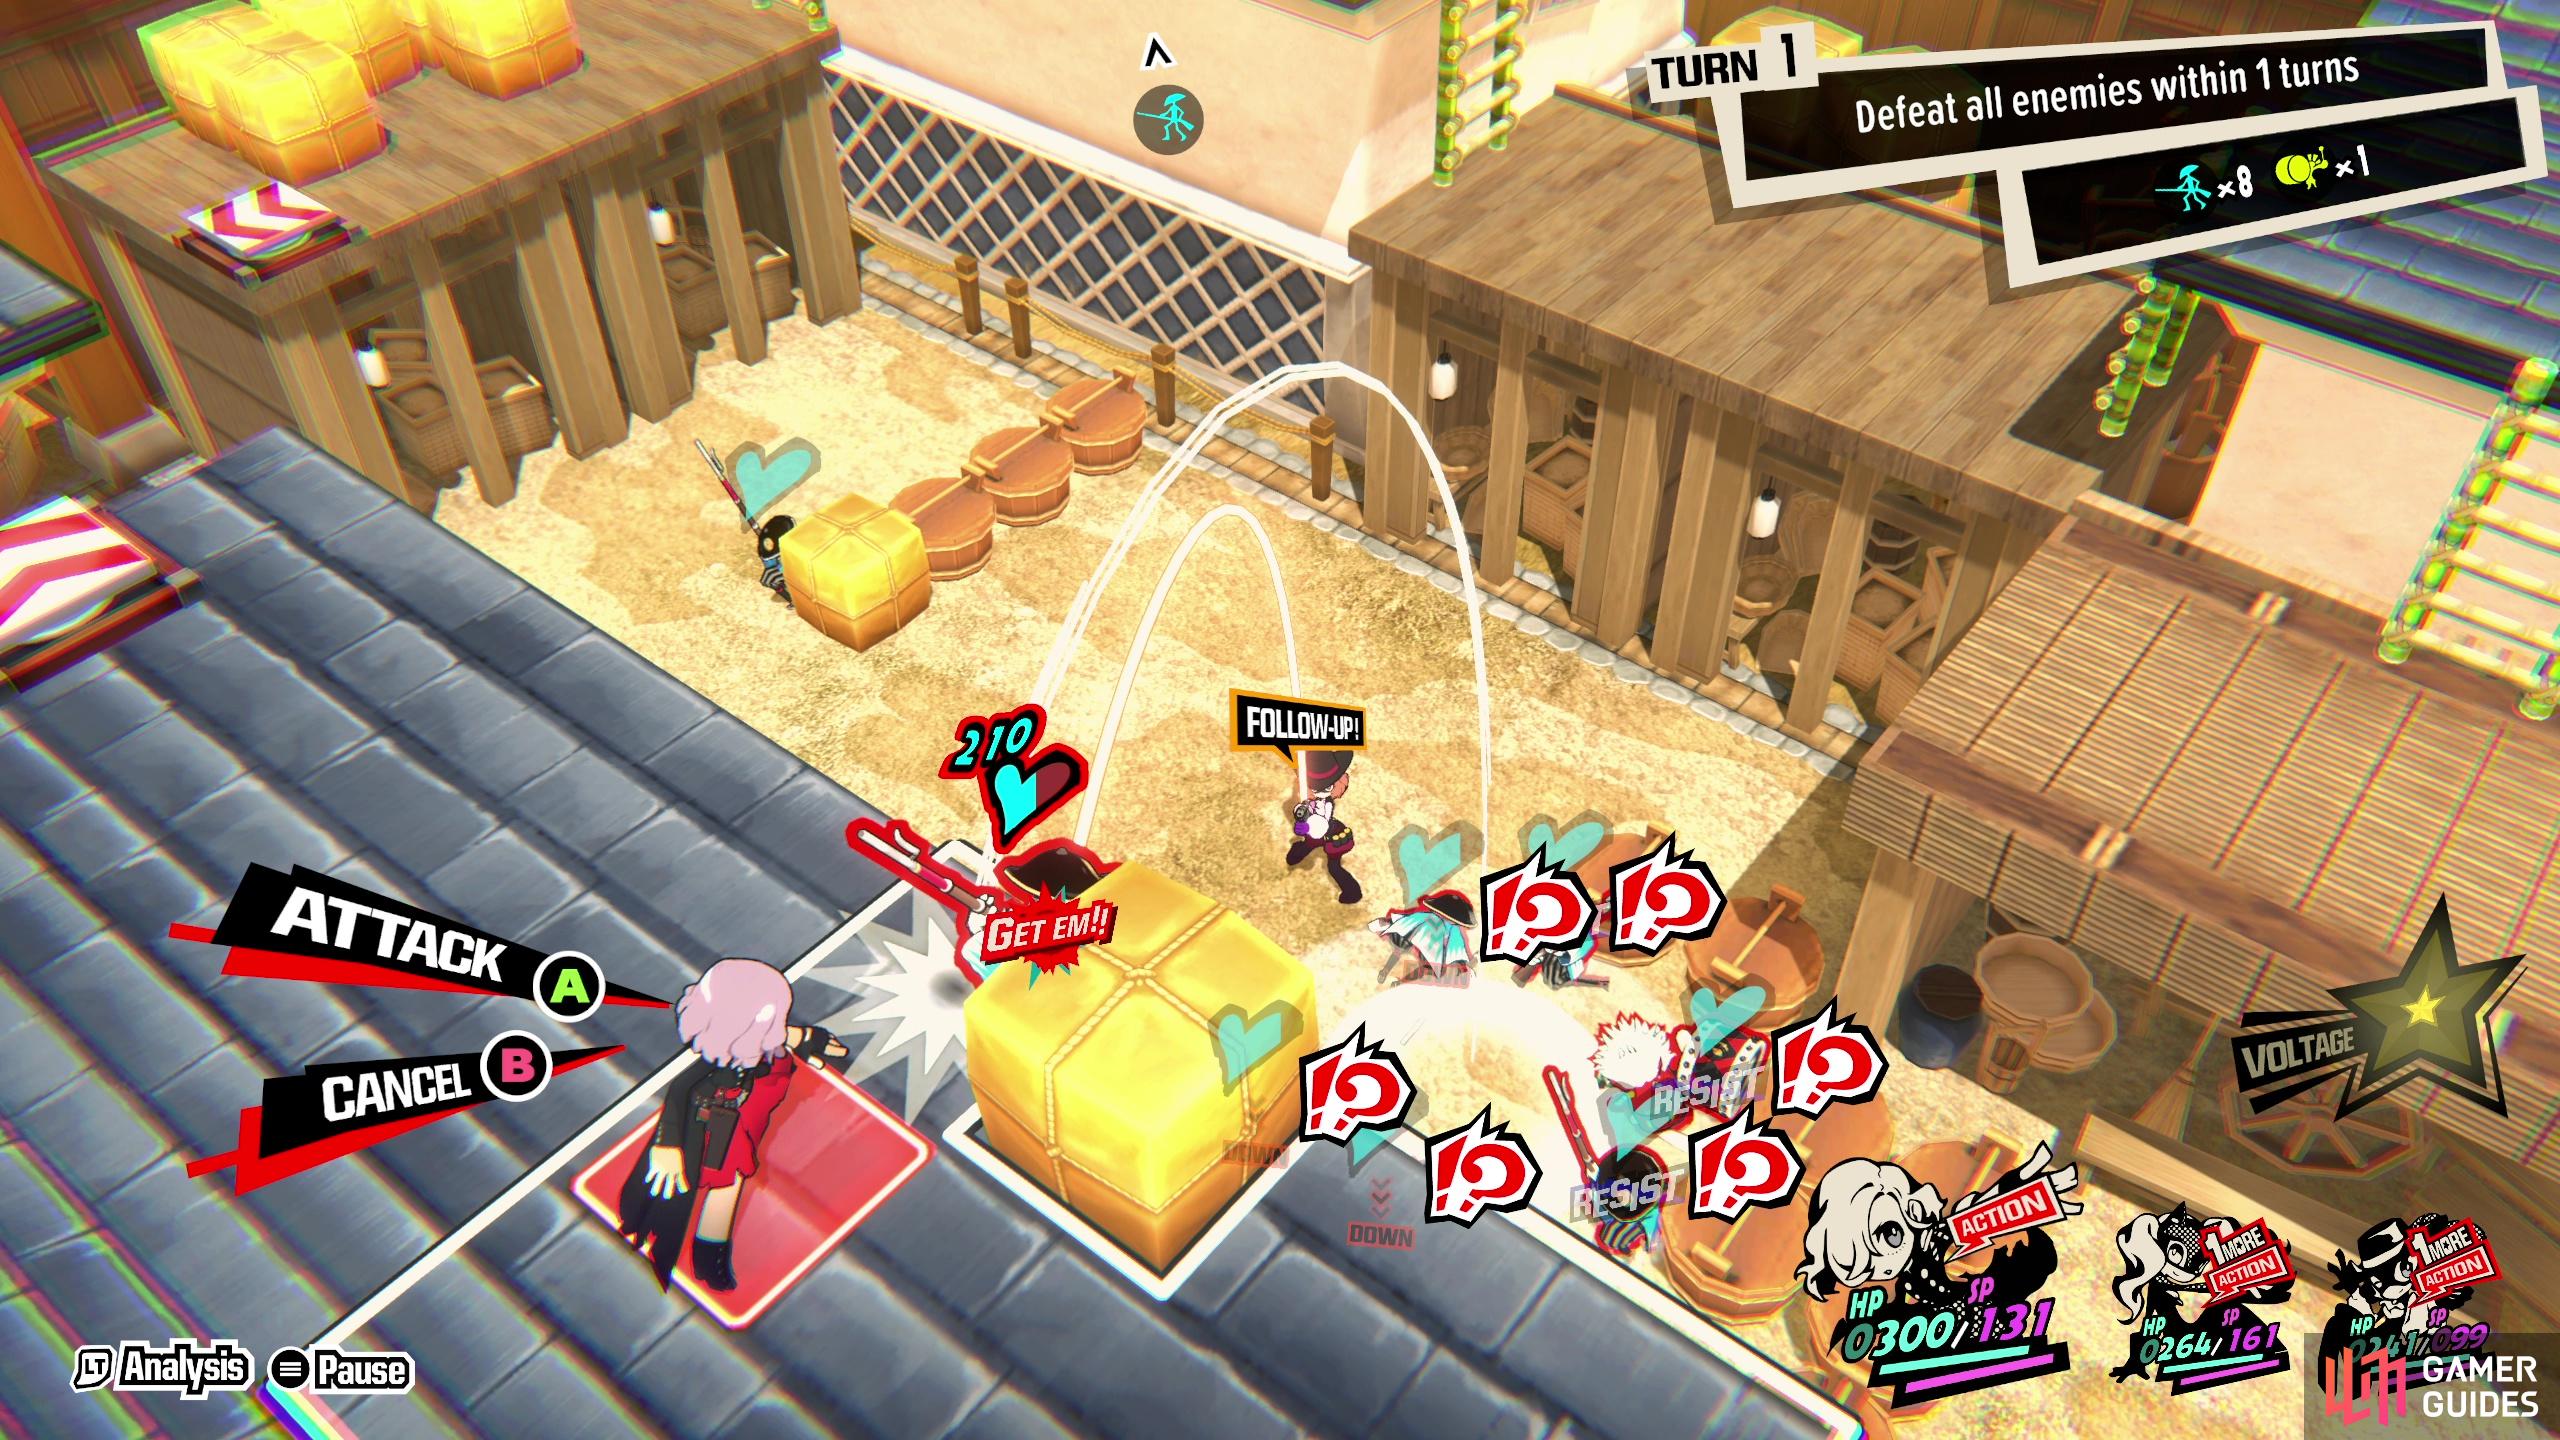
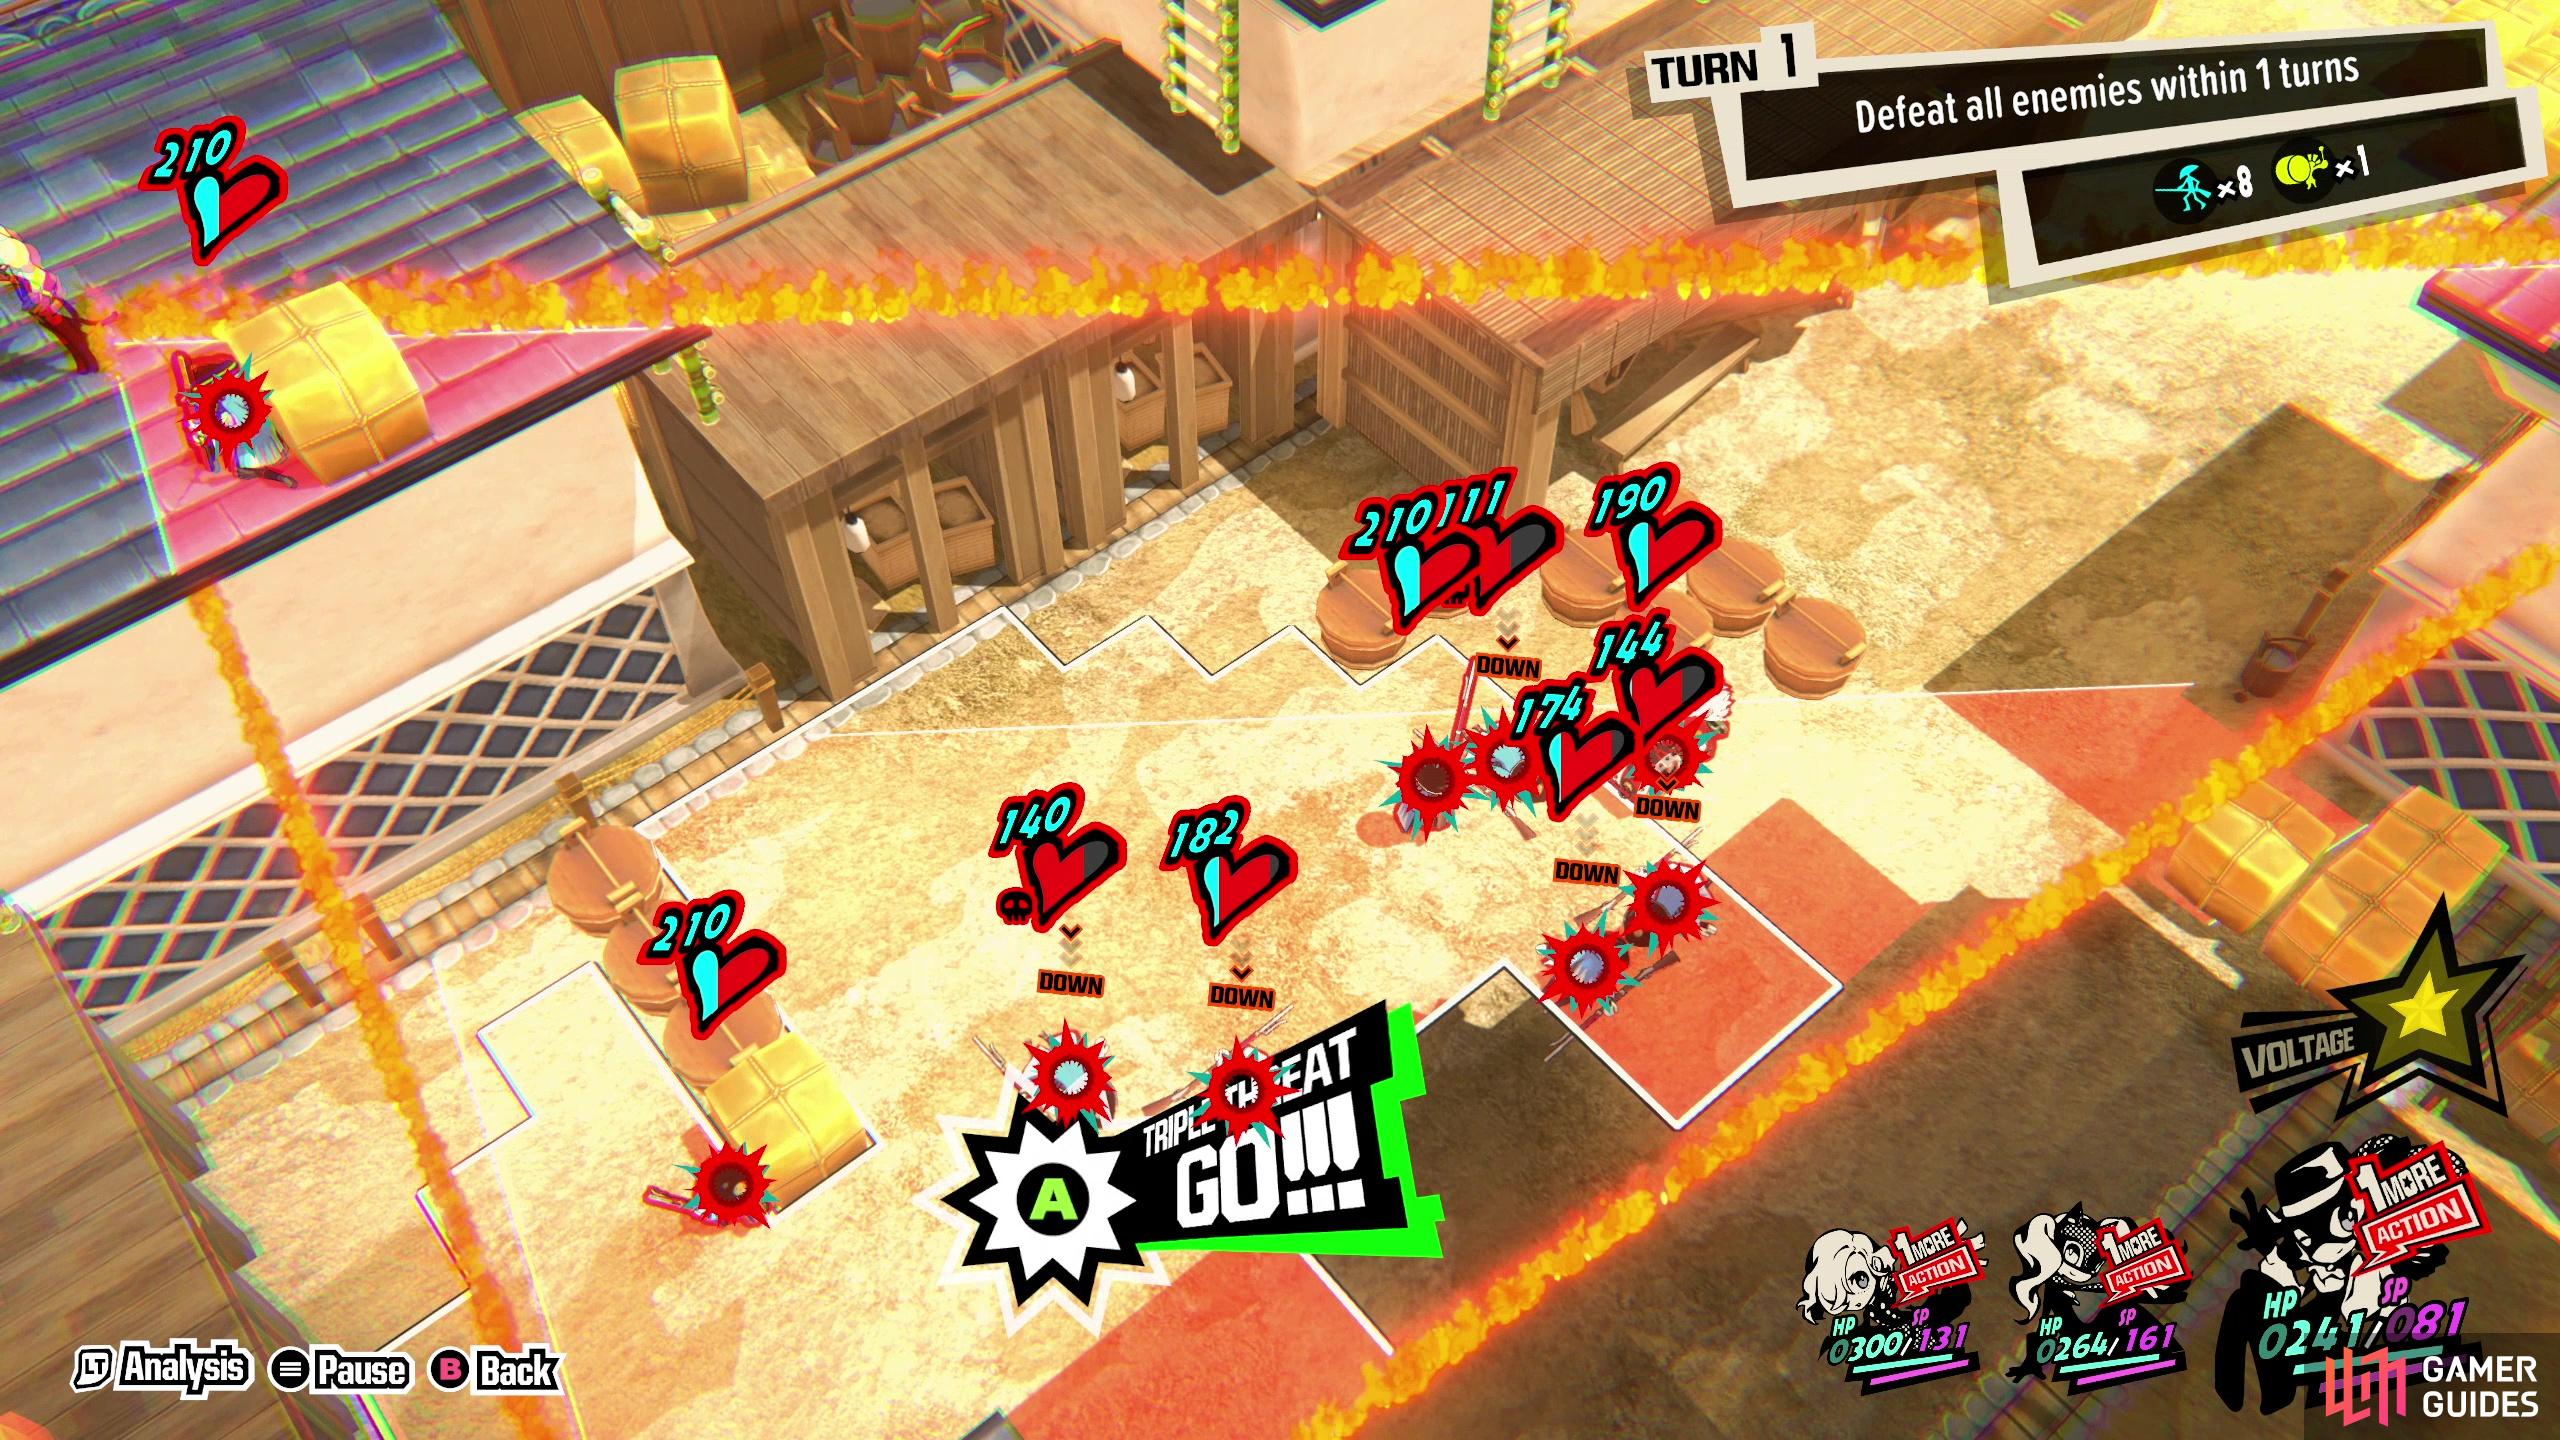
Before we get into the preparations, we’ll describe the map so you better understand what we’re doing. The map consists of two buildings lining a dirt road, with one character on the roof to the left, another on some roofs to the right, and a third character in the middle of the road in the center of the map. Many of the map’s enemies can be found on the road, but there’s also a significant number on the roofs to the right. You need to have the character on the roofs to the right move across the map, scoring One Mores by knocking enemies off the rooftops and into the road with the ultimate goal of creating a Triple Threat triangle that encompasses most (preferably all) of the enemies on the map.
While the character on the roof to the right has an important job, it’s also somewhat foolproof. The outcome of this quest will be determined by the character on the road in the middle, who can contribute to the rooftop characters by triggering Follow-Up Attacks. Their most important job, however, will be moving enemies to ensure they’re all in the area of the Triple Threat attack, and there are two good options for this - Makoto and her vortex spells or Haru and her hypno spells. Either one works, and you can, of course, also just use a persona that grants these if you’d rather include a different character. Makoto with Mafrei, God-Like Speed, and a persona granting Mapsi is the ultimate choice here, but you can also make do with Haru as long as you ensure she has Magical Mastery, God-Like Speed, and Mapsi, if possible. Follow-Up+ also helps for the middle/ground character, but it isn’t necessary.
Finally, the order in which you should select these characters matters, as mentioned earlier. It’ll determine where they’re positioned, and while it may seem like movement speed would play a larger role, in practice the only role significantly affected by movement speed is the middle/lower character, and they can score One Mores to reposition. In any event, deselect everybody, then pick Erina, Ann, and Makoto/Haru, in order. This will place Erina on the left roof, Ann on the right roof, and Makoto/Haru in the middle.


(1 of 4) Have Ann knock a guard into an enemy on the ground below,
Quest 9 - Persona 5 Tactica - Guide
The numerous variables at play during this quest make a step-by-step guide somewhat less effective than in previous one-turn quests, but it should suffice for the beginning phases. This guide assumes all three characters have God-Like Movement unlocked and the character in the middle has Mapsi.
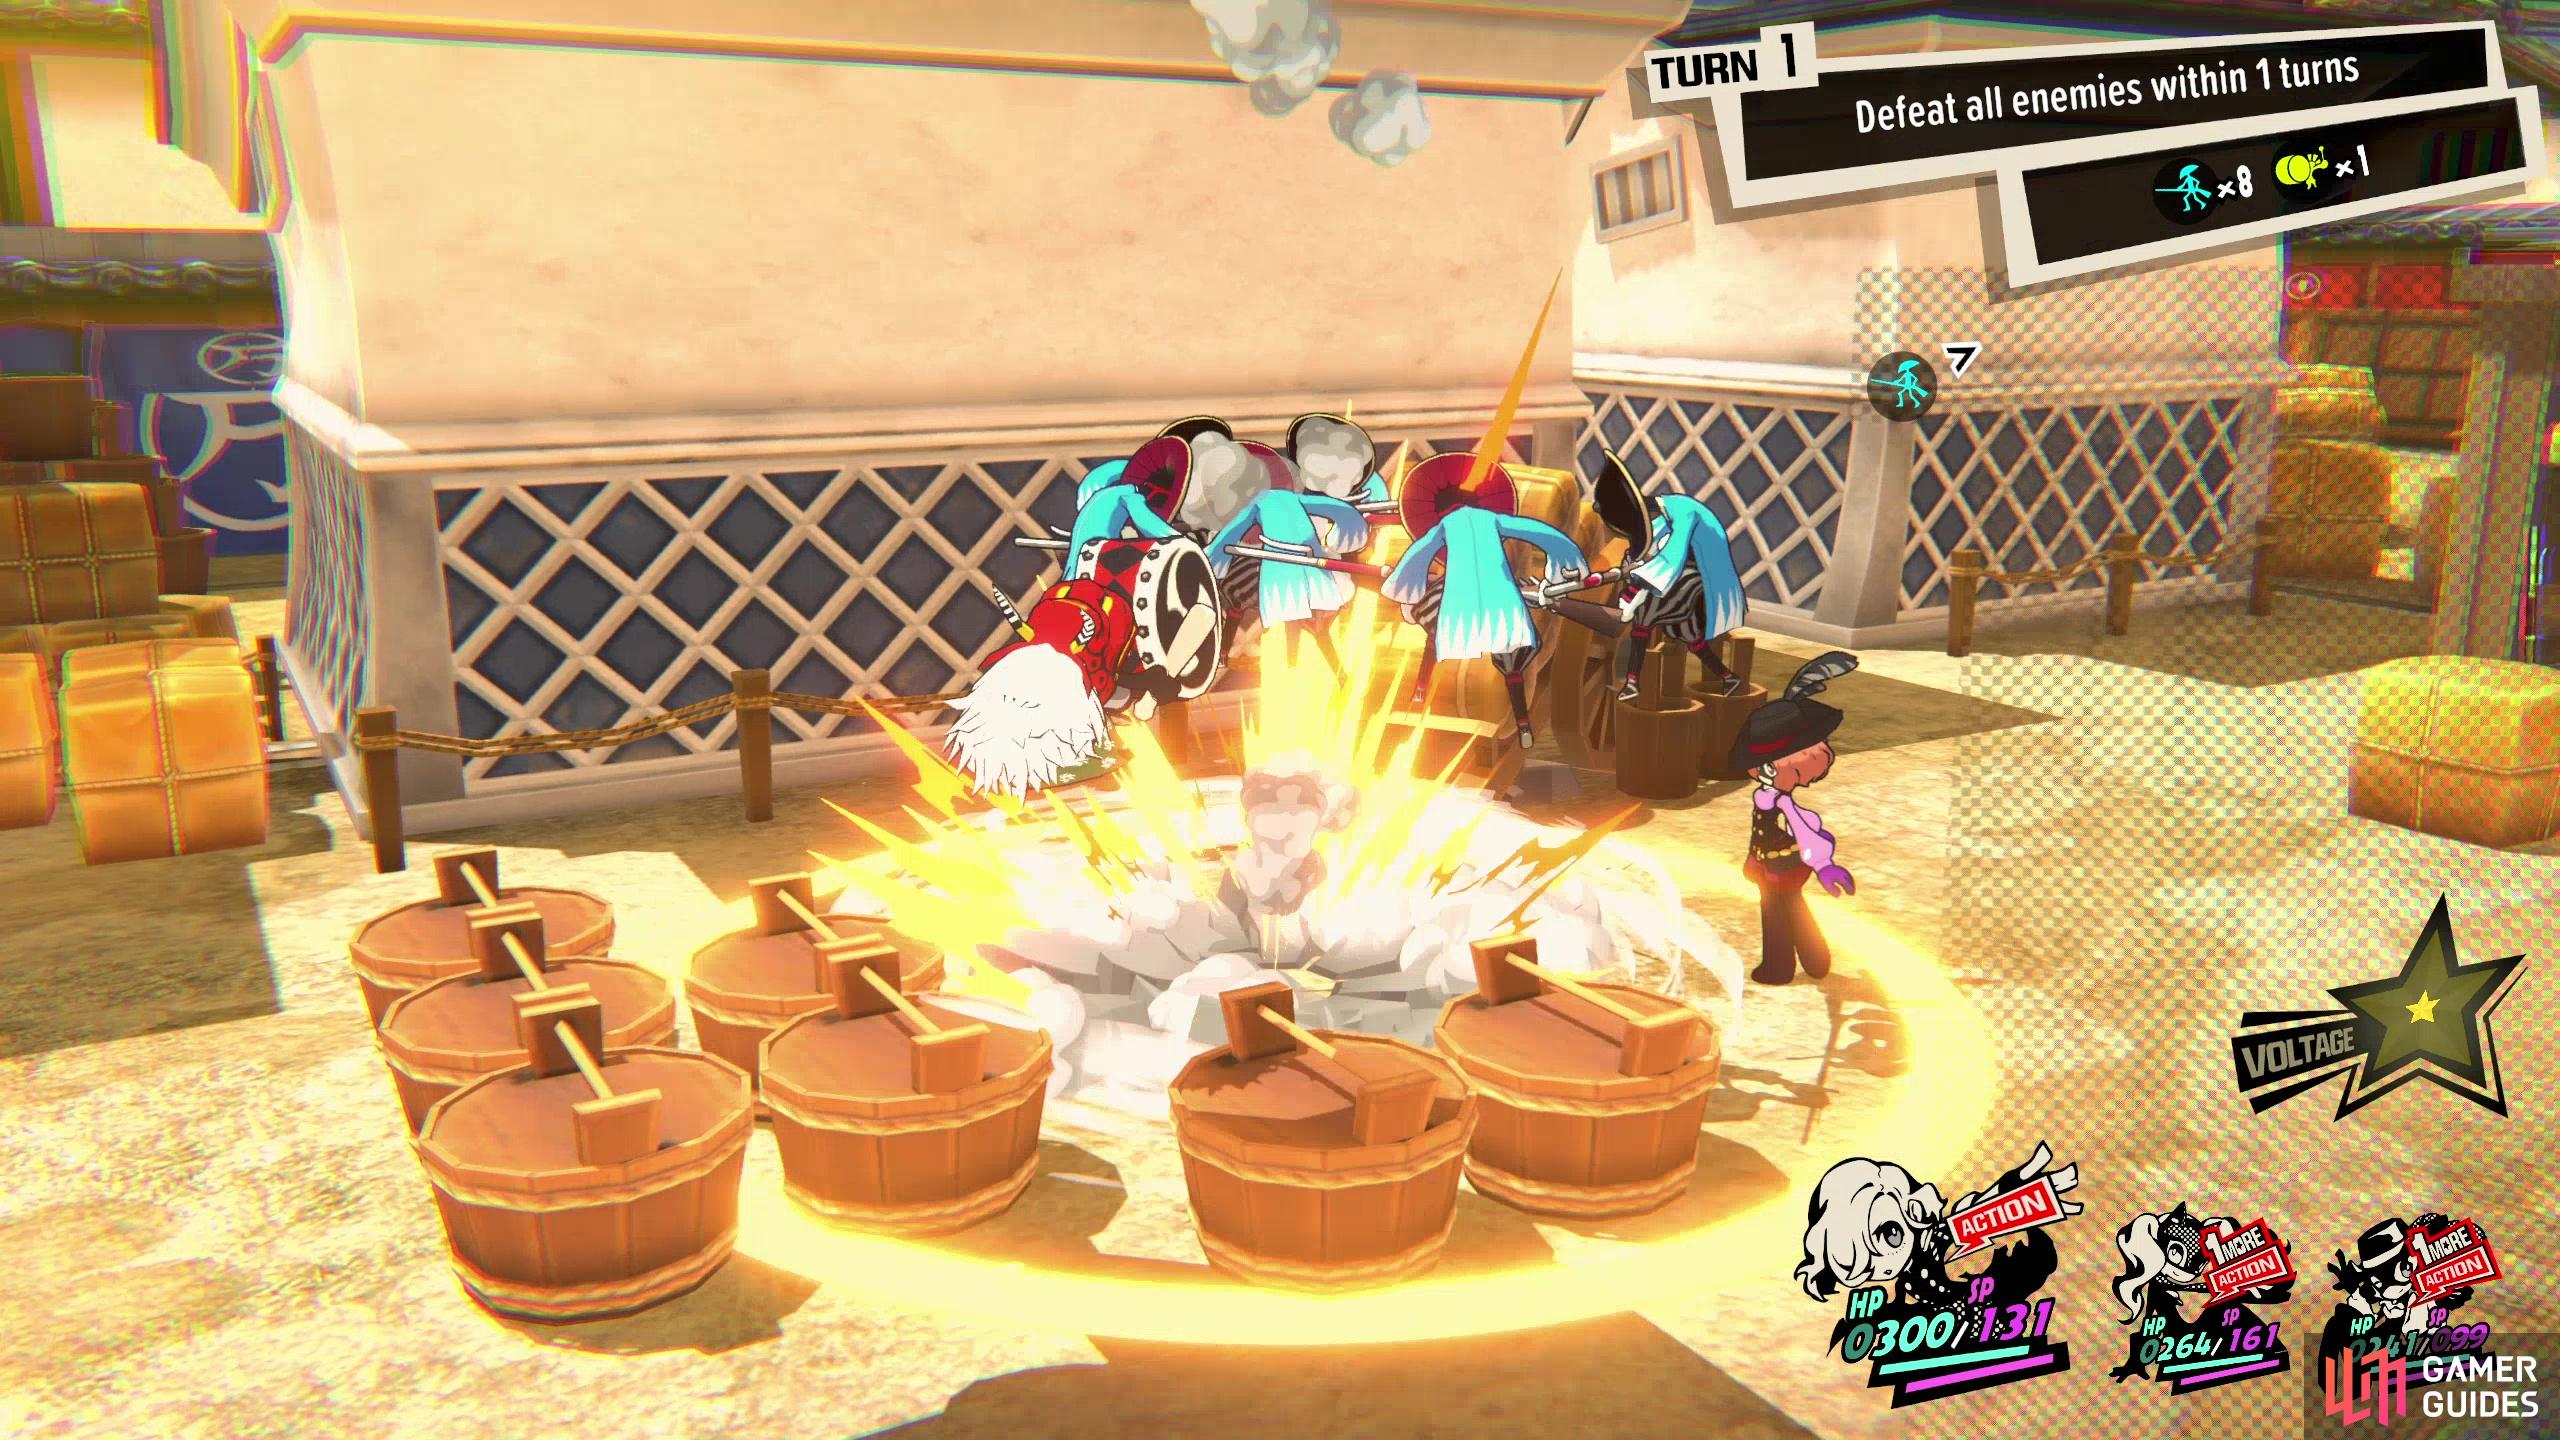
Step 1: Move Haru to the upper left corner of her movement range - this is to keep her out of the way while we knock characters off the rooftops so she doesn’t trigger any Follow-Up Attacks until we want her to. Be careful before knocking enemies off the roof and ensure it’s not going to waste a Follow-Up Attack!
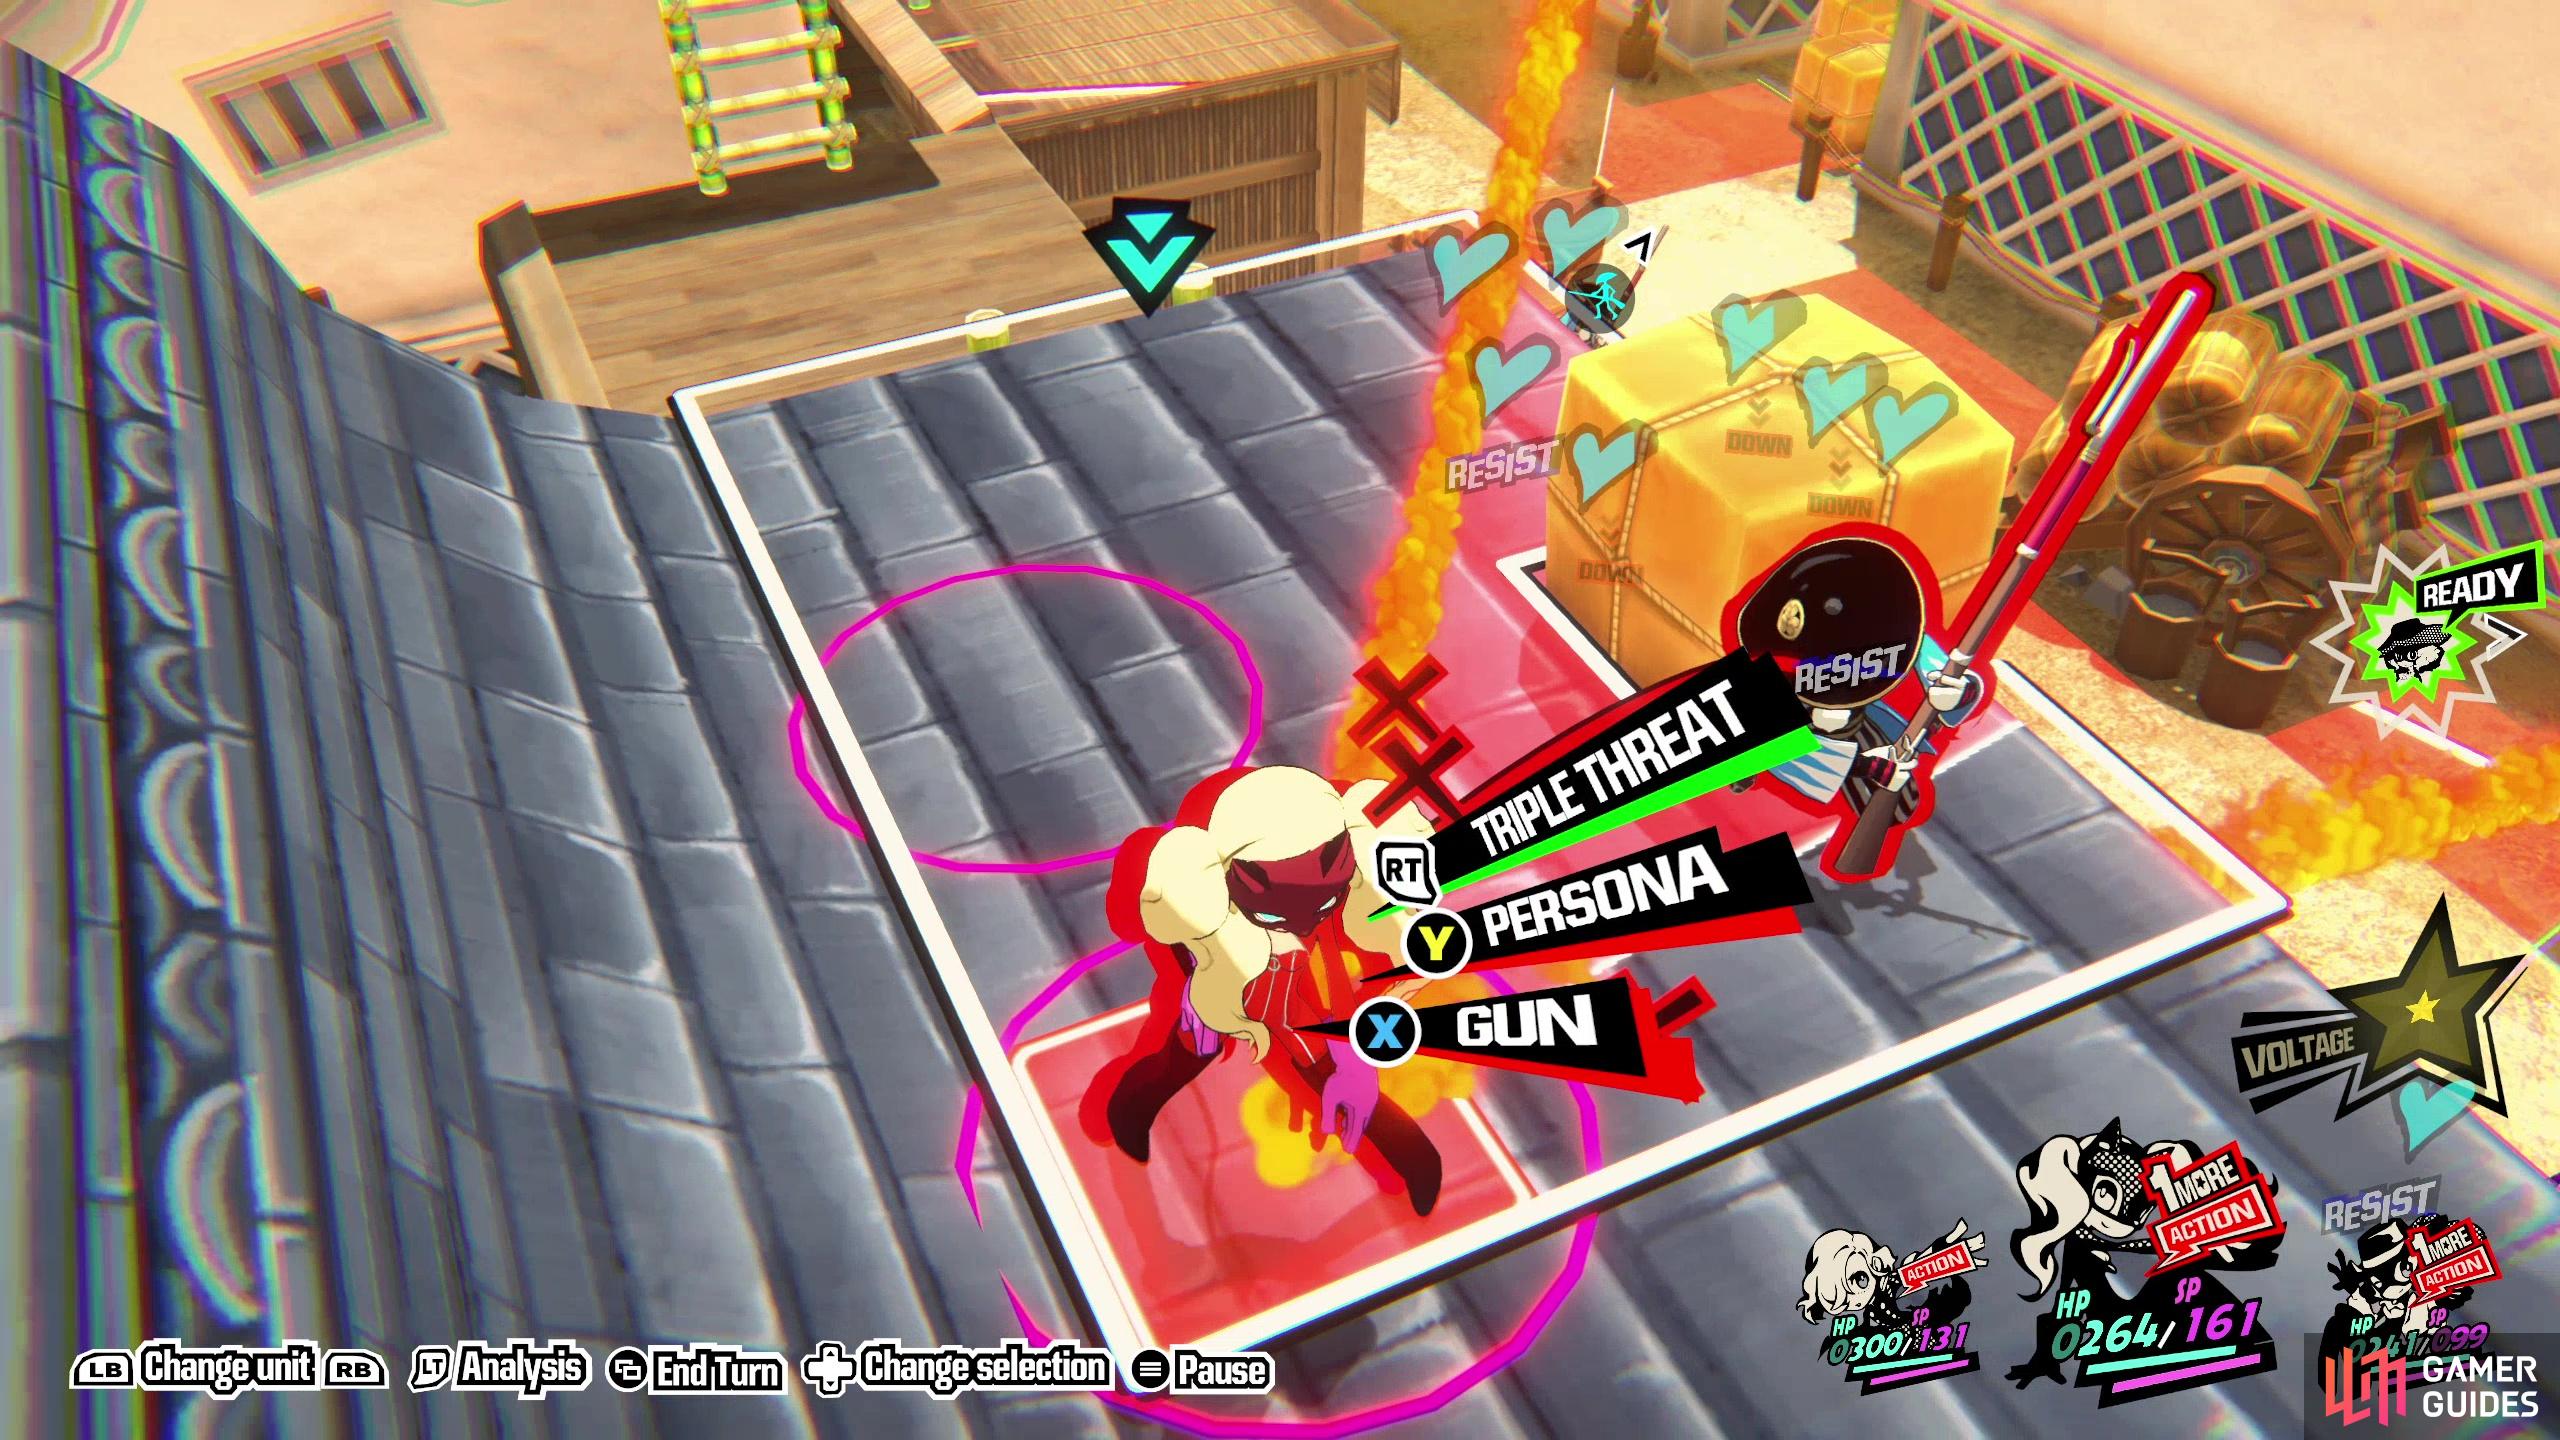
Step 2: Switch to Ann (or whoever is on the right roof), descend a ladder, then melee an enemy on the roof down into the street. You want to attack from the side so he collides with another enemy in cover on the ground below.
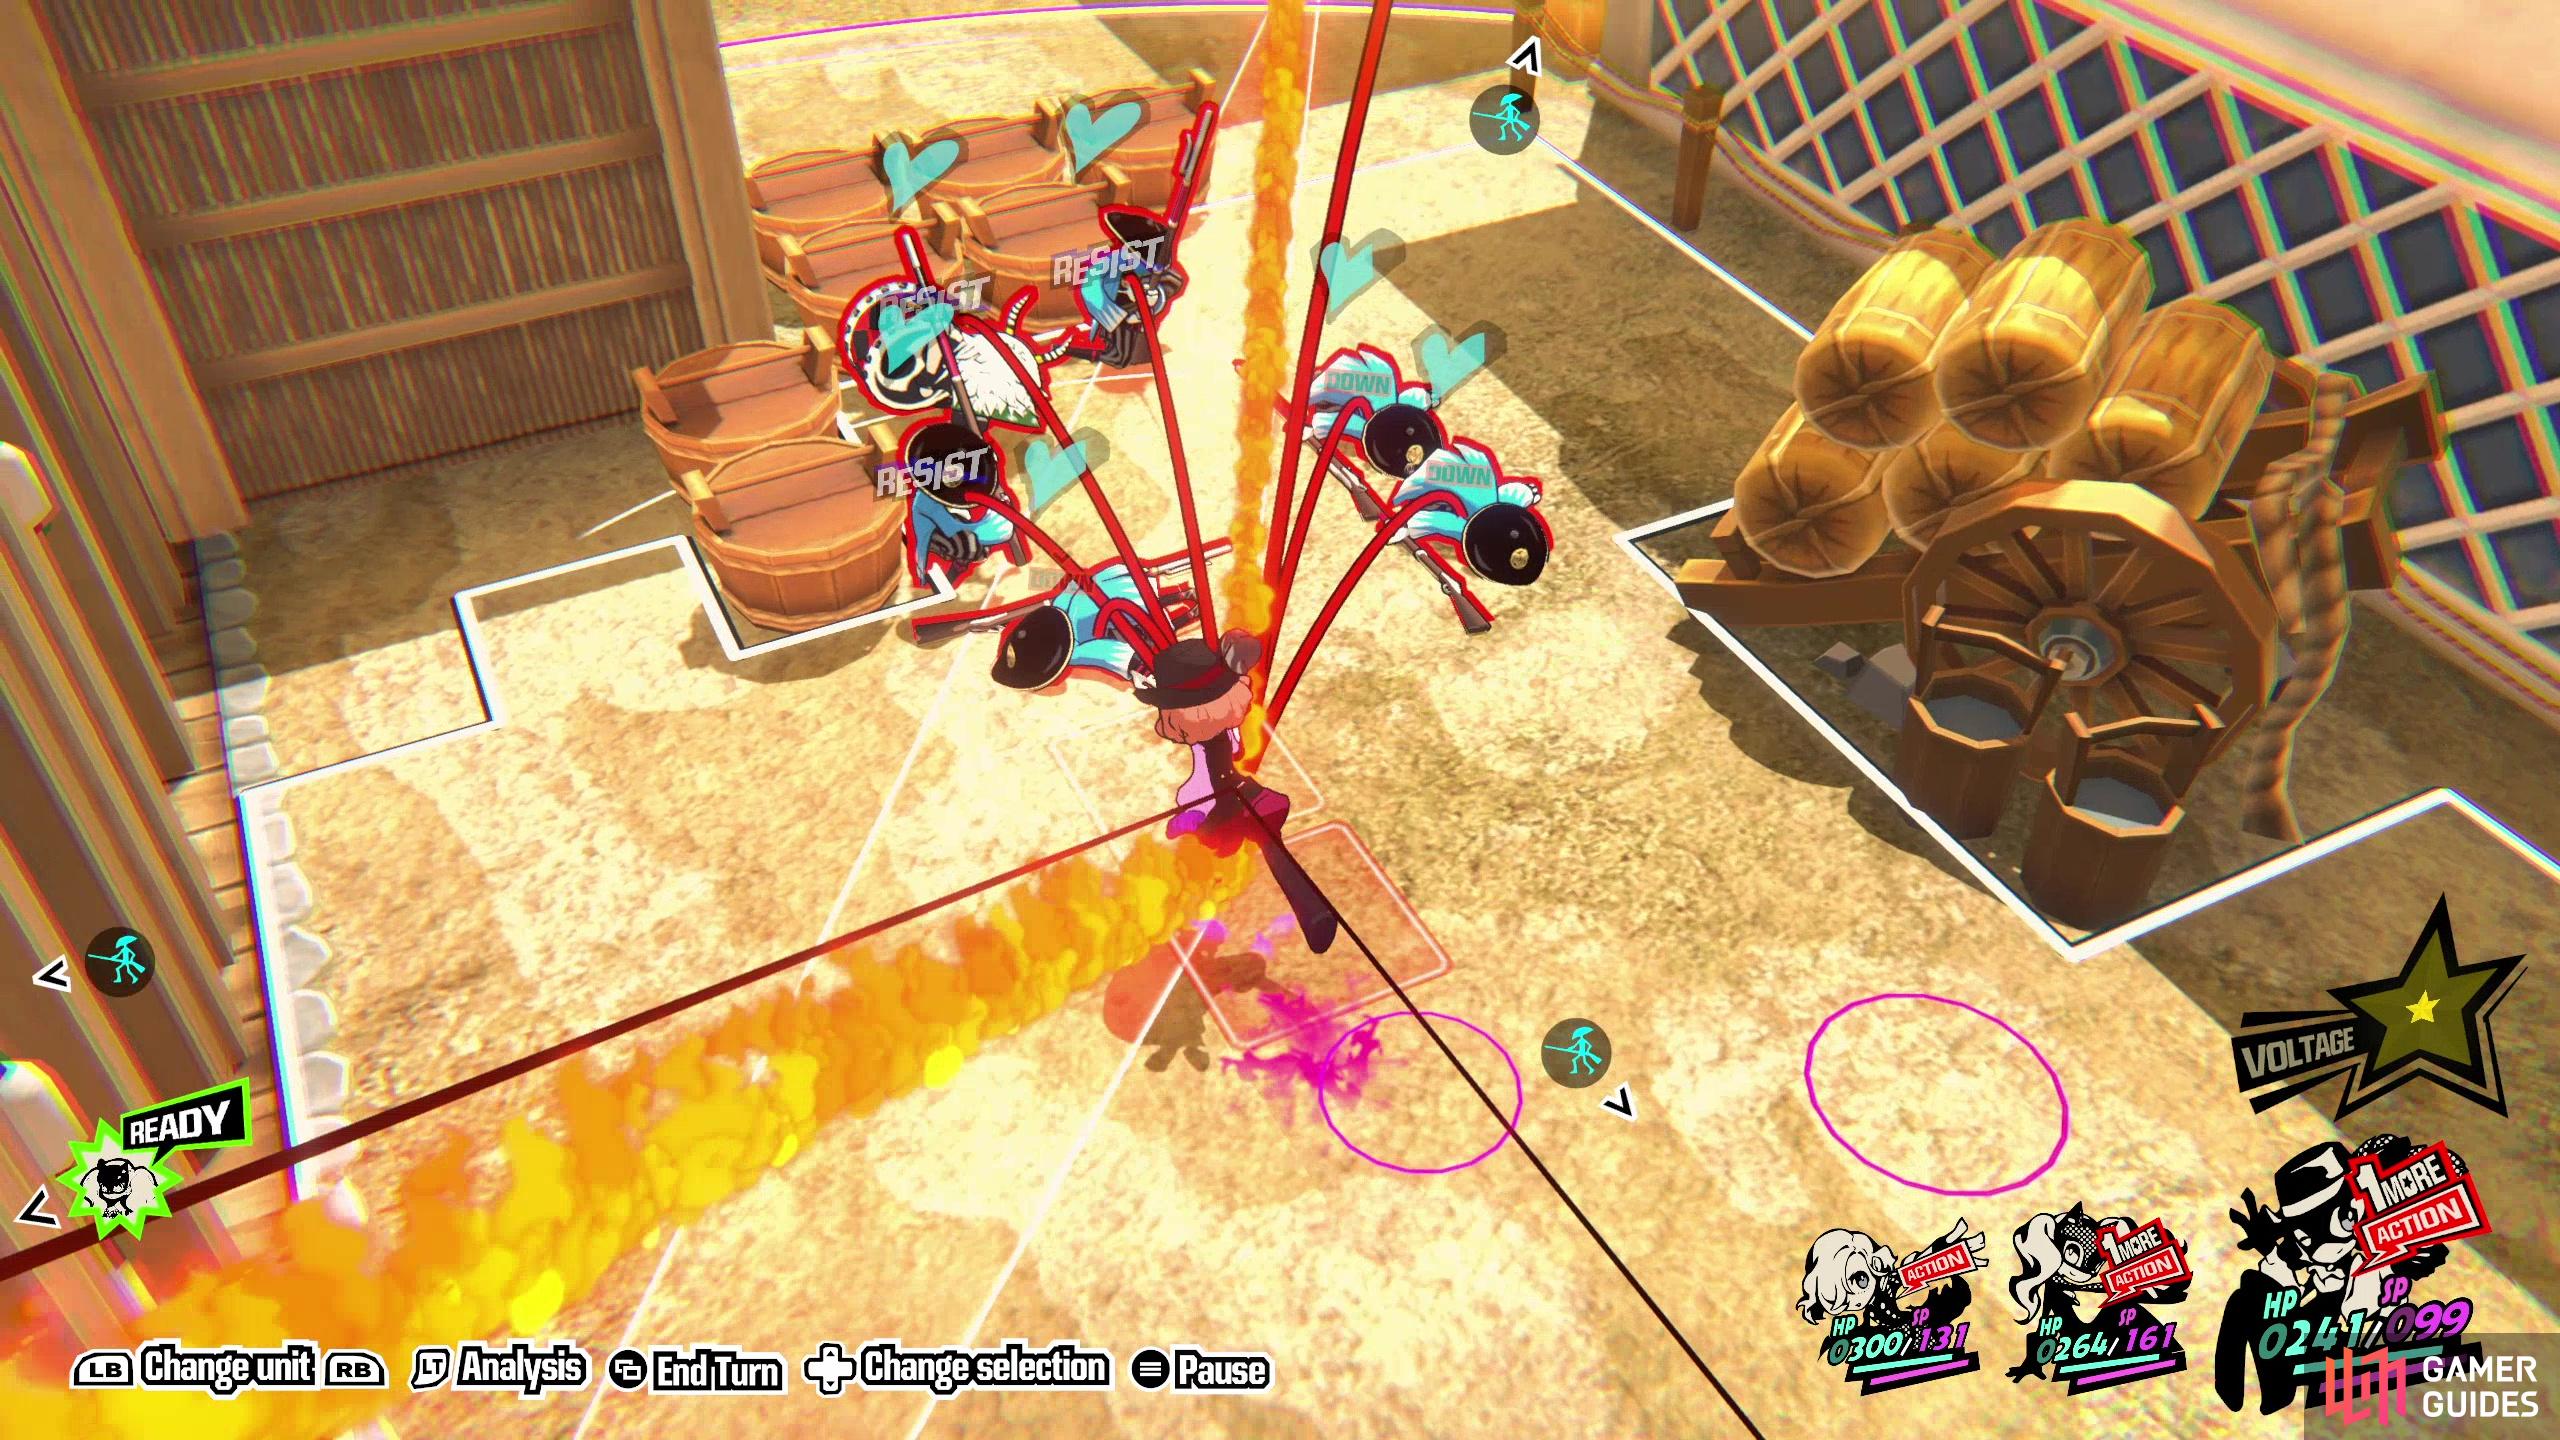
Step 3: Return to Haru and have her cast Mapsi on the two enemies you just knocked down. This will drag them toward her and ensure these enemies remain in the center of the upcoming Triple Threat attack. She should also get a One More from this thanks to the enemy Ann helped bump from cover earlier. Hide Haru back in the upper left corner at the far end of the map again when she’s done. More roofing work for Ann lies ahead.
Step 4: Take control of Ann again and climb another ladder, then descend a third to reach another section of the roof with an enemy standing out in the open. Bat him into the road below.
Step 5: Move Ann up a fourth ladder to find another enemy on the roof, this one hiding in cover. Just have Ann stand in the corner near this enemy for now.
(1 of 4) Move Haru towards the enemies clustered on the road so she’s ready for a Follow-Up attack,
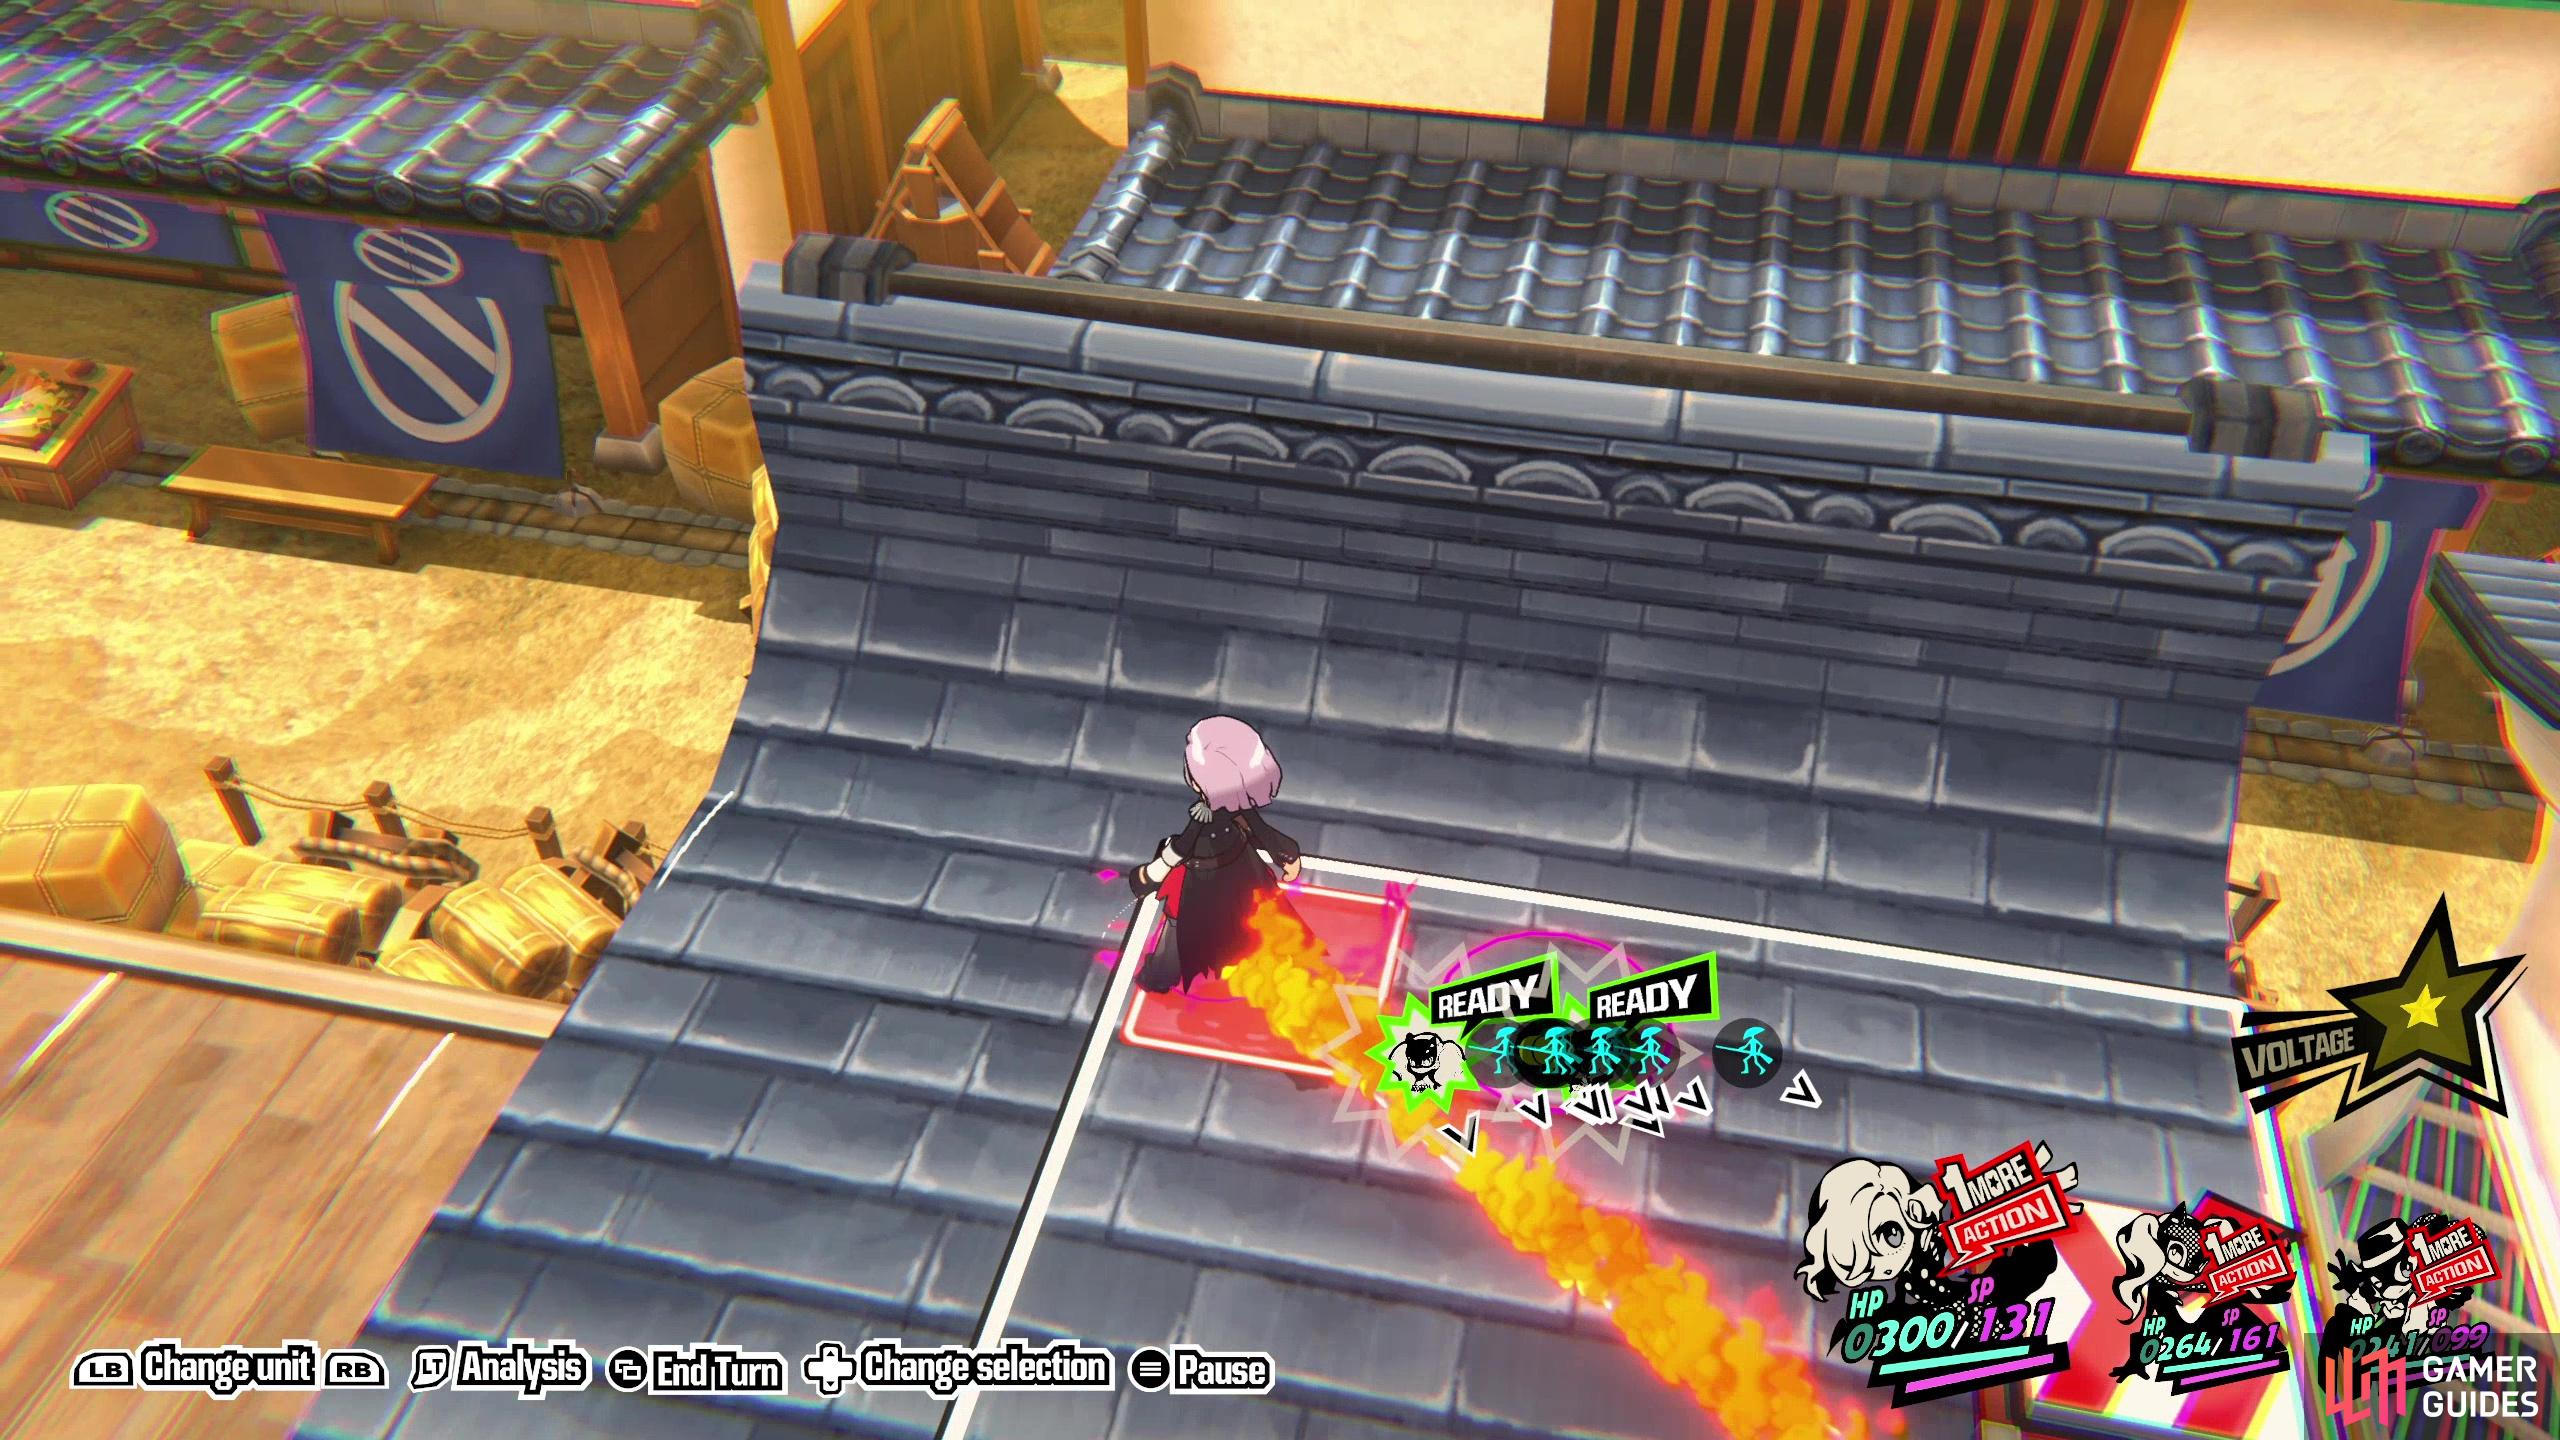
Step 6: Switch back to Haru and have her head out into the street near the cluster of enemies that you’ve been piling up there, then switch to Erina. As Erina, run down the roof and use a dash tile to leap to another section of roof, where you’ll find a guard hiding near a parcel. Bat him down and make sure Haru is close enough to score a Follow-Up Attack. This should get Erina a One More and dislodge most remaining enemies on the street from cover. Send Erina back to where she started and put her in the corner - her only purpose for the rest of this fight is serving as an anchor for the upcoming Triple Threat attacks.

(1 of 4) Move Haru into the corner opposite Ann and Erina and check the Triple Threat attack’s coverage.
Step 7: Now is where the step-by-step process starts to break down a bit and you may need to make some decisions based on where enemies have ended up. Move Haru as far down the street opposite Erina as possible to create a large triangle for the Triple Threat attack, then press 
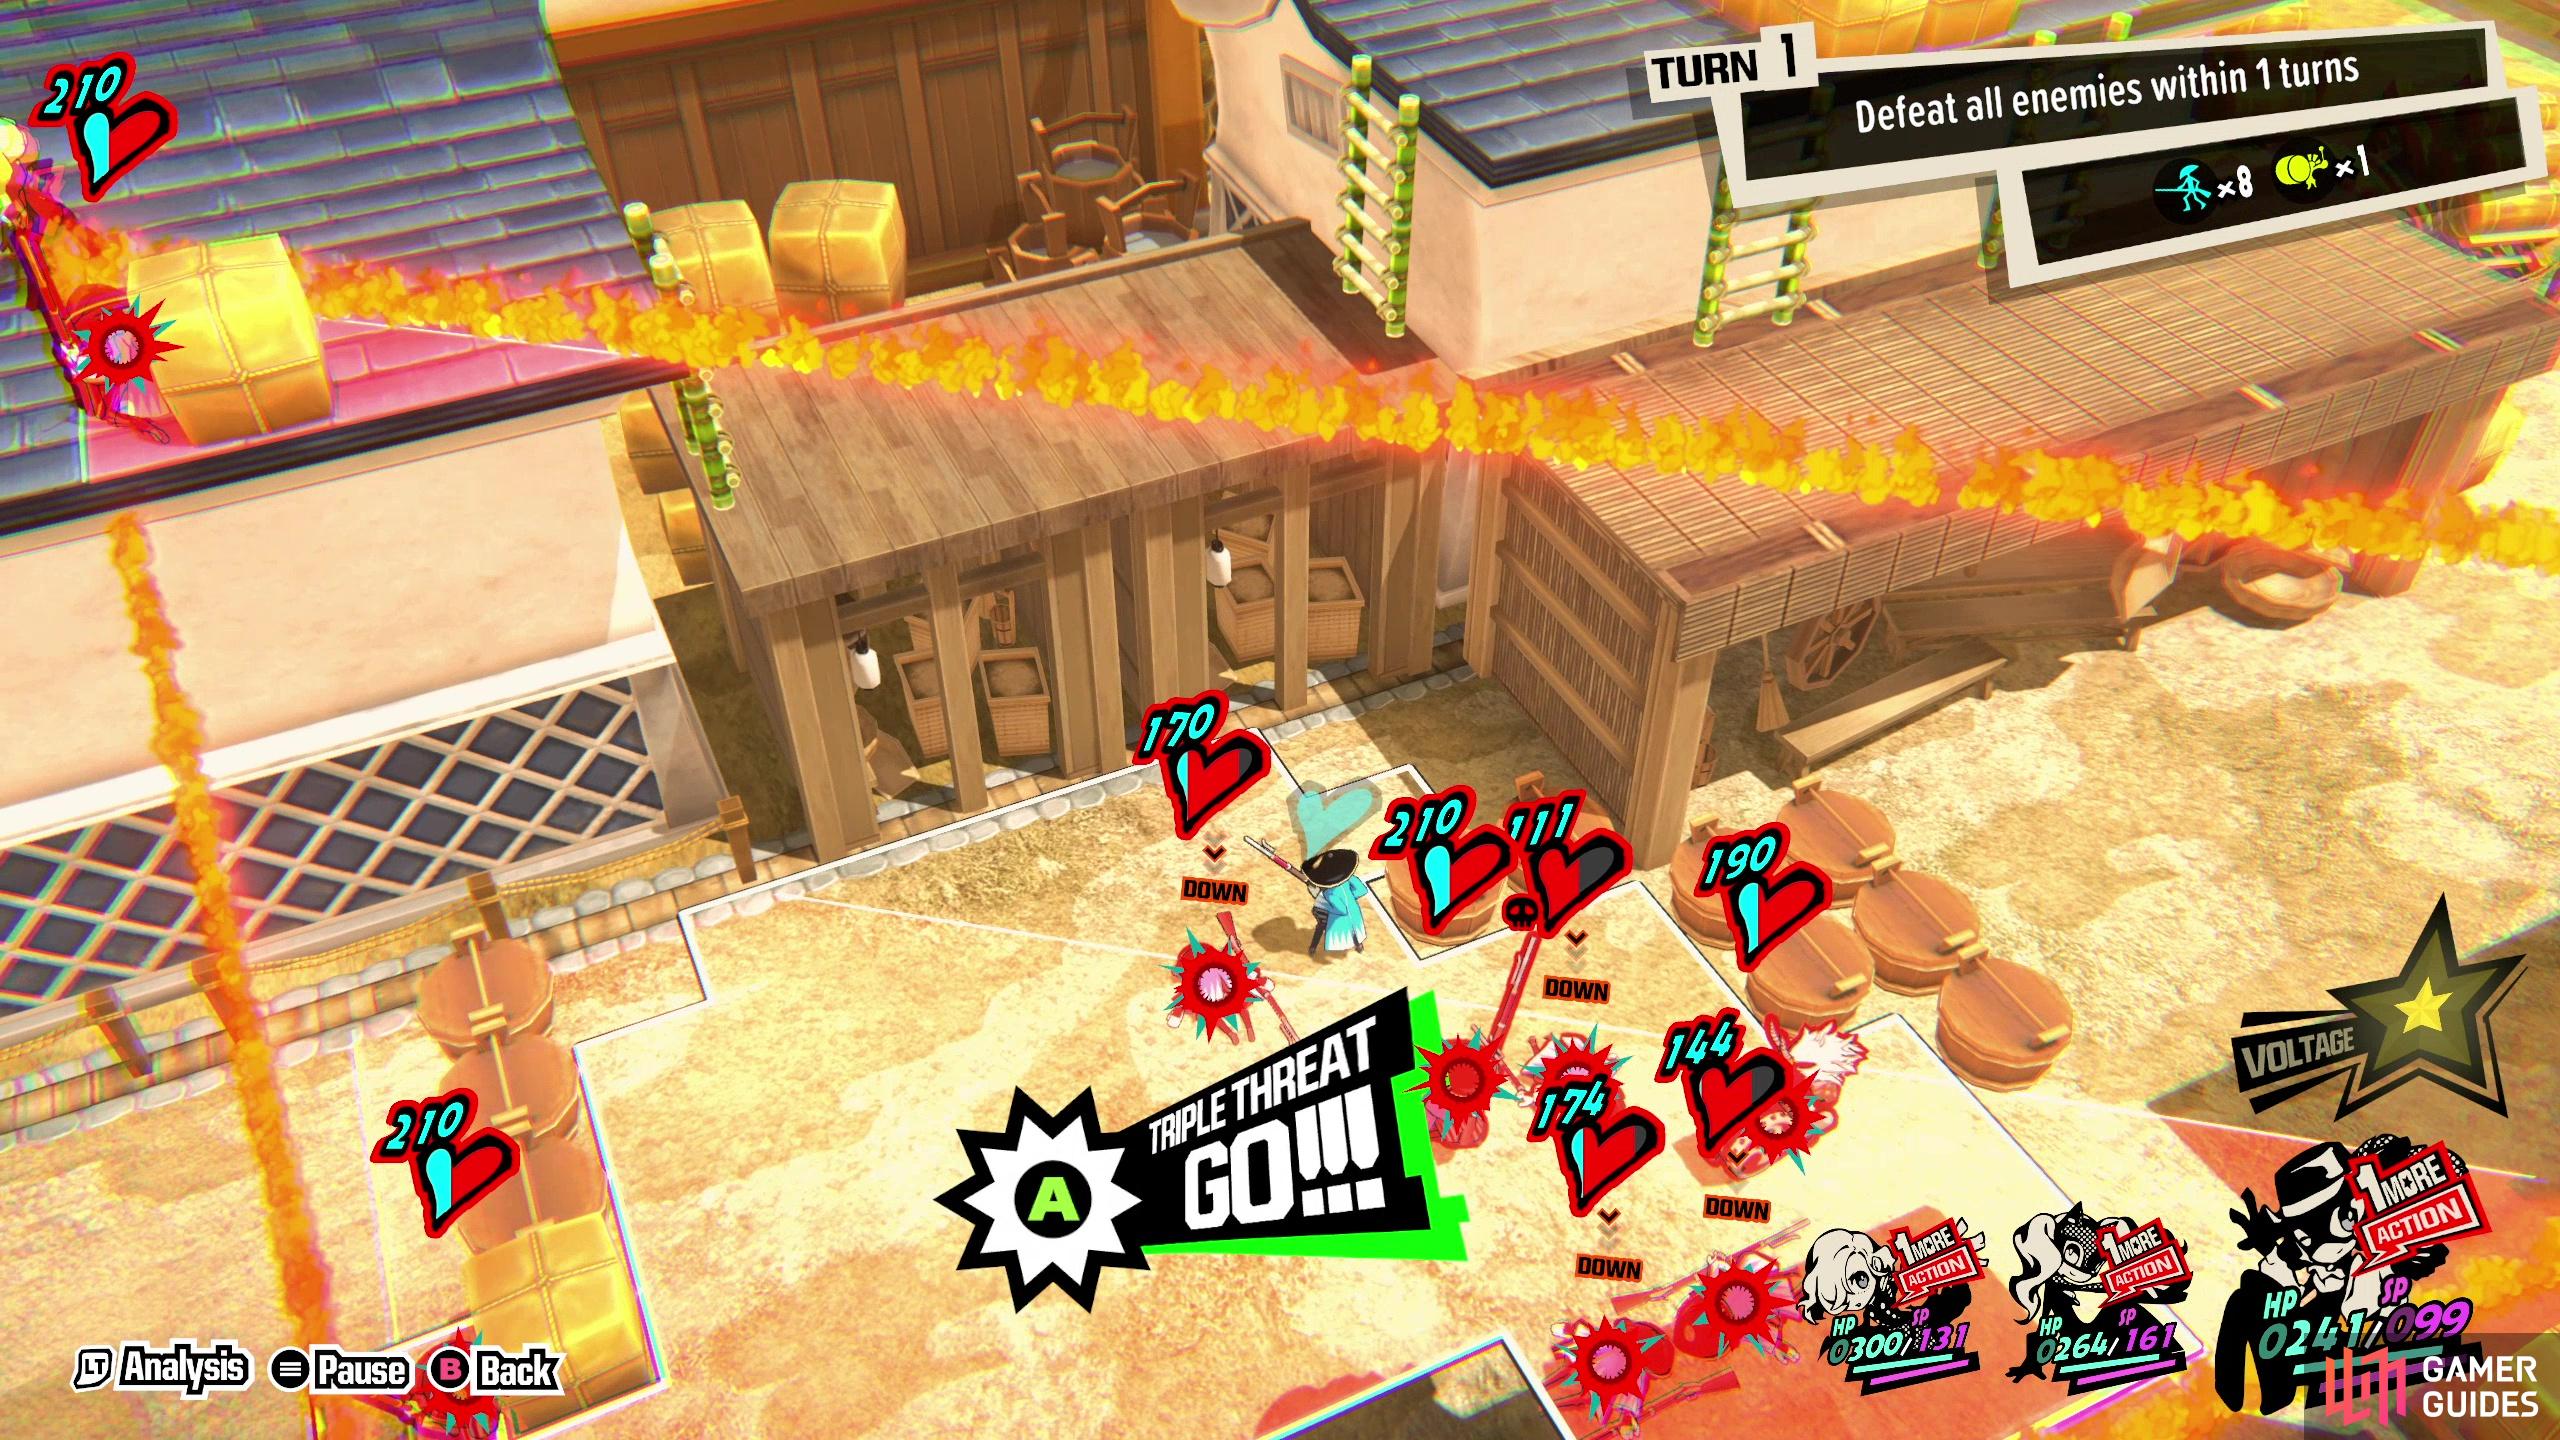
If not, for whatever reason, the solution is almost certainly going to be in Haru’s hands. Have her use Mapsi or Psio to draw enemies on the fringes of the Triple Threat AoE into the affected area, if necessary, while making sure to score a One More in the process. You can also use this to extend Haru’s range somewhat if she can’t get back far enough to enclose the enemies near Ann at the end of the map. There are a few variables that go into this - where Haru was when she cast Mapsi earlier, how many enemies she pulled, where she pulled them to, what her movement speed is, and all that together should determine, ultimately, what her range is. If Haru has Follow-Up+ you can have Ann attack the enemy near her to knock the one on the street below out of cover. If Haru performs a Follow-Up Attack, Ann will get a One More, and Haru can use Mapsi to pull the two afflicted enemies toward the center of the map.
Use Mapsi to shuffle enemies around and score One Mores to reposition Haru until every enemy is affected, then finish off the map with a pair of Triple Threat Attacks. Completing this quest will earn you the Decabria persona, a Lv34 hypno persona with the Brightening Star passive, which “Increases the amount of Voltage gained”.

 Sign up
No Comments