
The Enclave are iconic Fallout villains, in large part due to their aesthetic, and particularly because of their distinctive black Power Armor. Absolute top-of-the-line gear before the bombs fell, the X-01 series of Power Armor made its way into vanilla Fallout 4 even if the Enclave itself did not, but along with the performance changes made for the next-gen update some Creation Club content has been removed from behind its paywall and added to the base game. This includes a series of Enclave-related quests, including various, mostly unrelated quests that revolve around obtaining powerful Enclave arms and armor. Once such quest, Speak of the Devil, adds a new prototype suit of X-02 Power Armor for players to hunt down, and this page will provide a walkthrough for the aforementioned quest and instructions for finding the X-02 Power Armor.

(1 of 2) To get started, head to Wattz Consumer Electronics,
To get started, head to Wattz Consumer Electronics, (left), where you’ll find “The Black Devil Vol. 1” holotape. (right)
How to Start Speak of the Devil
Like most Enclave quests in Fallout 4, Speak of the Devil is only tangentially related to the other Enclave content. During the main Enclave quest Echoes of the Past you’ll track down a missing caravan, in the process stumbling on an Enclave encampment near The Slog. Interact with an “Enclave Field Operations Terminal” and pick the options “Retrieval Logs”, then “X-02 Power Armor” to find out some Enclave deserter absconded with this ultra-rare armor… although the Enclave itself doesn’t even have any leads.
Speak of the Devil will start automatically provided your version of Fallout 4 is up to date and you’ve escaped Vault 111, and fortunately for the sake of convenience you’ll get a lead directing you to Wattz Consumer Electronics. To get this quest moving, you just need to visit the aforementioned store, which is located northeast of Cambridge, southeast of ![]() Lexington, a ways south of Covenant. As far as enemy difficulty goes this location is moderate, at worst (the further south and east you get from Sanctuary the more difficult enemies generally get), but you will have to head further south during one of the objectives, ultimately going southeast of Diamond City. That said, this is one of the easier Enclave quests, as you likely won’t have to fight any enemies in Power Armor, nor will you have to tread into the more dangerous parts of the Commonwealth… RNG and scaling enemies notwithstanding.
Lexington, a ways south of Covenant. As far as enemy difficulty goes this location is moderate, at worst (the further south and east you get from Sanctuary the more difficult enemies generally get), but you will have to head further south during one of the objectives, ultimately going southeast of Diamond City. That said, this is one of the easier Enclave quests, as you likely won’t have to fight any enemies in Power Armor, nor will you have to tread into the more dangerous parts of the Commonwealth… RNG and scaling enemies notwithstanding.
Search Wattz Consumer Electronics
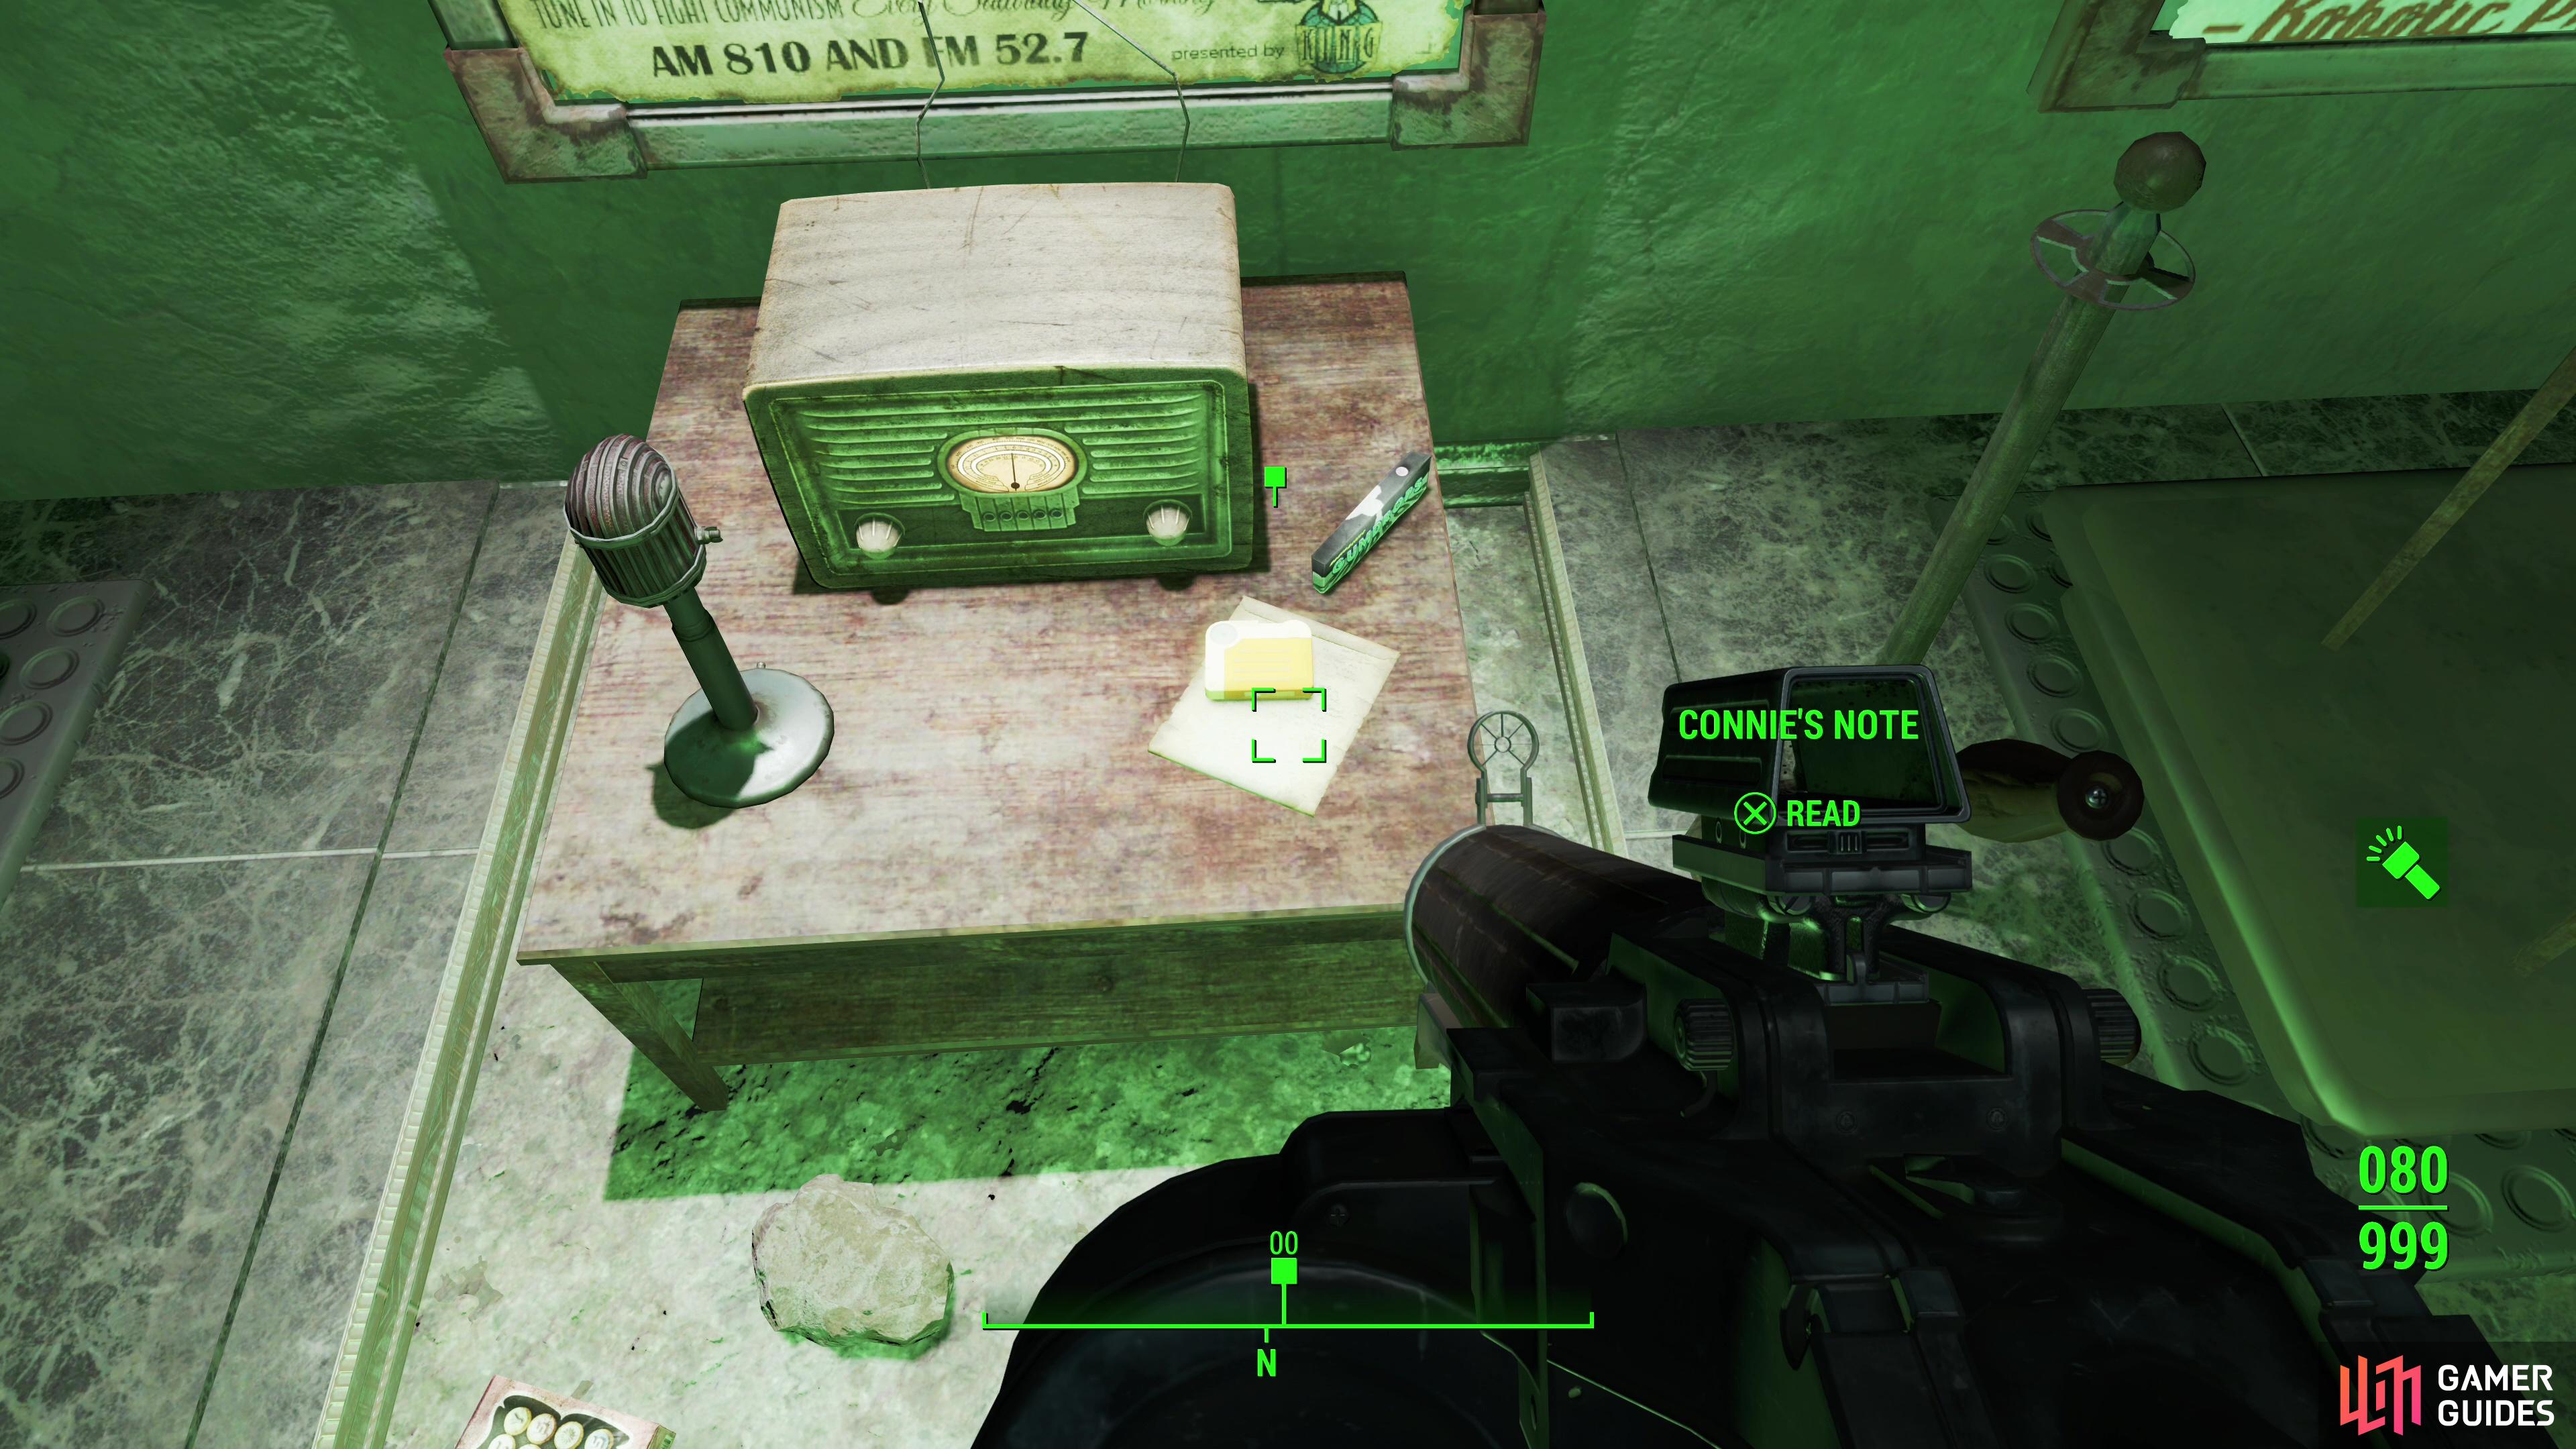
The first step of this quest is pretty easy, just travel to ![]() Wattz Consumer Electronics and head on in. You’ll enter near a pit that dominates most of the floor you’re on. Sidle around the edge of it and work your way north to find a “Black Devil” poster, below which is a radio, and near this radio is Connie’s Note and The Black Devil Vol. 1 holotape. Read the note to learn about this black-clad, Raider-hunting vigilante and Connie’s quest to summon him, then play the aforementioned holotape. Read both entries, then head outside.
Wattz Consumer Electronics and head on in. You’ll enter near a pit that dominates most of the floor you’re on. Sidle around the edge of it and work your way north to find a “Black Devil” poster, below which is a radio, and near this radio is Connie’s Note and The Black Devil Vol. 1 holotape. Read the note to learn about this black-clad, Raider-hunting vigilante and Connie’s quest to summon him, then play the aforementioned holotape. Read both entries, then head outside.

(1 of 2) Head over to the OMC-810 Relay Tower and search Richie’s corpse to find the AM 810 Music Catalogue holotape,
Head over to the OMC-810 Relay Tower and search Richie’s corpse to find the AM 810 Music Catalogue holotape, (left), then upload the “Stars and Stripes Forever” track to the relay tower. (right)
Investigate the OMC-810 Relay Tower
Your next stop is to the northeast, to Relay Tower 0MC-810, which itself is located between Taffington Boathouse and County Crossing. From Wattz Consumer Electronics just head east to find a road and follow it until you find a bridge crossing the river. On the far side of the bridge you’ll find yourself near Poseidon Energy Turbine #18-F, from which you just need to continue uphill to the northeast. The relay tower should be pretty easy to spot from a distance, but stay on guard, as a pair of Enclave Remnants skulk nearby… perhaps lured by the sounds of freedom emanating from the tower?
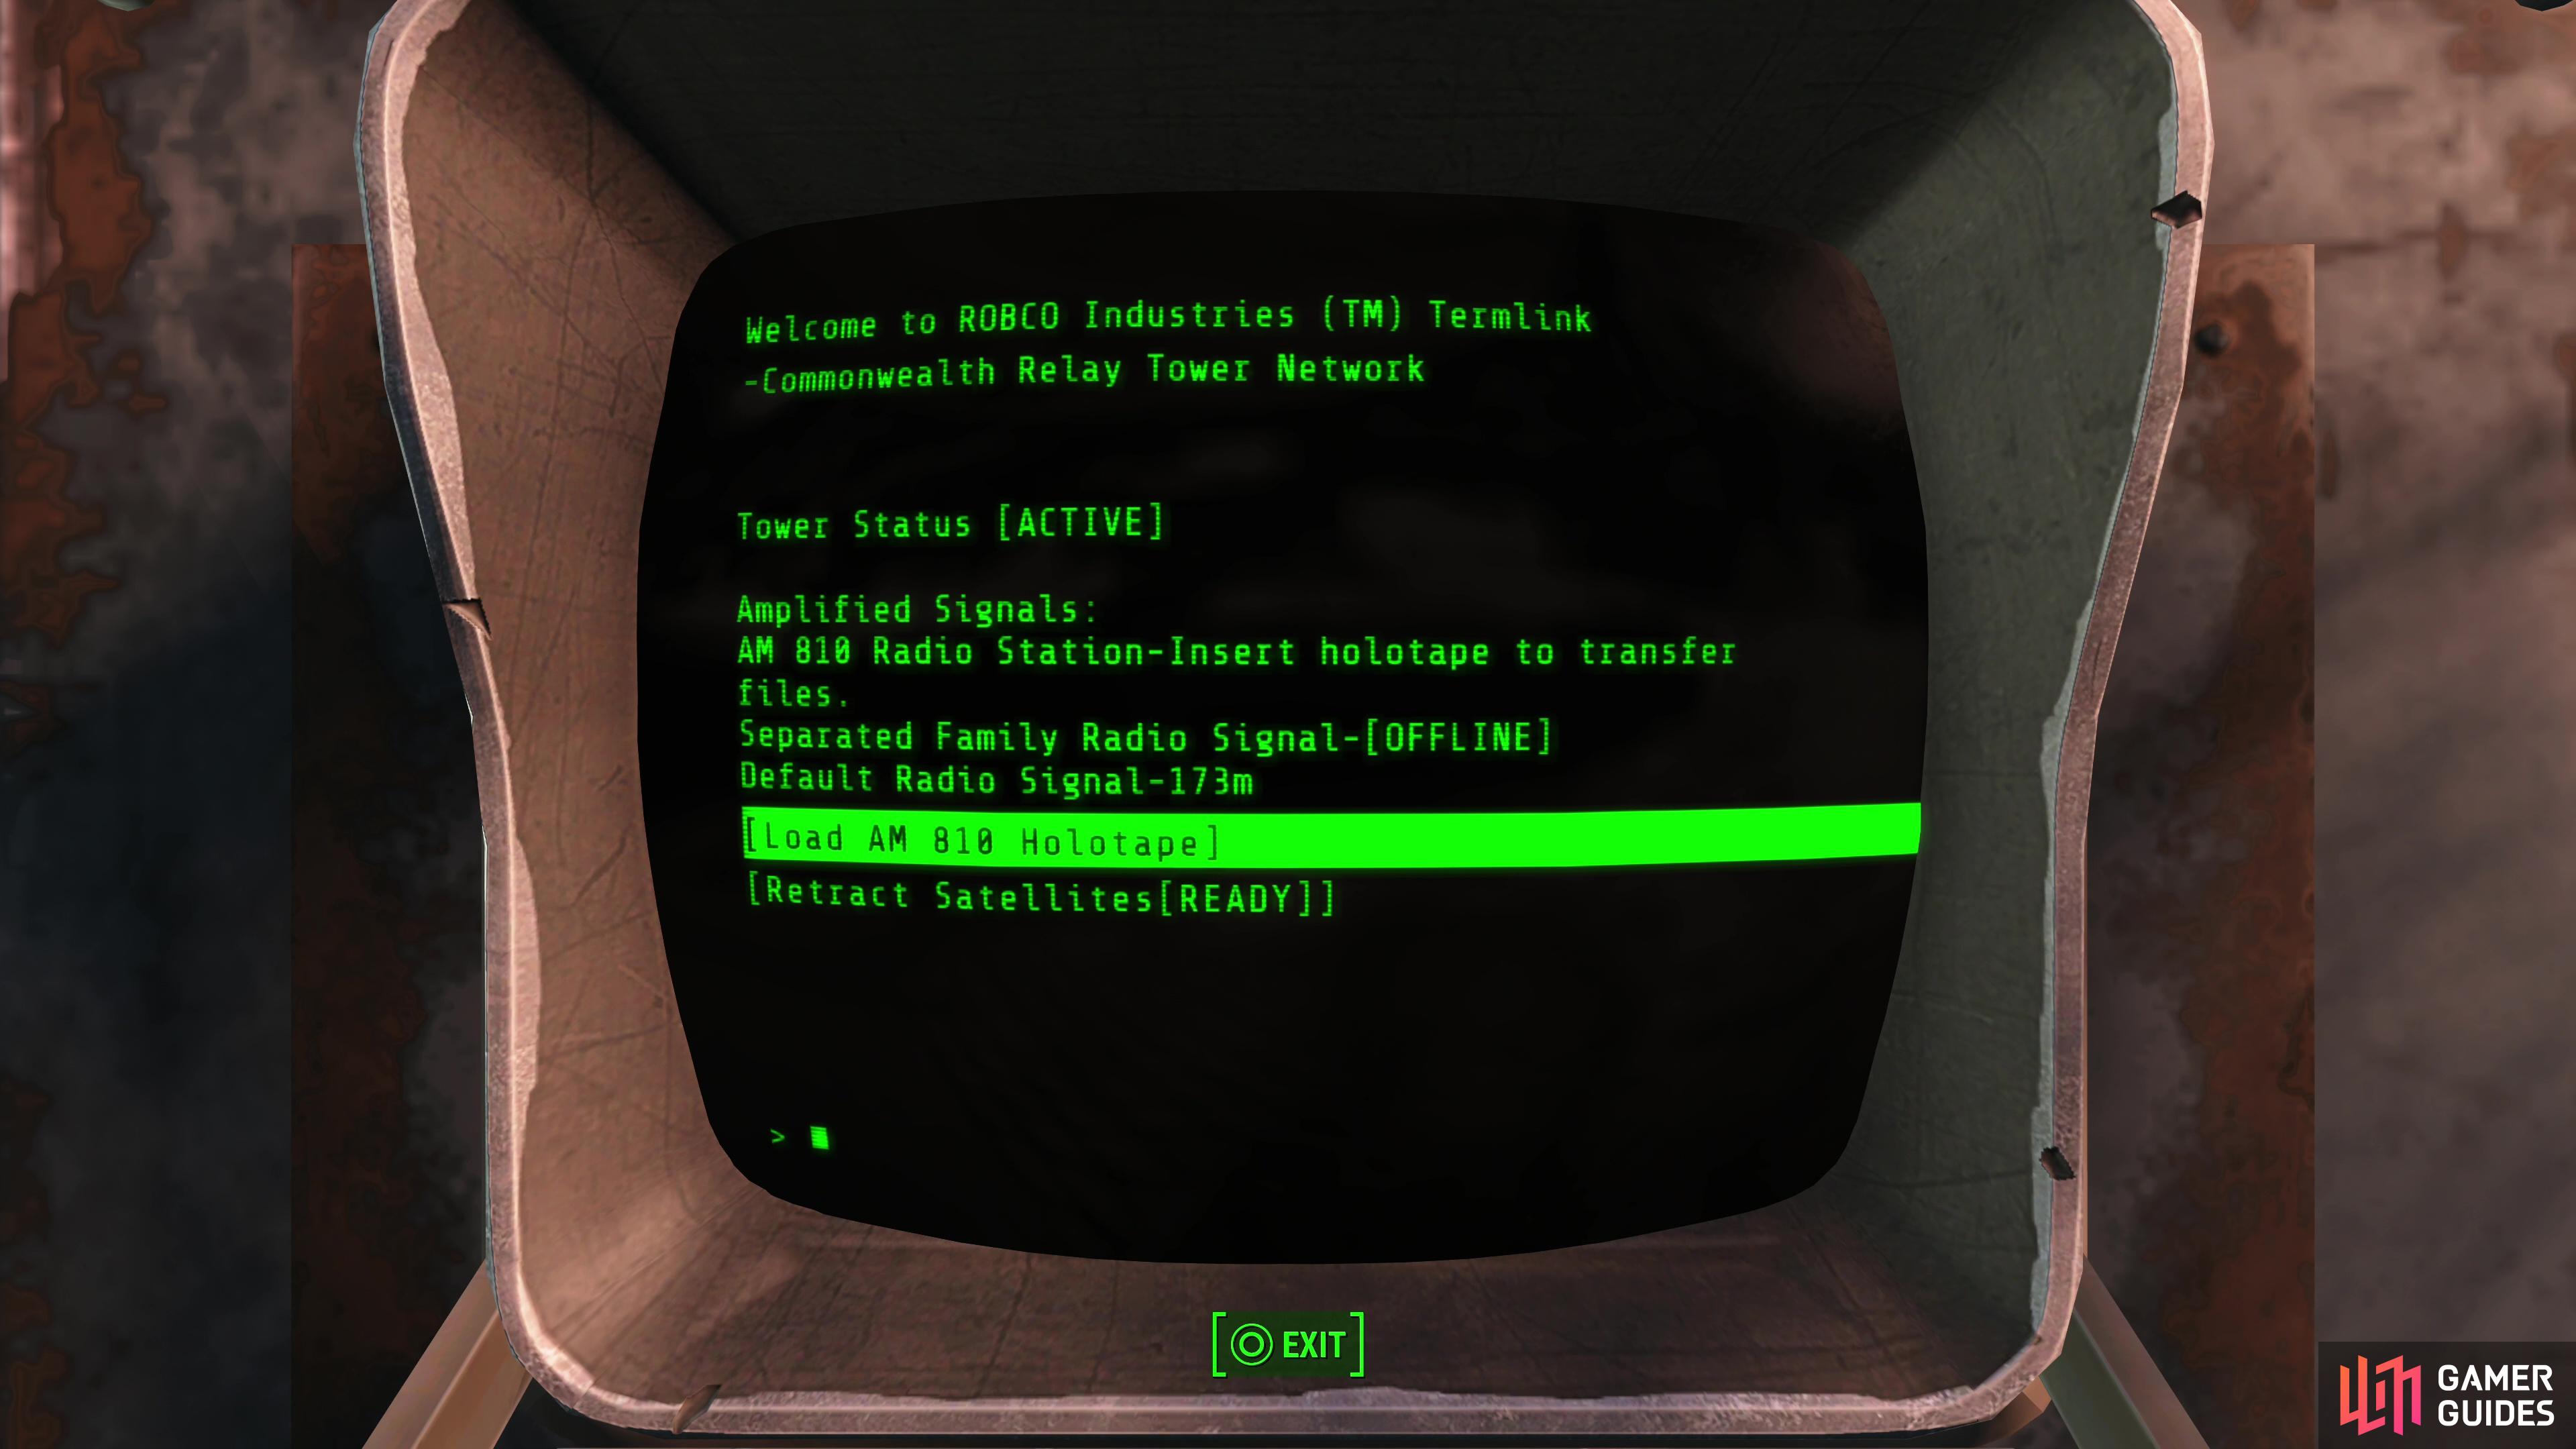
Whatever the case, put them down then search near the tower to find a “Relay Tower Terminal”, near which is the corpse of Richie, one of Connie’s pals. Grab Richie’s Note to learn that Connie was captured by the Enclave and taken to the nearby BADTFL Regional Office. One problem at a time. Before you run off to play hero grab the AM 810 Music Catalogue from Richie, then interact with the previously neglected terminal and pick the option “[Extend Satellites]”. Once the satellites are extended, hit the terminal again and pick the option “[Load AM 810 ![]() Holotape]”, followed by “[Transfer Files]” and finally “[Stars and Stripes Forever]”. You can’t actually transfer “[Battle Hymn of the Republic]” here, so don’t lose sleep over the illusion of choice.
Holotape]”, followed by “[Transfer Files]” and finally “[Stars and Stripes Forever]”. You can’t actually transfer “[Battle Hymn of the Republic]” here, so don’t lose sleep over the illusion of choice.


Find Connie in the BADTFL Regional Office
Next stop in the hunt for the Black Devil is the BADTFL Regional Office, which can be found back across the river to the southwest. Make your way back across the bridge near Poseidon Energy Turbine #18-F and take a left along the road and you should find it, just be careful, as Raiders lurk both without and within, and if you’re unlucky you may also have to deal with a random encounter and perhaps some Super Mutants who infest the ruins further south.
Once inside, you’ll need to make your way north through some double doors, then turn left through another doorway (mind the Laser Turret in here), before turning right through a third door. Kill the Raiders in the room below you and head downstairs and into an interrogation room to the northwest to find Connie, who isn’t very chatty after his encounter with the Enclave. Pick up Connie’s Confession from the desk and it’ll just read “CHECK THE WALL”. Sure thing, buddy. Examine a hole in the wall to the north and you’ll find a Pack of Cigarettes, under which is hidden some Cigarette Paper. If you grab this after reading Connie’s Letter you’ll learn that the “Password is “El Diablo Viene””. Good to know. Return to the desk in the center of the room and grab - and play - the FM 52.7 Music Catalogue holotape, which, unlike the last holotape you used for this quest, is password protected.
Normally you’d have the option to either guess the password via the [Generate Password list [Hacker 1+]] option or bypass the password entirely via the [Break encryption [Hacker 3+]] option, depending on how many points you’ve invested into the Hacker perk. Finally, if you picked up the hidden cigarette password earlier you can also skip the guessing game, which is just blindly picking entries from a list. Once you get past the password protection you’ll get access to the music on this holotape, which you’ll need shortly. Before that, however, be sure to read the transcriptions recorded on the holotape by selecting the options [Transcriptions]. You especially need to read [Raw audio transcription #0130], which will point you towards the Boston Police Rationing Site, which you’ll get to later.

(1 of 2) Head to the Relay Tower 0SC-527,
Head to the Relay Tower 0SC-527, (left), and upload the “America the Beautiful” track. (right)
Investigate Relay Tower 0SC-527
Fight your way out of the ![]() BADTFL Regional Office building (or just backtrack the way you came). Before you head off to the Boston Police Rationing Site you need to swing by Relay Tower 0SC-527 and upload the encrypted music on the holotape you got from Connie. This relay tower is quite a ways south from, down past (southeast of) Diamond City. Being the furthest area away from Sanctuary you may expect the environs around this relay tower to be the most dangerous in this quest, but honestly the Raiders and Super Mutants occupying Boston are more dangerous than anything you’ll likely encounter in the outskirts.
BADTFL Regional Office building (or just backtrack the way you came). Before you head off to the Boston Police Rationing Site you need to swing by Relay Tower 0SC-527 and upload the encrypted music on the holotape you got from Connie. This relay tower is quite a ways south from, down past (southeast of) Diamond City. Being the furthest area away from Sanctuary you may expect the environs around this relay tower to be the most dangerous in this quest, but honestly the Raiders and Super Mutants occupying Boston are more dangerous than anything you’ll likely encounter in the outskirts.
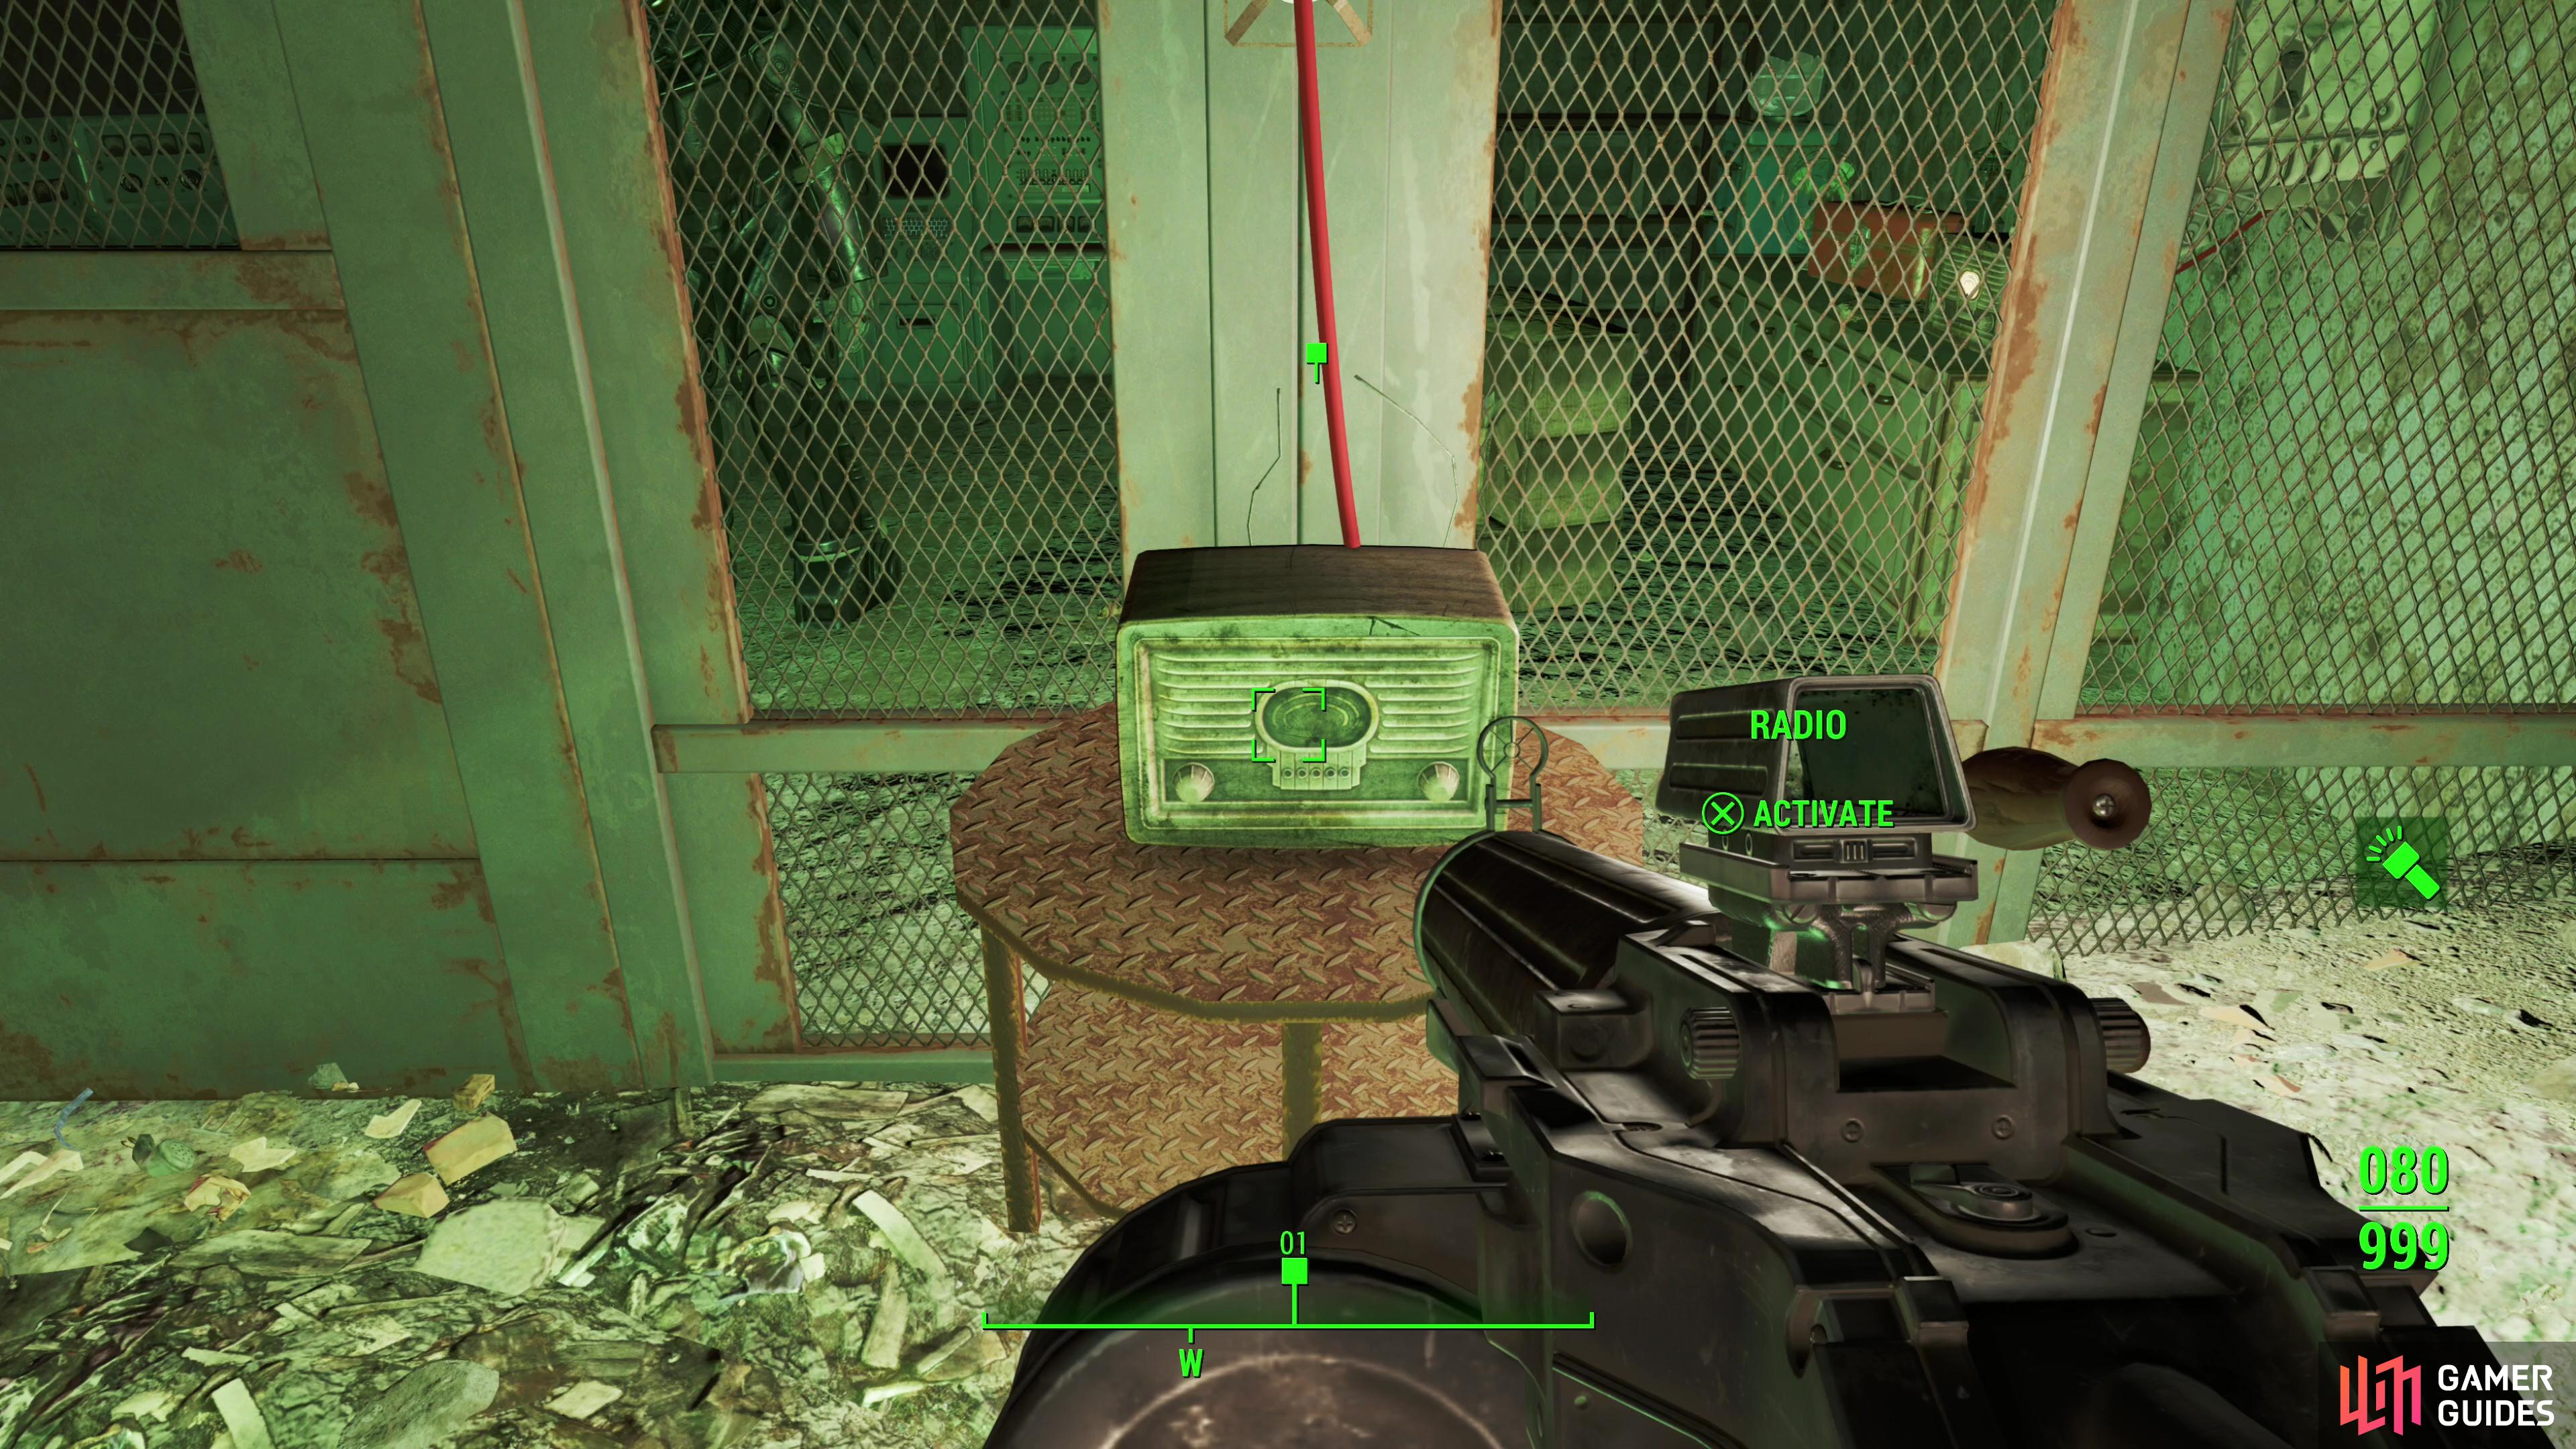
Make your way to the relay tower and dispose of the Mole Rats that invariably infest the place. Once those pests are exterminated, activate the “Relay Tower Terminal”, pick the option [Extend Satellites] and when that’s done use the terminal again and select the [Load FM 52.7 Holotape] and [Transfer files - America the Beautiful]. Sorted. Now you’ve made the call to the Black Devil, time to head on down to Boston Police Rationing Site.


(1 of 3) The door to the Boston Police Rationing Site is barred, so jump onto a white crate,
Find the X-02 Power Armor at the Boston Police Rationing Site
The last stop in this quest is the Boston Police Rationing Site, which is a short journey northwest from the Relay Tower 0SC-527. When you arrive you’ll find that the door on the southern edge of the building is barred. If you have an explosive weapon, you can just shoot the door and it’ll open - doesn’t seem like it should work, but it does. The way you’re probably supposed to enter is via some platforming; from the door turn west and you’ll see a white shipping crate. Jump on it, turn south and jump on a yellow shipping crate, then turn left (east) and jump onto a blue crate and then onto a blue train car. Walk along the train car until you spot a yellow crate near the door to the building and jump down onto it. Walk across the roof to the east and look north, northeast to find a white crate along the side of the building you can jump onto, then from here jump onto a green crate being raised by a machine, then turn left (west ) and jump onto a roof along the northern edge of the building. From here you can just enter via a window. Go downstairs, kill some Molerats, then head down a second flight of stairs in the southwestern corner and enter the Utility Tunnel area.
Follow the linear path ahead and enter a room full of Radroaches. Kill them and go through another door in the northern corner of the room and take a right through the first door you find. In this room you’ll find a caged-off area to the west, beyond which slumbers the armor you seek. Activate a radio on a table near the door and the door will open and the lights will power up, giving you access to this armor.

(1 of 3) Interact with a Radio in the Utility Tunnels,
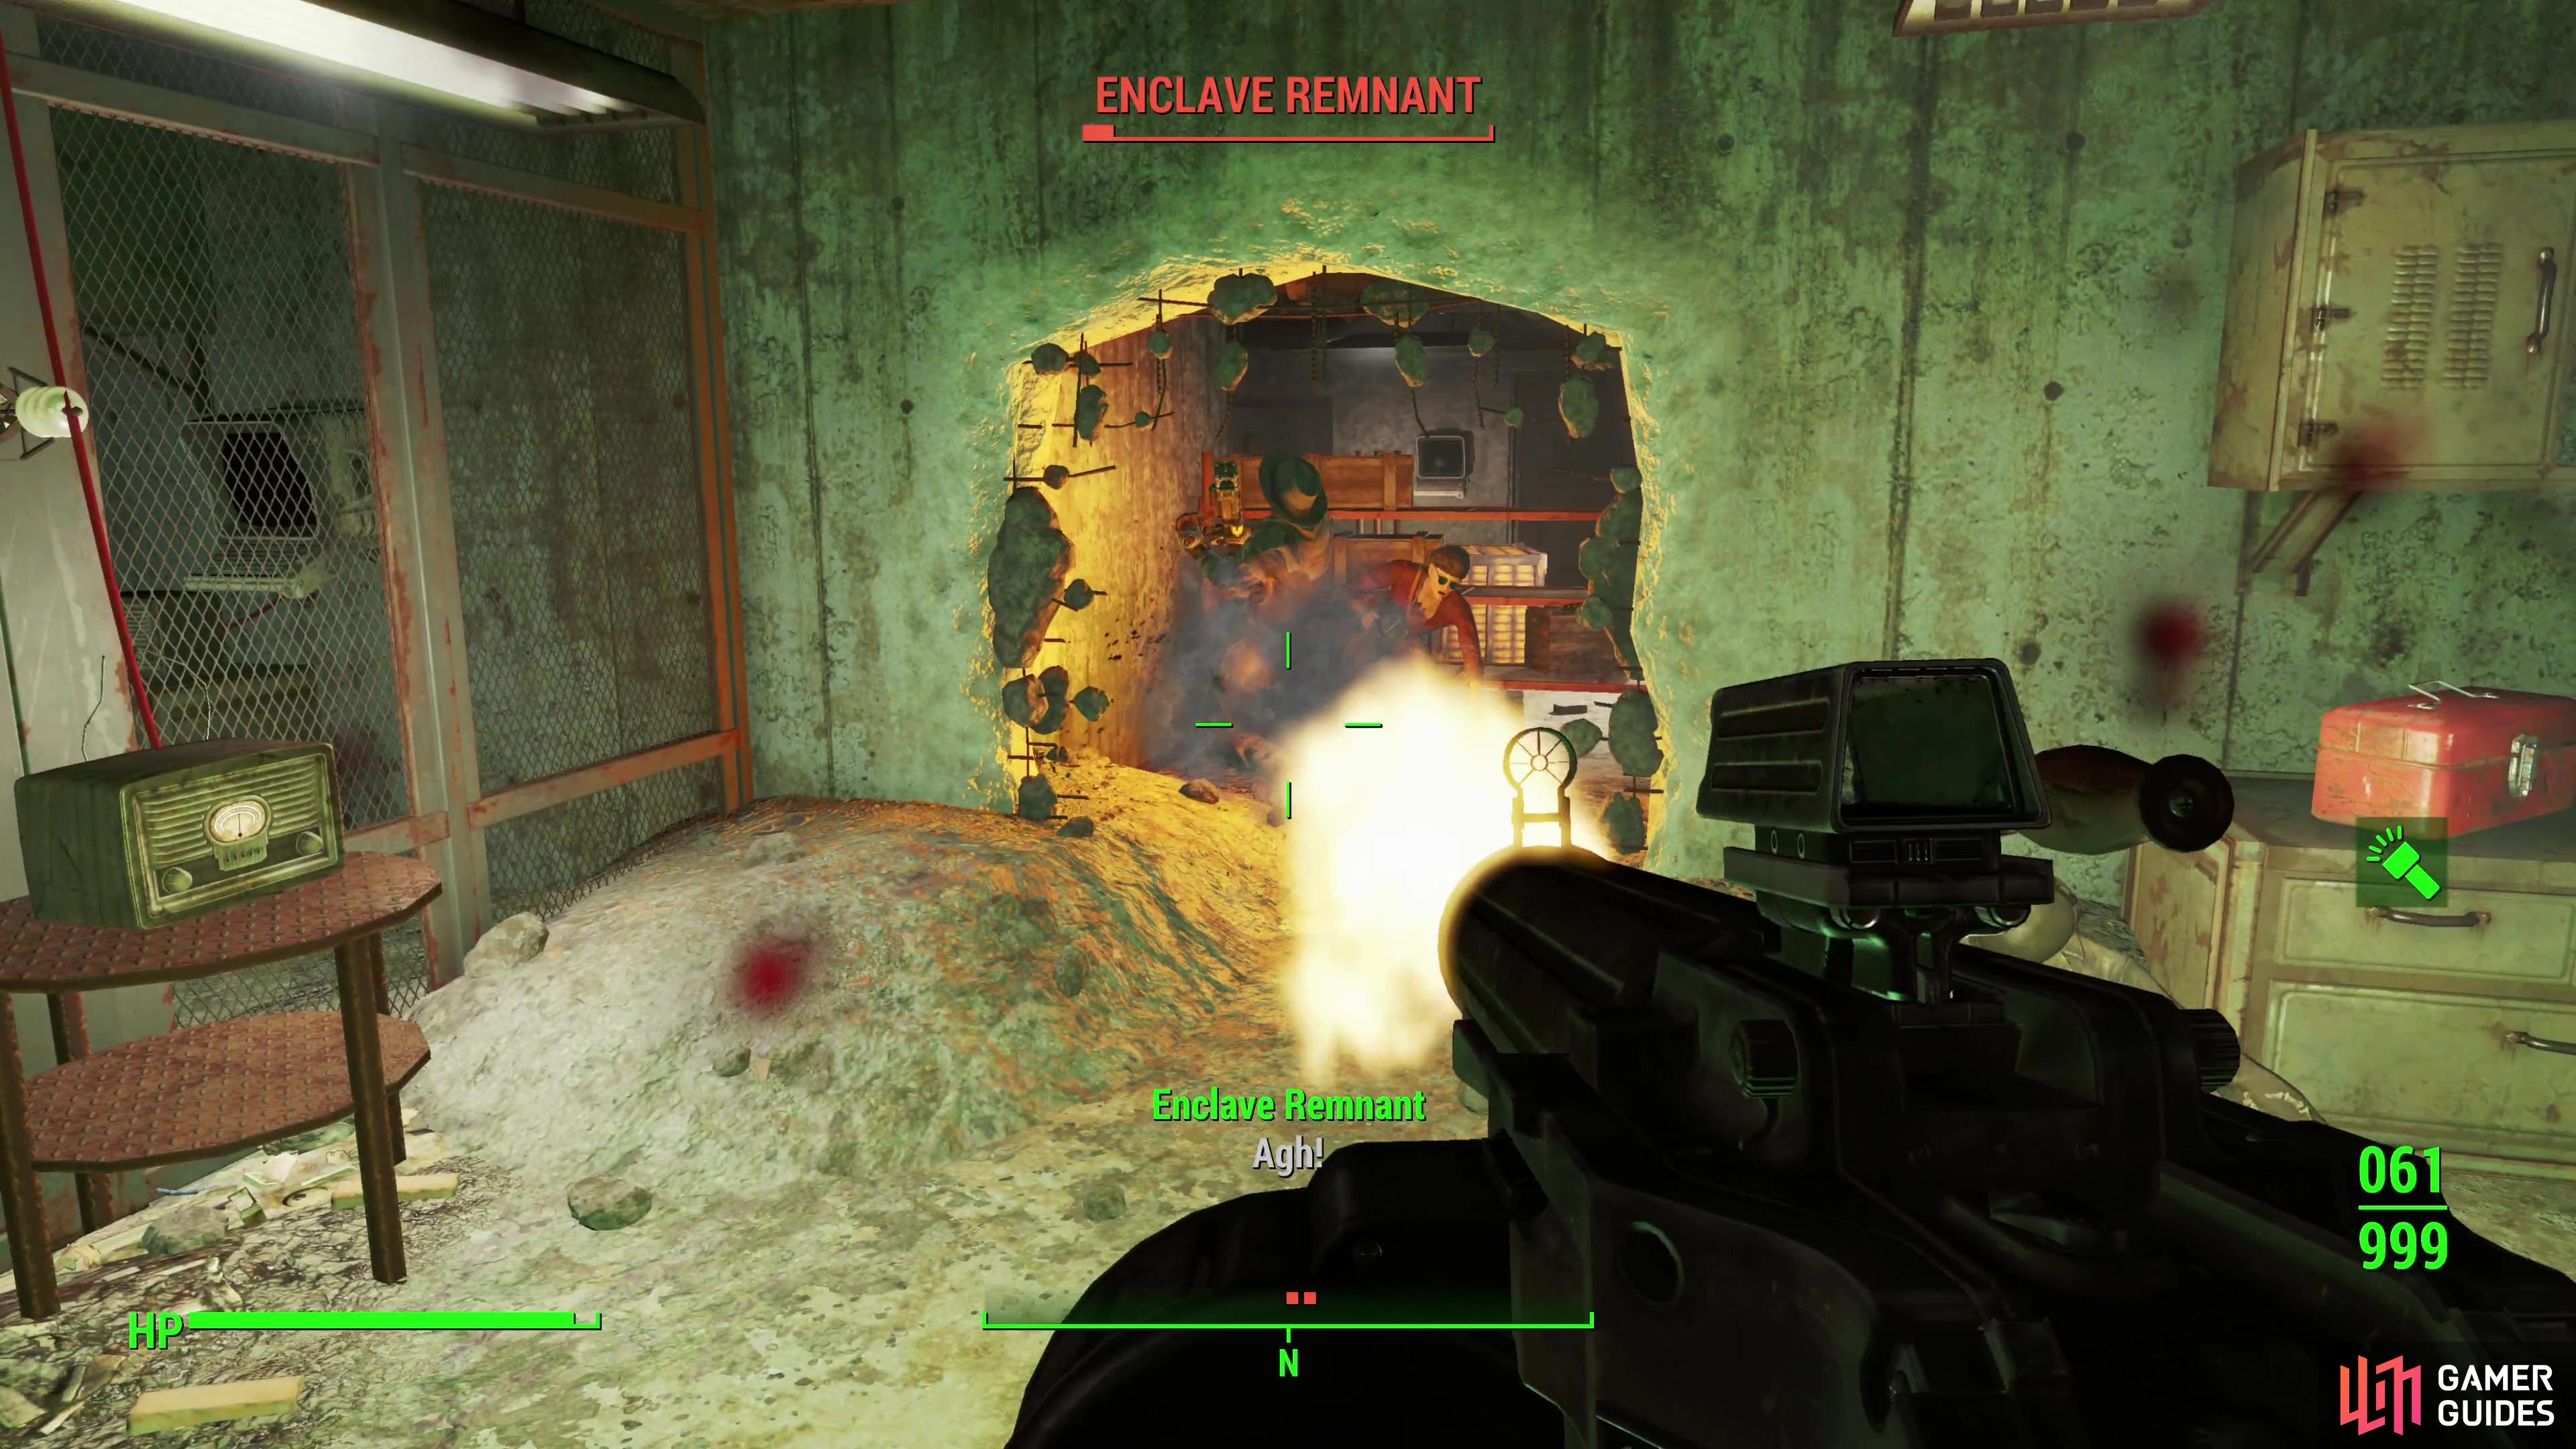
Before you hop in the X-02 Power Armor, search to the left of the suit to find some Notes on the X-02 to learn more about the device, then examine the Devil’s Terminal behind the armor. Read the entries to learn about the Black Devil’s backstory, but especially [A Humble Request], which asks you to kill the Enclave broadcast the Black Devil was using to put an end to his saga for good, promising you a safe full of goodies if you comply. Before you make your decision, exit out of the terminal and you’ll be attacked by two pairs of Enclave Remnants including a named character, Hodges. They have energy weapons, but no Power Armor, so they shouldn’t pose much threat - you can loot Hodge’s Journal to learn about the Enclave’s attempt to get into the caged-off area, but this isn’t essential.


(1 of 3) The Black Devil leaves you with a choice - keep the Enclave Radio station on in perpetuity,
Anyways, when you’re ready to make your decision return to the Devil’s Terminal and if you pick the option [Short circuit radio transmission] you’ll lose access to the lovely patriotic tunes playing over the Radio FM 52.7 Signal, but you’ll gain access to a safe on the wall to the left of the Devil’s Terminal that contains, amongst other goodies, the X-02 Devil’s Inferno mod. This torso armor upgrade will gives your X-02 Power Armor the following boon: “Deals Energy damage to nearby enemies. Increases wearer’s movement speed by 5%. Taking damage recharges action points.”. Alternatively if you pick the option [Restore Enclave Radio] you’ll get the new Enclave Radio station, which plays a variety of saccharine Americana music.
Whatever decision you make, you’re done with this quest - grab your X-02 Power Armor and make your way home.

 Sign up
No Comments