
| Important Items in this Area |
|---|
| Bandit’s Key |
| Etolian Auxiliary Archers Card |
| Black Infantry Archer Card |
| Crinfrid Reavers Dragon Hunter Card |
| Puttkammer Card |
| Sweers Card |
| Druzus the Hermit’s Notes |
| Gwent Players in this Area |
|---|
| Merchant - Random Card |
| Merchant - Random Card |
Make your way to Oreton (hopefully you can just fast-travel there, since you visited it during “Towerful of Mice” ) and search the notice board, where you can find the notice “Contract: Missing Soldiers” which starts the quest “Contract: The Mystery of the Byways Murders” . It’s far above your level right now, but there’s no reason you can’t pick it up and come back to it later. When you have that quest, play Gwent with the Trader, who has a Northern Kingdoms deck of some competence. While he won’t play many “Spy” cards or make use of too many “Tight Bond” combos (with the notable exception of a devastating pair of Catapult Cards), he does have a few 10 Strength Hero Cards, and he’ll bolster his other cards with “Commander’s Horn” cards. Beat him, take his random card, then head south-west along the coast to return to Graham’s house.
:::note:
If you have the DLC “Where the Cat and Wolf Play…” installed you’ll find the notice “Contract: the Beast of Honorton” on the notice board, which starts a quest of the same name, ultimately leading to a quest named after the DLC. There’s no harm in picking it up now, but at level twenty-five, it’s almost certainly beyond your means right now.
:::
A Greedy God (Level 7) Walkthrough
From Graham’s now-vacant house head north-west along a trail to eventually reach some ruins, where two peasants are arguing. Talk to them to discover that their meager offerings have angered the Allgod. Agree to intervene on their behalf to start the quest “A Greedy God” .
Talk to the nearby wooden effigy, then, after getting a response that raises Geralt’s suspicions, activate your Witchers Senses. Investigate the wine bottles nearby to get a scent trail, which leads to a pile of rocks nearby. Or rather, the illusions of rocks. With the Eye of Nehaleni you can dispel the rocks and find some stairs leading down to a cellar below… a well stocked cellar, with a rather corpulent monster inside. Talk to the beast to find out that it’s an unrepentant parasite who has no inclination of giving up its feast.
You have three options; kill the beast (it can breathe and throw fire at you, but otherwise it’s not too difficult to just chop him down in melee combat), convince the beast (under pain of death) to accept the smaller offerings, or agree to tell the peasants that the Allgod won’t be pleased with what they can safely spare. In the former case, the peasants aren’t too happy that you killed their god. In the latter two cases you can then inform the peasants about some “fascinating architecture” in the crypt below. The middle course is the most immediately lucrative.
| Objective | Reward |
|---|---|
| For talking to the Allgod | 25 XP |
| For telling the peasants about your encounter with the Allgod | 50 XP / 50 Crowns |
| For accepting the Allgod to accept smaller offerings | 50 XP / 50 Crowns |
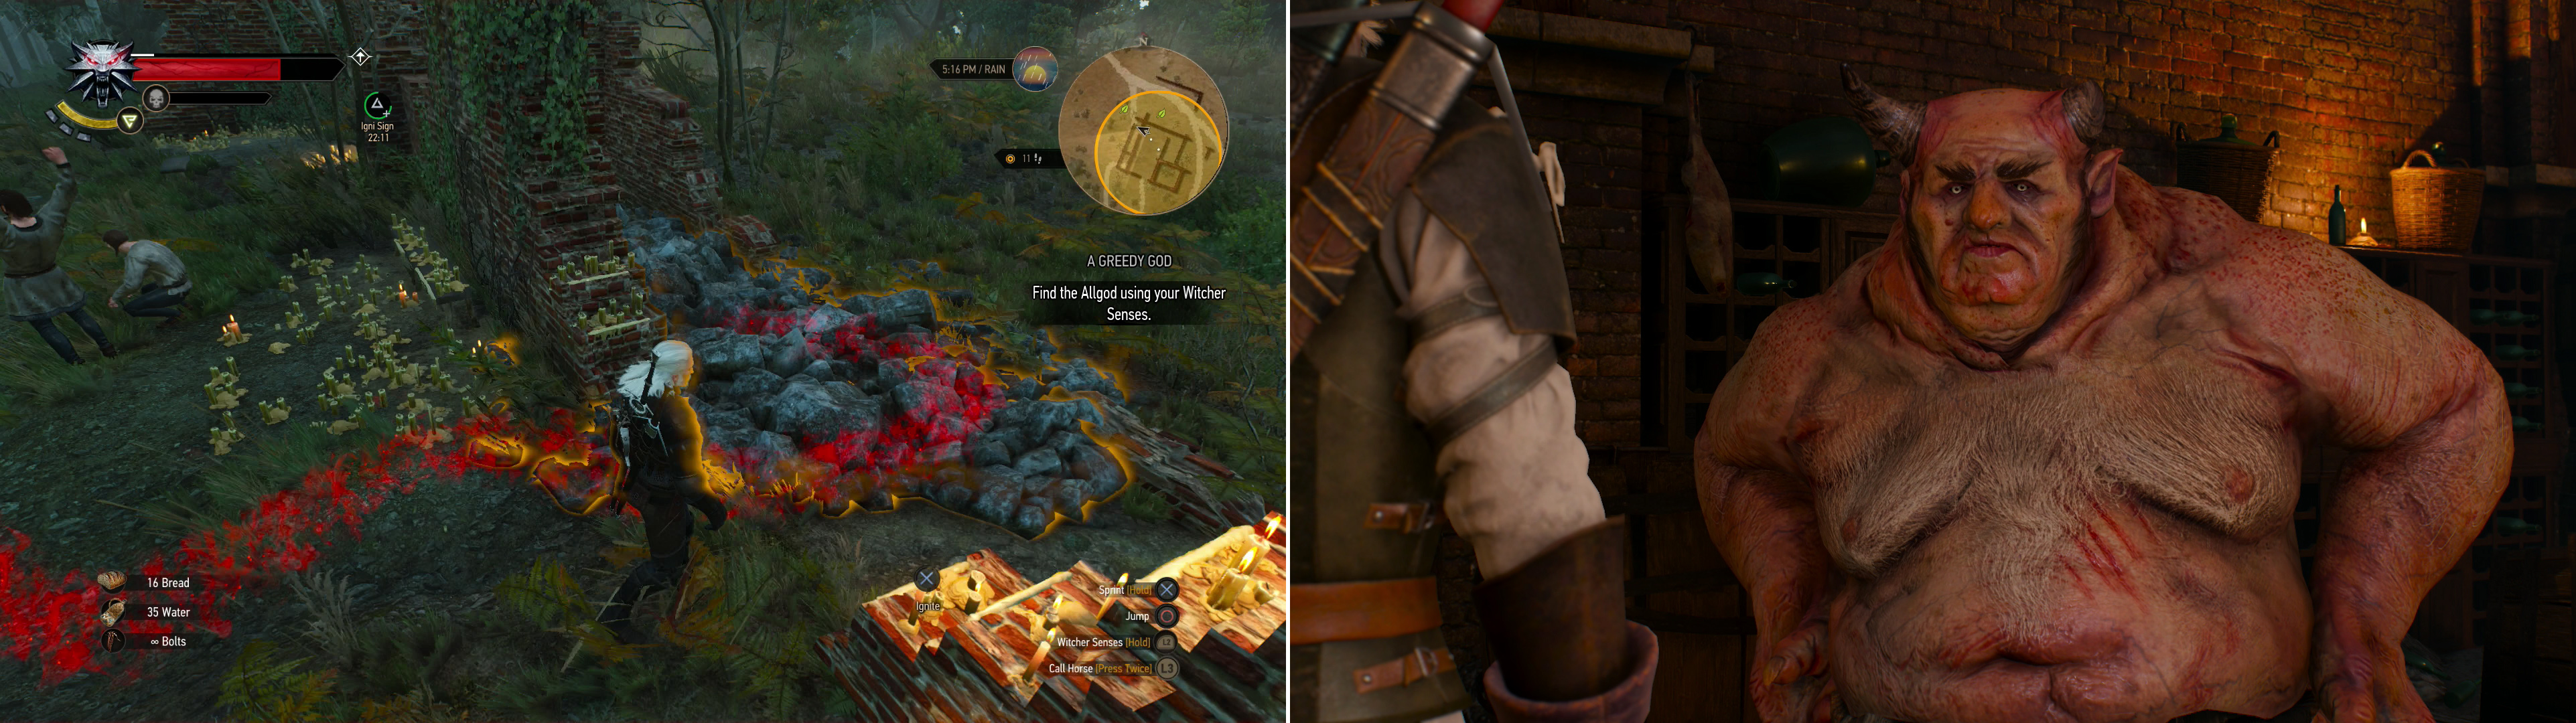
Follow the scent of some wine (left) to find the rather corpulent being masquerading as the AllGod (right).
Troll Bridge (Level 3)
From the ruins head north along a road until you find the “Wastrel Manor” signpost, where some peasants are busy constructing fortifications for some kindly Nilfgaardians (you may have discovered this signpost earlier, during your race with Keira). Continue north to reach a crossroads, at which point follow a road north-east until you reach a raised bridge. If you swim across the channel to the north you’ll find that the bridge is guarded by a handful of Bandits (level three), who have decided this is now a toll bridge, and they’re entitled to collect. You can either pay them to cross (50 Crowns), use Axii on them (requires an upgraded Axii) or introduce them to your Steel Sword. Either way, activate a wheel near the raised bridge to lower it, and make the world an easier to travel place for everyone.
| Objective | Reward |
|---|---|
| For using Axii on the bridge bandits | 40 XP |
Monster Nest/Abandoned Site (Level 9)
Cross the bridge south and return to the crossroads, at which point you should follow the eastern road. Follow this road until you reach a small village, which, if you explore, you’ll discover the “Claywich” signpost. Not much to see here, but having the signpost is still nice. If you rescued the Barber earlier, you can now stop by and peruse his services, but otherwise, there’s not much to see and do in Claywich. If you continue east from Claywich you’ll find another, even more unimpressive village. Further east lies the “Boatmaker’s Hut” signpost.
:::note:
If you have the free DLC “Where the Cat and Wolf Play…” installed there will be a high level Alghoul in the town east of Claywich. You probably don’t want to tangle with this beast at this point in the game, so do be sure to sneak around the edge of town to avoid it.
:::
More interesting than the last two places (almost anything would be) this village is now an Abandoned Site, due to the nearby Monster Nest. Kill the Ghouls (level nine) near their nest, then destroy it. When the Necrophage menace has been removed, peasants will move back in, including a merchant. Making the world a better place, one monster nest at a time…
| Objective | Reward |
|---|---|
| For destroying the Monster Nest | 20 XP |
| For liberating the Abandoned Site | 120 XP / 50 Crowns |
Leave the newly liberated town by taking a road to the north-east, which will eventually wrap around south-east and lead to a bridge. At the bridge you’ll find some ne’er-do-wells practicing the time-honored tradition of forcing travelers to pay an arbitrary bridge toll. You can either flash your Witcher medallion, which convinces the bandits to leave the bridge, or you can tempt them into attempting to rob you, which convinces them to leave this life. Either way, once done use your Witcher Senses to spot some footprints that lead from a campfire to the east of the bridge, to a treasure chest along the shore west of the bridge.
Head north-east along the shoreline, where you may encounter some Drowners (level nine). Of slightly more interest, however, keep your eyes to the east to find a small island that shows signs of recent human settlement, now abandoned. There are a few containers to loot and possibly some more Drowners to slay over here, but nothing to get excited over.
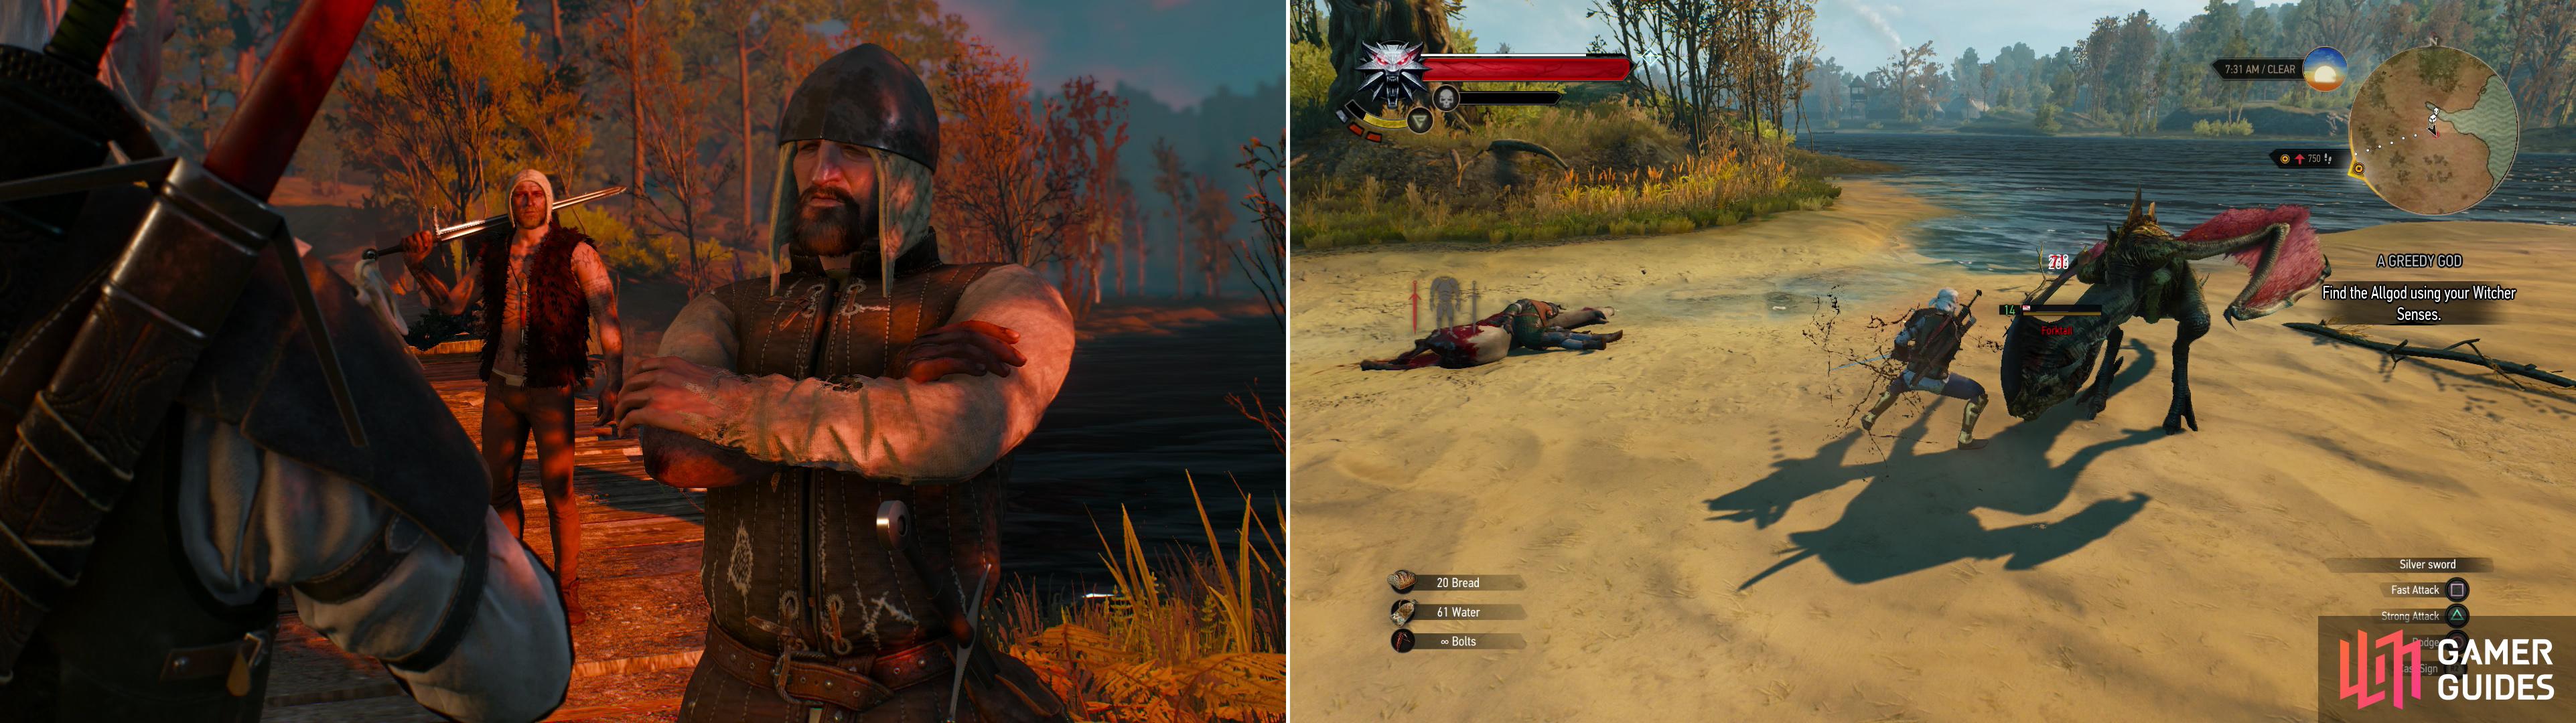
Around Oreton, practically every bridge comes with its own compliment of Bandit toll-men (left). More fearsome beasts, like this Forktail, prowl the shores (right).
Guarded Treasure (Level 14)
Swim back to the sandy shore to the west and continue along the shore to the north until you find a “Guarded Treasure” event. The guardian in this case is a Forktail (level fourteen) which could be trouble if you’re too low of a level. Really, though, if you killed the Shrieker (or better yet, the Wyvern at Lornruk) earlier, you should be more than strong enough to battle this beast. Typical rules apply; strong attack, dodge, Quen. Kill it and loot the corpse of a soldier lying near his equally dead mount.
Bandit Camp/Person(s) in Distress (Level 6)
Backtrack south along the coast until you return to the bridge where the Bandits once prowled. Cross it to the south-east, then continue south-east along a road until you reach a bandit camp, which just so happens to host a “Person(s) in Distress” event… there’s even has a “Bandits’ Camp” signpost here. You know the drill, kill the Bandits (level five) and their leader (level six) who will drop a “Bandits’ Key” . Take the key and free a Merchant, who will tell you to meet him in Claywich, then loot the camp.
Return to Claywich at some point (don’t freak out if you need to fast-travel around to give the Merchant time to show up) and he’ll reward you with six bottles of Dwarven Spirit. He’ll also allow you to peruse his wares, which include a number of Gwent Cards; the “Etolian Auxiliary Archers” Card, the “Black Infantry Archer” Card, another “Crinfrid Reavers Dragon Hunter” Card, the “Puttkammer” Card and the “Sweers” Card. The “Black Infantry Archer” Card is another fine, high-powered addition to the Nilfgaardian deck, while the “Crinfrid Reavers Dragon Hunter” card is just great. A third 5 Strength card with the “Tight Bond” ability? Add it to your Northern Kingdoms deck immediately! Oh, and be sure to play Gwent with the Merchant with all these new cards to win yet another, random Gwent card. He’s got a weak - if “Spy”-heavy - Northern Kingdoms deck, nothing you shouldn’t be able to thrash with ease.
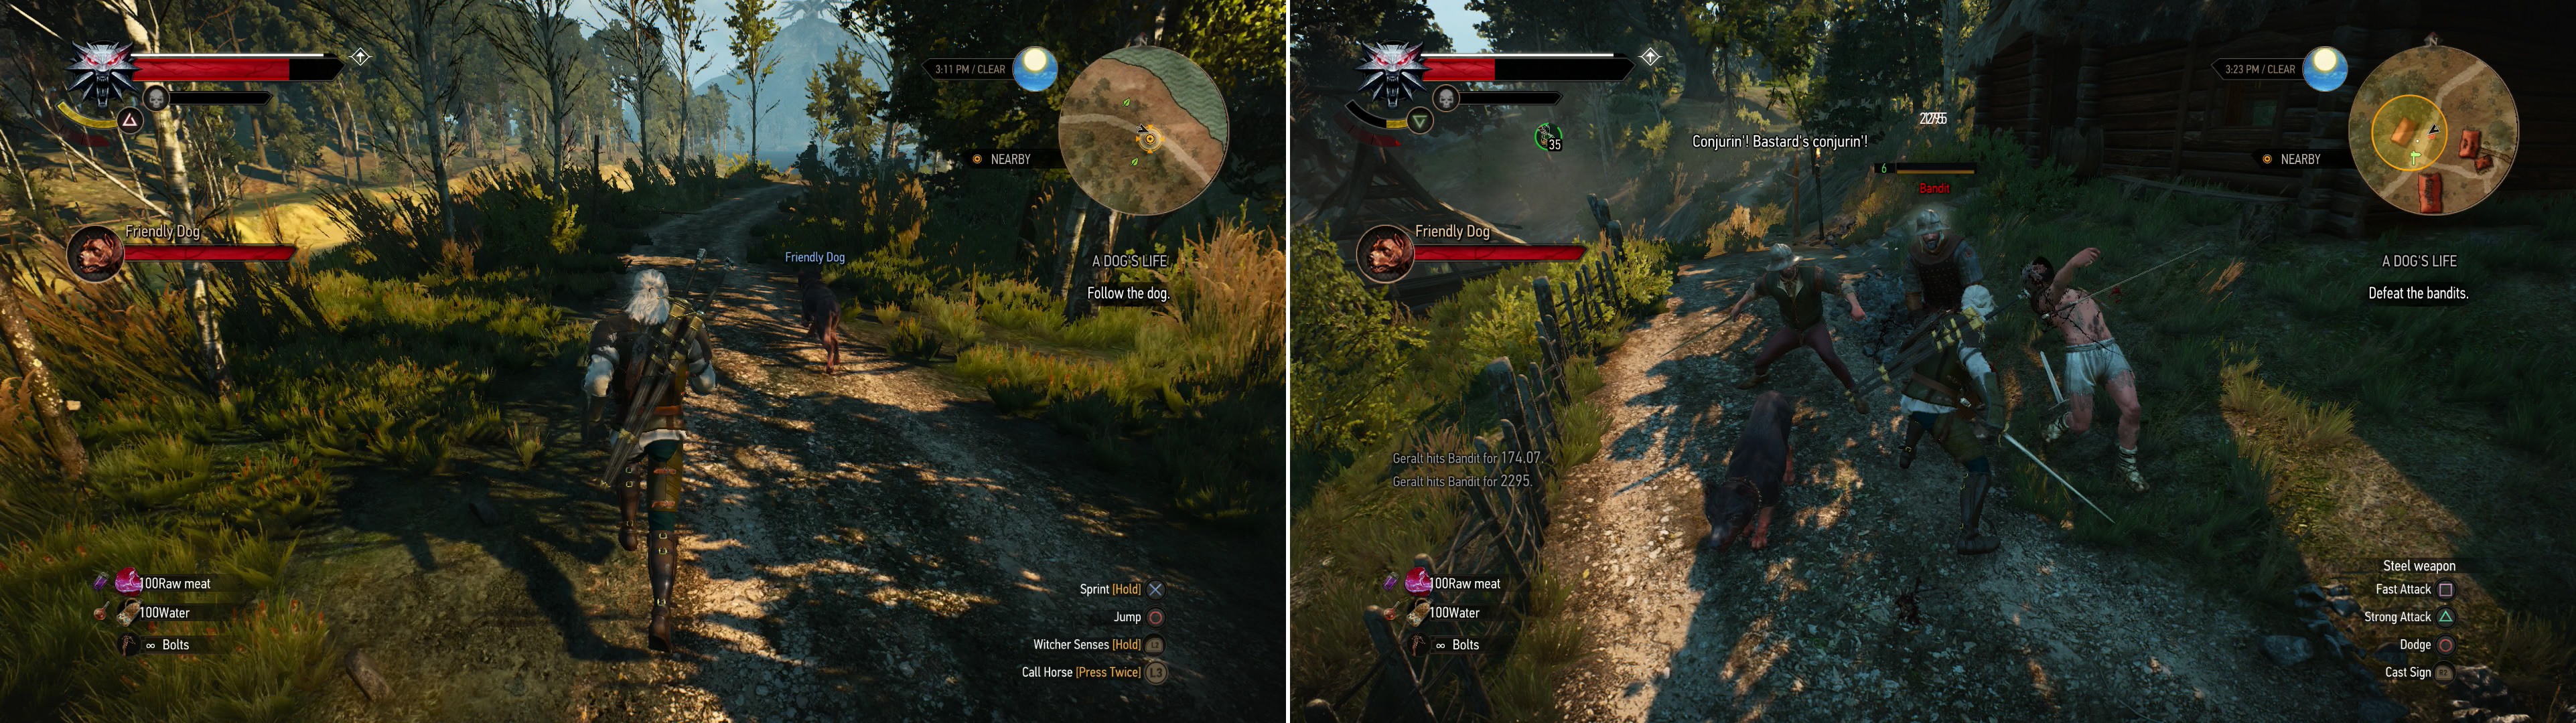
Help a dog fight off some Wolves, the follow the Friendly Dog back to Drudge (left) where you’ll need to assist it one more time by killing off some Bandits (right).
A Dogs Life (level 5) Walkthrough
From the Bandit Camp head south-west to find a small dock and the ruins of a house near the shore. Search the ruins and it’ll yield a chest for you to loot, then swim across the channel to the south-west. Near the shore here you’ll find a road running south. Follow it to reach a lovely village named Drudge. Or, well, an abandoned village named Drudge, anyways. Explore the western-most house (just north-west of the Drudge signpost) and search the south-western corner of the house to find a concealed chest, which requires a key you do not yet possesses. Hmm….
Leaver Drudge behind and follow the road to the north, which wraps around to the west, where you’ll find a dog fighting off a pack of Wolves (level nine). Kill the Wolves and after the fight Geralt will inspect the out-of-place surviving canine, noting that he’s got a key sewn onto his collar. Neat. This starts the quest “A Dog’s Life” . Follow this “Friendly Dog” back to Drudge, where you’ll find a trio of Bandits (level six) outside of the house with the chest in it. Put then Bandits down, then loot the chest to find, amongst other goodies, “Druzus the Hermit’s Notes” , which discusses the hermit’s (presumably) ill-fated decision to talk some sense into some nearby Bandits. When you return outside, the dog will be gone… its mission of vengeance now complete.
This bit of exploration is now done; it’s time to return to the main story. While Geralt originally thought the witch outside of Midcopse was the same witch Ciri fought with, that turned out to be Keira Metz. Another, more malevolent witch may lurk in the swamps of south-eastern Velen, however, and since you still have no leads concerning the Bloody Baron’s wife, you might as well look into that. To that end, head to the south-eastern end of Drudge to find a boat, which you can pilot east to the edge of the swamp. It’s from there where the guide will continue.
:::note:
There’s an alternative way to complete the upcoming quest “The Whispering Hillock” that can only be done if you complete it before continuing with “Ladies of the Wood” . If you want to see how that quest plays out, more or less, skip ahead to “The Whispering Hillock” . The change isn’t great and spoilers abound, and it makes more sense sequentially to advance “Ladies of the Wood” first, but if you want that option… keep a hard save now just in case you don’t quite like how things play out, so you can go back and tackle the alternative approach.
:::

 Sign up
"Take the key and free a Merchant, who will tell you to meet him in Claywich, then loot the camp."
This merchant is bugged as hell: he might not show up in Claywich at all, or show, but you cannot speak to him. As a result, either you need to look for a save before completing this event and try again. Or, in my case, just walk with him to Claywich. And he is not marked on map. Stand near the mostwestern house.
"When you have that quest, play Gwent with the Trader"
For those who asked: guide suggested, that you play boatman much later.