
| Important Items in this Area |
|---|
| Itinerant Merchant’s Notes |
| Small Chest Key |
| Old Key |
| Mysterious Map |
| Old, Yellowed Letter |
| Silver-Plated Key |
| Diagram: Griffin Steel Sword - Mastercrafted |
| Thief’s Journal |
| Diagram: Superior Wolven Armor |
| Gwent Players in this Area |
|---|
| Herbalist - Random Card |
| Blacksmith - Random Card |
| Merchant - Random Card |
Hidden Treasure: Freya Be Praised (Level 4)
You’ve done all you need to do in Blandare for now, time to quest your way to Fyresdal! To the south you’ll find two lakes, a larger one to the north, and a smaller one to the south. Head south along a road from the Blandare signpost and, when you reach some forks, turn south-east along a road running along the northern end of the northern lake.
Follow the road south-east, keep your Witcher Senses on, and you should spot the white circles indicating enemies near the shore. Monsters that hunt in packs, that dwell near the shore? Can only be one thing, really. Eventually you’ll find another sacked wagon along the southern side of the road, near which is a corpse. Investigate the corpse to find the “Itinerant Merchant’s Notes” and a “Small Chest Key” , then head south to the shore of the lake and kill a pack of Drowners (level fifteen). When the necrophages are smote dive into the water to find a submerged chest, which you can now open.
Treasure Hunt: X Marks the Spot (Level 12)
Speaking of keys and watery chests, make your way to the eastern end of the lake and search around for an unmarked house which is east of the lake. Inside you’ll find a skeleton with an “Old Key” and a “Mysterious Map” on it. Reading the letter starts the quest “X Marks the Spot” , which will give you a search location a good way to the west, south-east of Fayrlund. Leave the cabin and a Wraith (level seven) will challenge your theft of the key, but unfortunately for it, it’s horribly out-leveled. Getting this treasure isn’t too difficult to get, just return to the Blandare signpost and fast-travel back to Farylund and make your way down a road to the south-west, and stick on this road until it hits a river, which you should follow east until you find a waterfall. Drop down the waterfall (remember to roll!) to find a chest under the waterfall, which you can now open with this key.
Person(s) in Distress (Level 14)
Fast-travel back to Blandare and follow the road from the signpost south until you reach the fork again. Ignore the south-eastern path for now, since you’ve got no need to head back to the Hidden Treasure even you plundered and instead take the south-western road. Along this road, which runs west of the larger of the two lakes, you’ll find a “Person(s) in Distress” event. Kill a horde of Bandits (level twelve to fourteen) the likes of which you haven’t seen since the massive pirate camp along the western coast of Velen and approach a captive Herbalist to free him. He happens to live nearby (in the house just east of “Person(s) in Distress” map marker, in fact, although he’ll often be found outside), and on subsequent visits, you can do business with him. He doesn’t sell anything terribly interesting, nor does he offer great prices but you can, however, convince him to play Gwent with you.
Treasure Hunt: Inheritance (Level 14)
The next destination in this meandering quest to clear map markers is to the west, over some low mountains. You can head, with a bit of determination and a lot of jumping, find a passable route over the mountain (perhaps dispatching some Nekkers (level twelve) along the way)… or you can fast-travel back to Fayrlund and head south-east, or failing that, follow the road north from the Herbalist turning north-west, south-west, then south around the mountain. Just be wary of some Endrega Drones (level twenty) and an Armored Arachas (level twenty-six) that prowl the woods south of the road.
Either way your goal is to reach the ruined village of Boxholm. North of the signpost you’ll find a dead warrior and an equally dead bear. Loot the former to obtain an “Old, Yellowed Letter” and a “Silver-Plated Key”, then read the letter to start the quest “Inheritance”. Search the house west of the dead bear to find a half-buried chest, which, if looted, will complete this quest. Leave the house and search its western edge, along the river, to find a generous chest just waiting to be looted on a wooden porch.
Mastercrafted Griffin Steel Sword
Before you go, you might as well secure an excellent diagram that requires almost no work to obtain. You know, the best kind. From the site of the bear-Skelliger battle follow the road south to find the “Boxholm” signpost, if you didn’t discover already. From the “Boxholm” signpost follow a trail east through the ruins until you reach the now-thoroughly collapsed ruins of what must have once been an impressive stone building. The proudest remains of the structure now consists of two crumbling towers to the south. Loot the barrels and parcels nearby, then dead up some stairs to the east, scale a ledge, then turn north to spot a chest chilling out amidst some rubble. Inside you’ll find the “Diagram: Griffin Steel Sword - Mastercrafted” . Score.
Return to the “Boxholm” signpost, then cross a bridge to reach the western side of the river, which you should follow south. You’ll be going quite a distance now, your destination being the village of Fyresdal along the southern end of Ard Skellig. On the way you should spot a long-abandoned siege tower between a road running west of the river and the river itself. South of this siege tower you’ll find a chest with some loot inside. Continue south along the nearby road, and when it forks turn south-east, then south to reach Fyresdal.
Fyresdal
Enter the town and talk to a Skelliger near the notice board to find the con-man you’ve run into several times, who wisely has come to his senses and pays you back for the trouble he caused you. Seems like you’ve made a tidy profit on this. Fair enough. Grab the notice “Contract: Dragon” from the notice board to start a quest by the same name… a quest you won’t be dealing with just yet. Once done, explore to the south near the port to find a Merchant and a Blacksmith, both of whom play Gwent.
| Objective | Reward |
|---|---|
| For tracking down the con-man a second time | 50 XP / 200 Crowns |
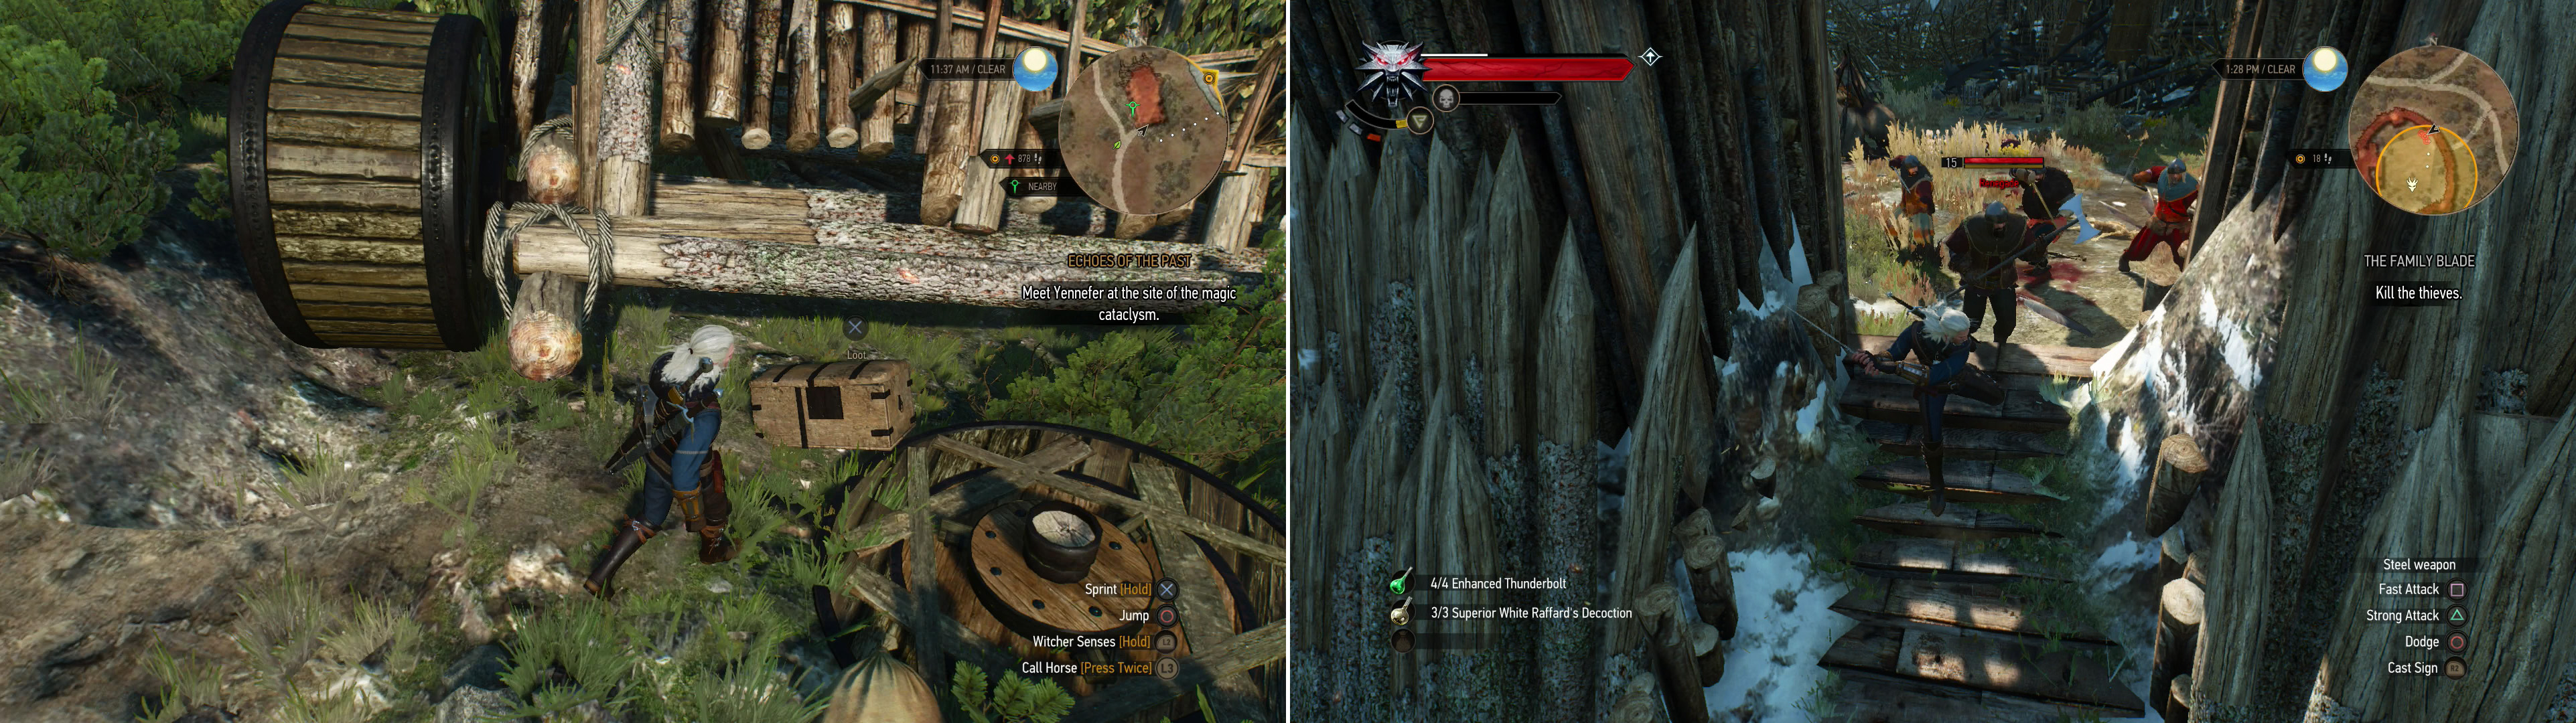
You can find some lucrative treasure near an abandoned siege tower (left). Kill the Bandits in a fort to find that, once again, the sword has eluded you (right).
Monster Nest (Level 13)
Leave Fyresdal via a road running south-west from the southern end of town and continue until you hit a fork. At this fork follow the eastern, less elevated of the two paths, which quickly leads to a triangular fork. Follow the road uphill to the west from here and at another fork follow the road south-west to reach a fort.
Enter the fort via an open gate on the north-eastern side of the structure and slay some Renegades (levels fourteen and fifteen), then loot them to score another “Thief’s Journal” . Read the journal to find that the blade has eluded you yet again… but on the plus side, it’s new location provides an excuse to explore the north-eastern parts of the island. There’s also a Harpy Nest here you can destroy while it’s unguarded. If you want to give the flying menaces a fighting chance, though, leave the fort and rest a while and the Harpies (level thirteen) will arrive. Kill them, bomb their nest, then loot it.
Before you leave, there’s a nice bit of loot you can grab if you’re adventurous. Search the northern end of the fort to find a collapsed tent, behind which are some sticks. Climb atop these sticks and use their elevation to leap onto the wall of the fort, which you should then follow clockwise to find a chest containing the “Diagram: Superior Wolven Armor” . Busy little fort, this.
| Objective | Reward |
|---|---|
| For destroying the Monster Nest | 20 XP |

 Sign up
"Leave the house and search its western edge, along the river, to find a generous chest just waiting to be looted on a wooden porch."
If you go to the signpost, and turn to the south-east, you see some wooden structure where you can find another chest with some generous loot.