
Now you’re onto the exciting treasure trail part of Novigrad. Djikstra and crew are talking to you in the bathouse, mentioning that there is a Reuvens treasure that’s gone missing. So, Geralt one again gets a taks, and that’s to retrieve Count Reuven’s Treasure in the Witcher 3.
| Important Items in this Area |
|---|
| Esterad Thyssen Card |
| Pop’s Mold Antidote |
| Manuscipt Page: Pop’s Mold Antidote |
| Mysterious Note |
| Bottle of Wine |
| Letter from Dudu |
| Gwent Players in this Area |
|---|
| Sigismund Dijkstra - Esterad Thyssen Card |
Sigis Bathhouse
Let’s start out by looking for this “Sigi Reuven” character you were told about. To find him head north from the notice board in Hierarch Square and when the road splits ignore the path leading uphill to the north and instead veer to the north-west. Head up some stairs and you’ll see some arches to the east, through which is the underground bathhouse you’re looking for. Knock on the ornate double doors and, after dropping his name, Geralt will be allowed in.
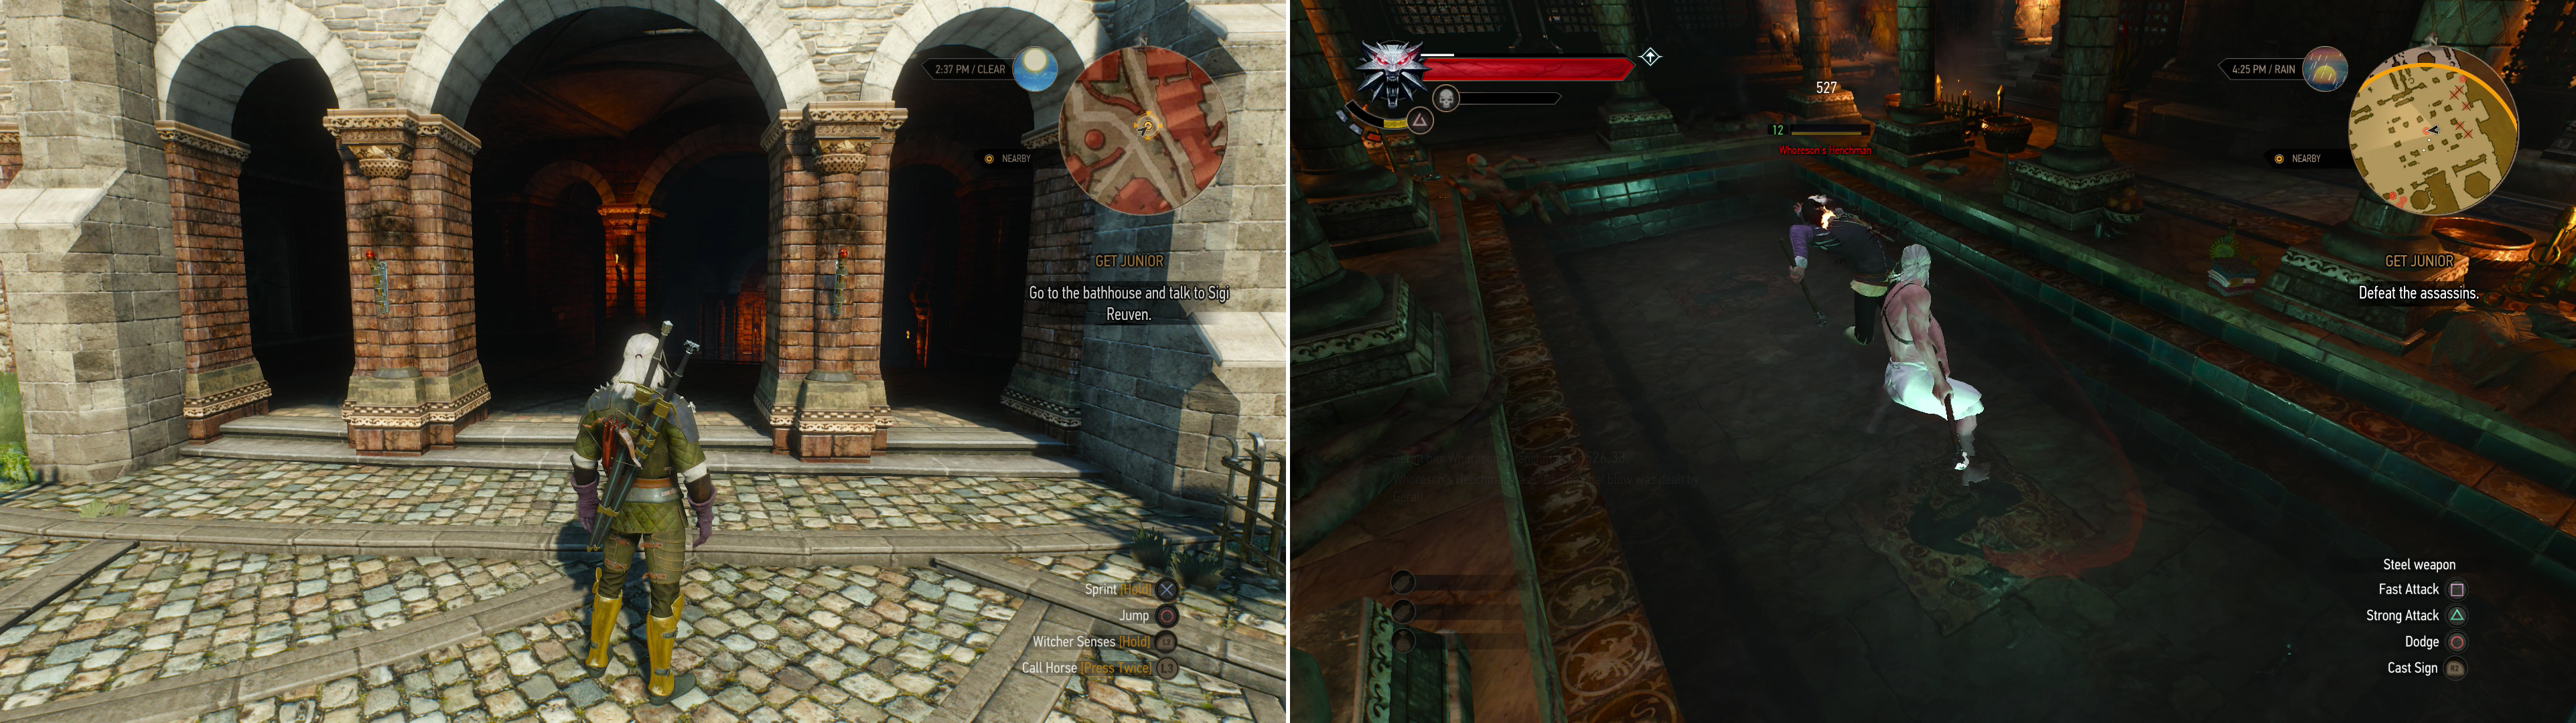
Find the bathhouse in Novigrad (left) where the elusive Count Reuven resides. Fend off some of Whoreson Junior’s thugs in the bathhouse (right).
Change into attire more appropriate for the venue then continue following Happen the Eunuch through the bathhouse, until you meet this Sigi Reuven, along with other members of Novigrad’s criminal underworld. As unappealing as bathing with the criminal underworld of Novigrad is, however, your meeting will be interrupted shortly by an even more distasteful bit of business. Dispatch Whoreson Junior’s Henchmen (level eleven and twelve), after which you’ll be able to continue your meeting with the now-suspicious criminals. After some more arguing, the dwarven criminal Cleaver will stomp off, proving as subtle as his name. The King of Beggars also departs, leaving you and Sigi to conduct business. This starts the quest “The Gangs of Novigrad” .
The Gangs of Novigrad Walkthrough
Once you talk to Sigi in private you’ll learn his real identity, as well as more information about this “Whoreson” everybody seems to have a problem with. You’ll need to find him before Cleaver does if you’re going to get the information you need from him. A failed assassination attempt on a Dwarven criminal boss named “Cleaver” can really only end so many ways, after all. Fortunately, there are three places you can go where you might learn some more about where Whoreson is hiding: in his casino, in the arena, and at his house. If all that fails, Sigi himself might know
| Objective | Reward |
|---|---|
| For meeting Sigi | 150 XP |
Before you head off, though, you can ask Dijkstra about Dandelion… but before you do, end the conversation, save your game, and challenge him to a game of Gwent. He’s got a pretty paltry Northern Kingdoms deck; he will use a few Hero Cards, and he likes to stack weather and “Scorch” cards, but he’s really lacking unit Strength. Beat him and he’ll tell you about some elf who plays Gwent, reviving the quest “Gwent: Big City Players” in the process. Your prize for winning is the “Estrad Thyssen” card, a 10 Strength Hero Card for the Northern Kingdoms, which is otherwise unremarkable.
| Objective | Reward |
|---|---|
| For defeating Dijkstra at Gwent | 25 XP / Esterad Thyssen Card |
How to not fail Gangs of Novigrad
Ask him about Dandelion and he’ll confirm that Dandelion crossed Whoreson Junior at some point… and suggest that he might be able to ask around if you do some work for him. Agree to help him, then follow Sigi down into a secret area under the bathhouse where he’ll introduce you to his problem… or rather, the guardian of his problem. He needs you to recover his stolen assets and keep the fact that said assets were stolen a secret. Ask for more information about the heist and you’ll get it, along with the formula for Pops’ Mold Antidote , which you’ll need to explore the sewers.
Count Reuven’s Treasure Walkthrough
Well, while you’re down here, we might as well help Dijkstra out. Search the remains of a pipe beyond the destroyed wall, then head north-west into the sewers. Activate your Witcher Senses and search a ruined grate in an alcove to the north-west, then follow the current to the north-east. When you reach a gate, turn north-west and investigate another pipe on the floor, then pop some of that Pops’ Antidote (it should have auto-equipped in one of your potion slots) and head into the poisonous green clouds. Each potion gives you 360 seconds of protection, and you have three of them. That’s about eighteen minutes to do all this or… well, you’ll have to waste some Alcohest making more.
Go through the gate to the north-east, kill a Drowner (level nine) and investigate some more pipes on the wall. Loot a chest and other containers on a platform to the north-west, then head down some stairs to the east. Search some rubble at the end of the stairs to find a Silver Emerald Ring on the ground. Continue down a tunnel to the east, then north to enter a chamber where you can find a corpse to investigate - that of Dijkstra’s thug. Grab the Pearl at the entrance to this chamber, then head north to find another corpse. Investigate it, and the Gold Ring that lies opposite him, then turn west, where you’ll find another chamber occupied by several Drowners (level nine).
Clear the room then head up some stairs (jumping the gap) to reach an upper level upon which plenty of loot can be found in various barrels and parcels. When you’re done enriching yourself return to the lower level and search near the western gate to find part of the bomb. If you continue west you’ll eventually reach the canal, and Geralt will comment on how the heist must have progressed. You can also head north-east along the edge of the canal to find a rather stingy chest to loot. Oh well, can’t all be winners.
| Objective | Reward |
|---|---|
| For searching the sewers | 200 XP |
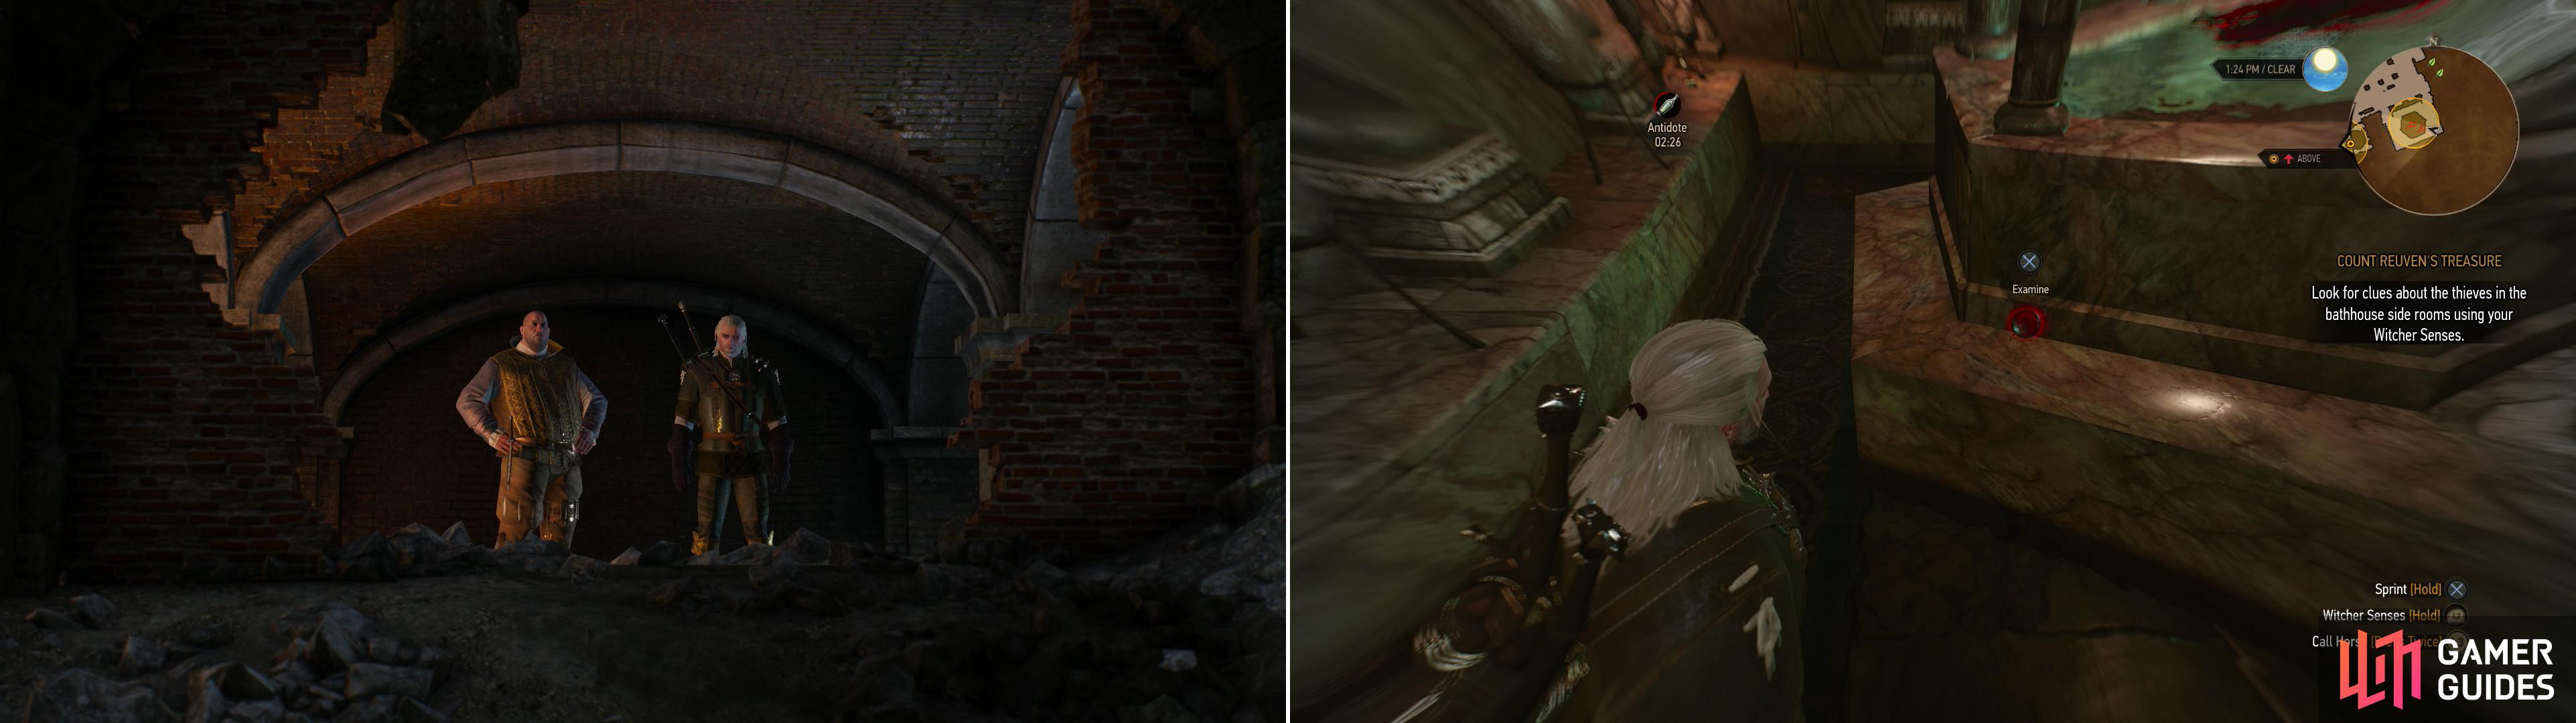
Dijkstra will show you his little “problem” (left). Search the sewers, then the bathhouse to find evidence of the heist (right).
Return to Dijkstra and tell him what you found and, at length, the two of you will pair off to find out which pipe the bomb was dropped down. Search the eastern-most of the two baths assigned to you and you’ll find a piece of the bomb, which prompts Geralt to call Dijkstra over. After he gets Happen to consult the guest book they’ll find that their likely bomber just so happens to be a dead man. Looks like you’ll need to investigate the house of the late Margrave Henckel.
| Objective | Reward |
|---|---|
| For searching the bathhouse | 50 XP |
Leave the bathhouse and head south to - and through - Hierarch Square. When you reach the “Hierarch Square” signpost turn west to find the house you’re looking for. Use Aard to gain entrance to the curiously run-down house, then activate your Witcher Senses and search some footprints inside. Investigate a cylinder on cabinet along the wall to the east. Loot the level, then follow the trail upstairs, where you’ll find a “Bottle of Wine” and a “Mysterious Note” to search. Geralt will read the note aloud when you pick it up. Head over to the wine room to the east and place the bottle in its proper slot to open the secret door back west, where the foot print trail leads…
Head through the aforementioned secret door to find a room with all kinds of things to search, including some spilled Wyvern Oil on the floor near the door, a mixture of substances on a table to the to the west, bomb instructions on a bookshelf hear the bomb-making table (RIP Kalkstein), and finally, the “Letter from Dudu” on a chest near the bed. Geralt will read this letter aloud, too, after which he hears some footsteps.
| Objective | Reward |
|---|---|
| For searching the conspirator’s hideout | 50 XP |
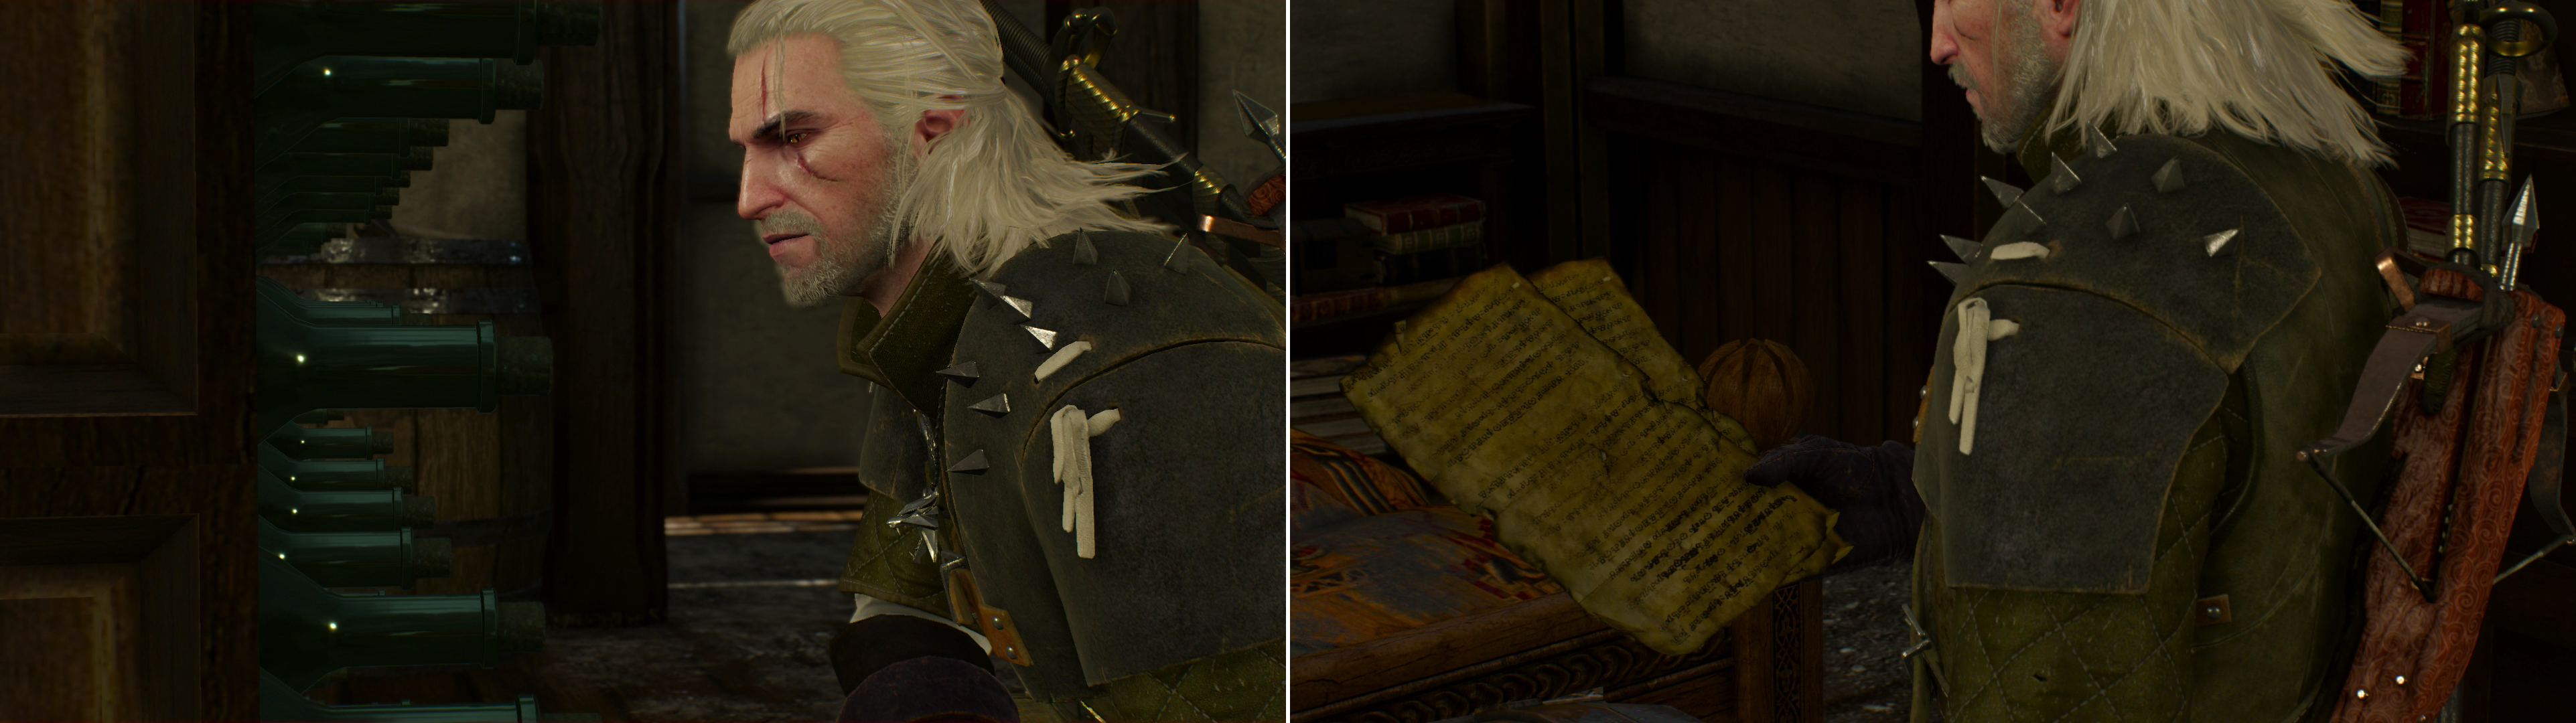
Find a specific bottle, which opens a secret door (left) the read some of the conspirator’s notes within (right).
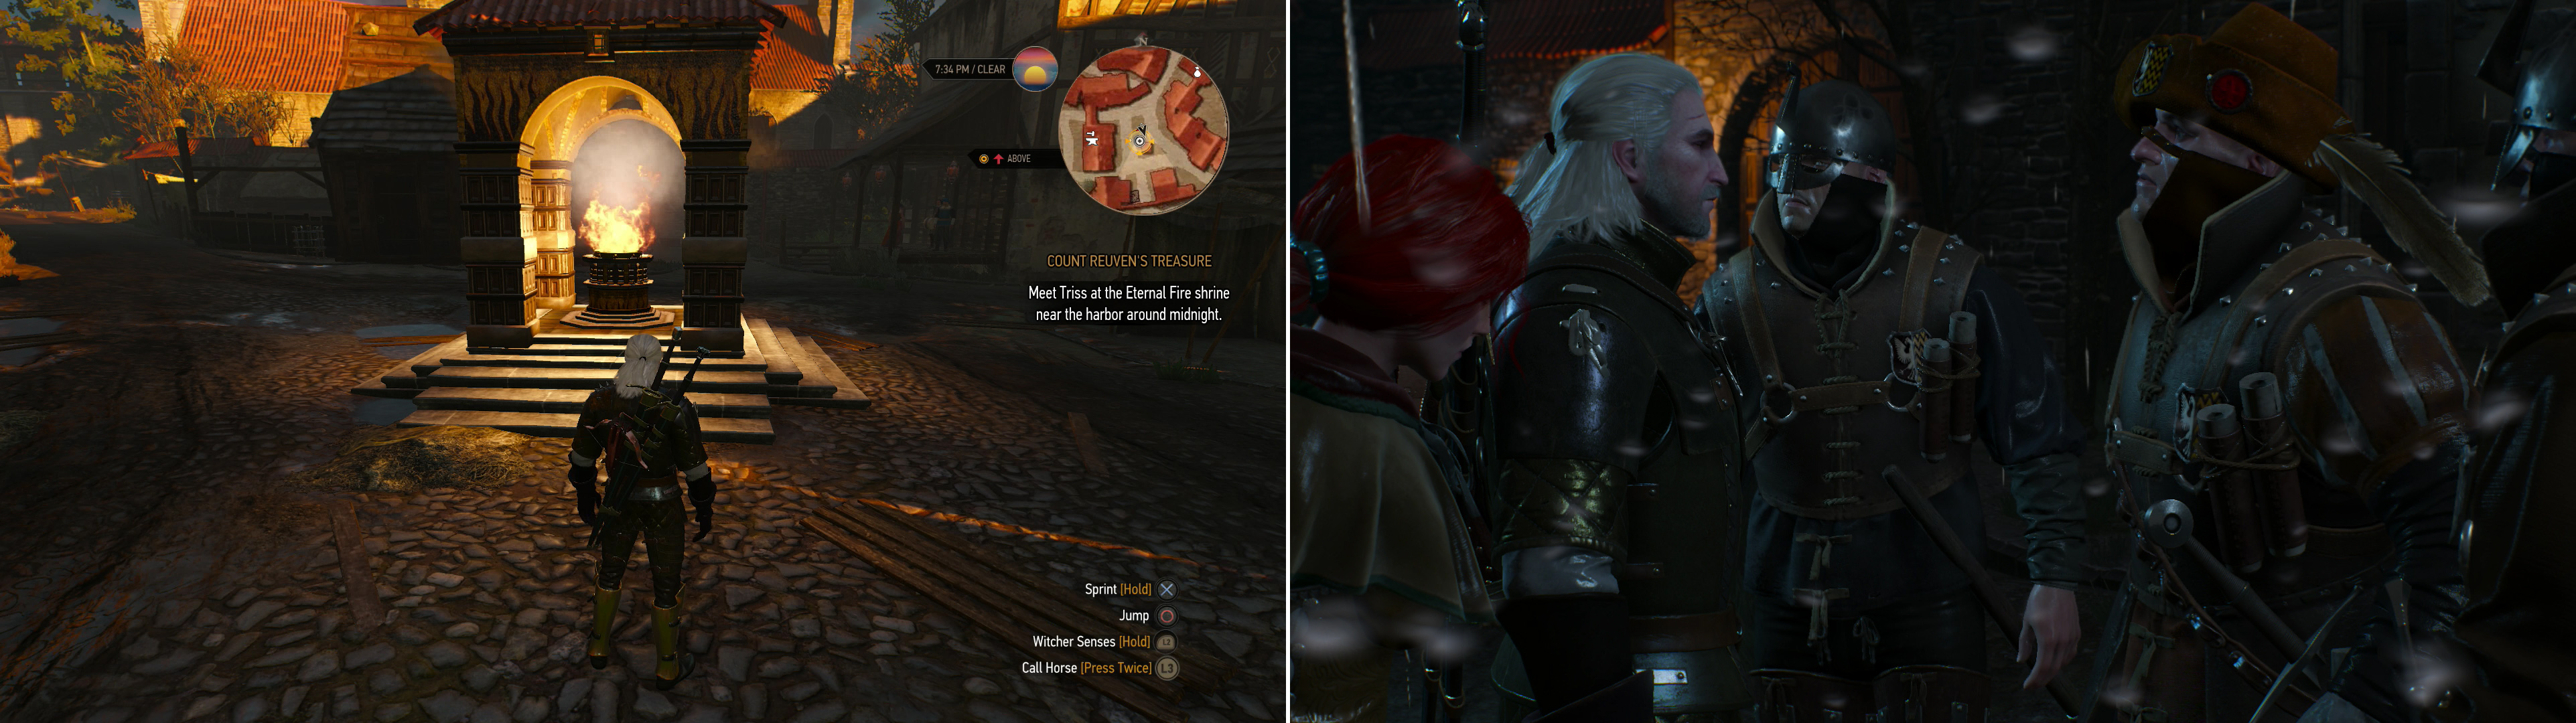
Go downstairs to see who came calling to find none other than Dijkstra, who has hired Triss to help provide magical support. Reveal some of what you discovered to Dijkstra to implicate a fellow nobody here is terribly fond of, then don’t correct Dijkstra when he overstates the intimacy you and Triss currently share… if you want to appease Triss, anyways. Dijkstra will leave and Triss will tell you to meet her by an Eternal Fire Shrine at midnight, which just so happens to be the brazier used as a landmark during your earlier exploration of the docks district
| Important Items in this Area |
|---|
| Letter to Caleb Menge |
| Menge’s Holy Tome |
| Menge’s Key |
| Key to Dijkstra’s Treasury |
| Cirilla Fiona Elen Riannon Card |
| Francesca Findabair, the Beautiful Card |
| Gwent Players in this Area |
|---|
| Merchant - Cirilla Fiona Elen Riannon Card |
To Catch a Witch… Hunter
When you’re ready head to the docks district and meditate at the shrine until midnight (if necessary). When you wake up Triss’ll be there, where she’ll lay out a plan for Geralt… a plan Geralt is, initially (and beyond all belief) confused by. The only person that could be dumber than Geralt is Menge, if he falls for this ruse.
Either storm the Witch Hunter barracks (left) or try to take a more diplomatic route (right).
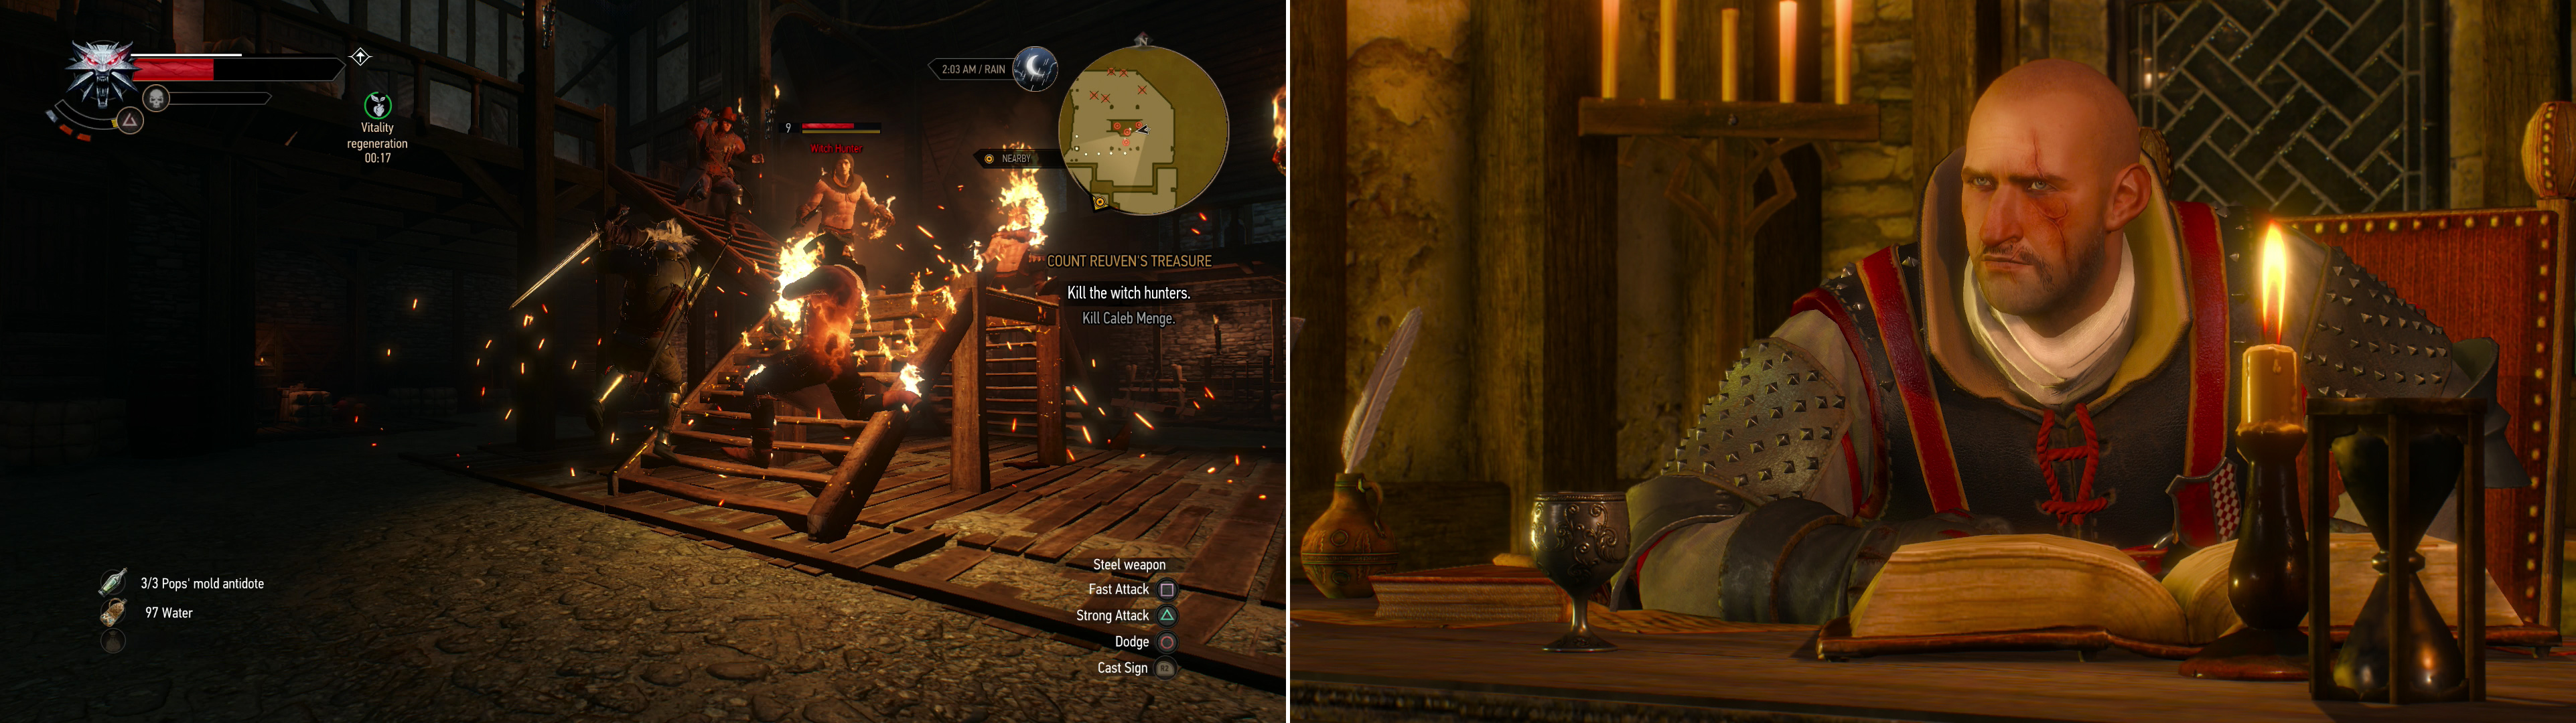
Geralt will take Triss to the Witch Hunter’s barracks, where the temptation of nabbing such a prominent sorceress will gain you access. Access, but not the audience you seek. To effect this you’ll need to keep playing the act. If you provoke the Witch Hunters, you’ll have to fight your way through the fortress. Kill the initial group of Witch Hunters (level nine) then go through a doorway to the south, where more Witch Hunters await. Fight your way up some wooden stairs to the south and into a building, where you’ll find Menge (level ten).
Either storm the Witch Hunter barracks (left) or try to take a more diplomatic route (right).
Alternatively you can pick the dialogue options “Wanna talk to Menge”, “Got something to offer Menge” and “I’ll tell your boss. No one else.” to get escorted into the Witch Hunter stronghold, whereupon the Witch Hunters will attempt to take Triss off for a delightful bout of torture. If you refuse, you’ll have to fight them here, having only made a bit more progress than you would have earlier… and probably having to end up fighting the same number of Witch Hunters.
If you let them take Triss, (pick the dialogue option “Fine, take her.”) you’ll be escorted to Menge, where you’ll hear the sounds of their interrogation techniques taking effect. Play it cool and pick the dialogue option “Why not?” to have a drink. After he’s certain you are who you say you are, say “Your hunters are torturing Triss, but I haven’t been paid”, then say “Witchers do anything for gold.” After this, be sure to say “I’m looking for this treasure…” which will give you the information Dijkstra needs.
Finally, ask about Dandelion. If you asked about Dijkstra’s treasure earlier, Menge will turn to violence and you’ll have to put down all the Witch Hunters in the stronghold. Otherwise, it’s just a subject the two can’t come to terms over. In the latter case, Menge will decide to have a look at how Triss is doing, which… ends poorly for him. This will start the quest “A Matter of Life and Death” … if you started a fight earlier, you’ll have to do a little more work to start this quest.
No matter how you got to this point, Menge is dead, and Triss will search Menge and, if you killed him, you’ll be told to search his desk to find a “Letter to Caleb Menge” (which he will have burned if you talked your way in) and “Menge’s Holy Tome” . Triss, for her part, will turn up Menge’s Key , which… well, it’s something. Exit the stronghold via the locked door to the west. Once outside, Triss will decide to blow off some steam and tell you to visit her later. Triss will then indulge in a little arson before teleporting off. Geralt will have to climb atop the roof of a building to the west, then jump over the adjoining wall. Search a wall to the north to find that it’s weak and blast it with Aard.
| Objective | Reward |
|---|---|
| For killing Menge yourself | 200 XP |
| For playing along until Triss kills Menge | 300 XP |
Time to report back to Dijkstra. Fortunately, he’s watchful and impatient. Once you’re through the wall one of his goons will talk to you, and take you to meet Dijkstra. The two will banter and you can choose to be rude or polite, as you see fit. Depending on what you did earlier you’ll have to talk to Priscilla about the Doppler, or go to meet the spy who is in contact with Menge, the location of which Dijkstra imparts to you. In the former case read the next two paragraphs, if not, skip them. Your reward from Dijkstra is the same either way.
| Objective | Reward |
|---|---|
| For giving Dijkstra Menge’s Key | 100 XP / 90 Crowns |
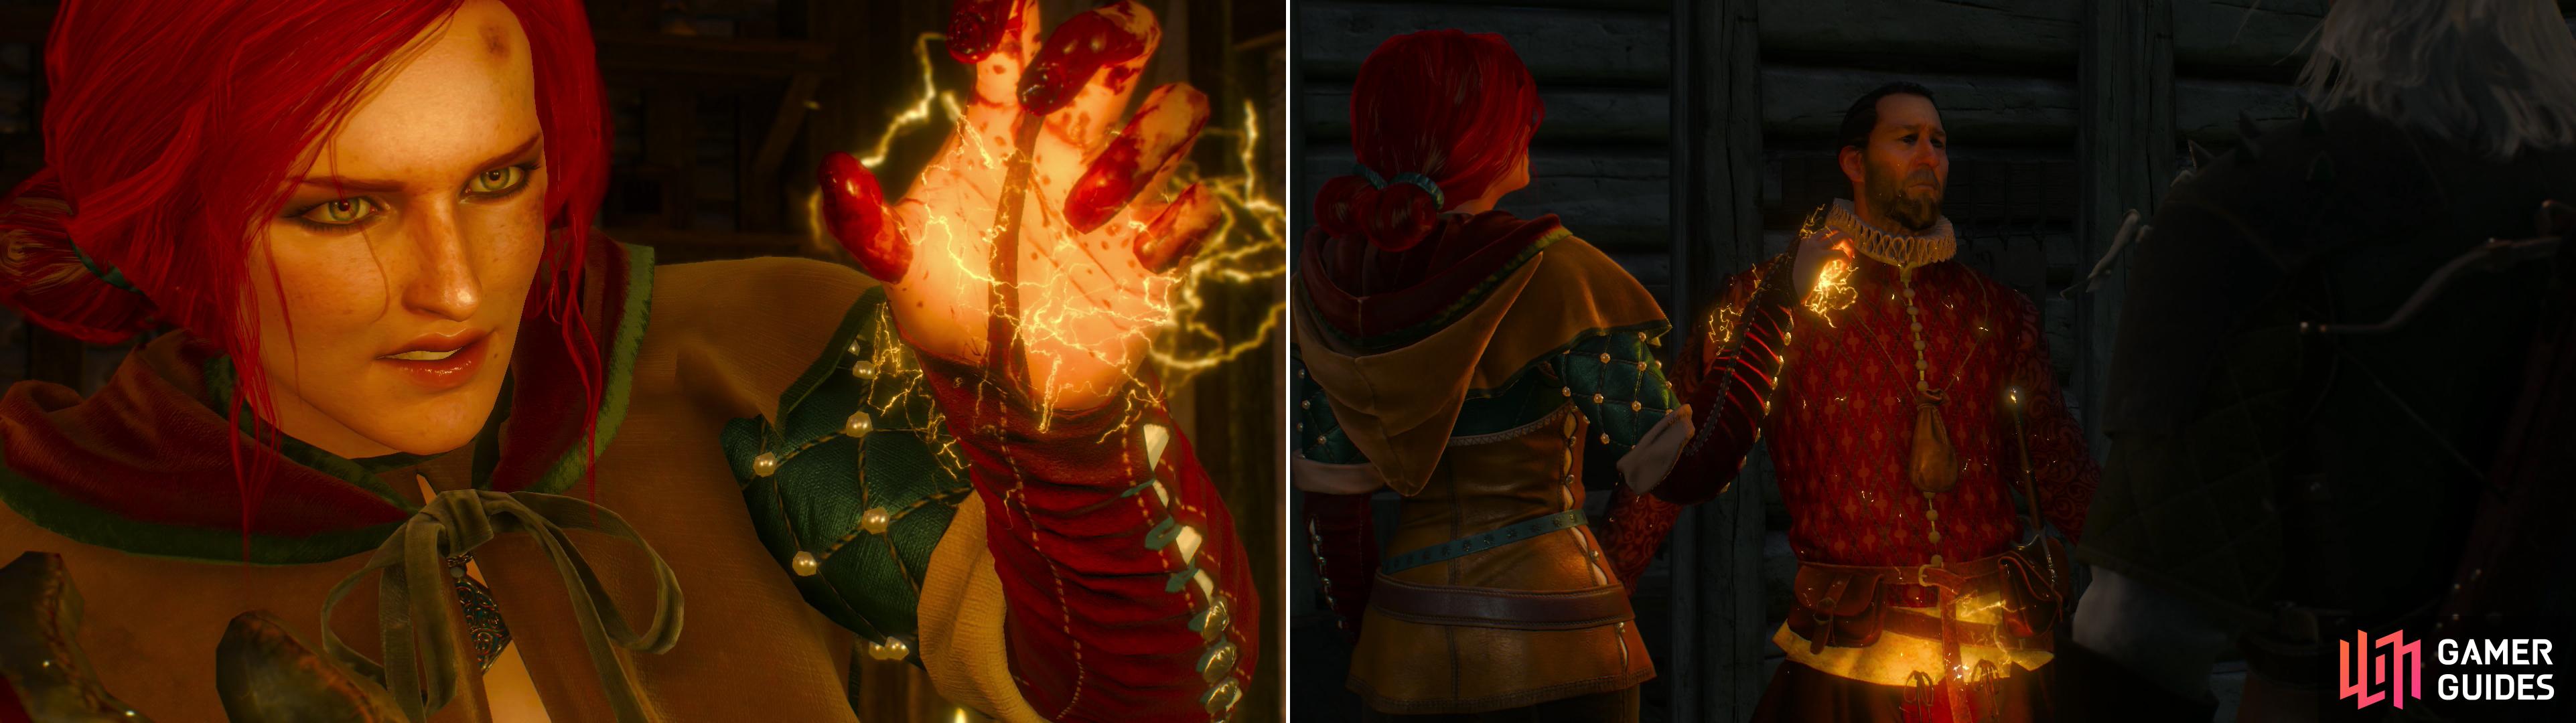
If tortured, Triss won’t be in a very forgiving mood (left). Track down and interrogate Menge’s contact to learn the information Menge himself can no longer provide (right).
Interrogating a Spy
If you… lacked finesse… during your attempt to reach Menge, you’ll have to do an extra step and talk to the spy that was in contact with Menge. Travel to the Eternal Fire Shrine east of Hierarch Square and search the eastern edge of the south-eastern most pillar to find the drop box location. Deposit Menge’s Holy Tome, then head to the eastern edge of the outskirts of Novigrad and meditate until midnight if you have to.
Once done, head inside and activate your Witcher Senses to find the perfect - if not predictable - place to hide. Geralt’s not very imaginative. The spy will show up after an unexpected visitor and play the tough guy act until he’s forced to speak in a most… awful… way. Learn everything the spy knows, then make a decision concerning his fate. Menge is the key to getting Dandelion, but Menge is dead… seems you need a Doppler, and Priscilla might know how to find one. This starts the quest “A Matter of Life and Death” .
| Objective | Reward |
|---|---|
| For interrogating the spy | 50 XP |
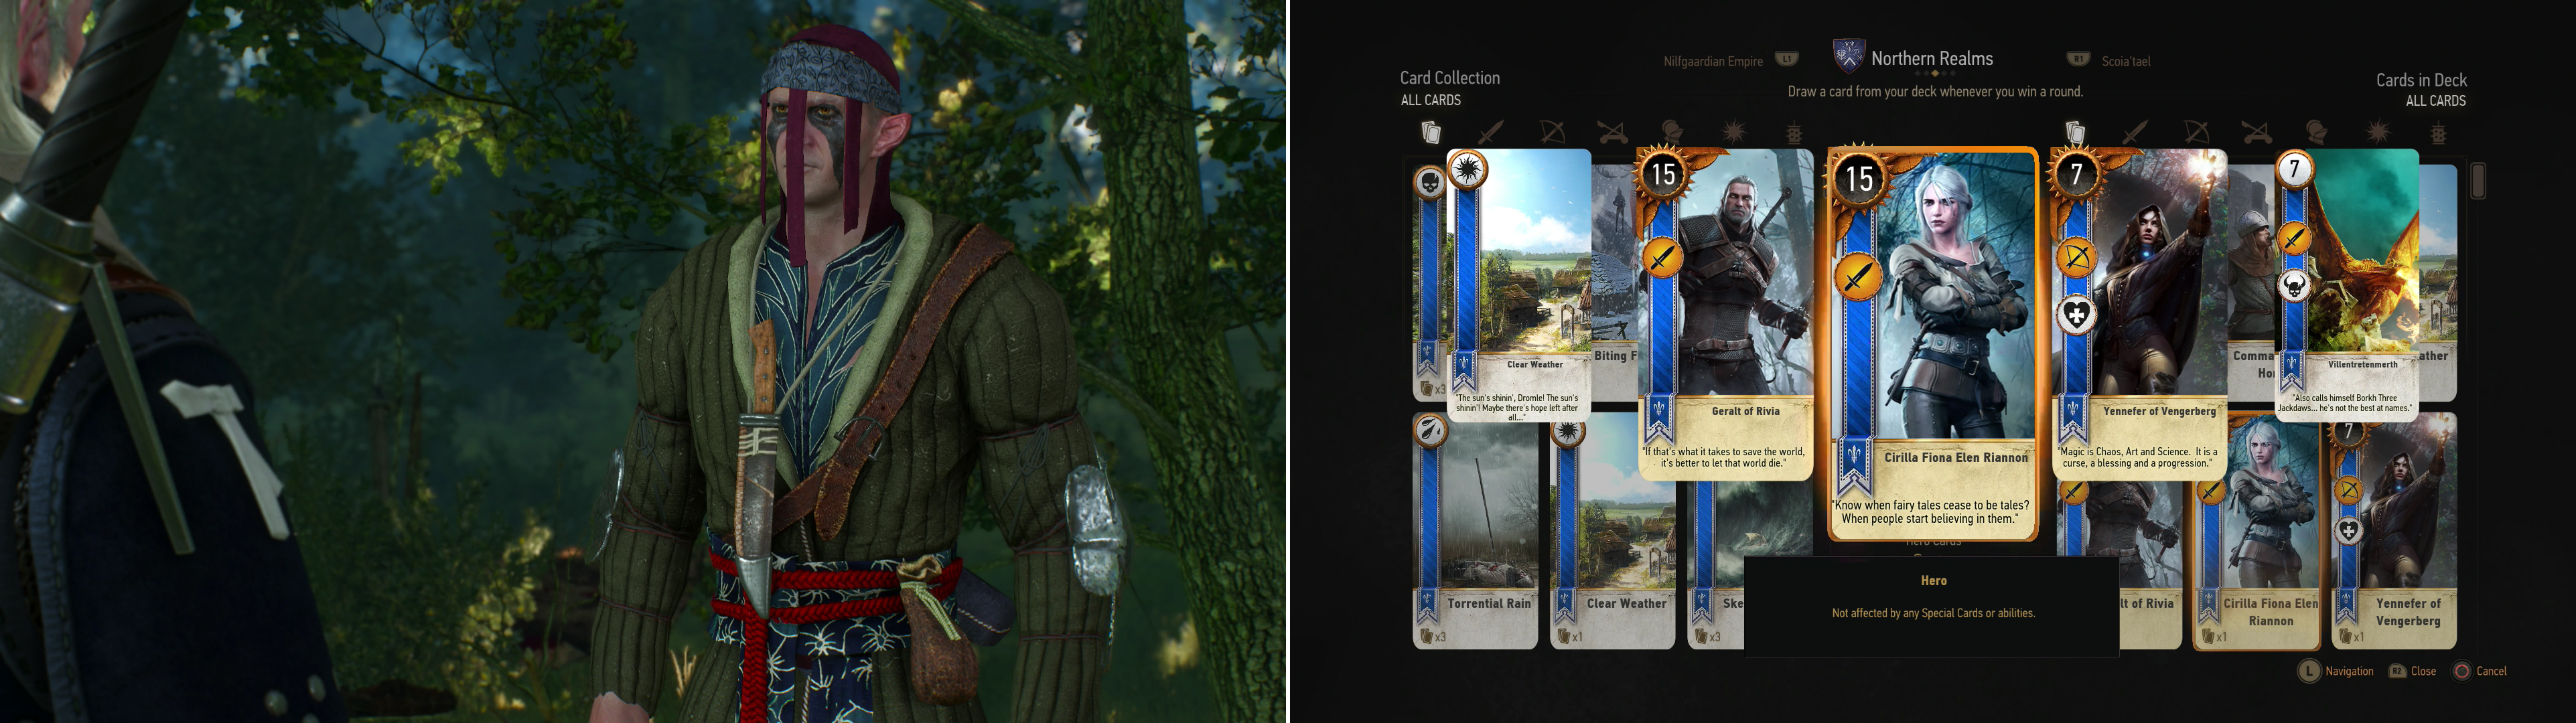
After hearing about him from Dijkstra, you’ll be able to play Gwent with the Scoia’tael Merchant (left). Defeat him to win the Cirilla Fiona Elen Riannon Card (right).
Gwent: The Scoiatael Merchant
Before you head off to find Priscilla, however, let’s clear up one more quest. Fast-travel to the “Logger’s Hut” signpost, which is south-west of Novigrad, then head south and slightly east into the forest to find the elven Merchant in the Scoia’tael camp. Now that Dijkstra outted him, he’ll play Gwent with you, fielding a mundane Scoia’tael deck. A few “Muster” cards, some “Commander’s Horn” cards, “Scorch” cards, but nothing spectacular. Once you beat him he’ll make you the new owner of the “Cirilla Fiona Elen Riannon” card - Ciri for short - a 15 Strength Close Combat Unit Hero Card, and worthy addition to any deck. You’ll also get the “Francesca Findabair, the Beautiful” card. This ends “Gwent: Big City Players” .
| Objective | Reward |
|---|---|
| For defeating the Scoia’tael merchant at Gwent | 25 XP / Cirilla Fiona Elen Riannon Card / Francesca Findabair, the Beautiful Card |
Return to a signpost and fast travel to “Hierarch Square” then head north to reach the Kingfisher, where Priscilla is waiting in her room on the second floor. Talk to her and… well, she doesn’t help very much. Seems you need to deal with Whoreson Junior first. This does, however, complete the quest “Count Reuven’s Treasure” .

 Sign up
No Comments