
Ophilia’s second chapter will take you to Saintsbridge, which can be found southwest of Clearbrook. If you haven’t been there yet, take the exit out of Clearbrook and make your way southeast to South Clearbrook Traverse. It is here that you’ll want to find the path west-southwest to East Saintsbridge Traverse. If you remember, the Shrine of the Healer (Apothecary) was in this zone and not too far northwest of there is the city of Saintsbridge.
Exploring Saintsbridge
As usual with the Chapter 2 towns, Saintsbridge is split into two sections, the main section to the south and Upstream to the north. Note that the repair cost for reputation in Saintsbridge is a whopping 8,000 Leaves, so be careful about ruining it. You’ve been three other towns already, so you got a fair share of good equipment from them. There’s not much to be had from the southern section of Saintsbridge, although if you journey all the way to the docks in the southwest, you can find an old man at the end that has a Bridge Lance. In the house next to the Provisioner is a chest that contains an Inspiriting Plum (M).
Make your way to Saintsbridge Upstream to find a bunch more people from which to pilfer. There’s a few items worth it in this section of the town, so start off by venturing west and looking for two older ladies in front of a house talking. The one on the right has a Rainbow Robe and Elemental Hat, both good items. Continue north to the tavern and north of that will be a building you can enter, which has a chest inside (Heavy Coin Pouch). East of there will be the cathedral, so enter it to find more people that are willing to empty their pockets for you.

Although a low steal percentage, the Holy Longbow is quite powerful and an excellent addition to your arsenal
Before doing anything, loot the two chests off to either side of the main aisle for an Herb of Valor and Olive of Life. Now, there is a NPC standing near the chest on the left that might have something you are looking for, a Holy Longbow. You have a low chance to steal this and you can’t purchase it with Tressa, so you need to make up your mind as to whether you want it or not. That about sums it up for exploring Saintsbridge, so let’s tackle the Side Stories here next.
The Pilgrims’ Plight
This Side Story begins inside of the cathedral, where the cleric mentions that some ruffian has been extorting coin from travellers making their journey to Saintsbridge. Head outside of the city, to East Saintsbridge Traverse, and you will find said Ruffian pretty much right there. To complete this quest, you will need to Challenge/Provoke him with Olberic or H’aanit. Win the battle (strength of four, so it should be fairly easy) and the quest will be finished.
| Objective | Reward |
|---|---|
| Took care of the ruffian extorting coin | 6,600 Leaves, Refreshing Jam |
The Worrywart
You can find the Worrywart on the bridge on the western end of the southern section of Saintsbridge. He thinks the water level is rising and that it might never stop rising. For this quest, you will need either Alfyn or Cyrus, so get one of them and exit to East Saintsbridge Traverse. Travel east to the save point, then go straight south until you see a man standing by the river. This is the Assiduous Scholar and you need to Inquire/Scrutinize the Early Ice Thawing information from him. Upon getting it, return to the Worrywart in Saintsbridge to finish.
| Objective | Reward |
|---|---|
| Subsided the Worrywart’s fears | 6,600 Leaves, Invigorating Nut, Resistant Nut |
Meryl, Lost then Found (II)
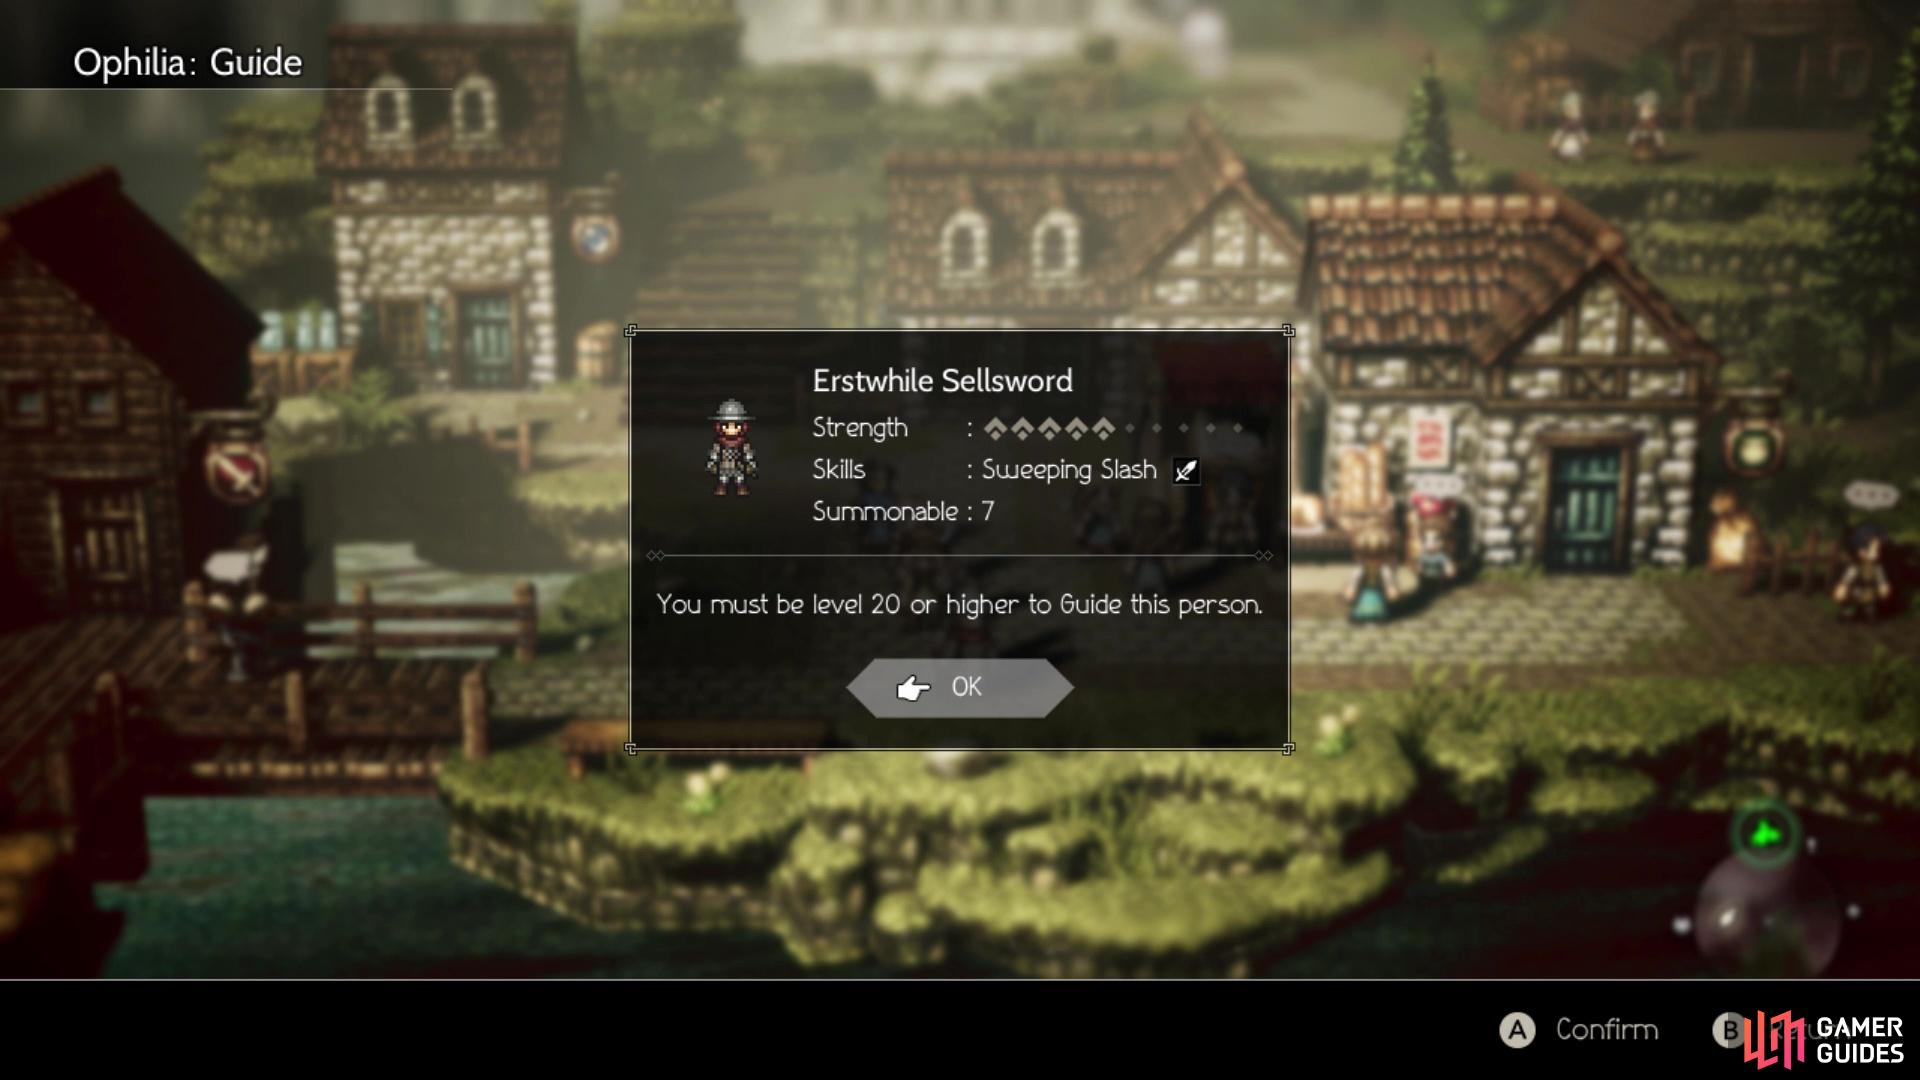
Meryl can be found in front of the Provisioner and is being harassed by the Erstwhile Sellsword standing next to her. To complete this Side Story, you will need either Olberic or H’aanit, as you need to Challenge/Provoke the Sellsword. He has a strength of five, so he shouldn’t be too rough to deal with, but keep an eye on your health. Unfortunately, the battle is longer than usual because of his weaknesses, since Linde can’t strike any of them, making the battle slightly more challenging for H’aanit. He is weak to axes and bows, though, so if you have access to those, don’t be afraid to use them. Upon defeating the Sellsword, the quest will be over.
Being weak to axes and bows makes this an easier duel for Olberic, since he can use all of his weapons
| Objective | Reward |
|---|---|
| Defeated the pestering Sellsword | 6,600 Leaves, Resistant Nut (M) |
Daughter of the Dark God (II)
The final Side Story you will be finishing right now is on the wooden bridge on the western side of the southern part of town. Lyblac, the woman from Bolderfall, says some things, then scurries off, with Alphas, the man who seems enamored by her, comes into the picture. There is really nothing to go by for this quest, but you will need either Alfyn or Cyrus to finish. Inquire/Scrutinize Alphas to find the Alphas’s Poem piece of information. With this, make your way to the cathedral and there will be another person standing off to the right in front of it. Talk to Flora and you will be able to hand her Alphas’s Poem, which will put an end to this quest.
| Objective | Reward |
|---|---|
| Found Alphas’ other half | 10,000 Leaves |
Ophilia’s Second Chapter
You’re pretty much good to go now, so head on over to the tavern and start Ophilia’s chapter. Ophilia meets with Bishop Bartolo, then journeys to the cathedral together. She will perform the Kindling, then go off to see the town. Before leaving the Cathedral, you can see that Bartolo is another NPC you can interact with. He has a Staff of Wonders on him to Purchase/Steal if you want, but exit the cathedral and start heading south. Eventually, you will run into some kids, two of which are bullying a third.
It appears the one kid, Emil, being pushed around lost one of the others’ brooch, so Ophilia helps Emil by trying to find it. After having no luck, it’s time to have a word with Derryl, whose house is located north of the tavern. Go inside and speak with Derryl, then you’ll have to use Guide on him afterwards. Bring him back to where you first found him for some scenes, with you ultimately having to chase both Emil and Derryl into the forest, where dangerous monsters await. The Murkwood is located to the far west of the northern area of town.
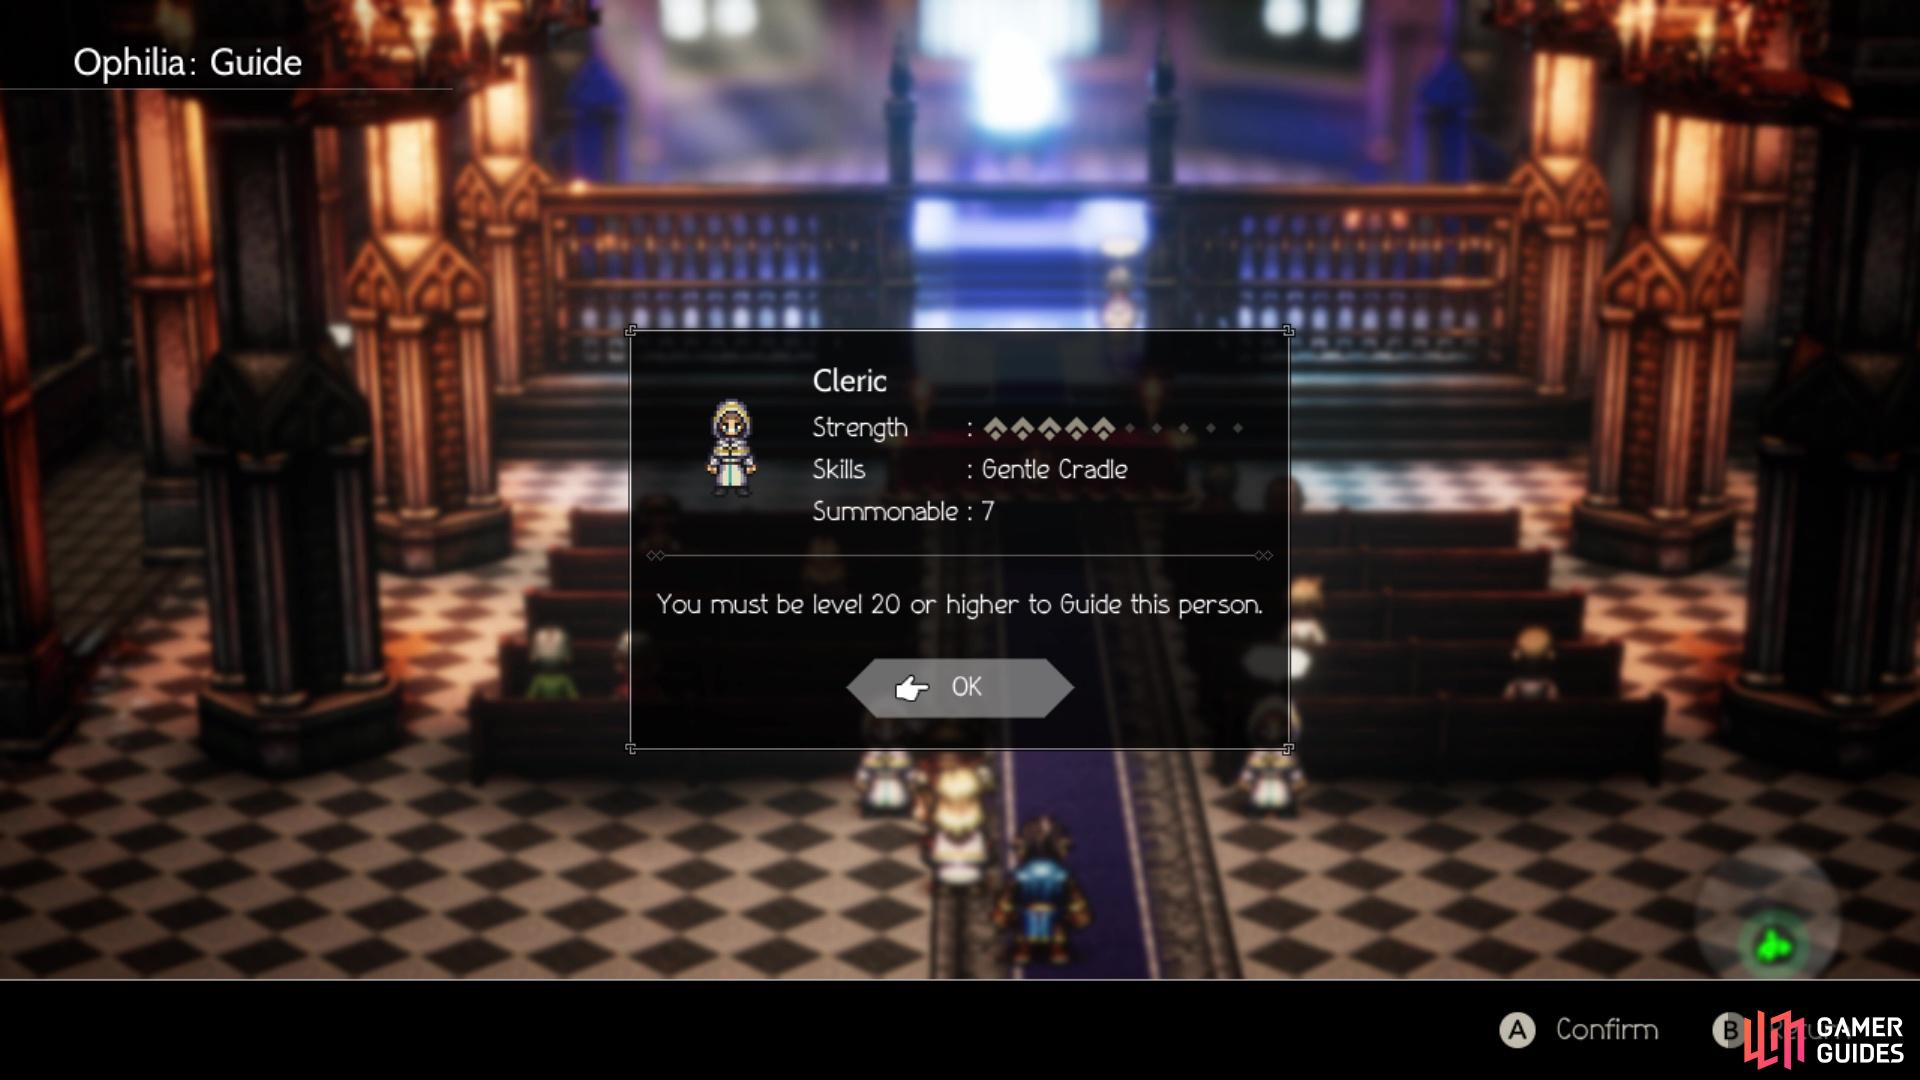
(1 of 2) Gentle Cradle is a 1500 heal for the party, which is always helpful
Gentle Cradle is a 1500 heal for the party, which is always helpful (left), while Sweeping Slash is just a nice hit-all attack (right)
Murkwood Trail
Upon entering the first area, just follow the trail ahead of you and open the chest along the way (Herb of Awakening). Continue west, then south and when you see a small ramp heading west once more, go down it and make a U-turn back to the east to find a chest (Inspiriting Plum Basket). Keep going on the trail until you come to a save point, as you can see a chest to the left of it. The opening for this is just left of the save point, so grab the chest for 3,500 Leaves. Save your game and enter the Murkwood.
The Murkwood
At the very beginning, the path will split, so head left first and you will find a chest off of that trail, to the left (Inspiriting Plum). Double back to the beginning and check the path on the right, which will pass under an arch. Keep going straight to the east to find another chest (Olive of Life M). Back at the entrance, locate the river to your west and follow its bank north until you run into another chest (Energizing Pomegranate M). Now, find the path that leads to the northeast, where you will find a save point.
While hugging the left side, go north a little bit and look for the trail north of the save that will bring you back west and to a chest (Kite Shield). Return to the save point and continue east this time. Eventually, you will spot another chest to the north of you, which contains a Healing Grape (M). Venture south now and when you see the first way going right, take it to find a purple chest to the north (Clarity Stone). Double back to where you went on this path and continue south to a split.
Heading right here brings you to another chest (Healing Grape Bunch), while left delves deeper into the dungeon. You will pass another chest, but you can’t get it right now, so keep going left to find a circular trail. In the top left corner of this circular path, you can find a slightly hidden way to the left for a chest (5,000 Leaves). Find the save point nearby, using it, then go down the tiny ramp to the right of it. If you head right, you can find the trail that leads to the chest you saw earlier, which contains a Psychic Staff. Just north of that will be Emil, triggered a scene and a boss fight.
BOSS - Hrodvitnir
This oversized puppy is alone, which is a nice thing after the last few boss fights, but don’t let that distract you from the boss. He’ll begin by howling, which allows it to gain two actions per turn, so you’ll want to keep an eye on your health at all times, just in case. Overall, this boss has a pretty simple pattern and doesn’t seem to have many skills to use. Bestial Claw is a party-wide physical attack that does decent damage, while Bestial Fang only targets a single character, but this one has a chance to lower your physical attack. Sharpen Claws is a buff Hrodvitnir can use on himself to up his physical attack.

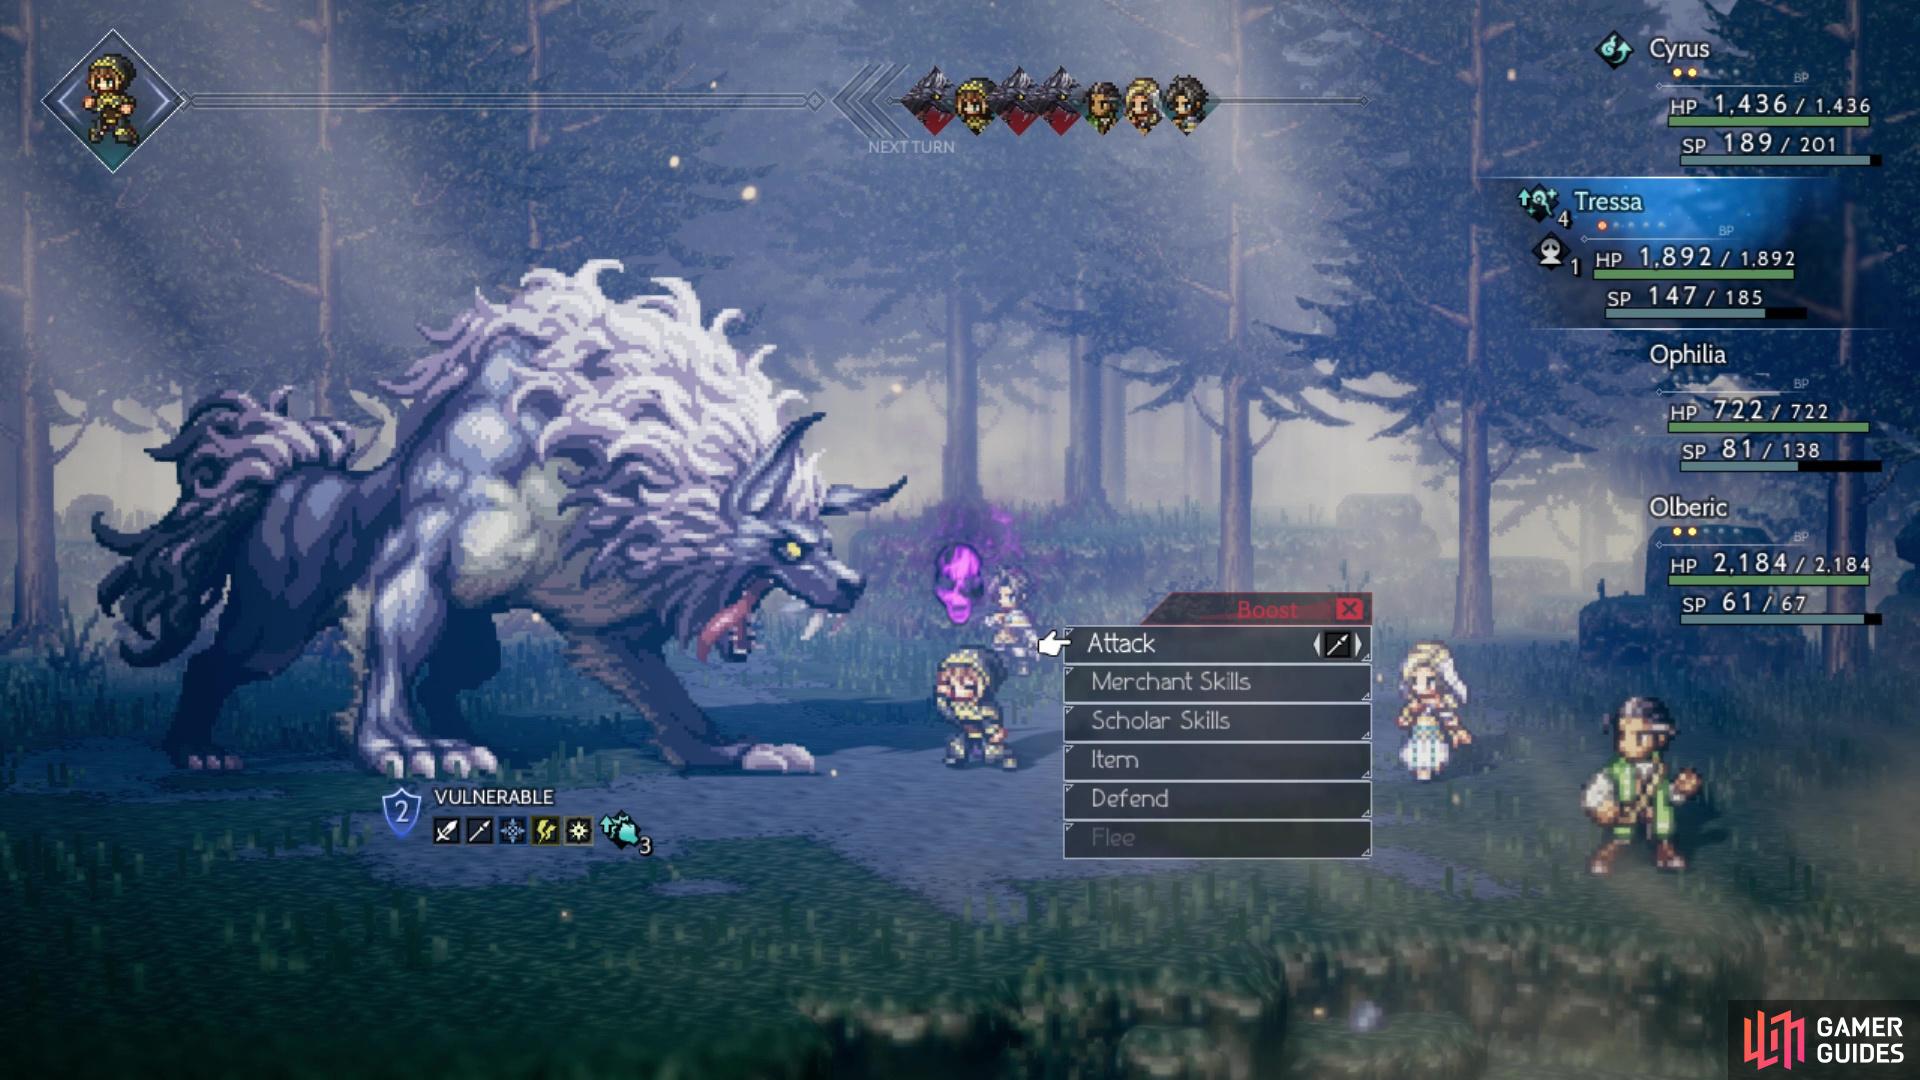
(1 of 2) Multiple actions per turn is the boss’ greatest strength in this fight
Multiple actions per turn is the boss’ greatest strength in this fight (left), Those inflicted with Terror cannot use Boost at all (right)
Should you break Hrodvitnir, then upon recovering from it, he will gain two more shields. He can only do this to the point where he’ll have 11 shields in total, so it won’t go any higher than that. At half health (yellow name), Hrodvitnir can become very dangerous, as he’ll howl again and gain an extra action on every turn. This means he can act three times on every turn, which can be extra dangerous now that he gained another skill to use. Night Howl doesn’t cause any damage, but it lowers your physical defense and can also inflict Terror (you can’t boost).
This battle essentially boils down in trying to defeat Hrodvitnir as fast as possible, as a prolonged battle only works in his favor. Piling on the damage while he’s broken is the ideal point, especially because it will be a little more challenging to break him the next time. Once he reaches 50% HP, you will want to make sure you keep a healer on call, just in case. A triple action turn could consist of something like Sharpen Claws first, followed by Night Howl and Bestial Claw. This combination can do some damage, but hopefully you are buff enough at this point to withstand it without much trouble. Hrodvitnir is weak to swords, spears, ice, lightning and light.
Emil ends up finding Derryl’s brooch after the battle is over, then everyone returns to town. Return to the Cathedral for a quick scene, then there will be one more, before Ophilia mentions that the next stop is Goldshore. This will bring an end to Ophilia’s second chapter.
 Sign up
No Comments