| Enemy Name | Notes |
|---|---|
| Battlesnake | None |
| Dr Goon | None |
| Fem-Goon | None |
After obtaining the three Syndicate Uniforms from around Spira, return to Guadosalam and approach the Chateau in the distance. Opt to enter and a mission will start. Go northeast of the entrance room to the living room to meet up with Ormi and Logos: you’ll be given a bit of a hint as you approach, so take note of it. Also take note of where Ormi is standing; that bit will be important in a few moments.
Now head northwest of the entrance room and you’ll find Leblanc’s private quarters. Speak with her and you’ll have to … give her a massage? Whose idea was this? In any case, you’ll be given a three-by-three grid - each of the nine squares representing a part of Leblanc’s body - and need to press X on certain parts of the body. You can get 0, 1, 2, or 5 points for your first try, and 0, 2, 3, and 5 for your second and beyond: these are designated by the colors blue, green, yellow, and red (imagine it “getting warmer”) respectively. Once you hit red, you clear the grid and restart it, with your ultimate goal being to get 32 or more points.
Or not. The thing is is that this only contributes towards an item you get very momentarily. If you fail the mission, you’ll get the Heady Perfume later on; if you win, you get the Gold Hairpin . They both have a great level of utility. The Heady Perfume will restore your HP and MP as you walk around in the field; you’ll basically start most battles for a good while with full HP and MP, reducing the need to heal greatly; this is great for passive people or for people who plan to grind later on. We personally prefer the utility of the Gold Hairpin, which halves the MP cost of the wearer’s abilities; we use this on magic-heavy characters (typically offense, though the supportive White Mage can also get some use out of it) since they, by definition, use a lot of MP, and we don’t like having to throw out an Ether every other turn. Pick whichever you want; if anything, it’s not hard to intentionally fail, just crack Leblanc’s back repeatedly.
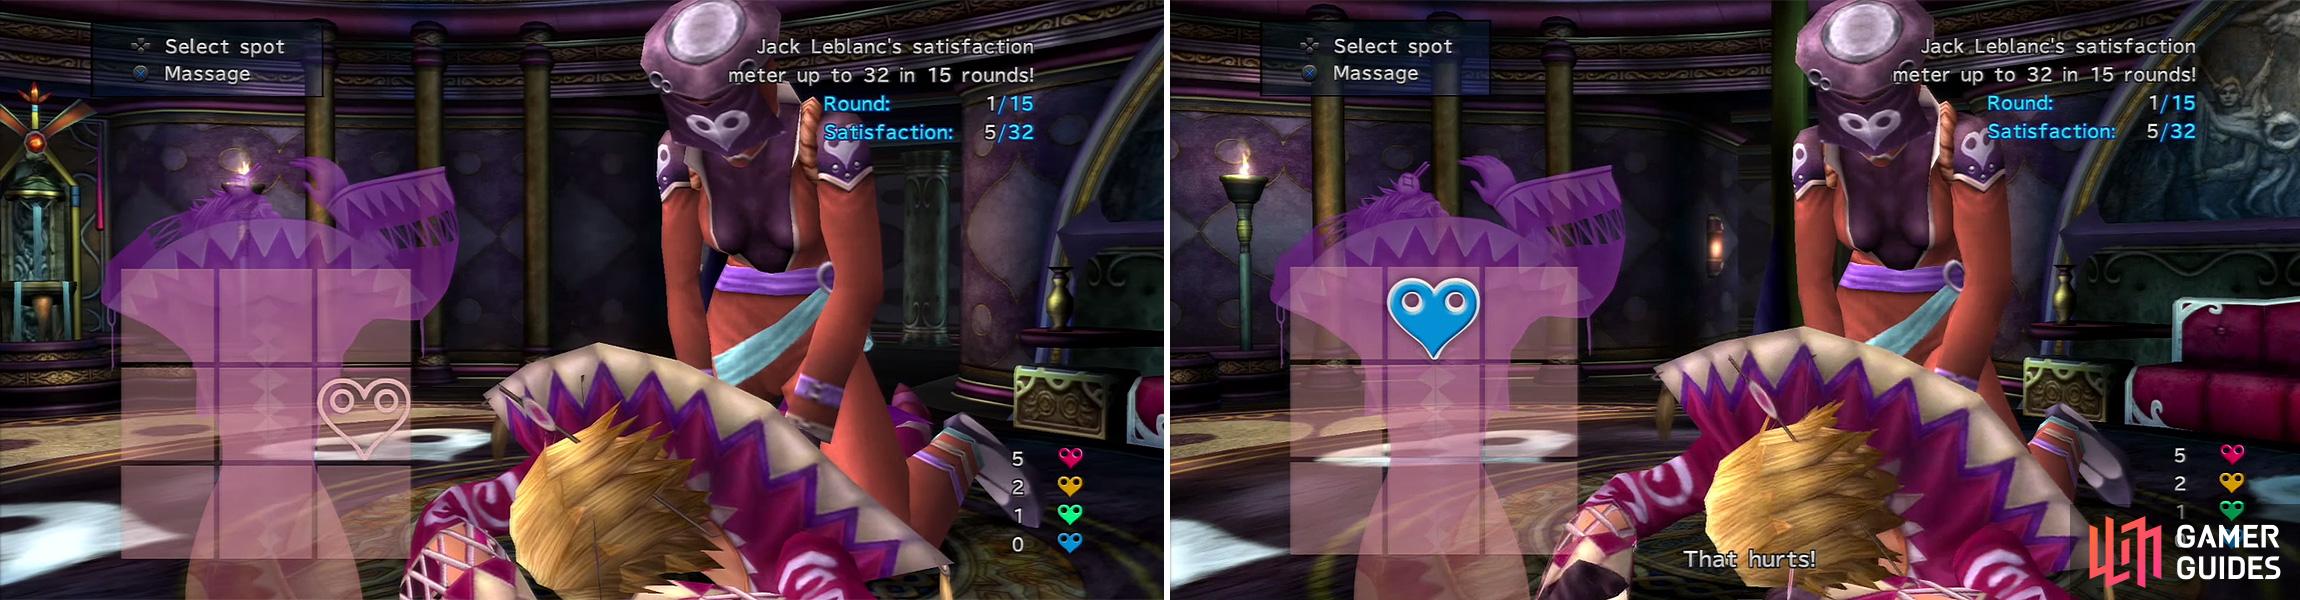
You need to figure out where Leblanc likes the massage. If she doesn’t like a point it will turn blue (right) and she will tell you.
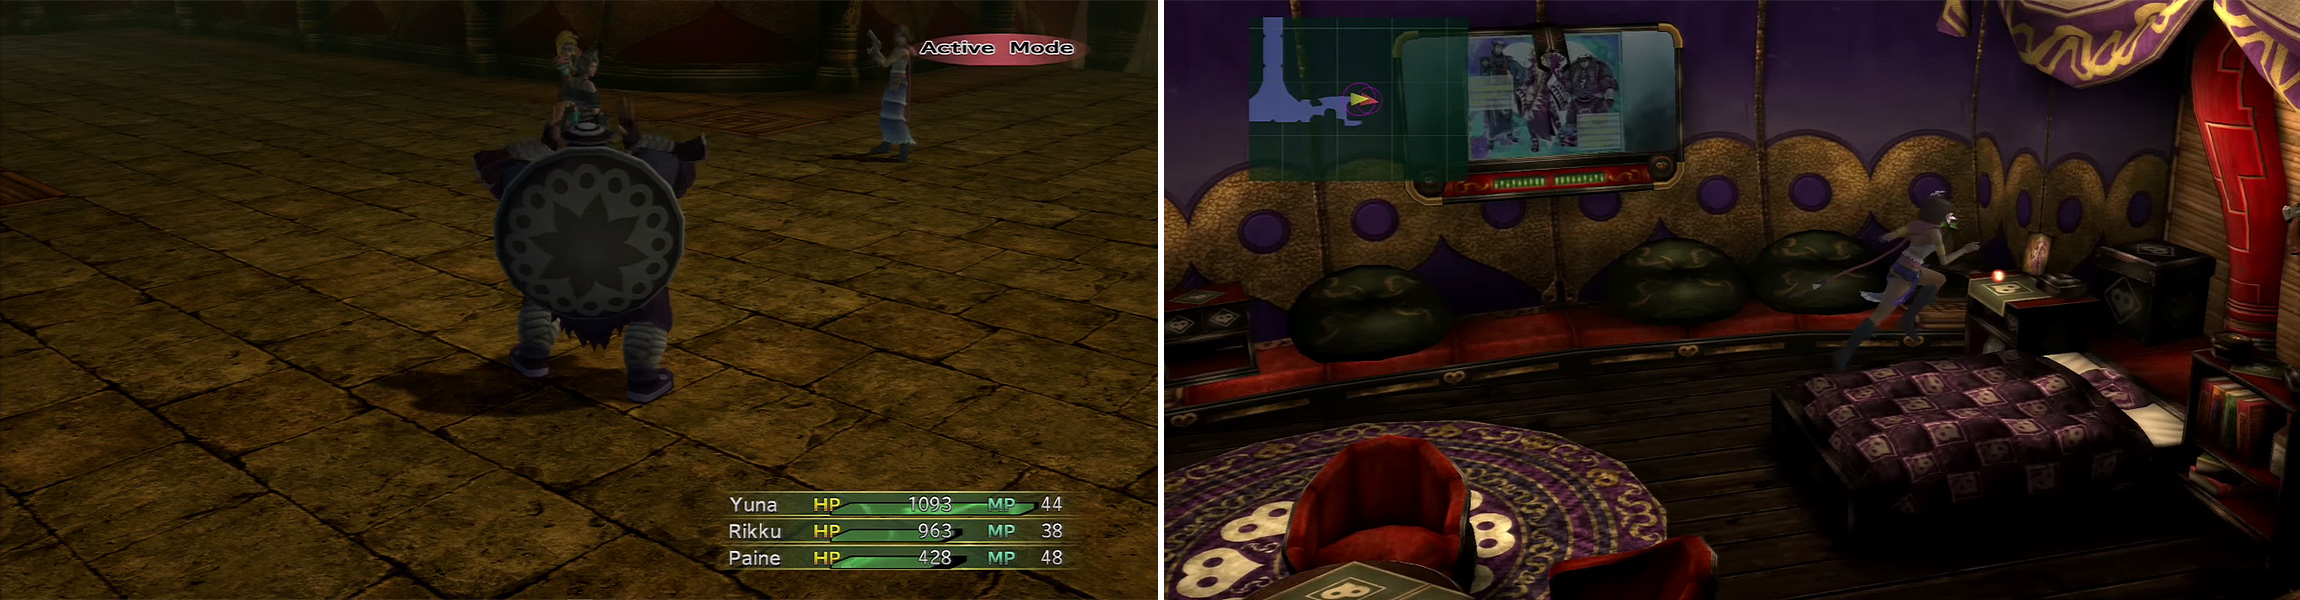
After that rather odd interlude, Ormi and Logos thankfully come into the room. Head into the living room where they were earlier. Remember where Ormi was standing? There’s a hidden switch there, near the left of the blue pedestals. A door will open the way to the next area. But first, a battle!
BOSS - Ormi, Fem-Goon, and Dr. Goon
| Ormi | Details |
|---|---|
| Max HP / Max MP | 1,640 HP / 40 MP |
| Elem. Weak / Resis / Immunity / Absorb | None / None / Gravity / None |
| EXP / GIL / AP | 220 / 200 / 1 |
| Common Steals / Rare Steals | X-Potion / Elixir |
| Common Item Drops / Rare Item Drops | Black Choker / None |
| Fem-Goon | Details |
|---|---|
| Max HP / Max MP | 167 HP / 172 MP |
| Elem. Weak / Resis / Immunity / Absorb | None / None / None / None |
| EXP / GIL / AP | 10 / 70 / 1 |
| Common Steals / Rare Steals | Potion / Potion x2 |
| Common Item Drops / Rare Item Drops | Potion / Hi-Potion |
| Dr Goon | Details |
|---|---|
| Max HP / Max MP | 232 HP / 41 MP |
| Elem. Weak / Resis / Immunity / Absorb | None / None / None / None |
| EXP / GIL / AP | 10 / 50 / 1 |
| Common Steals / Rare Steals | Budget Grenade / Grenade |
| Common Item Drops / Rare Item Drops | Potion / Grenade |
There is nothing different than you’d expect from their offense, especially given you’ve battled these guys practically a dozen times in the past couple of hours. Ormi’s offense has actually changed a bit; he still has his Attack and his Concussive Shock. There’s the new attack Huggles (three-hit to one, Delay) and Supercollider (removes 1/2 of your current HP and causes a Delay), though, making Ormi a much more considerable threat. The Fem-Goon (first and second-level Black Magic and Attack) and the Dr. Goon (Attack) haven’t changed, though.
Opening with Protect and Reflect are great ideas; Protect really lessens the damage you’ll take, especially from Huggles (we’ve seen it exceed 1,000). Reflect also helps bounce back essentially 89% of the Fem-Goon’s offense to your opponents, making things a bit easier on you, though you’ll likely end up relying on Pray and Hi-Potions to heal. Throwing up Darkness Dance and Stat Breaks is also great for further crippling Ormi, and justifiably so.
Once that’s all done, you can focus on eliminating the Dr. Goon, then the Fem-Goon, then Ormi, reinstilling Darkness Dance as needed. It’s pretty easy at that point.
When Ormi starts clapping his hands, he is about to use Huggles (left) so prepare for the strong attack. Later, finding the Crimson Sphere (right) results in another fight.
After the battle, go north and use the Save Sphere, then continue along the path to the intersection. Go north and through the door to find a chest; it will contain either a Heady Perfume or Gold Hairpin , depending on how well you did on the massage event earlier. Return to the intersection from before, then go east, then east at the next intersection as well. In the room beyond, you’ll find Crimson Sphere 10 . Also collect the other sphere, but you’ll have to fight for it! Are you getting tired of fighting this pair yet?
BOSS - Ormi & Logos
| Ormi | Details |
|---|---|
| Max HP / Max MP | 1,840 HP / 42 MP |
| Elem. Weak / Resis / Immunity / Absorb | None / None / Gravity / None |
| EXP / GIL / AP | 230 / 230 / 1 |
| Common Steals / Rare Steals | X-Potion / Elixir |
| Common Item Drops / Rare Item Drops | Defense Veil / None |
| Logos | Details |
|---|---|
| Max HP / Max MP | 1,432 HP / 64 MP |
| Elem. Weak / Resis / Immunity / Absorb | None / None / Gravity / None |
| EXP / GIL / AP | 230 / 230 / 1 |
| Common Steals / Rare Steals | Mega Potion / Elixir |
| Common Item Drops / Rare Item Drops | Favorite Outfit / None |
Ormi’s offense is - surprise! - the same as the last battle, though he won’t be using Concussive Shock, or at least he didn’t do so against us. Logos still has his double-hitting Attack. Logos also has a rather dreadful attack called Russian Roulette : it causes damage and a random status of Poison, Petrification, Silence, Curse, or Death, each having an equal 20% chance to occur, meaning there’s a 40% chance of your character being KO’ed (since Petrification is virtually the same thing as Death). Ouch. Don’t forget Supercollider from Ormi, either, since that can Shatter anyone who is Petrified; if you didn’t play FFX, that basically means they are KO’ed, but cannot be cured in-battle, effectively cutting you short one character.
Open up by using Protect from your White Mage and battering both of the bosses with some Stat Breaks. Darkness Dance wouldn’t be too bad to blind them, either. Causing Sleep is also great to let you work on a magical offense without fear of being attacked as much. Eventually, you’ll want to get your offense working against Logos (magical attacks if Sleeping), then take down Ormi. It’s not too hard; it just requires a bit of set-up to get rolling.
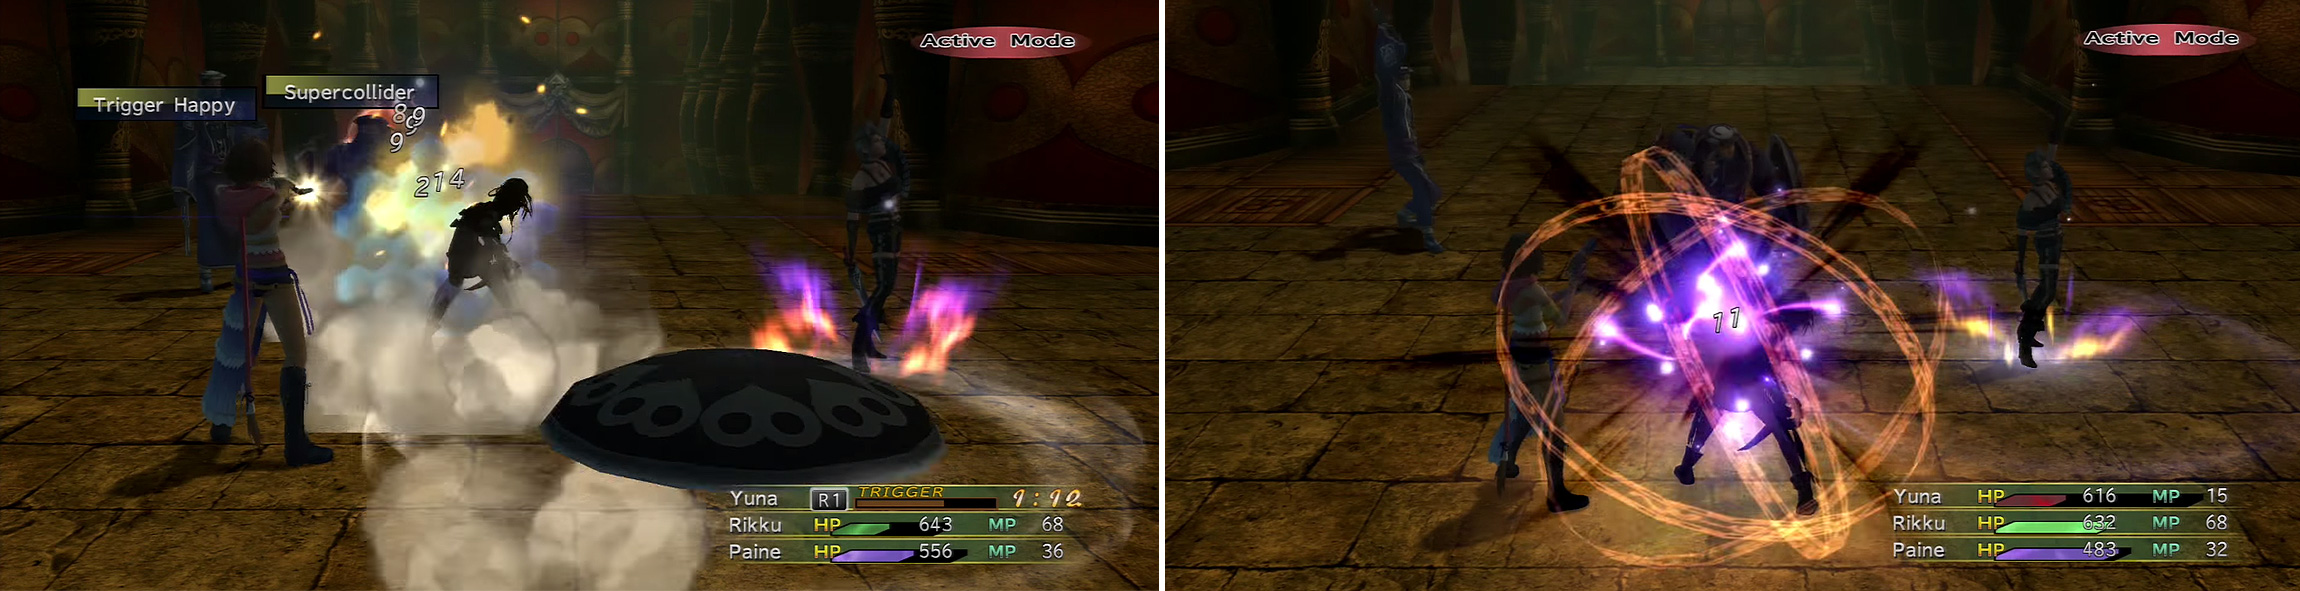
Ormi’s Supercollider (left) is quite nasty as is Logos’s Russian Roulette (right) which causes some horrible status ailments.
After the battle, leave the room to the intersection from before, at which you should go north to another intersection. From there, go west and climb the ledge. Jump over both of the pits towards the dead-end to make a spiky wall suddenly appear. How cliché. Drop into both of the gaps you jumped over and trigger the override switches to stop the wall before you get impaled. After, get out of the gap and go to where the spike wall emerged; there will be a switch there allowing you to open a door. Do so and a door will open elsewhere. Did you expect another trap? Backtrack to a Save Sphere, then go through the door that opened.
Not again…
BOSS - Leblanc, Ormi, and Logos
| Leblanc | Details |
|---|---|
| Max HP / Max MP | 1,380 HP / 460 MP |
| Elem. Weak / Resis / Immunity / Absorb | None / None / Gravity / None |
| EXP / GIL / AP | 380 / 300 / 2 |
| Common Steals / Rare Steals | Elixir / None |
| Common Item Drops / Rare Item Drops | Reassembled Sphere / None |
| Ormi | Details |
|---|---|
| Max HP / Max MP | 1,840 HP / 42 MP |
| Elem. Weak / Resis / Immunity / Absorb | None / None / Gravity / None |
| EXP / GIL / AP | 230 / 230 / 1 |
| Common Steals / Rare Steals | X-Potion / Elixir |
| Common Item Drops / Rare Item Drops | Twist Headband / None |
| Logos | Details |
|---|---|
| Max HP / Max MP | 1,432 HP / 64 MP |
| Elem. Weak / Resis / Immunity / Absorb | None / None / Gravity / None |
| EXP / GIL / AP | 230 / 230 / 1 |
| Common Steals / Rare Steals | Mega-Potion / Elixir |
| Common Item Drops / Rare Item Drops | Charm Bangle / None |
Logos and Ormi are essentially the same as in the past few battles. Leblanc, however, has a very varied repertoire. Offensively, she can use an Attack, Mech Fan (hits all magically; Delays), Flash Bomb (same as Logos’s), No Love Lost (damage to all, but only with the other two guys around) and Hush Grenade (ditto). There’s also Osmose for MP drainage and the “-ra” spells for elemental damage. She also has a fair few defensive moves: White Wind (1/8 max HP recovery to her party), Love Tap (Haste), and Not-So-Mighty Guard (Protect, Shell, and Regen to all).
The expectation when opening is pretty obvious: throw up Protect and Shell and use some Stat Breaks and Darkness Dance across the enemy party. From there on out, your White Mage needs to focus on doing some healing with each turn that comes up. You’ll want to, after this, focus your offense against Logos, as he’s the main one to worry about: he can KO you instantly, or Petrify you and have Ormi later Shatter you, which is even more lethal. You’ll probably need to hit him with Dispel first, though, to get rid of the Mighty Guard’s effects. After this, pour your attention towards Ormi, then Leblanc. It’s pretty easy with the set-up, as the last few fights were.
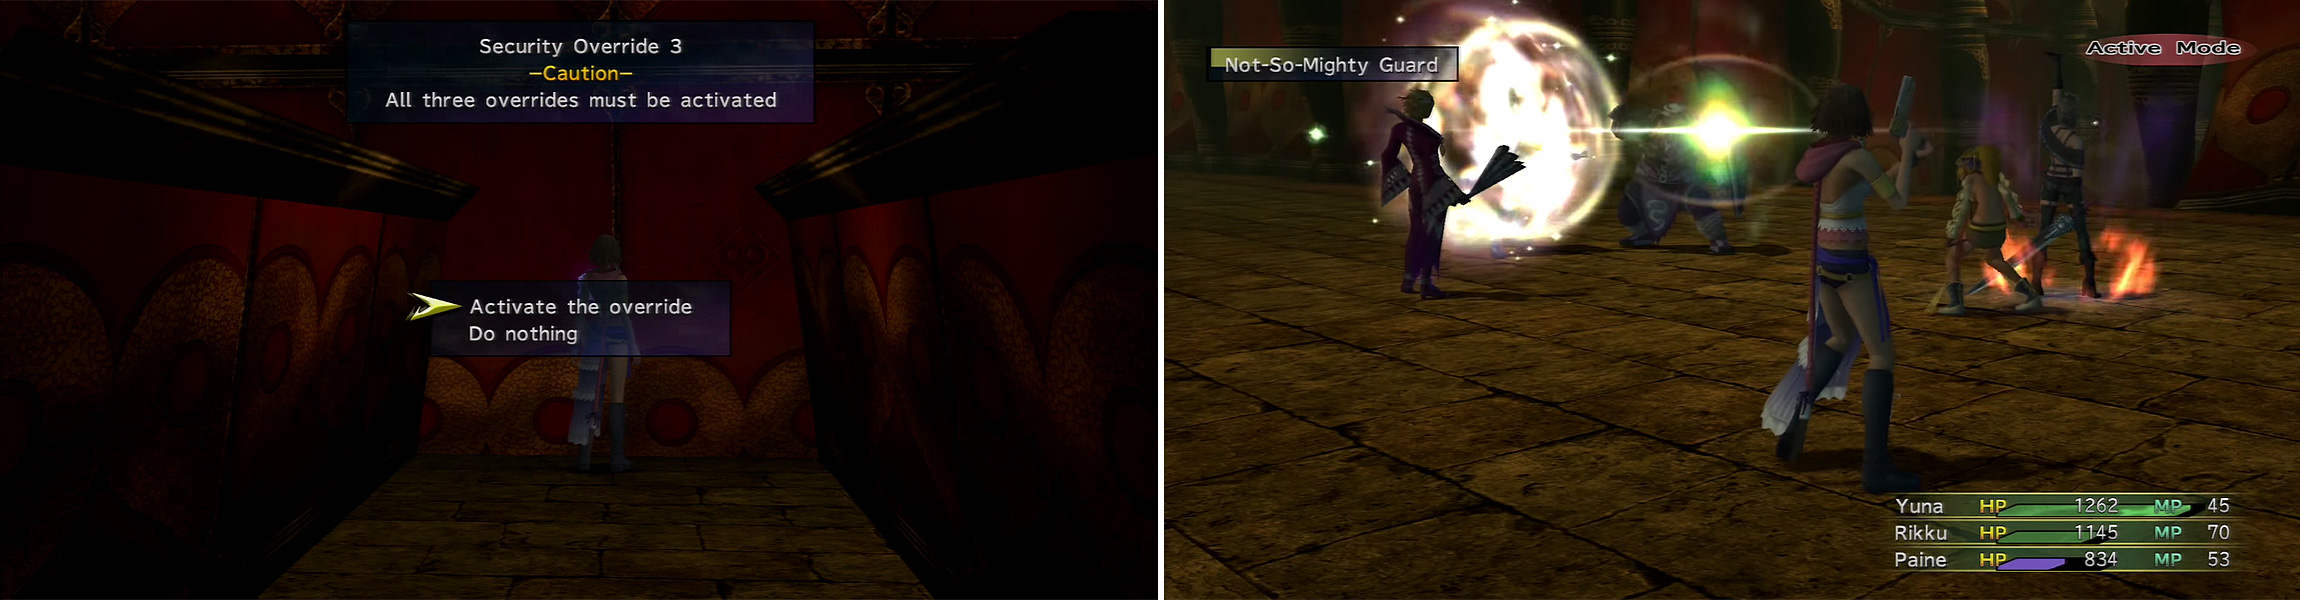
To get to the end, you need to deactivate the security measures found between the gaps of the platforms (left). During the Leblanc fight, she has access to a few annoying abilities like Not-So-Mighty-Guard (right) which should be Dispelled.
That’ll finally end this section - you’ll have your Reassembled Sphere and the Healing Light Garment Grid as a result!
 Sign up
No Comments